
4LD562112 - Alarm Clock AURIOL - Free user manual and instructions
Find the device manual for free 4LD562112 AURIOL in PDF.
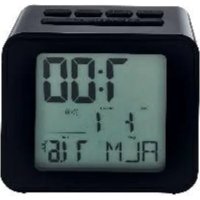
| Product type | Projection alarm clock radio |
| Brand | Auriol |
| Model | 4LD562112 |
| Dimensions | 130 x 98 x 45 mm |
| Weight | 184 g (without batteries) |
| Power supply | 2 x 1.5 V AA LR6/R6P batteries or 5 V 0.25 W power adapter |
| Time reception | DCF77 (radio-controlled) |
| Display | Analog hands (hours, minutes, alarm) |
| Alarm function | Adjustable, with snooze (SNOOZE ~5 min) |
| Projection | Temporary and permanent, 360° rotation (FLIP button) |
| Projection focus | Adjustment wheel |
| Lighting | Built-in (SNOOZE/LIGHT button) |
| Automatic time setting | Yes (DCF77 reception) |
| Power adapter | Model AV35-050-005T, input 230-240 V, output 5 V, 0.25 W |
| Power consumption (standby) | 0.1 W (mains) |
| Protection rating | IP20 |
| Storage temperature | -20 to 85 °C |
| Maintenance | Soft, dry cloth |
| Warranty | 3 years |
| Article number | 364475_2010 |
Frequently Asked Questions - 4LD562112 AURIOL
User questions about 4LD562112 AURIOL
0 question about this device. Answer the ones you know or ask your own.
Ask a new question about this device
Download the instructions for your Alarm Clock in PDF format for free! Find your manual 4LD562112 - AURIOL and take your electronic device back in hand. On this page are published all the documents necessary for the use of your device. 4LD562112 by AURIOL.
USER MANUAL 4LD562112 AURIOL
GBIE Usage and safety instructions
Table of contents
Table of contents -1
Introduction -3-
Intended use -3
Scope of delivery 3
Technical data -4-
Radio controlled projection alarm clock. 4
Plug-in power supply -4
Explanation of symbols -5-
Important safety informationImportant.safety.information. 7
Safety information for the user -7
Safety information for the batteries 8
Electricity hazard -9
Set up the device securely -11-
Front -12
Back with control panels 13
Setup -13
Alarm 14
Alarm setting 14
Activate or deactivate the alarm 14
Snoopze function (SNOOZE) -15-
Projection 15
Temporary projection 15
-1 - GBIE NI CY MT
Continuous projection 15
Adjust projection 15
Cleaning instructions. -16-
Storage 16
Simplified EU declaration of conformity. 16
Disposal -17-
Disposal of the electrical device 17
Warranty conditions 19
Warranty period and defects liability -20
Scope of the warranty 20
Warranty claim procedure 20
Service -21-
Supplier -22-
RADIO CONTROLLED PROJECTION ALARM CLOCK
Introduction
Congratulations on purchasing your new radio controlled projection alarm clock. In doing so, you have chosen to purchase a high-quality product. The manual is part of this radio controlled projection alarm clock. It contains important instructions pertaining to its safety, use and disposal. Please familiarise yourself with all the operating and safety instructions before using this product. Use the radio controlled projection alarm clock only as described and for the specified areas of application.
If you pass this product on to anyone else, please make sure you pass on these documents along with it. Please keep the packaging and manual for future queries.
Intended use
The device is suitable for displaying the time and for using the additional functions described. Any other use or modification of the device is considered improper. The manufacturer is not liable for damage caused by improper use. The device is not intended for commercial use.
Scope of delivery
Note:
Please check the scope of delivery after purchase. Make sure that all parts are present and not defective. If the delivery is incomplete and/or parts are damaged, do not use the device. Contact the service department (see "Warranty case processing").
- 1 x radio controlled projection alarm clock
- 1 x plug-in power supply
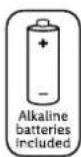
- 2 x alkaline batteries 1.5 V AA LR6
- 1xmanual
Technical data
Radio controlled projection alarm clock
- DCF77 radio-controlled time
- Dimensions: approx. 130 × 98 × 45 ~mm
Weight: approx. 184 g (excl. battery)
Input: 5.0 V S_GMA, 0.25 W
Climatic conditions for storage: -20^ 85^
Operation with two 1.5 V AA LR6/R6P batteries marked for DC voltage
Operation with the plug-in power supply, model: AV35-050-005T
Plug-in power supply
Model:AV35-050-005T
Manufacturer: Dongguan Jiayi Electric Co., Ltd.
Dimensions: approx. 5.8 × 44.7 × 37.6 mm
Weight: approx. 150 g
Length of cable: approx. 2 m
Input: 230 - 240 V, ~50 Hz
Output: 5.0 V SCA, 0.25 W
Average operational efficiency: 35.07%
Efficiency at low load (10%) : 27,77 %
No load power consumption: 0,1 W
Protection class: II
Protection type: IP20


Explanation of symbols
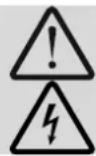
|  | DANGER! | This warning signal/word indicates a hazard with a high level of risk which, if not avoided, could result in death or serious injury. |
|  | WARNING! | This warning signal/word indicates a hazard with a medium level of risk which, if not avoided, could result in death or serious injury. |
|  | ELECTRICAL SHOCK HAZARD! | This warning signal/word indicates a risk of electric shock. |
| Note: | This warning word is used for additional information. | |
|  | Improper use of the batteries/rechargeable batteries poses a risk of explosion and leakage of the battery fluid. | |
|  |  | Alkaline batteries included |
|  |  | Batteries: \( 2 \times {1.5}\mathrm{\;V}\mathrm{{AA}}\mathrm{R}6/\mathrm{{LR}}6 \) |
|  | Symbol for DC voltage | |
| Plug-in power supply | ||
| Protection class II | ||
| i | Manual | |
| Read the manual! | ||
| CE | With the CE mark, digi-tech gmbh declares conformity with the applicable EU directives. | |
| Use only in dry locations indoors! | ||
| DCF77 radio-controlled time | ||
| Time | ||
| Wake-up alarm | ||
| Polarity of the coaxial connector | ||
| F | Safety isolation transformer |
Important safety information
Safety information for the user

WARNING! RISK OF INJURY!
This device may be used by persons with reduced physical, sensory or mental abilities or by those without experience and/or knowledge (including children above the age of 8), if they are supervised or have been instructed in the safe use of the device and have understood the dangers that are associated with using it. Children must not play with the device. Cleaning and user maintenance must not be carried out by children unless they are supervised. Also keep the packaging film out of reach of children. There is danger of suffocation.

WARNING!
HEALTH HAZARD!
EXPLOSION HAZARD!
Keep new and old batteries/rechargeable batteries out of reach of small children. If a battery/rechargeable battery is swallowed, medical help must be obtained immediately.
The batteries/rechargeable batteries must always be inserted with the correct polarity. Clean the battery and device contacts beforehand if necessary. Do not attempt to recharge, short-circuit, or open the batteries. Never heat the batteries/rechargeable
batteries to recharge them. Do not expose the batteries to excessive heat such as sunshine, fire or the like. There is an increased risk of leakage! Never throw batteries/rechargeable batteries into fire, as they can explode. Improper use of the batteries/rechargeable batteries poses a risk of explosion and leakage of the battery fluid.
If the batteries/rechargeable batteries should leak, avoid contact with skin, eyes and mucous membranes. Use gloves. In the event of contact with battery fluid, immediately rinse the affected areas with plenty of clean water and consult a doctor immediately. Remove exhausted batteries/rechargeable batteries from the device immediately, there is an increased risk of leakage.

Note:
- Non-rechargeable batteries must not be recharged.
- Different batteries or new and used batteries must not be used together.
- Do not short-circuit the supply terminals.
Electricity hazard
DANGER!
ELECTRIC SHOCK/DANGER TO LIFE!
- Do not immerse the radio controlled projection alarm clock or the plug-in power supply in water or other liquids, otherwise, there is a risk of electric shock.
- Do not touch the radio controlled projection alarm clock or the plug-in power supply with wet hands and do not operate it outdoors or in rooms with high humidity.
- Do not place any vessels filled with liquids, such as vases, on or in the vicinity of the radio controlled projection alarm clock and plug-in power supply. The vessel could tip over, and the liquid could impair electrical safety.
- Never open or remove the housing of the radio controlled projection alarm clock or the plug-in power supply. There are live parts inside the housing; touching them can lead to an electric shock.

- Do not insert any objects into openings in the device. You could touch live parts with a risk of electric shock.
- Unplug the plug-in power supply from the mains socket if faults occur during operation (e.g., malfunctions or smoke), after use and during thunderstorms. Always pull on the plug-in power supply, not the connection cable.
- To completely disconnect the device from electrical power, pull the plug-in power supply out of the mains socket. The plug-in power supply always consumes a small amount of electricity as long as it is connected to a mains socket. Even if the radio controlled projection alarm clock is not connected to the plug-in power supply.
- The mains socket must always be easily accessible so that you can pull the plug-in power supply quickly in an emergency.
- Position the cable of the plug-in power supply in such a way that it does not become a tripping hazard. The cable of the plug-in power supply unit must not be kinked or squeezed.
- Keep the plug-in power supply cable away from hot surfaces and sharp edges.
-
Do not make any changes to the radio controlled projection alarm clock or the plug-in power supply.
-
Only have repairs to the device or the plug-in power supply carried out by a specialist workshop. Improper repairs can result in considerable danger for the user.
- Only operate the radio controlled projection alarm clock with the included plug-in power supply. Use the plug-in power supply only for this radio controlled projection alarm clock. In the event of a defect, the plug-in power supply unit may only be exchanged for a power supply unit of the same type.
Set up the device securely
Place the device on firm and flat surface. The radio controlled projection alarm clock is not designed for use in rooms with high humidity (e.g., bathrooms). Protect sensitive surfaces before setting up, as otherwise scratches can occur. Make sure that:
- the device is not placed on a thick carpet or bed when in use;
- no direct heat sources (e.g., heaters) affect the device;
- no direct sunlight hits the device;
- contact with water spray and drops of water is avoided (do not place any objects filled with liquids, e.g., vases, on or near the device);
- the device is not in the immediate vicinity of magnetic fields (e.g., loudspeakers);
- no foreign objects can enter;
- candles and other open flames must be kept away from this product at all times to prevent the spread of fire.

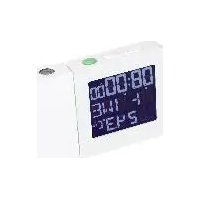
Front
| 1 | ALARM ON/OFF switch | 2 | Hour hand |
| 3 | SNOOZE/LIGHT button | 4 | Alarm time hand |
| 5 | Minute hand | 6 | Projection arm |
| 7 | Light |

Back with control panels
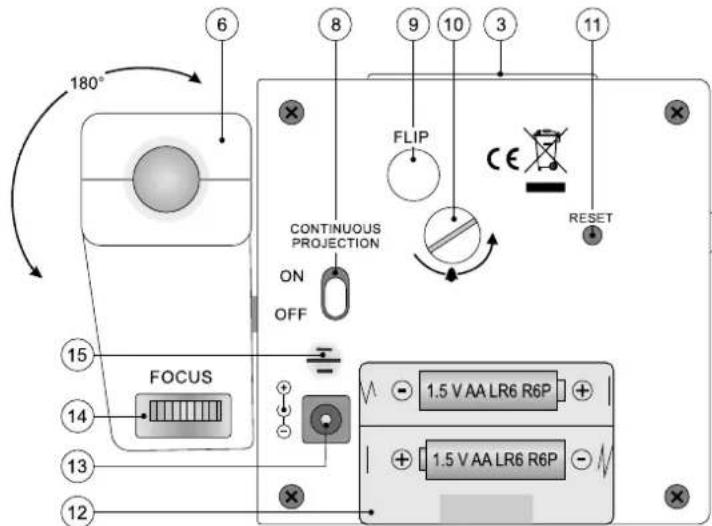
| 8 | Continuous projection on/off switch | 9 | FLIP button |
| 10 | Alarm dial | 11 | RESET button |
| 12 | Battery compartment | 13 | Plug-in power supply connection |
| 14 | Focus adjustment dial | 15 | Loudspeaker/buzzer |
Setup
Open the battery compartment (12).

Insert two 1.5 V AA LR6/R6P batteries in the correct

polarity according to the marking in the battery compartment.
Close the battery compartment (12).
The hands move to the 12:00, 4:00 or 8:00 position and stop.
The radio controlled projection alarm clock begins to receive the DCF77 radio signal. This process can take 3-10 minutes.
Note:
Please do not move the radio controlled projection alarm clock while the DCF77 radio signal is being received.
If the signal has been picked up successfully, the hands adjust automatically to the correct time.

If picking up the DCF77 signal is unsuccessful, the radio controlled projection alarm clock will again attempt at picking up a signal every hour.
You can also manually restart the DCF77 signal reception by pressing and holding the RESET button (11) on the back of the clock for 5 seconds.
The hands again move to the 12:00, 4:00 or 8:00 position and the projection alarm clock tries to pick up the DCF77 radio signal.
Alarm

Alarm setting
- Turn the alarm dial (10) in the direction of the arrow to set the alarm time.
Activate or deactivate the alarm
- Set the ALARM ON/OFF switch (1) to ON and the alarm is switched on. At the set time, the light (7) and the projected time light up briefly, whereby the rising alarm sounds.

- Set the ALARM ON/OFF switch (1) to OFF and the alarm is switched off. If the alarm is not switched off, it will sound again in 12 hours.
Snoopze function (SNOOZE)
- When the alarm sounds, press the snooze/light button (3) above to temporarily deactivate the alarm. The alarm will sound again after approx. 5 minutes.
Projection
Temporary projection
Press the snooze/light button (3) at the top to briefly activate the projection and the display lighting.
Continuous projection
Note:
For continuous projection, the batteries must be inserted and the radio controlled projection alarm clock must be connected to an external power source with the plug-in power supply.
Set the continuous projection on/off switch (8) on the back of the radio controlled projection alarm clock to "ON".
Adjust projection
- Set the temporary or continuous projection to project the time on the wall.
- Align the rotatable projection arm.
- Press the FLIP button (9) 90^ , 180^ , 270^ , 360^ to read the projection on the wall.
- Use the focus dial (14) to bring the projection on the wall into focus.
Note:
If the plug-in power supply is not connected, the continuous projection on/off switch (8) must be set to "OFF".
Cleaning instructions

DANGER!
ELECTRIC SHOCK/DANGER TO LIFE!

Unplug the plug-in power supply from the mains socket before cleaning the device. The device must not be exposed to moisture; avoid dripping or splashing water.
Improper cleaning can damage the device. DO NOT immerse the device in water or other liquids. Do not use aggressive cleaning agents, brushes with metal or nylon bristles, or sharp or metallic cleaning objects such as knives, hard spatulas and similar. These can damage the surface. Clean the device with a soft, dry, lint-free cloth, such as is used for cleaning eyeglass lenses.
Storage
If the radio controlled projection alarm clock is not used for a longer period of time, remove the batteries and store the device, cleaned and protected from sunlight, in a dry, cool place, ideally in the original packaging.
Simplified EU declaration of conformity

Digi-tech gmbh hereby declares that the radio controlled projection alarm clock 4-LD5621-1-2 complies with the RED 2014/53/EU directive, Article 10 (8). The full text of the EU declaration of conformity is available at the following internet address:

http://www.digi-tech-gmbh.com/ce/364475_2010_FPWE.pdf
Disposal
The product and packaging materials are recyclable; dispose of them separately for better waste treatment. For options for disposing of the used product, please contact your municipal or city administration.
Pay attention to the labelling of the packaging materials when separating waste; these are marked with abbreviations (a) and numbers (b) and have the following meaning:
1-7: plastics
20-22: paper and cardboard
80-98: composites.

Disposal of the electrical device
Remove the batteries before disposal and dispose of them separately (see Disposal of Batteries). This product is subject to the European Directive 2012/19/EU. The
crossed-out rubbish bin symbol means that the product must be disposed of at a separate waste collection point in the European Union. Labelled products must not be disposed of together with normal household waste, but must be returned to a collection point that accepts electrical and electronic equipment for recycling. Do not throw your product into the household waste when it has served its purpose, but dispose of it properly in the interests of environmental protection. You can check with your local authorities about collection centres and their opening times. Please take care to follow the regulations that are currently in force.
Battery disposal
The accompanying symbol indicates that batteries and
rechargeable batteries must not be disposed of with normal


household waste. Defective or used batteries/rechargeable batteries must be recycled in accordance with Directive 2006/66/EC and its amendments. Consumers are legally obliged to dispose of all batteries and rechargeable batteries, regardless of whether they contain harmful substances such as: Cd = cadmium, Hg = mercury, Pb = lead, Li = lithium or not, at a collection point in their municipality / district or at a retail outlet, for environmentally friendly disposal and for the recovery of valuable raw materials such as cobalt, nickel or copper.
The return of batteries and accumulators is free of charge.

WARNING!
Environmental damage through incorrect disposal of batteries/ rechargeable batteries!
Some of the possible materials such as mercury, cadmium and lead are poisonous and, if not disposed of properly, endanger the environment. For example, heavy metals can have harmful effects on the health of humans, animals and plants and accumulate in the environment and in the food chain, and can then enter the body indirectly via food.

WARNING! Danger of explosion!
With used batteries containing lithium (Li = lithium) there is a high risk of fire. Therefore, special attention must be paid to the proper disposal of used batteries and rechargeable batteries containing lithium. Incorrect disposal can also lead to internal and external short circuits due to thermal effects (heat) or mechanical damage. A

short circuit can lead to a fire or an explosion and have serious consequences for humans and the environment.
For this reason, tape off the poles of lithium-based batteries and rechargeable batteries prior to disposal in order to avoid an external short circuit.
Batteries and rechargeable batteries that are not permanently installed in the device must be removed and disposed of separately before disposal of the device.
Please return batteries and rechargeable batteries only when they have been discharged!
Use rechargeable batteries instead of disposable batteries whenever possible.
Recycling
The product packaging consists of recyclable materials.
Dispose of the packaging in an environmentally sound manner using the proper collection systems.

Waste disposal
Dispose of the packaging in an environmentally responsible fashion. Please note the marking of the different packaging materials and separate them if applicable.

digi-tech gmbh warranty
This device includes a 3 year warranty starting on the day of purchase. In case of defects of this projection device you have, by law, certain rights regarding the vendor of the device. These rights are not changed by the warranty which is described in the following paragraphs.
Warranty conditions
The warranty duration starts on the date of purchase. Please keep the original receipt in a safe place. The receipt is needed as a proof of purchase. If a defect occurs in the device within 3 years, the device will be repaired or replaced (according to our choice) free

of charge. This warranty requires that, within the 3 year warranty period, the device and the receipt can be made available to us along with a short written description of the defect and when it occurred. If the defect is covered by the warranty, you will receive the repaired device or a new device. Repair or replacement does not cause the warranty period to restart.
Warranty period and defects liability
The warranty period is not increased by the defect liability. This also applies to repaired or replaced parts. If defects are noticed at the time of purchase they must be reported immediately upon unpacking the item. Paid repair may be available after the end of the warranty period.
Scope of the warranty
The device was manufactured according to strict quality guidelines and was carefully inspected before delivery. The warranty does not include parts that experience normal wear and tear and can thus be seen as wear parts or fragile parts that are damaged. Examples include Switches, Batteries or parts made of glass. This warranty becomes void if the device is damaged, is not used in the recommended way or is improperly repaired. For proper use of the device all instructions in this manual must be adhered to exactly. Use of the device in a way that is discouraged in the manual must be avoided.
The device not intended for commercial use. Abusive or improper use, excessive force and changes that are made by non-authorized repair centers will void the warranty.
Warranty claim procedure
To ensure that your call is processed in a fast and efficient manner please note the following directions:
Have your receipt (as proof of purchase) and the article number (364475_2010) handy.

The article number can be found on the type label, an engraving, the front page of the manual (bottom left) or a sticker on the back side or bottom side of the case.
In case defects occur, please first contact the service center (see below) by phone or email.

Visit www.lidl-service.com to download this and many other manuals, product videos and software.

With this QR-Code you can reach the Lidl-Service Site (www.lidl-service.com) directly and you can open your manual by entering the article number (364475_2010).
Service
Inter-Quartz GmbH
Valterweg 27A
65817 Eppstein
GERMANY
Email: support@inter-quartz.de
Telephone: +49 (0)6198 571825

ATBEDEESFIFRGBIEITNI NLPTSE
0080055156616
008001114916 88033139
CH 0800563862 8000884
GBIE NI CY MT
80094403 80062851
800142315 00804411493
DK 80055156616 0800896640
EE 8000049116 08001026
0080044140855 080080847
HR 0800222943 08004449
HU 0680981220
IAN3644752010
Year of manufacture: 2021

Supplier
Please note that the following address is not a service address. Please first contact the service address (see above).
digi-tech gmbh
Valterweg 27A
65817 Eppstein
GERMANY


Alarm activeren of deactiveren -85-
Alarm activeren of deactiveren
WAARSCHUWING! Explosiegevaar!
Permanent projection
Bemerk:
digi-tech gmbh's garanti
Imported for GB market by:
Lidl Great Britain Ltd, Lidl House,
14 Kingston Road, Surbiton, KT5 9NU

digi-tech gmbh
Valterweg 27A
65817 Eppstein
GERMANY

Last information update · Stand der Informationen ·
Version des informations · Laatste informatie · Stav informaci
Stan informaci · Stav informacion · Actualizacion de las
informaciones · Informationernes stand:
06/2021


- GBIE Usage and safety instructions
- Table of contents
- RADIO CONTROLLED PROJECTION ALARM CLOCK
- Introduction
- Intended use
- Scope of delivery
- Note:
- Technical data
- Plug-in power supply
- Explanation of symbols
- Important safety information
- WARNING! RISK OF INJURY!
- WARNING!
- HEALTH HAZARD!
- EXPLOSION HAZARD!
- Electricity hazard
- DANGER!
- ELECTRIC SHOCK/DANGER TO LIFE!
- Set up the device securely
- Back with control panels
- Setup
- Alarm
- Alarm setting
- Activate or deactivate the alarm
- Snoopze function (SNOOZE)
- Projection
- Temporary projection
- Continuous projection
- Adjust projection
- Cleaning instructions
- Storage
- Simplified EU declaration of conformity
- Disposal
- Disposal of the electrical device
- Battery disposal
- Environmental damage through incorrect disposal of batteries/ rechargeable batteries!
- WARNING! Danger of explosion!
- Recycling
- Waste disposal
- digi-tech gmbh warranty
- Warranty conditions
- Warranty period and defects liability
- Scope of the warranty
- Warranty claim procedure
- Service
- Supplier
- Alarm activeren of deactiveren
- WAARSCHUWING! Explosiegevaar!
- Permanent projection
- Bemerk:
- digi-tech gmbh's garanti
- digi-tech gmbh
Brand : AURIOL
Model : 4LD562112
Category : Alarm Clock