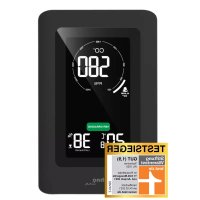
WL 1040 - Climate control TECHNOLINE - Free user manual and instructions
Find the device manual for free WL 1040 TECHNOLINE in PDF.

| Product type | LED wall clock with CO₂, temperature and relative humidity monitor |
| Brand | TECHNOLINE |
| Model | WL 1040 |
| Category | Climate control |
| Dimensions (estimated) | Approximately 220 x 150 x 40 mm |
| Weight (estimated) | Approximately 450 g (without batteries) |
| Main power supply | 5 V DC, 1.5 A power adapter (KA0601A-0501200EUS included) |
| Backup power supply | 2 AA batteries (not included) |
| CO₂ measurement range | 400 to 5,000 ppm |
| CO₂ accuracy | ± 50 ppm (up to 2,000 ppm) |
| Temperature range | 0 to 50 °C |
| Relative humidity range | 20 % to 95 % RH |
| CO₂ sensor type | NDIR sensor (non-dispersive infrared) |
| Display | LED, large format, auto-adjustable brightness via light sensor |
| Main functions | Time, CO₂, temperature, humidity display; color ventilation recommendation; programmable alerts (audible and visual); auto and manual calibration; toggle time/CO₂ display |
| CO₂ audible alarm | Yes, can be enabled/disabled, continuous beep when exceeding high threshold |
| Mounting | Wall mounting (hanging holes) or tabletop (stand) |
| Care and cleaning | Soft damp cloth (water + mild soap); do not use harsh chemicals; unplug before cleaning |
| Safety | Use only the supplied adapter; avoid water, excessive heat, direct sunlight; observe battery polarity; do not open the housing; dispose of according to regulations |
| Compliance | Directive 2014/53/EU and RoHS 2011/65/EC |
Frequently Asked Questions - WL 1040 TECHNOLINE
User questions about WL 1040 TECHNOLINE
0 question about this device. Answer the ones you know or ask your own.
Ask a new question about this device
Download the instructions for your Climate control in PDF format for free! Find your manual WL 1040 - TECHNOLINE and take your electronic device back in hand. On this page are published all the documents necessary for the use of your device. WL 1040 by TECHNOLINE.
USER MANUAL WL 1040 TECHNOLINE
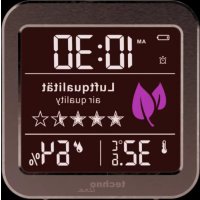
LED wall clock with CO_2 Monitor, Temperature and Relative Humidity
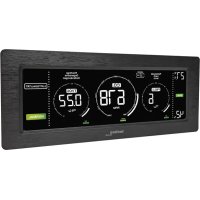
Overview
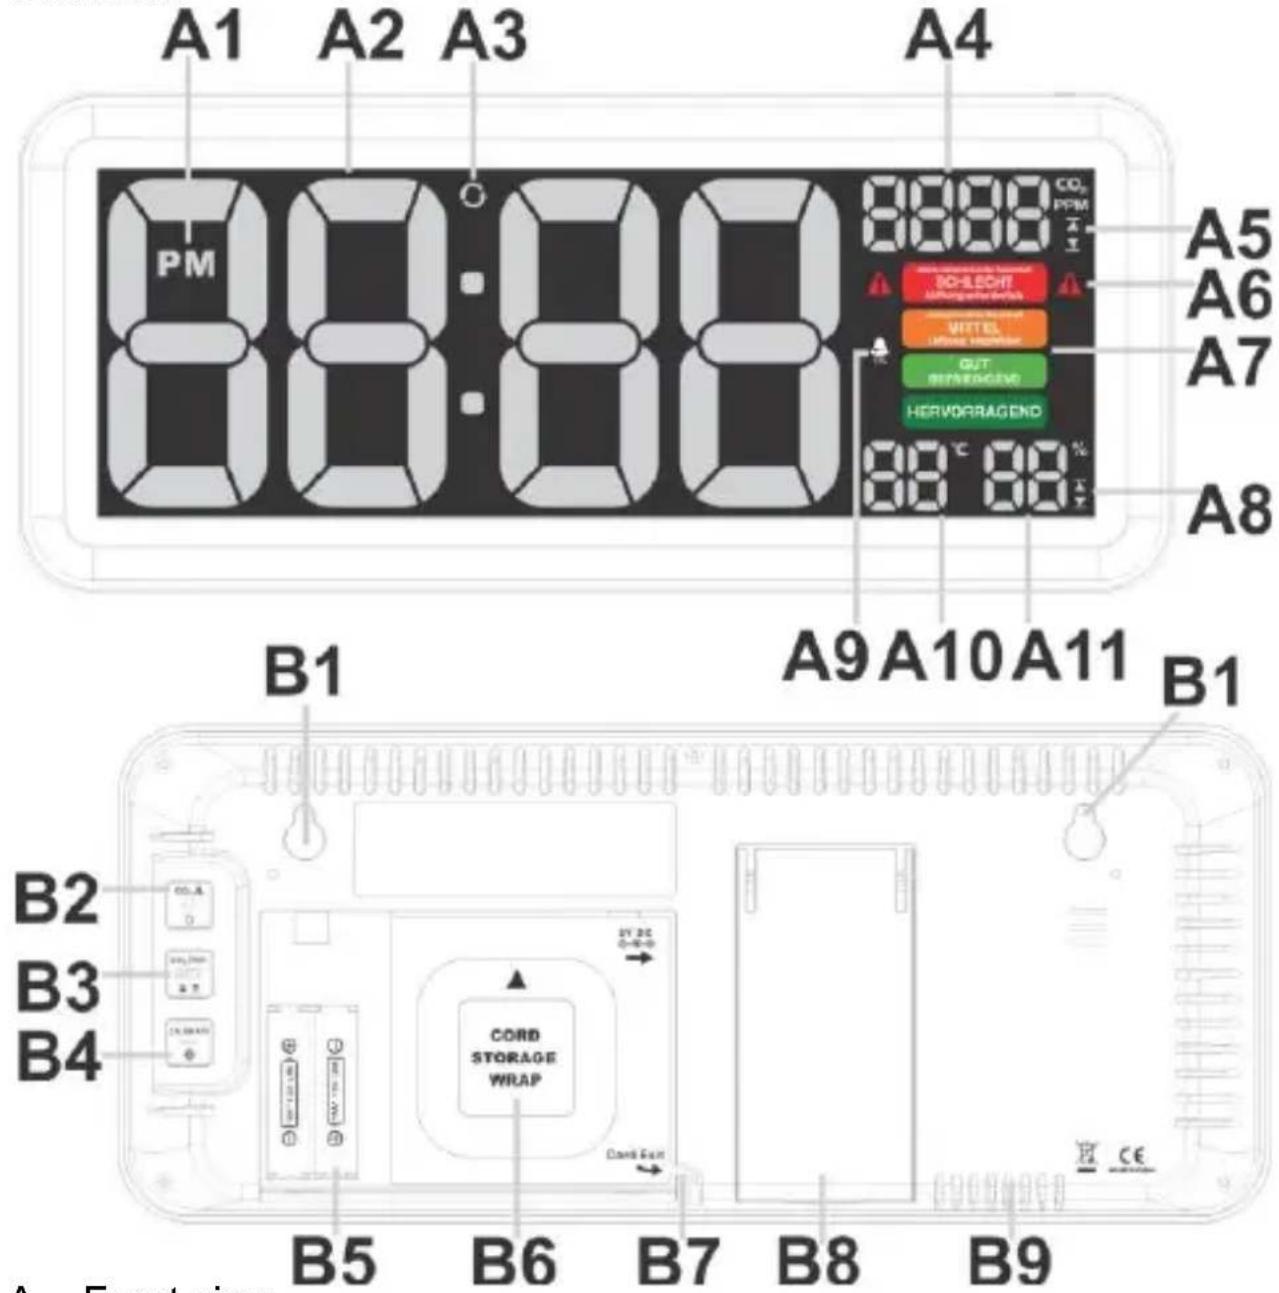
text_image
A1 A2 A3 A4 PM CO₂ PPM A5 A6 A7 A8 SO-LECHT LIQUING WITHER WITTEL LIQUING WITHER OUT STRENGIVE HERVORRAGEND A9 A10 A11 B1 B1 B2 B3 B4 B5 B6 B7 B8 B9 Cord Storage WRAP Card Exit CE A. FrontiersA – Front view
A1 – PM icon
A2 – Large display of time / CO2 value
A3 – Rotation icon
A4 – Small display of CO2 value
A5 – Low/high alert icon of CO2
A6 – CO2 warning icon
A7 – Ventilation recommendation messages
A8 – Low/high alert icon of humidity
A9 - CO2 alert sound icon
A10 – Indoor temperature
A11 – Indoor humidity
B - Back view
B1 – Hanging holes
B2 - +(plus) button
B3 - SET button
B4 -- (minus) button
B5 – Battery compartment
B6 – Power adapter cord storage wrap
B7 – Power adapter cord exit
B8 - Stand
B9 – CO2 sensor ventilation
Main features
- Bold and large displays of time, CO _2 level, temperature and relative humidity
- Coloured display of ventilation recommendation on basis of CO _2 levels
- Stable NDIR sensor for CO _2 detection
- Wide CO _2 measuring range 400 - 5000 PPM
- Programmable high/low iconic alert of CO _2 and relative humidity
- Audible CO _2 high / low warning alert
- Smart automatic baseline calibration and manual calibration on CO _2
• Light sensor for auto-adjusting brightness of display
• Built-in memory chip to store settings when power is off
• Battery backup (for time keeping): 2 x AA batteries (not included)
• Power supply: 5V\~1.5A power adaptor KA0601A-0501200EUS (included)
• Wall mounting or table standing
Installation
- Slide open the battery cover at the back of the clock.
- Plug in the enclosed 5V-1.5A AC/DC power adaptor to an AC wall outlet and then the DC jack to the back side of your clock.
- Optional, for Back-up function only: install 2 x AA batteries by observing the correct (+) and (-) polarity sign.
- Replace the battery cover.
Notes:
• Only use included power adapter KA0601A-0501200EUS
After you powered up your clock, the display will come on with 0:00 with the relevant temperature and relative humidity. Your CO₂ displays “150” PPM and starts to countdown. In around 150 seconds (2.5 minutes) a relevant CO₂ data will be displayed. It will continue to calibrate itself and display the correct CO₂ data in 24 hours.
If the AC power is interrupted, the display is turned off. The settings of your unit will be kept by the internal memory chip and the time will be kept by the backup batteries installed. Your clock will function again after the AC power resumes.
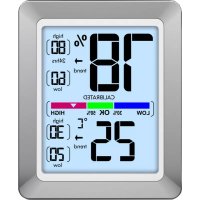
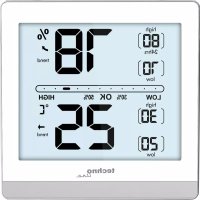
Ventilation recommendation on the basis of CO2 concentration in the air
| Measuring range | Display status | ||
| Over 2000 ppm eq |  |  |  |
| 1501 – 2000 ppm eq |  | ||
| 1001 – 1500 ppm eq | [FWAH] | ||
| 601 – 1000 ppm eq |  | ||
| 400 – 600 ppm eq |  | ||
Your CO2 monitor measures and displays the CO2 in PPM with color ventilation recommendations:
The flash when the current CO2 exceeds 2000 ppm.
To Set Time, 12/24 Hour, High-Low Alert of CO ^2 and Humidity

1) Press and hold the ▲▼ button, the hour digit "0" flashes. Press the

text_image
CO₂ + - or buttonCO₂|RH% SET
2) Press the ▲▼ button once again, the minute digits "00" flash. Press the
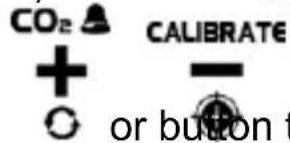
text_image
CO₂ + - or button t CALIBRATECO₂|RH% SET 3) Press the ▲▼ button once again, the time displays “24 Hr” and flashes.
text_image
CO₂ + CALIBRATE - e or bPress the 🔒 or ⚙️ button to select “12 Hr”. A “PM” icon will appear to indicate the afternoon time in the 12-hour format. Please note that there is no AM icon.
CO₂|RH% SET
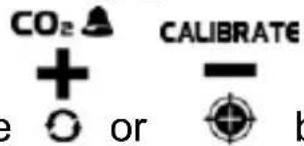
4) Press the button once again, the CO _2 digits "400" (default) flash
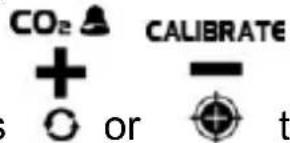
text_image
CO₂ ▲ CALIBRATE + - s or tand the ▼ icon appears. Press ○ or ⊕ to adjust the low alert level of CO₂. Press once to adjust +/- 10 PPM. Press and hold the + / - button to accelerate setting in fast speed. Lowest alert level is 400 PPM.
CO₂|RH% SET
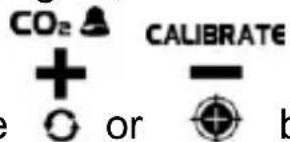
2) Press the ▲▼ button once again, the CO₂digits "2000" (default) flash

text_image
CO₂ CALIBRATE + - orand ▲ appears. Press the ⚙ or ⚠ button to adjust the high alert level of CO₂. Press once to adjust +/- 10 PPM. Press and hold the + / - button to accelerate setting in fast speed. The highest CO₂ alert level is 5000 PPM.
CO₂|RH% SET
3) Press the ▲▼ button once again, the humidity digits "35%" (default)
text_image
CO₂ + CALIBRATE - or bflash and ▼ appears. Press the ⏻ or Ⓗ button to adjust the low alert level of RH%. Press once to adjust +/-1%, press and hold the +/- button to accelerate setting in fast speed. Lowest alert level is 20%.
4) Repeat 2) to set high alert level of RH% (default at 70%). The highest RH% alert level is 95%.

5) Press to confirm and end the setting.
Note:
- Your monitor will store your settings and exit the alert set mode when no key is pressed in approximate 10 seconds.
- When the measured CO 2 or RH% reaches the set high / low alert level, the related ▲ or ▼ icon appears and flashes The CO 2 reading also flashes to remind you.
To use the acoustic CO₂ Alarm (for high alert)
- Press and hold the ○ button to turn on the CO₂ acoustic alarm.

When the alarm is on, the doon appears on the display.
- When the measured CO2 reaches the set high alert level, both the CO2

digits, the and icons flash and an acoustic beep sound will be given continuously. The beep sound will accelerate when the measured CO₂ level exceed more over the set high alert level. If this happens, please open the windows, adjust the air ventilation and avoid too many people gathering together to improve the air quality of your environment.
- Press any button to stop the sound temporarily (it will sound again in 15 seconds). To completely disable the CO_2 voice alarm, press and

hold the ○ button until the CO₂ icon disappears. The CO2 digits and ▲ icon remain flashing if CO₂ exceeds the set high alert.
To interchange the display of time and CO_2 reading


Press the ○ button once to change the constant large time display to constant large CO₂ display. Press this button once again to activate the auto-alternate time ⇔ CO2 display in every 5 seconds (a short beep will be heard and the icon appears). Press this button once again to revert to constant large time display. The icon disappears.
To calibrate the CO2 sensor
This monitor is factory calibrated to a 400 PPM CO2 standard concentration.
Caution: Do not manually calibrate the monitor in an environment of unknown CO2 concentration.
Automatic baseline calibration: your clock is equipped with a smart chip so that it will automatically calibrate itself to reduce the drift of the CO_2 sensor for long time usage. It will calibrate itself automatically at the minimum CO_2 reading detected during 7 days of continuous monitoring.
Important note: make sure the place you put your clock at is well ventilated (with a CO_2 level near 400 PPM) for at least an hour or so everyday, or you move the clock to such a well ventilated room for an hour or so everyday to perform Automatic Baseline Calibration.
Manual calibration of the CO_2 Sensor
It is recommended to undergo manual calibration performed by a qualified laboratory every 12 months.
- Place your CO _2 monitor in a 400 PPM calibration chamber. Power it on and wait for 2.5 minutes until the first
CALIBRATE
- CO _2 reading is displayed. Then press and hold 📋 until “CAL” flashes as below. In around 20 minutes, the blinking will stop and the calibration is completed. Your clock will return to normal display mode.
• To stop the manual calibration anytime, press ✕ once.
Light sensor for self-adjusting the display brightness
The clock is equipped with a light sensor (located at the top right of the clock). It will adjust the display's brightness (Hi / Med / Lo level) according to the surrounding light environment.
Troubleshooting
No display or functions
Check the AC/DC adaptor is properly connected.
Response time
Ensure the air flow channels at the back of the monitor are not blocked or covered.
CO2 reading shows "Err"
The CO2 sensor is not working properly. Unplug the AC/DC adapter for 10 seconds to insert it to your monitor again.
Care and maintenance
- Place your monitor on a stable surface, away from sources of direct sunlight or excessive heat or moisture.
- Clean your monitor with a soft cloth moistened only with mild soap and water. Stronger agents such as Benzine, thinner or similar materials can damage the surface of the item. Make sure the monitor is unplugged before cleaning.
- Do not open the back case or tamper with any components of this monitor.
- Do not plug in any other AC/AC or AC/DC adaptor with incorrect specifications or voltage.
CO2 levels and guidelines
Below are some CO2 reference levels in general:
400\~600 ppm Background (normal) outdoor air level.
600\~1,000 ppm Typical level for occupied spaces with good air exchange.
1,000 \~1,500 ppm Start ventilation of the room.
1,500\~2,000 ppm Level associated with complaints of
drowsiness and poor air. Ventilation recommended!
2,000\~5,000 ppm Level associated with headaches, sleepiness, and stagnant, stale, stuffy air. Poor concentration, loss of attention, increased heart rate and slight nausea may also be present. Ventilation strongly recommended!
5,000 ppm Exposure may lead to serious oxygen deprivation resulting in permanent brain damage, coma, and death. Requires immediate ventilation!
Declaration of conformity
Hereby, Technotrade declares that this product WL 1040 is in compliance with the essential requirements and other relevant provisions of Directive 2014/53/EU and ROHS 2011/65/EC. The original EU declaration of conformity may be found at: www.technoline.de/doc/4029665110400
Specifications
CO_2
Measurement range : 400 – 5000 PPM
Resolution : 1 PPM
Accuracy : +/- 50 PPM (up to 2000 PPM)
Warm up time : 2.5 minutes
Temperature range : 0°C to 50°C
Temperature resolution : 1°C
Relative Humidity range : 20% - 95%
Relative Humidity range : 1%
Operating temperature : 0°C to 50°C, < 95% RH non-condensing
Out of range display
CO_2 : 400 (below 400 PPM) / HI (over 5000 PPM)
Temperature : LO (below 0°C) / HI (above 50°C)
RH% : 20% (below 20%) / 95% (over 95%)
Power Supply : 5V DC, 1.5A adaptor
KA0601A-0501200EUS
Default Settings
CO _2 alert : Low - 400, High - 2000
RH% alert : Low - 35%, High - 70%
CO_2 voice alarm : Off
Precautions
- This unit is intended to be used only indoors.
- Do not subject the unit to excessive force or shock.
- Do not expose the unit to extreme temperatures, direct sunlight, dust or humidity.
- Do not immerse in water.
- Avoid contact with any corrosive materials.
- Do not dispose this unit in a fire as it may explode.
- Do not open the inner back case or tamper with any components of this unit.
Batteries safety warnings
- Use only alkaline batteries, not rechargeable batteries.
• Install batteries correctly by matching the polarities (+/-).
• Always replace a complete set of batteries. - Never mix used and new batteries.
- Remove exhausted batteries immediately.
- Remove batteries when not in use.
- Do not recharge and do not dispose of batteries in fire as the batteries may explode.
- Ensure batteries are stored away from metal objects as contact may cause a short circuit.
- Avoid exposing batteries to extreme temperature or humidity or direct sunlight.
- Keep all batteries out of reach from children. They are a choking hazard.
Use the product only for its intended purpose!
Consideration of duty according to the battery law
Old batteries do not belong to domestic waste because they could cause damages of health and environment. You can return used batteries free of charge to your dealer and collection points. As end-user you are committed by law to
bring back needed batteries to distributors and other collecting points!
Consideration of duty according to the law of electrical devices
This symbol means that you must dispose of electrical devices separated from the General household waste when it reaches the end of its useful life. Take your unit to your local waste collection point or recycling centre. This applies to all countries of the European Union, and to other European
countries with a separate waste collection system.
natural_image
Symbolic icon of a person moving with arrows, enclosed in a circle (no text or symbols)A10 – Temperatura interior