WS 9460 - Climate control TECHNOLINE - Free user manual and instructions
Find the device manual for free WS 9460 TECHNOLINE in PDF.
User questions about WS 9460 TECHNOLINE
0 question about this device. Answer the ones you know or ask your own.
Ask a new question about this device
Download the instructions for your Climate control in PDF format for free! Find your manual WS 9460 - TECHNOLINE and take your electronic device back in hand. On this page are published all the documents necessary for the use of your device. WS 9460 by TECHNOLINE.
USER MANUAL WS 9460 TECHNOLINE
other
| Time | Value | | :--- | :--- | | 24 hrs | 75 | | 80 hrs | 80 | | Low | 18 | | High | 30 | | Low | 25 | | High | 26 | | Low | 24 | A1 A2 A3 A4 A5
natural_image
Technical line drawing of a rectangular electronic device with a sun icon and label B1 (no text or symbols on the diagram itself)
text_image
B8 B2 B3 B4 B5 SET UP DOWN C/F B6 B7Beschreibung
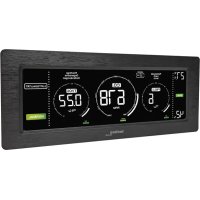
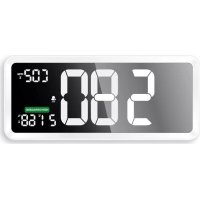
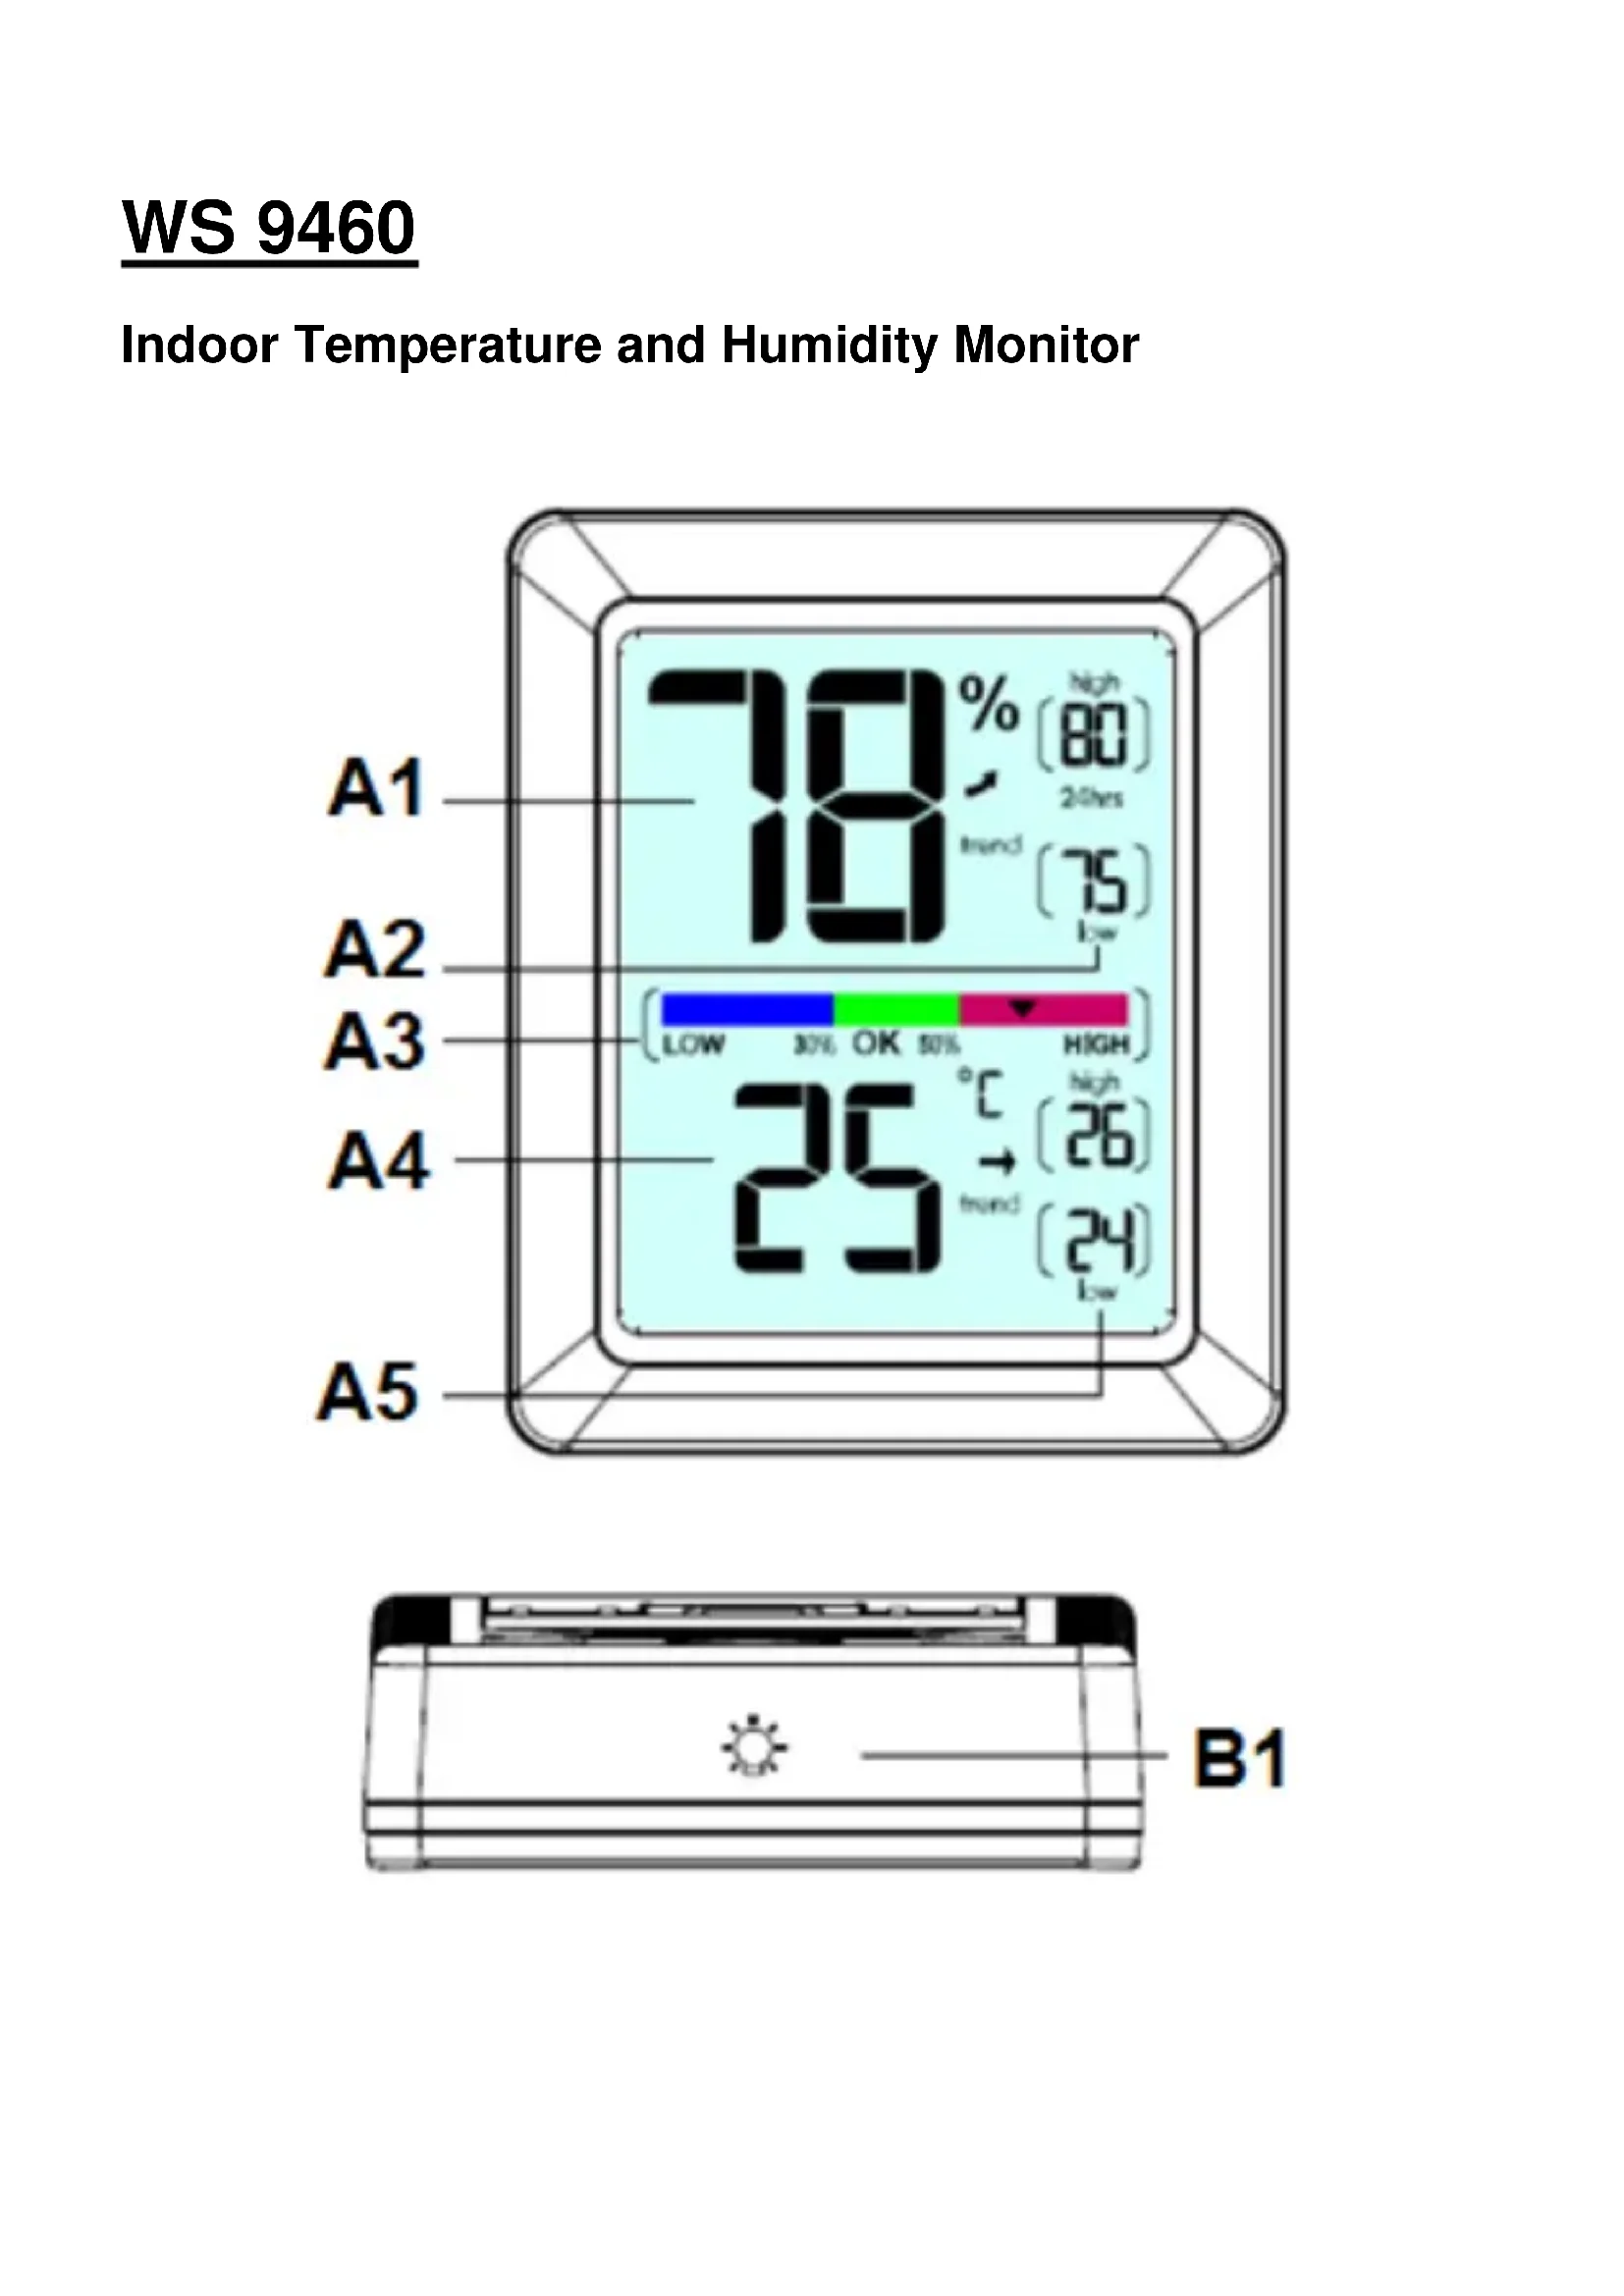
Indoor Temperature and Humidity Monitor
other
| Timeframe | Value (%) | | :--- | :--- | | A1 | 70 | | A2 | 19 | | A3 | 25 | | A4 | 25 | | A5 | 25 | High (80) 24hrs Low (75) High (26) low (24)
natural_image
Technical line drawing of a rectangular electronic device with a sun icon and label B1 (no text or symbols on the diagram itself)
text_image
B8 B2 B3 B4 B5 SET UP DOWN C/F B6 B7Description
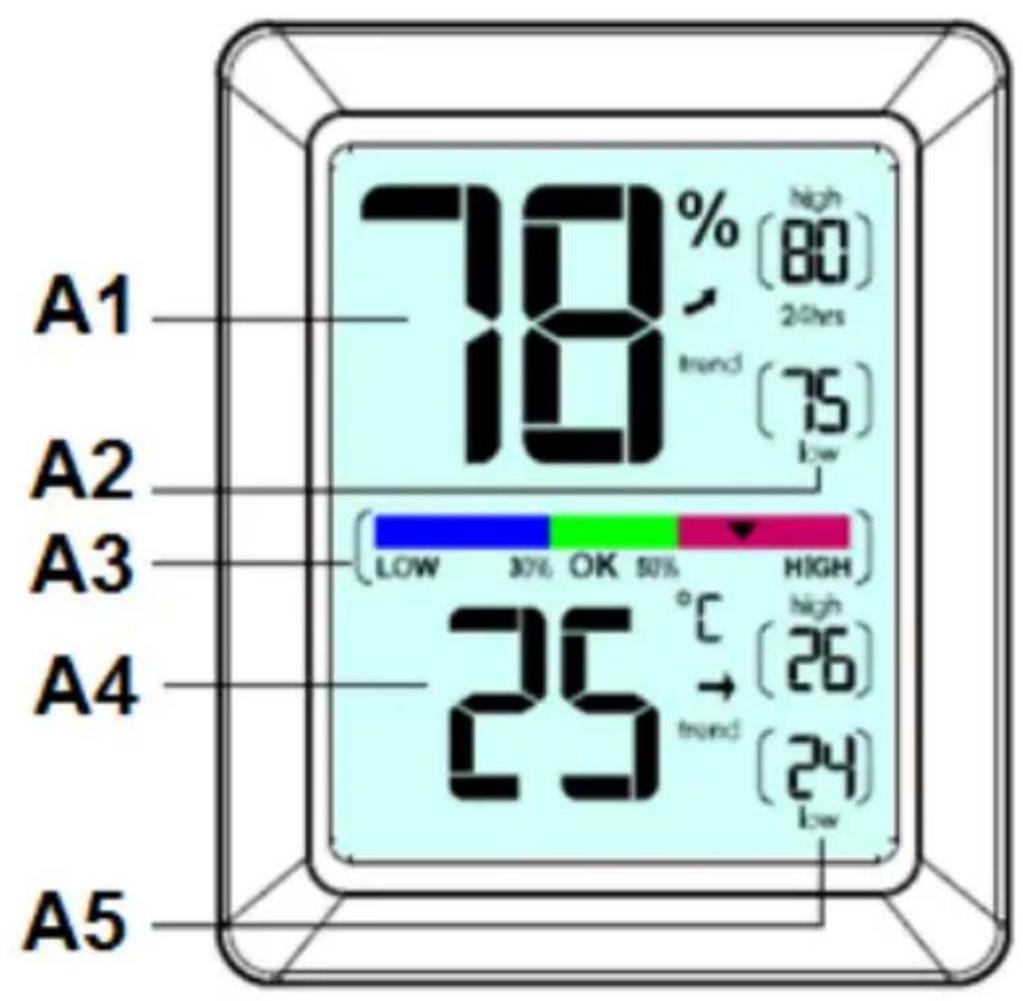
Part A – Front
A1: Current humidity
A2: Maximum and minimum humidity record
A3: Humidity level indicator
A4: Current temperature
A5: Maximum and minimum temperature record
Part B – Back
B1: “” backlight button
B2: "SET" button
B3: "UP" button
B4: "DOWN" button
B5: “°C/°F” button
B6: Battery cover
B7: Stand
B8: Magnet
Specifications:
• Temperature Range: -4^ 158^ ( -20 +70^ )
• Temperature Accuracy: +/- 1°C
• Temperature trend display either in °C or °F.
- Humidity Range: 1\~99%RH (relative humidity)
• Humidity Accuracy: +/-5%RH
• Minimum/Maximum display for humidity and temperature
• Power: 2 x AAA batteries
SETUP
If this is your first time to use the Temperature and Humidity Monitor, please be sure to remove the protective film that is applied to the LCD screen prior to using this product.
Install or Remove Batteries
Batteries must be installed for this product to operate. We recommend alkaline batteries for the best product performance.
- Press the tab at the top of the battery cover and pull to remove (B6).
- Insert 2 x AAA batteries into the battery compartment. Follow the polarity (+/-) diagram in the battery compartment, as shown.
- Replace the battery cover.
Select Degrees Fahrenheit or Celsius
To select between degrees Fahrenheit (°F) or Celsius (°C) temperature units, press the “°C/°F” button (B5) located on the back of the unit
Placement for Maximum Accuracy
Placement in a proper location is critical to the accuracy and performance of this product. Place the monitor in a dry area free of dirt and dust. To ensure accurate temperature measurement, place monitor out of direct sunlight and away from any heat source or vents. To ensure accurate humidity measurement, place monitor away from humidity sources. The monitor comes with 2 magnets on the backside to stick on the fridge. (B7)
OPERATION
Using the Humidity Monitor / Humidity Level Indicator
The Humidity Level Indicator easily conveys a low, high or ideal indoor humidity level for your home and health.
High & Low Records
High and low records are displayed for temperature and humidity. 24-hour records automatically clear every 24 hours since the batteries were installed.
All-time records are the maximum and minimum readings recorded since the batteries were installed.
To check the High & Low records in 24-hours or All-time, press UP (B3) or DOWN (B4) buttons.
To manually clear the high records currently being viewed, hold the UP button (B3) for few seconds.
To manually clear the low records currently being viewed, hold the DOWN button (B4) for few seconds.
Calibration
The temperature and humidity readings can be calibrated on the display to improve accuracy. Calibration can improve accuracy when product placement or environment factors impact your measuring accuracy.
- To access calibration mode, press and hold the SET button (B2) for few seconds.
- To adjust the current selected item, press and release the UP (B3) or DOWN (B4) button.
- To save your adjustments, press and release the SET button (B2) to adjust the next reading. The CALIBRATED indicator will remain under the calibrated values.
Note: After around 10 seconds of inactivity, the display will save the adjustments and exit calibration mode. Calibrations will be erased if the batteries are removed.
Backlit
Press button (B1) to active backlit about 10 seconds.
Trend displaying
The current temperature/humidity and the temperature/humidity trend are shown in the LCD display. You may see the following displays:

The temperature/humidity is rising.
The temperature/humidity is steady.

The temperature/humidity is falling.
This product will auto scan every 10 seconds. If the temperature changed +/-2^ or humidity changed +/-5% RH within 1 hour, the trend indicator will change accordingly.
Low Battery Indicator
If the battery symbol appears on the display, it's recommended to replace with new batteries to ensure optimum accuracy of the monitor.
Battery Change
It is recommended to replace the battery every 1 year to ensure optimum accuracy of this unit.
Precautions
- This main unit is intended to be used only indoors.
- Do not subject the unit to excessive force or shock.
- Do not expose the unit to extreme temperatures, direct sunlight, dust or humidity.
- Do not immerse in water.
- Avoid contact with any corrosive materials.
- Do not dispose this unit in a fire as it may explode.
- Do not open the inner back case or tamper with any components of this unit.
Batteries safety warnings
- Use only alkaline batteries, not rechargeable batteries.
• Install batteries correctly by matching the polarities (+/-).
• Always replace a complete set of batteries. - Never mix used and new batteries.
- Remove exhausted batteries immediately.
- Remove batteries when not in use.
- Do not recharge and do not dispose of batteries in fire as the batteries may explode.
- Ensure batteries are stored away from metal objects as contact may cause a short circuit.
- Avoid exposing batteries to extreme temperature or humidity or direct sunlight.
- Keep all batteries out of reach from children. They are a choking hazard.
Use the product only for its intended purpose!
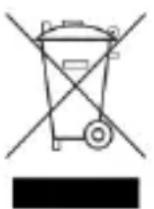
Consideration of duty according to the battery law
Old batteries do not belong to domestic waste because they could cause damages of health and environment. You can return used batteries
free of charge to your dealer and collection points. As end-user you are committed by law to bring back needed batteries to distributors and other collecting points!
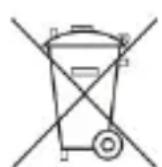
Consideration of duty according to the law of electrical devices
This symbol means that you must dispose of electrical devices separated from the General household waste when it reaches the end of its useful life. Take your unit to your local waste collection point or recycling centre. This applies to all countries of the European Union, and to other European countries with a separate waste collection system.
other
| Time | Value | | :--- | :--- | | 24 hrs | 75 | | 80 hrs | 80 | | Low | 18 | | High | 30 | | Low | 25 | | High | 26 | | Low | 24 | A1 A2 A3 A4 A5
natural_image
Technical line drawing of a rectangular electronic device with a sun icon and label B1 (no text or symbols on the diagram itself)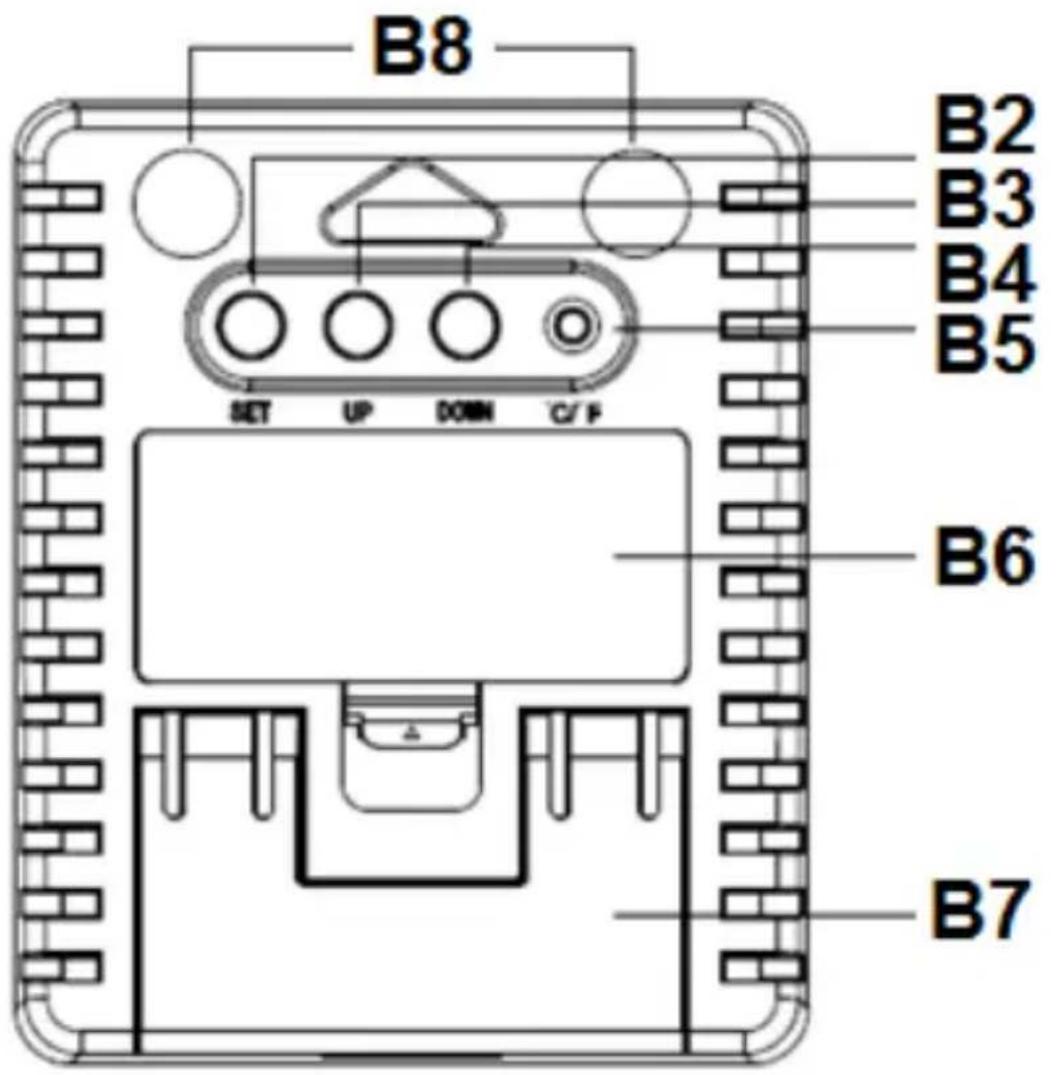
text_image
B8 B2 B3 B4 B5 SET UP DOWN C/F B6 B7Description
natural_image
Two black curved arrows pointing in opposite directions (no text or symbols)natural_image
Symbolic icon of a person moving with arrows, enclosed in a circle (no text or symbols)other
| Timeframe | Value | | :--- | :--- | | A1 | 70% (high) | | A2 | 70% (low) | | A3 | 30% (low) | | A4 | 25°C (high) | | A5 | 24°C (low) |
natural_image
Technical line drawing of a rectangular electronic device with a sun icon and label B1 (no text or symbols on the diagram itself)
text_image
B8 B2 B3 B4 B5 SET UP DOWN C/F B6 B7Descripción
Parte A – Delantera
A1: Humedad actual
natural_image
Abstract black arrows pointing in opposite directions (no text or symbols)other
| Time | Value | | :--- | :--- | | 24 hrs | 75 | | 80 hrs | 80 | | Low | 18 | | High | 30 | | Low | 25 | | High | 26 | | Low | 24 | A1 A2 A3 A4 A5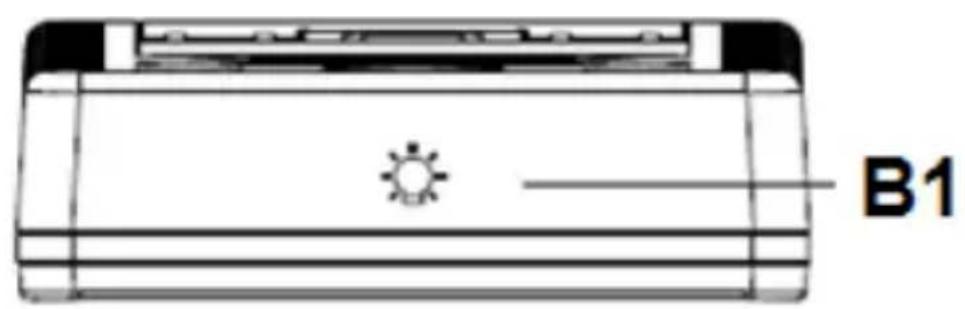
natural_image
Technical line drawing of a rectangular electronic device with a sun icon and label B1 (no text or symbols on the diagram itself)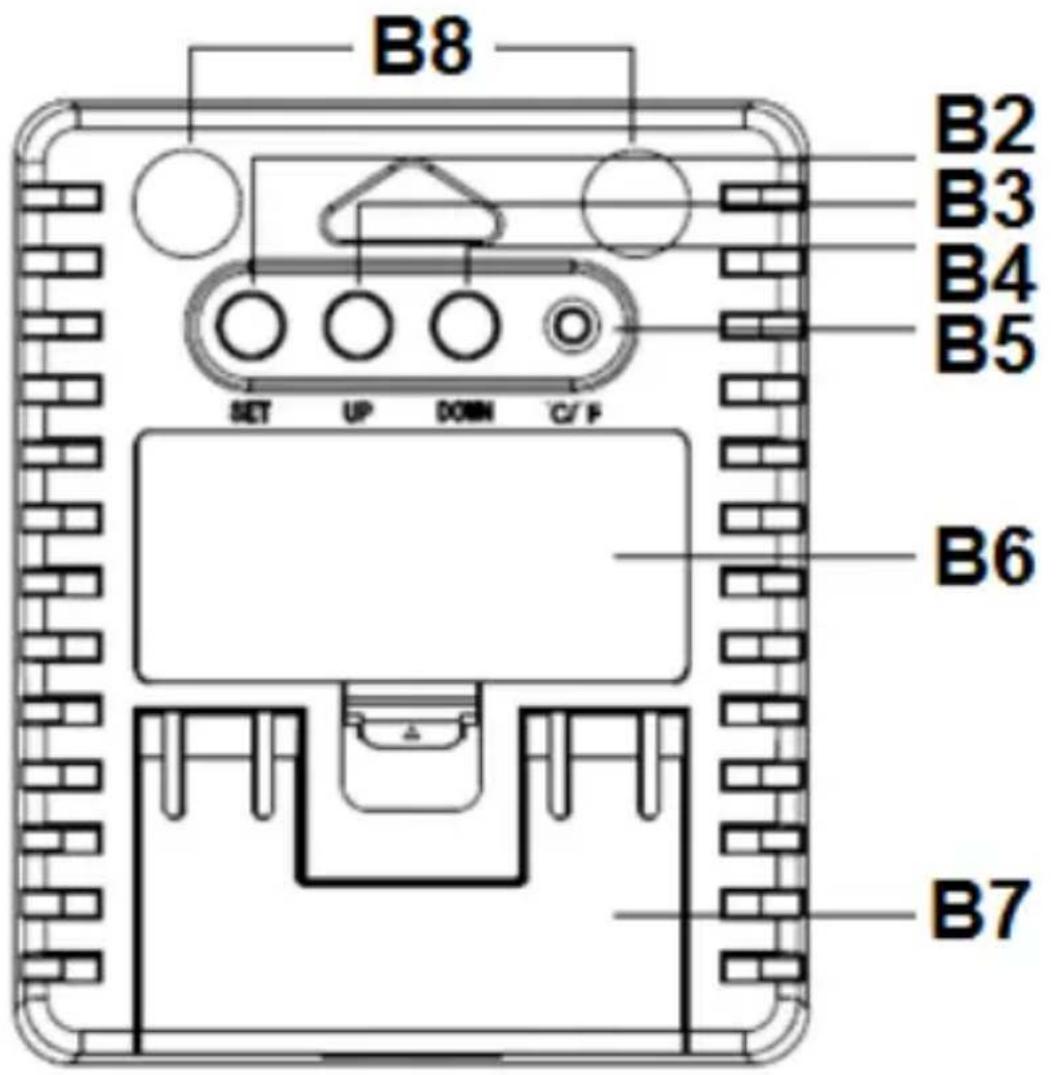
text_image
B8 B2 B3 B4 B5 SET UP DOWN C/F B6 B7Descrizione
Parte A – Anteriore
natural_image
Two black curved arrows pointing in opposite directions (no text or symbols)natural_image
Technical line drawing of a rectangular electronic device with a sun icon and label B1 (no text or symbols on the diagram itself)
text_image
B8 B2 B3 B4 B5 SET UP DOWN C/F B6 B7Popis
natural_image
Abstract black curved arrows pointing upward and downward (no text or symbols)other
| Timeframe | Value | | :--- | :--- | | A1 | 70% (high) | | A2 | 70% (low) | | A3 | 30% (low) | | A4 | 25°C (high) | | A5 | 24°C (low) |
natural_image
Technical line drawing of a rectangular electronic device with a sun icon and label B1 (no text or symbols on the diagram itself)
text_image
B8 B2 B3 B4 B5 SET UP DOWN C/F B6 B7Opis
Część A – przód