K 3 Home T 150 - Pressure washer Kärcher - Free user manual and instructions
Find the device manual for free K 3 Home T 150 Kärcher in PDF.
User questions about K 3 Home T 150 Kärcher
0 question about this device. Answer the ones you know or ask your own.
Ask a new question about this device
Download the instructions for your Pressure washer in PDF format for free! Find your manual K 3 Home T 150 - Kärcher and take your electronic device back in hand. On this page are published all the documents necessary for the use of your device. K 3 Home T 150 by Kärcher.
USER MANUAL K 3 Home T 150 Kärcher
Chairman of the Board of Management

S. Reiser
Manager Regulatory Affairs & Certification
71364 Winnenden (Germany)
Tel.: +49 7195 14-0
Fax: +49 7195 14-2212
Winnenden, 2022/12/01
Contents
General notes. 11
Environmental protection 11
Intended use 12
Accessories and spare parts. 12
Scope of delivery 12
Description of the device 12
Safety devices 12
Symbols on the device 12
Installation 12
Initial startup. 13
Operation 13
Transport 14
Storage. 14
Care and service 14
Troubleshooting guide. 14
Warranty. 15
Technical data 15
EU Declaration of Conformity. 15
General notes
Read these original operating instructions and the enclosed safety instructions before using the device for the first
time. Proceed accordingly.
Keep both books for future reference or for future owners.
Environmental protection

The packing materials can be recycled. Please dispose of packaging in accordance with the environmental regulations.

Electrical and electronic devices contain valuable, recyclable materials and often components such as batteries, rechargeable batteries or oil, which - if handled or disposed of incorrectly - can
pose a potential danger to human health and the envi
ronment. However, these components are required for the correct operation of the device. Devices marked by this symbol are not allowed to be disposed of together with the household rubbish.
Cleaning work producing in oily waste water, e.g. washing engines, washing undercarriages etc., may only be performed at washing stations with an oil separator.
Working with detergents may only be performed on watertight surfaces with connection to the waste water sewage system. Do not allow detergent to enter waterways or the soil.
Notes on the content materials (REACH)
Current information on content materials can be found at: www.kaercher.de/REACH
Intended use
Use the high-pressure cleaner in private households only.
The high-pressure cleaner is intended for cleaning machines, vehicles, buildings, tools, facades, terraces, garden machines etc. using a high-pressure water jet.
Accessories and spare parts
Only use original accessories and original spare parts. They ensure that the appliance will run fault-free and safely.
Information on accessories and spare parts can be found at www.kaercher.com.
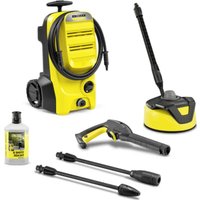
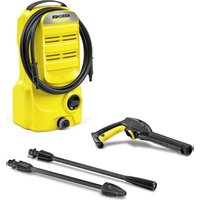
Scope of delivery
The scope of delivery for the appliance is shown on the packaging. Check the contents for completeness when unpacking. If any accessories are missing or in the event of any shipping damage, please notify your dealer.
Description of the device
For the illustrations, refer to the graphics page Illustration A Illustration B
1Water connection coupling
2Water connection with integrated sieve
3 Detergent suction hose
4Mains connection cable with mains plug
⑤Hose reel
6 Holder for hose reel
Fixing for high-pressure hose
Storage for high-pressure gun
⑨ Vario Power spray lance for common cleaning tasks The working pressure can be continuously increased from "SOFT" to "HARD". To adjust the working pressure, release the trigger gun lever and turn the spray lance to the desired position. Detergent can be added to the water jet when the spray lance is turned all the way in the SOFT direction.
10 Spray lance dirt blaster for stubborn soiling
1 High-pressure gun
12 Clamp for connecting / disconnecting the high-pressure hose
13High-pressure gun lever
14High-pressure gun lock
15 High-pressure hose
Storage for spray lance
Transport handle
Storage for high-pressure hose / mains connection cable
19Transport wheel
Trigger "0/OFF" / "I/ON"
21High-pressure connection
22Type plate
23Screws
24Clip for high-pressure hose
25**Garden hose (fabric reinforced, diameter at least 1/2 inch (13 mm), length at least 7.5 m, with commercially available quick coupling)
** additionally required
Safety devices
CAUTION
Missing or modified safety devices!
Safety devices are provided for your own protection. Do not bypass, remove or render ineffective any safety devices.
Power switch
The power switch prevents unintentional operation of the device.
High-pressure gun lock
The lock locks the lever of the high-pressure gun and prevents the device from starting unintentionally.
Auto-stop function
If the lever of the high-pressure gun is released, the pressure switch turns off the pump and the high-pressure jet stops. The pump switches on again when the lever is pressed.
Symbols on the device
Do not aim the high-pressure jet may at persons, animals, live electrical equipment or the device itself.
Protect the device against frost.
The device may not be connected to the public drinking water network.

Installation
For the illustrations, refer to the graphics page.
Fit the supplied loose parts onto the device before starting up the device.
Place the screws provided and matching screwdriver at the ready.
Installing the wheels
- Install the wheels on the device so that they latch into place.
Illustration C
Mounting the transport handle
- Attach the transport handle.
- Secure the transport handle with 4 screws. Illustration D
Mounting the storage option for the high-pressure gun
-
Push in the storage option for the high-pressure gun into the holder on the device.
-
Hold the storage option in the end position and secure it using a screw.
Illustration E
Mounting the storage option for spray lances
- Push in the storage option for the spray lances into the holder on the device.
- Hold the storage option in the end position and secure it using a screw.
Illustration F
Mounting the storage option for the high-pressure hose / mains connection cable
Devices without a hose reel
- Push in the storage option for the high-pressure hose / mains connection cable into the holder on the transport handle.
- Hold the storage option in the end position and secure it using a screw.
Illustration G
Mounting the high-pressure hose reel
Devices with a hose reel
- Attach the holder for the hose reel.
-
Secure the holder using 2 screws. Illustration H
-
Attach the hose reel.
The hose reel locks into place.
Illustration I
Installing the water connection coupling
- Screw the water connection coupling onto the water connection on the device.
Illustration J
Initial startup
- Place the device on a flat and level surface.
- Unwind the high-pressure hose and eliminate any loops and twists.
Note
Devices with a hose reel During operation, the high-pressure hose must be completely unwound from the hose reel.
3. Connect the high-pressure hose to the device.
a Pull up the clamp on the coupling.
b Insert the high-pressure hose into the coupling.
c Press down the clamp on the coupling.
Illustration K
- Connect the high-pressure hose to the high-pressure gun.
a Squeeze the clamp.
b Pull out the clamp.
c Insert the high-pressure hose.
d Press the clamp in until it latches into place.
Illustration L
- Check for a secure connection by pulling on the high-pressure hose.
- Plug the mains plug into a mains socket.
Water supply
For the connection values, see the type plate or chapter Technical data.
Observe the water distribution company regulations.
ATTENTION
Damage through contaminated water
Contamination in the water can damage the pump and the accessories.
KÄRCHER recommends using the KÄRCHER water filter for protection(special accessory, order number
4.730-059).
Connection to the water line
ATTENTION
Hose coupling with Aquastop on the water connection of the device
Damage to the pump
Never use a hose coupling with Aquastop on the water connection of the device.
You can use an Aquastop coupling on the tap.
- Plug the garden hose onto the water connection coupling.
- Connect the garden hose to the water line.
Illustration M
- Open the water tap fully.
Operation
ATTENTION
Pump running dry
Damage to the device
If pressure does not build up in the device after 2 minutes then switch the device off and proceed according to the instructions in chapter Troubleshooting guide.
High-pressure operation
ATTENTION
Damage to painted or sensitive surfaces
Surfaces can be damaged when the jet is too close to the surface or an unsuitable spray lance is used.
Maintain a minimum spray distance of 30~cm when cleaning painted surfaces.
Do not clean car tyres, paint or sensitive surfaces such as wood with the dirt blaster.
- Insert a spray lance into the high-pressure gun and lock it by turning it 90^ .
Illustration N
- Switch the device on ("I/ON").
- Unlock the lever of the high-pressure gun.
- Press the lever of the high-pressure gun.
The device switches on.
Operation with detergent
△DANGER
Failure to adhere to the safety data sheet
Incorrect handling of the detergent can seriously damage your health
Observe the safety data sheet of the detergent manufacturer, in particular the instructions on personal protective equipment.
Note
KÄRCHER detergents ensure fault-free operation. Ask us for a consultation, request our catalogue or our detergent information sheets.
Note
Detergent can only be mixed into the jet at low pressure.
- Pull the desired length of the detergent suction hose out of the casing.
Illustration O
- Hang the detergent suction hose in a container with detergent solution.
- Use the Vario Power spray lance.
- Turn the spray lance all the way into the "SOFT" position.
The detergent solution is mixed with the water jet during operation.
Recommended cleaning method
- Spray the detergent sparingly on the dry surface and let it work for a while (do not let it dry).
- Rinse off the loosened dirt with the high-pressure jet.
After operation with detergent
- Flush the device with clear water for approx. 30 seconds.
Interrupting operation
- Release the lever of the high-pressure gun. The device switches off when the lever is released. The high pressure in the system is retained.
- Lock the lever of the high-pressure gun. Illustration P
- Switch the device off "0/OFF" during work breaks longer than 5 minutes.
Ending operation
CAUTION
Pressure in the system
Injuries from high-pressure water escaping uncontrollably
Only disconnect the high-pressure hose from the high-pressure gun or the device when the system is fully depressurised.
- Release the lever of the high-pressure gun.
- Close the water tap.
- Press the lever of the high-pressure gun for 30 seconds.
The pressure remaining in the system is discharged.
- Release the lever of the high-pressure gun.
- Lock the lever of the high-pressure gun.
- Disconnect the device from the water supply.
- Switch off the device "0/OFF".
- Pull the mains plug out of the socket.
Transport
CAUTION
Failure to observe the weight
Risk of injury and damage
Be aware of the weight of the device during transportation.
Pulling the device
- Pull the device via the transport handle.
Transporting the device in a vehicle
- Secure the device against slipping and tipping over.
Storage
CAUTION
Failure to observe the weight
Risk of injury and damage
Be aware of the weight of the device during storage.
Storing the device
- Place the device on a level surface.
- Disconnect the high-pressure hose from the high-pressure gun.
- Disconnect the spray lance from the high-pressure gun.
- Stow both spray lances and the high-pressure gun in the appropriate storage options.
- Disconnect the high-pressure hose from the device.
- Stowing the high-pressure hose. Devices without a hose reel Store the high-pressure hose on the device.
Devices with a hose reel
a Insert one end of the high-pressure hose into the opening at the front of the hose reel.
b Turn the crank to wind up the high-pressure hose.
c While doing so, guide the high-pressure hose with the second hand.
Illustration Q
d Use the high-pressure hose clip to attach the coiled high-pressure hose to the hose reel. Illustration R
- Stow the mains connection cable on the device.
Observe the additional instructions before storing the device for a longer period of time, see chapter Care and service.
Frost protection
ATTENTION
Danger of frost
Incompletely emptied devices can be destroyed by frost.
Completely empty the device and accessories. Protect the device from frost.
The following requirements must be satisfied:
The device is disconnected from the water supply.
The high-pressure hose is removed.
- Switch the device on "I/ON".
- Wait for a maximum of 1 minute until no more water escapes from the high-pressure connection.
- Switch off the device.
- Store the device in a frost-protected room, together with all accessories.
Care and service
△DANGER
Danger of electric shock
Injuries due to touching live parts
Switch off the device.
Remove the mains plug.
The device is maintenance-free, i.e. you do not need to perform any maintenance work.
Clean the sieve in the water connection
ATTENTION
Damaged sieve in the water connection
Damage to the device through contaminated water Check the sieve for damage before inserting it in the water connection.
If necessary, clean the sieve in the water connection.
- Remove the water connection coupling.
- Pull the sieve out.
-
Clean the sieve under running water. Illustration S
-
Insert the sieve into the water connection.
Clean the detergent filter
Clean the detergent filter before longer periods of storage.
- Pull the filter off the detergent suction hose.
- Clean the filter under running water. Illustration T
Troubleshooting guide
Malfunctions often have simple causes that you can remedy yourself using the following overview. When in doubt, or in the case of malfunctions not mentioned here, please contact your authorised Customer Service.
△DANGER
Danger of electric shock
Injuries due to touching live parts
Switch off the device.
Remove the mains plug.
Device not running
- Press the lever of the high-pressure gun.
The device switches on. - Check that the voltage specified on the type plate corresponds to the voltage of the power source.
- Check the mains connection cable for damage.
Device does not reach required pressure
The water supply is too low.
- Open the water tap fully.
- Check the water inlet for an adequate flow rate.
- Check the setting at the spray lance.
The sieve in the water connection is dirty.
- Pull the sieve in the water connection out using flat pliers.
- Clean the sieve under running water.
Illustration S
Air is in the device.
- Vent the device:
a Switch on the device without a connected spray lance for a maximum of 2 minutes.
b Press the high-pressure gun and wait until the water escaping from the high-pressure gun is free of air bubbles.
c Connect the spray lance.
Strong pressure fluctuations
- Clean the high-pressure nozzle:
a Use a needle to remove dirt from the nozzle drill.
b Rinse the high-pressure nozzle from the front with water.
- Check the water supply volume.
Device leaking
- The device leaks a small amount for technical reasons. If the leak is severe, request authorised Customer Service.
Detergent is not sucked in
- Use the Vario Power spray lance and turn it all the way in the "SOFT" direction.
- Clean the filter on the detergent suction hose.
- Check the detergent suction hose for kinks.
Warranty
The warranty conditions issued by our relevant sales company apply in all countries. We shall remedy possible malfunctions on your appliance within the warranty period free of cost, provided that a material or manufacturing defect is the cause. In a warranty case, please contact your dealer (with the purchase receipt) or the next authorised customer service site.
(See overleaf for the address)
Technical data
| K 3 Premium K 3 | ||
| Electrical connection | ||
| Voltage | V | 220-240 |
| Phase ~ 1 1 | ||
| Frequency Hz 50-60 50-60 | ||
| Current consumption | A 6 6 | |
| Degree of protection | IPX5 IPX5 | |
| Protection class | L | II II |
K 3 Premium K 3
| Power protection (slow-blowing) | A | 10 | 10 | |
| Water connection | ||||
| Feed pressure (max.) MPa | 1,2 | 1,2 | ||
| Input temperature (max.) | °C | 40 | 40 | |
| Input amount (min.) | l/min | 8 8 | ||
| Device performance data | ||||
| Operating pressure | MPa | 8,0 | 8,0 | |
| Max. permissible pressure | MPa | 12,0 | 12,0 | |
| Water flow rate | l/min | 5,5 | 5,5 | |
| Maximum flow rate | l/min | 6,3 | 6,3 | |
| Detergent flow rate | l/min | 0,3 | 0,3 | |
| High-pressure gun recoil force | N | 12 | 12 | |
| Dimensions and weights | ||||
| Typical operating weight | kg | 5,6 | 5,2 | |
| Length | mm | 309 | 242 | |
| Width | mm | 285 | 285 | |
| Height | mm | 805 | 805 | |
| Determined values in acc. with EN 60335-2-79 | ||||
| Hand-arm vibration value | m/s2 | 1,7 | 1,7 | |
| Uncertainty K | m/s2 | 0,7 | 0,7 | |
| Sound pressure level LpA | dB(A) | 74 | 74 | |
| Uncertainty KpA | dB(A) | 3 3 | ||
| Sound power level LWA + uncertainty KWA | dB(A) | 90 | 90 | |
Subject to technical modifications.
EU Declaration of Conformity
We hereby declare that the machine described below complies with the relevant basic safety and health requirements in the EU Directives, both in its basic design and construction as well as in the version placed in circulation by us. This declaration is invalidated by any changes made to the machine that are not approved by us.
Product: High-pressure cleaner
Type: 1.676-xxx
Currently applicable EU Directives
2011/65/EU
2000/14/EC
2006/42/EC (+2009/127/EC)
2014/30/EU
Harmonised standards used
EN 60335-1
EN 60335-2-79
EN 62233: 2008
EN 55014-1:2017 + A11:2020
EN 55014-2: 1997 + A1: 2001 + A2: 2008
EN61000-3-2:294-240
EN 61000-3-3:2013
EN IEC 63000:2018
Applied conformity evaluation method
2000/14/EG:Annex V
Sound power level dB(A)
Measured: 87
Guaranteed: 90
The signatories act on behalf of and with the authority of the company management.

H.Jenner
Chairman of the Board of Management

S. Reiser
Manager Regulatory Affairs & Certification
Documentation supervisor:
S. Reiser
Alfred Karcher SE & Co. KG
Alfred-Karcher-Str. 28 - 40
71364 Winnenden (Germany)
Ph.: +49 7195 14-0
Fax: +49 7195 14-2212
Winnenden, 2022/12/01
Contenu
Remarques generales. 16
2006/42/CE (+2009/127/CE)
2014/30/UE

H. Jenner
Chairman of the Board of Management

S. Reiser
Manager Regulatory Affairs & Certification
Responsible de la documentation :
S. Reiser
Alfred Karcher SE & Co. KG
Alfred-Karcher-Str. 28 - 40
71364 Winnenden (Germany)
Tél.: +49 7195 14-0
Télécopie: +49 7195 14-2212
Winnenden, 2022/12/01
Indices

H.Jenner
Chairman of the Board of Management

S. Reiser
Manager Regulatory Affairs & Certification
71364 Winnenden (Germany)
Tel.: +49 7195 14-0
Fax: +49 7195 14-2212
Winnenden, 2022/12/01
Índice de Contents
Avisogenerales 25
Protection del medioambiente 25
Uso previsto 25
2006/42/CE (+2009/127/CE)
2014/30/UE

H.Jenner
Chairman of the Board of Management

S. Reiser
Manager Regulatory Affairs & Certification
Responsible de documentacion:
S. Reiser
Alfred Kärcher SE & Co. KG
Alfred-Karcher-Str.28-40
71364 Winnenden (Germany)
Tel.: +49 7195 14-0
Fax: +49 7195 14-2212
Winnenden, 2022/12/01
Indices
Indicaoesgerais 30
2006/42/CE (+2009/127/CE)
2014/30/UE
Chairman of the Board of Management

S. Reiser
Manager Regulatory Affairs & Certification
Winnenden, 2022/12/01
Inhoud
Chairman of the Board of Management
S. Reiser
Manager Regulatory Affairs & Certification
71364 Winnenden (Germany)
Tel.: +49 7195 14-0
Fax: +49 7195 14-2212
Winnenden, 2022/12/01
icindekiler
Genel uyarilar 39
Cevre koruma 39
2006/42/AT (+2009/127/AT)
2014/30/AB

H.Jenner
Chairman of the Board of Management

S. Reiser
Manager Regulatory Affairs & Certification
Winnenden, 2022/12/01
Innehäll
Allman information. 44
Miljöskydd. 44
16Fvaring for stralr
⑦Transporthandtag
18 Forvaring for hogtrycksslang / natkabel
(19)Transporthul
20Maskinens strombrytare "0/OFF"/I/ON"

H. Jenner
Chairman of the Board of Management

S. Reiser
Manager Regulatory Affairs & Certification
Dokumentationsbefullmaktigad:
S. Reiser
Alfred Kärcher SE & Co. KG
Alfred-Karcher-Str.28-40
D-71364 Winnenden (Germany)
Tfn: +49 7195 14-0
Fax: +49 7195 14-2212
Winnenden, 2022/12/01
Sisälto
Yleisia ohjeita 48
Chairman of the Board of Management

S. Reiser
Manager Regulatory Affairs & Certification
71364 Winnenden (Germany)
Puh.: +49 7195 14-0
Winnenden, 2022/12/01
Indhold
Generelle merknader 52
Miljøvern 52
- Apne vannkranen welt.
Bruk
OBS
2006/42/EF(+2009/127/EF)
2014/30/EU
Anvendte harmoniserte standarder
EN 60335-1
EN 60335-2-79
EN 62233: 2008
EN 55014-1:2017 + A11:2020
EN 55014-2: 1997 + A1: 2001 + A2: 2008
EN 61000-3-2: 2014
EN 61000-3-3:2013
ENIEC6300222418

Chairman of the Board of Management
S. Reiser
Manager Regulatory Affairs & Certification
71364 Winnenden (Germany)
TIf.: +49 7195 14-0
Winnenden, 2022/12/01
Indhold
Generelle henisninger 56
Miljobeskyttelse 57
Korrekt anvendelse 57
Tilbehør ogreservedele 57
Leveringsomfang 57
Relevant EU-directiver
2011/65/EU
2000/14/EF
2006/42/EF (+2009/127/EF)
2014/30/EU
2000/14/EF: Tillaeg V
Lydeffektniveau dB(A)
Malt: 87
Garanteret: 90

Chairman of the Board of Management

S. Reiser
Manager Regulatory Affairs & Certification
71364 Winnenden (Germany)
TIf.: +49 7195 14-0
Fax: +49 7195 14-2212
Winnenden, 2022/12/01
Sisukord
Uldised juhised 61
Keskkonnakaitse 61
Toode: Korgsurvepesur
Tüpp: 1.676-xxx
Chairman of the Board of Management

S. Reiser
Manager Regulatory Affairs & Certification
71364 Winnenden (Germany)
Tel: +49 7195 14-0
Winnenden, 2022/12/01
Satures
Visparigas norades 65

H. Jenner
Chairman of the Board of Management

S. Reiser
Manager Regulatory Affairs & Certification
Pilvarotais sagatavot dokumentaciju:
S. Reizers (S. Reiser)
Alfred Kärcher SE & Co. KG
Alfred-Karcher-Str.28-40
71364 Winnenden (Vacija)
Talr.: +49 7195 14-0
Fakss: +49 7195 14-2212
Vinendene (Winnenden), 2022/12/01
Turinys

H. Jenner
Chairman of the Board of Management
S. Reiser
Manager Regulatory Affairs & Certification
Dokumentacios tvarkytojas: S. Reiser
Alfred Kärcher SE & Co. KG
Alfred-Karcher-Str.28-40
2006/42/WE (+2009/127/WE)
2014/30/UE

H.Jenner
Chairman of the Board of Management

S. Reiser
Manager Regulatory Affairs & Certification
Administrator dokumentaci:
S. Reiser
Alfred Karcher SE & Co. KG
Alfred-Karcher-Str. 28 - 40
71364 Winnenden (Germany)
Tel.: +49 7195 14-0
Fak8: +49 7195 14-2212
Winnenden, 2022/12/01
1
Tartalom
Chairman of the Board of Management

S. Reiser
Manager Regulatory Affairs & Certification
Winnenden, 2022/12/01
Obsah
Obecné poukyny 83
Ochrana zivotniho prostfedi 83
Pouzitikestanovenemuucelu 83
Prislustenvi a nahradni dily. 83
Rozsah dodávky. 83
Popis pristroje 83
2006/42/ES (+2009/127/ES)
2014/30/EU
2000/14/ES: Priloha V

H.Jenner
Chairman of the Board of Management

S. Reiser
Manager Regulatory Affairs & Certification
Zmocnenec pro dokumentaci: S. Reiser
Alfred Kärcher SE & Co. KG
Alfred-Karcher-Str.28-40
Winnenden, 2022/12/01
Obsah
2006/42/ES (+2009/127/ES)
2014/30/EU
2000/14/ES: Priloha V

H.Jenner
Chairman of the Board of Management

S. Reiser
Manager Regulatory Affairs & Certification
71364 Winnenden (Germany)
Tel.: +49 7195 14-0
Fax: +49 7195 14-2212
Winnenden, 2022/12/01
Kazalo
Spošna navodila 92
Zaščita okolja 92
Namenska uporaba 92
Pribor in nadomestni deli. 92
Obsegdobave. 92
Opis naprave 92
Varnostne naprave 92
Simboli na napravi. 93
Montaza. 93
Zagon 93
Obratovanje 93
Transport 94
Skladišcenje 94
20Stikalo naprave "0/OFF" / "I/ON"
21 Visokotlačni prikrljucek
22 Tipska plościca
23Vijaki
Zadevne EU-directive
2011/65/EU
2000/14/ES
2006/42/ES (+2009 / 127 / ES)
2014/30/EU

H. Jenner
Chairman of the Board of Management

S. Reiser
Manager Regulatory Affairs & Certification
Winnenden, 2022/12/01
Cuprins
Indicatiigenerale 96
Protectia mediolui 96
Dispositivedesignaranta 97
Directive UE relevante
2011/65/UE
2000/14/UE
2006/42/UE (+2009/127/UE)
2014/30/UE
Norme armonjate aplicate
EN 60335-1
EN 60335-2-79
EN 62233: 2008
EN 55014-1:2017 + A11:2020
EN 55014-2: 1997 + A1: 2001 + A2: 2008
EN 61000-3-2: 2014
EN 61000-3-3: 2013
EN IEC 63000:2018
Procedura de evaluates a conformitàtii
2000/14/UE: Anexa V
Nivel de putere acustica dB(A)
Māsurat: 87
Garantat: 90
Semnatarii actionažáín numele sì prin imputernicirea

Chairman of the Board of Management

S. Reiser
Manager Regulatory Affairs & Certification
Insarcinat cu elaborarea documentatiei:
S. Reiser
Alfred Karcher SE & Co. KG
Alfred-Karcher-Str.28-40
71364 Winnenden (Germania)
Tel.: +49 7195 14-0
Fax: +49 7195 14-2212
Winnenden, 2022/12/01
Opé napomene 101
Zašita okolíša 101
2006/42/EZ (+2009/127/EZ)
2014/30/EU
Primijenjene uskladene norme
EN 60335-1
EN 60335-2-79
EN 62233: 2008
EN 55014-1:2017 + A11:2020
EN 55014-2: 1997 + A1: 2001 + A2: 2008
EN 61000-3-2: 2014
EN 61000-3-3: 2013
ENIEC63000:2018
Chairman of the Board of Management

S. Reiser
Manager Regulatory Affairs & Certification
Winnenden, 2022/12/01
Sadržaj
Opste napomene 105
Zašita Životne sredine 105
Namenska upotreba 105
Priborirezervndelovi. 105
Obim isporuke 105
Opis uredaja 105
Sigurnosni ureadi 106
Simboli na uredaju. 106
Montaza. 106
Pušanje u pogon 106
Rad. 107
Transport 107
Skladistenje 107
2006/42/EZ (+2009/127/EZ)
2014/30/EU
Primenjene harmonizovane norme
EN 60335-1
EN 60335-2-79
EN 62233: 2008
EN 55014-1:2017 + A11:2020
EN 55014-2: 1997 + A1: 2001 + A2: 2008
EN 61000-3-2: 2014
EN 61000-3-3: 2013
EN IEC 63000:2018
Chairman of the Board of Management

S. Reiser
Manager Regulatory Affairs & Certification
Lice ovlasceno za Dokumentaciju:
S. Reiser
Alfred Kärcher SE & Co. KG
Alfred-Karcher-Str. 28 - 40
71364 Winnenden (Germany)
Tel.: +49 7195 14-0
Winnenden, 2022/12/01
περιεχόμενα
1
Chairman of the Board of Management

S. Reiser
Manager Regulatory Affairs & Certification
YIeUbVOC TeVIKOU qKeλou:
S. Reiser
Alfred Karcher SE & Co. KG
Alfred-Karcher-Str.28-40
71364 Winnenden (Germany)
Tnλ: +49 7195 14-0
Φaξ: +49 7195 14-2212
Winnenden, 2022/12/01
CopepkHne
O6uue yka3aHn 114
3aunTaOkpykaIoue cpebl. 114
IcnoJIb3ObaHne no Ha3HaueHnIO 115
PpHaadJeKHOCTn 3anaChbIe Yactn 115
KoMJIeKT NocTaBKn 115
OncanHe ycTpoNCTBa 115
IpeoxpaHHTeJIbHbIe yCTpoiCTBa 115
CnmboJIHa yCTpoNCTBe 115
MoHTax 115
BbD B 3KcPnyatauHIO. 116
3Kcnpnyatauia 116
TpaHcnpToBka 117
Xpahene 117
UxOuI TexHnueckoe o6cnyKuBaHne. 118
Pomoub npn HeucnpabHocTax 118
TapaHTnA 118
Texnueckne xapaKTepeNCTIKN 119
Deklapaun O COOTBETCBN CTahapTAM EC ... 119
O6üne yka3aHnY

Ipeed nepBbIM npimHeHnem yctpoiCTBa 03HaKOMITbcc DaHHoOpunHaNbHOHnHCTpykUnei no
3KcNpyatauIN npunaraembIMyka3aHnmaN NO TEXHnke 6e3onacHOCTN. DeIcTBOBaTb B COOTBETCTBnC HmN.
CoxpaHb o6e 6poUOpbln daJbHeuero
IIOJIb3OBAHnI INI DnI CJIeDyUoJcero BJIaJeJIbua.
3aunTa OkpykaIoUe CpeDbI

YnakoBOuyHbe MaTePnaJIbI NODaIOTC
BToPnHOn nepepa6oTke. YnaKOBky Heo6xOdmo yTuHn3uPoBaTb 6e3 yUepe6a dnn OkpyKaHOeI cpebl.

3NeKtpueckne H3NeKtpoHHbI ycTpoNCTBa
yacto coedePkat cehHbIe MaTePnAJIbI,
pnproHbIe dIy BtOpuHoi nepepa60TK, n
3aayactyTO Takne KOMNoHeHTbl, KaK 6aTapei,
akymyITopbI IIN MaCNO, KOToPbIe npn HnpabNlbHom o6paueHIn nII HeHaJnxJaee yTNl3aun PpeCTabJIOT NtEHNaJIbHyIO naCHocTb dIg 3dOpOBbI IN OkpyKaIOUeI cpebl. TeM He MeHee, daHbIe KOMNoHEtbl Heo6xOIMbI dIpaBnIbHO pa60bI yCTpoiCTBa. YcPoIcTBA, 6o3NaeHHbIe 3Tm CmBOJOM, 3anpeSeHO yTNl3nPOBaT BMeCTe C 6blTOBbIMn OTXoAMn.
Pa60tI NO oucTke, B pe3yIbTaTe KOToPbIX
6pa3yeTcCTOuHaB Oda, CoepXaUaMaCna,
HAnpImep, IpombIBKa DnurTaTeJr, MoKa dHnUa,
DOJIKNbI POnN3BOoNTbcr TOnbKO Ha MOeYhBX
IIIOuaKAX C MacNoOTDeJInteJeM.
Pa6OtBc MOIOUIMM CpeCTBaMn DOJINHbI NPOBOUNTBcra TOnbko Ha BOHOHePONHuaeMbIX pa6OuNX NOBExPHocTAX C NOKNUOyeHNEM K 6bITOBoK KaHaN3aun. He dOnyckaTb NonaDaHnMa MOIOxxCpeCTB B BOIOEmbl INI NOpBy.
Yka3aHnno KOMTIOHeHTam (REACH)
ΦHKcaTop BbICOKoHaNoPHoro NnCTOJIeTa
ФИКсаTOp 6nOKnpyeT pyUar BbICOKOHaNOPHOro нICTОЛета n 3aUuIuaet OT HeNpeHAmepeHHORO ЗANySCa yCTpoiCtBa.
ФункиаabTomaTneCKORO OCTaHOBa
Ecni pbuvar BbICOKoHaOpHOro nIcToIeta OTNyCKaETcR, MaHOMeTpUeckn BblKIOuYateNb OTKnIOyAEt HAcOC, NOdaVa BOdbI NOd BbICOKIM DaBJIeHNem IpeKpaAaETcR. Pn Haxatn Ha pbUar HAcOC CHOBA BkIOUyAEcR.
CNMBOJIbI Ha yCTpoiCTBe
He HanpaBnABy CTpyo BOdy NOD BbICOKM DaBJIeHnEM Ha JIODei, XJBOTHBIX, BKJIOUeHHOE 3JNEKTPnueCKoe 06OpyDobAHne HJN Ha cAmO yCTpOietBO. 3aunuatayCTpOietBO OT MOPo3a.

YcTpoIcTB 3aIpe7aeTcNIOKJIHOuTaH HeNOCpeIcTBeHNO KOMMyHaJIbHOJ XO3aIcTBeHHO-NITbeBOB BOOnpOBoDHO CETN.
MoHTax
PncyHKn cm. Ha cTpaHnca x pcncyHKamn.
Ipeed BBODOMB 3KcnnyatauynO yCTaHOBNt
He3akpenHnBHe IpnnaIraeMbIye AcTn Ha yCTpOncTBe.
IoIroTOBnTB BXOJaUne B KOMNKeT NOCTaBKn BnHTbI N COOTBETCTByIOUyO OTBepTKy.
YctaHOBka KOJec
- 3aФИКсИрОВаТь KOЛЕСа Ha yCTpoIcTBe Do ΜeПЧКа. Pисунok C
YcTaHOBka pyKn dJa TpaHcnpTIpOBKn
- PpikpenTe pyuKy dIra TpaHcnOpTnpOBKn.
- 3aKpeHnTb pyuKy IJra TpaHCnOpTnpOBKn 4 BnHTaMn.
PncyHok D
YcTaHOBkaOTceKaДЯХpaHeHnI NuctOJeTa BbICOKOr DaBNeHnI
- BCTaBntb OTCek IJRA xpaHeHnI NICTOJeta BBICOKOTO DaBHeHnB KpeJIneHnE Ha yCTpOJCTBE.
- YdepxkmbaTb OTCek dIy XpaHeHnB KpaHem NOIOKeHHN N 3aKpeNITb eRO BHTOM. PucyHok E
YcTaHOBkaOTceKaIJXpaHeHnCtpyHnO Tpy6Kn
- Bctabntb OTceK dIy xpaHeHn cTpyHbIX Tpy6OK B KpeIeHne Ha ycTpoNCTBe.
- YdepKnBaTb OTCekДЯ XpaHeHnB KpaHem NOJIOKeHnN 3aKpeNITb ERO BHTOM. PucyHok F
MOHTAX OTCEKa JIЯ XpaHeHn IJNaHra BbICOKO r DaBHeHn/CeTeBOr COeDInHrTeJIbHOrO Ka6EJa
UcTpoIcTbA 6e3 6apa6ana JIJI WJAnHa
- BcTaBnTb OTeK dIy XpaHeHnaIHaRa BbICOKOrO daBJIeHnI/ceTeBOrO CoeHNHTeNbHOrO Ka6JIa cnApyKnB KpeJIneHne Ha pyKe IJra TpaHCnOpTnPOBKn.
- YdepKINBaTb OTCeK dIy XpaHeHnB KpaHem NOIOKeHnN 3aKpeNITb eRO BnHTOM. PcyHok G
YcTahOBka 6apa6aHa nlaIshnaHroB BbICOKO rDaBJeHnA
UcTpoIcTBa c 6apabahom dna shnaHra
- Hacadntb depkatae bI 6apa6ana IJn shaHa.
- 3aKpeNTb DePkaTeNb 2 BnHTamN. PucyHok H
- HacaHb 6apabn Dnna shaHra. Bapabn nnaHra 3aФNKcnpyeTca Ha MeCTe. PucyHok I
YcTaHOBKa MyΦTbI JJI Na NOBODa BOdBi
- PnBHTMb MyfTy dIy noBbOa BoIb K naTpby6ky dIy noBbOa BoIb Ha yCTpoiCTBe. PucyHok J
BBoD B 3KcnNyaTaauIO
- NocTABnTB yCTpoNCTBO Ha POBHyO NOBepXHOCTb.
- Pa3MOTaTB uHaHr BbICOKO rDaBHeHn r paCnyTaTb BO3MOXHbIe nTIN n nepeKpyuBaHn.
PpumeyaHue
Ycmpoucmea c 6apabahom dna wana2a:Bo epemr 3Kcnnyamau u wana hbcokoo daenehur donjhen 6bimb nonHocmbio pa3moman c 6apaaba dnra wana2a.
3.ПодсоeДиHHTb WlaHr BbICOKOr O daBJIeHnK yCTpoIcTBy.
a NpOHTb 3axm Ha MyoTe.
b Bctabntb ⅢaHr BBICOKoro daBneHnB MycTy.
C PnJkaTb 3aXIM Ha MyΦTe BHN3.
PncyHok K
4.ПодсоeДиHHTb WlaHr BbICOKO rDaJIeHnK BBICOKOHAnOpHOMy NICTOJIeTy.
a Cxatab 3axmM.
bBbHyb3axm.
c Bctabntb wJnaHr BbcOKoro daBneHn.
d PnKtaTb 3aXmM Do pKcaun.
PucyHok L
- PpOBepuTb HaJeXHOCTb COeINHeHn, NotaHyB 3a WNaHR BbICOKOrO DaBNeHn.
- Bctabntb wTeNceIbHyIO BNJIky Bpo3eTKy.
Poaay Boa
IapametpbI nIpyoIKHoueHn yka3aHbI Ha 3aBOcko Tabniue nn B rnaBe TexHuyeckue xapaekmuKu.
Co6nIoudaT npednncanHn npednpnraTn BOOCha6KeHH.
BHIMAHHE
PoepekeHua u3-3a 3a2p3HeHHou e0dbI
3a2p3HeHua, codepaueec8 bode, moym
6b136amb noepekdeHua Hacocu npuHaedKHoCmeu.
Dna 3auumb kOmaHua KARCHER pekomehyem
ucnoh3oamb bodHO qunbp KARCHER
(cneuaabhbie npuHaedKHoCmu, Homep dna 3aka3a
4.730-059).
IopKnIOUeHne K BOOOnpOBoNy
BHIMAHHE
UHaOaMycma c cucmemou Aquastop Ha oDonpooHOM nampy6ke ycmpoucmea
NopeXdeHue Hacoca
Hukoada He ucnonb3yume wnaHaoyu Myfmy c cucmemou Aquastop Ha bodonpoeohom nampy6ke ycmpoucmea.
Bb moxeme uonb3o8am Mymy Aquastop Ha eodonpoeOHOM KpaHe.
- YcTaHOBtBaObBiIuHaHrHa MyfTy Inra NOBbAo BObl.
- PocoeHHb caOBbI IJIaHr K BOOpnoBdy. Pucyok M
- NOnHocTbHOOTKpbITb BOdONpOBOdHbI KpaH.
3Kcnnyatauia
BHIMAHHE
Cyxou xod hacoca
PoepekeHue ycmpoUcMa
Ecnu ycmpoicmeo he co3daem daenenue meuenue
2 MuHym, bIKIOUcMb ycmpoucmeo u cneodobamb UHCmpyKuM E 2nae POMoub npu HeucnpaehocmIx.
Pexm pa60tbI C BbICOKM DaBJIeHHeM
BHIMAHHE
PoepekeHue OkpaewHHbix unu yacmeumelhbx noepxHocmeu
NoepxHocmu noepkdoamc npu cnuKoM manom
pacmoHuu do oBekma un npu ebipe
Henodxoadue cmpyuHou mpy6ku.
Ppu ouucmke okpaewHHbix noepxHocmeu
cobnodamb paccmohue He Mehee 30 cm.
He yucmumb aemomobunbHbIe wUnbI,okpaewHHbIe
UUNyecmeunbHbIe noepxHocmu C
ucnoJb3OaHuEM 2p83e60fpe3bl.
- BCTaBnTb cTpHyu Tpy6ky B BBICOKOHanOpHbI nICTOJET N3aΦNkCnPoBaTb ee, NOBepHyB Ha 90° PucyHok N
- BkJIOHHTb yCTpOINCTBO (I/ON).
- Pa36JIOKINPOBaTb pbIHaR BbICOKOHaNOpHOro INCTOJIeta.
- HaxaTb pbUar BbICOKoHAnOpHOrO NcToJeta. YcTpoIcTB0 BKNIOuHaETc.
3KcnnyataunCnCTaumcpectBOM
ONACHOCTb
Hecobioheue nacnpma 6eonacnocmu
Cepbe3hbl 6pe3o0e6bu u3-3a HenpaBbHO20 ucNoB3O8aHua yucmaueo cpecm8a.
Cobnodamnbacnpm 6e0nacHocmu npou3oedumen Mokuceo cpedcmea, e yacmHocmu yka3aHua omHocumelbHo cpecme uHDubuyanbHO 3auumbl.
PpumeyaHue
Icnonb3o8aHue moiux cpecmse KARCHER
obecneueaem 6eomka3Hyu paBomy obopydo8aHua.
Bbl Moxeme o6pamumbcra 3a koncynbmaueu,
3anpocmb haw kamaio2 unu uHopMaUOHHbie
nammku no moiuum cpecmmeam.
PpumeyaHue
Moouee cpedcmeo moKHO do6aemmb mJbKO npu HU3KOM daeIehUU.
- BcacbIbAIOuI MJIaHr IJRA MOIOUero cpeCTBa BbITaIHTb N3 KOpNyc Ha Heo6XoDmMyO DnIHy. PucyHok O
- Onyctntb BcacbBaIOuIIN IJIaHr IJIaYnCTaIeO cpeCTBa B EMKoCTb C pactBOPOM YnCTaIeO cpeCTBa.
- NcnoJb3ObaTb cTpHyu Tpy6ky Vario Power.
4.Повернгыстуную Тубку в полжене «SOFT»doynopa. BoВремаразьп pactвор моюцero cpeДТВа добавлиется КстуveBoДbl.
PekomeHdoBaHHbI MeTOd OYNCK
- MoOuee cpeIcTBO 3KOHOMHO paCnblNTb Ha cyxyo NOBepxHOCt b N DaTb eMy NOeINCTBOBaTb (He BbICblXaTb).
- Cmblt 3aqr3HeHHCTpye BbICOKO DaBHeHH.
Iocne 3Kcnnyataunm MOOnum CpeDCTBOM
- PpOMbIbYcTpoiCTBO YnCTOu BOIOB TeueHne npn6JI. 30 cekyHd.
PpnoocTaHOBka pa6oTbI
- Otnyctntb pbuar BbcOKoHaOpHoro nCTOneta. Pn otnyckaHnPBuHa yCtpoiCTBO BblKlNoaetcB. BbcOKoe daBneHne B cIcTeMe coxpaHreTc.
- 3aФИКСИРОВАТБ рБИАг ВБICOKHAПОРНOr
ПИСТОЛЕТа.
Pисунок P
3.BoBpemInepepbIBOBbpa6Ote6oJee5MNHyT yctpoiCTBO CNeIyET BbIKNIOuATb 0 / O F F
OkoHuaHne pa6oTbI
△OCTOPOXHO
JaeneHue cucmeme
Tpaembl e pezynbame HeKOHmpolupyEmo2o bixoda eoobI rOd bICOKUM daJeHuem
OmcodunmbuHaBbICOKo0daJeHua om ebICOKOHanopHOZnucmonema unu ycmpoucmea moIbko mo2da, Ko2a e cucmeme omycymcmyem daJIeHue.
- Otnyctntb pbuar BbICOKOHaNoPHO rNCToJeTa.
- 3aKpbIbBoDOnpOBoDnHbI KpaH.
- HaximMaTb pbIar BbICOKoHaIopHOro nIcToJeTaB TeueHne 30 cekyHd. OctabweecB cnCTeMe daBJIeHne c6paCbIbaETcR
- OTnycTntb pbIurBbICOKOHaNoPHO rNCToJeTa.
- 3aФИКСИРОВаТь рБИАг ВИСΚΟΗΝΑΝΥΝΟ ПИСΤΟЛЕТA.
- OToeDInHb yCTpoIcTBO OT CnCTEmbl BOOCha6xHeHn.
- BbIKIOuHTb yCTpOoiCTBO «0/OFF»
- 13BneB wTeNceBHyIO BnIKy n3 po3eTKN.
TpaHcnpTnpoBka
△OCTOPOXHO
Heco6nOdeHue eeca
Onachocmb nolyuehura mpaum u noepexdehu Bo bpema mpaehnpmuoeku yumbiamb bcycmpoucmea.
BoloueHne yctpoNCTBa
- Taryb yctpoCTBO 3a TpaHcnpOpTnpoBouHyO pyky.
TpaHcnpTnPOBka yCTpoNCTBa B TpaHCnpTHOM cpeDCTBe
- 3aФнсрOBaTb yCtpoIcTBO OT cMeUeHnI nO npOKuIbIbAHnI.
XpaHeHne
△OCTOPOXHO
Heco6nOdeHue eeca
Onachocmb npnyehnma pmae u noepkdehu Bo bpeym xpanenu yumbiamb bcycmpoucmea.
XpaheHne yctpoNCTBa
- NocTabuTb yctpoiCTBO Ha poBHOI NOBepxHOCtN.
- OToeHNHTb IJNaHr BbICOKO rDaBneHnO r BBICOKOHAnOPHOro NCTOneta.
- OToCoEiHHTb CtpuHyTO Tpy6Ky OT BbICOKOHAnOPHOro NtCTOJeta.
- YIIOXINb CTpyHbIe Tpy6Kn I NcTOnET BbICOKOrO DaBHeHnB COOTBeTCTByIOUne OTceKn DnIa XpaHeHn.
- OToeMHHTb IHaHr BbICOKOrO daBneHnA OYcTpOuCTBa.
- YIIOXHTb ⅢJAAHr BbICOKO r DaBHeHn r XpaHeHn. YcTPOIcTBa 6e3 6apabHa dnn IyIooXHTb ⅢJAAHr BbICOKO r DaBHeHn Ha YcTPOIcTBe DnY XpaHeHn. YcTPOIcTBa C 6apa6aHom dnn IyIuaHra
a Bctabntb OINH KOHeU WnHaRa BbICOKOro DaBHeHnB OTBepCTne B npeDHeu qactn 6apa6aba DnA WnHa.
b NObepHyTb KPNBOUINHHyO pyKoTky, TTo6bl HaMoTaTb UJNaHr BbICOKOrO daBJeHn.
c Btopoyn pykoi HanpaBnTb WnAnr BbICOKoD aBJIeHn.
PncyHOKQ
d C nOMOuBIO 3axmma dIy IuaHaRa BbICOKoR OaBJIeHnI npIKpeNITb HAMOTAHHbI IuaHr BBICOKoR OaBJIeHnI K bapa6aHy.
PucyHok R
- YIIOXnTb cTeBOB COeINHInTeJbHbI Ka6JIb Ha yCTpOYCTBO DnA XpaHeHnA.
Co6nOdaTb DonoHInTeIbHbIe yka3aHnna nepei dInTeJIbHbIM XpaHeHHem, CM. rnaBy Yxod u mexHuueckoe o6cnyKueBaHue.
3aunTa ot 3amep3aHn
BHIMAHNE
Onachocmb 3aMep3aHua
He noHocmbIO onopoxKeHHbIe ycmpoucmea Moaym 6bbmb nopekdeHbI npu eo3deUcmBuu MOp03a.
PonHocMbIO onopoxHumb ycmpoucmeo u npuHaadnexKhocmu.
3aummb ycmpoem0 om Mop03a.
DolKbI 6bItb BbIIOJIHeHbI CJIeYIOUIne ycIOBnA:
- YcTPOINCTBO OTOEINHEHO OT CnCTembl BOOCHa6KeHnA.
-
Ⅲnahr BbICOKOr DaBJeHn CHrT.
-
BkIIOHTb yCTpoiCTBO I/ON
- Побождать He 6олee 1 Мнутbl, noka Ha naTpy6ke BbICOKOrO DaBHeHr He nepeCTaHET BbICTyNaTb BOda.
- Bbiknounty yctpoiCTBO.
- XpaHntb yCTpoNCTBO n BCE pInHaJnEeKHOCTu B 3aunueHHOM OT MOpO3a NOMEueHIN.
YxOД n TeXHnueckoe 06cJnyXnBaHne
△ONACHOCTb
Onachocmb nopaxeHua 3Jekmpuueckum mokom
TpaBmIe pezynbmae kacanur mokoeedyux yacmeu
BbIIOumb ycmpoUcm80.
U38neuB wmeencenbHyIO BuNKy.
YcTpoIcTBO He Tpe6yET TexHnueckoro 06CnyKnBaHnra, To eCTb BblIOJIHeHHa peryJrAphoro TexHnueckoro 06CnyKnBaHnra He Tpe6yETca.
OuNTka cetTuToR OunbTpRa B natapy6Ke IIN NOBODa BObl
BHIMAHHE
IoepeXeHHb cemyambu u pfunbmp enampy6ke dna nodeoda oodbl
Poepekehue ycmpoucmea u3-3a 3aaep3henue bOdbI Ppoepumb cemyamblu pfunbp mHa Hanuue noepekdehu, npexde yem ecmaenmb e2o e nampy6ok dna nodeoda bOdbI.
Oueta b cetatb y nIbtp B naTppyke Iny noBdoa BOdbIO MEpe Heo6xOIMocTu.
- ChTb MyfTy c natpy6ka dIЯ NOBDA BObl.
- BbHyTb ceTuatbI qnIbTp.
- PpOmbItb ceTtBtBnΦnIbTp nOg npToCHoBdoN. PncyHOK S
- Bctabntb cetcahtbI pHnbpB natpy6ok dna NOdBODa BObl.
OuNCTka qnIbTpdaJyHcTjaeero cpeDcTba
Pepd dIInTeIbHbIM XpaHeHnEM OuNtB fNtBtp MOUeero cpeCTBa.
- ChrMb nIbTp co BCacbIbAIOero IJnaHra dnn MOIOeO cpeCTBa.
- PpombyTb pInIbTp nOД npOTouHoi BOIOJ. PucyHOK T
POMOUIB pRn HEnCpPaBHOCTX
3aactyio HecnpabHocTn IMeOT npocTbe IpnuHbI, NO3OMy C NOMOsbIO cIeNyUoero 063opa IN MOxHO yCTpaHNTc camOCToTeNbHO. B cIyae comHeHHN IIN BO3HKnHOBeHHN He ONICAHbIX 3deCb HecnpabHocTei cIeMyet ObaaTaBcR B aBTOpn3OBaHHyIO cepBucHyIO cnYk6y.
ONACHOCTb
Onachocmb nopaxeHua 3Jekmpuueckum mokom
TpaBmblpezynbmae kacaHua mokoeedyux yacmeu
Bbiknouumbycmpoicmeo.
U38aneuwmencenbHyuBulky.
YcTpoNCTBO He pa6Otae
- HaxaTb pbIur BbICOKoHAnOpHOro NICTOJeta. YCTPOINCTBO BKJIHOaETcR.
2.ПpoBepntb COOTBETCTBNE HAnpJKeHnY, yka3aHHOrO Ha 3aBOdCKoT Ta6NtueK, HApJKeHnIO nCTOuHnKa NITaHnY. - PpOBepuTb ceTeBOi Ka6eBHa noBpeKdEHHa
DabHeHbYcTpoCTBe He CO3aetC
CnIshKOM cIa6aIpoaB OdbI.
- PoinhoTbOtKpbTb BOOnpoBOHbI KpaH.
- PpOBepuTb NOaHy BObI Ha DOCTaTOHbI Osbem.
- PpOBepntb HAcTpoHcy CtpyHOn Tpy6Kn.
CetTuatbI dHnBtp B natapy6ke noDBoDa BObl 3aqr3HeH.
- BbHyTb cetTuBn fHJbTp n3 naTppy6ka noDbOda BOdbI NIOCKORY6aMn.
- PpOmbItb CeTtAblnIbnTp nOd npToOHOBdoN. PucyHOK S
ByctpoiCTBe cOepeKHTc8 BO3dyx.
- YdaJIITb BO3dYx N3 yCTPOIcTBa:
a BkHIOHTb yCTpOINCTBO 6e3 NOKIIHOUeHHoI CTpyHIOI Tpy6KN He 6Oonee Yem Ha 2 MInHyTbI.
b HaxaTb BbICOKoHaOpHbI NcToJET nOdoXdTaB, NOKa Ha NcToJTe He HauHET BbICTyNaTb BOda 6e3 Ny3bIPbKOB Bo3dyxa.
C PndcoeHNHTb CtpnyHny Tpy6Ky.
CnBhble nepenaabi daBneHna
- OuNCTnTb cOnIb BbICOKOr daBneHn:
a Ydaanntb 3arpr3HeHn 13 OTBepctna conna nIIOJ.
bPombytbcnIO BbICOKO DaBJeHnBaDOn Cpeeni.
- PpOBepnTb obem nOaBaEMoBdbl.
YcTpoNCTBO HReepMeTuH0
- He3haHTenbHra HerepMeTnHocTh yCTpoNCTBa obycIOBHeHa TexHueCKMn Oco6eHHOCrMn. PnCINbHOI HerepMeTnHOCTHn ObpaTnTBcB aBTOpu3OBaHHyO cepBuChHyO cnYk6y.
Ynctraee cpeCTBO He BCacbIbaeTc
- NcnoB3oBaTb ctpyHny Tpy6ky Vario Power n noBepHyTB B HappaBHeHn «SOFT» do ynopa.
- OuHCTnTb fNJIbTp BO BCacbIbAIOUeM IJNaHRe IJNA HCTraIeO CpeIcTBA.
- Поверпь BCacbIbauишланг Ддчпсero cpeicTBa Ha haJIuHne MeCt nepern6a.
RapaHTn
B kaskdo ctpahe DeiCCTBYKOT COOTBeTcTBYUOUIne rapaHTnHbIe ycNOBIA, yCTaHOBNeHHbIE ynoHOMOeHHo opraHn3aUneI NO C6bIy Hawei npOdykUHN. Bo3MOXHbIe HeNCnPaHBocTHu YcTPONCTBa B TeueHHe rapaHTnHOrO cPoka Mbl YcTpaHReM 6ecnnaTHO, ecnn npuHa 3aknouaetcB DepeKtax MaTeepnAIOB uIN npOn3BOJcTBeHHbIX 6pake. B cnUyae BO3NKHOBEHn IpeTeH3N B TeueHne rapaHTnHORO cPoka npoc6a obpaatbcra Chekom O nOKyNke B TropROyO prAraHn3aUIO, npOdaBsyIO n3deJeNne INN B 6bnkaiuyo yNoHOMOeHHyo cnyk6y cepBnCHoro 06cnkBAHn. (Adpec yka3an Ha o6opote)
Data Bbinycka OTO6paxaetcHa 3aBODCKO Ta6nueke B3akOnpoBaHHOM BnDE.
Pn3TOMOTdJIbHbIeUHpblmMeIO TcneDyUoee 3NaueHHe::
Приимер: 30190
3 roB BbInycka
0 cToneTHe BbInycka
1 DecTnTneBbInycka
9 BTOPAUcPpMaMeCuaBbIycka
0 nepBaIuΦpa Mecaa BbInycka
TakIM 06pa3OM, B daHHOM npHMepe KOD 30190 O3Haayet DaTy BbInycka 09/(2)013.
TexHnueckne XapaKTepncTnKn
K 3 Premium K 3
YpOBeHb3BykoBoMouhOCTnA6(A)
U3MepeHo:87
TapaHTnPoBaHo:90
HnKeNoDnncabWneCe Jnca DeNCTBYOT OT NMeHN I NO DOBepenHOCTn PpaBHeHH.

H.Jenner
Chairman of the Board of Management

S. Reiser
Manager Regulatory Affairs & Certification
JIInO,OTBETCTBeHHoe3a BeEHeHne DOKyMeHTaUN:
II. Pau3ep (S. Reiser)
Alfred Kärcher SE & Co. KG
Alfred-Karcher-Str.28-40
71364 Winnenden (Germany)
Ten.: +49 7195 14-0
Φaκc: +49 7195 14-2212
r.BunHHeHdEh,2022/12/01
3Mict
3araJIbHI Bka3iBKn. 119
Oxopoha doBkiJnla 120
BukopnstaHHa npn3haeHHam 120
Ppniladra Ta 3anachi detani 120
KOMnJIeKT NOCTaBKn 120
Onnc npictpo 120
3anobixhi npictroi 120
CnmboHa npncptoi 121
36upaHnHa 121
BbeDeHHB eKcnnyataio 121
Eknnnyataia 121
TpancnpotyBaHHa 122
36epirannn 122
Iorrr Ta texhne o6cnyroByBaHHa 123
IOnomoraBpa3i HecnpaBHOcte 123
Tapaantia 123
TexhiHxapakTepnCTIKN 124
Deknapaia npo BiinobiHictb cTahapam EC. 124
3araJIbHI Bka3iBKN

PepenepwnBnKOpncTaHHa mnpctpo03HaHOMNTncb 3 ciEo opinHaJIbHOIO IHCTpyKciEo 3
eKnnyataui Ta Bkazibkamn 3Texhikn 6e3nekn, 0doaHbcr. IjTn BiinobiHO Do Hx.
36epiratn obuBbI 6poWpy nnoaBworo BkOpncTahnna 6o nla HAcTyHoro Bnachka.
Oxopoha doBkilln

NakyabJIbHI MaTeiAnI npuaTHi Do BVOpHHoi nepepo6Kn. YnakOBky Heo6xIdHO yTuIn3yBaTn 6e3 uKoDi nJa DOBkiJJIa.

EneKtpuHi Ta eNeKtpoHHi npncTpoi MicrTaB ciHHi MaTepiAIn, kI npuaTHI Do BTOPHHOI nepepo6Kn, Ta qacto KOMnOHeHTN, kk-OT 6aTaapei, akymjTOpu Nm MactuJIO, kY pazi
HnipabNbHO NOBxKeHHa 3 Hmna
Hnnpabnboho yTuNi3aui MoKyTB CTBOpNTn noteHny He6e3neky dny 3dopOB' nIOuHN Ta DOBkInna. Ondak ci KOMnoHeHTn Heo6xDiHi dny HaneKHOI ekCnlyataui npncTpoIO. PnncTpoi, no3Haehi cIM CmBONOM, 3a6bOpohrcyTuNl3yBaTN pa30m i3 no6yTOBM CMITTM.

Po60tn 3 ouuienHH, B pe3yIbTaTI knx
3'YBnEeBcBiDnpaBoBaHa B0a 3 BMICTOM
OINBn, HApnKJaD, IpomBaHnYDaNpyHa, MTTT DaHIIa, NOBHHI BKNOHyBaNTcB TiNbKn Ha MmHnx MaJdaHnKax 3 OINBOyNOBnOBaYeM.

Po6Otn 3 MNUOuMn 3acO6aMn IOBUNHHi
BVKOHyBaTncb TiNbKn Ha pOboQnx PNOUHax, He HnKNHX dIaPiHN, 3 BxOoM y No6yToBy aIi3aicIO. MIOUcI 3acO6n He NOBnHi nOTpanJIaTIu y oIMN a6o rpyHT.
Bka3iBkn ⅢOIO KOMnoHeHTIB (REACH)
AkyaIbHI BiIOMoCTI npo KOMnoHEnTn HabeJeHi Ha caTI: www.kaercher.de/REACH
BnKOpncTaHHa 3a npu3HaueHHaM
BukopncTOByBaTN MNoHn anapat BucOKOr TnCKy TInbKn y DoMaunhOmy roCnoApCTBi.
MnHnn anapat BnCOKO TnCKy npn3NaeHm dIa MNTT MaunH, ABTomo6inib, 6yDIBeIb, IHCTpyMeHTiB, facaib, Tepac, caDOBO-ropoHoro IHBeHTapIO Ta iH. CTpyMeHem BOINPiBnCOKIM TnCKOM.
PpnaT Ta 3anachi deTani
CnD BnKOpNCToBvBaTJ NIme OpRiHaNbHe npIuaJaTa opRiHaNbHi 3anachi YactHn, TOMy IIO camE BOHrapaHTyOt b 6e3neuHy ta 6e3nepe6iMy ekcnnyatauio npncTroIO.
InΦopmaiaI ΣΟΟ πριλίδη Ta 3aπachnix ΚαctnH MICTNbCRA HA caiTi www.kaercher.com.
KOMnJIeKT NOCTaBKn
KomnneKaTua npncTroo 3a3NaeHa Ha ynaKobci. Nid
yac po3nakyBaHH npncTroo nepeBipntu
komnkeTauio. Y pa3i HeCTaui npnilaDra 60
ykoJKeHb, OTpMaHnx Ni dac TpaHCnpTyBaHH,
cnid nobIDomTu npo ce ToproBehHi opraHiaa, kA
npoanda npncTpi.
Onnc npnctpo
PncyHKn DnB. Ha cTopiHci 3 306paXeHHaMm MaIOHOK A MaIOHOK B
① MyΦTaДЯ NiДБeДЕнHЯ BODI
② Natapy6ok NiIbVeHHe Hn BOn 3i BCTaHOBHeHM ciTuactm fijbTpom
③ BCMOKtyBaIbHn IJIaHr MmHOrO 3ac06y
④ MepexeBn Ka6enb 3i WTeNCenbHOBOUNKOHO
⑤ Bapaban dny shaHra
⑥ Tpmau6apa6aHa dIaHra
⑦ KpinJIeHHa 6apa6aHa dIy IuaHra
⑧ Micce nla 36epiranHH BncoKoHAnipHOr NiCTOneta
9 CtpymHHa Tpy6ka Vario Power nOCHOBHX 3aBdaHb OuHueHHa Po6oHn TnCK MoXHa nJaBHO nIDBnUyBaTu BId SOFT (Hn3bkn) Do HARD (BnCokn). DnpeRyIIOBaHHa po6oYoro TnCKy CnID BiDnyCTNTu BaxiNb pyHOro NiCTOneTa-PO3NlIOBaYa n NOBepHyTN CTpymHHy Tpy6ky B 6axaHe noJoxKeHH. JkIo cTpymHHa Tpy6ka Do ynpoy NOBepHyTa B HAprrMky SOFT, MoKHa dOdaTu MNouHn 3ac6.
10 CtrpyMNHa Tpy6ka 3 rpa3bOBOΦpe3oIO dna BuaJeHHa 3aTBePdiNOro 6pydy
11BncoKoHaipHn niCToJET
12 3aTnCKaayIJI KIOUeHHy/BiKIOUeHHy IJHaHra BNCOKO TnCKy
13 BaxinBncoKoHanipHoro nicToeta
(14)Φikcatop BnCOKoHanipHoro nictoneTa
15 WJIaHr BnCOKOro TnCKy
16 Micce dnia 36epirahn ctpymnHhoI Tpy6kn
(7)PyuKa dIra TpaHcnOpTyBaHHa
18 Micue dna 36epiraHHaHaRa BncoKOro Tncky/ MepekeBoro ka6enio
(19)TpaHcnpThe KoIneco
20 BmMkau npncTropo «O/OFF»/«I/ON»
21ПдкнючHHBAICOKOТNUCKY
(2)3aBOcBka Ta6nUka
23]BnHTn
24 3aTnCKaI dIa IJnaHra BnCOKO TnCKy
25 **CaobuI uHaHr (apMoBaHn, MiHImaIbHn Iiametp 1/2 duimha (13 MM),MiHImaJIbHa DOBXINHa 7,5M,3i CTaHdapTHm UWBnKOpO3HIMHM 3'eDHaHHaM)
** notpi6no doaTkoBO
3ano6ixhi npncTpoi
△OSEPEXHO
BidcymHi a6o 3mHeHi 3ano6ixHi npucmpoi!
3anobixhi npucmpoi npuzhahehi dna eauo0 3axumy. He iHopybam, he 3himamu ma He deakmuysamu 3ano6ixhi npucmpoi.
BvMkaq npnctro
Bumkauch npunctpo 3anobirae Hehabmnci po6ot npunctpo.
ΦikcaTOp BucOKoHAnipHoro nicToJeTa
ΦikcaTOp 6IOKy BaxJIb BnCOKOHanipHOrO nICToTe Ta 3axucaB HeHaBMnCHOrO 3anyCK npCTpoIO.
Iio yac ouuueHH noapab6oahux noeepxohb dompumyeamucbiocmahi He mehuie 30 cm.
He ouuuyama aemomobinbhi wunu, noqap6oabi afo yumusi noepxhi 3 uukopucmaHHa m ap3booippezu.
- BctabHTN CTpyMNHHy Tpy6ky B BVUCOKOHnipHn nictoJET i 3aΦikCyBaTHn II, NOBepHyBn Ha 90^ ManIOHOK N
- YbIMKHyTu npucTpii (I/ON).
- Po36nokyBaTn BaXjin BnCOKoHanipHoro niCToneTa.
- HatncHytn BaKijIb BnCOkOHanipHoro nictoeta. PtncptiB BMnKaetcbr.
Eknpnyataia 3 MnHm 3acobom
HEBE3NEKA
Hedompumannnnapopma6e3neku
CepuO3Ha uKoDa 3dOpoe'U oepe3 HnpeabunbHe buKOpucmaHH MuHoo 3ac06y.
Dompumyamucnacnpmy 63neku eupo6huka MuH020 3ac06y, 3okpema 8ka3i0k uodo 3ac06i iHduibyaIbHO2O 3axucmy.
Bka3ieKa
Muhi 3acobu KARCHER 2apaHmyomb 6e3npe6iHy po6omy. PeKoMeHdyEmo ompumamu KOHCyIbmaio a6o 3amOemu haw kamaJoo yu iHfOpMauiHi Mamepianu npo hawi MuHi 3acobu.
Bka3ieka
MuHui 3aci6 moKe odaamucb minbku 3a Hu3bko2o mucky.
- BCMOKTyBaJIbHn IJNaHr dIЯ MmHOrO 3ac06y BNTaTIN 3 KOpNcY Ha NOTpi6Hy DoBxInHy. ManIOHOK O
- OnyctTuN BCMOKTyBaIbHn IJNaHr dJa MmHoro 3ac06y B EMHiCTb 3 pO3HnOM MmHoro 3ac06y.
- BnKOpncToBvBaTn CtpymnHnTy Tpy6kY Vario Power.
- Поверн'tисту минни Трубку в полжень «SOFT» до у鞘р.
Piucpo6oTnpo3HHMmHc0rO3ac06ydoaetbcra doCTpyMeHaBOi.
PekomeHdoBaHm MeToD YnueHHA
- Ouaadnbo po3nnntMmHm 3ac6 Ha cyxy nobepxHIO n 3aJIMuNTn Ha deKaN yac (He BHTnpaTn).
- P03uHHeH 6pyd 3mntn ctpyMeHem BOH n iD BUCOKIM TUCKOM.
Pio60tn 3 MmHm 3aco6om
- PpOMnTn npNCTpii NcTOIO BOHO npOTaRm np6JI. 30 cekyHd.
PepepuBaHHpo60Tu
- BiDnycTnTb BaxjNb BucOKoHanipHOro nicToIeta. RaKIO BaxjNb BiDnyckaetbcr, npicTpI BmNkaetbcr. BucOKn Tuck B cncTeMi 36epiraetbcr.
- 3aφikCyBaTN BaKijb BnCOKOHanipHOro nictOJeTa. ManHOK P
3.Пид уас поерьу po6oTI noHaJ 5xbuInH npucTpi cnId Bmukatn «0/OFF»
3aBepueHHpo60Tu
△OSEPEKHO
Tucky cucmeme
Tpaemu eHaacniodOK HeKOHmpoJbOeaHO2o buxody bodu nducokum muckom
Biodeyamaunahueucokozomuckyeucokohaniphozo nicmonema a6o npucmpo minbku modi, kou e cuminemi iocymhui muck.
- Biinyctntn Baxjnl BucokohanipHoro nicToeta.
- 3akpnTn BOonpObiHn KpaH.
- HatnckaTn Baxijb BncoKoHanipHoro nicToeta npotraom 30 cekyHd.
Tnck, 00 3aJINBcB CNTeMl, cNJaETbcra.
- BiDnyctHTn BaxjInB BuCOKoHaipHoro niCToneta.
- 3aΦikCyBaTn BaXijB BnCOKoHanipHoro niCToJeta.
- Bi'edHaTn npucptpi BID cnCTeMn BOOOnocTaaHna.
- BmKHyTu npucTpii 0 / O F F
- Bntarhytn wTencelbHy BNkny 3 pO3eTkn.
TpaHcnpTyBaHH
△OSEPEXHO
Hedompumannbau
He6e3neKa mpaBMyBaHnHa ma nowkoOKeHb NiacmpaHcnpmyeaHnaepaxoByaMu eazy npucmpo.
BolouinH npucpoU
- Tarynt npncptpi 3a pyky dny TpaHcnopTybaHHa
TpaHcnpTyBaHHn npncIpoU B TpaHcnpTHomy 3ac06i
- 3aφikcyBaTu npictpiB iD 3cynHnI nepeKnDaHH.
36epirahnna
△OSEPEKHO
Hedompumannhaazu
He6e3neKa mpa8My8aHHma nowko0keHb
Iid yac 36epiaHHaPaxo8yeamu easy npucmpoio.
36epiraHHn npncptpo
- NocTabNTn npucptpi Ha pibHni nobepxHi.
- BiD'EnHaTN WJHaH BnCOKOro TnCKy BiD BnCOKOHAnipHoro NiCTOneta.
- BiD'eHaTHn CTPyMHHHy Tpy6ky BiD BucOKoHapHoro nictoneta.
- CknaCTn 6nbDi CTpyMHHi Tpy6kn i BnCOKoHaipHni nicToJET Ha BiIDNoBidiHi npncTpoi dIa 36epirAHn.
- Bi'edhatn 1nHaH BnCOKoT NcKy Bi npctpoJ.
6.ПибратишалгВисOKOTO TUCKY.
Пистpoi 6e3 6apabanaДЯшална
Yкл actNшалгВисOKOTO TUCKY Ha npicstpoi Dna
36epirahn.
Пистpoi 36apabahomДЯшална
a Bctabntu OINH KHeCb WNaHry BnCOKOro TnCKy B OTBip Ha nepeDiHi CTopoHi 6apa6aHa dIra WnaHra.
b KpyTtyn pyKoTky, 3MOtaN 3MOTaN 7JNAH BnCOKO TCKy.
c HanpaBnTn ⅢaHr BnCOKOro TnCKy DpyroIpykoI.
d BnKOpNCToBvOuN 3aTnCKaU dna IuaHra BnCOKOr TnCKy, npKnpiNTn HAMoTaHn IuaHr BnCOKOr TnCKy Do 6apa6aHa dna IuaHry. ManIOHok R
- 36epiratm mepekeBn ka6enb Ha npncptoi.
DotpmyBatncra doataKOBnx Bka3iBOK nepeid trpBaJIMM
36epiraHHaM, nVB. INaBy Doaia ma mexHicHe
obcny2o8ybaHHa.
3axnct BiMopo3y
YBATA
He6e3neka 3aMep3aHHa
He noeHicmIO bunopokHeHi npucmpoi MoKymb 6ymu nowkodKeHi uepe3 MOp03.
IoeHicmIO cnopoxHumu npucmpiu ma doadamkoee obnadhaHH.
3axucmum npucmpiu sio mopo3y.
IobHH6yTu BnKoHaHtaki yMOBu:
- Ppncpii BiD'edHaHn BID CnCTeMn BODOIOCTaAHH.
- トナHΓ BNCOKO TUCKY 3HTN.
- YbimKHyTn npucTpI INON
- noyeKaTu He 6IbSe 1 XBnInHn, nOKu Ha naTppy6Ky BucOKoTo TnCKy He npINHHt BnCTyNaTu BOda.
- Bvmkhny npncptpi.
- 36epiratn npictpi 3 npnaandm B 3axuheomy BiD mopo3y npmiueHhi.
Oorna TaTexHicHe 06cnyroByBaHHa
HEBE3NEKA
He6e3neka ypaKeHH enekmpuHUM cmpyMOM
Tpaemu e pezylbmani mopkaHn cmpymoEdyux yacmuH
Bumkhymu npucmpiu.
Bumru umencelbny uuky.
PnucpiH He Notpe6yE TexHiuHoro 06cnyroByBaHHa, To6To BnKoHaHHa peryIaepHoro TexHiuHoro 06cLyroByBaHHa He notpi6Ho.
OuHHeHHcIyactoroΦInbTpBaBnatpy6ky DnnaDaui BODn
YBAGA
NowokxeHu cimacmu qinbmp nampy6ky dna nideedeHH bdu
NoekxHn npucmpo uee3 3a6pydHen Hb Dupeepumcimacmu fInbmp Ha HaeBicmb NookxH, nepu Hix cmaenmu u02o b nampybo dnpiideehn Bodu.
Oueta ciTuaCTn fIbTp B natpy6ky dna niBedeHHBAoN B Mipy Heo6xiaHocti.
- 3Hrtn MyfTy 3 npTyka dIy nIbBeDeHHB ODoN.
- BntaTn ciTuaCTn pfInbTp.
3.ПомпсTiч actnФiNbTp NiД npOTOHO BOIOJ. ManHOK S - BctabTn ciTuaCTn fIbTp B nATpy6ok dna niDBeDeHHBODn.
OuHennHg pIbtpy MmUoyoro 3ac06y
IpeepTrpBaJIIM 36epirAHHm OuHuaTn fIbTp MNoUO 3acO6y.
1. 3Hrtnn pifnbtp 3i wnaHra dny MmHoro 3acoby.
2. PpOMnTn pJIbTp nId npOTouHO BOIOU. ManIOHOK T
Donomora B pa3i HecnpaBHOCTeI
HecnpabHocti yacto MaObI npocTy npuHy, kMy MoXHa ycHyTu cAmOCTiMHO 3a DOnOMorIO IHcTpyKci, HabeDeHHx HnXyue. 3a HaBbOCTi CymHIBiB a6o B pa3i HeHa3BaHnx HecnpabHocte cnId 3BePtaTnCra Do ABTopn3OBaHOi cepBicHOi cnYk6n.
HEBE3NEKA
He6e3neka ypaKeHH eJekmpuHUM cmpyMOM TpaMu e pezynbmani mopKaHHcmpymoBedyux yaCmuH
Bumkhymu npucpiu.
Bumru umencelbny buky.
PnucpiHne npaioe
- HatnchyTu Baxijb BucokohanipHoro nicToJeta. PnictpiB BMKAeTbcra.
- IpebeipuTn BiNobiHicThb Hanyr, 3a3NaueHOHa 3abOcbKi Ta6nUci, Hany3i DkepeNa KINBneHHA.
- Ipebeipntm MepexeBn Ka6eIb Ha noiKOxKeHHa
Y npncptpoI He CTBOPHOCTbcra Tnck 3aHaTo cna6ka noDaH a BOn.
- NobHicTIO BiIDKpTN BOODnpOBiDN KpaH.
- Ipebeipntn noaay BOnn Ha oocTaHn OBcra.
- Ipebeipntn HanaTuBaHHcCTpyMHHOITpy6Kn. Citactn fInbTp B nATpy6ky niDBeDeHHBODn 3a6pydHeHn.
- BntaTn cituaCTn fInbTp 3 naTppy6ka niBedeHnBAO nIIOCKORY6aMn.
- PpOMTn ciTuaCTn fiJIbTp nID npOTouHO BOIOU. ManHOK S
Y npictpoi MicnttbcnoBipra.
- Buaanit noBITpr 3 npictpo:
a YbIMKnHyTn npncTppi 6e3 niKKnHoueHOI ctpymHHoI Tpy6Kn He 6iNbJhe HIX Ha 2 XBNINHN.
b HatncchyTu BncoKoHaipHn niCToNET i NoeKaTu, nOKu Ha niCToNETi He noUHe BnCTyNaTu BOa 6e3 6yNb6aWok nobitpr.
cPnEHaTnCTpyMmHHy Tpy6Ky.
Bennki nepenad Tncky
- OuHCTHTN CONJIO BUCOKO TNCKY:
a BuaNTn 3a6pydHeHHN 3 OTbOpy cOnJa roJkoIO.
bPomntu conno BncoKoro Tncky Booio cnepeNy.
- Npepeipntn o6craB Oo nOdaetbcra.
Pnncptpi HeepMeTnHm
- He3naHa HeerpmTeuHicb npctpoO obymoBneHa texHiHMMn Oc06nNBOCTaMn. Y pa3i cnJIbHOI HereepMeTuHocTi 3BepHyTnCra Do aBtOpn3OBaHOI cepBicHOI cJyK6n.
MmHHn 3acio He BcMOKtYcTbcR
- BnKOpNCTOByBaTn CTpyMmHHy Tpy6ky Vario Power i noBepHyTu B HanpMyKv «SOFT» do ynopy.
- OuHCTHTn pInbTp y BCMOKTyBaIbHOMy IuaHry dna MmHoro 3acO6y.
- NpebipTu BCMOKTyBaIbHn ⅢJIaHr dIra MmHoro 3ac06y Ha neperHH.
Rapantia
Ykochni kpaiiHdiOTbBiIDNObiHirapaHTiHi yMOBn, BCTaHOJIeHI yNOHBaXeHOIO oprAizicIO 36yTu Hauoi npOdyKuB CII KpaHl. MoKnBHeCnpaBHOCTI npAnady npOtaTROM rapaHTIHORo cTPOky MN ycBaEMO 6e3KOITOBHO, kUO npUnHa HeCnpaBHOCTI nonrae B deΦeKTax MaTePiaJIB a60 BnO6bHyOMy bpaKy. Y pa3i BHNKHeHHN pPeTeH3I npOTrrom rapaHTIHORo cTPOky npOxAHHRA 3BepTaTNC, MAOnp Ni pCi Co6I Yek npO nOKynk, do ToproBeJIbHOI oprAizac, Io npOdaJa npOdyKT, a6o Do hAI6NkQOI yNOHBaXeHOI cnyx6n cepBichoro o6cLyroByBaHH.
(Adpecn nB. Ha 3Bopoti)
Texhichi XapaKTepncTnKi
K 3 Premium K 3
| Еlektroniche piДкlioочи Hарuya | V | 220 | |
| Фаза ~ 1 | 1 | ||
| Частota Hz 50-60 50-60 | |||
| Стожbanь стуруму A | 6 | 6 | |
| Стуниь засcentу | IPX5 | IPX5 | |
| Клас засcentу | [ ] | II | II |
| Запбіжник мерекi (iHerційник) | A | 10 | 10 |
Chairman of the Board of Management
S. Reiser
Manager Regulatory Affairs & Certification
Oc06a, BiDnOBiDaIbHa 3a BeEeHHaDOKymeHTauii:
III. Pau3ep (S. Reiser)
Alfred Karcher SE & Co. KG
Alfred-Karcher-Str. 28 - 40
71364 Winnenden (Germany)
Ten.: +49 7195 14-0
ΦaKc: +49 7195 14-2212
M. BiHHHeHdEn, 2022/12/01
Ma3MyHbI
KannbHcykaynap 124
KopwaFAn opTaHbI KopFay 125
BmybIMbMaKcTaHa cKeKc KOnJaHy. 125
KepeK-JapaKa KHe KocanKbI 6eJWeKTeP 125
Ketkizim XnHaftbl 125
KypblfbiHbIH CnnaTtAmacbl 125
Kopfahbic KypaJI-ka6IbIKTapbl 125
KypbIbnfbiDaftiBenrinep 126
OpHaty 126
PaiDanaHyra eHri3y 126
PaiDanaHy. 126
TacbImanay 127
CaTay. 127
KyTim XeHe TexHnKaIbIK Kbl3MeT KepeSy 128
Akaaynap Ke3iHderi KemeK 128
Keninik. 128
TexHkaIbIK MaJyMaTTap 129
EO cTaNdapTTapbHa cAKeCTiri TypaIbI
deKnapaun 129
XaannbHyckaynap

KpbblfBhlb anfaW pet konlaan6ac 6pybH,ocbl naaIaNHy XeHHderi TynHcKa HcyckayIbIK neh BepinreH
Kayinci3dk KehiHderi HycKaynapbl Okbin WbIfbHbI3.
Onapra caa apekeT eriH3.
Eki KITanwahbI da epi kapaanadany Hemece KeNeci neci ywiH caKtan KOyblHbI3.
KopwaFAH opTaHbI KopFay

OpaybI MaTePnAaPbH yTnIn3aCuaJayf a60JaB. OpaBtapDb KOpwaHaOpTaKaY inci3 Tpye yTnIn3aCuaJhaHbI3.

3neKtpnik XeHe 3neKtpoHdbk 6ymbimapdbIH KypambHa KaTe KOJdaHy HeMece yTINn3aunraay HETNXeciHde aam DeHCayIbIFbHa XeHe KopwaraH optara Kayin
ToHdpiy bIKTmAn, KHybKaaTa eHdEmJI
MATEPnAanap KHe 6aTapeAp, AKKMyrAToPnap Hemece MaCnAeKb6JIWeKTep Kni Ke3deCeI.
Ana, atanmbi 6eep 6yibmbl TniciHne naDanaHy win KaKET 60naDbI. Ocb TaHbAmeh 6enireHren KpybnfbIapdbI ykokbictapbIme 6ipre tacayfa 6oImaDbI.
Ta3apTy Ke3iHne KypambHaMaBb6ap aKnacynap TybIHdAaTbIH KymbICTapDbI (MbICaJIb, KO3faNTKbIHTapBH, TynTeipH Kyy) MaNbI aBIPfBiWbI 6ap Kyy anaHdpbHda fHa Kypri3yre pyKcat 6epinei.
Kyfbu KypanapMeH KymbicapbKaepi3e 6ypbinaTbH repMetnKaIbIK Kymbic anaHapbIHda fana Kypri3yre pyKcAT 6epinei. Kyfbu KypanapDb cy KoImaIapbHa Hemece Jepre TeKeHHi3.
Kypamdafb3aTap6oBbHwaHyckaynap (REACH)
BmybIMhbH KypambIHdaftb3aTtapTypaNbcoHfbl MmimetTepiMbHaMeKeHka6oBuHwa Tabyfa 60ana:www.kaercher.de/REACH
БуиьIMДы MaKcaTbIHa cэиКec KOnДaHy
Kyyra apHaIraH annapatbI TeK yI wapyaBilbIbHa apHaIraH KbICbIMda rHa nAaIaHaB3. KbcIMMeH xyy annapaTbMaHINHaIapDb, TacbIMaNay KpaIaPbIH, KpbIbIMApDbl, KpaIaPdb, Kac6eTTepdi, TeppacanapDb, 6a-6akwa Ka6bIKTapBH KbcIMDbI aBHHbIH KEMERIme Ta3anayra apHaIraH.
KepeK-kaPak XaHe KocalkbI 6eJWeKTeP
TeK TynHcyKaJIbKepeK-KapaK Hemece KocaJIbI 6eJWeKTEpDi naDanaHaHBi3, c6e6i on KypaJNbIH Kayinci3 XHe anatcb3 Kymblc icTeyiHe KeniNik 6oJaBl.
Kepek-kaapakTap MeH Kocankb6eJWeKTeP TypaBia knapaT www.kaercher.com Be6-caHTbHa KaKTeIMdi.
XeTki3jIm XnHaFbI
BiybIMHbIH XeKti3iJIM XINHaBbI opaybiTbIH YcTIHe KepceTinreH. BybIMDbI opaybiTuH WbIFapraHda KINHaKTbIH TObnIKbIfbIH TeKcepIn WbIFbIHbI3.KepeKkapaTAP XeticnerEH HeMeCE TacbImaJday Ke3IHde 3akbIMap TureH KaFdaJa, DJInepiHi3re xa6apJaacbHbI3.
KypblfblHbH cNnattamacbl
CypetTepdi cypetTepi 6ap 6eTTen KapaHbI3 Cypet A Cypet B
① CyKeTki3yRe apHaIraH XaJIrFaBbIi MyΦTaCbI
② Cy kTekiye apHaIraH kipikTipinreH eneri 6ap KaIraBliW
③ Kfblu3aTTb copaTbiH TyTIK
④ Keiinik ictiKweci 6ap xeiniik 6aiahbiCTbipfbiW ka6eB
5IuHaHr opambl
6 6
7Kofapbi Kbcibmdbi WnaH6eKiTkiWi
8KofapbI KbICbIMdbI NCTOletTt caTay
Ta3aIaydbIH KAnbIg KymbcIcIapbHa apHaIraH Vario PowerUymeri: KymbcKblcIMbIH 工 X Y M C A K 已 KyIeH ATTbI KyIre 6aY KeTepyre 6oJaIb. Kymbc KblcIMbIH e3repy yuih Kofapbi TereypinPi NtctOnetTI H TeTirih Xi6epiH3 XHe WymeKi Kanafan KyIre 6ypaHbI3. Bypikkiu SOFT KyiHe ToJIbIme H 6ypaIraH JkardaIa, KByIw KypaNDbI Kocyfa 6oJaIb.
10 KnBn KeTpiTeiH DaKTap yuH φpe3anapbI 6ap WymeK
1)KofapbI tereypHdi nctoJeT
12 KofapbI TereypinKi6bipweKti Kocyra/axbipatyra apHaHFaH Kbickbl
(13)KofapbI KbICbIMdbI NCTOET TyTkacbl
14KofapblkbicmbnncToJenTTHKcCatopbl
(15)KorapbI tereypinDi Ky6bpwek
16ArbHdbI Ky6bpnapdbicaKtay
17TacbImanayTtkacbi
18 Xorapbl KblcBIMdbI WnaHrt/Xenire kocbiny ka6eniH caKtay
(19)Kekikthn DeHreneri
20《0/OFF》/《I/ON》aXbipaTkbilbbl
21KofapbI TereypinDi icikwe
23aybIT TaKaTnWacbi
23Буразнданap
24XofapbI KbICBIMDbI UJNaH KblckblUbl
25 ** BaKaWa 7nAhrici (MaTAmeH HbIraTbINFaH, DnAmEpi - KEMiHNe 1/2 IIOIM (13 MM), Y3bIHDbIFbl - KEMiHNe 7,5 M, CTAHdApTTbI XbINJaDAM 6aJNaHbICTbIpaTbIH XaNFAfbUwne)
**KocbIMwTaTan eTinei
KopraHbIC KypaJ-ka6dIbIKTapbl
△ABAHJIAHbI3
KemicneumH Hemece 32epminzeh KopraHbIC Kypan-ka6dbikmapbl!
KopraHbIC Kypblrbcbi ci3diH kayinci3diizhi3e apHaJIFaH.
Kayincidik Kypblnfbnapbih aHaHbIn emneHi3, anbim macmamahbi3 Hemece eWipMeHi3.
AxbipatkbliW
AxbipatkbI KypbIINfbIHbIH Ke3deiCOK KOcbIyblHaKeepri 6oanaBl.
KorapbTereypinHnctOnetTInΦnKcaTopbI
ΦHKCaTOp KOrapbI TereepiHdi NnCTOJIeTTIH TetiriH 6yFaTTaIbI KHe KypblfBihH Ke3deCOK icKe KOcbIybiHa Keepri 6oanaBl.
ABTomaattbI Tpyde eWy fynKunraCbl
KorapbTereepiHnncToJIeTTH Tetiri Xie6epinre HKe3de copfbHbIH INHeBMaTNkA,bIK aXbIpaTkblbI eWeedi XeHE KOrapbTereepiHdAfbc TokTaNb. Tetikr 6ackaH Ke3de copfb KaTadaH KocblnaBbl.
Kypblfbldafl6eIrrinep
Kofapbi TereypiHdi aftbictb iadamapfa,
kahyapnapra, kymbic icten TyphaH
3neKtpnik KypblfBifa XeHe KypblfBihH
e3iHe 6afttayFa TbIbIM CanbHa.
KypblfBhlb a3daH KopFaHb3.

KypblfblbKOFAmblkayb3 cy kTeki3y XeniciHe TikeeN Kocyfa TbInbIM CanbHaDbI
OphaTy
CpeTepri rpaKanbIK 6eTeH KapaHbI3.
Paianahyra eHri3ep aIbHna 6ekitimereh 6eJweKTepeMoTtackaHbI3.
KnbIHbIKTaH 6paHaDaHb KaHe cKaKeC KeNetIH 6ypayblTb DaBHaDn KObIHbI3.
DehreKeTepi MOHTaXday
- Kypblfbldafl DeHreIekTepei 6ekiriHj3. Cypet C
TacbImaJday TyTKacBih OPhaTbIHb3
- TacbImaIday tyTkacbH 6ekTiH3.
- TacbImaay TytKacbH 4 6ypaHaMeH 6eKiTiJ3. Cyper D
KofapbIKbICbIMDbI NCTOJETKe apHaJIFaH KOIMAhblOpHaTbIHbI3
- Xorapbl Kbcibmbl nictoTeke apHaJIfah KOImAhbl KypblnfbdaftbYcTafblka cbIpblTbHbI3.
- CaTaydbi coHbI KyHHe HbIK YCTaHbI3 XoHe 6ypaHdAmeH 6ekitIH3. Cypet E
Bypikkiu TyTikke apHaJIraH KOIMaHbI OPHAtblb3
- BypiKkiu Tyikke apHaHraH KOIMaHbI Kypblfbldaflyctafblka nTepiH3.
- CaTaydbi coHbI KyHHe HbIK YCTaHbI3 XOHe 6ypaHdAmeh 6ekitih3. Cypet F
KorapbI KbicbIMdbI WnaHr/Jenire Kocy Ka6eni ywiH KoImaHbI OPhaty
UHaOpambyKOK KypbIJfBJIap
- XorapbI KbICbIMDbI WJHaHrHi/Kyat CbIMbIH caKtayf a pHaJIraH KypaIbI cbIpTTaH TaCbIMaIaNay TyTKacbIHdaFbI 6ekitKiUke nTepiH3.
- CaTaydbi coHbI KyHHe HbIK YCTaHbI3 XOHe 6ypaHdAmeh 6ekitih3. Cypet G
KorapbI KbICbIMdbI WJNaHr opaMbIH OPHAbIHbI3
UHaHr opambl6ap Kypbnfbnap
- UHaH opamacbIHbI yTaftbIbIb6eKtiH3.
- YcTaBbIbTbI 2 6ypaHdAmeh 6ekTiHi3. Cypet H
- Ⅲnahr opambH 6eKITiHi3. Ⅲnahr opambl cbipt etin 6eKITinei. Cypet I
Cy XeTki3yre apHaJrFaH XaJIrFaBbI MyΦTaHbI MOHTaXdA
- Cy ketki3yre apHaIraH JkAnrFaBbI MyfTaHbI cy ketki3yre apHaIraH JkAnrFaBbIka bypaHbI3. Cyper J
PaindaanhyFa eHri3y
- KypbIFbIHbTeRicKa3bIKbIKKa opHaTbIHbI3.
- KorapbI TereypiHdi Ky6bIpweKti TOnbIK Wein, iIMekTep MeH 6ypbInbCTapdbI 6ocatbHb3.
Hycay
UHaOpamb6ap KypbIrfbnap:KymbcKe3iHde KOrapbKbICbIMdbUHaHa,UnaHa opaMbHaH MoBbFImeH WbIrapbNybi KepeK.
- KorapbI TereypinDi Ky6bIpweKti KypblfBIfa KaNFaHbI3.
a MydtaDarbKbickBltkTepeiH3.
b KofapbI TereepiHdi Ky6bIpweKti MyfTaFa CaJIbIHb3.
c MyoTadafbl KbICKblUHTbl TEmeHre 6acbl3. Cypet K
- KofapbI TereypinDi Ky6bpWekTi XofapbI TereypinDi nictoJTeKe KaJFaHbI3.
a KbICbIITb KblCbIHbI3.
bKbickbiWtbl WbIfapbiHb3.
cKorapbiterereypinki Ky6bipuekTi caIbHb3.
d CapT erin kaaBbInraHwa TyTKaHbI KbICbIN TypblHbl3. Cypet L
- Korapbi Tereepindi Ky6bipwekTi TapTbn, 6ekHicti ceHimdiJirih TeKcepiH3.
- Xeni ictiKwecinH awacbH po3eTka caIbHbI3.
Cy 6epy
KocbIaTbIH KyKTeMeHi ΦIpMaJIbIK TaKTaIwaHaH Hemece 6eImHeH KapaHbI3 TexHukaJIbIK MaFTyMammap.
CymeH kAMtAmacbI3 ety KecinOpHbIHbIH HyckaynapbIH caKTahbI3.
HA3AP AYdAPbIhbl
JaacmaHrah cydbin Keimipemih 3aJIaJIbI
CydaI naMaHynap copbIHbH XHe OHbIH
Xa6dbkmapbIHbH 3aKbIMdaHybHa anbIn Keedei.
KARCHER Kopray yuiH KARCHER cy cy32icih
naDaJIaHy YcbHbIaDbI (apHaUb I Xa6dbIK, mancbIpbc
6epy Hemipi 4.730-059).
Cy Ky6bipbHa KocbIy
HA3AP AYdAPbIhbl
KypbIrfHbIH cy KocblmbiHda wJahaiHj Aquastop-NEH 6aJNaHbcJI
CopfbHbH 3aKbIMdaHybl KypbIINbIHc cy KocblmbIHda ewkaah Aquastop- nien bauNaHbicka HnaHei KOndaHaBbI3. KpaHra Aquastop MyfmacbH KondaHyra 60nadbl.
- BaKaWa Ky6bIpWerH cy XeTki3yre apHaNfA H KaNfAfbIUtBtH MyΦTaCbHa OPhaTbIhBt3.
- BaKaHa Kc6bIpWerIH cy Kc6bIpbHa KocBihI3. CypT M
- Cy ky6bipbHbIH WymerIH TOJIbIKTaaawbHbI3.
PaindanaHy
HA3AP AYdAPbIhbl
CopfbHbH KpyrKaMaJxMbIc icmeyi
KpybINrBihbIH 3aKbIMdaHybl
Eep KpybIrrbIda 2 MuHym 6oBu I KbIcIM nauDa
6oImaca, OHDA OHBI eWipiH3 XHe Akaynap Ke3IHdezi
KEMeK- 6enIMdezi HcckaynapdbCaKaMaHbI3.
XofapblkbicbIMMeHxymbic icTey pexnmi
HA3AP AYdAPbIhbl
BoaHn Hemece ceimman 6emmpoiH 3aKbIMdaNybl
ArbcmbH jemkinkmi KaawkbmbfCaKaMaHaH
Kardauida Hemece memik dypbic maHaMaHaH
Kardauida bemmepi 3akbIMdaabbl.
Eoanrah bemmepdi mazanay Kezihde 30 cm-deH KEM emec ueizhicmi caKmaHbI3.
Aemomobunb wuHaapbIH, na2bH HeMece ce3imman 6emmpiH ppe3a KeMeeImeMa3aJaMaHbI3.
- Tetikti xofapbl tereypihdi nictoJeTke caJIbIbI3 XeH e Obl 90°-ka 6ypai OTbIpBn, 6ekitih3.
Cyper N
- KypbIJIfBihHkoCbIHb3(《/ON》)
- XorapbI TereypinHnI nctonetTirH TetirH 6yraTTaH aUblHbI3.
- KorapbI tereepin nnctonetTtTeirHe 6acbl3. KypblFbKocblaBl.
Ta3anay KypaIapbImeH naIanaHy
KAYIN
Texhukanbik meNkXammbl caKmamay
Kyrbliu Kypandapobbu muicihue naudanaH6araH Kaardau da dehcaaynbikka aybip 3akbim Keenedi.
Kyblw KypandbH ehdipyuui cki KyparaH mexHukanbIK mekkammbl, Kebihece Xeke KopraHbc KypandaPbI 6ouhwa Hcaynapdbi kapaHbI3.
Hycay
KARCHER m3anay kypandapby y3dkci3 kymbic icmeyae kenindik bepedi. Cizae kehec bepyae pykcam emih3 hemece 6130iH kamanoaembi Hemece ma3anaarbiu 3ammap mypanbl aknapammbik npakmapbIMbi3dbi cypaHbI3.
Hycay
Kyfbiu KypaIbI meK mEmeHai KbICbIM Ke3iHde apanacmbipyra bona.
- Kopnyctan JyftbI W KypaIra apHaIraH copy Ky6bIpweriH Tana an eTineTIn Y3bIHdbfBt H TapTbHbI3. Cypet O
- Kyfbu KypaJra apHaJrH copy Ky6bIpWerIH KyyfBk KypaIbH epiHdici 6ap bIbIcKa caIbHbI3.
- Vario Power TeTirH naJaIaHbIbI3.
- Tetikti «SOFT» kynie tipenreHwe 6ypaHb3. Kymbic 6apbcihda kylbIkwypaIdbH epitHici cy afbiciba apanaactbiplaIaBl.
YcbHbInaTbH kyy TaCINI
- Kyrblu KypandblyHemdeon Otbipbn, KypraK 6etke WaabHb3 XHe ciHyre KaandpblbHb3 (KeNTipMei).
- Epireh 6aIbIKtbi XOFapbl TereypiHdi aBicne HwaBIn TaCTaHbI3.
KyfbIkw KypaJImeH KyfAHHaN KeiH
- Kypblfnblb3 0cekyHd 6oHbI Ta3a Cymeh Kybln TaCTaHbI3.
XymbictbI TOKTaTy
- KOrapbl TereepinHn nncToJenT Hetirih XiepeipH3. Tetiri Xiepeipireh Ke3e, KypblfB eweDi. KyneDe KOrapbl KbICbIM KaJaDbI.
- KorapbI TereepiHdi nucToTetTin Tetirih 6yraTaHbI3. Cypert P
- KymbckeiHde 5MHyTTah aca y3inictepde KypblfblHb eipin kypih3 (0/OFF)).
XymbictbHaaykTanybl
△ABAHJAHb13
XyuedeiKbcbim
Kyuimi meeepin Ke3iHde cy afbicbHaH japaKam any Korapbl meeepinHoi Ky6bpueekmi kyeedezi KbcmbdbI macmaFaHHa KeuiH raHa axbipamblb3.
- KofapbI TereepiHdi NmctOJeTTIH TeTirih Xbi6epiH3.
- Cy K6bIpbHbIH WMyerH Xa6bHbI3.
- Korapbi tereypin hi nctoJIeTTIH Tetirih 30 cekyHd 6oibi bacbn typbHbI3. Kyne de Kanfah Kbcim TactanaDbI.
- KofapbI TereepiHdi NmctOJeTTIH TeTirih Xbi6epiH3.
- KofapbI TereepiHdi nctOnetTin Tetirih 6yFaTaHaB13.
- KypbIfBihCy K6bIpBihH XeJIiCHeH axbIpaTbIHb3.
- KypbIrfbHb eWipiH3 (0/OFF)
- Keni icikwecih Toktah axbipatbHb3.
TacbImaIyay
△ABAHJAHbI3
CaImakmbiH caKmaJMybI
Kapakam any KHe KpybIrfbHb3aKbIMday Kayni Tacbmanday Ke3iHde KpybIrfbHbH canMarbH eckepH3.
KypbIINfbHbCyupey
- KypbIJIfBiHbI TaCBImaNday TyTKacbiHaH cyupeH3.
ABTomo6nJIbMeH TaCbImaIay
- KypbIJIfBtHbIKcAImaTbIHdAnXaHe KyIaMaTbIHdAn etin 6ekitih3.
CaKay
△ABAHJAHbI3
CaMaKmbiH caKmamaybi
Kapakam any KHe KpybIrfbIH 3aKbIMday Kayni TacbImanday KeiHde KpybIrfbIH canMarbIH eckepH3.
KypbInfbHbI yCTay
- KypbIJIbIbHI teric Ka3blkTbIKKa opHaTbIbI3.
- WymeKti XOFapb TereypiHdi XOFapb KbICbIMdbI NCTOJETTEH akbipatbIHb3.
- WymeKti KofapbI TereypinDi NnctOnetTeH axbipaTbHbI3.
- Bypikkiu tyiktiEkeyiH De, KofapbKbcBIMdbI nctoJETTI de Tnicti KOImara KoibHb3.
- KorapbI KbICbIMdbI WnAHHi KypblrBdaH aKbipaTbHbI3.
- KofapbTereepiHki KybipweKti caJIbIHbI3.
UHaHr opamblXOK Kypblfblnap
Y6epnte UHaHr BbICOKOrDabJIeHnA dJaXpaHeHnA
Ha yCTpoNCTBE.
UHaHr opambl6ap Kypblfblnap
a Kofapb Tereypinki Ky6ipweKTH 6ip yuBn wJnH opamacbiHbIH aIdbIHfBI XafbIHdaFBi CaHbJIayfa caJIbHI3.
b KofapbI tereypinDi ky6ipweKti opay yuH niHdi 6ypaHbl3.
c KofapbI TereepiHdi Ky6ipweKti ekHui KOJIbIHbI36eH 6aFbITTaHbI3. Cypet Q
d OpalraH JorapbI KbICbIMdbI UJnahriHi JorapbI KbcIMDbI UJnAHr KbICbIBuHBiKEMeImeH UJnAH 6apa6aHbHa 6ekitiH3.
Cyper R
- KypbIJIbIaIbI XeJI Ka6eIN cAlbHbI3.
Y3ak caTay aIbHda KocbIMHa YckaynapblcakTaHb3, Kymim XaHe mexHukalbIK Kb13MemKepcemy-6eimin KapaHb3.
Aa3daH KopFay
HA3AP AYdAPbIhbl
Kambin kany kayni
ToIbIFbIMeH KeimipinMeSeH KypblfblHbIH a3daH 3aKbIMdaNybl MyMKiH.
Kypblfbl MeH Kypamdaac 6eJIkmePi mOnbIfbImeH Kyprambl anbIHb3.
KypblfBhlbCyblk acepiHeH KopraHb3.
MbHaHbOpbHdayKaKeT:
KypbInfbCy Ky6bpbiHaH aXbipaTbJFaH.
KorapbI tereypinDi K6bpwek axbipatbnraH.
1. KypblfblHbKocblh3(I/ON)
2. Korapbl tereypindi kanaftaibtah cy afbin 6itkeHwe makcymy1 MHyT KyTiHi3.
3. KypbIfBbIbIeWipiHj3.
4. KypbIrfbHbXbJIbIby 6eImecIHde 6apnbK Ka6dbIKTapbImeH 6ipre caKaTaHbI3.
Kytim XeHe TexHnKaJIbIK Kbl3MeT KepceTy
KAYIN
ToKneH 3bIKbIMdaNy Kayni
Kephey kyuiHde myprah 6eIweKmepMeH 6aJnaHbIC Ke3iHdezi 3aKbIMdap
KypbINrBnHbI eWipjH3.
Jenik umekepi0emkadaan wifapbin anbHb3.
KypbIINfI TexHnKaIbIK Kbl3MeT KepCeTydi Taan
eTnei, aFHN, OFaH KbI3MeT KepCteTy 6oBihwa TypaKTbl
KymbICTap Kypri3y KaKeT emec.
Cy xetki3yre apHaJfAH XaJfAfbIuTafbl enekTI Ta3anay
HA3AP AYdAPbIhbl
Cy kemki3yze apHaJraH kaJraFbIumarbl enekmiH 3aKbIMdaJybl
Ja c cybH acepiHe H KypblfBhlh 3aKbIMdaNybl EnekmI cy kemki3ye aphanfah kanaRaBka canMac 6ypbH 3aKbIMdapra mekepiH3.
KaKet 6onFaH KaFdaIa, eNeKTi cy KcETKi3yre apHaIraH KaIFaftuTa Ta3apTbIHbI3.
- Cy kTeKiyre apHaJFaH XaNfAfbIuTah MyTaHbI aJIbIn TactaHbI3.
- Enekti wbifapbihb3.
- Enekti cy afbicbHbH acTbIHda xybln aIbHb13. Cypert S
- EneKti cy keTki3yre apHaIraH KaIraBbIka caJIbIHbI3.
Kyfbu KypanFa aphanfah cy3riHi Ta3aJay
¥3ak caTay Ke3eHinH anDbHda xyfblu KypanFa apHaIraH cy3riHi Ta3aJaan TypbHb3.
- KyfbIu Kypanra apHaIraH copy Ky6bIpweriHe cy3riHi aIbIn TactaHbI3.
- Cy3riH cy aRbICbIHbIH actbIHda xybln aIbIHbI3. Cyper T
Akaynap Ke3iHderi KEmek
AkaaynapdbH cebentepi ken karaa da keneci wonydbI naaanahy apkblb e3diirHeH KOHOfa 6oNaTBHa KaapanabIM 60JaDbI. KydkTeP 6OJa Hemece ocB I Kepde KepcetinMerE h akaynap 6oFAn Ke3e, pyKcat etinreH cepBnctIK optanbikka xa6apnaCbHbI3.
KAYIN
ToKneH 3bIKbIMdaNny kayni
Kephey kyuihde myprah 6eIweekmepmen 6aJnaHbIC Ke3iHdezi 3akbimdap
KypbInrBfHbI eWipjH3.
Jeninik umekepdi po3emkaadn wibrapbn anbHb3.
KypbIJIbI JxMbIC iCTeMeiDi
- KofapbI TereepinPi NnctoneTITH TetiriHe 6acbl3. Kypblfbl KocblJaBl.
- ΦιπMaJIbIΚ TaΚΤΑΝΑ ΚερCetIΙΓΕN KEPHEY KopeK ΚεδιH KEPHEYIMΕN CαηKEC KENE Me, JOK Na, TEKCEpiHi3.
- Kei 6aycbIMbH 3aKbIMdapFa TekepeiH3.
KypbIINfbl KbcIbIM TydbIpMaNdBi
Cy xekTki3y xekTkinikci3.
1.CyKy6blpbiHbIuWymerHToIbIKTaaawbHbI3.
2. KekiniKi cy mienepi 6epin XaTbip Ma, XOK na, TeKcepiH3.
3. LymektiH petTeJimiH TeKcepiH3.
Cy kTeK3yre apHanfah XaNfAfbIuTafbl eNEK NaCTAHdbI.
- Cy kTeK3yre apHaIraH XaIraFbIuTah enEkeTki KEMnipaybI3bIh KEmerimeH WbIrapbIbI3.
- EJekTi cy afbcbihbH acTbIHda Kybln anbHb3.
Cyper S
Kypblfbldaftblya.
- KypblfblhXkEnTeHi3:
a KypblfblHbX KaINaFaHraH WymeKci3 MaKcMym 2 MNHyTKa KOCblHbI3.
b Kofapbi TereypiHdi nctOJeTTi 6acblb3 KHe cy kenipwikci3 wblknaHa WcyTih3.
cUyMeKti Kocblb3.
KbICMHBH KyuTi aibipMacbi
- Korapbi tereypindi cantamahb ta3anay:
a CanTamaHbIH caHbINaybiHaH.
b KorapbTereypinCi nTaMaHbI cyMeH Kybln anblHbI3.
- KeIrrc cydbH MmIeepiTeKcepiHa3.
KypbfnbHbH caHbJayIbblbfbl
- KypbIfBihHwafBH cahblaynbIbIFbIH OHBI KOHCTpyKunacbl KaMTamacbl3 etedi. Kywi CaHbIaayblbIK Ke3iHne aBTopnaHdbIpblnfaH cepBnctik KbImetke Jyrihi3.
Kyblw Kypan ciH6eNdi
- Vario Power wymeri naiandaanbHb3 xhe OHb1 «SOFT» 6aftbHa tipenreHre dein bpaHb3.
- Kyrbi Kypanfa aphanfah copy ky6bipweriHderi cy3rihi Ta3anaHb3.
- Kyrbiu kypanfa aphanfah copy ky6bipwerih ninyre Tekcepihi3.
KeninDik
Op enIe JeeprinikTi dinCTpn6bHOTopnap 6epren Keniinik
waPTTapbl konlaHbnaDb. BybIMda MaTePnAndbIK
Hemece eHdiPictik akaynap anbIKtaJfAH JkaFdaJa,
bIKTmamakaynapdbk KeniINik MEP3iMi iWInHe aKbICb3
KeHNdeMl3. KeniNik MEP3iMeH Hapa3bnbIKTapbHb3
6oJCa, bYbIMdbI catKaH cayda MekeMeciHe Hemece
XaKbIHDaftbEkinetTI Kbi3Met KepeSy opHbHa
Ty6ipTeKTi KepCetin XabapnacbHb3.
(MeKeHHaJIbI apTKbI JkaFbIHda 6epinreH)
EHdpinre H Kyhi KepceTinre H Typ KecTeciHne uHpnaHraH.
Keke caHdapdbin MarbiHacbl KenecideneBonaDbI:
Mbizbl:30190
3 Hdpinre Xblbl
0 HdpinreH facbpbl
1 EHdpipireh OHKbIINbIK
9 Hdpinre aibHbEkiHw caHb
0 ΘHdpipireh aibihbH bpiHicha
COHbIMeH 6yMbIcAnDa 30190 KoDbI
09/(2)013 eHdpinren Kynin 6inipepi
TexHnKaJIbIK MaFJyMaTTap
K 3 Premium K 3
| Зелекгхелicine кosity | |||
| Керney | V | 220-240 | |
| Фаза ~ 1 | 1 | ||
| Жилік Hz 50-60 50-60 | |||
| ТуТыньлaitын ТOK A | 6 | 6 | |
| КорваIC Класы | IPX5 | IPX5 | |
| Корray Класы | [ ] | II | II |
| Женишамадан Тьс | A | 10 | 10 |
| Жукулдан Корray (Инерц�ліk) | |||

H.Jenner
Chairman of the Board of Management

S. Reiser
Manager Regulatory Affairs & Certification
KykaTamaHbI Kypri3etIH yekilneTTi Tynfa:
C. Pai3ep
Alfred Kärcher SE & Co. KG
Alfred-Karcher-Str. 28 - 40
71364 Winnenden (Германь)
Tei.: +49 7195 14-0
Teledpa: +49 7195 14-2212
Winnenden,
CbDpXaHne
O6uynka3aHnna 130
3aunTaHaOkonHaTa Cpea. 130
Ynotpe6a no npedna3NaueHne 130
Akecoapn npeepBnuactn 130
06xBaT Ha doCTaBka 130
OncanneHa ypeda 130
PpeDn3H yCtpoCCTBa. 131
CnmboN Bbpxy ypea 131
MoHTax 131
IyckaneBekcnnoatauia 131
Eknpnoatau 132
TpaHcnpOpTnpaHe 133
CbXpaHHe 133
Pnka n noDpBkKa 133
Pomou npn noBpeu 134
TapaHcIy 134
TexHHeckn daHHN 134
Deklapaun3a cboTBcTbne Ha EC 135
067n yka3aHna


Ppei nIbPBoTo n3nO13BaHe Ha ypea npooyTeTe TOBa opuHnaHHO pkoBOIDCTBO 3a ekCnNoaTaunrN
npnIOXKeHTe yka3aHnra 3a 6e3oNaChOcT.
Ppoeepaate cboTbeTHO.
3anaTe DBeTe KHNKn 3a NocneBaUo N3N0JI3BaHe nIIN 3a CNeDbaunco6CTBeHnK.
3auneta Ha OKonHaTa cpeDa

OnakobbHnTe MaepnAnNoJnxKat Ha peunKInpahe.MoJIa,INxBbpIyTe onakOBKnTe no cbo6pa3eH cOKoHaTa CpeDa HauH. EneKtpuecknte n eJeKtpoHHte ypeNi cbDbPxKat CEHN MaepnAn, NOJnxKaUn Ha peunKInpahe,a YecTo IN CbCTabHn YactH, Hanp 6aTePN, akMyJnatOPn 6aTePN nn Macno,
KoITn HnepaBnH 6opabe He nI IN3XbPnHe MOraT Da npEcdTabJbAT NoteHuaHa OnaCHOCT 3a OBeWKOTO 3dpae N 3a OkonHata cpea.3a npabnHToO fynKuOnHpaHe Ha ypea BCE nak Te3n CbCTaBH NaCTn Ca Heo6xOdMn. O6o3NaYeHnte C To3n CmBON ypei He Tp6Ba Da 6bDat n3XBbPnHN 3aeDHO C 6ntOBITE OTnAdBuN.
Pa60Tn no NOUcTBaHe, npu KOnTO ce noJyBaT CbDbpKaUm MacNo OTnAaHn BOu, HApN. MneHe Ha DnBnIaTeJI, MNEHe HA KapOcePn, Tpr6Ba Da CE N3BbPwBAT eINHCTBeHO Ha MeCTa 3a n3MnBaHe C MacNOyIOBNTeJI.
Pa6OTn C NOUHCTBaAun npenapatn Tpr6Ba da ce n3BbPwBAT cMo BbpxHy HENpOnuCKaun TeuHOCTn pa6OTn IOBbPxHOCn CBp3Ka KbM KaHaJIIN3aUnraTa 3a MpbCHA BOJa. He OJnyCkaiTe NoUHCTBaun npenapatn Da noJaat BBB BOHN 6aceHH NIn B noVbata.
Yka3aHnna 3a cbCTabHn BeuecTba (REACH)
AkyaHa HhOpMaun 3a CbCTabKnte ue HaMepeH TaHTepHcTpaHua: www.kaercher.de/REACH
YnoTpe6a no npedHa3HaueHne
I3noJI3BaIte ypea 3a noUHCTBaHe NOID BnCOKO HAnrahe cAmO B YactHO DomAKINCTBO.
YpeT3aNoCTBaHe NOB BnCOKO HaJIraHe e
IpeHa3HaueH 3a NoCTBaHe Ha MaUNH,
ABTomoNIn, CTPOTeHN KOHCTpyKUnn, INCHtpMeHTn,
facaN, Tepacn, rpaHnCKn YpeDu n T.H. C BoDHa CTpyr
NOB BnCOKO HaJIraHe.
Akecoapn npeepBnu qactn
I3noI3BaIte cAmO opuHaHnH Akcecoapn OpunHauHn pe3epBn Yactn, NO To3n HaunocnpyraBe 6e3oNaChata N 6e3npo6mHaeknloataaHa ypeDa.
HOpMaun OTHoCnO akcecoapn n pe3epBn Yactn 1e HamepuTe Tk: www.kaercher.com.
06XbaT Ha DoCTaBka
0xbatbHa docTabKaTa Ha ypea e n3o6pa3eH Bbpxy onakobkata. Pnp pa3oNAKOBAHe npOBepTe cbdbpkaHTo 3a qIIOCT. Pnp nnCbau anKCEcoapn nn np TpaHCNOPTHN UETN, MoJ, O6bphTe ce KbMa Baunn dinctpn6byTop.
OnncaHne Ha ypeDa
BnxTe n3o6paXeHNrTa Ha cTpaHnCata C rpaΦnKn
Nurypa A
Nurypa B
① Kynnyr3a n3B0da 3a BOda
② IV3BOD 3a BOda c BrpaDeHa ceIka
③ BcmykaTeJIeH Mapky 3a cpeIcTBo 3a IOuNCtBaHe
④ Мөхов 3axpaHbaц ka6e n c uencen
⑤ Bapa6aH 3a Mapkya
⑥Дьрхачза6apabah3aMapkya
⑦ΦικcaTOp 3a MapKу 3a BucOko HαlaRaHe
8 CbxpahraBaHe 3a nictoTe C BncoKo Hana
9 CtpyHa Tpb6a Vario Power 3a Hau-0buaHnTe pa6OTn NO nouCTBaHe Pa6OTHO HAraHe moKe da ce yBeJIuHaBa 6e3TeHenO ot SOFT do HARD. 3a peYIpaHe Ha pa6OTHO HAIraHe IyChTe loCTa Ha INCToJeTa 3a pbUHO npBcKaHe n 3aBbPteTe Tpb6aTa 3a pa3npbckBaHe Ha JeNaHTo NoIOXeHne.Ako Tpb6aTa 3a pa3npbckBaHe e 3aBbPraHa DoKpaBnOCoka SOFT, moKe da ce Do3npa NouchTbaU npenapat.
10 CtpyHa Tp6a φpe3a 3a 6oknyka ynpntu 3ambpcBaHnA
11Пистонетзаразовтоювсоконаяганe
12 Cko6a 3a Cbbp3BaHe/otkaaHe Ha Mapkya c BnCOKO HAnraHe
13 NocT Ha nctOJeTa 3a pa6ota noD BncoKo HnlaRaHe
14БnOKIpOBKaHaNCTOJeTa3a pa6oTaNoD BnCOKO HajraHe
15 Mapkyu 3a pa6oTa noD BncoKo HaJraHe
16MraTo3acbxpaHHeHaTpb6n3a pa3npbckBaHe
(17)Дрьжka 3a TpaHcnpOtpaHe
18 CbxpahraHa He Ha Mapkyc Bucoko Hnrahe/ Tpb6oPbOBo3 a npncbeHnRaHe KbM MpeXkata
19TpaHcnopTHo KOJIeNo
20 PpeKbCbaH na ypeDa "O/OFF" / "I/ON"
21 N3BOD 3a BnCOKO HnIraHe
(2)Tinoba Ta6eIka
(23)BnHTObE
24 KInnc 3a Mapky 3a BnCOKo HajraHe
25 **rpaHnHcN Mapky (apMpaH, MHNMaJIeH dIaMeTbp 1/2 0J (13 mm), MNHMaJIHa DbLnKHa 7,5 m, c HAIuYeB TbproBCKaTa MpeKa 6bp3OdeiCTBaU KyIpyHr)
** DOnbHnHTeHNO HeoXoHIMO
PpeDna3Hn yctpOcTBA
△PENEA3JNBOCT
Juncu uMu moduupanu npedna3nu ycmpoucmra!
Ipenda3hume ycmpoucmea cnxam 3a Bawama 3auuma.
He npene6pe2eaume, omcmpaH8aume u deakmueupaume npedn3Hume ycmpoucmea.
PpeKbCBAuHa ypeDa
PpeKbcbayt Ha ypea npedotBpataBa HnpeDHaMepeHTo NyckaHe B EKCnloaTaun Ha ypea.
Iopepu npadu 3ambpche ooda
3ambpcraaunma b6e boda mozam da noepedr nomnama u npunaadnexhocmume.
3a 3auuma KARCHER npenopbya ynompe6ama ha eodnua fumbp KARCHER (cneuaHa npunaedexknocm, kamaonoxen Homep 4.730-059).
Cbbp3BaHe KbM BODonpoBoda
BHIMAHHE
KynnyHa Mapkya c Aquastop Ha u3eoda 3a eoda Ha ypeda
IoppeHa nomnama
Hukoza He u3non3aume kynnyHa Mapkyc
Aquastop Ha u3o0da 3a 8o0da Ha ype0da.
Moxeme da u3non3ame kynnyHe Aquastop Ha KpaHa 3a 8oda.
- NocTaBeTe rpaHnckn Mapkyu Ha KynnyHra 3a n3B0da 3a B0da.
- CbpxTe rpaHcKm Mapkyu KbM BOJOpBOJa.
Φurypa M
- Otbopete Hnblno kpaHa 3a BOnata.
Ekcnnoatauia
BHIMAHHE
Pa6oma Ha cyxo Ha nomnama
IopepdaHa ypeda
Ako 2muKmHa 2 MuHymu ypeb m He nocmua HaIraaHe, u3KIOUcHeme ypea u npouedupaame cbJacHO yka3aHuaMa, daDeHu e aanae Pomou npu nopedu.
Pa60Ta C BnCOKO HaIraHe
BHIMAHHE
Noepeda Ha JnakupaHu UNu yecmeumenu no6bpxHocmu
NoebpxHocmume ce noepexkdam npu mbepde manko pa3cmOHa Ha cmpyMa unu nopadu u36Op Ha HenoDxOoAa mpb6a 3a pa3npbckBahe.
Ipu noucmehe Ha IakupaHn noebpxhocmu cna3eaume MuHmajHO pa3cmohue 30 cm ha cmpyma.
He noucmbaume aemomobunhu aymu, nau unu uecmbeumn HnoBpXHocmu kmo dbpeo c pfpe3ama 3a 3ambpcreaHua.
- ΠbXHeTe Tpb6a 3a pa3npbckBaHe B nuctoeta 3a pa60Ta NOB BncoKo HaNraHe NЯ qNKcnpaTe Cbc 3abptane Ha 90^
PhiypaN
- BkIIOHeTe ypeDa ("I/ON").
- De6IokupaTe IocTa Ha nIcToIeta 3a pa6Ota noD BucOKo HJIraHe.
- HatncheTe loCTa Ha nictoJeta 3a pa6ota noB BucOKO HnlaRaHe.
YpeBt Ce BKnIOUBa.
Pa60a c nouCTBaun npenapatn
ONACHOCT
Hecb6nodabahe Ha uHphiopMaauOHHu Jucm 3a 6e3onachocm
CepuO3Hu yepeXdAun Ha 3dpaBEmo nopadu HnnpaBUnHa ynompe6a Ha cpedcmeomo 3a noucmcBaHe
Cna3aumu unfoopmauOnHHn lacm 3a 6e3onachocm, npedocmaeeH om npou38oDumela Ha noucmbauume npenapamu, ocobeno yka3aHura 3a nuHno 3auumho obopydahe.
Yka3aHue
Ioucmeauime npenapamu Ha KARCHER
zapaanmuam 6e3npo6nemha pa6oma. Mony,
Kocynmuaume ce unu nouckaume hauur kamanos
unu hauume unfoopmauoHnu nucmoe 3a
noucmeau npenapamu.
YKa3aHue
Toucmbauqum npenapam moke da ce doaba camo npu HUCO hnaahe.
1.Издьрайе CMукалпma Маркуч 3а поисвацпpenapatdoжениндаьлжинаOTkopnyca.ФиграO
2. 3aKaYeTe BCMyKaTeHnHa MapKyu 3a cpeIcTba 3a NOUHCTBaHe B pe3epBoap C pa3TBOp Ha cpeIcTBO 3a NOUHCTBaHe.
3. Изпonsьаite Трбада 3a pa3npbckBaHe Vario Power.
4. 3abptete dokpaenrHaTa Tpb6a B noonKeHne "SOFT". IopBpeMe Ha pa6oTata pa3TbOpBT Ha nouictBaU npenapat ce cmeCba C BOdHaTa CTpy.
PpenopbuaH MeToDn 3a nouchBaHe
- HanpbckaIte IKOHOMNHy NOUHCTBaunI npenapat Bbpxy cyxata NOBbpxHOCT n OCTaBeTe da noJeCTBa (he n3cyuabaIte).
- OTMnIe pa3TbOpeHaTa MpbCOTnA CbC CTpyrTa NOB BnCOKo HnIraHe.
Cnepa6oTa c noouctBaun npenapatn
- ɪənɪaʌkbaɪte ypeə da OK. 30 cekyni C uɪnCTa Bɔda.
PpeKbcBaHe Ha pa6oTaTa
- Iychete locta ha nictoneta 3a pa6ota noBnCOKO HnIraHe.
IOMIOCTbTceOTnycHe,ypeBt ceN3KlHouBa.
Bucokoto Hanrahe B cHCTeMaTa ce 3ana3Ba.
2.БлokираиTe JIoCTa Ha nIcToJIeTa 3a pa6Ota noD BnCOKO HAIraHe.
Фигра P
- Пп пекьсанma на paбога та за поеве ot 5 MнHyти n3knHoyete ypeda "0/OFF".
PpNKlIOUyBaHe Ha pa6oTaTa
△PENEA3NBOCT
Hannaahe cucmemama
Hapahrahura nopadu heKoHmpolupaHo u3muaua na o bucoko hanae eoda Omdenme mapkya 3a pa6oma noo bucoko hanae an nucmonema 3a pa6oma noo bucoko hanae unu om ype da camo aKO e cucmemama Hma hanae.
- PycheTe loCTa Ha nCtOneTa 3a pa6To Ta noD BucOko HnIraHe.
- 3aTbOpTe KpaHa 3a BOData.
- HatncheTe Nocta Ha NcToIeTa 3a pa6oTa noB BucOKo HaNraHe 3a 30 cekyHnBce Oue HANuHOTo B CnCTemata HaNraHe ce ocbo6oxdaBa.
4.Пусhte Лоста на пuctонета за работа по ВUCOKO habягache.
5.БлokираиTe JIOCTa Ha nIcTOneTa 3a pa6Ota noD BnCOKO HAnraHe. - OTdeneTe ypea ot 3axpaHbAHeTo C BOJa.
7.ИЗклочеурда"0/OFF". - ⅢBaIeTe MpeKOBnI ΚeNceJI OT KOHTaKTa.
TpaHcnpTupaHe
△PENEA3NIBOCT
Hecb6IIOdaeaneHa meaIono
Onachocm om HapaHaeBua u noepedu
Ipu mpaHcnpmuhe cb6nOdaeaume meaIomo Ha
ypeda.
TerIeHe Ha ypeDa
- Terlente ypeda 3a npbxxkata 3a TpaHcnpTupahe.
TpaHcnpTnpaHe Ha ypeDa B npeBO3Ho CpeDCTB0
- Iopcnrgpte ypea cpeu n3nB3BaHe n ppeo6pbuahe.
CbXpaHeHne
△PENEA3JNBOCT
Hecb6nlodaaHe ha meaIono
Onachocm om HapaHraBaHua u nopedu Ipu cbxpanehuemo 3emaume nod EHumaHue meanomo Ha ypda.
CbxpaheneHa ypeda
- NocTabete ypeda Ha paBaHa NOBbpxHocT.
2.ИЗКЛЮЧЕ Маркуа C BиСОКO HaЯRaHe OТ ПИСТОЛЕТС BиСОКO HaЯRaHe. - OtdeneTe Tpb6ata 3a pa3npbckBaHe OT nuctoneTa 3a pa6ota NOD BncoKO Hanrahe.
- Пиберетстунite Тьби Ипстолета CBUCOKO Налягане CBOTBETHITE MecTa 3a CBxpaHЯBaHe.
- OTdeneTe Mapkyua 3a Bucoko Hanrahe otypeja.
6.Приберete Маркуа c ВUCOKHaJIraHe. YpeNi 6e3 6apaban 3a Марку
Приберete Маркуа 3a paBoTa nOd BWCOKo HaJIraHe BypeDA. YpeNi C 6apaban 3a Марку
a BkapaTe eDHHnKpaHa MapkyuCa BnuCOKo Hanae B OTBopa B npedHaTa Yact Ha 6apabHa 3a Mapky.
b 3aBbptete pbykata c KOnaHo, 3a da HabneTe Mapkyuca BucOKO HaJraHe.
c Pn ToBa HnpaBnaBaIte Mapkya C BncoKo HnraHe C npyraTa pka. Fnrpya Q
d C KJIINca 3a Mapkyu 3a BUCOKO HAnraHe 3aKpeIeTe HABITnA Mapkyu 3a BUCOKO HaJIraHa He Ha 6apabHa 3a Mapkyu. UpyaR
- Ппберете Трьбогробда 3а письедиЯваен Кьм Мржата на урEDA.
IpeiNo-npoDbJnxHTeHcBxpaHeHne 06bphete BHMaHHe Ha DonbJHnTEJIHnTe yKa3aHnB, Bk. InaBa Ipuka u nodpbkka.
3aunTa OT 3ampb3BaHe
BHIMAHHE
Onachocm on 3aMPb3BaHe
HeHantbIHO u3npa3HeHume ypedu Mozam da 6bdam pa3pyueHu om 3aMp3eaHe.
I3npa3Heme HantbHNo ypeDa u npuHaedKxHocmume.
3aumeme ypda om 3ampb3eahe.
Tp6Ba da ca n3nJIHeH nCleHnTe ycIOBna:
- YpeBt e OTdeneHOT 3axpaHbAHeTO C B0da.
MapkybT 3a pa6oTa noD BucOko HanaIraHe e CBAJIeH. - Bknoye ypea "I/ON".
2.ИЗчakай Te MaKcImaHNo 1 MmHyTa,ДOKaTO OT n3BOJa 3a BnCOKO HaJIraHe BeYe He n3TnHa BOJa. - Nknoye ypea.
- CbXpaHraBaTe ypea C BCuKn npHaJnEeKHO B 3auntHeO OT 3ampb3BaHe NOMEueHne.
Pnka nOdpbXka
ONACHOCT
Onachocm om mokoe ydap
Hapaheaun npadu donup do npoeekdau mu k yacmu
N3KJIIOyeme ypeda.
N3bpaune uencena.
YpeBbHe ce HxKdae OTnOndpBkKa,TOEcT,He Tpr6Ba Da n3BbPbBaTe nepnoDnUHn pa60Tu No nOndpBkKa.
IOnuHCTBaHe Ha ueKkata B N3BOda 3a BOda
BHIMAHHE
IoppeHa uedka e u3eoda 3a oda
PoepaHa ypea nopadu 3ambpceaeHa eodama Ppedu da nocmaume uedkama b u3boda 3a 6oda, npoepeme 3a nopedu.
Pn Heo6xOIMOCT NOUcTeTe ZeKaTa B N3BOJa 3a BOJa.
- OToTpaHHeKynnyHra ot n3B0da 3a B0da.
2.ИЗваде Te ueДкata.
3.Почирете uedkata noT Teuaа BODa.ФИгура S - NocTabete ueKaTaB n3bOda 3a BOna.
IOnuNCtBaHe Ha qnJIbpa 3a NoUcTbaa npenapaT
Ppei no-npoIbJnxIteJIHo cBxpaHHe nOuNCTeTe fHtba 3a NOUcTBau npenapat.
- CbaneTe cHNTbpa OT cMykATEENHnMa Mapkyu 3a nouchTbaU npenapat.
- Nocntete fNITbpa noTteaua Boda. Tnrypata
Pomou npn noBpeN
Mhoro yecTo npuHnIte 3a NOBpeDa ca eJeMeHTapHn I C NOMOUsTa Ha cJIeDNHte Yka3aHn MOKe CaMn Da Tn OTCTpaHnTe. Ako He cTe CNyprHn nIIIOBpeDnTe He ca ONNCAHN TYK, O6bPHeTe Ce KbM OTOpN3npaHn cepBn3.
ONACHOCT
Onachocm om mokoe ydap
HapaHaaHua nopadu donup do npoeKdau mu k yacmu
N3KJIIOyeme ypeda.
H3bpaune uencena.
YpeBt He pa6oTu
- HatncheTe Nocta Ha nictoeta 3a pa6ota noB BucOKO HnlaRaHe.
YpeBt Ce BKNHouBa. - Поверете дani поочено.ToТиноВаТаТбелka Нанржени сьвпада снанржениToHa ИЗTOЧИКА HA TOK.
- Повере Te Мрековя 3axpaHbaц ka6eJ 3a noBpeDi.
YpeDbT He Noctra Hajrahe
IodabaHTo Ha BOna e TBbpDe cna6o.
- OTBopTe HnblHo KpaHa 3a BODaTa.
- PpOBepeTe IoIaBaHTo Ha BOJa 3a DoCTaTbUeH De6nT.
- Поверете Настpoикata Na Трбараза pa3пьсквае.
UeKaTa B n3B0a 3a BOa e 3aMbpceHa.
- ⅢBaIeTe UeKaTa B N3BOJa 3a BOJa C PIOCKN KJIeU.
- NouinCTe TeEckata NoTteuasa Boga.
Phiypa S
Bypea mMa Bb3dyx.
- BeHTnIuPaaiTe ypeJa:
a BkHIOye ypeHa 6e3 Cbbp3aHa Tpb6a 3a pa3IpbckBaHe 3a MaKcImaJIHO 2 MHyTu.
b HaTnCHHe TnCTOnTe 3a pa60Ta noD BnCOKo HnIraHe nN3uKaIte, DOKaTO BoDaTa 3aNoUHe Da n3TuHa 6e3 MexypcTe oT NnCTOnTe 3a pa60Ta noD BnCOKO HnIraHe.
c CbpxKeTe Tpb6aTa 3a pa3npbckBaHe.
CNIHN KOJe6aHn Ha HAJraHaTeO
Chairman of the Board of Management

S. Reiser
Manager Regulatory Affairs & Certification
Пьномошник NOДOKум entaцета:
S. Reiser
Alfred Karcher SE & Co. KG
Alfred-Karcher-Str. 28 - 40
71364 Winnenden (Germany)
Ten.: +49 7195 14-0
Φaκc: +49 7195 14-2212
BunHeHdEn,2022/12/01

THANK YOU!
MERCI! DANKE! iGRACIAS!

Register your product and benefit from many advantages.
www.kaercher.com/welcome


Rate your product and tell us your opinion.
www.kaercher.com/dealersearch
Alfred Kärcher SE & Co. KG
Alfred-Karcher-Str. 28-40
71364 Winnenden (Germany)