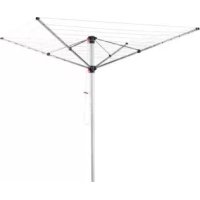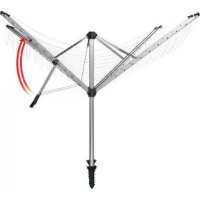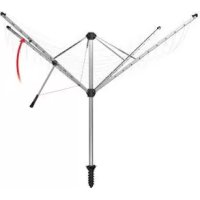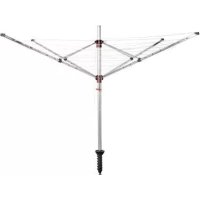
IAN 327051 - Clothes dryer AQUAPUR - Free user manual and instructions
Find the device manual for free IAN 327051 AQUAPUR in PDF.



| Product type | Rotating umbrella clothes dryer |
| Brand | AquaPur |
| Model | IAN 327051 |
| Reference | 30157 |
| Weight | Approximately 3.5 kg |
| Mast diameter | 50 mm |
| Maximum load capacity | 150 kg |
| Mast material | Aluminum |
| Rope material | Resistant synthetic |
| Number of arms | 4 |
| Opening system | Lifting rope with pulley |
| Height adjustment | Rack and star core |
| Mounting type | Ground sleeve to screw or concrete |
| Use | Domestic use, outdoor |
| Warranty | 3 years |
| Included accessories | Rope clamp, screwing tool, protection caps, anchor cover, protective cover |
| Safety instructions | Do not use in strong wind; distribute laundry evenly; keep out of reach of children |
| Maintenance | Clean with clean water; avoid abrasive products |
| Replaceable wear parts | Lifting rope and mast |
| Storage | Close, cover with protective cover, store in a sheltered place out of reach of children |
Frequently Asked Questions - IAN 327051 AQUAPUR
User questions about IAN 327051 AQUAPUR
0 question about this device. Answer the ones you know or ask your own.
Ask a new question about this device
Download the instructions for your Clothes dryer in PDF format for free! Find your manual IAN 327051 - AQUAPUR and take your electronic device back in hand. On this page are published all the documents necessary for the use of your device. IAN 327051 by AQUAPUR.
USER MANUAL IAN 327051 AQUAPUR
ALUMINIUM ROTARY CLOTHES AIRER with protective cover and screw-in ground anchor
GBENI
ALUMINIUM ROTARY CLOTHES AIRER
Operation and Safety Notes
FRCHBE
SECHOIR PARAPLUIE EN ALUMINIUM
ALUMINIUM-WASCHESPINNE
1. Table of contents
Introduction; Intended use; Page 6
Scope of delivery / parts; Technical data.. Page 7
Safety instructions.. Page 8
Check contents and clothes airer; Installation of the ground anchor .........Page 9
Use the clothes airer
Care instructions; Disposal; Warranty . Page 12

Warning! This signal draws attention to the risk of a medium-degree danger which if not avoided can lead to a fatal or serious injury.

Caution! This signal draws attention to the risk of a low-degree danger which if not avoided can lead to a slight or moderate injury.

Note! This signal warns against the possibility of damage to property or provides useful additional information on assembly or on operation.

Note! This signal means you should read the operation and safety notes before using the clothes airer.
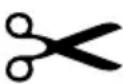
Note! This symbol suggests removing the transport protection from the top of the ground anchor. It is no impairment of the product if the transport protection is missing.
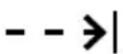
Note! Install the clothes airer in the ground anchor up to the point marked by the arrow - indicated with the symbol "depth of insertion" on the pole.
2. Introduction
2.1 Congratulations!
With this purchase you have decided to buy a quality product. Familiarize yourself with this product before the installation and initial start-up.
This operating manual belongs to this aluminium clothes airer. It contains important information for assembly and use.
To increase the clarity, the aluminium clothes airer will here after just be called "clothes airer".
Please read the instructions, especially the safety instructions, through carefully before you start using the clothes airer. Failure to observe these instructions may lead to serious personal injury or damage to the clothes airer.
These instructions are based on the standards and rules in the European Union. Please also note country-specific policies and laws in foreign countries.
Please keep these instructions for further use. Should you hand over the clothes airer to a third party then please make sure to include these instructions.
3. Intended use

This product is intended for private use only and not for commercial purposes.
Use the clothes airer only as described in this instruction manual. Any other use is considered as incorrect and can lead to damage to property or personal injury. The clothes airer is not a toy.
The manufacturer or the retailer assumes no liability for damage caused by improper or incorrect use.
4. Scope of delivery / parts
1 Line stoppers, 4×
2 Arms, 4×
3 Screw-in tool
4 Protective cap, 2×
5 Cover of ground anchor
6 Spacer
7 Alu-tube
Ground anchor
9 Protection cover
10 Main standard
11 Collar, 2 x
12 Tensioning line
13 Handle at the tensioning line (fig. B)
14 Ratchets at top collar (fig. B)
15 Handle on collar, 2× (fig.B,C)
16 Toothed rail (fig. C)
17 Clothes line (fig. D)
18 Holes (fig. E, H)
5. Technical data
Type: 30157
Weight: approx. 3.5kg
Dimensions of the main standard () : 50~mm
Dimensions of the clothes airer () : approx. 2.95m
Distance between the open arms: approx. 2.10m
Maximum load of the collars: 150kg
Article nr.: 327051_1904
6. Safety instructions

Caution: The clothes airer must be checked for damage before each use. A damaged clothes airer may no longer be used.
Make sure you hang up your laundry evenly. Do not hang up laundry in strong wind! Place the clothes airer so that it can rotate freely. Please remove all clothes pegs before closing the clothes airer to avoid damaging the main standard 10. When storing the airer, please use the protection cover 9 to prevent the clothes lines from getting tangled.

Warning: Please make sure that children do not use the clothes airer as gym equipment or roundabout. Children can get tangled in the clothes
lines. Risk of suffocation! This product is not a child's toy. Close the clothes airer after use. Close the cover of the ground anchor after removing the clothes airer.

Warning! Risk of strangulation! The included protection cover 9 must be used to cover the clothes airer after each use in order to avoid entanglement in the clotheslines (children).

The PE-packaging is not a toy. Risk of suffocation! Please dispose the packaging in the recycle bin for plastic waste right after unpacking the
product. PE is non-polluting and non-toxic. Warning! The protection cover is not a toy! Please keep out of reach of children. Risk of suffocation!
6.1 Wear and tear of the tensioning line used to open the clothes airer

The tensioning line 12 is an essential part of rotary clothes airers. It is
therefore made of very strong material, and designed to last over the years.
Nevertheless, it may be necessary to replace the tensioning line over the product's service life. If torn fibres appear on the outside of the tensioning line (frayed cord), replace the tensioning line with a new original one as soon as possible. You can obtain this, stating your type of clothes airer, directly from us.

A defective tensioning line can rip suddenly when using, causing you to lose your balance (worst case scenario) risk of injury.

Caution! After opening each time, place the tensioning line 12 over the arm so that it does not become soiled from the ground or threaten children
with the risk of strangulation.
6.2 Wear and tear of the main standard

The main standard 10 that rotates in the ground anchor 8 can be exposed to wear and tear depending on the ground conditions. Please
check the area of the main standard where it comes out of the ground anchor for wear and tear at least once a year. Although the main standard has been manufactured to strict quality requirements, grooves can appear in this area
and weaken the main standard. If you notice deep grooves all around the main standard, or any severe dents, please replace the main standard with a new original one as soon as possible.

Deep grooves or severe dents on the main standard, caused by a lawnmower or a wheelbarrow for example, can weaken the main standard,
which can fall down due to strong wind or uneven distribution of laundry on the airer, and can cause physical injury.
You can obtain a new main standard, stating your type of clothes airer, directly from us. Replace other spare parts such as pulleys and rivets always with approved original spare parts, only these will ensure the safe function your clothes airer.
7. Check contents and clothes airer
ATTENTION! Danger of damage!
The clothes airer might get damaged if you open the package carelessly. Do not use sharp objects when unpacking.
-
Remove the clothes airer from the packaging.
-
Remove the packaging material and all protective foil.
-
Check if the delivery is complete (see fig. A).
-
Check if the clothes airer or single items are damaged. Please do not use the clothes airer if this is the case. Contact the manufacturer using the service address provided on the warranty card.
8. Installation of the ground anchor
Choose a location where the clothes airer can rotate freely. Depending on the soil you can either screw-in the ground anchor or fix it in concrete.
-
Remove the transport protection from the tip of the screw-in ground anchor (see fig. E).
-
Remove the protective caps 4 from the cover 5
-
Hook the cover in the holder of the ground anchor 8 until it engages (see fig.F).
8.1 Install the ground anchor
The ground anchor can be screwed into the ground (ground level) using the included screw-in tool 3 and 7.
-
Put the two protective caps 4 onto the ends of the alu-tube 7 (see fig. G).
-
Insert the alu-tube 7 through the upper openings of the screw-in tool 3
-
Put the spacer 6 in the ground anchor 8 and push it all the way to the bottom (see fig. F).
- Insert the screw-in tool into the ground anchor and screw the ground anchor clockwise into the ground until the top edge is level with the ground.
- Remove the screw-in tool and also any soil that may have penetrated out of the ground anchor.
- Place the clothes airer with the main standard, until the arrow mark, into the ground anchor. Please make sure your clothes airer is in a perpendicular position (see fig. H). You can check this by using a sprit level.
You can now use the clothes airer.
8.2 Fixing the ground anchor into concrete
If you want to put the clothes airer in a location with sandy or stony soil you should fix the ground anchor with concrete. This will ensure a firm footing.
- Dig a hole with a diameter of about 40~cm and a depth of 30~cm with a spade or a shovel (see fig. H).
- Wrap newspaper around the lower end of the ground anchor 8 to cover the holes 18. This prevents the holes at the bottom from being concreted and penetrated water can drain from the ground anchor.
- Put the spacer 6 in the ground anchor 8 and push it all the way to the bottom (see fig. F).
- Fix the ground anchor into the concrete according to the concrete specified procedure. The newspaper at the bottom of the ground anchor is also concreted.
- Place the clothes airer with the main standard, until the arrow mark, into the ground anchor, before the concrete is hard. Please make sure your clothes airer is in a vertical position (see fig. H). You can check this by using a sprit level.
- Remove the clothes airer from the ground anchor and wait until the concrete is completely hardened.
You can now use the clothes airer.
9. Use the clothes airer
9.1 Opening the clothes airer and height adjustment
By releasing the upper red grip key 15, you can adjust the height of the airer at the main standard and perfectly adapt it to your desired working height. To open,
first pull the arms 2 out of their catches 14 at the upper part 11 of the holder (see fig. B).
9.2 Opening with the rope tackle block
When the handle 13 is pulled, the clothes airer opens while the lines 17 are tautened at the same time; this is especially easy thanks to the built-in tackle block. To close, pull the lower red handle; the airer will close.

Caution! After opening each time, place the tensioning line 12 over the arm so that it does not become soiled from the ground or threaten children
with the risk of strangulation.
9.3 Retautening the lines

If possible, NEVER open the line stoppers 1 on the end of the arms - only if you want to exchange your clothes line!
- Open your clothes airer until the lower collar 11 engages in the toothed rail 16.
- Divide the loose clothes line 17 on all 4 sides as regularly as possible on all 4 line circles by pulling the clothes line lightly (see fig. D).
- Open the clothes airer gradually and divide the clothes line step by step until you have reached your using height or until the outermost line circle is tight. Important! Using height: distance between the collars 30 - 35cm
9.4 Close the clothes airer
- Remove all objects from the clothes line 17.
- Release handle button 15 at the bottom collar 11 (see fig. C).
- Pull the bottom collar at the hand grip completely downwards.
- Slide the arms 2 in the ratchets 14 at the top collar, until they lock into place (see fig. B).
- Pull the protection cover over the clothes airer, as described in the chapter "storage" if you wish to no longer use the clothes airer or store it.
9.5 Storage
Close the clothes airer and pull the protection cover over the clothes airer. Take the clothes airer from the ground anchor and store it in a dry, sheltered and inaccessible place to children. Secure the clothes airer from falling over.
10. Care instructions

This quality product is made of weatherproof materials and can be washed down with a garden hose. The lines should be cleaned using a soft piece of
cloth. Do not clean with sharp or rough objects or with aggressive detergents.
11. Disposal
11.1 Disposal of packaging
Please sort the packaging before disposal. Put cardboard with the waste paper, foils the collection of recyclables.
11.2 Disposal of the clothes airer
Disposal of the clothes airer is to be done in accordance with the rules and regulations in your country.
You will receive 3 years warranty on this device, starting from the date of purchase. You are entitled legal rights against the seller in case of defects of this product. These legal rights are not limited by our following represented warranty.
12.1 Warranty terms and conditions
The warranty period begins with the date of purchase. Please keep the original sales receipt. This document is required as proof of purchase.
Should a material or manufacturing fault of this product occur within 3 years from the date of purchase, we will, at our discretion, either repair this product or replace it free of charge. This warranty requires that, within the 3 year period, the defective unit is submitted with proof of purchase (sales receipt) and with a brief description what the defect is and when it occurred.
If the defect is covered by our warranty, you will receive a repaired device or a new product. No new warranty period begins with the repair or replacement of the product.
12.2 Warranty period and statutory claims for defects
The warranty period is not extended by the warranty. The same applies to replaced and repaired parts. Any damage and defects already present during the purchase must be reported immediately after unpacking. After the warranty period incidental repairs are subject to a charge.
12.3 Warranty coverage
The device has been manufactured according to strict quality guidelines and meticulously checked before delivery.
The warranty applies to material or manufacturing defects. This warranty does not cover product parts that are subject to normal wear and tear and therefore are viewed as wear parts, such as clothes line and protective cover.
This warranty is void if the product has been damaged, misused, or not correctly maintained. For proper use of the product, all instructions given in the operating instructions must be followed exactly. Purposes and actions, which are discouraged in the manual or warned about, must be avoided.
The product is intended for private use only and not for commercial purposes. The warranty will be void in case of abusive and improper handling, use of force, or in the case of interventions which have not been carried out by our authorized service center.
12.4 Processing in case of warranty
To ensure that your request is processed quickly, please follow the instructions below:
- Please keep the sales receipt and the item number (IAN 327051_1904) ready, as proof of purchase for all requests.
- The article number can be found on a nameplate, an engraving, on the title page of your instructions (bottom left) or as a sticker on the back or bottom side.
- In case of malfunction or any other defect, first contact the following designated service center by phone or email.
- A defective product can then be sent together, with the sales receipt and a brief description what the defect is and when it occurred, postage-free, to the service address provided to you.
On www.lidl-service.com (QR code on the front page), you can download with inserting the item number (IAN 327051_1904) this manual and many more manuals, product videos and software.
12.5 Service
Chere cliente, cher client!
Pooblasceni serviser: