
A4WMSTPN1 - Fabric stain remover AEG - Free user manual and instructions
Find the device manual for free A4WMSTPN1 AEG in PDF.
| Product Type | Textile stain remover (Stain removal pen) |
| Brand | AEG |
| Model | A4WMSTPN1 |
| Color | White |
| Supply Voltage | 220-230 V |
| Frequency | 50-60 Hz |
| Power | 7.0 W |
| Net Weight | 2.2 g |
| Stain Removal Technology | Ultrasonic (46,000 vibrations per second) |
| Max Operating Cycle | 5 minutes, then automatic shutdown for cooling (1-minute pause required) |
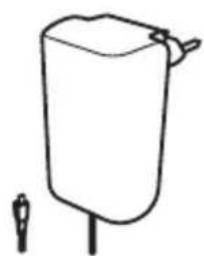
| Accessories Included | Power adapter with interchangeable plugs, container, base, connector |
| Intended Use | Pre-treatment of stains on textiles before washing |
| Recommended Detergent Type | Neutral liquid detergent, colorless, chlorine-free |
| Safety Precautions | Do not use directly on skin, eyes, or worn clothing; do not immerse in water; not recommended for pacemaker users |
| Cleaning and Maintenance | Clean the tip with a damp cloth; do not use abrasive products, alcohol, or solvents |
| Warranty | 2 years from date of purchase |
Frequently Asked Questions - A4WMSTPN1 AEG
User questions about A4WMSTPN1 AEG
0 question about this device. Answer the ones you know or ask your own.
Ask a new question about this device
Download the instructions for your Fabric stain remover in PDF format for free! Find your manual A4WMSTPN1 - AEG and take your electronic device back in hand. On this page are published all the documents necessary for the use of your device. A4WMSTPN1 by AEG.
USER MANUAL A4WMSTPN1 AEG
STAIN REMOVER PEN
Ultrasonic wave technology
Model A4WMSTPN1

Contents
- Safety Information 3
- Safety Instruction 4
- Introduction 4
- Product description 4
- Getting Started 5
- Using Your Product 6
- Tips 7
- Cleaning and Maintenance 7
- What to do if... 8
- Technical data 8
- Environment concerns 8
- GUARANTEE 9
1. SAFETY INFORMATION
For your safety and correct operation of the appliance, read this manual carefully before installation and use. Always retain a copy of these instruction in the event or re-sale or move home. Users must understand the operation and safety features of the appliance.
1.1 Children and vulnerable people safety
- The appliance can be used by children aged 8 years +.
People with reduced physical, sensory or mental capabilities, or who have not used the appliance previously need to be supervised and understand the hazards involved. - The Stain Remover Pen is not recommended for use by persons with pacemakers.
- Stop the unit immediately if you experience any physical discomfort.
- Ensure the appliance is kept out of reach of children.
- Keep all packaging away from children and dispose of it appropriately.
- Do not let children play with the appliance.
- Children shall not carry out cleaning and user maintenance of the appliance without supervision.
1.2 General Safety
- Do not use a damaged appliance.
- Make sure that the parameters on the Technical data are compatible with the electrical ratings of the mains power supply.
- Never attempt to attach the power adapter connector to other devices. This could damage the equipment.
- Never attempt to connect any other connector to the pen. The supplied connector is intended for use with this product ONLY and any unintended use could damage your Stain Remover Pen.
- Do not use the power cord to pull or drag the product.
- Do not place the power cord over sharp edges (e.g. a table edge) to avoid damage.
- Never pull on the power cord to remove the plug from the power outlet; remove using the mains adaptor instead.
- Do not pour water directly on the unit and never immerse it in water.
- Do not clamp, twist, stretch or tie the power cord into a knot.
- Avoid electric shock hazards. Do not pour water onto the unit or handle it with wet hands. Never immerse the unit, power cord, plug or connector in water or any other liquid or flammable material
- Use original accessories only to prevent product damage or injury.
- The appliance should only be used with the power adaptor supplied.
- Unplug the unit before any cleaning, maintenance and before changing accessories.
- Clean the appliance with a moist cloth. Use only neutral detergent.
Do not use abrasive products, abrasive cleaning pads, solvent or metal object.
• This product is for household use only.
2 SAFETY INSTRUCTION
2.1 Use
- Avoid electric shock hazards. Do not pour water onto the unit or handle it with wet hands. Never immerse the unit, power cord, plug or connector in water or any other liquid or flammable material
- Risk of burns. Do not use the Stain Remover Pen directly on your hands, face, eyes, or any other part of your body. Never use the Stain Remover Pen on garments being worn.
- The Stain Remover Pen tip can become heated during operation. Be careful not to injure your skin while using the pen.
- If the pen becomes too hot, immediately switch the unit off and allow it to cool before resuming operation.
- Do not use the Stain Remover Pen without wetting the stain.
- Never use the wand on flammable fluids (alcohol, thinner, gasoline, etc.).
- Never use the Stain Remover Pen on animals.
3. INTRODUCTION
Thank you for purchasing the new AEG Stain Remover Pen. This device has been specially designed for quick stain pre-treatment before placing your clothes into the washing machine and washing them according to the care label.
What is the secret of its power?
The ultrasound waves create microbubbles in the water solution, which expand and explode to remove the stain residue. Effective stain removing with 46.000 vibration per second (Hz).
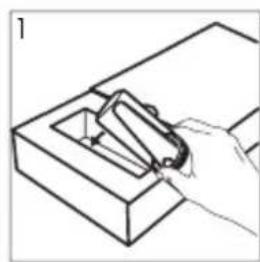
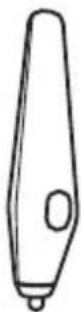
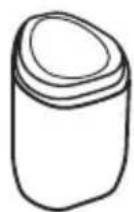
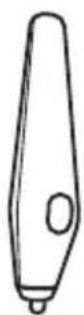
4. PRODUCT DESCRIPTION
- Cup
- Base
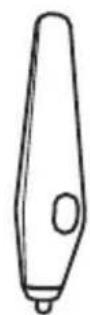
- Pen
- Connector
- Power supply with a plug


natural_image
Simple line drawing of a cylindrical container with a protruding rod and two small protrusions at the bottom (no text or symbols)4
5
5. GETTING STARTED (READ CAREFULLY)
Perform the colour fastness test below before using your Stain Remover Pen:
- Moisten an inconspicuous area of the fabric with water.
- Apply colourless liquid detergent.
- Apply the Stain Remover Pen in this area following the instructions below.
- Allow the fabric to dry. If it has not faded, you are clear to use your Stain Remover Pen.
CAUTION!
The Stain Remover Pen will operate continuously for 5 minutes before it is switched off to allow the tip to cool. After 4 and a half minutes of use, the wand tip will begin to flash to indicate its maximum cycle time has nearly been reached.
After a 1 minute pause, the wand can again be used normally.
CAUTION!
Use only neutral and colourless liquid laundry detergent, which is chlorine-free. Never use coloured detergents or fabric softeners, as they can stain the fabric.
CAUTION!
This product is designed to remove stains up to 3 cm (about 1 inch) in diameter.
It is not suitable for use on old stains or stains from chlorine bleaches, mustard, non-removable inks, solvents and other chemicals causing permanent damage.
CAUTION!
If the care label on your clothes says "wash separately" or "wash with similar colors", that usually means that the dye isn't stable and is going to bleed or even rub off. You should wash your garment at least 3 times according to the care label before to apply the Stain Remover Pen to avoid a possible halo effect on unwashed dyed clothes. On darker fabrics reduce the application time.
6. USING YOUR PRODUCT
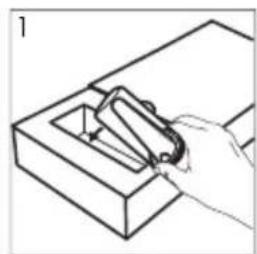
Follow the steps below to prepare your Stain Remover Pen for use.
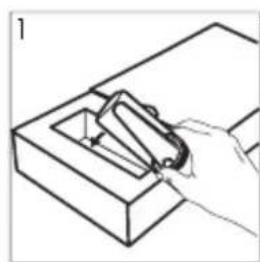
-
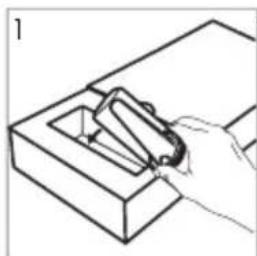
Connect the power cable to the pen.
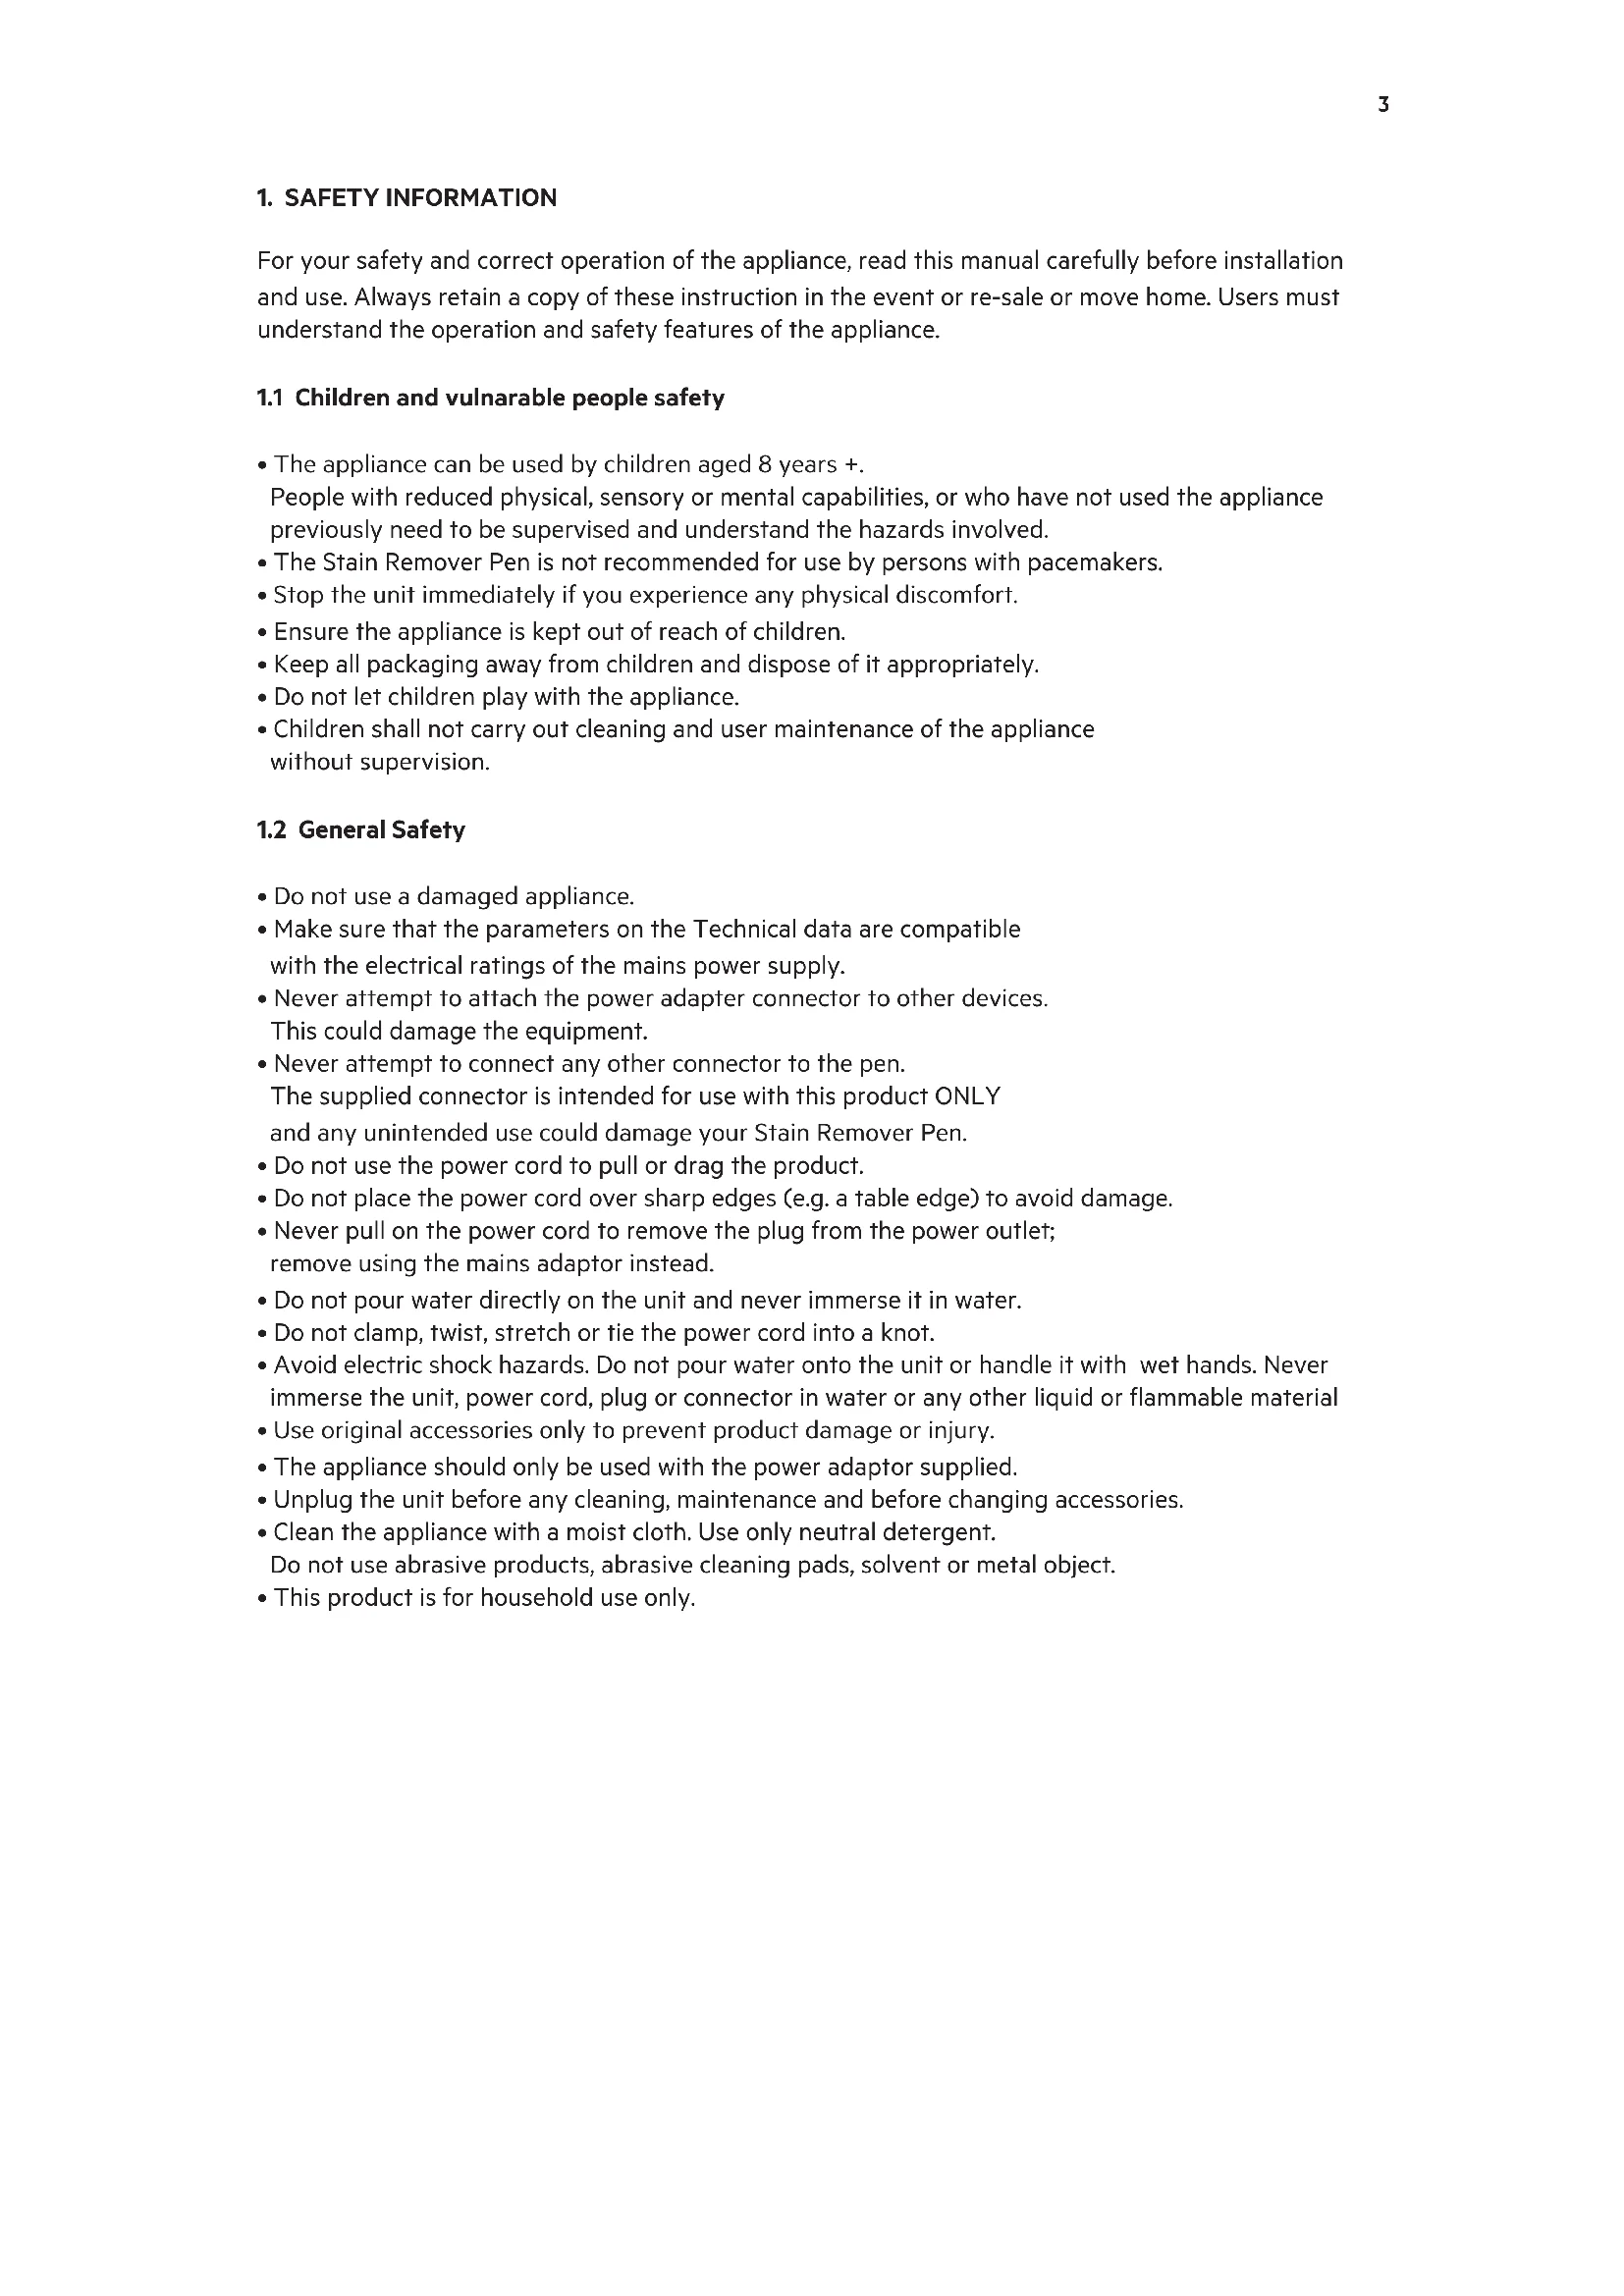
-
Chose the correct plug and insert it into the power supply. Plug the power supply into the outlet.
3-4. Mix some water and colourless fabric detergent (non-chlorine bleach). The cap on the Stain Remover Pen can be used as a cup to fetch water.
-
Place a piece of cloth or clean paper under the garment to absorb the stain residuals.
-
Add the water-detergent mixture, soaking the fabric in the stained area.
-
Always hold the pen in an upright position with the pen tip gently pressed on the stained area. Do not use excessive force. Press and hold the button for as long as the tip is on the stain. Make circular movements, passing the tip gently across the full extent of the stain.
-
Add more water-detergent mixture as needed for best results. The stain must always be wet to ensure the efficiency of its removal.
-
Remove excess dirt from the cloth and the tip of the pen with absorbing paper or clean cloth.
-
Repeat the process from step 5 until the stain has been satisfactorily removed or no further progress is made in removing the stain.
CAUTION! Don't use the device more than 1 minutes on delicate and dyed fabrics.
-
After completing the pre-treating process, clean your pen and store it in its housing.
-
Wash the garment according to the care label to remove the stain residue from the garment.
NOTE: Stain residues might remain on the garment after the pre-treatment with the pen. To be fully effective, the pre-treated garment has to be washed according to the care label.

natural_image
Illustration of a hand holding a pen or tool, with no visible text or symbols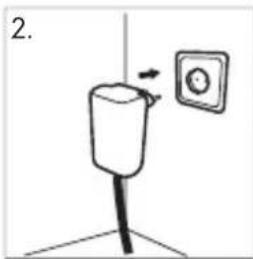
natural_image
Simple line drawing of a spray bottle with an outlet wall, no text or symbols present
natural_image
Simple line drawing of a laboratory apparatus with a beaker and tubing (no text or symbols)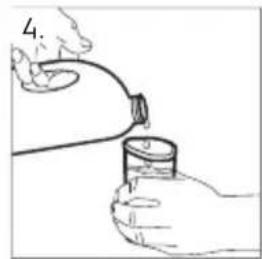
natural_image
Hand holding a small container with a tube, no visible text or symbols
natural_image
Hand holding a paper with a dark ink blot, no text or symbols present
natural_image
Illustration of a hand pouring liquid from a container onto a surface, with no text or symbols present.
natural_image
Hand holding a pen tip touching a circular object with dark spots, no text or symbols visible
natural_image
Illustration of a hand using a tool to lift or lift liquid from a pipe, with no visible text or symbols.
natural_image
Hand holding a small object with a curved line, no text or symbols visible

natural_image
Line drawing of a hand using a tool to cut or inspect a rectangular block (no text or symbols)
6.1 Observation
EU PLUG

natural_image
Line drawing of a hand holding a small object, possibly a device or tool, with no visible text or symbols.
natural_image
Simple line drawing of a mechanical or electrical component with a black circle and arrow, no text or symbols present.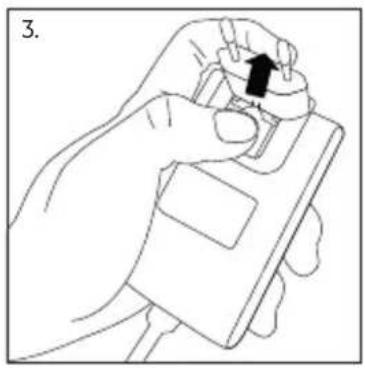
natural_image
Line drawing of a hand holding a small object with an arrow indicating rotation (no text or symbols)EU PLUG

natural_image
Line drawing of hands holding a small electrical socket with pins (no text or symbols)
natural_image
Simple line drawing of a mechanical or electrical component with a black circle and arrow, no text or symbols present.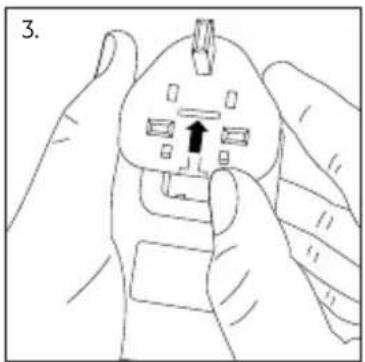
natural_image
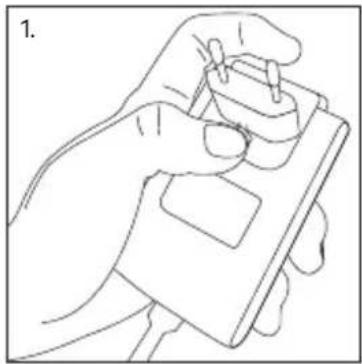
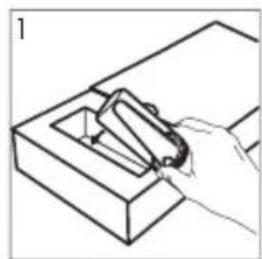
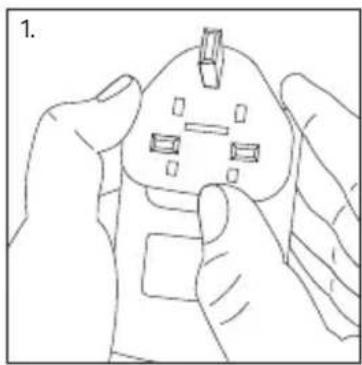
Line drawing of hands holding a small electrical plug with a black arrow pointing to the socket (no text or symbols)Changing the power plug
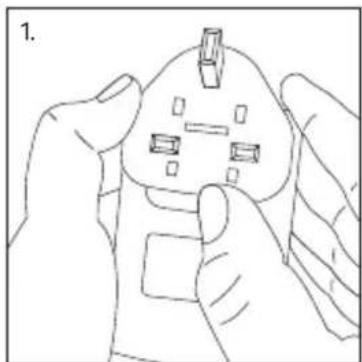
To release the Plug, press downward the small key of the Plug (images 1 and 2) while you slide ahead the Plug (image 3). The Plug will be separated away from housing, sliding ahead, therefore pay attention to keep it under control and not drop it.
7. TIPS
- The more the water applied on the stain, the more efficient the process.
- By changing the position of the paper towel or cloth the stain will be absorbed more efficiently.
- Add detergent whenever necessary for persistent stains.
The difficulty in removing a stain will vary depending on the type of fabric, how long the stain has been allowed to set, temperature, pigmentation and other factors.
Removal efficiency can be affected by factors that include the presence of water; mechanical action; chemical action; temperature and time.
Each of these factors can help to make the process more effective, and some stains will be more responsive to one factor than to others. For example, pigmented soilings (fruit, wine, etc.) are more easily removed with chemicals such as bleaches e.g. stain removal additives), while greasy (Butter, chocolate, etc.) and particulate (grease, mineral oil, dust, etc.) soilings are more easily removed by a combination of mechanical action and heat. The Stain Remover Pen operates as a purely mechanical agent, using water as a medium to impart energy. Adding water in generous amounts and a colourless or neutral liquid detergent, and applying the wand for a sufficient amount of time on the fabric, are essential for effective stain removal.
Best results are achieved on:
- Fresh stains that have not completely set.
• Stains that have been previously washed but not dried in a dryer or ironed. - Small stains confined to a small area of the garment.
Less efficient on:
- Set-in or old stains.
• Stains that have been previously washed and dried in a dryer or ironed. - Large stains, spread across a large area of the garment.
8. CLEANING AND MAINTENANCE
Quick cleaning instructions:
- Disconnect the connector from the Stain Remover Pen.
- Dry the cup and the base if it has been filled with water.
- Clean the tip with a damp cloth.
- Sto the Pen in its cradle and wind the power cord into a coil.
- Store the unit in a dry and well-ventilated area.
NOTE: Never use abrasives, alcohol, solvents or any other chemicals to clean the unit.
9. WHAT TO DO IF...
If there is a fault, first try to find a solution in the troubleshooting table below.
If you cannot find a solution to the problem, contact an after sales customer service centre.
Troubleshooting table
Problem Causes Solutions
| The unit will not turn on or has stopped working | Pre-set cooldown activated. Wait | 1 min and resume operation. |
| Plug not properly inserted. Plug | the power cord into the unit and the plug into the power outlet. | |
| Power button defect. Contact an | authorised AEG service center. |
10. TECHNICAL DATA
Product Stain Remover Pen
| Model A4WMSTPN1 | |
| Colour White | |
| Voltage (V) 220-230 | |
| Power rating (W) 7.0 | |
| Frequency(Hz) | 50-60 |
| Net weight (Kg) | 0.34 g (0.75 lbs) |
11. ENVIRONMENT CONCERNS
The symbol ^2 on the product or on its packaging indicates that this product may not be treated as household waste. Instead it shall be handed over to the applicable collection point for the recycling of electrical and electronic equipment. By ensuring this product is disposed of correctly, you will help prevent potential negative consequences for the environment and human health, which could otherwise be caused by inappropriate waste handling of this product. For more detailed information about recycling of this product, please contact your local city office, your household waste disposal service or the shop where you purchased the product.
Packaging materials
The materials with the symbol are recyclable.
Dispose the packaging in suitable collection containers to recycle it.
12. GUARANTEE
This guarantee is valid for 2 years from the original date of purchase.
The original sales receipt, is required as proof of purchase.
The guarantee covers faults of the appliance, which have been caused by faulty construction or material faults from the date of purchase.
The AEG after sales customer service centre will assist you on the phone with basic trouble shooting for your appliance at the time of service call request. Please see the list below to find your local after sales customer service phone number.
AEG will examine the product and decide, at its sole discretion, if it is covered under this guarantee. If considered covered, AEG will then, at its sole discretion replace the defective product with a new one.
Inhaltsverzeichnis
natural_image
Simple line drawing of a cylindrical container with a protruding rod and two small protrusions (no text or symbols)4
5
5. INBETRIEBNAHME (BITTE SORGFÄLTIG LESEN)
natural_image
Illustration of a hand holding a pen or stylus with a curved handle, no text or symbols present
natural_image
Simple line drawing of a cup with an arrow pointing to a wall-mounted circular component (no text or symbols)
natural_image
Simple line drawing of a laboratory apparatus with a beaker and tubing (no text or symbols)
natural_image
Hand holding a small container with a tube, no visible text or symbols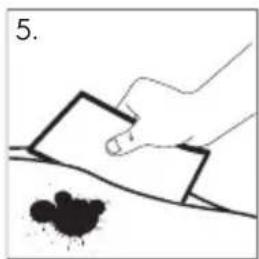
natural_image
Hand holding a rectangular object over a surface with a dark smudge (no text or symbols)
natural_image
Simple line drawing of a hand pouring liquid from a container onto a surface, with no text or symbols present.
natural_image
Hand holding a pen applying material to a curved surface, no text or symbols visible
natural_image
Illustration of a hand pouring liquid into a pipe with a tool, no text or symbols present
natural_image
Hand holding a small object with a curved line, no text or symbols visible

natural_image
Line drawing of a hand using a tool to cut or inspect a rectangular object (no text or symbols)
6.1 Observation
EU PLUG

natural_image
Line drawing of a hand holding a small electronic device (no text or symbols)
natural_image
Simple line drawing of a mechanical or architectural component with a black circle and arrow, no text or symbols present.
natural_image
Line drawing of a hand holding a smartphone with an arrow pointing to the screen (no text or symbols present)EU PLUG

natural_image
Line drawing of hands holding a small electronic component with four pins (no text or symbols)
natural_image
Simple line drawing of a mechanical or architectural component with a black circle and arrow, no text or symbols present.
natural_image
Illustration of hands holding a small electrical plug with a black arrow pointing to the socket (no text or symbols)natural_image
Simple line drawing of a cylindrical container (no text or symbols)1

2

3

natural_image
Simple line drawing of a cylindrical container with a protruding handle and a small protruding rod (no text or symbols)4
5
5. GUIDE DE DÉMARRAGE (À LIRE ATTENTIVEMENT)
natural_image
Illustration of hands holding a pen or tool with a curved handle (no text or symbols)
natural_image
Simple line drawing of a cup with an arrow pointing to a wall-mounted socket (no text or symbols)
natural_image
Simple line drawing of a laboratory apparatus with a beaker and tubing (no text or symbols)
natural_image
Hand holding a small container with a tube inserted, no visible text or symbols
natural_image
Hand holding a small object over a surface with a dark smudge (no text or symbols)
natural_image
Illustration of a hand pouring liquid from a container onto a surface with a small dark object underneath (no text or symbols)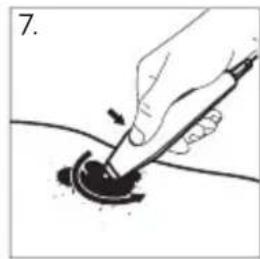
natural_image
Hand holding a pen applying material to a circular object, no text or symbols visible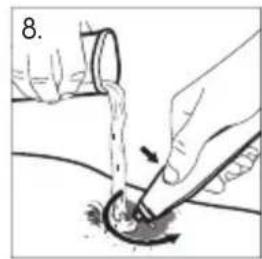
natural_image
Illustration of a hand using a tool to lift or spread liquid into a circular container (no text or symbols)
natural_image
Hand holding a small object over a surface, no text or symbols visible

natural_image
Line drawing of a hand using a tool to cut or install a component on a base (no text or symbols)
6.1 Observation
EU PLUG

natural_image
Line drawing of a hand holding a small electronic device (no text or symbols)
natural_image
Simple line drawing of a mechanical or architectural component with a black circle and arrow, no text or symbols present.
natural_image
Line drawing of a hand holding a smartphone with an arrow pointing to the screen (no text or symbols present)EU PLUG
natural_image
Line drawing of hands holding a small electronic component with four pins (no text or symbols)
natural_image
Simple line drawing of a mechanical or architectural component with a black circle and arrow, no text or symbols present.
natural_image
Illustration of hands holding a small electrical plug with a black arrow pointing to the socket (no text or symbols)natural_image
Simple line drawing of a cylindrical container (no text or symbols)1

2

3

natural_image
Simple line drawing of a cylindrical container with a protruding handle and a small protruding rod (no text or symbols)4
5
natural_image
Illustration of hands holding a pen or tool with a curved line extending from it (no text or symbols)
natural_image
Simple line drawing of a mechanical component with an arrow indicating direction, no text or symbols present.
natural_image
Simple line drawing of a hand washing a cup with a curved tube above it (no text or symbols)

natural_image
Simple line drawing of a hand holding a rectangular object over a surface with a dark spot (no text or symbols)
natural_image
Simple line drawing of a container pouring liquid into a granular substance (no text or symbols)
natural_image
Hand holding a pen applying material to a circular object, no text or symbols visible
natural_image
Illustration of hands using a tool to lift or lift liquid from a pipe (no text or symbols present)
natural_image
Hand holding a square object with a curved line, no text or symbols visible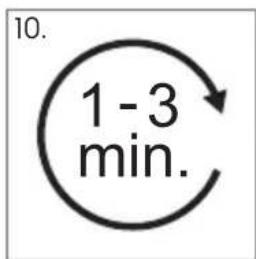

natural_image
Line drawing of a hand using a tool to cut or inspect a rectangular object (no text or symbols)
6.1 Observation
EU PLUG

natural_image
Line drawing of a hand holding a small electronic device (no text or symbols)
natural_image
Simple line drawing of a mechanical or architectural component with a black circle and arrow, no text or symbols present.
natural_image
Line drawing of a hand holding a smartphone with an arrow pointing to the screen (no text or symbols present)EU PLUG

natural_image
Line drawing of hands holding a small electronic component with four pins (no text or symbols)
natural_image
Simple line drawing of a mechanical or architectural component with a black circle and arrow, no text or symbols present.
natural_image
Illustration of hands holding a small electrical plug with a black arrow pointing to the socket (no text or symbols)natural_image
Simple line drawing of a cylindrical container (no text or symbols)1

2

3
natural_image
Simple line drawing of a cylindrical container with a protruding handle and two small pins at the bottom (no text or symbols)4
5
5. KOM GODT I GANG (LÆSES GRUNDIGT)
natural_image
Illustration of hands holding a pen or tool, no text or symbols present
natural_image
Simple line drawing of a spray bottle with an arrow pointing to a wall-mounted electrical outlet (no text or symbols)
natural_image
Simple line drawing of a laboratory apparatus with a beaker and tubing (no text or symbols)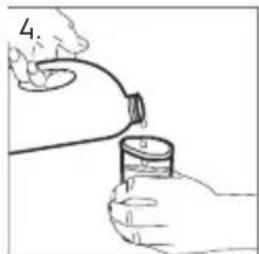
natural_image
Hand holding a small container with a tube inserted, no visible text or symbols
natural_image
Simple line drawing of a hand pressing down on a surface with a dark ink blot (no text or symbols)
natural_image
Illustration of a hand pouring liquid into a container over a surface, with no text or symbols present.
natural_image
Hand holding a pen applying material to a circular object, no text or symbols visible
natural_image
Illustration of a hand pouring liquid into a circular pipe with an arrow indicating flow direction (no text or symbols)
natural_image
Hand holding a square object with a curved line, no text or symbols visible
natural_image
Line drawing of a hand using a tool to cut or install a rectangular block (no text or symbols)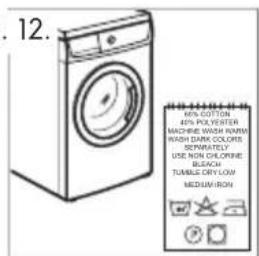
6.1 Observation
EU PLUG

natural_image
Line drawing of a hand holding a small electronic device (no text or symbols)
natural_image
Simple line drawing of a mechanical or architectural component with a black circle and arrow, no text or symbols present.
natural_image
Line drawing of a hand holding a smartphone with an arrow pointing to the screen (no text or symbols present)EU PLUG

natural_image
Line drawing of hands holding a small electronic component with four pins (no text or symbols)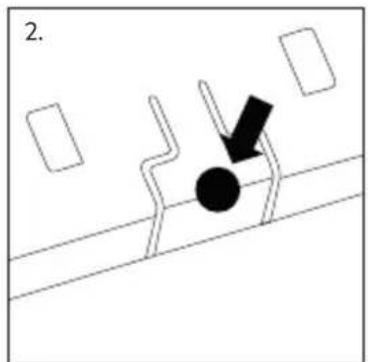
natural_image
Simple line drawing of a mechanical or architectural component with a black circle and arrow, no text or symbols present.
natural_image
Illustration of hands holding a small electrical plug with a black arrow pointing to the socket (no text or symbols)Ændring af stikket
natural_image
Illustration of hands holding a pen or tool with a curved arrow indicating motion (no text or symbols)
natural_image
Simple line drawing of a mechanical device with an electrical outlet (no text or symbols)
natural_image
Simple line drawing of a water tap with a submerged object and pipe (no text or symbols)

natural_image
Hand holding a small object over a surface with dark granular substance (no text or symbols)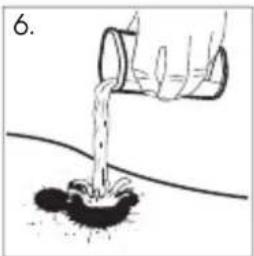
natural_image
Illustration of a hand pouring liquid from a container into a puddle (no text or symbols)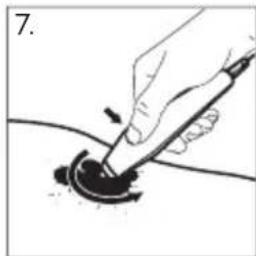
natural_image
Hand holding a pen applying material to a curved surface, no text or symbols visible
natural_image
Illustration of hands performing a manual water stroke technique on a circular object (no text or symbols)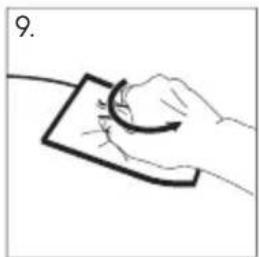
natural_image
Simple line drawing of a hand holding a rectangular object with a curved arrow, no text or symbols present

natural_image
Line drawing of a hand using a tool to cut or inspect a rectangular object (no text or symbols)
6.1 Observation
EU PLUG
natural_image
Line drawing of a hand holding a small electronic device (no text or symbols)
natural_image
Simple line drawing of a mechanical or architectural component with a black circle and arrow, no text or symbols present.
natural_image
Line drawing of a hand holding a smartphone with an arrow pointing to the screen (no text or symbols present)EU PLUG

natural_image
Line drawing of hands holding a small electronic component with four pins (no text or symbols)
natural_image
Simple line drawing of a mechanical or architectural component with a black circle and arrow, no text or symbols present.
natural_image
Illustration of hands holding a small electrical plug with a black arrow pointing to the socket (no text or symbols)natural_image
Illustration of hands holding a pen or tool with a curved line, no text or symbols present
natural_image
Simple line drawing of a hand holding a cup with an arrow pointing to a wall-mounted electrical outlet (no text or symbols)
natural_image
Simple line drawing of a laboratory apparatus with a beaker and tubing (no text or symbols)
natural_image
Hand holding a small container with a tube inserted, emitting vapor or smoke (no text or symbols visible)
natural_image
Hand holding a small object over a surface with a dark smudge (no text or symbols)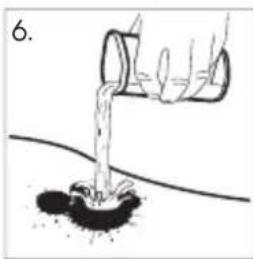
natural_image
Simple line drawing of a hand pouring liquid into a container over a surface (no text or symbols)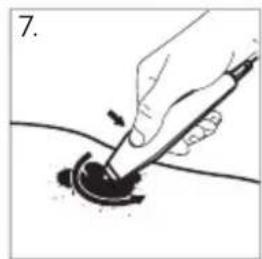
natural_image
Illustration of a hand using a pen to apply material to a circular object (no text or symbols visible)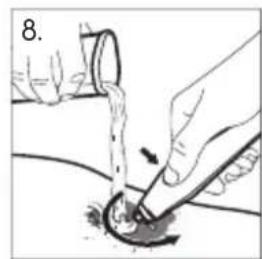
natural_image
Illustration of a hand using a tool to lift or spread material from a pipe (no text or symbols present)
natural_image
Hand holding a small object with a curved line, no visible text or symbols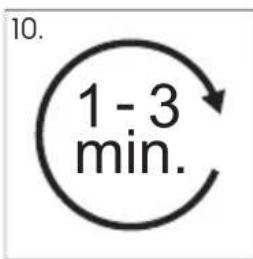
natural_image
Line drawing of a hand using a compass to measure a component on a rectangular base (no text or symbols)
6.1 Observation
EU PLUG

natural_image
Line drawing of a hand holding a small electronic device (no text or symbols)
natural_image
Simple line drawing of a mechanical or architectural component with a black circle and arrow, no text or symbols present.
natural_image
Line drawing of a hand holding a smartphone with an arrow pointing to the screen (no text or symbols present)EU PLUG

natural_image
Line drawing of hands holding a small electronic component with four pins (no text or symbols)
natural_image
Simple line drawing of a mechanical or architectural component with a black circle and arrow, no text or symbols present.
natural_image
Illustration of hands holding a small electrical plug with a black arrow pointing to the socket (no text or symbols)natural_image
Illustration of hands holding a pen or stylus, no text or symbols present
natural_image
Simple line drawing of a spray bottle with an arrow pointing to a circular component (no text or symbols)
natural_image
Simple line drawing of a laboratory apparatus with a beaker and tubing (no text or symbols)
natural_image
Hand holding a small container with a tube inserted, no visible text or symbols
natural_image
Illustration of a hand holding a small object over a surface with a dark spot (no text or symbols)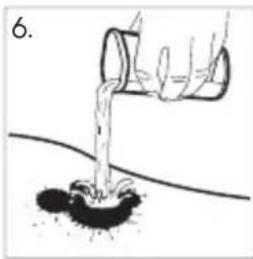
natural_image
Illustration of a hand pouring liquid into a container over a surface, with no text or symbols present.
natural_image
Hand using a pen to apply material to a circular sample (no text or symbols visible)
natural_image
Illustration of a hand using a tool to lift or lift liquid onto a surface, with no visible text or symbols.
natural_image
Hand holding a small object with a curved line, no visible text or symbols

natural_image
Line drawing of a hand using a tool to cut or inspect a rectangular block (no text or symbols)
6.1 Observation
EU PLUG

natural_image
Line drawing of a hand holding a small electronic device (no text or symbols)
natural_image
Simple line drawing of a mechanical or architectural component with a black circle and arrow, no text or symbols present.
natural_image
Line drawing of a hand holding a smartphone with an arrow pointing to the screen (no text or symbols present)EU PLUG

natural_image
Line drawing of hands holding a small electronic component with four pins (no text or symbols)
natural_image
Simple line drawing of a mechanical or architectural component with a black circle and arrow, no text or symbols present.
natural_image
Illustration of hands holding a small electrical plug with a black arrow pointing to the socket (no text or symbols)natural_image
Simple line drawing of a cylindrical container with a protruding rod and two small protrusions at the bottom (no text or symbols)4
5
5. DARBA SĀKŠANA (IZLASIET RŪPĪGI)
natural_image
Illustration of hands holding a pen or tool with a curved arrow indicating motion (no text or symbols)
natural_image
Simple line drawing of a mechanical component with an attached circular component (no text or symbols)
natural_image
Simple line drawing of a laboratory apparatus with a beaker and tubing (no text or symbols)
natural_image
Illustration of a hand pouring liquid into a container with a tube (no text or symbols)
natural_image
Hand holding a small object over a surface with a dark spot, no text or symbols present
natural_image
Simple line drawing of a hand pouring liquid into a container over a surface (no text or symbols)
natural_image
Hand holding a pen applying material to a circular object on a curved surface (no text or symbols visible)
natural_image
Illustration of hands using a tool to lift or spread material from a pipe (no text or symbols)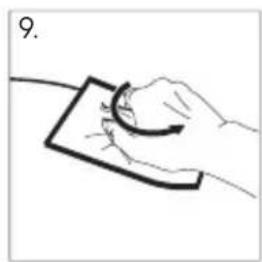
natural_image
Hand holding a small object with a curved line, no visible text or symbols

natural_image
Line drawing of a hand using a tool to cut or install a component on a base (no text or symbols)
6.1 Observation
EU PLUG

natural_image
Line drawing of a hand holding a small electronic device (no text or symbols)
natural_image
Simple line drawing of a mechanical or architectural component with a black circle and arrow, no text or symbols present.
natural_image
Line drawing of a hand holding a smartphone with an arrow pointing to the screen (no text or symbols present)EU PLUG

natural_image
Line drawing of hands holding a small electronic component with four pins (no text or symbols)
natural_image
Simple line drawing of a mechanical or architectural component with a black circle and arrow, no text or symbols present.
natural_image
Line drawing of hands holding a small electrical plug with a black arrow pointing to the socket (no text or symbols)natural_image
Illustration of hands holding a pen or tool with a curved arrow indicating motion (no text or symbols)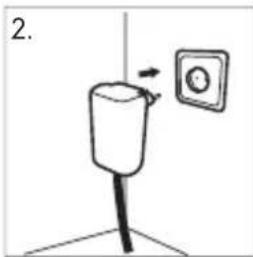
natural_image
Simple line drawing of a spray bottle with an outlet, no text or symbols present
natural_image
Simple line drawing of a laboratory apparatus with a beaker and tubing (no text or symbols)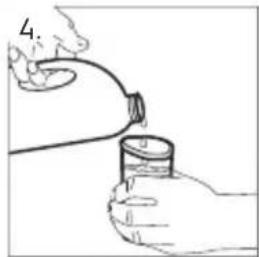
natural_image
Hand holding a small container with a tube, no visible text or symbols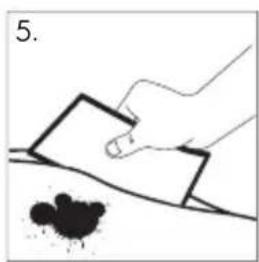
natural_image
Hand holding a rectangular object over a surface with a dark smudge (no text or symbols)
natural_image
Simple line drawing of a hand pouring liquid from a container onto a surface, with no text or symbols present.
natural_image
Hand holding a pen applying material to a circular object, no text or symbols visible
natural_image
Illustration of a hand pouring liquid into a pipe with a tool, no text or symbols present
natural_image
Hand holding a square object with a curved line, no text or symbols present

natural_image
Line drawing of a hand using a tool to cut or inspect a rectangular object (no text or symbols)
6.1 Observation
EU PLUG

natural_image
Line drawing of a hand holding a small electronic device (no text or symbols)
natural_image
Simple line drawing of a mechanical or architectural component with a black circle and arrow, no text or symbols present.
natural_image
Line drawing of a hand holding a smartphone with an arrow pointing to the screen (no text or symbols present)EU PLUG

natural_image
Line drawing of hands holding a small electronic component with four pins (no text or symbols)
natural_image
Simple line drawing of a mechanical or architectural component with a black circle and arrow, no text or symbols present.
natural_image
Illustration of hands holding a small electrical plug with a black arrow pointing to the socket (no text or symbols)natural_image
Simple line drawing of a cylindrical container (no text or symbols)1

2

3

natural_image
Simple line drawing of a cylindrical container with a protruding handle and two small pins at the bottom (no text or symbols)4
5
5. JAK ZAČÍT (ČTĚTE POZORNĚ)
natural_image
Illustration of hands holding a pen or tool with a curved arrow indicating motion (no text or symbols)
natural_image
Simple line drawing of a spray bottle with an outlet, no text or symbols present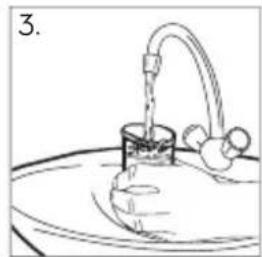
natural_image
Simple line drawing of a laboratory apparatus with a beaker and tubing (no text or symbols)
natural_image
Illustration of a hand holding a small container connected to a tube, with no visible text or symbols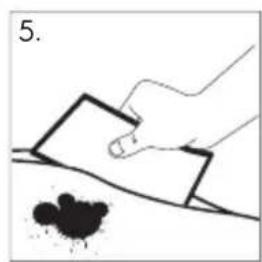
natural_image
Simple line drawing of a hand holding a rectangular object over a surface with a dark spot (no text or symbols)
natural_image
Simple line drawing of a hand pouring liquid from a container onto a surface, with no text or symbols present.
natural_image
Hand holding a pen applying material to a circular object, no text or symbols visible
natural_image
Illustration of a hand pouring liquid into a pipe with a tool, no text or symbols present
natural_image
Hand holding a small object with a curved line, no visible text or symbols

natural_image
Line drawing of a hand using a tool to cut or inspect a rectangular object (no text or symbols)
6.1 Observation
EU PLUG

natural_image
Line drawing of a hand holding a small electronic device (no text or symbols)
natural_image
Simple line drawing of a mechanical or architectural component with a black circle and arrow, no text or symbols present.
natural_image
Line drawing of a hand holding a smartphone with an arrow pointing to the screen (no text or symbols present)EU PLUG

natural_image
Line drawing of hands holding a small electronic component with four pins (no text or symbols)
natural_image
Simple line drawing of a mechanical or architectural component with a black circle and arrow, no text or symbols present.
natural_image
Line drawing of hands holding a small electrical plug with a black arrow pointing to the socket (no text or symbols)natural_image
Simple line drawing of a cylindrical container (no text or symbols)1

2

3

natural_image
Simple line drawing of a cylindrical container with a protruding handle and two small pins at the bottom (no text or symbols)4
5
5. ZAČÍNAME (DÔKLADNE SI PREČÍTAJTE)
natural_image
Illustration of a hand holding a pen or tool, with no visible text or symbols
natural_image
Simple line drawing of a hand holding a cup with an electrical outlet, no text or symbols present
natural_image
Simple line drawing of a laboratory apparatus with a beaker and tubing (no text or symbols)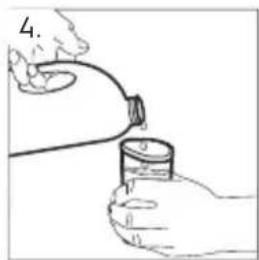
natural_image
Illustration of hands holding a small container with a tube, no text or symbols present
natural_image
Hand holding a paper with a black ink blot, no text or symbols present
natural_image
Illustration of a hand pouring liquid into a container over a surface with a small pile of dark granular substance (no text or symbols)
natural_image
Hand holding a pen applying material to a curved surface, no text or symbols visible
natural_image
Illustration of hands using a tool to lift water from a pipe onto a circular surface (no text or symbols)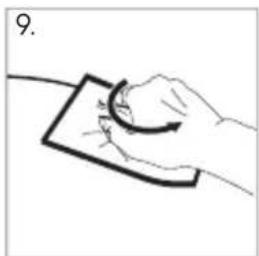
natural_image
Hand holding a small object with a curved arrow, no visible text or symbols

natural_image
Line drawing of a hand using a tool to cut or inspect a rectangular block (no text or symbols)
6.1 Observation
EU PLUG

natural_image
Line drawing of a hand holding a small electronic device (no text or symbols)
natural_image
Simple line drawing of a mechanical or architectural component with a black circle and arrow, no text or symbols present.
natural_image
Line drawing of a hand holding a smartphone with an arrow pointing to the screen (no text or symbols present)EU PLUG

natural_image
Line drawing of hands holding a small electronic component with four pins (no text or symbols)
natural_image
Simple line drawing of a mechanical or architectural component with a black circle and arrow, no text or symbols present.
natural_image
Illustration of hands holding a small electrical plug with a black arrow pointing to the socket (no text or symbols)natural_image
Simple line drawing of a cylindrical container with a protruding rod and two small protrusions (no text or symbols)4
5
5. ZAČETEK (POZORNO PREBERITE)
natural_image
Illustration of hands holding a pen or tool with a curved arrow indicating motion (no text or symbols)
natural_image
Simple line drawing of a spray bottle with an outlet mounted on a stand, no text or symbols present
natural_image
Simple line drawing of a laboratory apparatus with a beaker and tubing (no text or symbols)
natural_image
Illustration of hands holding a small container with a tube, no text or symbols present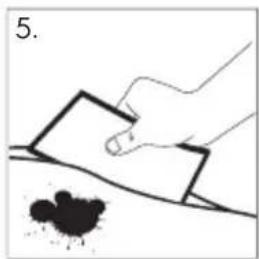
natural_image
Hand holding a rectangular object over a surface with a dark spot, no text or symbols present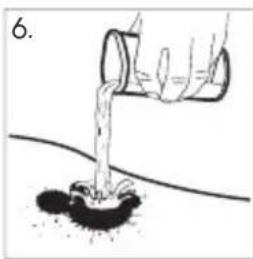
natural_image
Illustration of a hand pouring liquid from a container into a granular substance on a curved surface (no text or symbols)
natural_image
Hand holding a pen applying material to a circular object, no text or symbols visible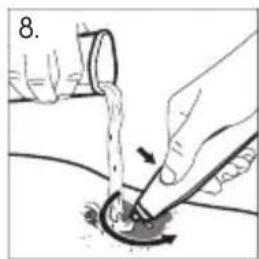
natural_image
Illustration of hands using a tool to lift water from a pipe, no text or symbols present
natural_image
Hand holding a rectangular object with a curved arrow, no text or symbols present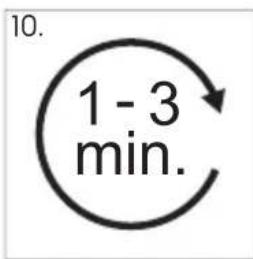

natural_image
Line drawing of a hand using a tool to cut or install a component on a base (no text or symbols)
6.1 Observation
EU PLUG

natural_image
Line drawing of a hand holding a small electronic device (no text or symbols)
natural_image
Simple line drawing of a mechanical or architectural component with a black circle and arrow, no text or symbols present.
natural_image
Line drawing of a hand holding a smartphone with an arrow pointing to the screen (no text or symbols present)EU PLUG

natural_image
Line drawing of hands holding a small electronic component with four pins (no text or symbols)
natural_image
Simple line drawing of a mechanical or architectural component with a black circle and arrow, no text or symbols present.
natural_image
Line drawing of hands holding a small electrical plug with a black arrow pointing to the plug (no text or symbols)Menjava napajalnega vtiča
natural_image
Simple line drawing of a cylindrical container with a protruding rod and two small protrusions at the bottom (no text or symbols)4
5
5. ROZPOCZĘCIE PRACY Z URZĄDZENIEM (DOKŁADNIE PRZECZYTAĆ)
natural_image
Illustration of hands holding a pen or tool with a curved arrow indicating motion (no text or symbols)
natural_image
Simple line drawing of a mechanical component with an arrow indicating motion, next to a circular symbol (no text or labels)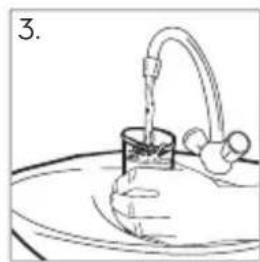
natural_image
Simple line drawing of a laboratory apparatus with a beaker and tubing (no text or symbols)
natural_image
Hand holding a small container with a tube, emitting smoke from a pipe (no text or symbols visible)
natural_image
Hand holding a rectangular object over a surface with a dark ink blot (no text or symbols)
natural_image
Illustration of a hand pouring liquid from a container onto a surface, with no text or symbols present.
natural_image
Hand using a pen to apply material to a circular sample (no text or symbols visible)
natural_image
Illustration of hands using a tool to lift or spread material from a pipe (no text or symbols present)
natural_image
Hand holding a small object with a curved line, no text or symbols visible
natural_image
Line drawing of a hand using a tool to cut or adjust a rectangular object (no text or symbols)
6.1 Observation
EU PLUG

natural_image
Line drawing of a hand holding a small electronic device (no text or symbols)
natural_image
Simple line drawing of a mechanical or architectural component with a black circle and arrow, no text or symbols present.
natural_image
Line drawing of a hand holding a smartphone with an arrow pointing to the screen (no text or symbols present)EU PLUG

natural_image
Line drawing of hands holding a small electronic component with four pins (no text or symbols)
natural_image
Simple line drawing of a mechanical or architectural component with a black circle and arrow, no text or symbols present.
natural_image
Line drawing of hands holding a small electrical plug with a black arrow pointing to the plug (no text or symbols)natural_image
Simple line drawing of a cylindrical container (no text or symbols)1

2

3

natural_image
Simple line drawing of a cylindrical container with a protruding handle and two small pins at the bottom (no text or symbols)4
5
5. ELSÖ LÉPÉSEK (OLVASSA EL FIGYELMESEN!)
natural_image
Illustration of hands holding a pen or tool with a curved arrow indicating motion (no text or symbols)
natural_image
Simple line drawing of a spray bottle with an outlet mounted on a stand, no text or symbols present.
natural_image
Simple line drawing of a laboratory apparatus with a beaker and tubing (no text or symbols)
natural_image
Illustration of hands holding a small object with a tube, no text or symbols present
natural_image
Hand holding a rectangular object over a surface with dark granular substance (no text or symbols)
natural_image
Simple line drawing of a container pouring liquid into a container over a surface (no text or symbols)
natural_image
Hand holding a pen applying material to a circular object, no text or symbols visible
natural_image
Illustration of hands using a tool to lift or spread liquid into a circular container (no text or symbols)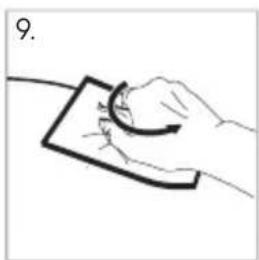
natural_image
Hand holding a rectangular object with a curved arrow, no visible text or symbols

natural_image
Line drawing of a hand using a tool to cut or inspect a rectangular object (no text or symbols)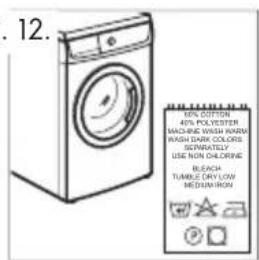
6.1 Observation
EU PLUG

natural_image
Line drawing of a hand holding a small electronic device (no text or symbols)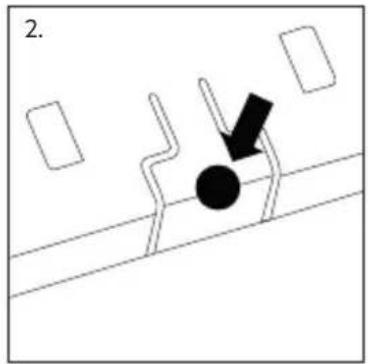
natural_image
Simple line drawing of a mechanical or architectural component with a black circle and arrow, no text or symbols present.
natural_image
Line drawing of a hand holding a smartphone with an arrow pointing to the screen (no text or symbols present)EU PLUG

natural_image
Line drawing of hands holding a small electronic component with four pins (no text or symbols)
natural_image
Simple line drawing of a mechanical or architectural component with a black circle and arrow, no text or symbols present.
natural_image
Line drawing of hands holding a small electrical plug with a black arrow pointing to the socket (no text or symbols)Tápcsatlakozó csere
natural_image
Line drawing of a hand holding a small electronic device (no text or symbols)
natural_image
Simple line drawing of a mechanical or architectural component with a black circle and arrow, no text or symbols present.
natural_image
Line drawing of a hand holding a smartphone with an arrow pointing to the screen (no text or symbols present)EU PLUG

natural_image
Line drawing of a hand holding an electronic plug with four pins (no text or symbols)
natural_image
Simple line drawing of a mechanical or architectural component with a black circle and arrow, no text or symbols present.
natural_image
Illustration of hands holding a small electrical plug with a black arrow pointing to the socket (no text or symbols)natural_image
Simple line drawing of a cylindrical container with a protruding rod and two small protrusions (no text or symbols)4
5
natural_image
Illustration of hands holding a pen or tool with a curved line indicating motion (no text or symbols)
natural_image
Simple line drawing of a cup with an arrow pointing to a wall-mounted socket (no text or symbols)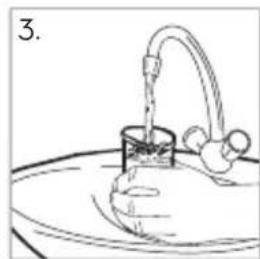
natural_image
Simple line drawing of a laboratory apparatus with a beaker and tubing (no text or symbols)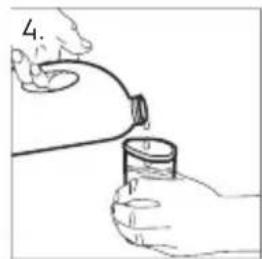
natural_image
Illustration of hands using a tool to interact with a container (no text or symbols visible)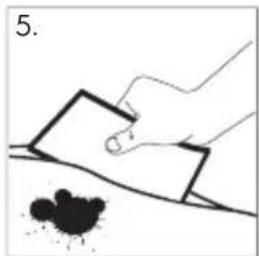
natural_image
Hand holding a small object over a surface with a dark smudge (no text or symbols)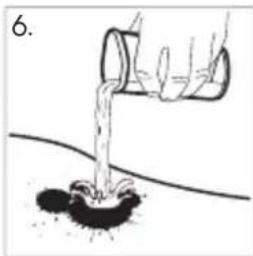
natural_image
Simple line drawing of a hand pouring liquid into a container over a surface (no text or symbols)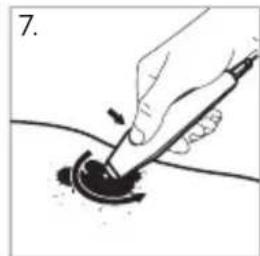
natural_image
Hand holding a pen applying material to a circular object, no text or symbols visible
natural_image
Illustration of a hand pouring liquid into a pipe with a tool, no text or symbols present
natural_image
Hand holding a small object with a curved line, no visible text or symbols

natural_image
Line drawing of a hand using a compass to cut a rectangular object (no text or symbols)
6.1 Observation
EU PLUG

natural_image
Line drawing of a hand holding a small electronic device (no text or symbols)
natural_image
Simple line drawing of a mechanical or architectural component with a black circle and arrow, no text or symbols present.
natural_image
Line drawing of a hand holding a smartphone with an arrow pointing to the screen (no text or symbols present)EU PLUG

natural_image
Line drawing of hands holding a small electronic component with four pins (no text or symbols)
natural_image
Simple line drawing of a mechanical or architectural component with a black circle and arrow, no text or symbols present.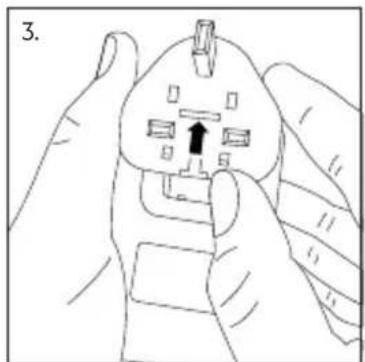
natural_image
Illustration of hands holding a small electrical plug with a black arrow pointing to the socket (no text or symbols)natural_image
Simple line drawing of a container with a handle and two small protrusions (no text or symbols)4
5
5. НАЧАЛО НА УПОТРЕБА (ПРОЧЕТЕТЕ ВНИМАТЕЛНО)
natural_image
Illustration of a hand holding a pen or stylus with a curved line, no text or symbols present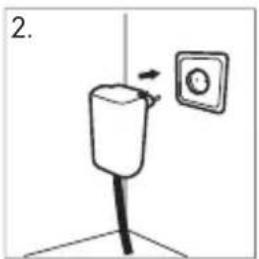
natural_image
Simple line drawing of a hand holding a cup with an open electrical outlet (no text or symbols)
natural_image
Simple line drawing of a laboratory apparatus with a curved tube and tubing (no text or symbols)
natural_image
Hand holding a small container with a tube inserted, no visible text or symbols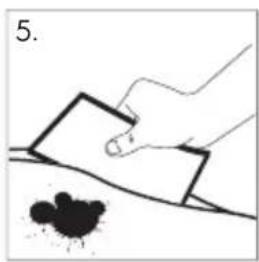
natural_image
Hand holding a small object over a surface with a dark ink blot (no text or symbols)
natural_image
Illustration of a hand pouring liquid from a container into a pile of dark granular material (no text or symbols)
natural_image
Hand using a pen to apply material to a circular object on a surface (no text or symbols visible)
natural_image
Illustration of a hand using a tool to lift or lift liquid onto a surface, with no visible text or symbols.
natural_image
Hand holding a paper with a curved line, no text or symbols present

natural_image
Line drawing of a hand using a tool to cut or install a component into a rectangular block (no text or symbols)
6.1 Observation
EU PLUG

natural_image
Line drawing of a hand holding a small electronic device (no text or symbols)
natural_image
Simple line drawing of a mechanical or architectural component with a black circle and arrow, no text or symbols present.
natural_image
Line drawing of a hand holding a smartphone with an arrow pointing to the screen (no text or symbols present)EU PLUG

natural_image
Line drawing of hands holding a small electronic component with four pins (no text or symbols)
natural_image
Simple line drawing of a mechanical or architectural component with a black circle and arrow, no text or symbols present.
natural_image
Illustration of hands holding a small electrical plug with a black arrow pointing to the socket (no text or symbols)Смяна на щепсела
natural_image
Simple line drawing of a cylindrical container (no text or symbols)1

2

3

natural_image
Simple line drawing of a cylindrical container with a protruding handle and two small pins at the bottom (no text or symbols)4
5
natural_image
Illustration of hands holding a pen or tool, no text or symbols present
natural_image
Simple line drawing of a cup with an arrow pointing to a wall-mounted socket (no text or symbols)
natural_image
Simple line drawing of a laboratory apparatus with a beaker and tubing (no text or symbols)
natural_image
Hand holding a container with a tube inserted, emitting vapor or smoke (no text or symbols visible)
natural_image
Hand holding a small object over a surface with a dark smudge (no text or symbols)
natural_image
Illustration of a hand pouring liquid into a container over a surface, with no text or symbols present.
natural_image
Hand using a tool to apply material to a circular sample (no text or symbols visible)
natural_image
Illustration of hands using a tool to lift or spread liquid into a circular pipe (no text or symbols)
natural_image
Hand holding a small object with a curved line, no text or symbols visible
natural_image
Line drawing of a hand using a tool to cut or adjust a component on a base (no text or symbols)
6.1 Observation
EU PLUG

natural_image
Line drawing of a hand holding a small electronic device (no text or symbols)
natural_image
Simple line drawing of a mechanical or architectural component with a black circle and arrow, no text or symbols present.
natural_image
Line drawing of a hand holding a smartphone with an arrow pointing to the screen (no text or symbols present)EU PLUG

natural_image
Line drawing of hands holding a small electronic component with four pins (no text or symbols)
natural_image
Simple line drawing of a mechanical or architectural component with a black circle and arrow, no text or symbols present.
natural_image
Line drawing of hands holding a small electrical plug with a black arrow pointing to the plug (no text or symbols)natural_image
Illustration of hands holding a pen or tool with a curved line indicating motion (no text or symbols)
natural_image
Simple line drawing of a spray bottle with an arrow pointing to a wall-mounted square (no text or symbols)
natural_image
Simple line drawing of a laboratory apparatus with a beaker and tubing (no text or symbols)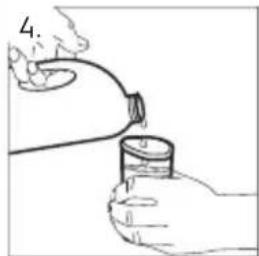
natural_image
Illustration of a hand holding a small object with a curved line, no text or symbols present
natural_image
Hand holding a rectangular object over a surface with a dark smudge (no text or symbols)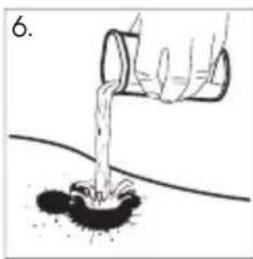
natural_image
Illustration of a hand pouring liquid from a container onto a surface, with no text or symbols present.
natural_image
Hand holding a pen applying material to a circular object, no text or symbols visible
natural_image
Illustration of hands using a tool to lift water from a pipe, no text or symbols present
natural_image
Hand holding a small object with a curved line, no visible text or symbols

natural_image
Line drawing of a hand using a tool to cut or install a rectangular block (no text or symbols)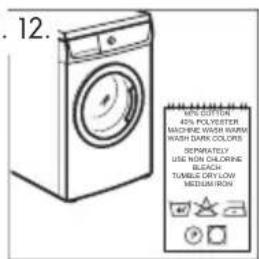
6.1 Observation
EU PLUG

natural_image
Line drawing of a hand holding a small electronic device (no text or symbols)
natural_image
Simple line drawing of a mechanical or architectural component with a black circle and arrow, no text or symbols present.
natural_image
Line drawing of a hand holding a smartphone with an arrow pointing to the screen (no text or symbols present)EU PLUG

natural_image
Line drawing of hands holding a small electronic component with four pins (no text or symbols)
natural_image
Simple line drawing of a mechanical or architectural component with a black circle and arrow, no text or symbols present.
natural_image
Illustration of hands holding a small electrical plug with a black arrow pointing to the plug (no text or symbols)natural_image
Simple line drawing of a cylindrical container (no text or symbols)1

2

3

natural_image
Simple line drawing of a cylindrical container with a protruding handle and a small protruding rod (no text or symbols)4
5
5. GUIDA INTRODUTTIVA (LEGGERE ATTENTAMENTE)
natural_image
Illustration of hands holding a pen or tool with a curved handle (no text or symbols)
natural_image
Simple line drawing of a mechanical device with an attached circular component (no text or symbols)
natural_image
Simple line drawing of a laboratory apparatus with a beaker and tubing (no text or symbols)
natural_image
Hand holding a small container with a tube, no visible text or symbols
natural_image
Hand holding a paper with a droplet on the ground, no text or symbols present
natural_image
Simple line drawing of a pipe pouring liquid into a container over a surface (no text or symbols)
natural_image
Hand holding a pen applying material to a circular object, no text or symbols visible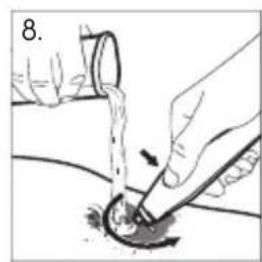
natural_image
Illustration of hands performing a manual oil extraction or cleaning procedure (no text or symbols visible)
natural_image
Hand holding a small object with a curved line, no text or symbols visible

natural_image
Line drawing of a hand using a tool to cut or inspect a rectangular object (no text or symbols)
6.1 Observation
EU PLUG

natural_image
Line drawing of a hand holding a small electronic device (no text or symbols)
natural_image
Simple line drawing of a mechanical or architectural component with a black circle and arrow, no text or symbols present.
natural_image
Line drawing of a hand holding a smartphone with an arrow pointing to the screen (no text or symbols present)EU PLUG

natural_image
Line drawing of hands holding a small electronic component with four pins (no text or symbols)
natural_image
Simple line drawing of a mechanical or architectural component with a black circle and arrow, no text or symbols present.
natural_image
Illustration of hands holding a small electrical plug with a black arrow pointing to the plug (no text or symbols)natural_image
Illustration of hands holding a pen or tool with a curved handle, no text or symbols present
natural_image
Simple line drawing of a spray bottle with an outlet wall, no text or symbols present
natural_image
Simple line drawing of a laboratory apparatus with a beaker and tubing (no text or symbols)
natural_image
Illustration of hands holding a small container with a tube, no text or symbols present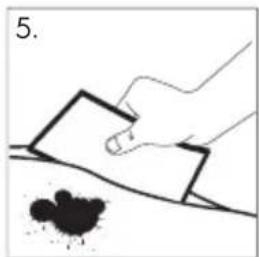
natural_image
Hand holding a rectangular object over a surface with a dark smudge (no text or symbols)
natural_image
Simple line drawing of a hand pouring liquid from a container into a puddle (no text or symbols)
natural_image
Hand holding a pen applying material to a circular object, no text or symbols visible
natural_image
Illustration of hands using a tool to lift water from a pipe, no text or symbols present
natural_image
Hand holding a rectangular object with a curved line, no text or symbols visible

natural_image
Line drawing of a hand using a tool to cut or install a rectangular block (no text or symbols)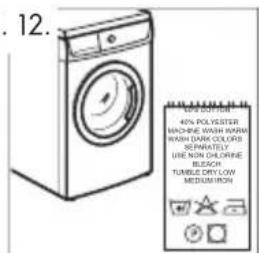
6.1 Observation
EU PLUG

natural_image
Line drawing of a hand holding a small electronic device (no text or symbols)
natural_image
Simple line drawing of a mechanical or architectural component with a black circle and arrow, no text or symbols present.
natural_image
Line drawing of a hand holding a smartphone with an arrow pointing to the screen (no text or symbols present)EU PLUG

natural_image
Line drawing of hands holding a small electronic component with four pins (no text or symbols)
natural_image
Simple line drawing of a mechanical or architectural component with a black circle and arrow, no text or symbols present.
natural_image
Line drawing of hands holding a small electrical plug with a black arrow pointing to the plug (no text or symbols)natural_image
Simple line drawing of a cylindrical container (no text or symbols)1

2
3

natural_image
Simple line drawing of a cylindrical container with a protruding handle and a small protruding rod (no text or symbols)4
5
5. CÓMO EMPEZAR (LEA ATENTAMENTE)
natural_image
Illustration of hands holding a pen or tool, no text or symbols present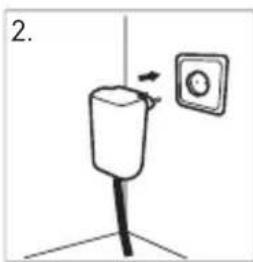
natural_image
Simple line drawing of a mechanical component with an arrow indicating rotation, next to a circular component (no text or symbols)
natural_image
Simple line drawing of a laboratory apparatus with a beaker and tubing, no text or symbols present
natural_image
Hand holding a small container with a tube inserted, no visible text or symbols
natural_image
Illustration of a hand using a power tool to clean or brush the surface (no text or symbols)
natural_image
Simple line drawing of a hand pouring liquid from a container onto a surface, with no text or symbols present.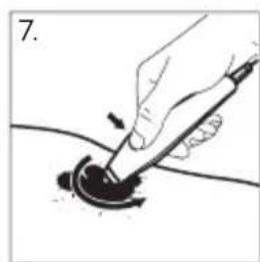
natural_image
Hand holding a pen applying material to a circular object, no text or symbols visible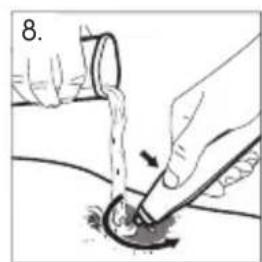
natural_image
Illustration of hands using a tool to lift or spread material from a pipe (no text or symbols)
natural_image
Hand holding a small object with a curved arrow, no visible text or symbols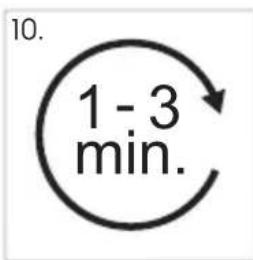

natural_image
Line drawing of a hand using a compass to cut a rectangular block (no text or symbols)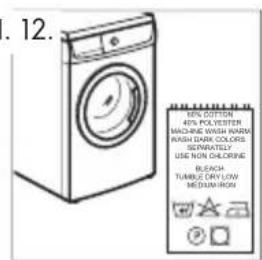
6.1 Observation
EU PLUG

natural_image
Line drawing of a hand holding a small electronic device (no text or symbols)
natural_image
Simple line drawing of a mechanical or architectural component with a black circle and arrow, no text or symbols present.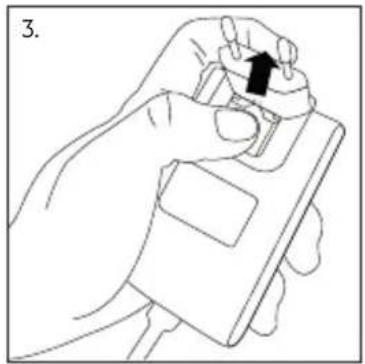
natural_image
Line drawing of a hand holding a smartphone with an arrow pointing to the screen (no text or symbols present)EU PLUG

natural_image
Line drawing of hands holding a small electronic component with four pins (no text or symbols)
natural_image
Simple line drawing of a mechanical or architectural component with a black circle and arrow, no text or symbols present.
natural_image
Illustration of hands holding a small electrical plug with a black arrow pointing to the plug (no text or symbols)Cambio del enchufe
natural_image
Simple line drawing of a cylindrical container (no text or symbols)1

2
3

natural_image
Simple line drawing of a rectangular container with a protruding rod and two small protrusions at the bottom (no text or symbols)4
5
natural_image
Illustration of a hand holding a pen or tool with a curved line extending from it, no text or symbols present
natural_image
Simple line drawing of a mechanical component with an arrow indicating direction, no text or symbols present.
natural_image
Simple line drawing of a laboratory apparatus with a beaker and tubing (no text or symbols)
natural_image
Illustration of hands pouring liquid from a container into a tube (no text or symbols)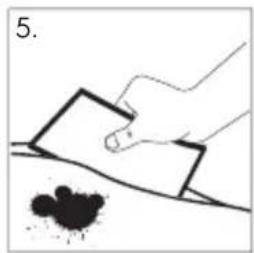
natural_image
Hand holding a rectangular object over a surface with a dark spot, no text or symbols present
natural_image
Simple line drawing of a pipe pouring liquid into a container over soil (no text or symbols)
natural_image
Hand holding a pen applying material to a circular object, no text or symbols visible
natural_image
Illustration of hands using a tool to lift or spread liquid into a circular container (no text or symbols)
natural_image
Hand holding a square object with a curved line, no text or symbols visible

natural_image
Line drawing of a hand using a tool to cut or inspect a rectangular object (no text or symbols)
natural_image
Line drawing of a hand holding a small object, possibly a device or tool, with no visible text or symbols.
natural_image
Simple line drawing of a mechanical or architectural component with a black circle and arrow, no text or symbols present.
natural_image
Line drawing of a hand holding a small object with an arrow pointing upward (no text or symbols)natural_image
Line drawing of hands holding a small electrical plug with three pins (no text or symbols)
natural_image
Simple line drawing of a mechanical or architectural component with a black circle and arrow, no text or symbols present.
natural_image
Line drawing of hands holding a small electrical plug with a black arrow pointing to the socket (no text or symbols)natural_image
Simple line drawing of a cylindrical container (no text or symbols)1
2
3

natural_image
Simple line drawing of a cylindrical container with a protruding handle and two small pins at the bottom (no text or symbols)4
5
5. COMEÇAR (LER COM ATENÇÃO)
natural_image
Illustration of a hand holding a pen with a curved line, no text or symbols present
natural_image
Simple line drawing of a spray bottle with an outlet mounted on a stand, no text or symbols present.
natural_image
Simple line drawing of a laboratory apparatus with a beaker and tubing (no text or symbols)
natural_image
Illustration of a hand pouring liquid from a bottle into a container (no text or symbols)
natural_image
Hand holding a rectangular object over a surface with a dark ink blot (no text or symbols)
natural_image
Simple line drawing of a container pouring liquid into a granular substance (no text or symbols)
natural_image
Illustration of a hand using a pen to apply material to a dark circular sample (no text or symbols)
natural_image
Illustration of a hand pouring liquid into a circular container with a tool, no text or symbols present
natural_image
Hand holding a square object with a curved arrow, no text or symbols present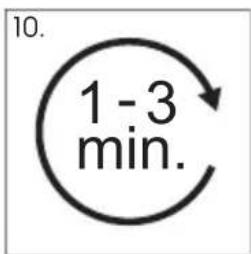
natural_image
Line drawing of a hand using a tool to cut or inspect a rectangular object (no text or symbols)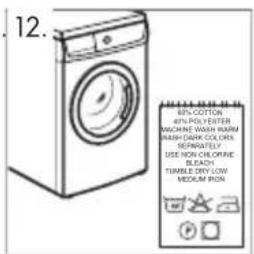
6.1 Observation
EU PLUG

natural_image
Line drawing of a hand holding a small object, possibly a device or tool, with no visible text or symbols.
natural_image
Simple line drawing of a mechanical or architectural component with a black circle and arrow, no text or symbols present.
natural_image
Line drawing of a hand holding a small object with an arrow indicating rotation (no text or symbols)EU PLUG
natural_image
Line drawing of a hand holding an electrical socket with four pins (no text or symbols)
natural_image
Simple line drawing of a mechanical or architectural component with a black circle and arrow, no text or symbols present.
natural_image
Line drawing of hands holding a small electrical plug with a black arrow pointing to the plug (no text or symbols)natural_image
Simple line drawing of a rectangular container with a protruding rod and a small protruding plug (no text or symbols)4
5
natural_image
Illustration of hands holding a pen or tool with a curved line, no text or symbols present
natural_image
Simple line drawing of a spray bottle with an outlet mounted on a stand (no text or symbols)
natural_image
Simple line drawing of a laboratory apparatus with a beaker and tubing (no text or symbols)
natural_image
Illustration of hands using a tool to interact with a container (no text or symbols)
natural_image
Hand holding a small object over a surface with a dark smudge (no text or symbols)
natural_image
Illustration of a hand pouring liquid from a container into a dark granular substance on a curved surface (no text or symbols)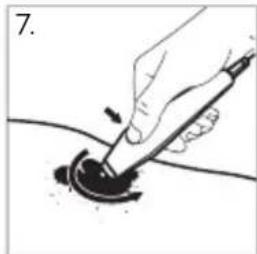
natural_image
Illustration of a hand using a tool to apply material to a circular object (no text or symbols visible)
natural_image
Illustration of hands using a tool to lift or spread liquid into a circular pipe (no text or symbols)
natural_image
Hand holding a square object with a curved arrow, no text or symbols present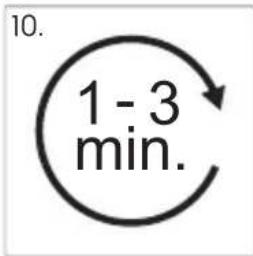

natural_image
Line drawing of a hand using a tool to cut or install a component into a rectangular block (no text or symbols)
6.1 Observation
EU PLUG

natural_image
Line drawing of a hand holding a small object, no text or symbols present
natural_image
Simple line drawing of a mechanical or architectural component with a black circle and arrow, no text or symbols present.
natural_image
Line drawing of a hand holding a smartphone with a black arrow pointing to the screen (no text or symbols)EU PLUG

natural_image
Line drawing of hands holding a small electrical socket with four pins (no text or symbols)
natural_image
Simple line drawing of a mechanical or architectural component with a black circle and arrow, no text or symbols present.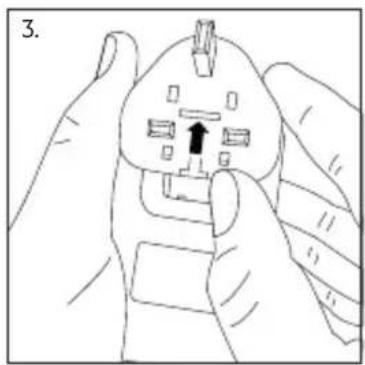
natural_image
Line drawing of hands holding a small electrical plug with a black arrow pointing to the socket (no text or symbols)- Contents
- SAFETY INFORMATION
- Children and vulnerable people safety
- General Safety
- SAFETY INSTRUCTION
- Use
- INTRODUCTION
- PRODUCT DESCRIPTION
- GETTING STARTED (READ CAREFULLY)
- CAUTION!
- USING YOUR PRODUCT
- Observation
- EU PLUG
- Changing the power plug
- TIPS
- CLEANING AND MAINTENANCE
- Quick cleaning instructions:
- WHAT TO DO IF...
- Troubleshooting table
- TECHNICAL DATA
- ENVIRONMENT CONCERNS
- Packaging materials
- GUARANTEE
- Inhaltsverzeichnis
- INBETRIEBNAHME (BITTE SORGFÄLTIG LESEN)
- GUIDE DE DÉMARRAGE (À LIRE ATTENTIVEMENT)
- KOM GODT I GANG (LÆSES GRUNDIGT)
- Ændring af stikket
- DARBA SĀKŠANA (IZLASIET RŪPĪGI)
- JAK ZAČÍT (ČTĚTE POZORNĚ)
- ZAČÍNAME (DÔKLADNE SI PREČÍTAJTE)
- ZAČETEK (POZORNO PREBERITE)
- Menjava napajalnega vtiča
- ROZPOCZĘCIE PRACY Z URZĄDZENIEM (DOKŁADNIE PRZECZYTAĆ)
- ELSÖ LÉPÉSEK (OLVASSA EL FIGYELMESEN!)
- Tápcsatlakozó csere
- НАЧАЛО НА УПОТРЕБА (ПРОЧЕТЕТЕ ВНИМАТЕЛНО)
- Смяна на щепсела
- GUIDA INTRODUTTIVA (LEGGERE ATTENTAMENTE)
- CÓMO EMPEZAR (LEA ATENTAMENTE)
- Cambio del enchufe
- COMEÇAR (LER COM ATENÇÃO)
Brand : AEG
Model : A4WMSTPN1
Category : Fabric stain remover