IAN 331821 - Weather Station AURIOL - Free user manual and instructions
Find the device manual for free IAN 331821 AURIOL in PDF.
User questions about IAN 331821 AURIOL
0 question about this device. Answer the ones you know or ask your own.
Ask a new question about this device
Download the instructions for your Weather Station in PDF format for free! Find your manual IAN 331821 - AURIOL and take your electronic device back in hand. On this page are published all the documents necessary for the use of your device. IAN 331821 by AURIOL.
USER MANUAL IAN 331821 AURIOL
text_image
Digital home control display showing weather, temperature readings, and a kitchen appliance.RADIO-CONTROLLED WEATHER STATION / FUNK-WETTERSTATION / STATION MÊTÉO RADIOGUIDÉE
STATION Usage and safety instructions
GB IE NI CY MT Before reading, unfold the two pages with the illustrations and then familiarise yourself with all functions of the device.
Hi-Tech Park Ningbo, China
Hi-Tech Park Ningbo, China
www.digi-tech-gmbh.com/downloads
Intended use......Page 44
Scope of delivery......Page 44
Parts description......Page 45
Technical data...... Page 47
Safety...... Page 49
Explanation of the signal words...... Page 49
General safety instructions......Page 50
Safety instructions for batteries....Page 51
Setup Page 52
Wall mounting......Page 52
Start-up......Page 53
Commissioning the outdoor sensor....Page 53
Commissioning the radio-controlled weather station...... Page 53
Operation......Page 55
Basic settings...... Page 55
Locations...... Page 56
Changing the °C/°F display of the outdoor sensor...... Page 60
Activating the background illumination of the radio-controlled weather
station...... Page 60
Moon phases......Page 60
Daily MIN/MAX values......Page 60
Battery state warning...... Page 61
Air pressure history......Page 61
Trends......Page 61
Configuring the alarm function......Page 62
Activating/deactivating alarm functions......Page 62
Snoozing/switching off the alarm function......Page 62
Switching the display of the added outdoor sensors......Page 63
Adding an outdoor sensor....Page 63
Temperature alarm......Page 64
Cold weather warning......Page 65
Room name...... Page 65
Maintenance and cleaning......Page 66
Troubleshooting......Page 66
Storage......Page 67
Order service......Page 67
Warranty and service...... Page 70
Warranty......Page 70
Service address...... Page 71
Simplified EU declaration of conformity....Page 72
Explanation of the pictograms used
| Explanation of the pictograms used | |||
 | Read the operating instructions! |  | Wear safety gloves! |
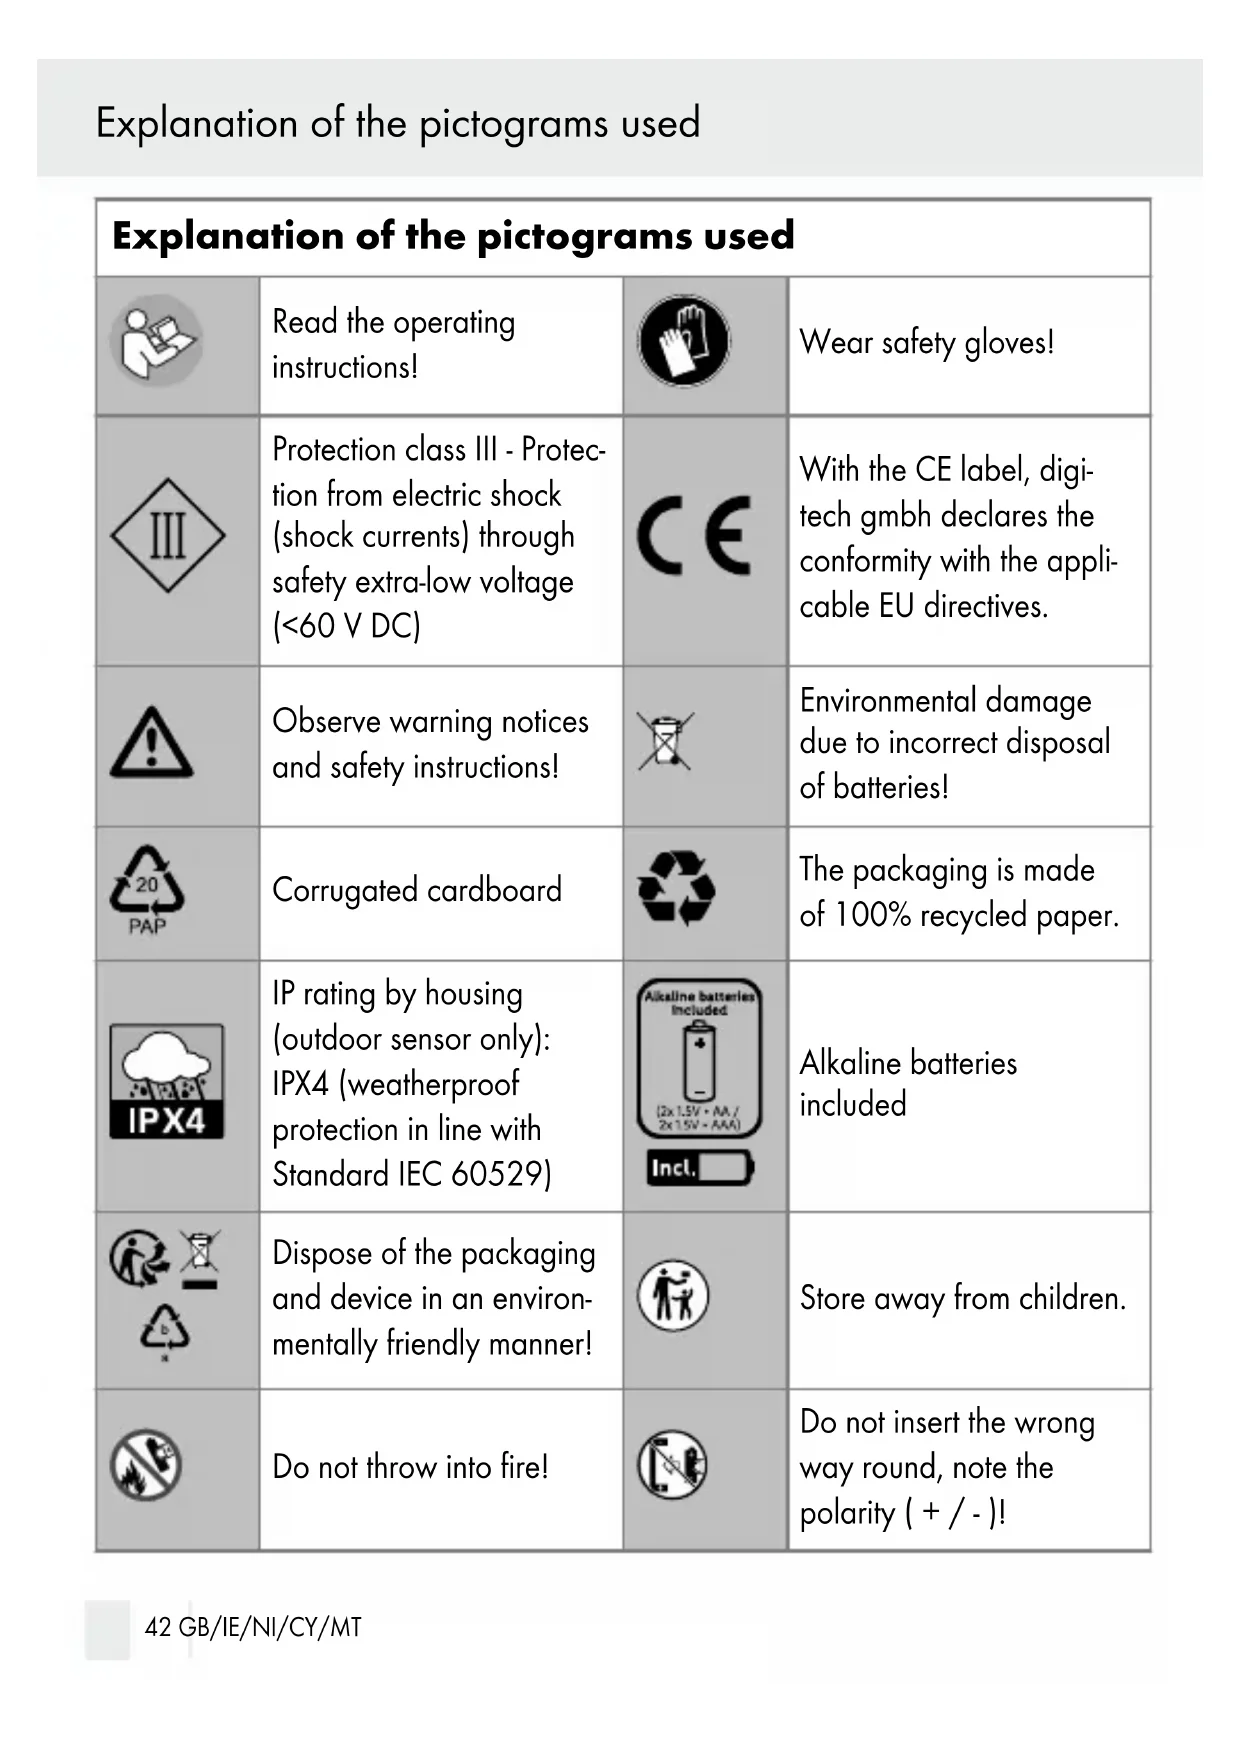
 | Protection class III - Protection from electric shock (shock currents) through safety extra-low voltage (<60 V DC) | 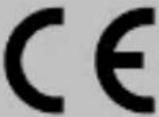 | With the CE label, digitech gmbh declares the conformity with the applicable EU directives. |
 | Observe warning notices and safety instructions! |  | Environmental damage due to incorrect disposal of batteries! |
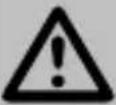
 | Corrugated cardboard |  | The packaging is made of 100% recycled paper. |
 | IP rating by housing (outdoor sensor only): IPX4 (weatherproof protection in line with Standard IEC 60529) | 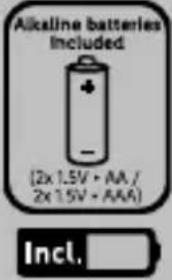 | Alkaline batteries included |
 | Dispose of the packaging and device in an environmentally friendly manner! |  | Store away from children. |
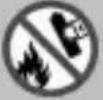 | Do not throw into fire! | 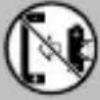 | Do not insert the wrong way round, note the polarity (+ / - )! |
Explanation of the pictograms used / Introduction
 | Do not use force! |  | Do not disassemble/open! |
 | Never mix different systems, brands and types! |  | Never mix new and used batteries! |
 | Do not recharge! Do not thr  water! water! | ||
 | Do not short-circuit! - Batteries may explode or leak. |  | Insert correctly! - Note the polarity (+ / - ) |
- Introduction

Congratulations on the purchase of your new device.
You have opted for a high-quality product. The user manual is a part of this product. It contains important notes concerning safety, handling and
disposal. Familiarise yourself with all control and safety notes prior to using the product. Only use the product as described and only for the stated applications. Pass on this manual when passing the product on to third parties.
This document is the complete operating instructions. By scanning the QR code, you will be taken directly to the Lidl service page (www.lidl-service.com) and can view and download these operating instructions by entering the article number IAN 466444_2404.
- Intended use
This product is intended for the recording and display of environmental parameters indoors and outdoors as well as the radio-supported display of time and date. This is an information technology product.
The radio weather station is intended for indoor operation only. The outdoor sensor is intended for indoor and outdoor operation.
The product is intended for private use only and not for commercial use.
Trademark references
The trademarks and brand names AURIOL and LIV & BO are the property of their respective owners.
- Scope of delivery
Check immediately after unpacking that the parts are complete and that the product is in proper condition.
1 radio weather station 2 batteries (AA)
1 outdoor sensor 2 batteries (AAA)
1 short manual
- Parts description
Radio-controlled weather station

1 Display of the radio-controlled weather station
C Values of the radio-controlled weather station
D Time and date
E Values of the outdoor sensor
2 Suspension eye of the radio-controlled weather station
3 SNOOZE / LIGHT button
4 RESET button
5 Ventilation slots
6 Fold-out foot
7 Battery compartment of the radio-controlled weather station
8 Battery compartment cover of the radio-controlled weather station
9 2 x batteries AA 1.5 V
10 SET button
11 Arrow up button
12 Arrow down button
13 ALERT button
14 ROOM button
15 HISTORY button
16 CH button
Outdoor sensor B
17 °C/°F button
18 TX button
19 Channel selection switch
20 Outdoor sensor battery compartment
21 Outdoor sensor battery compartment cover
22 Outdoor sensor suspension eye
23 Control LED
24 Outdoor sensor display F Values of the outdoor sensor
25 2 x batteries AAA 1.5 V
Introduction / Explanation of display icons
| Explanation of display icons | |
 | This icon warns of wintery temperatures of 1 °C and below. |
 | Shows the expected weather conditionsThe following weather conditions are possible: sunny, slightly overcast, cloudy, rainy, heavy rain |
 | Shows the current moon phase |
 | Shows the temperature, air humidity and air pressure trendArrow down: values are droppingArrow right: values remain constantArrow up: values are increasing |
 | Is displayed if the set time format is 12 hours |
| [T450] | Is displayed when daylight saving time is set |
 | Indicates the reception of the DCF radio signal |
| [X0XA] | Indicates that the batteries in the radio-controlled weather station are low |
| [BYX7] | Is displayed when the snooze function is activated |
| [X6ST] | Shows the currently activated alarm function(s) |
| [SACH] | Shows the currently selected channel of the outdoor sensor |
| [SABZ] | Is displayed if the temperature alarm function is activated |
| MAXMIN | Is displayed when the MAX or MIN value is called up |
 | Indicates the reception of the outdoor sensor's RF radio signal |
 | Is displayed when a RF radio signal is transmitted by the outdoor sensor |
 | Indicates that the batteries in the outdoor sensors are low |
| CH1 CH2 CH3 | Shows the currently selected channel of the outdoor sensor |
- Technical data
Radio-controlled weather station:
Temperature measuring range: 0 °C to 50 °C (32 °F to 122 °F)
Air humidity measuring range: 20% to 95%
Radio-controlled clock: DCF77 / 77.5 kHz
Batteries: 2 x LR6, 1.5 V (AA)
Protection class

Frequency band: 433.92 MHz
max. transmission power: 0.824 mW
Dimensions: approx. 156 x 114.6 x 31 mm
Weight (without batteries): approx. 256 g
Outdoor sensor:
Temperature measuring range: -20 °C to +50 °C
$$ (- 4. 0 ^ {\circ} \mathrm{Fto} + 1 2 2 ^ {\circ} \mathrm{F}) $$
Air humidity measuring range: 20% to 95%
Radio transmission range: max. 100 m (open field)
Batteries: 2 x LRO3, 1.5 V (AAA)
Explanation of display icons
IP rating: IPX 4
Frequency band: 433.92 MHz
max. transmission power: 0.0165 W
Dimensions: approx. 102.5 x 42 x 26 mm
Weight (without batteries): approx. 42 g
Information on battery LR03 (AAA):
Producer: Zhongyin (Ningbo) Battery Co., Ltd
Battery category: Portable battery
Labelling: JYSD152.2024
Place of production: 128 Xingguang Road,
Hi-Tech Park Ningbo, China
Date of production: This information can be found on the
battery.
Weight: 12g
Capacity: This information can be found on the
battery.
Chemical composition: Zinc manganese dioxide
Hazardous substances contained in the battery:
none
fire extinguishing agent to be used:
Any fire class (no restriction)
critical raw materials:
Manganese, graphite, nickel
Information on battery LR6 (AA):
Producer: Zhongyin (Ningbo) Battery Co., Ltd
Battery category: Portable battery
Labelling: JYSD151.2024
Place of production: 128 Xingguang Road,
Hi-Tech Park Ningbo, China
Date of production: This information can be found on the
battery.
Explanation of display icons / Safety
Weight: 23 g
Capacity: This information can be found on the
battery.
Chemical composition: Zinc manganese dioxide
Hazardous substances contained in the
none
battery:
fire extinguishing agent to be used: Any fire class (no restriction)
critical raw materials: Manganese, graphite, nickel
•Safety

Damage due to failure to comply with these operating instructions will invalidate the guarantee! We assume no liability for consequential damage! We assume no liability for material damage or personal injury due to improper handling or failure to comply with the safety instructions!
- Explanation of the signal words
The following signal words are used in this manual:
WARNING! This symbol with the signal word "WARNING" indicates a hazard with a medium level of risk which, if not avoided, may result in death or serious injury.
CAUTION! This symbol with the signal word "CAUTION" indicates a hazard with a low degree of risk which, if not avoided, may result in minor or moderate injury.
ATTENTION: This signal word warns of possible damage to property.
Note: This signal word indicates useful information.
- General safety instructions
WARNING! RISK OF DEATH AND ACCIDENTS FOR TODDLERS AND CHILDREN!
Never leave children unsupervised with the packaging material. Risk of suffocation through packaging material. Children often underestimate the risks. Always keep children away from the product.
This device may be used by children aged 8 years and up, as well as by persons with reduced physical, sensory or mental capacities, or lacking experience and / or knowledge, so long as they are supervised or instructed in the safe use of the device and understand the associated risks. Do not allow children to play with the device. Cleaning and user maintenance must not be performed by children without supervision.
Packaging material is not a toy. Children can get caught in it while playing and suffocate.
- Do not use the product if it is damaged.
Do not expose the radio-controlled weather station to humidity and direct sunlight.
■ Only use the radio-controlled weather station indoors.
This product does not contain any parts that need to be serviced by the customer.
■ Never open or remove the housing of the product.
WARNING! DANGER OF INJURY!

Do not apply pressure to the display and keep sharp objects away from the display. If the display is broken, wear gloves when collecting the individual parts.
In case of skin contact with display fluid, wipe it off with a clean cloth and rinse the skin with plenty of water. Contact a doctor if necessary.
In case of eye contact with display liquid, rinse the eye with plenty of water. Contact a doctor immediately.
If display liquid is swallowed, rinse the oral cavity with water and then drink plenty of water. Contact a doctor immediately.
●Safety instructions for batteries
WARNING! DANGER OF LIFE!
Keep batteries / rechargeable batteries out of the reach of children. In case of swallowing, consult a doctor immediately!
Swallowed batteries can cause burns, perforation of soft tissue and death. Severe burns can occur within 2 hours after swallowing.
- Do not use rechargeable batteries!
Never recharge non-rechargeable batteries. Do not short-circuit batteries / rechargeable batteries and / or open them. Overheating, fire hazard or bursting may result.
- Do not throw batteries/rechargeable batteries into fire or water.
- Do not subject batteries/rechargeable batteries to mechanical strain.
Risk of leaking batteries/rechargeable batteries
CAUTION! Risk of injury!

Leaking or damaged batteries / accumulators can cause burns if they come into contact with the skin. Therefore, wear suitable protective his case.
Avoid extreme conditions and temperatures that may affect the batteries/rechargeable batteries; do not put them on heaters or subject them to direct sunlight.
If batteries/rechargeable batteries have leaked, avoid contact of the battery acid with the skin, eyes and mucous membranes! Rinse the affected region immediately with clear water and contact a physician!
Take leaking batteries/rechargeable batteries out of the product immediately to prevent damage.
Only use batteries/rechargeable batteries of the same type. Do not mix old and new batteries/rechargeable batteries!
Take batteries/rechargeable batteries out of the device if you are not going to use it for longer periods.
ATTENTION: Risk of damage to the product
■ Only use the stated type of batteries/rechargeable batteries!
■ Always replace batteries in pairs.
- Insert the batteries/rechargeable batteries in the product and make sure the polarity (+) and (-) is correct.
- Clean the contacts of batteries/rechargeable batteries and those in the battery compartment with a dry, lint-free cloth or cotton swab before inserting them.
- Immediately remove spent batteries/rechargeable batteries from the product.
- Setup
☐ Place the radio-controlled weather station on a level surface with the foot folded out 6.
☐ Place the outdoor sensor on a level surface. Make sure that the outdoor sensor cannot topple over. IPX4 protection is not guaranteed if the outdoor sensor is horizontal.
- Wall mounting
Note: Do not mount the wireless weather station or outdoor sensor higher than 2m.
The radio-controlled weather station can also be mounted on the wall (suspension eye 2) and can be attached with suitable attachment material. Please observe the conditions on site and ensure sufficient ventilation.
The outdoor sensor (suspension eye 22) may only be used standing up or hanging down. Lying, the IPX4 protection is not guaranteed. For wall mounting, the outdoor sensor can be fixed with suitable mounting material (not included in the scope of delivery). Please observe the conditions on site and do not exceed the 100 m distance (open field) to the radio-controlled weather station.
- Start-up
Note: The maximum range between the radio-controlled weather station and the outdoor sensor is 100 metres. The range might be reduced by obstacles (walls or objects).
Note: Remove all packaging material from the product. Remove all protective films before first use.
Note: You can install the radio-controlled weather station and the outdoor sensor on a surface or hang it on a wall using suspension eyes 2 22.
Note: Ensure sufficient ventilation of the radio-controlled weather station and keep the ventilation slots free from obstruction 5.
•Commissioning the outdoor sensor
☐ Open the battery compartment 20 on the back of the outdoor sensor by sliding the battery compartment cover 21 in the direction indicated by the arrow.
☐ Remove the spent batteries first (if applicable).
☐ Insert two AAA batteries into the battery compartment 20. Observe the correct polarity (+/-).
The control LED 23 on the front of the outdoor sensor flashes briefly. The temperature 59 and the air humidity 58 are displayed.
☐ Close the battery compartment 20 on the back of the outdoor sensor by sliding the battery compartment cover 21 in the opposite direction to that indicated by the arrow.
Note: The control LED 23 flashes once per minute to signal radio transmission.
•Commissioning the radio-controlled weather station
Note: If the batteries are removed or empty, all settings are deleted.
Start-up
☐ Open the battery compartment ☐ 7 on the back of the radio-controlled weather station by opening the battery compartment cover ☐ 8.
☐ Remove the spent batteries first (if applicable).
☐ Insert two AA batteries into the battery compartment ☐ Observe the correct polarity (+/-).
After insertion, you will hear a single beep.
☐ Close the battery compartment 7 on the back of the radio-controlled weather station by closing the battery compartment cover 8.
•Automatic signal detection
After inserting the batteries, you have 20 seconds to set the current air pressure 28 and the weather display 35.
If you do not set anything, the air pressure and the weather are set automatically.
☐ Press the arrow up button 11 or the arrow down button 12 to adjust the air pressure 28.
☐ Press the HISTORY button 15 to confirm your selection.
☐ Press the arrow up button 11 or the arrow down button 12 to adjust the weather display 35 to the weather at your location.
☐ Press the HISTORY button 15 to confirm your selection.
The radio-controlled weather station now automatically tries to detect the radio signal of the outdoor sensor and the DCF radio signal. This procedure can take several minutes.
The RF signal icon 55 flashes while the outdoor sensor's signal is being detected (see Fig. E). The temperature and the air humidity of the outdoor sensor are displayed 47 49 (see Fig. E). If the synchronisation failed, the RF signal icon 55 goes off.
The DCF signal icon 38 flashes while the DCF radio signal is being detected (see Fig. D).
Only the SNOOZE/LIGHT button 3 and the arrow down button 12 function during this time.
Note: You can cancel the signal detection by pressing and holding the arrow down button 12 until the DCF signal icon 38 goes off.
Once the DCF signal is received, the time 43, date 40 and weekday 41 are set automatically. The DCF signal icon 38 goes off.
During daylight saving time, the DST icon 39 is displayed (see Fig. D).
The time is synchronised daily at 01:00, 02:00 and 03:00 o'clock. Another synchronisation takes place at 04:00 and 05:00 o'clock.
•Operation
- Basic settings
☐ Press and hold the SET button 10 for approx. 3 seconds.
A beep sounds and the first setting can be changed.
☐ Press the arrow up 11 or arrow down button 12 to change the respective value.
The following settings are possible:
| °C/°F Setting the temperature unit | |
| Hpa/inHg Setting the air pressure unit | |
| Time zone Setting the time zone | |
| Day month/month day Setting the date display | |
| 24H/12H Setting the time format | |
| Hour Setting the hour | |
| Minutes Setting the minute | |
| Year Setting the year |
Operation
| Month Setting the month | |
| Day Setting the day | |
| Language Setting the language | |
| Country Setting the country | |
| City Setting the city | |
| RCC on/offSwitching reception of the DCF | radio signal on and off |
☐ Press the SET button 10 to confirm the set value.
This will take you to the next setting.
- Locations
| Country/City | Abbr. | |
| DE | Aachen | AC |
| Berlin | B | |
| Duesseldorf | D | |
| Dresden | DD | |
| Erfurt | EF | |
| Frankfurt | F | |
| Flensburg | FL | |
| Fribourg | FR | |
| Hanover | H | |
| Bremen | HB | |
| Hamburg | HH | |
| Rostock | HRO | |
| Stralsund | HST |
| Country/City | Abbr. | |
| Cologne | K | |
| Kiel | KI | |
| Kassel | KS | |
| Leipzig | L | |
| Munich | M | |
| Magdeburg | MD | |
| Nuremberg | N | |
| Regensburg | R | |
| Stuttgart | S | |
| Saarbruecken | SB | |
| Schwerin | SN | |
| DK | Aalborg | ALB |
| Aarhus | ARH | |
| Country/City | Abbr. | |
| Copenhagen | CPH | |
| Odense | ODE | |
| ES | Alicante | ALI |
| Andorra | AND | |
| Badajoz | BAD | |
| Barcelona | BAR | |
| Bilbao | BIL | |
| Cadiz | CAD | |
| Cordoba | COR | |
| Ibiza | IBZ | |
| La Coruna | LCO | |
| Leon | LEO | |
| Las Palmas | LPA | |
| Madrid | MAD | |
| Malaga | MAL | |
| Palma de Mallorca | LPM | |
| Salamanca | SAL | |
| Seville | SEV | |
| Valencia | VAL | |
| Sarragossa | ZAR | |
| FR | Besancon | BES |
| Biarritz | BIA | |
| Bordeaux | BOR | |
| Country/City | Abbr. | |
| Brest | BRE | |
| Cherbourg | CHE | |
| Clermont-Ferrand | CMF | |
| Lyon | LYO | |
| Marseille | MAR | |
| Monaco | MCO | |
| Metz | MET | |
| Nantes | NAN | |
| Nice | NIC | |
| Orleans | ORL | |
| Paris | PAR | |
| Perpignan | PER | |
| Lille | LIL | |
| Rouen | ROU | |
| Strasbourg | STR | |
| Toulouse | TOU | |
| GB | Aberdeen | ABD |
| Birmingham | BIR | |
| Bristol | BRI | |
| Edinburgh | EDH | |
| Glasgow | GLW | |
| London | LON | |
| Manchester | MAN | |
| Country/City | Abbr. | |
| Plymouth | PLY | |
| BG | Sofia | SOF |
| Burgas | BUR | |
| EE | Tallinn | TAL |
| Paide | PAI | |
| LT | Vilnius | VIN |
| Kaunas | KAU | |
| LV | Riga | RI |
| Daugavpils | DAU | |
| FI | Helsinki | HEL |
| HU | Budapest | BUD |
| Debrecen | DEB | |
| HR | Zagreb | ZAG |
| IT | Ancona | ANC |
| Bari | BAI | |
| Bologna | BOL | |
| Cagliari | CAG | |
| Catania | CAT | |
| Firenze | FIR | |
| Foggia | FOG | |
| Genova | GEN | |
| Lecce | LEC | |
| Messina | MES | |
| Country/City | Abbr. | |
| Milano | MIL | |
| Napoli | NAP | |
| Palermo | PAL | |
| Parma | PAR | |
| Perugia | PER | |
| Rome | ROM | |
| Torino | TOR | |
| Trieste | TRI | |
| Venice | VEN | |
| Verona | VER | |
| Ventimiglia | VTG | |
| IE | Dublin | DUB |
| NI | Belfast | BEL |
| LUX | Luxembourg | LUX |
| NL | Amsterdam | AMS |
| Arnhem | ARN | |
| Eindhoven | EIN | |
| Enschede | ENS | |
| Groningen | GRO | |
| Den Haag | HAA | |
| Rotterdam | ROT | |
| PT | Evora | AVO |
| Coimbra | COI | |
| Country/City | Abbr. | |
| Faro | FAR | |
| Leiria | LEI | |
| Lisbon | LIS | |
| Porto | POR | |
| PL | Gdansk | GDZ |
| Krakow | KKW | |
| Poznan | POZ | |
| Szczecin | SZC | |
| Warsaw | WAW | |
| SE | Goteborg | GOT |
| Malmo | MLO | |
| Stockholm | STO | |
| SK | Bratislava | BRV |
| SL | Ljubljana | LJU |
| Maribor | MA | |
| RS | Belgrade | BEE |
| Novi Sad | NS | |
| AT | Graz | GRZ |
| Innsbruck | INN | |
| Linz | LNZ | |
| Salzburg | SLZ | |
| Vienna | VIE | |
| Country/City | Abbr. | |
| BE | Antwerp | ANT |
| Bruges | BRG | |
| Brussels | BRU | |
| Charleroi | CHA | |
| Liege | LIE | |
| CH | Basel | BAS |
| Bern | BER | |
| Chur | CHR | |
| Geneva | GNV | |
| Locarno | LOC | |
| Lucerne | LUC | |
| St. Moritz | MOR | |
| St. Gallen | SGL | |
| Sion | SIO | |
| Vaduz | VDZ | |
| Zurich | ZUR | |
| CZ | Prague | PRG |
| MD | Chișinău | CIS |
| MT | Valletta | VLT |
| RO | Bucharest | BUK |
| GR | Athens | ATH |
| CY | Nikosia | NIK |
- Changing the °C/°F display of the outdoor sensor
☐ Open the battery compartment 20 on the back of the outdoor sensor by sliding the battery compartment lid 21 in the direction of the arrow.
□ Use a thin object for assistance.
□ Press the °C/°F button 17.
☐ Close the battery compartment 20 on the back of the outdoor sensor by sliding the battery compartment lid 21 counter to the direction of the arrow.
- Activating the background illumination of the radio-controlled weather station
☐ Press the SNOOZE/LIGHT button 3.
The background illumination of the display lights up for approx. 5 seconds.
•Moon phases
The moon phases icon 29 shows the current moon phase. The light area indicates the visible part of the moon.
•Daily MIN/MAX values
The radio-controlled weather station saves the highest and lowest measured temperature and air humidity value of the current day. For this purpose, the values of the radio-controlled weather station are analysed.
The values are each reset at midnight (00:00 hrs) or by pressing and holding the arrow up button 11.
□ Briefly press the arrow up button 11.
"MAX" 52 is displayed (see Fig. E).
The highest measured temperature 47 is displayed.
The highest measured air humidity 49 is displayed.
□ Briefly press the arrow up button 11 again while "MAX" is displayed.
"MIN" 52 is displayed (see Fig. E).
The lowest measured temperature 47 is displayed.
The lowest measured air humidity 49 is displayed.
- Battery state warning
When the batteries get weak, the corresponding symbols 51 37 57 are shown on the displays of the radio-controlled weather station 1 and the outdoor sensors 24.
☐ Replace the batteries in the radio-controlled weather station or the outdoor sensor.
•Air pressure history
You can call up the air pressure values measured in the past 12 hours.
Note: Three dashes are displayed if there are no measuring values available for a certain point in time.
□ Briefly press the HISTORY button 15.
The hourly display 27 shows the value of the past hour (-1).
□ Press the HISTORY button 15 again.
Each time you press the HISTORY button 15 the hourly display 27 moves back another hour (or 2, or 3, etc.).
The pressure display 28 indicates the air pressure 4 hours previously, for example.
•Trends
Air pressure trend
The air pressure trend display 26 shows you the air pressure trend.
Temperature trend and air humidity trend
The radio-controlled weather station trend display 34 and the outdoor sensor trend display 48 shows you the temperature and air humidity trend.
- Configuring the alarm function
The product features two alarm functions that can be separately configured.
☐ Press the SET button 10 to toggle between the two alarm functions.
☐ Confirm your selection by pressing and holding the SET button 10. The hour display starts to flash.
☐ Press the arrow up ☐ 11 or arrow down button ☐ 2 to set the desired hour.
☐ Confirm your selection by pressing the SET button 10.
☐ Press the arrow up 11 and arrow down button 12 to set the desired minute.
☐ Confirm your selection by pressing the SET button 10.
The time of one alarm function has been configured.
Note: The alarm function must be manually activated to become active (see section "Activating/deactivating the alarm function").
- Activating/deactivating alarm functions
The bell icons 45 42 indicate whether an alarm function is activated or deactivated (see Fig. D).
☐ Press the SET button 10 to toggle between the two alarm functions.
☐ Press the arrow up button 11 to activate the alarm function.
The respective alarm bell icon is displayed.
☐ Press the arrow down button 12 to deactivate the alarm function.
The respective alarm bell icon is no longer displayed.
- Snoozing/switching off the alarm function
The alarm of the alarm function sounds at the set time.
□ Briefly press the SNOOZE/LIGHT button 3 to activate the snooze function.
The snooze icon 46 (see Fig. D) starts to flash and the alarm sounds again in 5 minutes.
☐ Press any button on the back of the radio-controlled weather station.
The alarm function stops.
- Switching the display of the added outdoor sensors
□ Press the CH button 16.
The channel display 54 shows the channel of the outdoor sensor. Once you have added the outdoor sensor to the selected channel, the data of the outdoor sensor is displayed.
- Adding an outdoor sensor
Note: You can connect up to three outdoor sensors to the radio-controlled weather station. Additional outdoor sensors are available from the order service.
□ Briefly press the CH button 16.
The radio channel changes. The currently selected channel is indicated in the channel display icon 54 (see Fig. E).
☐ Open the battery compartment 20 on the back of the outdoor sensor by sliding the battery compartment cover 21 in the direction indicated by the arrow.
☐ Use a thin object if necessary.
☐ Set the channel selection switch 19 to the same channel.
□ Keep the CH button 16 pressed until the RF signal symbol 55 lights up.
□ Use a thin object if necessary.
Operation
☐ Press the TX button 18 to manually establish the connection.
Reception is established. The temperature and the air humidity are indicated on the radio-controlled weather station and on the outdoor sensor.
☐ Close the battery compartment 20 on the back of the outdoor sensor by sliding the battery compartment cover 21 in the opposite direction to that indicated by the arrow.
•Temperature alarm
Only one temperature range can be configured for each outdoor sensor. When the outdoor sensor measures a value below the set temperature range, an alarm sounds on the radio-controlled weather station.
□ Press the ALERT button 13.
The temperature alarm is activated and the icon 53 (see Fig. E) is lit.
☐ Press and hold the ALERT button 13 for 2 seconds.
The temperature display 47 starts to flash and shows the upper temperature limit.
☐ Press or hold the arrow up 11 or arrow down button 12 to set the upper temperature limit.
☐ Press the ALERT button 13 to confirm your selection.
The temperature display 47 continues flashing and shows the set lower temperature limit.
☐ Press or hold the arrow up ☐ or arrow down button ☐ to set the lower temperature limit.
☐ Press the ALERT button 13 to confirm your selection.
The temperature alarm is set.
As soon as the temperature alarm sounds, you can switch it off by pressing the SNOOZE/LIGHT button 3.
•Cold weather warning
The cold weather warning icon 36 starts to blink when the outdoor sensor measures temperatures between +1 °C and -1 °C.
The cold weather warning icon 36 is displayed constantly when the outdoor sensor measures temperatures of -1.1 °C and below over a longer period.
•Room name
You can assign a room name to each channel.
Choose one of the 5 predefined ones or configure your own room name.
Selecting a predefined room name
□ Press the ROOM button 14.
The room name 50 starts to blink (see Fig. E).
☐ Press the ROOM button 14 to select one of the predefined names.
☐ Do not press a button for approx. 10 seconds to confirm your selection.
Configuring your own room name
□ Press the ROOM button 14.
The room name 50 starts to blink (see Fig. E).
☐ Switch to the configurable room name (indicated by the 5 dashes in factory-set state).
The freely configurable room name can consist of up to 5 characters/letters.
☐ Keep the ROOM pressed 14 until the first dash starts to blink.
☐ Press the arrow up button 11 or the arrow down button 12 to change your selection at the current position.
You can also keep the arrow up 11 and arrow down button 12 depressed to navigate faster through the selection.
□ Briefly press the ROOM button 14 to confirm your selection.
Operation / Maintenance and cleaning / Troubleshooting
☐ Change another position or keep the ROOM button 14 depressed to confirm the entered name.
●Maintenance and cleaning
Do not use aggressive cleaning agents, brushes with metal or nylon bristles or sharp or metallic cleaning objects such as knives, hard spatulas and the like. These can damage the surfaces.
This product does not contain any parts that need to be serviced by the customer.
☐ Only use a dry, lint-free cloth for cleaning.
- Troubleshooting
The product contains sensitive electronic components. Radio transmitting devices in the immediate vicinity may interfere with the function. Remove such devices from the vicinity of the product if the display shows interference.
Electrostatic discharges can cause malfunctions. In the event of such malfunctions, remove the battery briefly and reinsert it.
Obstacles, such as concrete walls, can also cause the reception to be severely disturbed. In this case, change the location. Observe the maximum range of the outdoor sensor (see technical data). This range is the free-field range. Any obstacle reduces the range.
Cold (outdoor temperatures below 0 °C ) can negatively affect the battery performance of the outdoor sensor and thus the radio transmission. Exhausted batteries of the outdoor sensor lead to reception disturbances. Replace the batteries with new ones.
If the product does not work properly, remove the batteries for a short moment and then reinsert them or press the RESET button 4. This will reset all settings.
- Storage
ATTENTION: Risk of damage!
Place the product so that it cannot fall into the water.
■ Store the product in a clean, dry, frost-free place inaccessible to children.
□ Clean the product thoroughly (see chapter "Cleaning").
☐ If possible, pack the product in the original packaging.
☐ Store the product in a dry and frost-free place ( ≥ +5 ^ ) without direct sunlight.
- Order service
You can order additional outdoor sensors by fax to: +49(0)6198-5770-99 or online at www.inter-quartz.de. One outdoor sensor costs 5 € plus VAT and shipping.
- Disposal

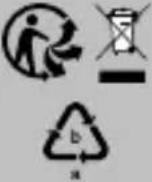
The product and the packaging materials can be recycled. Dispose of them separately to ensure better recycling. Your local community or municipal authorities can provide information on how to dispose of the product after the end of its useful life.
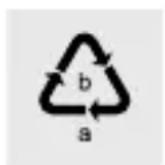
Note the labels of the packaging materials when sorting the waste. These list the abbreviation (a) and number (b) with the following meaning:
1-7: plastics; 20-22: paper and cardboard; 80-98: composites.
The following declaration is only valid for Germany:
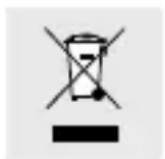
The symbol with the crossed-out dustbin means that electrical and electronic equipment must not be disposed of together with household waste. Consumers are legally obliged to dispose of electrical and electronic equipment at the end of its life separately from unsorted munic-
Disposal
ipal waste. This ensures that recycling is carried out in an environmentally friendly and resource-saving manner.
Batteries and accumulators that are not firmly enclosed in the electrical or electronic equipment and can be removed without being destroyed must be separated from the equipment before it is handed in at a collection point and sent to a designated disposal point. The same applies to lamps that can be removed from the appliance without being destroyed.
Owners of electrical and electronic equipment from private households can hand it in at the collection points of the public waste management authorities or at the collection points set up by the manufacturers or distributors as defined by the ElektroG. The return of old appliances is free of charge.
Please return the old appliance to your LIDL-shop.
Retailers with a sales area of at least 400 m2 for electrical and electronic equipment are obliged to take back the equipment. The same applies to grocery retailers with a total sales area of at least 800 m2, provided they offer electrical and electronic equipment on a permanent basis or at least several times a year. Distance sellers with a storage area of at least 400 m2 for electrical and electronic equipment or a total storage area of at least 800 m2 are also obliged to take back electrical and electronic equipment. In general, distributors have the obligation to ensure the free take-back of WEEE by providing suitable take-back facilities within a reasonable distance.
Consumers have the option of returning an old appliance free of charge to a distributor who is obliged to take it back if they purchase an equivalent new appliance with essentially the same function. This possibility also exists for deliveries to a private household. In distance selling, the possibility of free collection upon purchase of a new appliance is limited to heat exchangers, display screen equipment and large appliances with at least one outer edge longer than 50 cm. The distributor has to ask the consumer at the time of the conclusion of the sales contract about a corresponding intention to return. Apart from that, consumers may return up to three WEEE of one type to a collection point of a distributor free of
charge, without this being linked to the purchase of a new appliance. However, the edge lengths of the respective appliances must not exceed 25 cm.
Consumers are encouraged to take measures to avoid waste. With regard to electrical and electronic equipment, these are extending its life by repairing defective equipment and disposing of functioning used equipment instead of sending it for disposal.
Remove the battery without destroying it before disposal and dispose of it separately (see Disposal of batteries).
The following declaration is valid in all countries except Germany:
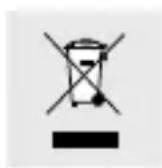
The icon with the crossed-out waste bin indicates that electrical and electronic equipment must not be disposed of in the household waste. Consumers are obligated by law to dispose of obsolete electrical and electronic equipment separate from unsorted household waste. This ensures environmentally friendly and resource-saving disposal.
Batteries and rechargeable batteries that are not permanently installed in electrical and electronic equipment and can be removed without destruction must be separated from such devices and disposed of properly before turning the device over to a collection point. The same applies for illuminants that can be removed from the device without destruction.
Private owners of electrical and electronic devices can dispose of these at municipal collection points. The disposal of obsolete devices is free of charge.
This free take-back obligation applies if the device has been purchased at a store or delivered to a home address. The place of performance of the take-back obligation is the same as the place of performance of the delivery. Transport charges may not be invoiced for the returned devices.
In general, distributors are obligated to ensure the free take-back of obsolete devices through suitable collection points within a reasonable distance.
Consumers can return obsolete devices to a take-back distributor if purchasing a new device of the same type with essentially the same function. This also applies to
Disposal / Warranty and service
home deliveries. In distance selling, the free pick-up of an obsolete device when purchasing a new device is restricted to heat exchangers, visual display units and large devices with an outer edge length of more than 50 cm. The seller has to ask the consumer about their intention to return the obsolete device at the time the sales agreement is concluded. Apart from this, consumers can dispose of up to three obsolete devices of the same type at the seller's collection point free of charge without having to purchase a new device. However, the edge length of the respective devices must not exceed 25 cm.
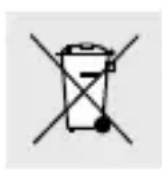
The symbols on the side mean that batteries and rechargeable batteries must not be disposed of in the household waste. Defective or spent batteries/rechargeable batteries must be recycled in accordance with Directive (EU) 2023/1542 and its revisions. Consumers are obligated by law to dispose of batteries and rechargeable batteries at a collection point in their community/district or at a retailer, regardless of whether they contain hazardous substances, such as Cd = cadmium, Hg = mercury, Pb = lead, Li = lithium, or not. This way, they can be disposed of in an environmentally-friendly manner or recycled to recover valuable raw materials, such as cobalt, nickel or copper.
Batteries and rechargeable batteries can be returned free of charge.
• Warranty and service
•Warranty
The warranty period starts on the date of purchase. Please keep the sales receipt in a safe place. This sales receipt is required as proof of purchase.
If a material or manufacturing defect occurs within three years from the date of purchase, we will, at our discretion, repair or replace the product free of charge. This warranty service requires that you present the defective appliance and the proof of purchase (receipt) within the three-year warranty period, along with a brief written description of the fault and when it occurred. If the defect is covered
by the warranty, your product will either be repaired or replaced by us. If the product is repaired or exchanged, this does not start a new warranty period.
Damage caused by improper handling, failure to comply with the user manual or interference by unauthorised persons as well as consumables (e.g., batteries) are excluded by the warranty. The repair or replacement of a product does not signify the beginning of a new warranty period.
Handling of warranty claims
To ensure that your claim is processed quickly, please follow the instructions below:
- Please have the sales receipt and the item number (IAN 466444_2404) at hand as proof of purchase.
- The item number is indicated on the type plate, on the cover page of your manual (bottom left) or on the sticker on the back or on the bottom.
- In the case of malfunctions or other defects, please contact the service department below first by phone or e-mail.
•Service address
Inter-Quartz GmbH
Valterweg 27A
65817 Eppstein-Bremthal
GERMANY
Tel: +49 (0)6198 571825
E-mail: support@inter-quartz.de

AT BE DE ES FI FR GB IE IT NI NL PT SE 00800 5515 6616
BG 00800 1114916 00800 44140855 00800 44 FL 493
CH 0800 563862 0800 2R2943 0800 896640
CY 8009 4403 0680 981220 0800 191026
CZ 800 142 315 8800 331 39 0800 80847
DK 800 5515 6616 8000 5884 0800 004449
EE 80000 49116 800 62851
IAN 466444\_2404
Please have your receipt and the article number (e.g. IAN 466444_2404) ready as your proof of purchase when enquiring about your product.

Year of manufacturing: 2024
Supplier
Please note that the address on the back is not a service address. First, contact the service point indicated above.
- Simplified EU declaration of conformity
digi-tech gmbh hereby declares that the "Radio-controlled weather station 4-LD6774" product complies with the directive RoHS 2011/65/EU and amendment (EU) 2015/863 and RED directive 2014/53/EU and the battery regulation (EU) 2023/1542.
You can download your operating instructions and declaration of conformity here: www.digi-tech-gmbh.com/downloads
Subsequently click the magnifying glass and enter the item number 466444_2404.
Montage mural......Page 85
Mise en marche......Page 86
www.digi-tech-gmbh.com/downloads
Producent: Zhongyin (Ningbo) Battery Co., Ltd
Categorie batterij: Draagbare batterij
Aanduiding: JYSD152.2024
Hi-Tech Park Ningbo, China
Producent: Zhongyin (Ningbo) Battery Co., Ltd
Categorie batterij: Draagbare batterij
Aanduiding: JYSD151.2024
Hi-Tech Park Ningbo, China
WAARSCHUWING! GEVAAR VOOR LETSEL!

WAARSCHUWING! LEVENSGEVAAR!
Gooi batterijen/accu's nooit in vuur of water.
www.digi-tech-gmbh.com/downloads
www.digi-tech-gmbh.com/downloads
Potom kliknite na lupu a zadajte číslo položky 466444_2404.
Hi-Tech Park Ningbo, China
Hi-Tech Park Ningbo, China
www.digi-tech-gmbh.com/downloads
Producent: Zhongyin (Ningbo) Battery Co., Ltd
Batterikategori: Bærbart batteri
Hi-Tech Park Ningbo, China
Producent: Zhongyin (Ningbo) Battery Co., Ltd
Batterikategori: Bærbart batteri
Hi-Tech Park Ningbo, China
www.digi-tech-gmbh.com/downloads