USER MANUAL USBD1 A1 ULTIMATE SPEED
OWIM GmbH & Co. KG
Stiftsbergstraße 1
74167 Neckarsulm
GERMANY
Model No.: HG11474
Version: 09/2025
IAN 480247_2504
8=
PREMIUM-KFZ-BATTERIE-DIAGNOSEGERÄT / PREMIUM CAR BATTERY TESTER / TESTEUR DE BATTERIE DE VOITURE PREMIUM USBD1 A1
DE AT BE CH
PREMIUM-KFZ-BATTERIE-DIAGNOSEGERÄT
Bedienungsanleitung
GB IE


Scan QR code with mobile phone for test result.
C
D


F
Waveform
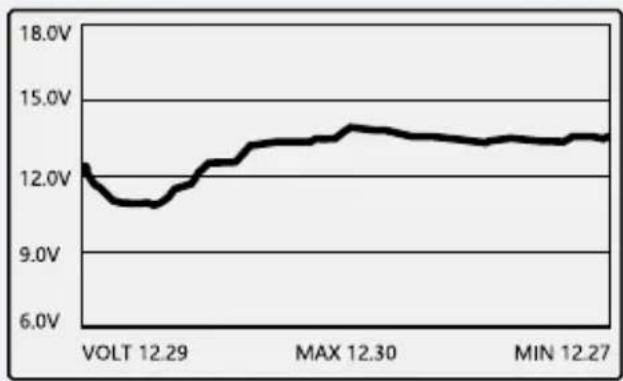
line
| Time | Voltage |
| -------- | ------- |
| VOLT 12.29 | 12.0V |
| MAX 12.30 | 14.0V |
| MIN 12.27 | 13.5V |
Save Voltage Data
"OK" to save
"←" to exit
G
line
| Time | Voltage |
| ---------- | ------- |
| VDLT 12.29 | 12.0V |
| MAX 12.30 | 14.0V |
| MIN 12.27 | 14.0V |

H


Intended use.... Page 34
Scope of delivery.... Page 34
Parts list Page 34
Technical data Page 35
Car, truck and motorcycle battery measure range. . . . . . . . . . . . . . . . . . . . . . . . . . . . . . . . . . . . . . . . . . . . . . . . . . . . . . . . . . . . . . . . . . . . . . . . . . . 35
General safety instructions.... Page 36
First set-up of the product Page 40
Unpacking the product. Page 40
Preparation Page 40
Connecting the clamps.... Page 40
Operating the product.... Page 40
Battery test Page 40
Selecting the battery application.... Page 40
Selecting the battery type ...... Page 40
Selecting the battery standard.... Page 40
Selecting the battery rated value.... Page 41
Battery test result ...... Page 41
Cranking test Page 42
Selecting the cranking test....Page 42
Selecting the battery voltage.... Page 42
Conducting the cranking test Page 42
Charging test Page 42
Selecting the charging test.... Page 43
Selecting the battery voltage.... Page 43
Conducting the charging test.... Page 43
Unloaded Test Page 43
Loaded test.... Page 43
Ripple test.... Page 43
QR code.... Page 44
Waveform Page 44
Review Page 45
Setup Page 45
Setup Page 45
Fn Page 45
Language.... Page 45
Beep.... Page 45
Brightness.... Page 46
About Page 46
Notes on battery testing.... Page 46
Troubleshooting Page 46
Cleaning and care Page 46
Storage Page 47
Disposal Page 47
Warranty Page 47
Warranty claim procedure.... Page 48
Service.... Page 48
| List of pictograms used |
 | Read the user manual. |  | NOTICE! - Warns of possible damage to property/the product if not avoided (e.g. risk of short circuit) |
 | DANGER! - Designating a hazard with high risk, which will result in death or severe injury if not avoided (e.g. risk of suffocation) |  | INFO: This symbol with the "Info" signal word offers additional useful information. |
| - - - - | Direct current/voltage |
 | WARNING! - Designating a hazard with moderate risk, which can result in death or severe injury if not avoided (e.g. risk of electric shock) |  | Use the product in dry areas only. |
 | Safety information Instructions for use |
 | CAUTION! - Designating a hazard with low risk, which could result in minor or moderate injury if not avoided (e.g. risk of scalding) |  | CE mark indicates conformity with relevant EU directives applicable for this product. |
We congratulate you on the purchase of your new product. You have chosen a high quality product. The instructions for use are part of the product. They contain important information concerning safety, use and disposal. Before using the product, please familiarise yourself with all of the
safety information and instructions for use. Only use the product as described and for the specified applications. If you pass the product on to anyone else, please ensure that you also pass on all the documentation with it.
Intended use
This product is intended to:
- perform an analyzer test for 24 V/12 V/6 V lead-acid batteries
- test 24 V/12 V vehicle starting system and charging system
The product displays the test results on a mobile phone by scanning the QR code.
■ Use the product in dry areas only.
The product is only suitable for use in private households and is not intended for commercial use.
- Scope of delivery
After unpacking the product, check if the delivery is complete and if all parts are in good condition. Remove all packaging materials before use.
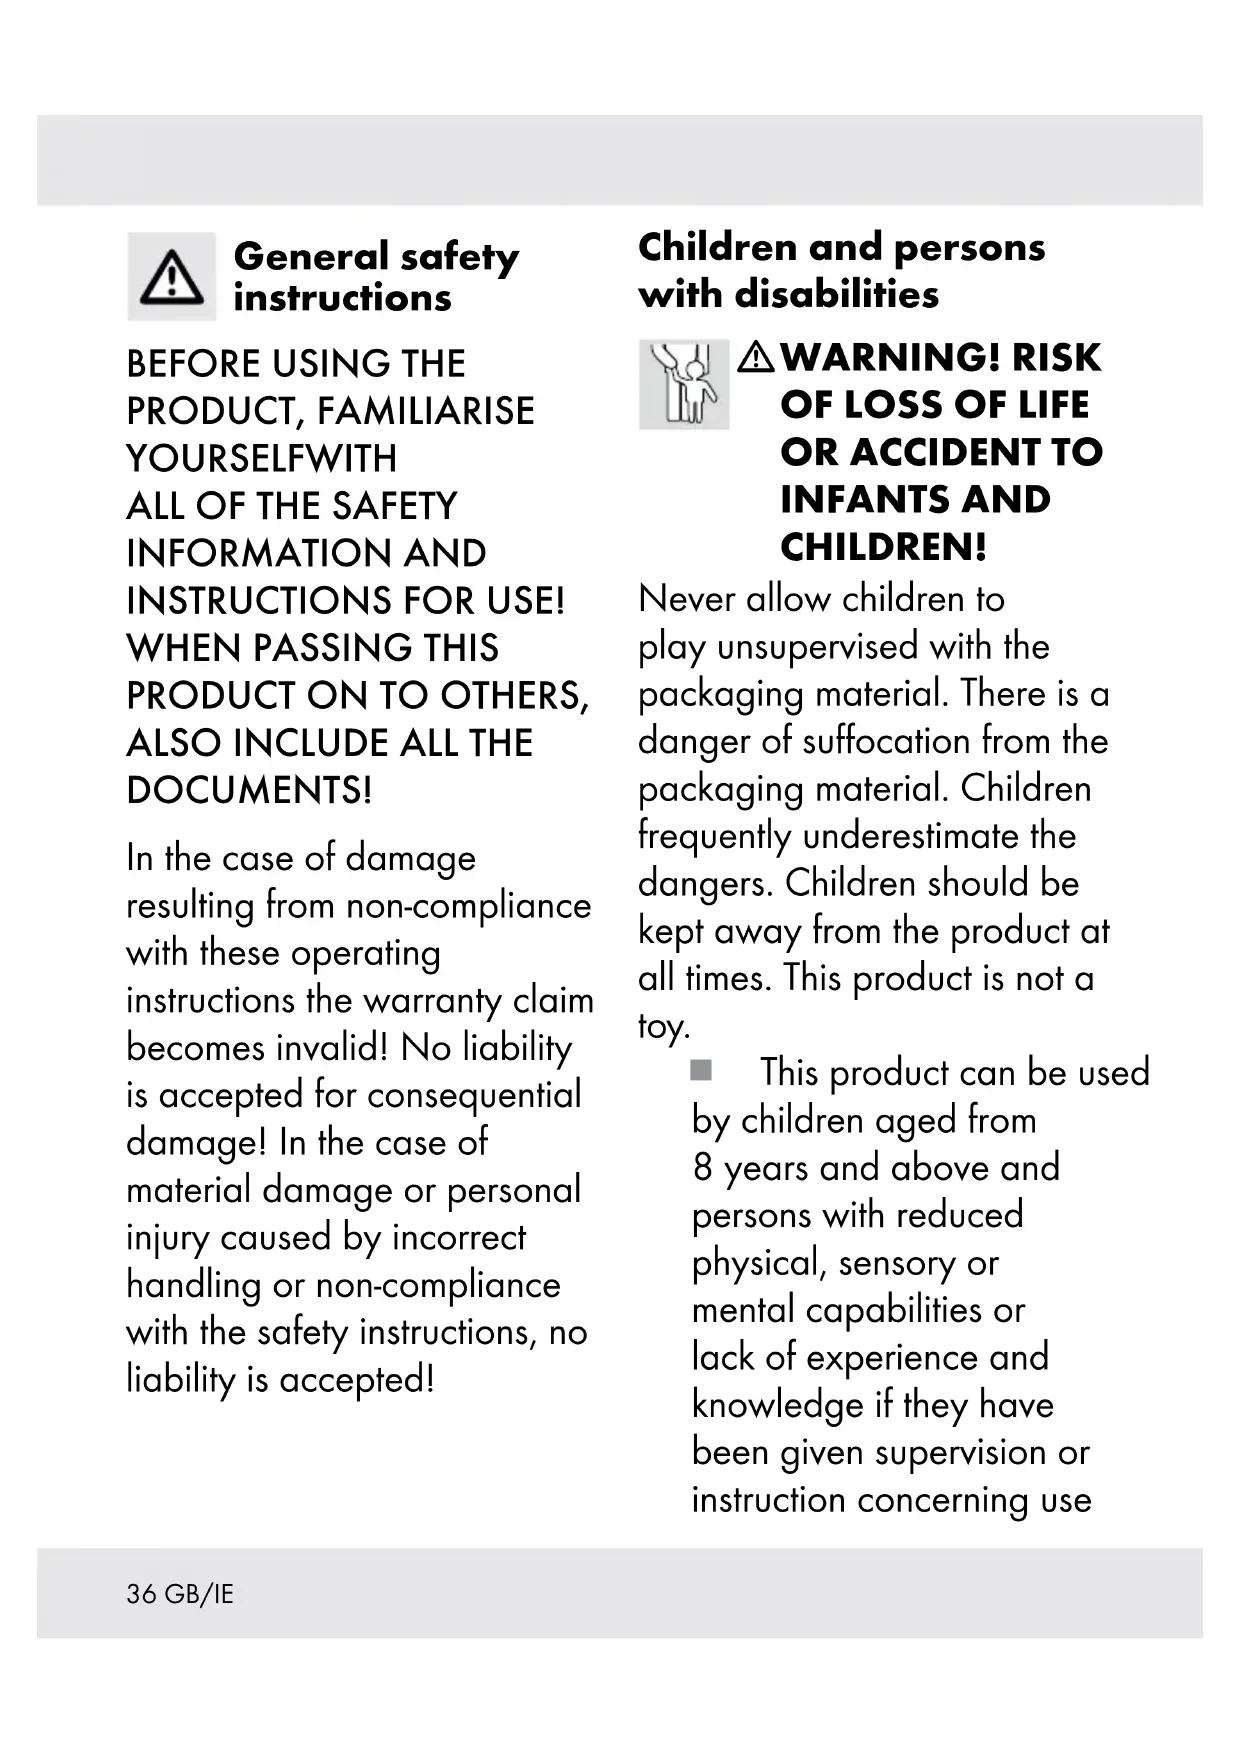
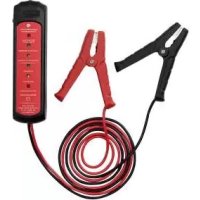
1 Premium car battery tester
1 Short manual
Parts list
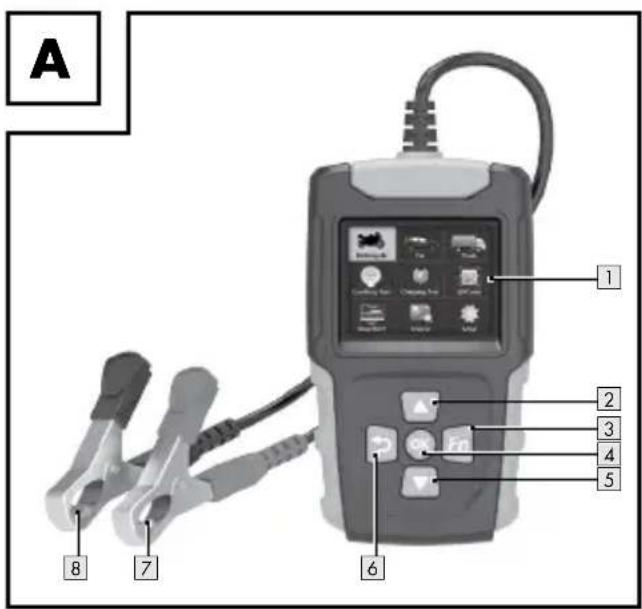
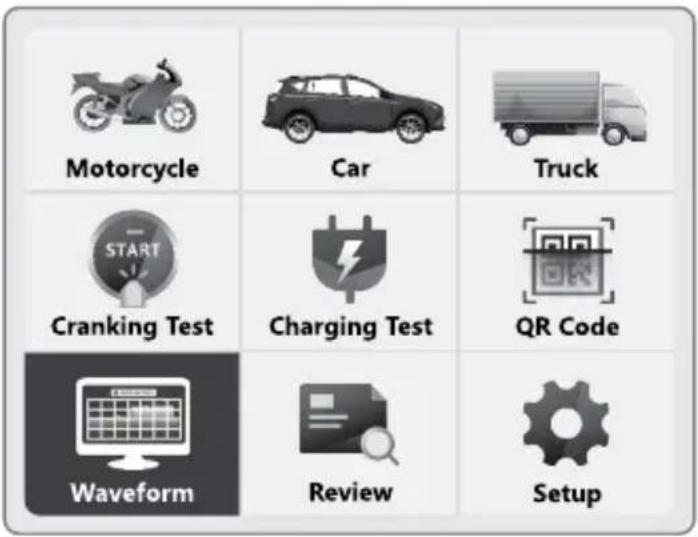
(Fig. A)
1 Display
2 ▲Up button)
3 Fn (short cut key of battery test or waveform)
4 OK (Make a selection or save change)
5 Down button)
6 Back button: to interrupt or cancel an operation, to exit full-screen mode)
7 Red clamp (+)
8 Black clamp (−)
① INFO: The screenshots (Fig. B to H) are for reference only.
- Technical data
| Model number: HG11474 | |
| Applicable battery: 6 V/12 V/24 V lead-acid battery |
| Input voltage range: 5 V to 32 V | —— |
| Ambient temperature: 0 °C to +45 °C |
| Humidity: max. 95 %, non-condensing |
| Altitude: max. 2,000 m above sea level |
● Car, truck and motorcycle battery measure range
| Association/Standard | Measure range |
 |  |
| CCA Cold Cranking Amps 100-2,000 A 20-1,000 A | | |
| IEC International Electrotechnical Commission Standards 100-1,400 A 20-700 A | | |
| EN | European Automobile Industry Association Standards | 100-2,000 A 20-1,000 A | |
| SAE | Society of Automotive Engineer Standards | 100-2,000 A 100-1,000 A | |
| DIN | Germany's National Standards Organization (Deutsches Institut für Normung) | 100-1,400 A 20-700 A | |
| CA | Cranking Amps Standards | 100-2,000 A | 20-1,000 A |
| MCA | Marine Cranking Amps Standards | 100-2,000 A 20-1,000 A | |
| BCI | British Council International Standards | 100-2,000 A 10-1,000 A | |
| GB | National Standards of the People's Republic of China | 30-220 Ah | 2-120 Ah |
| JIS | Japanese Industrial Standards | 26A17-245H52 | 26A17-150F51 |

General safety instructions
BEFORE USING THE
PRODUCT, FAMILIARISE
YOURSELFWITH
ALL OF THE SAFETY
INFORMATION AND
INSTRUCTIONS FOR USE!
WHEN PASSING THIS
PRODUCT ON TO OTHERS,
ALSO INCLUDE ALL THE
DOCUMENTS!
In the case of damage
resulting from non-compliance
with these operating
instructions the warranty claim
becomes invalid! No liability
is accepted for consequential
damage! In the case of
material damage or personal
injury caused by incorrect
handling or non-compliance
with the safety instructions, no
liability is accepted!
Children and persons with disabilities

⚠ WARNING! RISK OF LOSS OF LIFE OR ACCIDENT TO INFANTS AND CHILDREN!
Never allow children to play unsupervised with the packaging material. There is a danger of suffocation from the packaging material. Children frequently underestimate the dangers. Children should be kept away from the product at all times. This product is not a toy.
This product can be used by children aged from 8 years and above and persons with reduced physical, sensory or mental capabilities or lack of experience and knowledge if they have been given supervision or instruction concerning use
of the product in a safe way and understand the hazards involved.
■ Children shall not play with the product.
■ Cleaning and user maintenance shall not be made by children without supervision.
■ Children must never be allowed to play with the product.
- Do not use the product if it is damaged.
■ Damaged products represent a danger of death from electric shock!
■ Do not expose the product to:
to:
—extreme temperatures
—strong vibrations
—heavy mechanical loads
—direct sunlight
—moisture
Otherwise there is a danger that the product will be damaged.
The guarantee does not cover damage caused by incorrect handling, non-compliance with the user manual or interference with the product by unauthorised individuals.
- Do not disassemble the product under any circumstances. Improper repairs may place the user in considerable danger.
Repairs should only be carried out by qualified persons.
- Keep the product clean.
- Do not expose the product
—extreme heat or cold
—extreme temperature fluctuations
Failure to observe this advice could lead to condensation forming.
Wait until the product has reached temperature of the room before you use it.
Before inspection, read the manufacturer's instructions for the respective battery.
■ Never place tools on a vehicle battery, as this can lead to a short circuit between the terminals. This could damage the product, the tools or the battery.
■ Engine parts become very hot when the engine is running. Avoid contact with hot engine parts to prevent severe burns.
■ When the engine is running: Be cautions when working around:
—the ignition coil
—the distributor cap
—the ignition wires
—the spark plugs
These parts are high voltage components that can cause electrical shock.
■ Always block the drive wheels. Never leave a vehicle unattended while testing.
- Do not allow water or moisture to enter the product.
■ Fuel and battery vapours are highly flammable. Do not smoke near the vehicle during testing.
⚠ WARNING! Before
starting the engine
for testing or trouble
shooting, always make
sure the parking brake is
firmly engaged. Put the
transmission in neutral
transmission.
⚠️ CAUTION! When the engine is running, many parts (such as pulleys, coolant fans, belts etc.) turn at high speed. To avoid serious injury, always be alert and keep a safe distance from these parts.
If the insulated layer of the cable is damaged, it may cause a short circuit. Stop using the product immediately and send it for repair.
■ After the test: Remove the clamps from the battery terminal. Otherwise it may cause the product to malfunction or damage the battery.
- Do not use alcohol-based liquids to wipe the product. The product may crack.
- Do not allow engine oil to adhere to the metal parts of the clamps. This may cause poor contact.
If the battery terminals are oxidised or heavily corroded, the conductivity is poor.
- Do not attach the clamps directly onto the steel bolt that tightens to the battery terminal posts. This may give inaccurate readings or inconsistent results.
For use in dry areas only. The product shall not be exposed to dripping or splashing. Do not use the product in wet or high humidity areas.
If the product is used in a manner not specified by the manufacturer, the protection provided by the product may be impaired.
- Do not open the product. No user replaceable or maintenance parts inside. Contact qualified persons for repairs.
● First set-up of the product
Battery test
- Unpacking the product
- Take the product out of the packaging and remove all packaging materials and plastic wrappings.
- Check to make sure that all listed parts are included (see "Scope of delivery").
- Check whether the product and all parts are in good condition, if any damage or defect is detected, do not use the product, but follow the procedure described in chapter "Warranty".
● Preparation
Connecting the clamps
- Connect the red clamp 7 to the positive (+) pole of the vehicle battery.
- Connect the black clamp 8 to the negative (−) pole of the vehicle battery. The display 1 lights up within a few seconds.
- Operating the product
-
Selecting a menu item:
Press ▲ 2 or ▼ 5.
-
Confirming the selection: Press OK 4.
(See Fig. B)
i INFO:
☐ Switch off the vehicle engine and all other accessory loads before testing. Otherwise the test results are not accurate.
☐ Compare the battery test results with the data of the battery label.
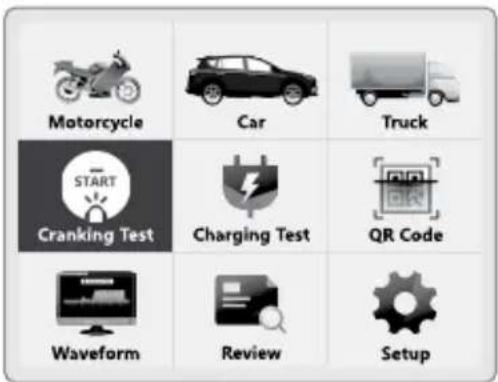
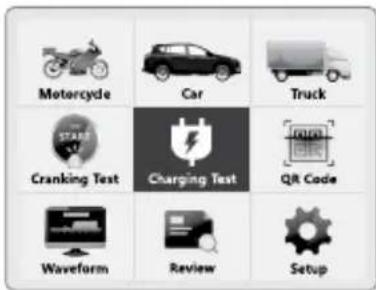
- Selecting the battery application
-
Select the battery application (Motorcycle/Car/Truck).
-
Confirm the selection.
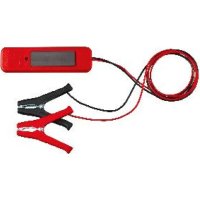
- Selecting the battery type
- Select Type.
- Confirm the selection.
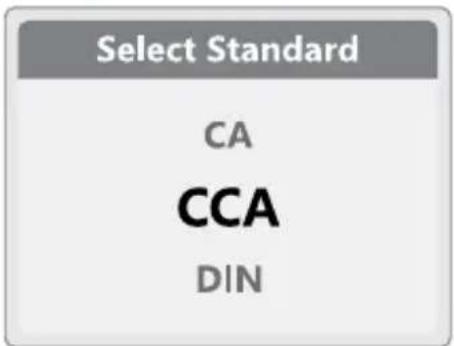
- Selecting the battery standard
-
Select Standard.
-
Confirm the selection.
i INFO: The screen of the product may vary in different EU countries.
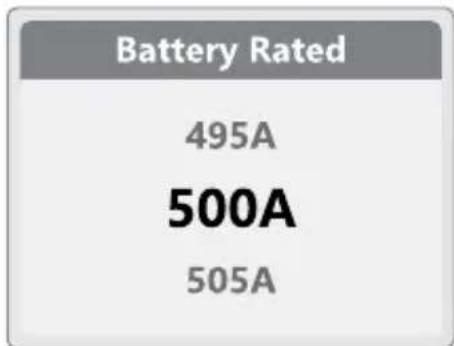
- Selecting the battery rated value
① INFO: See table "Car, truck and motorcycle battery measure range"
-
Select the battery CCA value for Battery Rated.
-
Confirm the selection.
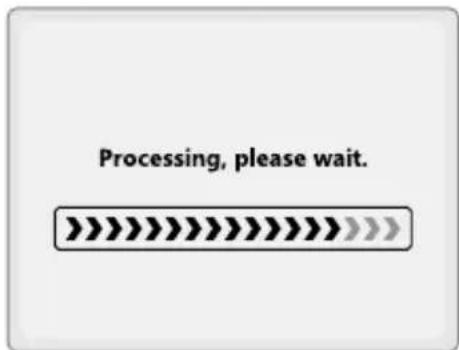
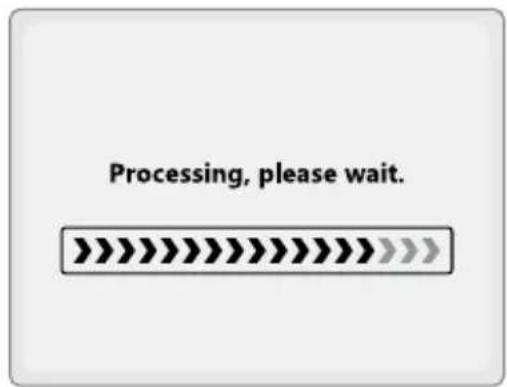
The display 1 shows Processing, please wait.
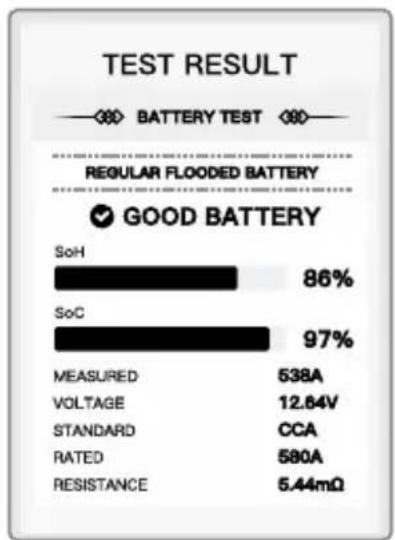
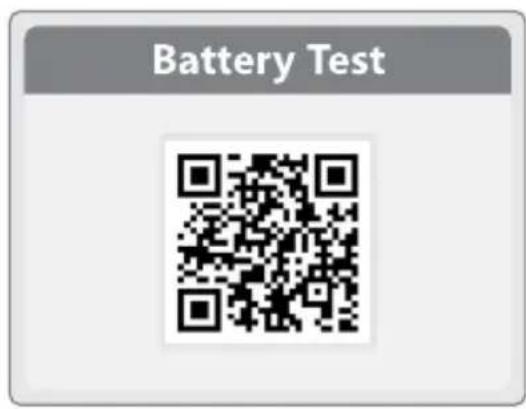
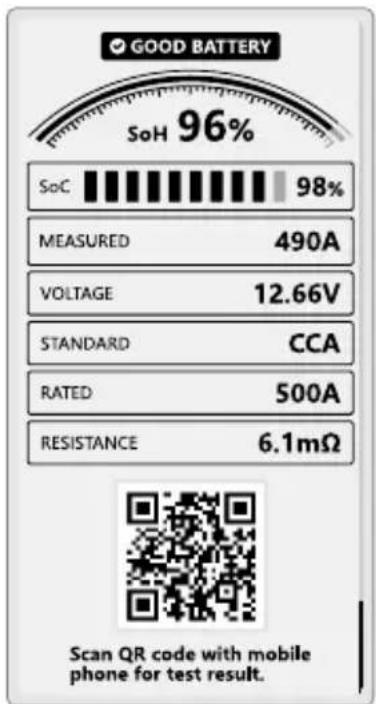
Battery test result
i INFO:
☐ 5 different results are analysed and distinguished.
SoH: state of health
SoC: state of charge
| Result Details | |
| GOOD BATTERY | The vehicle battery is healthy. |
| GOOD - RECHARGE | Good battery but lower power. Recharge before using. |
| REPLACE | The vehicle battery is almost empty. Replace the battery. i INFO: The vehicle battery may still be able to start the engine but it may work only for a short time. |
| CHARGE - RETEST | Low power leads to inaccurate results. Test again after recharging. |
| BAD CELL | There has been a problem with a bad cell inside the battery. The battery needs to be replaced. |
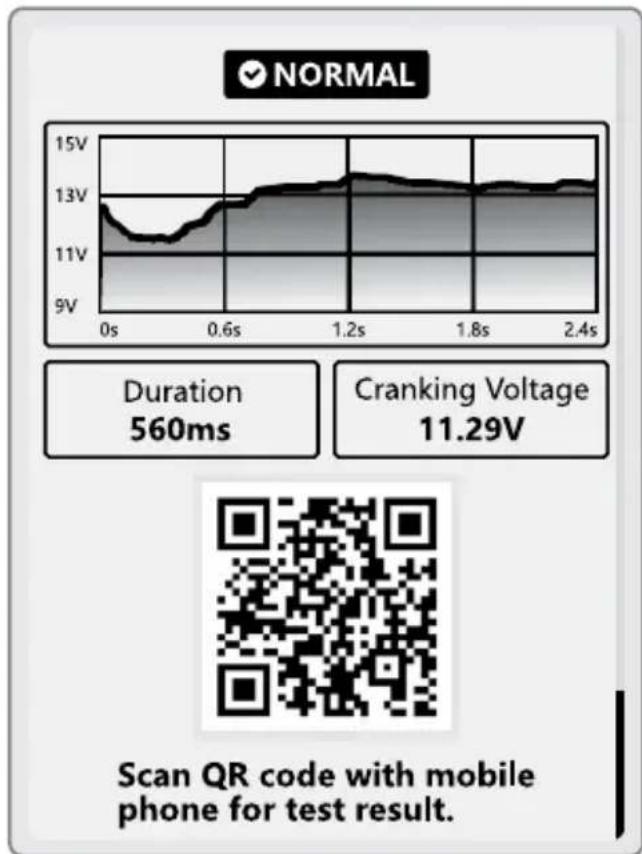
| QR code in test result | 1. Display the QR code: Press ▲2, OK 4 or ▼5.2. Scan the QR code with a mobile phone. |
① INFO: The screen of the product may vary in different EU countries.
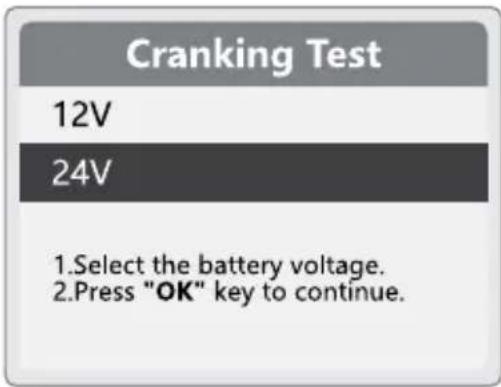
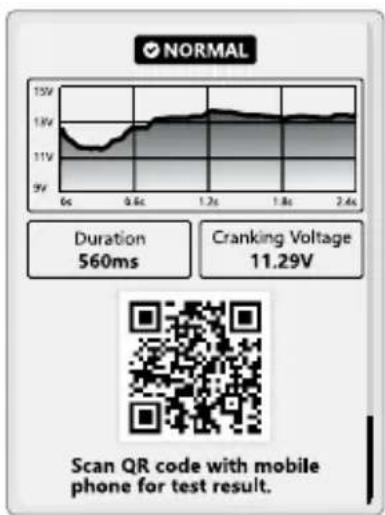
- Cranking test
(See Fig. C)
⚠ WARNING! Risk of injury! Firmly engage the parking brake. Put the vehicle in neutral transmission.
i INFO:
☐ Switch off the vehicle engine and all other accessory loads before testing. Otherwise the test results are not accurate.
☐ Do not stop the vehicle engine during the cranking test.
Before testing: Connect the clamps to the vehicle battery (see "Connecting the clamps").
- Selecting the cranking test ^3
- Select Cranking Test.
- Confirm the selection.
- Selecting the battery voltage
- Select the battery voltage.
- Confirm the selection.
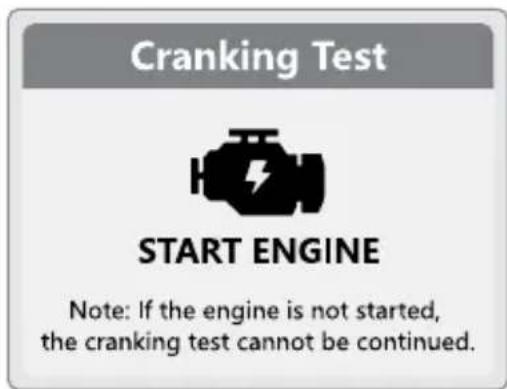
● Conducting the cranking test
i INFO: If the engine is not started, the cranking test can not be continued.
- Follow the prompts to start the vehicle engine.
The display 1 shows Processing, please wait.
The display 1 shows the test results including:
— start-up duration
— start-up status
— start-up voltage
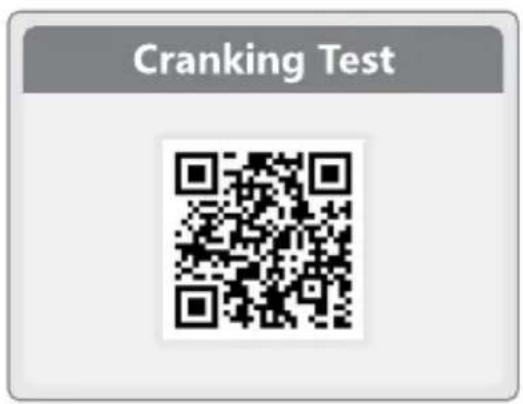
- Displaying the QR code: Press
OK 4 or ▼ 5.
▲2,
- See the test result: Scan the QR code with a mobile phone.
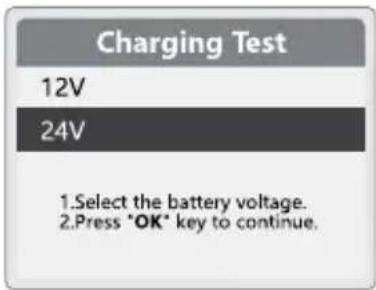
● Charging test
(See Fig. D)
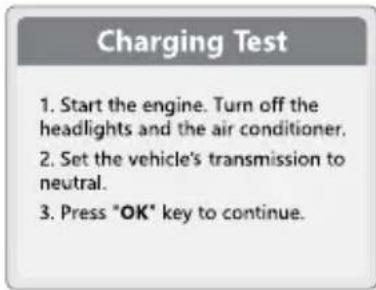
⚠ WARNING! Risk of injury! Firmly engage the parking brake. Put the vehicle in neutral transmission.
i INFO:
☐ Switch off all devices (e.g. headlights, air conditioner, radio) before the charging test.
Before testing: Connect the clamps to the vehicle battery (see "Connecting the clamps").
i INFO: The screen of the product may vary in different EU countries.
42 GB/IE
- Selecting the charging test - Loaded test
- Select Charging test.
- Confirm the selection.
- Selecting the battery voltage
- Select the battery voltage.
- Confirm the selection.
● Conducting the charging test
① INFO: Do not switch off the vehicle engine during the test. Follow the on-screen guidance.
1. Start the vehicle engine.
2. Turn off the headlights and the air-conditioner. Keep the engine idle for 10 seconds.
3. Confirm: Press OK 4.
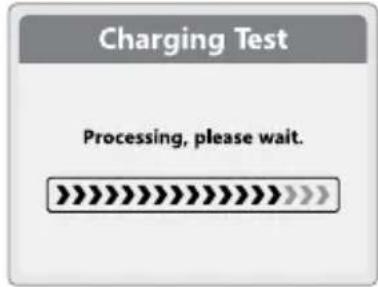
The display 1 shows Processing, please wait.
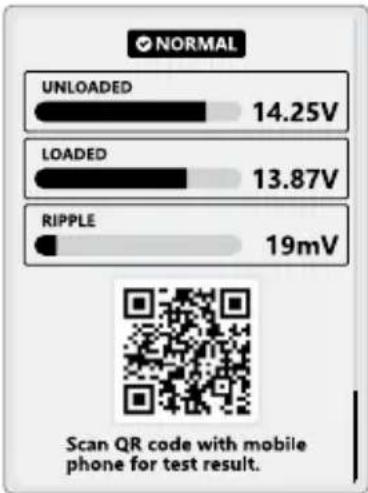
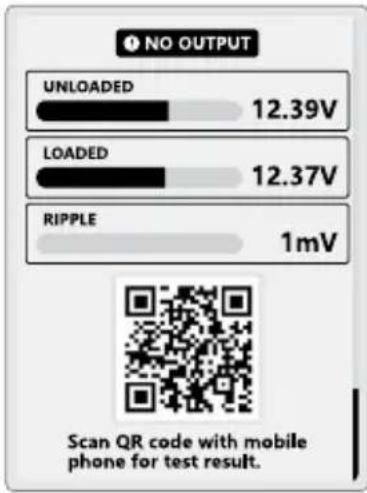
Unloaded Test
- Press the accelerator and hold the engine speed between 2,500-3,000 RPM for approx. 10 seconds.
-
Confirm: Press OK 4.
The display 1 shows Processing, please wait.
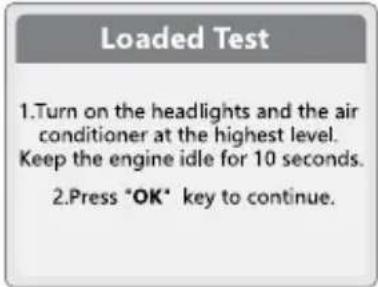
-
Turn on the headlights and the air conditioner at the highest level. Keep the engine idle for 10 seconds.
- Confirm: Press OK 4.
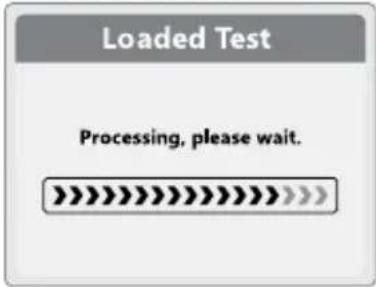
The display 1 shows Processing, please wait.
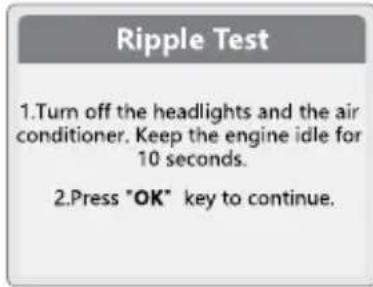
Ripple test
i INFO:
☐ If the test result voltage is out of normal range, there is an error.
☐ NO OUTPUT: The charging test was not completed. When the battery power is exhausted, the vehicle stops working. Check the alternator immediately or contact a car service centre.
- Turn on the headlights and the air conditioner at the highest level. Keep the engine idle for 10 seconds.
The product displays the charging results including:
— unloaded voltage
– loaded voltage
- ripple voltage
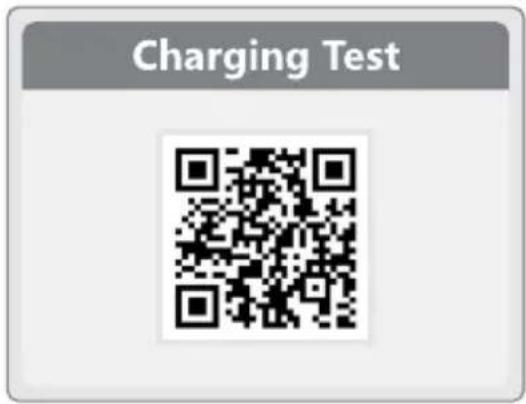
- Displaying the QR code: Press ▲2, OK 4 or ▼5.
- Set the vehicle's transmission to neutral.
① INFO: The screen of the product may vary in different EU countries.
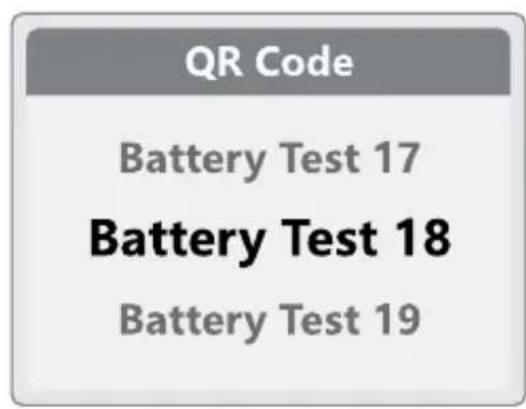
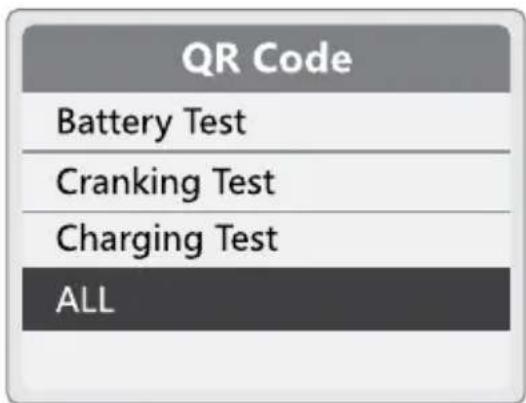
QR code
(See Fig. E)
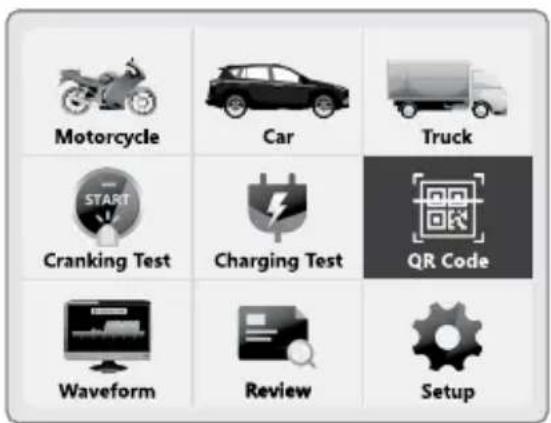
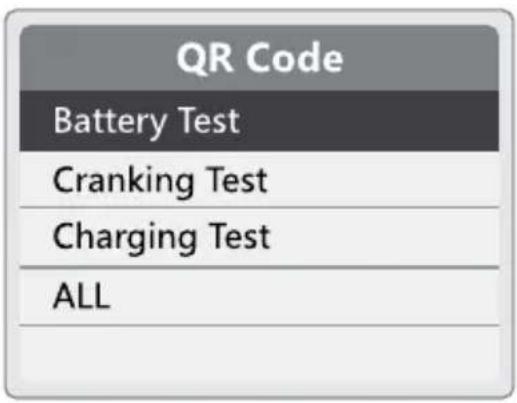
- Select QR Code.
- Confirm the selection.
- Select the QR code classification.
- Confirm the selection.
- Select the test name. The test names are listed in chronological order.
- Confirm the selection.
The test result QR codes are displayed:
The QR code ALL is displayed.
- See the test result: Scan the QR code with a mobile phone.
Hints:
To ensure that you can scan the QR code smoothly, we would like to remind you: If your Smartphone can not scan QR code directly, please try the following alternatives to complete the scanning operation:
Social media App - for example: Facebook that provides a convenient service for QR code scanning. You can find the relevant options in the app to scan.
Web browser - for example: google chrome browser that also provides a convenient service for QR code scanning. Just open this browser, go to "Settings" or related menus, find and enable the QR code scanner.
Professional QR code scanning tools: There are many professional QR code scanning applications on the market. You can go to the app store to download and install a well-rated QR code scanning tool.
The above methods can effectively help you solve the QR code scanning problem. We suggest that you choose the scanning method that suits you best according to your usage habits and preferences.
(See Fig. F)
- Select Waveform.
- Confirm the selection.
Waveform is displayed.
- Exit the screen: Press
- Confirm the selection.
Exit the screen: Press


① INFO: The screen of the product may vary in different EU countries.
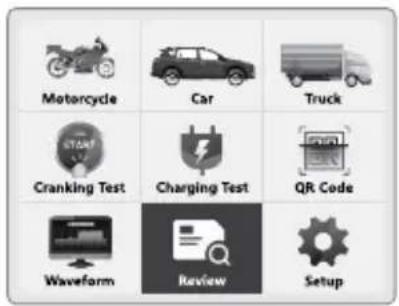
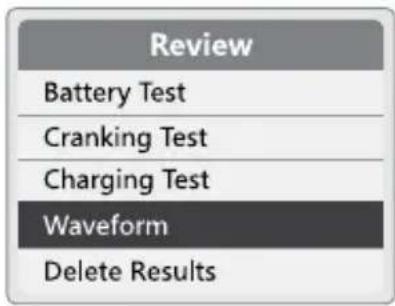
● Review
(See Fig. G)
① INFO: Delete Results deletes all history review.
- Select Review.
- Confirm the selection.
-
Select the review classification:
-
Battery Test
- Cranking Test
- Charging Test
-
Waveform
-
Confirm the selection.
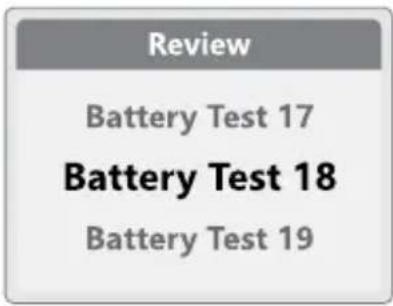
-
Select the test name. The test names are listed in chronological order.
-
Confirm the selection.
The test results are displayed:
- Battery Test
- Cranking Test
- Charging Test
-
Waveform
-
Select Delete Results.
- Confirm the selection.
- Deleting all test result data: Press OK 4.
Exit the screen: Press

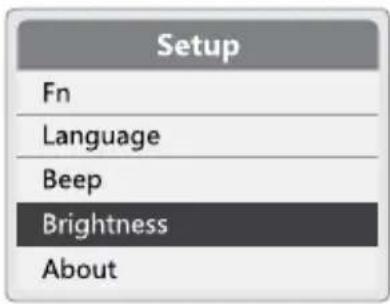
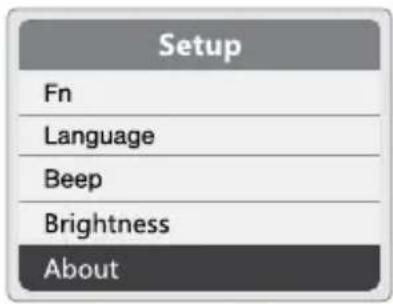
Setup
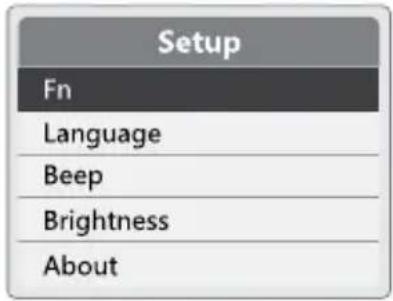
(See Fig. H)
Setup
- Select Setup.
- Confirm the selection.
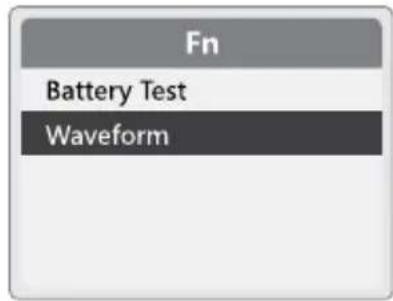
Fn
① INFO: Fn acts as the shortcut key of battery test or waveform.
- Press Fn 3.
- Confirm: Press OK 4.
- Select Battery Test or Waveform as a shortcut.
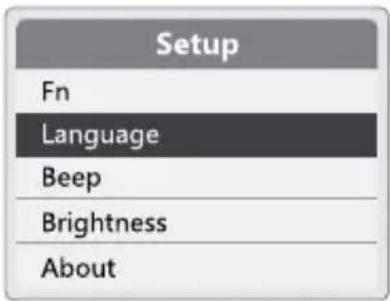
Language
- Select Language.
- Confirm the selection.
- Select between different languages: Press ▲2 or ▼5.
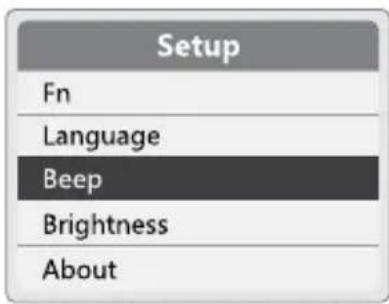
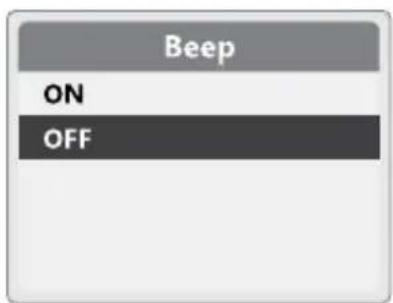
Beep
① INFO: The status of the buzzer can be set to ON or OFF.
- Select Beep.
- Confirm the selection.
- Set the status of the buzzer to ON or OFF.
i INFO: The screen of the product may vary in different EU countries.
Brightness
- Select Brightness.
- Confirm the selection.
- Set the brightness bar: Press ▲2 or

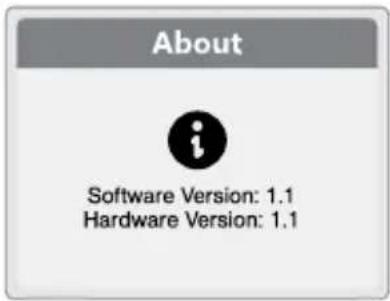
About
- Select About.
- Confirm the selection. Software and hardware version are shown.
Notes on battery testing
☐ If the product detects that the temperature of the battery could have an influence on the result: The product asks to select whether the ambient temperature is above or below 0 °C . After the selection is made: The test continues.
☐ To obtain a more decisive result: The product asks whether you want to test the battery before or after charging. If the vehicle has just been driven, select BEFORE CHARGING.
● Troubleshooting
| Problem Possible cause | Solution | |
| The display 1 does not light up when both clamps 7/8 are connected to the vehicle battery. | The red clamp 7 and the black clamp 8 are not connected to the correct poles. | Connect the red clamp 7 and the black clamp 8 to the correct poles. |
| The vehicle battery terminal posts are oxidized or badly corroded. | Have the vehicle battery serviced. |
| The vehicle battery is empty. Charge the vehicle battery. |
● Cleaning and care
⚠️ DANGER! Risk of electric shock!
- Do not immerse the product in water or other liquids. Never hold the product under running water.
- Do not allow water or other liquids to enter the interior of the product.
⚠ NOTICE! Risk of damage! Do
not use abrasive, aggressive cleaning agents or hard brushes.
□ Clean the housing with a soft dry cloth.
i INFO: The screen of the product may vary in different EU countries.
Storage
□ Clean the product before storage.
□ Store the product in the original packaging when it is not in use.
☐ Store the product at a dry location out of the reach of children.
● Disposal
The packaging is made of environmentally friendly materials, which may be disposed of through your local recycling facilities.

Observe the marking of the packaging materials for waste separation, which are marked with abbreviations (a) and numbers (b) with following meaning: 1–7: plastics/20–22: paper and fibreboard/80–98: composite materials.
Product:
The product incl. accessories, manual and packaging materials are recyclable and are subject to extended producer responsibility. Dispose them separately, following the illustrated Info-tri (sorting information), for better waste treatment.
The Triman logo is valid in France only.
Contact your local refuse disposal authority for more details of how to dispose of your wornout product.
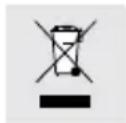
To help protect the environment, please dispose of the product properly when it has reached the end of its useful life and not in the household waste. Information on collection points and their opening hours can be obtained from your local authority.
● Warranty
The product has been manufactured to strict quality guidelines and meticulously examined before delivery. In the event of material or manufacturing defects you have legal rights against the retailer of this product. Your legal rights are not limited in any way by our warranty detailed below.
The warranty for this product is 3 years from the date of purchase. The warranty period begins on the date of purchase. Keep the original sales receipt in a safe location as this document is required as proof of purchase.
Any damage or defects already present at the time of purchase must be reported without delay after unpacking the product.
Should the product show any fault in materials or manufacture within 3 years from the date of purchase, we will repair or replace it – at our choice – free of charge to you. The warranty period is not extended
as a result of a claim being granted. This also applies to replaced and repaired parts.
This warranty becomes void if the product has been damaged, or used or maintained improperly.
The warranty covers material or manufacturing defects. This warranty does not cover product parts subject to normal wear and tear, thus considered consumables (e.g. batteries, rechargeable batteries, tubes, cartridges), nor damage to fragile parts, e.g. switches or glass parts.
● Warranty claim procedure
To ensure quick processing of your claim, observe the following instructions:
Make sure to have the original sales receipt and the item number (IAN 480247_2504) available as proof of purchase.
You can find the item number on the rating plate, an engraving on the product, on the front page of the instruction manual (bottom left), or as a sticker on the rear or bottom of the product.
If functional or other defects occur, contact the service department listed below either by telephone or by e-mail.
Once the product has been recorded as defective you can return it free of charge to the service address that will be provided to you. Ensure to enclose the proof of purchase (sales receipt) and a short, written description outlining the details of the defect and when it occurred.
Service
GB Service Great Britain
Tel.: 0800 404 7657
E-Mail:owim@lidl.gb
IE Service Ireland
Tel.:1800101010
E-Mail:owim@lidl.ie

—Extreme hitte of kou
WAARSCHUWING! Risico op
i INFO: Met Delete Results
SoC: Stav nabití (state of charge)
Processing, please wait.
(Spracovávam, čakajte.)

SoH: Stav zdravia (state of health)
SoC: Stav nabitia (state of charge)
Processing, please wait.
(Spracovávam, čakajte.)
SoH: Állapot (state of health)
i TUDNIVALÓ: A Delete Results