IAN 296998 - Battery tester ULTIMATE SPEED - Free user manual and instructions
Find the device manual for free IAN 296998 ULTIMATE SPEED in PDF.
| Brand | Ultimate Speed |
| Model | IAN 296998 |
| Product type | Battery and alternator tester |
| Test voltages | 6 V and 12 V (DC) |
| Input range (6 V mode) | 5.6 V - 7.8 V DC |
| Input range (12 V mode) | 11.5 V - 15.5 V DC |
| Main functions | Battery load test, alternator test |
| Status indicators | LEDs: low charge, half charge, full charge, correct/maximum charge function, overvoltage |
| Included accessories | 2 quick-connect test clips (red +, black -), instruction manual |
| Mounting | Magnetic strips on back for attachment to bodywork |
| Safety | Short-circuit protection, clip insulation, avoid ignition sources |
| Cleaning | Slightly damp cloth, do not immerse |
| Disposal | Compliant with Directive 2012/19/EU, do not dispose of with household waste |
| Warranty | 3 years (Kompernass Handels GmbH) |
| Use | Private, non-professional |
| Test cables | Not repairable, replace the device if damaged |
| Customer service (France) | Tel. 0800 919270, e-mail: kompernass@lidl.fr |
Frequently Asked Questions - IAN 296998 ULTIMATE SPEED
User questions about IAN 296998 ULTIMATE SPEED
0 question about this device. Answer the ones you know or ask your own.
Ask a new question about this device
Download the instructions for your Battery tester in PDF format for free! Find your manual IAN 296998 - ULTIMATE SPEED and take your electronic device back in hand. On this page are published all the documents necessary for the use of your device. IAN 296998 by ULTIMATE SPEED.
USER MANUAL IAN 296998 ULTIMATE SPEED
text_image
PDF online www.lidl-service.comBATTERIE- UND LICHTMASCHINEN- TESTER / BATTERY & ALTERNATOR TESTER / TESTEUR DE BATTERIE ET ALTERNATEUR UAWSB 2 A1
DE AT CH
BATTERIE- UND LICHTMASCHINENTESTER
Bedienungsanleitung
GB IE
BATTERY & ALTERNATOR TESTER
Operating instructions
FR BE
text_image
Diagram showing four labeled components of a handheld device, including a power connector and two coiled cable connectors.Sicherheitshinweise
KOMPERNASS HANDELS GMBH
BURGSTRASSE 21
DE-44867 BOCHUM
DEUTSCHLAND
www.kompernass.com
Table of contents
Introduction 10
Intended Use .... 10
Package contents....10
Technical data 10
Appliance description ..... 10
Safety instructions....11
Connection....12
Testing a battery and generator .....12
Cleaning 13
Disposal 14
Congratulations on the purchase of your new appliance.
You have clearly decided in favour of a quality product.
These operating instructions are a part of this product.
They contain important information in regard to safety, use and disposal. Before using the product, familiarise yourself with all of these operating and safety instructions. Use the product only as described and only for the specified areas of application. In addition, pass these documents on, together with the product, to any future owner.
Intended Use
The appliance is designed for checking the battery charge level of 6 or 12 volt batteries. In addition, the charging function of a generator can also be tested. The appliance is not meant for commercial use.
Package contents
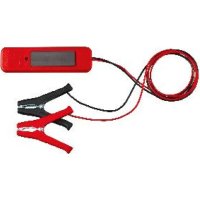
• Battery & Alternator Tester UAWSB 2 A1
- 2 quick-connect terminal clamps, permanently mounted (1 red "+" , 1 black "-" )
• Operating instructions
Technical data
- Input voltage in 6 V operation 5,6 -7,8 V --- (DC)
- Input voltage in 12 V operation 11,5 - 15,5 V === (DC)
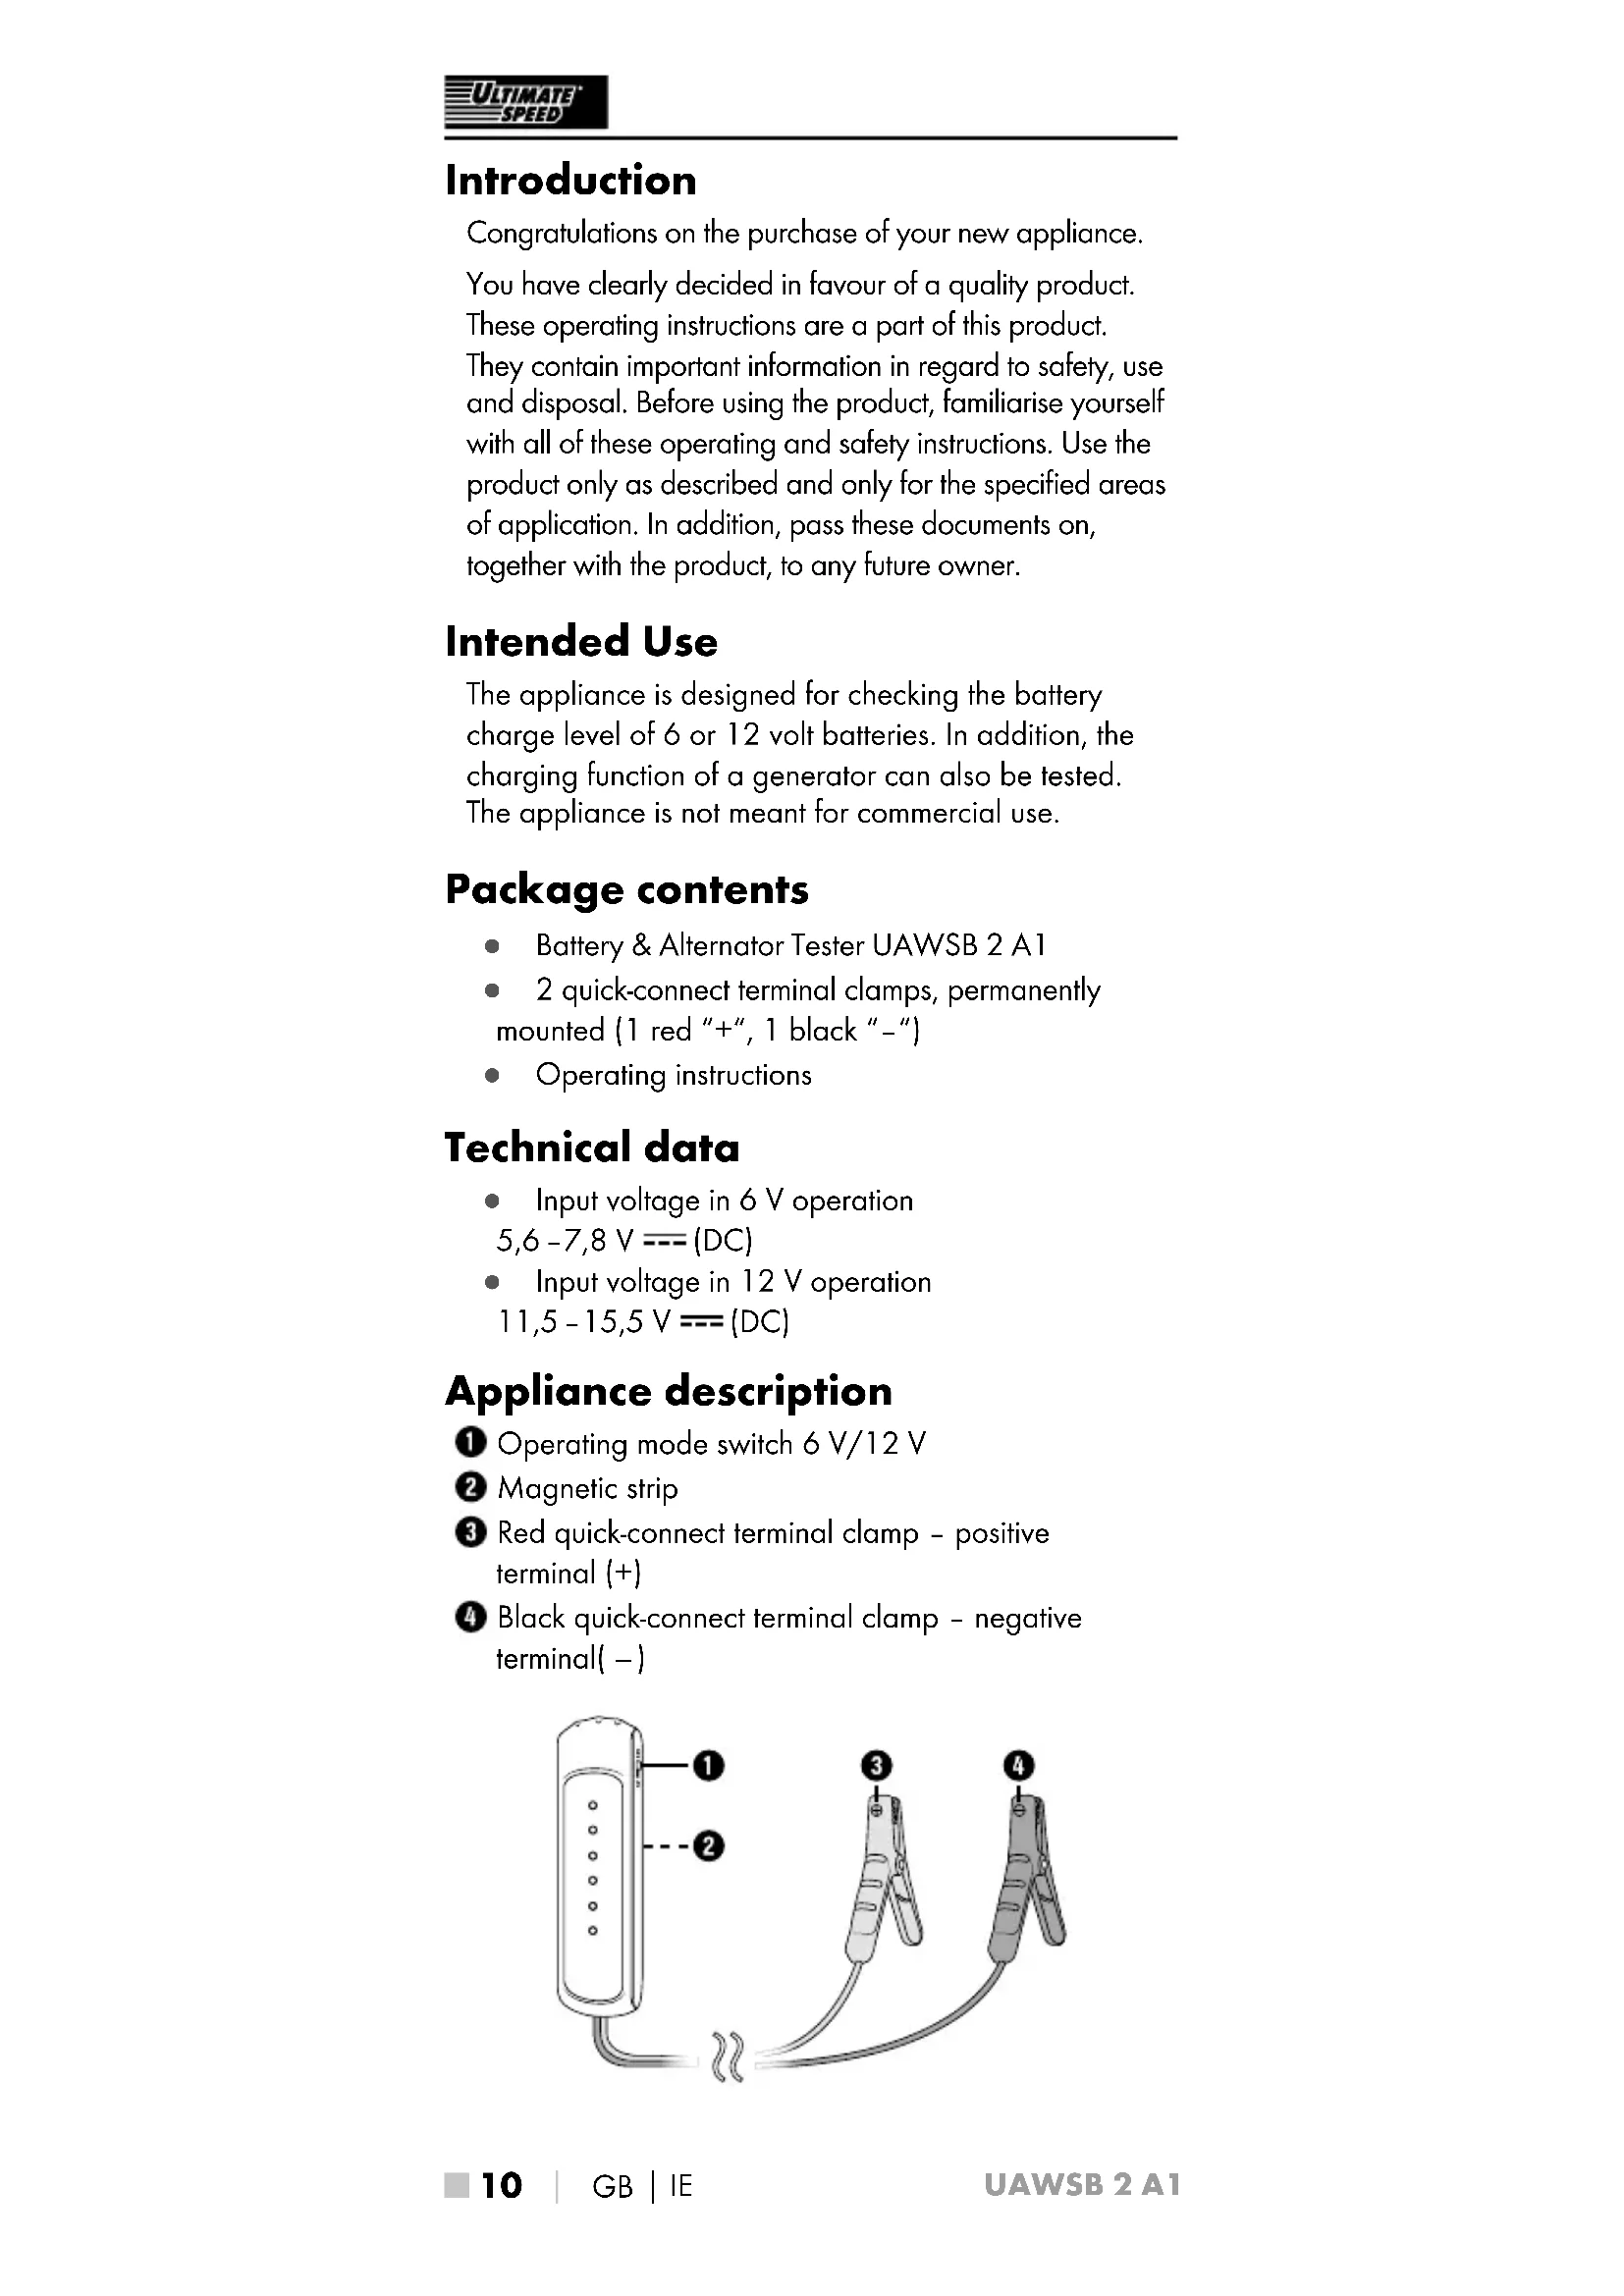
Appliance description
① Operating mode switch 6 V/12 V
② Magnetic strip
3 Red quick-connect terminal clamp - positive terminal (+)
4 Black quick-connect terminal clamp - negative terminal( - )

text_image
Diagram showing four labeled components of a handheld device with wires and connectors, likely illustrating a cable or connector assembly.Safety instructions
Danger! Avoid danger to life and limbs caused by improper use!
■ Do not operate the appliance with a damaged measuring cable.
■ The measurement cable must be placed so that they cannot be caught by rotating parts within the engine compartment.
CAUTION! Damaged measurement cables create a life-threatening risk of electric shock.
■ Dispose of the device when the measurement cables have become damaged. The measurement cables are not intended to be repaired.
⚠️Danger of explosion and fire! Make
certain that explosive or combustible substances, such as petrol or solvent, cannot be ignited during use of the appliance!
Ignition sources (e.g. open light, burning cigars, cigarettes or electric sparks) must be kept away from the starter batteries.
Danger of chemical burns!

Protect your eyes and skin against chemical burns caused by acid (sulphuric acid) upon contact with the battery! Do not look directly at the connected battery and use the following: acid-resistant safety glasses, clothing and gloves! If your eyes or skin come into contact with sulphuric acid, rinse the affected part of the body with plenty of clear running water and seek immediate medical assistance!
- Avoid an electric short-circuit when connecting the appliance to the battery. Connect the red quick-connect terminal clamp ③ only to the positive terminal (+) of the battery! Connect the black quick-connect terminal clamp ④ only to the negative terminal (−) of the battery!
■ Touch only the insulated parts of the quick-connect terminal clamps ③ ④ !
⚠ Attention! Avoid damage caused by improper use!
■ Only use the appliance with the included original parts!
- Keep the electrical contacts of the battery free of dust and lubricants. Clean the contacts with a clean cloth as required.
Connection
- First connect the red quick-connect terminal clar to the positive pole (+) of the battery.
- Then connect the black quick-connect terminal clarifies to the negative pole (−) of the battery.
The appliance can be fastened to the vehicle chassis during the measurement using the magnetic strip ② on the back of the appliance.
Testing a battery and generator
Select operating mode
- Set the operating mode swit① on the appliance side to 6 or 12 volts, depending on the type of battery you are testing.
Battery test/start capability
- If only the "Charge very low" LED lights up, the charge level of the battery is weak. In this LED status, the electrical voltage in 6 volt mode is approximately 5.8 volts and in 12 volt mode approximately 11.5 volts. The battery needs to be charged.
- If the "Half charged" LED also lights up, the battery is around 50% charged. In this LED status, the electrical voltage in 6 volt mode is approximately 6.1 volts and in 12 volt mode approximately 12 volts. We recommend charging the battery.
- If the "Fully charged" LED also lights up, the battery is fully charged and start capable. In this LED status, the electrical voltage in 6 volt mode is approximately 6.4 volts and in 12 volt mode approximately 12.6 volts.
Attention! Property damage! Before charging, learn about how to maintain the battery by reading its operating instructions!
Generator test
- Connect the appliance to the battery as described above under "Connection".
- Start the engine and switch on all consumers (headlights, radio, rear window heating, etc.).
- Increase the number of revs to around 2500 rpm for a short while.
- If the "Charging OK" to "Charging at MAXIMUM" LED lights up, the alternator/voltage regulator is working properly. In this LED status, the electrical voltage in 6 volt mode is approximately 6.7 or 7.3 volts and in 12 volt mode approximately 13.2 or 14.5 volts.
- If the "OVERLOAD/Faulty regulator" LED lights up, the alternator/voltage regulator is defective. In this LED status, the electrical voltage in 6 volt mode is approximately 7.8 volts and in 12 volt mode approximately 15.5 volts. In this case, contact your local garage.
Cleaning
Danger of electric shock! Always disconnect the appliance from the battery before cleaning it. Under no circumstances may the appliance be immersed in water or held under running water duringcleaning.
Attention! Property damage! Do not use aggressive or abrasive cleaning agents, as these can damage the upper surfaces.
■ Clean the outside of the appliance with a slightly damp cloth.
Disposal

Do not dispose of the appliance in your normal domestic waste. This product is subject to the European guideline 2012/19/EU.
Dispose of the appliance through an approved disposal centre or at your community waste facility.
Observe the currently applicable regulations.
In case of doubt, please contact your waste disposal centre.


Dispose of all packaging materials in an environmentally friendly manner.

The packaging of this appliance is made of card.
This appliance has a 3-year warranty valid from the date of purchase. If this product has any faults, you, the buyer, have certain statutory rights. Your statutory rights are not restricted in any way by the warranty described below.
Warranty conditions
The validity period of the warranty starts from the date of purchase. Please keep your original receipt in a safe place. This document will be required as proof of purchase.
If any material or production fault occurs within three years of the date of purchase of the product, we will either repair or replace the product for you at our discretion. This warranty service is dependent on you presenting the defective appliance and the proof of purchase (receipt) and a short written description of the fault and its time of occurrence.
If the defect is covered by the warranty, your product will either be repaired or replaced by us. The repair or replacement of a product does not signify the beginning of a new warranty period.
Warranty period and statutory claims for defects
The warranty period is not prolonged by repairs effected under the warranty. This also applies to replaced and repaired components. Any damage and defects present at the time of purchase must be reported immediately after unpacking. Repairs carried out after expiry of the warranty period shall be subject to a fee.
Scope of the warranty
This appliance has been manufactured in accordance with strict quality guidelines and inspected meticulously prior to delivery.
The warranty covers material faults or production faults. The warranty does not extend to product parts subject to normal wear and tear or fragile parts such as switches, batteries, baking moulds or parts made of glass.
The warranty does not apply if the product has been damaged, improperly used or improperly maintained. The directions in the operating instructions for the product regarding proper use of the product are to be strictly followed. Uses and actions that are discouraged in the operating instructions or which are warned against must be avoided.
This product is intended solely for private use and not for commercial purposes. The warranty shall be deemed void in cases of misuse or improper handling, use of force and modifications / repairs which have not been carried out by one of our authorised Service centres.
Warranty claim procedure
To ensure quick processing of your case, please observe the following instructions:
■ Please have the till receipt and the item number (e.g. IAN 12345) available as proof of purchase.
■ You will find the item number on the type plate, an engraving on the front page of the instructions (bottom left), or as a sticker on the rear or bottom of the appliance.
If functional or other defects occur, please contact the service department listed either by telephone or by e-mail.
■ You can return a defective product to us free of charge to the service address that will be provided to you. Ensure that you enclose the proof of purchase (till receipt) and information about what the defect is and when it occurred.

You can download these instructions along with many other manuals, product videos and software on www.lidl-service.com.
Service
GB Service Great Britain
Tel.: 0800 404 7657
E-Mail: kompernass@lidl.co.uk
IE Service Ireland
Tel.: 1890 930 034
(0,08 EUR/Min., (peak))
(0,06 EUR/Min., (off peak))
E-Mail: kompernass@lidl.ie
IAN 296998
Importer
Please note that the following address is not the service address. Please use the service address provided in the operating instructions.
KOMPERNASS HANDELS GMBH
BURGSTRASSE 21
DE-44867 BOCHUM
GERMANY
www.kompernass.com
Table des matières
Introduction 18
text_image
Diagram showing four labeled components of a handheld device, including a vertical panel and three connected test probes with numbered labels.KOMPERNASS HANDELS GMBH
BURGSTRASSE 21
DE-44867 BOCHUM
ALLEMAGNE
www.kompernass.com
Inhoud
Inleiding 26
Gebruiksdoel....26
text_image
Diagram showing four labeled components of a device with wires, including a connector and two clamps.KOMPERNASS HANDELS GMBH
BURGSTRASSE 21
DE-44867 BOCHUM
DUITSLAND
www.kompernass.com
Spis treści
text_image
Diagram showing four labeled components of a medical device with wires and connectors, likely illustrating a medical or diagnostic setup.KOMPERNASS HANDELS GMBH
BURGSTRASSE 21
DE-44867 BOCHUM
NIEMCY
www.kompernass.com
Obsah
Úvod....42
Účel použití....42
Obsah dodávky....42
text_image
Diagram showing four labeled components of a handheld device with wires and connectors, likely illustrating a cable or connector assembly.Bezpečnost
KOMPERNASS HANDELS GMBH
BURGSTRASSE 21
DE-44867 BOCHUM
NĚMECKO
www.kompernass.com
Obsah
Úvod....50
Účel použitia....50
Obsah dodávky....50
text_image
Diagram showing four labeled components of a device with cable and connector, likely illustrating a medical or electrical setup.Bezpečnostné pokyny
KOMPERNASS HANDELS GMBH
BURGSTRASSE 21
DE-44867 BOCHUM
NEMECKO
www.kompernass.com
KOMPERNASS HANDELS GMBH
BURGSTRASSE 21
DE-44867 BOCHUM
GERMANY
www.kompernass.com