Bolero Flux PT 604000 Inox A+++ - Basket CECOTEC - Free user manual and instructions
Find the device manual for free Bolero Flux PT 604000 Inox A+++ CECOTEC in PDF.

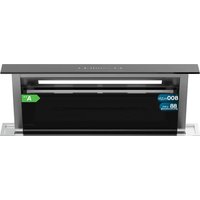
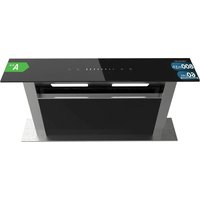
| Product type | Range hood |
| Brand | Cecotec |
| Model | Bolero Flux PT 604000 Inox A+++ |
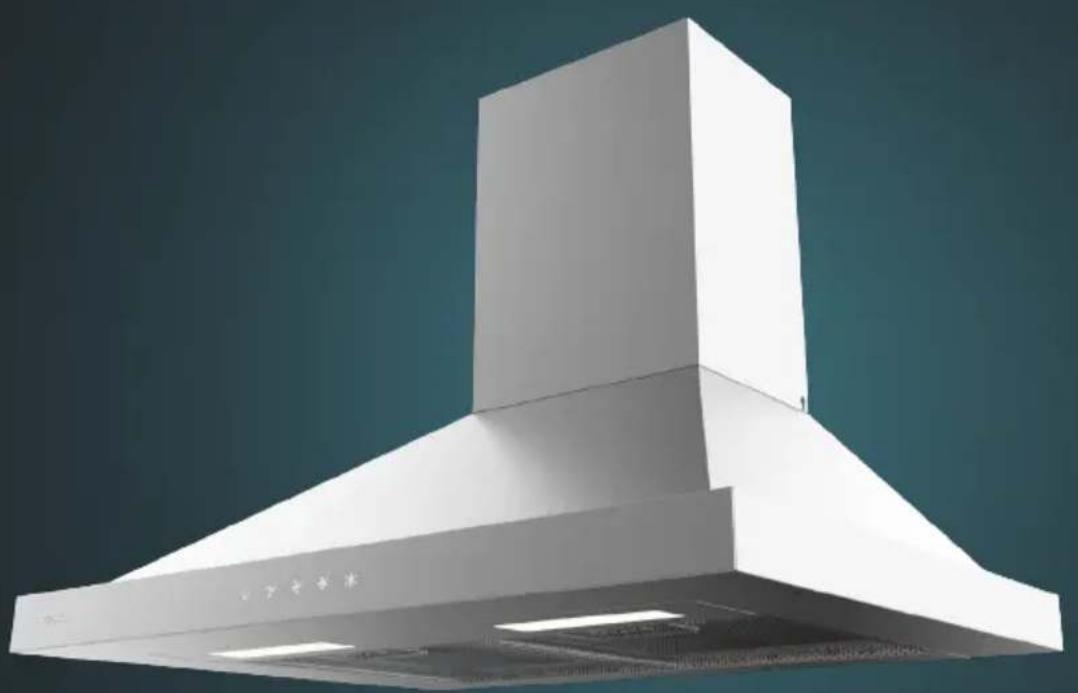
| Material | Stainless steel |
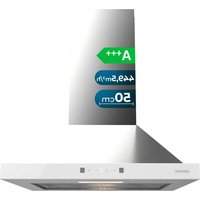
| Energy class | A+++ |
| Width | 60 cm |
| Depth | 50 cm |
| Recommended installation height | 65 to 75 cm above the cooking surface |
| Power supply | 220-240 V, grounding mandatory |
| Controls | Touch panel: on/off, 3 speeds, lighting |
| Speeds | 3 (low, medium, high) |
| Lighting | Touch LED |
| Exhaust system | Exhaust to outside or recirculation (optional charcoal filters) |
| Metal filters | Mesh filters, dishwasher safe |
| Charcoal filters | Available as optional for recirculation mode |
| Number of charcoal filters | 2 |
| Filter maintenance | Clean metal filters monthly; replace charcoal filters regularly |
| Safety | Motor overheating protection |
| Spare parts | Metal filters, charcoal filters, LED bulbs (replacement by professional) |
| Box contents | Hood, instruction manual, mounting kit, charcoal filters |
Frequently Asked Questions - Bolero Flux PT 604000 Inox A+++ CECOTEC
User questions about Bolero Flux PT 604000 Inox A+++ CECOTEC
0 question about this device. Answer the ones you know or ask your own.
Ask a new question about this device
Download the instructions for your Basket in PDF format for free! Find your manual Bolero Flux PT 604000 Inox A+++ - CECOTEC and take your electronic device back in hand. On this page are published all the documents necessary for the use of your device. Bolero Flux PT 604000 Inox A+++ by CECOTEC.
USER MANUAL Bolero Flux PT 604000 Inox A+++ CECOTEC
Campana piramidal / Pyramid-shaped hood
bolero
- Parts and components 13
2.Before use 13 - Installation 13
- Operation 17
- Cleaning and maintenance 17
- Troubleshooting 18
- Copyright 18
- Simplified EU Declaration of Conformity 19
SOMMAIRE
EN · The coding in this manual is generic and applies to all code variants of the appliance.
The graphics in this manual are schematic representations and may not exactly match the product.
2. BEFORE USE
- This appliance comes in a packaging designed to protect it during transport. Take the appliance out of its box and remove all packaging materials. You can keep the original box and other packaging materials in a safe place to prevent damage to the appliance if you need to transport it in the future. If you wish to dispose of the original packaging, make sure all items are recycled properly.
- Check that all parts and components are included and in good condition. If any of them are missing or damaged, please contact Cecotec's Official Technical Support Service immediately.
Box content
- Kitchen hood
- Instruction manual
Assembly kit (depending on model) -
Carbon filters
-
Do not remove the product's serial number in order to keep proper traceability if technical assistance is required.
3. INSTALLATION
Product dimensions
Figure 2 shows the external dimensions of the kitchen hood.
ENGLISH
Ventilation requirements
- The ventilation system outlet must lead outdoors, except when using a recirculation system (ductless).
- Do not place the ventilation system outlet in an enclosed area.
- Use only a rigid metal ductwork. Plastic ventilation grilles are not recommended.
-
The ventilation system must have a damper. If the roof or wall cap already has a damper, do not use the one supplied with the kitchen hood.
-
To maximise ventilation system performance:
O Minimise the duct length and number of turns and bends.
Do not change the duct size.
Seal all connections with duct tape to prevent leaks.
Seal around the exterior wall or roof cap with caulking.
- The kitchen hood must be installed 65 - 75cm above the hob.
Ventilation systems
Figure 3 shows the different ventilation systems.
Fig. 3 key:
OPTION 1
A. Roof ventilation outlet.
B. Kitchen hood.
C. Round ductwork.
D. Roof cap.
OPTION 2
E. Wall ventilation outlet.
F. Kitchen hood.
G. Round ductwork.
H. Wall cover.
OPTION 3
I. Recirculation system (ductless).
J. Kitchen hood.
K. Deflector.
NOTE: To ensure optimal air extraction, the following rules must be strictly observed:
- Failure to follow these basic instructions will reduce performance and increase noise levels of the kitchen hood.
- Installation must be carried out by a qualified technician.
-
Do not connect the hood's air outlet pipe to an existing ventilation system being used for another appliance, such as a chimney.
-
The bend angle of the air outlet pipe must not be less than 120^ .
- Position the duct horizontally. Alternatively, the duct can rise from the hood and be directed to an exterior wall.
- After installation, ensure the kitchen hood is level and perfectly balanced to prevent grease from accumulating on one side.
- Make sure the chosen extraction duct complies with all regulations and is fire-resistant.
Kitchen hood installation
Note: Remove the protective film from the chimney before installation.
Figure 4 shows the accessories included for installation.
1.- Air outlet pipe installation
- Valve installation Install the one-way anti-return valve to the kitchen hood's air outlet as shown in Figure 5.
- Attach the duct to the kitchen hood's air outlet as shown in Figure 11.
Fig. 5 key:
- One-way anti-return valve.
- Air outlet.
-
Air outlet pipe.
-
Drill 3 holes of 8mm in the wall to install the mounting plate. Screw and tighten the bracket to the wall using the provided wall plugs and screws (Fig. 6).
- Hang the kitchen hood on the mounting plate (Fig. 7).
- Slide the inner chimney section into the upper section. Then pull the latter upwards and adjust to the desired height. Consider whether the system is extraction or recirculation. (Fig. 8).
- Secure the lower chimney section with 2 screws 4 × 8 ~mm (Fig. 9).
Fig. 9 key:
-
4 × 8 ~mm screws
-
Slide the chimney to adjust its height. Once the desired height is achieved, use 2 screws 4 × 8 ~mm to join the fixing holes with plate I, as shown in Figure 10.
Fig. 10 key:
-
Plate I
-
Drill 2 holes of 8mm to position plate II. Screw and secure plate II to the wall using the 2 included screws. Attach the chimney to the unit and secure it with 2 screws (Fig. 11).
Fig. 11 key:
- Plate II
ENGLISH
Replacing the LED light
Note:
- The LED light must only be replaced by qualified technicians or by Cecotec's Official Technical Support Service.
- Unplug the power cord before replacing it.
- Before replacing the lamp/bulb, make sure it is not hot.
- Always use gloves or cloths to avoid direct contact with LED lights.
- Direct contact may shorten the lamp/bulb lifespan.
To replace the lamp/bulb, follow the steps below:
- Remove the mesh filters.
- Place one hand inside the hood to gently push the lamp/bulb outwards. Use your other hand to grip and pull it out, then remove the cable.
- After replacing the lamp/bulb, connect the cable and position the new lamp/bulb in the hole (Fig. 12).
Note: Remember to reassemble everything after replacing the bulb and secure all screws in the same position. Always replace the bulb with one of the same type and amperage.
Carbon filter installation (Figure 13)
If using the recirculation system, it is recommended to install carbon filters. Carbon filters can filter unpleasant food odours from the environment.
- Remove the mesh filters before installing the carbon filters.
- Place the carbon filter on the fan housing shaft by aligning the carbon filter holes with the housing shaft.
- Rotate the carbon filter clockwise.
- Turn until it cannot move further. Turn the carbon filter cover anticlockwise to remove it.
- Finally, reinstall the mesh filters.
Note:
- Make sure the filter is properly locked, otherwise it could become loose and pose a hazard.
- When carbon filters are installed, the suction power decreases.
- Carbon filter dimensions: Face A diameter 12.9 cm; Face B diameter 13.3 cm.
- IMPORTANT: Install carbon filters only if using the hood in air recirculation mode (WITHOUT EXTERNAL EXHAUST DUCT).
It is recommended to replace carbon filters regularly, depending on usage time, when a decrease in odour absorption properties is noticed.
Power cord installation
You must connect the plug to a 220-240 V~, 50/60 Hz power line.
The kitchen hood must be connected to an earthed installation.
4. OPERATION
- To switch on the kitchen hood, press the power touch icon.
- Select the desired operating speed by pressing the respective touch icons (low, medium or high).
- Turn the light on or off by pressing its respective touch icon.
NOTE: The hoods are equipped with an overheating protection system that activates to prevent possible incidents when the motor temperature exceeds the operating limit value.
5. CLEANING AND MAINTENANCE
Cleaning and maintenance
Switch off the kitchen hood and unplug it from the mains socket before performing any cleaning or maintenance tasks. The hood's external surfaces are susceptible to scratches and stains. Therefore, use mild cleaning products and remove any alkaline or acidic substance residues (lemon juice, vinegar) immediately.
Stainless steel surfaces
Stainless steel must be cleaned regularly to ensure a long service life. To do this, use a suitable cleaner.
Control panel surface
The control panel can be cleaned with a damp cloth and a neutral cleaning product. Make sure the cloth is clean and well wrung out before cleaning the kitchen hood. Use a soft, dry cloth to remove any excess moisture that may remain after cleaning.
Mesh filter cleaning
Clean the filter every month to prevent fire hazards. The filter accumulates grease, smoke and dust, which affects the efficiency of the kitchen hood. If the filter is not cleaned, grease residues will accumulate. Clean the filter with water and a suitable cleaning product, allow it to air dry before replacing it.
ENGLISH
6. TROUBLESHOOTING
| Problem Possible causes | Uses Solution | |
| The light turns on, but the motor does not run. | The ventilation system is blocked. | Clear the obstruction. |
| The capacitor is faulty. | Contact Cecotec's Official Technical Support Service. | |
| The motor is faulty. | Contact Cecotec's Official Technical Support Service. | |
| The light does not turn on and the motor does not run. | The LED light does not work. | Replace the LED light bulb. |
| The plug is loose. | Make sure the plug is properly connected to the power socket. | |
| The kitchen hood vibrates. | The fan is damaged. | Contact Cecotec's Official Technical Support Service. |
| The motor is not properly secured. | Contact Cecotec's Official Technical Support Service. | |
| The hood is not properly fixed to the wall. | Make sure the kitchen hood is completely secure. | |
| Smoke or steam cannot be properly extracted. | The distance between the kitchen hood and the hob is too great. | Reduce the distance between the hood and the hob. |
| The hob is exposed to a high airflow. | Reduce the airflow in the cooking area by closing doors or windows. |
7. COPYRIGHT
The intellectual property rights over the texts in this manual belong to CECOTEC INNOVACIONES, S.L. All rights reserved. The contents of this publication may not, in whole or in part, be reproduced, stored in a retrieval system, transmitted, or distributed by any means (electronic, mechanical, photocopying, recording or similar) without the prior authorization of CECOTEC INNOVACIONES, S.L.
8. SIMPLIFIED EU DECLARATION OF CONFORMITY

Cecotec Innovaciones hereby declares that this appliance complies with the essential requirements and other relevant provisions of the regulations applicable in the European Union. This appliance has been designed, manufactured and tested in compliance with required safety and quality
standards. The full text of the EU Declaration of Conformity can be found on the following website: https://cecotec.es/es/information/declaration-of-conformity
FRANÇAIS
1. PIECES ET COMPOSANTS
6. PROBLEEMOPLOSSING
2. ΠPIN ANO TH XPHSE
Autn n oukeun diatioetai o e oukeuaia oxediouevn va tny npootateuei kat a Tne
muapopa. Apaipote tn oukeun atto to kouti tsk kal apaipote oao to uikoc oukeuaiaac.
Mtopeite va qualcte to apxiko kouti kai alaa eion oukeuaiaac o ae qaaecs epoc yia va
aTOnpuyete znla otn ouakeun eav xpeiaotei va tn metapepete oTo eAlov. Eav thete va
aToppieTe Tnv apxikn oukeuaia, povtioe va avakukwote oA ta avikeiEvva wotra.
Bεβaiωθειτο οι ωλα τα εξαρτήμata και τα εξαρτήμata περλαμβάνονται και σε καλή κατασταη. Eav kαποio από αυτα λείπει ἡδε είαι σε καλή κατασταη, επικονωνησε αμεως με την Επισημη Yπηρεσία τεχικής ΑΤΟΤΗΝΙ Πης Βεις Cecotec.
περιεχόμενα kOUTIó
- AtoppoqnTnpaç.
-EyXεipidio odnyiwv. -
KIT toiotheTnOg (avaloya ta ovtEa).
-Φiλtpa avθpaka. -
Mny aphaipéite tov oepiako apioa oto ppoiov, yia va diatnpnoet en owtn ixvnlaoiotnta tou eonliaoou oc se TepiTTwON Tou zntnoe BohTeia.
3. EΓΚΑΤΑΣΤΑΣH
Metpnoeic TpoiovtoC
To x 2 8eixvei Tc Egwtepikec eptnoeis Tou aoppoqnnpa.
EAAHNIKA
Aattnoeic aepioou
H eioo tsou ouotnmuotc eoepioou TpeTt va eivai oE eWTEPIKO xwpo, EKTOS av xpnoipoiieitai ouotma avakukloopopiac (xwpiacepioo).
- Mny toTIOeTeIe Tnv eOoTOU OuaTnMaTOEaepiOou oKkIoTo xwo.
- Xpnoiopoioaneo eva akau, eotnua eepioou. Ev ouviatai n xpno TAAOTIKwv aepaywyw.
- To ouotma eiaepioou npetie va diaotei aooeotnpa. Eav to kalmu ta oopns n tou toixou oac exei non aooeotnpa, mnv xpnoipoinoete auto tou npapextai e tov atoppoqntnpa oac.
- Ia va eviotoinoiete tvn oon tou ouotnauos eaeipouu:
ydi ydi ydi ydi ydi ydi ydi ydi ydi ydi ydi ydi ydi ydi ydi ydi ydi ydi ydi ydi ydi ydi ydi ydi ydi ydi ydi ydi ydi ydi ydi ydi ydi ydi ydi ydi ydi ydi ydi ydi ydi ydi ydi ydi ydi ydi ydi ydi ydi ydi ydi
aal paa aie 1e jll y gaiy baill g aell cbe j5d . aae ge ggeall pbi
a a a a a a a a a a a a a a a a a a a a a a a a a a a a a a a a a a a a a
aall no 1000
aill 2gac gccg cgtg 1iia iia iia iia iia iia iia iia iia iia
.
-ccuilljec
aill jy aell w yae oiee ne yes yie eee yie yie yie yie yie yie yie yie yie
…
:
jbs jkiy, lidaiaed yaiy 21, joi kjiy jilal j jao sli -1
-1
15,4
()
aalai aaiiaaa iaii jai liaiie 1 1 1 1 1 1 1 1 1 1 1 1 1 1 1
.
a111 1s s
50/60 220-240 a1b
Jusily 2jao baiu cui j
J.4
Liaiaiaiaiaiaiaiaaiyaiyaiyaiyaiyaiyaiyaiyaiyaiyaiyaiyaiyaiyaiyaiyaiyaiyaiyaiyaiyaiyaiyaiyaiyaiyaiyaiyaiyaiyaiyaiyaiyaiyaiyaiyaiyaiyaiyaiyaiyaiyaiyai
aannn
aee aee eae ee eae eae eae eae eae eae eae eae eae eae eae eae eae eae eae eae eae eae eae eae eae eae eae eae eae eae eae eae eae eae eae eae eae eae eae eae
aaii i 1
a 151 Jblll aiee ie eae ae eae ae eae ae ae ae ae ae ae ae ae ae ae ae ae ae ae ae ae ae ae ae ae ae ae ae ae ae ae ae ae ae ae ae ae ae ae ae ae ae ae ae ae ae ae ae ae ae ae ae ae ae ae ae ae ae ae ae ae ae ae ae ae ae ae ae ae ae ae ae ae ae ae ae ae ae ae ae ae ae ae ae ae ae ae ae ae ae ae ae ae ae ae aaee
a4 ≤ a5 ≤ a_6
山.6
Cecotec Innovations 45
CE


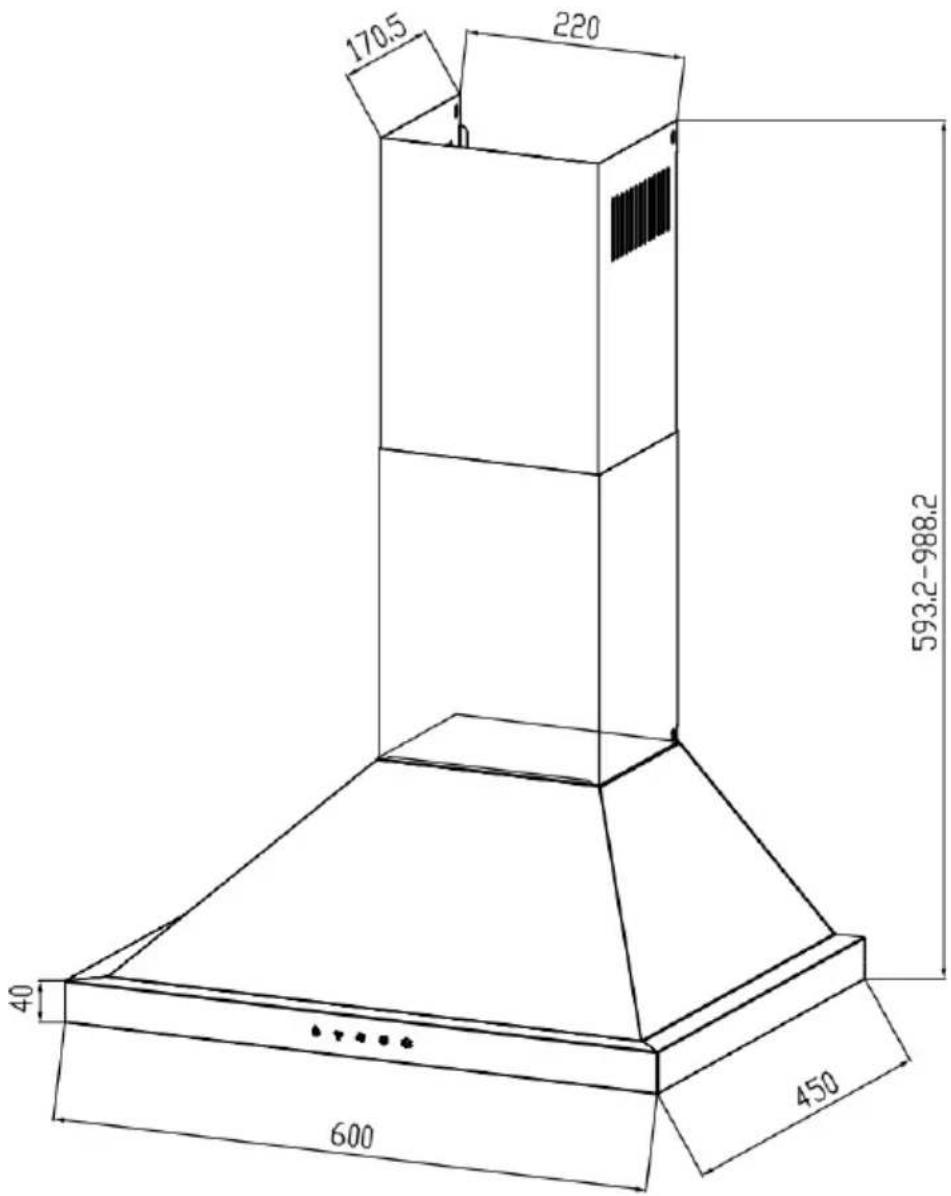
Fig./Img./Abb./Afb./Rys.1
Fig./Img./Abb./Afb./Rys.2
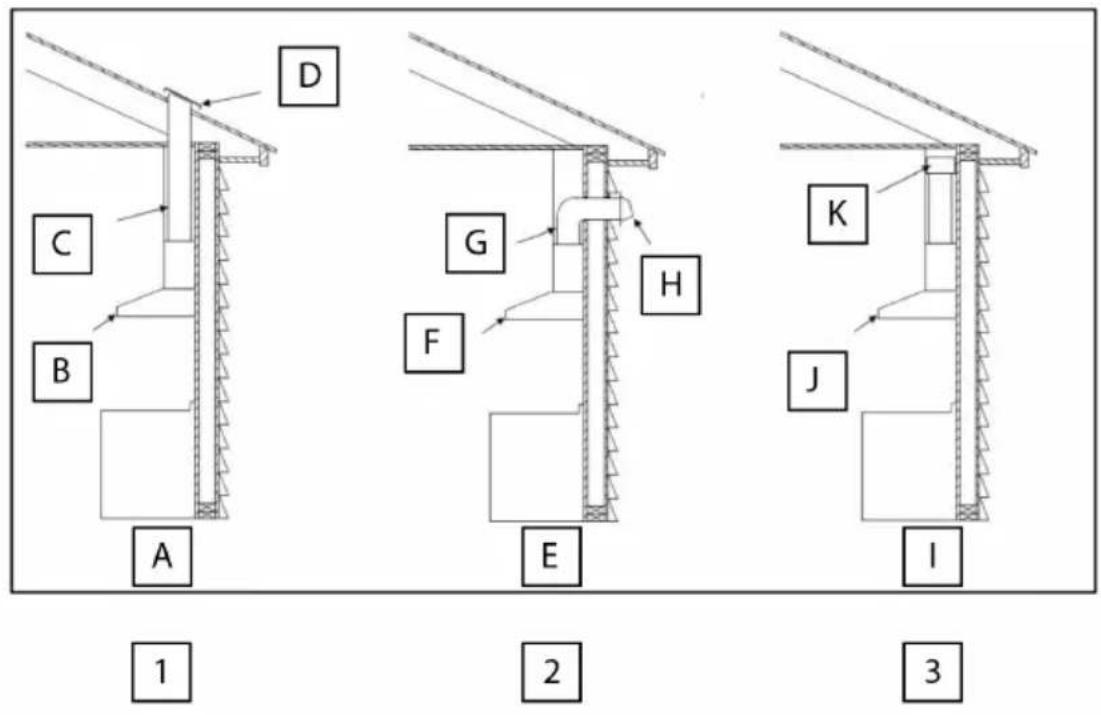
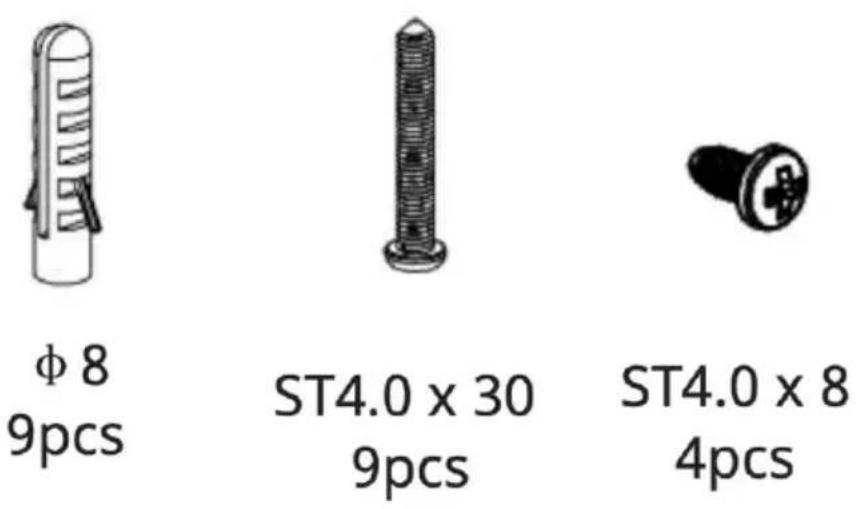
Fig./Img./Abb./Afb./Rys.3
Fig./Img./Abb./Afb./Rys.4
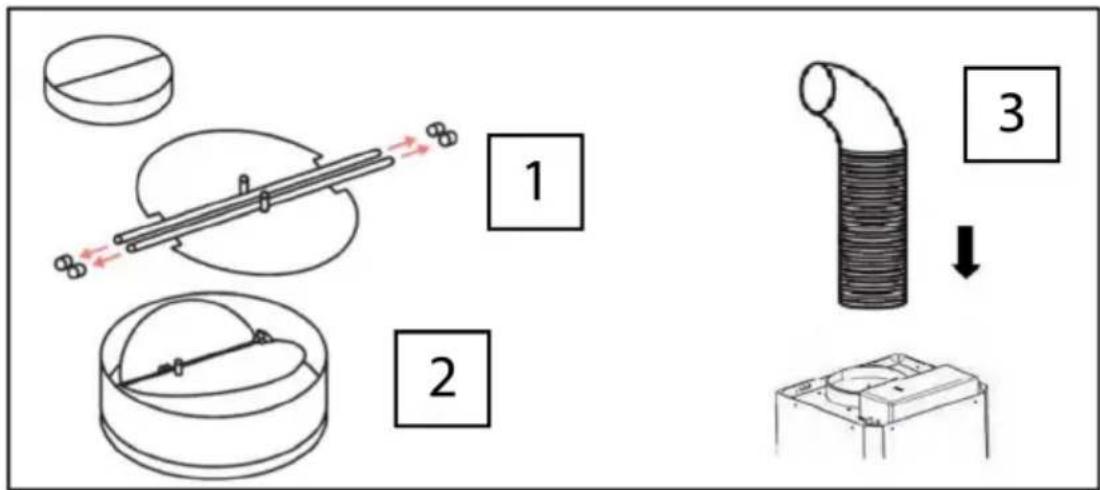
Fig./Img./Abb./Afb./Rys.5
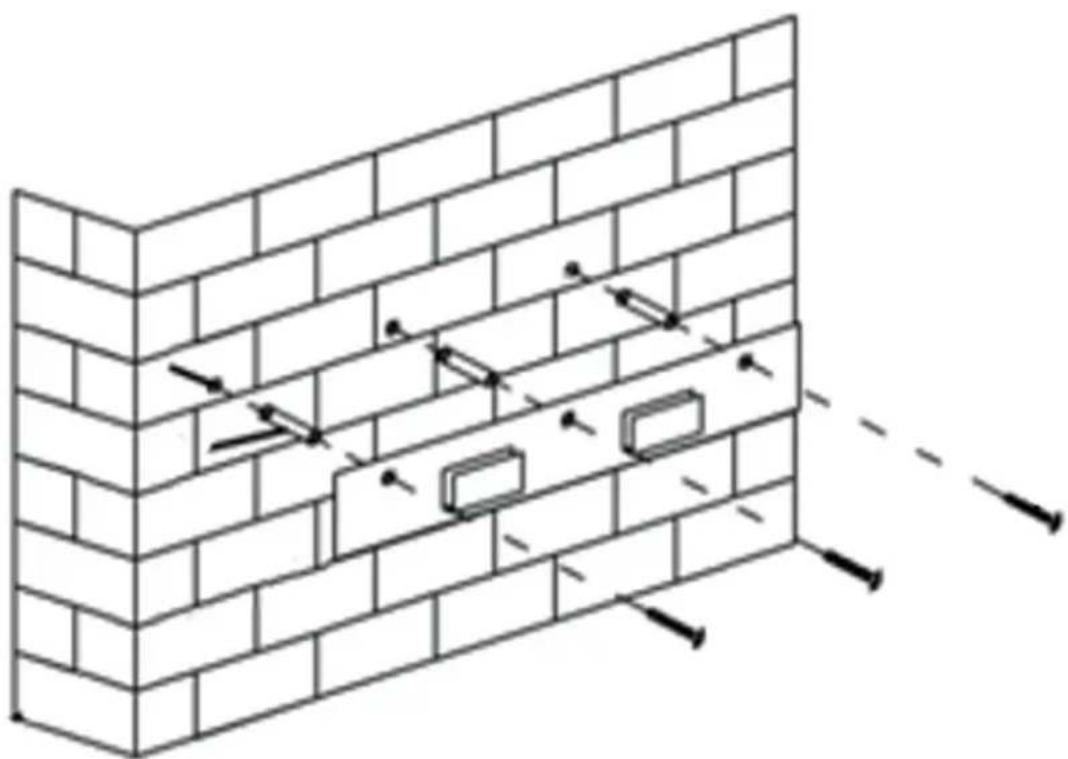
Fig./Img./Abb./Afb./Rys.6
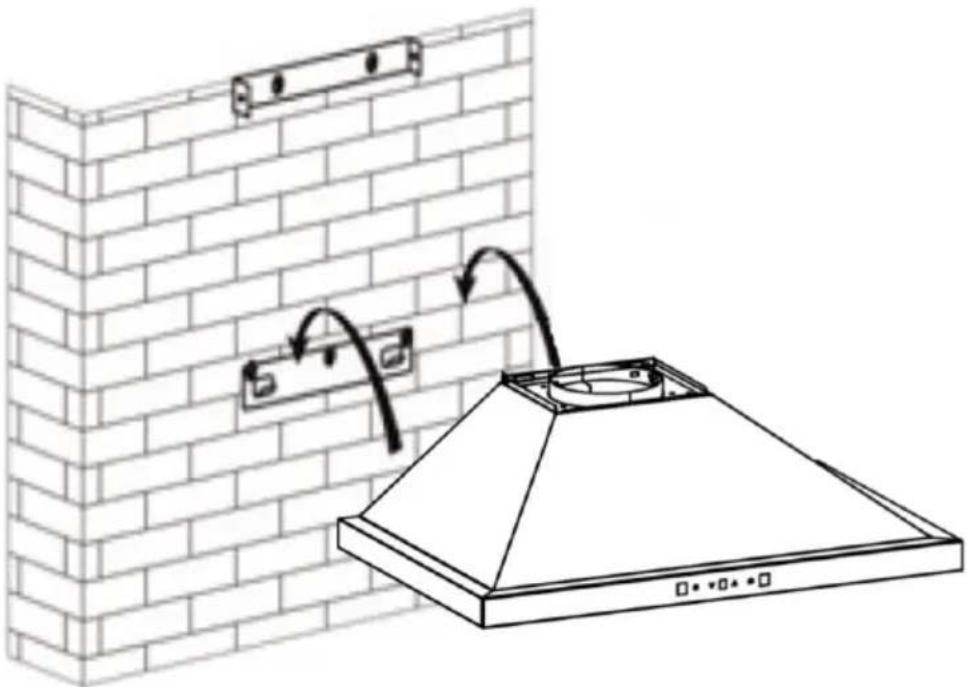

Fig./Img./Abb./Afb./Rys.7
Fig./Img./Abb./Afb./Rys.8
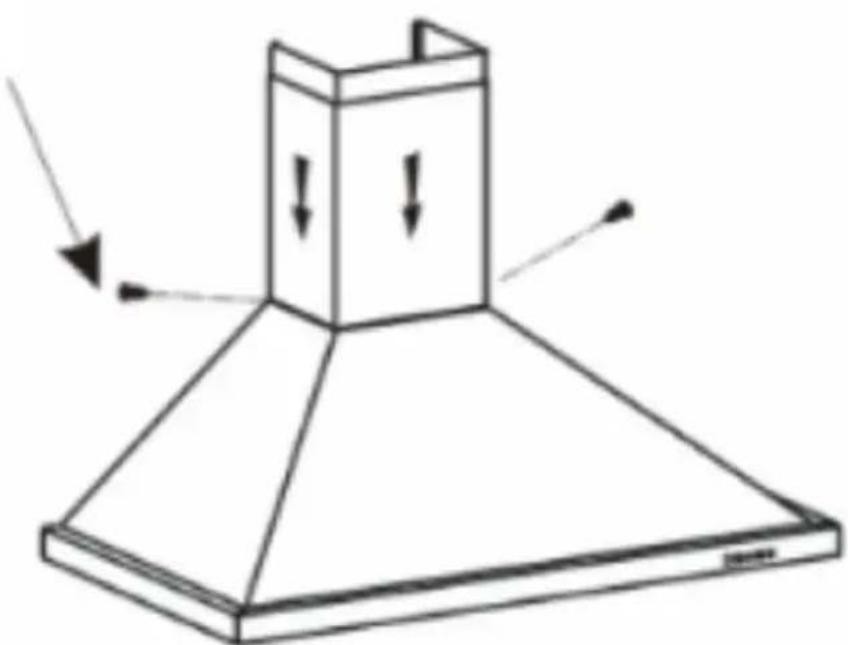
Fig./Img./Abb./Afb./Rys.9
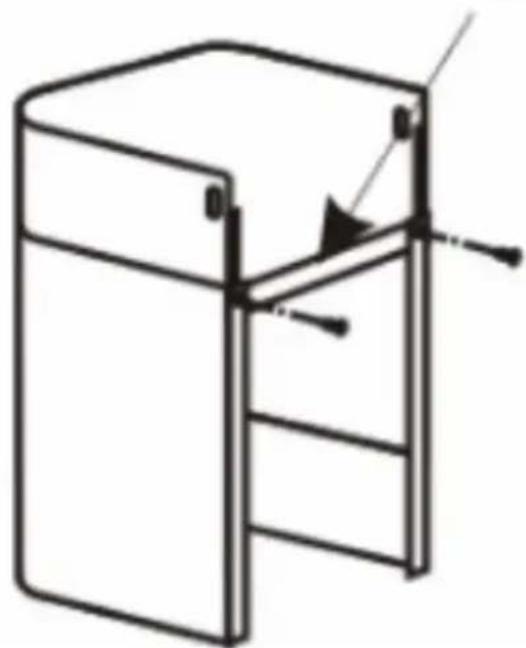
Fig./Img./Abb./Afb./Rys.10
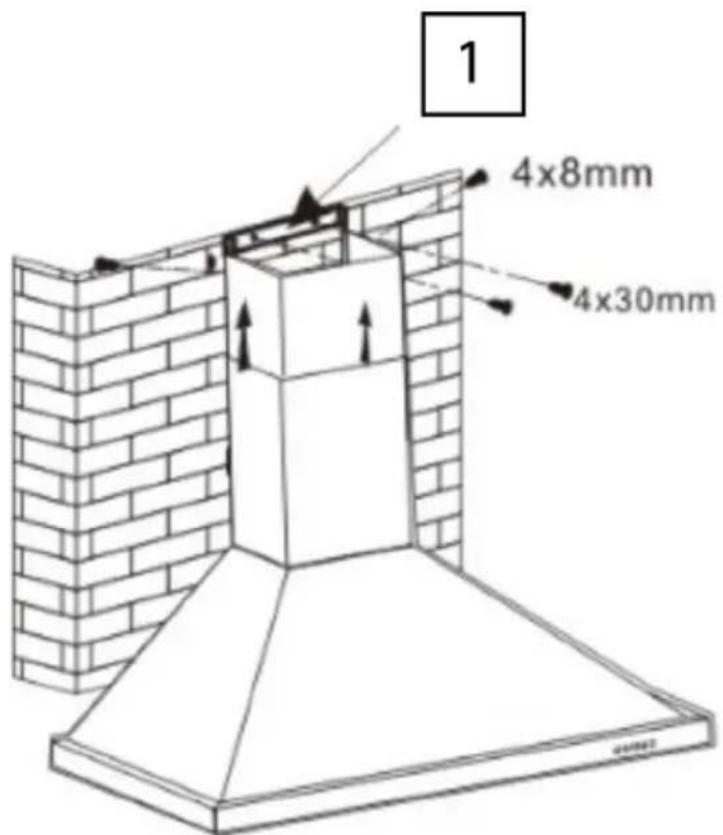
Fig./Img./Abb./Afb./Rys.11
Fig./Img./Abb./Afb./Rys.12

Fig./Img./Abb./Afb./Rys.13
www.cecotec.es