Bolero Flux TLT 604000 Inox A+++ - Basket CECOTEC - Free user manual and instructions
Find the device manual for free Bolero Flux TLT 604000 Inox A+++ CECOTEC in PDF.

User questions about Bolero Flux TLT 604000 Inox A+++ CECOTEC
0 question about this device. Answer the ones you know or ask your own.
Ask a new question about this device
Download the instructions for your Basket in PDF format for free! Find your manual Bolero Flux TLT 604000 Inox A+++ - CECOTEC and take your electronic device back in hand. On this page are published all the documents necessary for the use of your device. Bolero Flux TLT 604000 Inox A+++ by CECOTEC.
USER MANUAL Bolero Flux TLT 604000 Inox A+++ CECOTEC
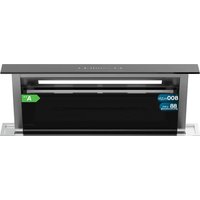
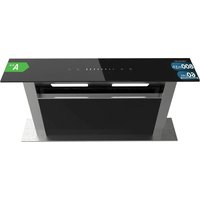
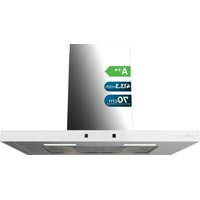
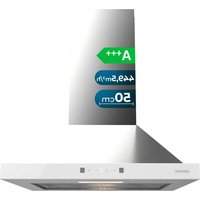
natural_image
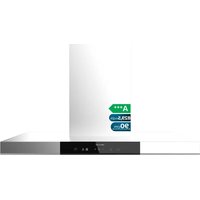
Exterior view of a white CBOCLOC stainless steel kitchen fan (no text or symbols visible on the panel itself)bolero
- Parts and components 12
- Before use 12
- Installation 13
- Operation 15
- Cleaning and maintenance 16
- Troubleshooting 17
SOMMAIRE
EN • The coding in this manual is generic and applies to all code variants of the appliance.
- Power icon
- Low speed touch icon
- Average speed touch icon
- High speed touch icon
- Light on/off touch icon
NOTE:
The graphics in this manual are schematic representations and may not exactly match the product.
2. BEFORE USE
This appliance is packaged in such a way as to protect it during transport. Remove the device from its box and remove all packaging material. You can keep the original box and other packaging materials in a safe place to prevent damage to the appliance if you need to transport it in the future. If you wish to dispose of the original packaging, make sure you recycle all items correctly.
- Check that all parts and components are included and in good condition. If any of them are missing or damaged, please contact the official Cecotec Technical Support Service immediately.
Box content
- Kitchen hood.
- Instruction manual.
- Assembly kit (depending on model).
- Carbon filters.
- Do not remove the product's serial number in order to keep proper traceability in case you need technical assistance.
3. INSTALLATION
Product size
Figure 2 shows the external dimensions of the extractor hood.
Ventilation requirements
- The outlet of the ventilation system must be in the open air, except if a recirculation system is used (without ventilation).
- Do not place the outlet of the ventilation system in an enclosed area.
- Use only a rigid metal ventilation system. The use of plastic vents is not recommended.
- The ventilation system must have a stop gate. If the ceiling or wall cover is already fitted with a stop gate, do not use the one supplied with the kitchen hood.
- To maximize the performance of the ventilation system:
Minimize the duct length and the number of bends and elbow joints. - Do not modify the duct size.
- Seal all connections with electrical tape to prevent leakage.
Seal the exterior wall or roof opening around the cover with caulk. - The extractor hood should be installed at a height of 70-80 cm above the cooker.
Ventilation system
Figure 3 shows the different ventilation systems.
Fig. 3 key:
OPTION 1
A. Ventilation outlet through the roof.
B. Kitchen hood.
C. Round ventilation.
D. Roof cover.
OPTION 2
E. Ventilation outlet through the wall.
F. Kitchen hood.
G. Round ventilation
H. Wall cover
OPTION 3
- Recirculation system (without ventilation)
J. Kitchen hood.
K. Baffle.
NOTE: To ensure optimum air extraction, the following rules must be strictly observed:
ENGLISHENGLISH
- Ignoring these basic instructions will reduce the performance and increase the noise levels of the extractor hood.
- Installation must be carried out by a qualified technician.
- Do not connect the kitchen hood exhaust duct to an existing ventilation system that is being used for another appliance, such as a fireplace.
- The angle of curvature of the air outlet pipe must not be less than 120^ .
- Align the tube horizontally. Another possibility is that the pipe rises from the hood and is directed to an outside wall.
- After installation, make sure that the kitchen hood is placed horizontally and fully balanced to prevent grease from accumulating on one side.
- Make sure that the exhaust duct chosen for installation complies with all regulations and is fire resistant.
Assembly in a wall
- When you have decided on the exact installation point of the kitchen hood, refer to the dimensions in Figure 4 to mark the drilling position on the wall. Once this step is done, drill 4 holes (φ10).
Fig. 4 key:
1.- Holes.
- Then insert the 4 expansion screws supplied into the holes.
- Then, screw two screws into the two upper expansion plugs, but do not tighten them completely.
- Remove the filters from the extraction hood. Hang the extraction hood on the screws.
- While one person holds the extraction hood, the other should tighten the screws.
- Next, screw the other 2 screws into the 2 lower expansion screws and tighten them completely (Figure 5).
- Finally, install the filters.
Installation in a cabinet
- When you have decided on the exact installation point of the extractor hood, refer to Figure 6 to open a hole in the bottom of the cabinet to allow the exhaust duct to pass through.
Fig. 6 key
1.- Centre line.
2.- The back of the kitchen hood must be aligned with this edge.
- Remove the filters.
- Attach the extraction hood directly to the bottom part of the cabinet using 4 screws (Figure 7).
Installation of the air outlet pipe
Note: Remove the protective film before installation.
- Valve installation
Install the non-return valve on the air outlet of the extraction hood as shown in Figure 8. - Place the tube in the air outlet of the extraction hood, as shown in Figure 8.
Fig. 8 key:
1.- Non-return valve.
2.- Air outlet. - Air outlet tube.
Replacing the LED light
Note:
- The light must be replaced by a qualified professional or by the official Cecotec Technical Support Service.
- Unplug the power cable before replacing it.
- Before installing the light, make sure that it's not hot.
- Always use gloves or cloths to avoid direct contact with the LED lights.
- Remove the filters and the 3 screws from the rear of the hood (Fig. 9).
- Push the LED light out and replace it (Fig. 10).
- After removing the LED light, turn the plate over (Fig. 11).
Installing the carbon filter
If the recirculation system is to be used, it is recommended that carbon filters be installed. Carbon filters can filter out unpleasant food colours in the environment.
- Remove the mesh filters before installing the carbon filters.
- Place the carbon filter on the fan housing shaft by fitting the carbon filter holes on the housing shaft.
- Then, turn the carbon filter clockwise.
- Turn it until it can no longer move. Turn the carbon filter cover counterclockwise to remove
it. - Finally, install again the mesh filters.
Note:
- Make sure that the filter is properly fixed, otherwise it could come loose and pose a hazard.
- When carbon filters are installed, the suction power decreases.
- Carbon filter dimensions: Diameter face A 12.9 cm; Diameter face B 13.3 cm.
- IMPORTANT: install the carbon filters only if the kitchen hood is to be used in air recirculation mode (NO OUTLET PIPE TO THE OUTSIDE).
ENGLISHENGLISH
Installation of the power cable
You must connect the plug to a 220-240 V-, 50/60 Hz power line.
The kitchen hood must be connected to an earthed installation.
4. OPERATION
- To turn the kitchen hood on, press the ON/OFF touch icon.
- Choose the desired operating speed by pressing the respective touch icons (low, medium or high).
- Turn the light on or off by pressing its respective touch icon.
NOTE: The hoods are equipped with an overheating protection system that acts to prevent possible incidents when the motor temperature exceeds the operating limit value.
5. CLEANING AND MAINTENANCE
Cleaning and maintenance
Always turn the kitchen hood off and unplug it from the socket before performing any cleaning or maintenance tasks. The exterior surfaces of the kitchen hood are susceptible to scratches and stains. Therefore, use mild cleaning products and remove alkaline or acidic substances (lemon juice, vinegar) immediately.
Stainless-steel surface
Stainless steel must be cleaned regularly to ensure a long service life. To do this, use a suitable cleaning product.
Control panel surface
The control panel can be cleaned with a damp cloth and a neutral cleaning agent. Make sure the cloth is clean and well wrung out before cleaning the kitchen hood. Use a soft, dry cloth to remove any excess moisture that may remain after cleaning.
Cleaning the mesh filters
Clean the filter every month to avoid risk of fire. The filter accumulates grease, smoke and dust, which influences the efficiency of the kitchen hood. If the filter is not cleaned, grease residues will accumulate in it. Clean the filter with water and a small amount of a suitable cleaning agent and allow it to air dry before replacing it.
- TROUBLESHOOTING
| Problem Possible causes | Solution | |
| The light is on, but the motor does not work. | The ventilation system is blocked. Clean the blockage. | |
| The capacitor is faulty. | Contact the official Cecotec Technical Support Service | |
| The motor is faulty. | Contact the official Cecotec Technical Support Service | |
| The light does not switch on and the motor does not work. LED bulb does not work. Replace the LED bulb. | ||
| The plug is loose. | Make sure that the plug is correctly plugged into the socket. | |
| The kitchen hood vibrates. The fan is faulty. | Contact the official Cecotec Technical Support Service | |
| The engine is not properly fixed. | Contact the official Cecotec Technical Support Service | |
| The kitchen hood is not properly attached to the wall. | Make sure the kitchen hood has cooled down completely. | |
| Smoke or steam cannot be properly extracted. | The distance between the kitchen hood and the stove is too big. | Reduce the distance between the kitchen hood and the stove. |
| The stove is exposed to a large air flow. | Reduce the air flow by closing doors or windows. |