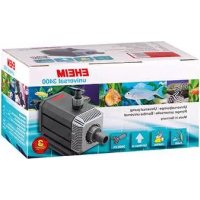
Flow 6500 - Pump EHEIM - Free user manual and instructions
Find the device manual for free Flow 6500 EHEIM in PDF.
User questions about Flow 6500 EHEIM
0 question about this device. Answer the ones you know or ask your own.
Ask a new question about this device
Download the instructions for your Pump in PDF format for free! Find your manual Flow 6500 - EHEIM and take your electronic device back in hand. On this page are published all the documents necessary for the use of your device. Flow 6500 by EHEIM.
USER MANUAL Flow 6500 EHEIM
natural_image
Technical line drawing of a mechanical component with threaded end and flanged top (no text or symbols)2500 3500 5000 6500
natural_image
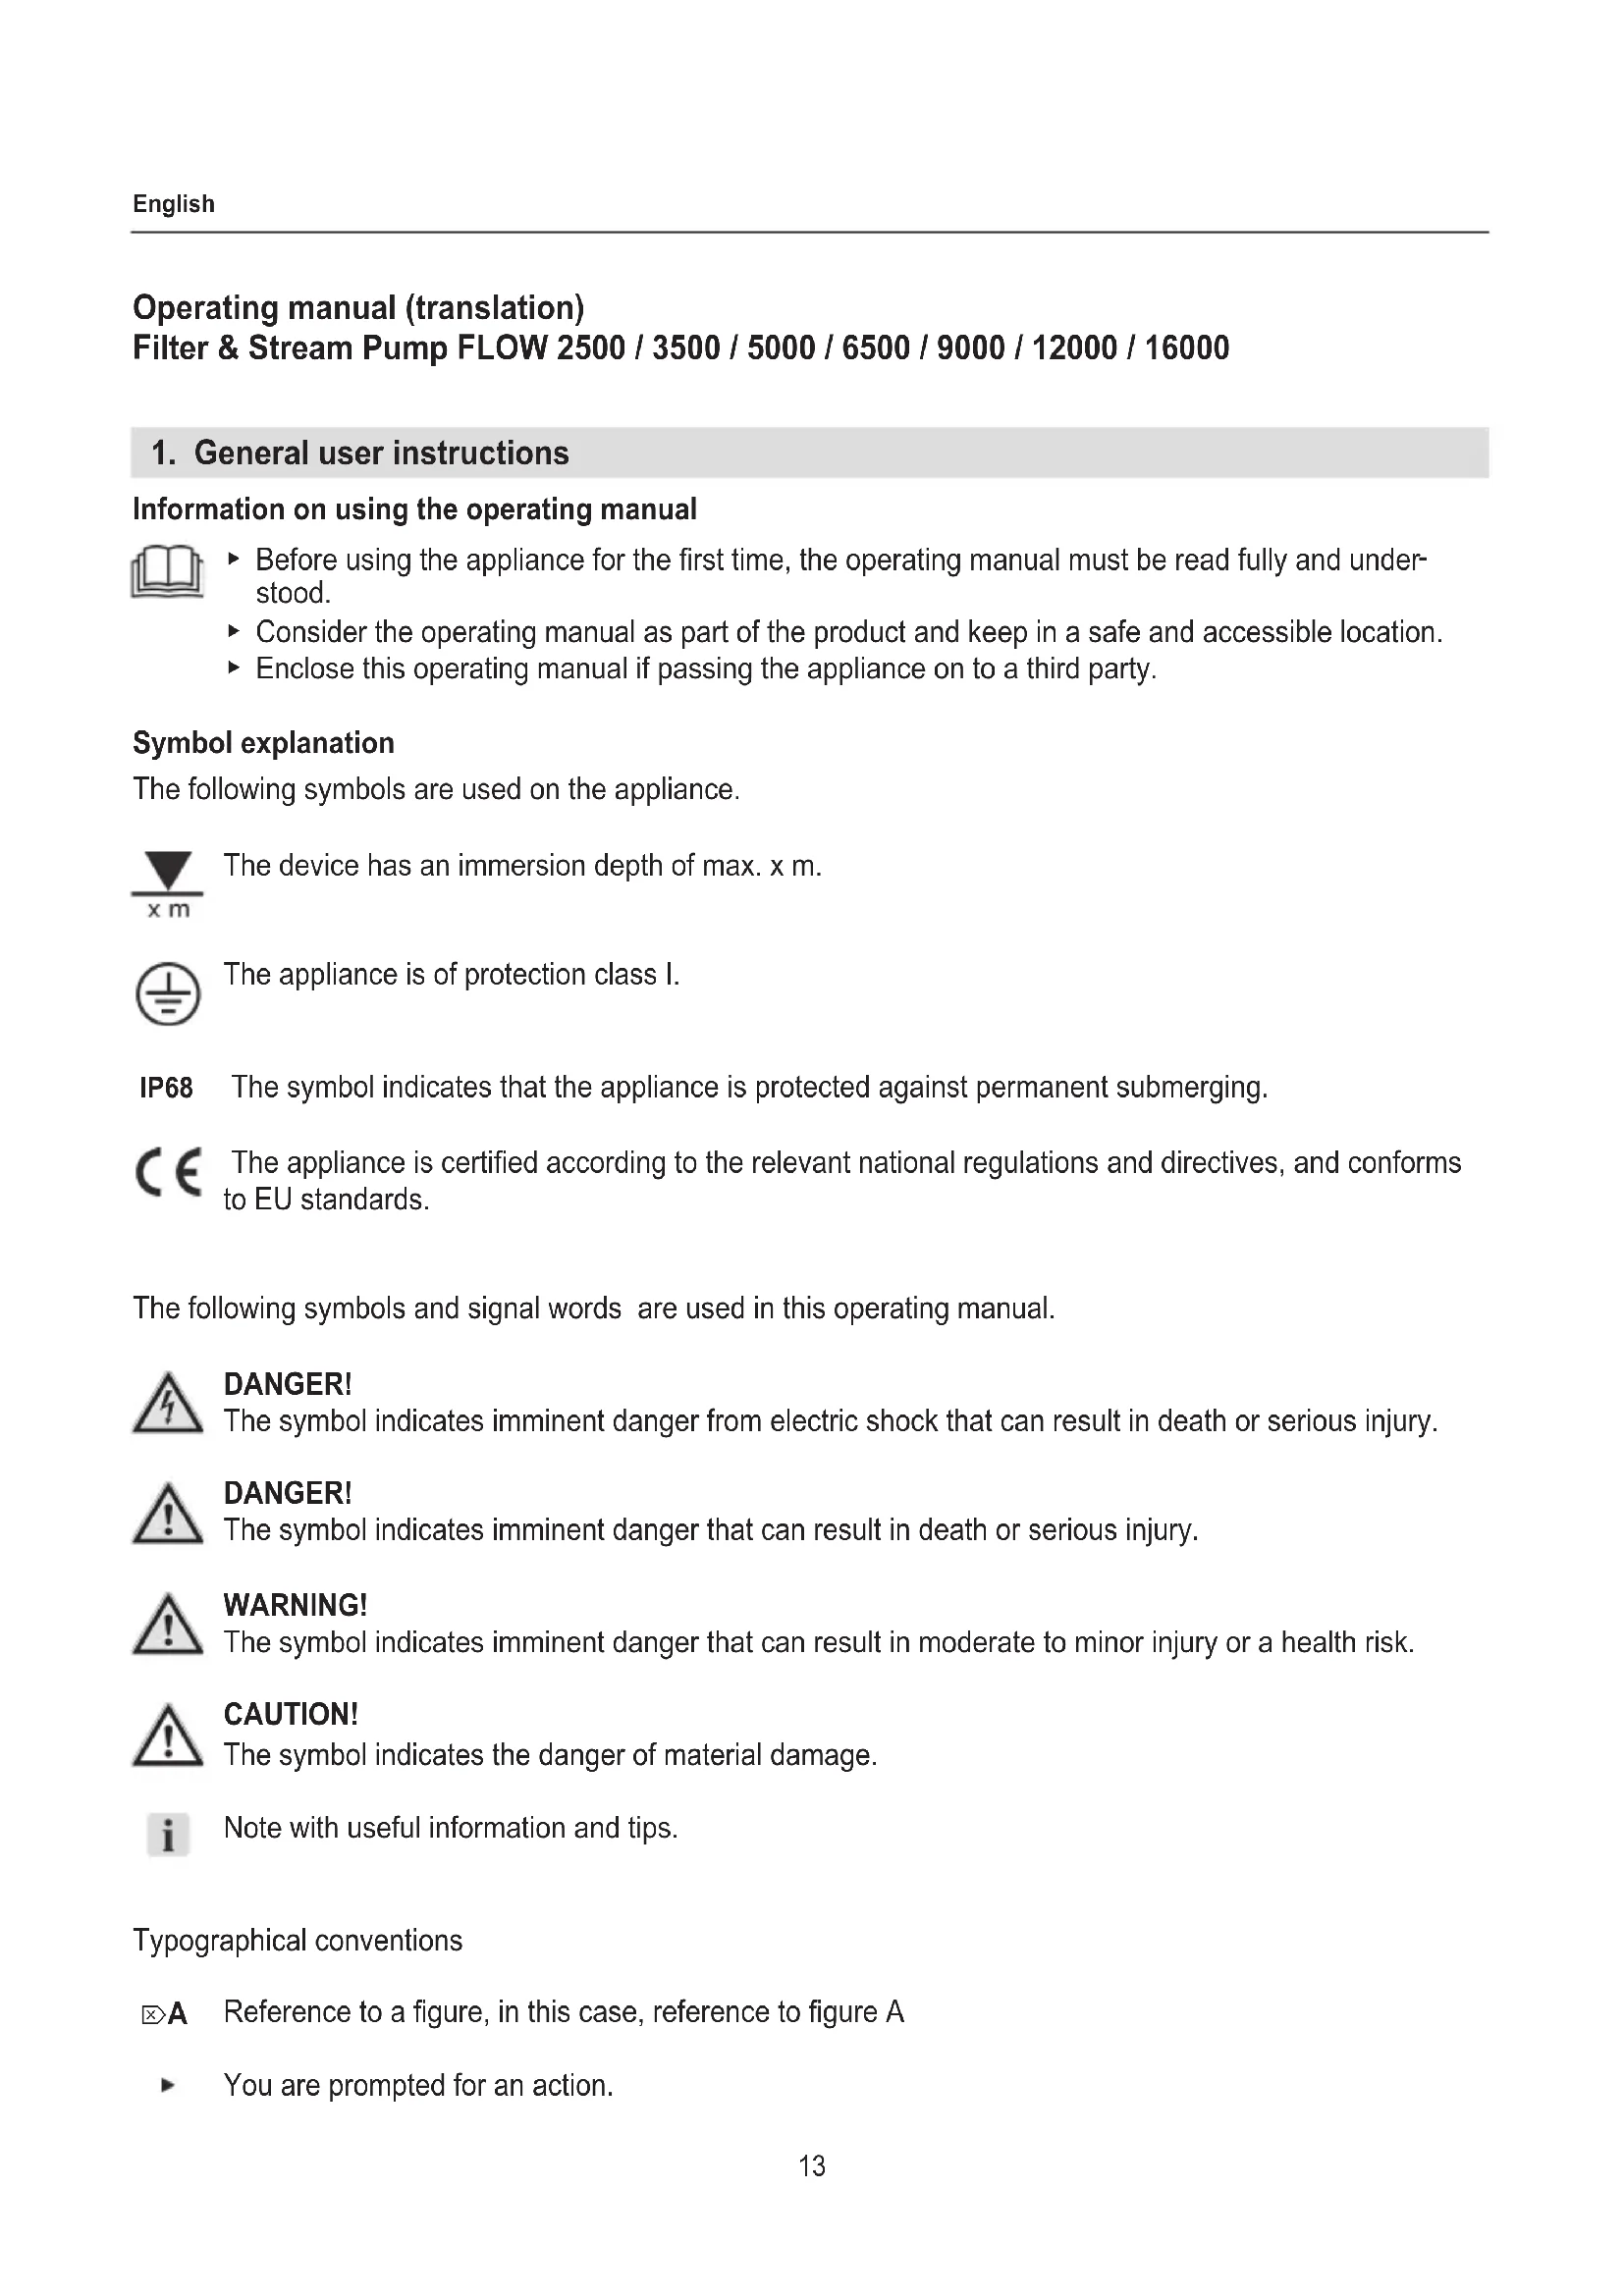
Technical line drawing of a mechanical component with threaded ports and ventilation grille (no text or symbols)9000 12000 16000


de Bedienungsanleitung
en Operating manual
fr Notice d'utilisation
it Istruzioni per l'uso
es Manual de instrucciones
pt Manual de instruções
nl Bedieningshandleiding
da Betjeningsvejledning
sv Bruksanvisning
tr İşletim kılavuzunun
pl Instrukcji obsługi
ru Руководство по эксплуатации
de Bedienungsanleitung (Original)
Filter- & Bachlaufpumpe FLOW 2500 / 3500 / 5000 / 6500 / 9000 / 12000 / 16000 ....6
en Operating manual (translation)
Filter & Stream Pump FLOW 2500 / 3500 / 5000 / 6500 / 9000 / 12000 / 16000 .... 13
Notice d'utilisation (traduction)
fr Pompe de filtration et d'évacuation de ruisseau
FLOW 2500 / 3500 / 5000 / 6500 / 9000 / 12000 / 16000....19
it Istruzioni per l'uso (traduzione)
Pompa per filtri e per ruscelli FLOW 2500 / 3500 / 5000 / 6500 / 9000 / 12000 / 16000 ....26
es Manual de instrucciones (traducción)
Bomba de filtración y arroyos FLOW 2500 / 3500 / 5000 / 6500 / 9000 / 12000 / 16000....33
pt Manual de instruções (tradução)
Bomba de filtragem e de riachos FLOW 2500 / 3500 / 5000 / 6500 / 9000 / 12000 / 16000 ....40
Bedieningshandleiding (vertaling)
Filter- & beeklooppomp FLOW 2500 / 3500 / 5000 / 6500 / 9000 / 12000 / 16000....47
da Betjeningsvejledning (oversættelse)
Filter- & bækpumpe FLOW 2500 / 3500 / 5000 / 6500 / 9000 / 12000 / 16000 .... 54
SV Bruksanvisning (översättning)
Filter- & bäckpump FLOW 2500 / 3500 / 5000 / 6500 / 9000 / 12000 / 16000 ....61
tr Kullanma kılavuzu (çeviri)
Filtre ve dere akımı pompası FLOW 2500 / 3500 / 5000 / 6500 / 9000 / 12000 / 16000 ....68
pl Instrukcja obsługi (tłumaczenie)
Pompa filtracyjna i strumykowa FLOW 2500 / 3500 / 5000 / 6500 / 9000 / 12000 / 16000....75
Руководство по эксплуатации (перевод)
ru Фильтр-насос и насос для искусственного ручья
FLOW 2500 / 3500 / 5000 / 6500 / 9000 / 12000 / 16000....82
text_image
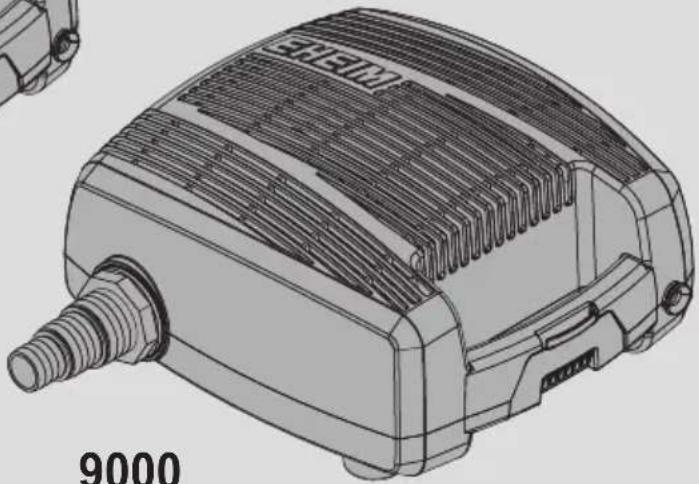
7475560 7475610 7426290 FLOW2500: 7621388 FLOW3500: 7675558 7426290 7475560 FLOW2500: 7482120 FLOW3500: 7482130 FLOW2500 FLOW3500
text_image
FLOW5000 FLOW6500 7475570 FLOW5000: 7604028 FLOW6500: 7604078 7475630 7475570 7482050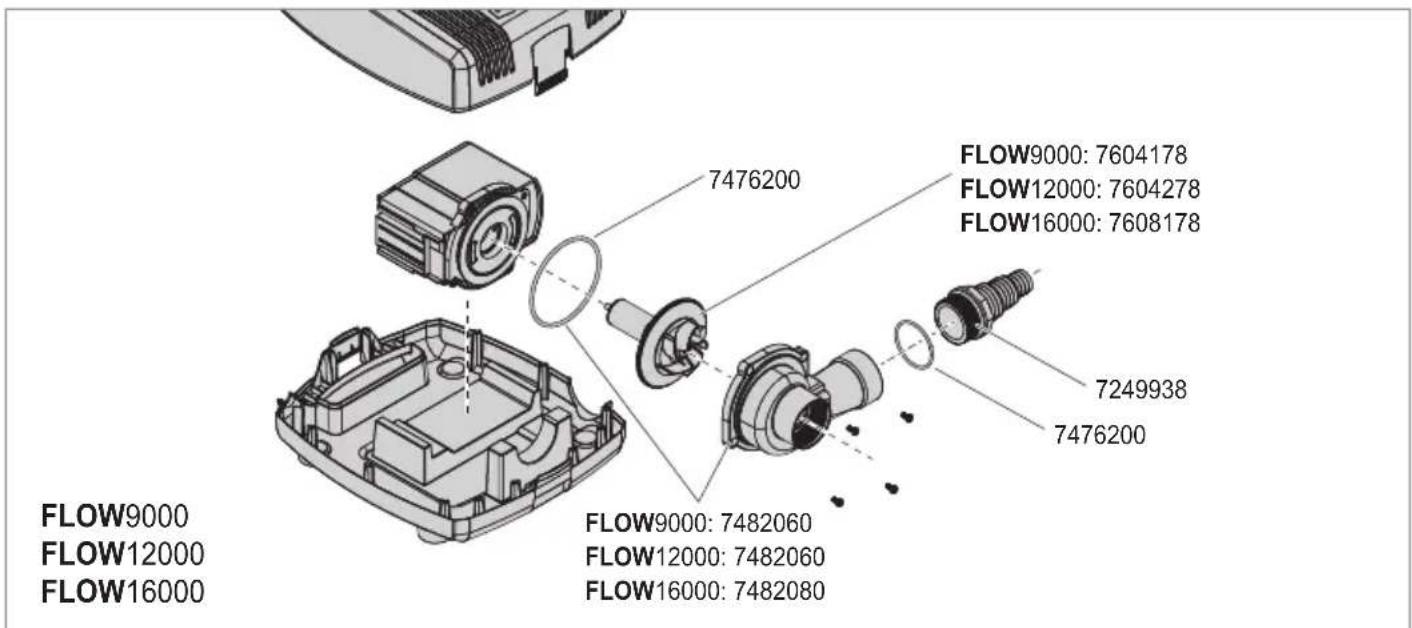
text_image
FLOW9000 FLOW12000 FLOW16000 7476200 FLOW9000: 7604178 FLOW12000: 7604278 FLOW16000: 7608178 7249938 7476200 FLOW9000: 7482060 FLOW12000: 7482060 FLOW16000: 7482080A

text_image
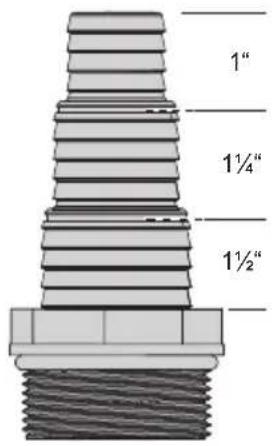
FLOW2500 FLOW3500 FLOW5000 FLOW6500 1" 1¼"FLOW9000
FLOW12000
FLOW16000

text_image
1" 1¼" 1½"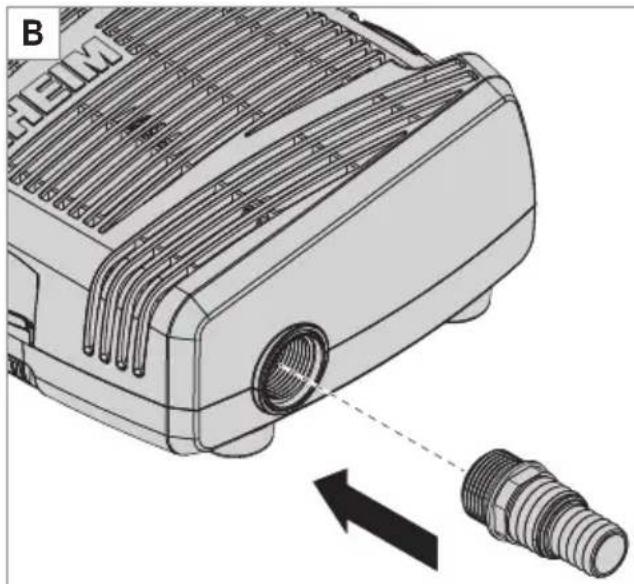
natural_image
Technical illustration of a mechanical component with threaded ports and an arrow indicating assembly or insertion (no text or symbols present)C
text_image
CHEM ① ② ①D

natural_image
Technical illustration of a mechanical housing with internal components and an arrow indicating direction (no text or symbols present)E

natural_image
Technical line drawing of a mechanical component with pipes and a curved structure (no text or symbols)F
text_image
FLOW2500 FLOW3500G

text_image
FLOW5000 FLOW6500H

text_image
FLOW9000 FLOW12000 FLOW16000Operating manual (translation)
Filter & Stream Pump FLOW 2500 / 3500 / 5000 / 6500 / 9000 / 12000 / 16000
1. General user instructions
Information on using the operating manual

Before using the appliance for the first time, the operating manual must be read fully and understood.
- Consider the operating manual as part of the product and keep in a safe and accessible location.
▶ Enclose this operating manual if passing the appliance on to a third party.
Symbol explanation
The following symbols are used on the appliance.

The device has an immersion depth of max. x m.

The appliance is of protection class I.
IP68 The symbol indicates that the appliance is protected against permanent submerging.

The appliance is certified according to the relevant national regulations and directives, and conforms to EU standards.
The following symbols and signal words are used in this operating manual.

DANGER!
The symbol indicates imminent danger from electric shock that can result in death or serious injury.

DANGER!
The symbol indicates imminent danger that can result in death or serious injury.

WARNING!
The symbol indicates imminent danger that can result in moderate to minor injury or a health risk.

CAUTION!
The symbol indicates the danger of material damage.

Note with useful information and tips.
Typographical conventions
☒A Reference to a figure, in this case, reference to figure A
▶ You are prompted for an action.
2. Application
The appliance and all parts included in the scope of delivery are intended for private use and must only be used:
· for pumping water
· for operating filter systems, water features, waterfalls, streams, etc.
· for water aeration and circulation
· in compliance with the technical data
The following limitations apply to the appliance:

· do not use for commercial or industrial purposes
· do not pump caustic, inflammable, aggressive or explosive substances, food or drinking water
· the water temperature may not exceed 35^ C
· do not use in swimming ponds
· never operate without a water flow
3. Safety instructions
Risks for persons and property can arise from this appliance if the appliance is improperly used or not used as intended or if the safety instructions are not heeded.
For your safety

This appliance is not intended for use by persons (including children) with reduced physical, sensory or mental capabilities, or lack of experience and knowledge, unless they are under the supervision of someone responsible for their safety or have received instruction on usage of the appliance from said person. Children should be supervised to ensure that they do not play with the appliance.
· Only for European markets:
This appliance can be used by children from the age of 8 and by persons with reduced physical, sensory or mental capabilities or lack of experience and/or knowledge if they are supervised and have been instructed in the safe use of the appliance and have understood the resulting dangers. Children must not play with the appliance. Cleaning and user maintenance must not be carried out by children unless they are supervised.
- Before use, carry out a visual inspection to ensure that the appliance, especially the mains cable and plug, are undamaged.
- Do not use the appliance if it is not working properly or is damaged.
· Never use the appliance with a damaged mains cable.
· Repairs must only be carried out by an EHEIM service centre.
- Do not carry the appliance by the mains cable, and to disconnect from the mains, always pull on the plug and not on the cable or appliance.
- Protect the mains cable against heat, oil and sharp edges. If the connection cable has been laid in the ground or in gravel without an empty conduit, it must not be possible to step on it.
- Only carry out the work described in these instructions.
- Never make technical modifications to the appliance.
- Only use original spare parts and accessories for the appliance.
- Only operate the appliance when there is no one in the water!

- The electrical installations must comply with the international and national erection specifications.
- The appliance must be protected by a residual current protection device with a maximum rated residual current of 30 mA.
- Please contact an electrician if there are any questions or problems.
· Disconnect the appliance from the mains before all work.
- The electrical data of the appliance must match the data of the power mains. This data is found on the type plate, the packaging and in these instructions.
- Extension cables and power distributors must be suitable for outdoor use (protected against splashing water).
- Mains connection cables must not have a smaller cross-section than rubber hose lines with the abbreviation H05RN-F3G0,75. Extension cables must meet the requirements of DIN VDE 0620.
- The mains connection cable of this appliance cannot be replaced. If the cable is damaged, the appliance must be scrapped.
- Protect the mains socket and mains plug against moisture. It is recommended to form a drip loop with the mains cable to prevent any water running along the cable to the mains socket.
- Only connect the appliance to a correctly installed protective contact mains socket.

- The appliance has a magnet with a strong magnetic field that can affect pacemakers or implanted defibrillators (ICD). Maintain a distance of at least 30 cm between the implant and magnet.
4. Commissioning

CAUTION! Material damage.
The pump must not run dry.
Connecting the hose
- Use a saw to shorten the outlet spigot to the diameter of your hose (☒A).
- Screw the outlet spigot onto the pump (☒B).
- Connect your hose to the outlet spigot.

We recommend fastening the hose with a hose clamp
5. Operation
Switching on the pump
- Place the pump on a solid surface as horizontal as possible in the pond so that the filter housing is covered by at least 20 cm of water. Pay attention to the maximum pond depth (see Technical data).
- Insert the mains plug in the mains socket. Attention: The pump starts immediately!
Switching off the pump
- Remove the mains plug from the mains socket.
6. Maintenance

ATTENTION! Electrocution!
▶ Before all maintenance work, remove the mains plug.

CAUTION! Material damage.
- Do not use hard objects or aggressive cleaning agents for cleaning.

The following sections describe maintenance work necessary for optimum and fault-free operation. Regular maintenance prolongs the service life and secures functionality of the pump over a long period.
Cleaning the filter housing
- Take the pump out of the water.
- Remove the hose from the outlet spigot.
- Remove the outlet spigot.
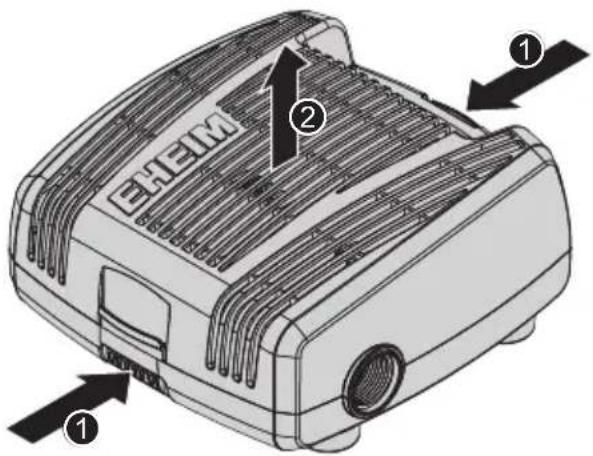
- Open the filter housing by pressing in the two side latches at the same time (☒C1).
- Take off the housing cover (☒C2).
-
Remove the pump upwards out of the housing base (☒D).
-
Clean the filter housing with a water jet.
- Install the pump again in reverse order.
When assembling, make sure that the mains cable is guided correctly through the strain relief and the housing opening ( E ).
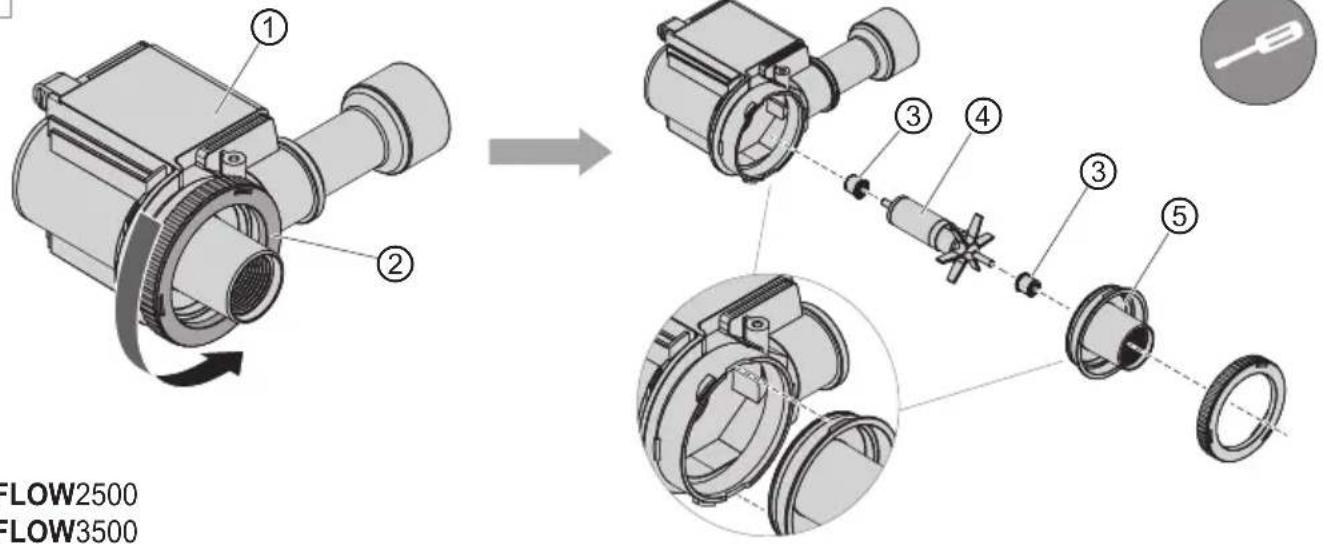
Cleaning the pump (2500 / 3500)
- Open the filter housing (☒C) and remove the pump (☒D), see Cleaning the filter housing.
- Unscrew the locking ring ② from the motor housing ① (☒F).
- Use a screwdriver to carefully prise the pump cover ⑤ uniformly to the front out of the motor housing.
- Pull the impeller ④ out of the motor housing.
- Install the pump again in reverse order.
- When assembling, make sure that the lugs on the pump cover engage in the recesses in the motor housing. - Make sure that the impeller is installed complete with the two bearing bushings ③ (☒F). - When assembling, make sure that the locking ring engages easily when being screwed on.
Cleaning the pump (5000 / 6500 / 9000 / 12000 / 16000)
- Open the filter housing (☒C) and remove the pump (☒D), see Cleaning the filter housing.
- Remove the screws ③ (☒G/H).
- Tilt the pump cover ② against the motor housing ①. Take off the pump cover.
- Pull the impeller ⑤ out of the motor housing.
- Remove the O-ring ④ from the motor housing.
- Install the pump again in reverse order.
When assembling, make sure that the markings on the impeller and on the motor housing align with each other.
7. Clearing faults

ATTENTION! Electrocution!
▶ Before clearing faults, remove the mains plug.
Faults Possible cause Remedy
| Pump does not start | No mains voltage | ▸ Check the mains voltage▸ Check the supply line |
| Pump does not pump | Mains plug is not inserted | ▸ Insert the mains plug in the mains socket. |
| Impeller is blocked ▶ Clean the pump | ||
| Thermal cut-out has activated | 1. Remove the mains plug and let the pump cool down.2. Insert the mains plug again after approx. 1 hour. | |
| Pump not pumping sufficiently | Filter housing is soiled | ▸ Clean the filter housing |
For other faults, please contact EHEIM Service.
8. Decommissioning
Storing and overwintering

- Take the appliance out of the pond.
- Clean the appliance
- Store the appliance in a frost-proof place.

Store the appliance in a water-filled container to avoid starting difficulties in the spring. The mains plug must not be submerged.
Disposal

When disposing of the appliance, heed the respective statutory regulations. Information on the disposal of electrical and electronic appliances in the European Union:
Within the European Union, disposal of electrically operated appliances is governed by national regulations that are based on the EU Directive 2012/19/EU on waste electrical and electronic equipment (WEEE). The appliance may no longer be disposed of with the municipal or household waste. The appliance will be accepted free of charge at municipal collection points or recycling centres. The product packaging is made up of recyclable materials. Dispose of them in an environmentally responsible manner and take them for recycling.
- Technical data
| FLOW 2500 3500 5000 650 | 0 9000 12000 | 16000 | |||||
| Type 7604 5110 5111 5112 | 5113 5114 5115 | ||||||
| Rated power 38 W 55 W 50 | W 70 W 80 W | 110 W 160 W | |||||
| Delivery rate 2300 l/h 3200 | l/h 4600 l/h 620 | 0 l/h 9200 l/h 1 | 1900 l/h 15500 | l/h | |||
| Max. delivery head 2.4 m 2. | 9 m 3.1 m 3.6 m | 3.6 m 4.0 m | 4,5 m | ||||
| Max. immersion depth | 1 m | 1 m | 2 m | 2 m | 4 m | 4 m | 4 m |
| Dimensions (L × W × H) | 241 × 254 × 122 mm | 367 × 300 × 130 mm | |||||
| Cable length | 10 m | ||||||
| Water connections | 1“ – 1 14 ” | 1“ – 1 14 ” – 1 12 ” | |||||
| Media temperature | 4°C – 35°C | ||||||
| Mains voltage/frequency | 220 – 240 V / 50 Hz | ||||||
Limpar a bomba (5000/6500/9000/12000)
Reproduction or copying – even parts thereof – only with the express permission of the producer.