K5 Power Control Car & Home - Pressure washer Kärcher - Free user manual and instructions
Find the device manual for free K5 Power Control Car & Home Kärcher in PDF.

| Product type | High-pressure cleaner |
| Brand | Kärcher |
| Model | K5 Power Control Car & Home |
| Dimensions (L x W x H) | 402 x 306 x 588 mm |
| Operating weight | 14.8 kg |
| Power supply | 230 V, 50 Hz, 2.1 kW |
| Protection rating | IPX5 |
| Operating pressure | 12.5 MPa |
| Max. admissible pressure | 14.5 MPa |
| Water flow rate | 7.5 l/min |
| Max. flow rate | 8.3 l/min |
| Detergent flow rate | 0.3 l/min |
| Max. water supply temperature | 40 °C |
| Max. supply pressure | 1.2 MPa |
| Sound pressure level | 76 dB(A) |
| Main functions | High-pressure cleaning, water suction from tanks, use of detergent via Plug 'n' Clean system, rotating washing brush |
| Safety devices | Main switch, gun lock, Auto-Stop function, motor thermal protection |
| Routine maintenance | Cleaning the filter in the water supply connection, draining before frost |
| Spare parts and repairability | Original accessories and spare parts recommended; warranty period varies by country, contact customer service |
Frequently Asked Questions - K5 Power Control Car & Home Kärcher
User questions about K5 Power Control Car & Home Kärcher
0 question about this device. Answer the ones you know or ask your own.
Ask a new question about this device
Download the instructions for your Pressure washer in PDF format for free! Find your manual K5 Power Control Car & Home - Kärcher and take your electronic device back in hand. On this page are published all the documents necessary for the use of your device. K5 Power Control Car & Home by Kärcher.
USER MANUAL K5 Power Control Car & Home Kärcher

H.Jenner
Chairman of the Board of Management

S. Reiser
Director Regulatory Affairs & Certification
71364 Winnenden (Germany)
Tel.: +49 7195 14-0
Fax: +49 7195 14-2212
Winnenden, 2018/10/01
Contents
General notes. 10
KARCHER Home & Garden app. 10
Environmental protection 10
Intended use 11
Accessories and spare parts.. 11
Scope of delivery 11
Description of the device 11
Safety devices. 11
Symbols on the device 12
Assembly 12
Initial startup 12
Operation 12
Transport. 13
Storage. 14
Troubleshooting guide. 14
Technical data. 15
EU Declaration of Conformity. 15
General notes
Read these original operating instructions and the enclosed safety instructions before using the device for the first
time. Proceed accordingly.
Keep both books for future reference or for future owners.
KARCHER Home & Garden app
The KÄRCHER Home & Garden app contains:
- Installation and initial startup information
Information about the areas of application - Tips & Tricks
- FAQ with detailed troubleshooting
- Connection to the KÄRCHER Service Centre
The app can be downloaded here:


Trademarks
- Google Play™ and Android™ are trademarks or registered trademarks of Google Inc.
- Apple® and App store® are trademarks or registered trademarks of Apple Inc.
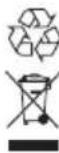
Environmental protection

The packing materials can be recycled. Please dispose of packaging in accordance with the environmental regulations.

Electrical and electronic appliances contain valuable, recyclable materials and often components such as batteries, rechargeable batteries or oil, which - if handled or disposed of incorrectly - can
pose a potential danger to human health and the environment. However, these components are required for the correct operation of the appliance. Appliances marked by this symbol are not allowed to be disposed of together with the household rubbish.
Cleaning work producing in oily waste water, e.g. washing engines, washing undercarriages etc., may only be performed at washing stations with an oil separator.
Working with detergents may only be performed on watertight surfaces with connection to the waste water sewage system. Do not allow detergent to enter waterways or the soil.
Extraction of water from public waterways is not permitted in some countries.
Notes on the content materials (REACH)
Current information on content materials can be found at: www.kaercher.de/REACH
Intended use
Use the high-pressure cleaner in private households only.
The high-pressure cleaner is intended for cleaning machines, vehicles, buildings, tools, facades, terraces, garden machines etc. using a high-pressure water jet.
Accessories and spare parts
Only use original accessories and original spare parts. They ensure that the appliance will run fault-free and safely.
Information on accessories and spare parts can be found at www.kaercher.com.
Scope of delivery
The scope of delivery for the appliance is shown on the packaging. Check the contents for completeness when unpacking. If any accessories are missing or in the event of any shipping damage, please notify your dealer.
Description of the device
The maximum amount of equipment is described in these operating instructions. Depending on the model used, there are differences in the scope of delivery (see packaging).
For the illustrations, refer to the graphics page Illustration A
① Stand with carrying handle
② Water connection with integrated sieve
③Transport wheel
4Visor
5Hose guide
(6) Trigger "0/OFF" / "I/ON"
7 Storage for spray lance
8High-pressure hose
Plug'n'Clean detergent bottle
Storage / parking position for high-pressure gun
① Transport handle, telescoping
12 Power Control spray lance dirt grinder for stubborn dirt, pressure level: HARD
13Vario Power Power Control spray lance for the most common cleaning tasks, pressure levels: HARD / MEDIUM/ SOFT/MIX
14 Power Control high-pressure gun
15 Button for separating the high-pressure hose from the high-pressure gun
16High-pressure gun lever
17 Pressure indicator (0-MIX / 1-SOFT / 2-MEDIUM / 3-HARD)
18High-pressure gun lock
19Carrying handle
20Hose holder
21)Type plate
22)Accessory compartment
23)Hook for net attachment
24)Accessory compartment net
25Mains connection with mains plug
26Water connection coupling
27**Garden hose with commonly available coupling - Fabric reinforced
Diameter of at least 1/2 inch (13 mm)
Length at least 7.5m
28**KARCHER suction hose for water supply from open containers (order no. 2.643-100.0)
Supplied screws and dowels
30^ Foam nozzle with detergent container The detergent is sucked out of the container to produce a strong detergent foam.
31^ Rotating washing brush (e.g. for washing cars)
* optional, ** additionally required
Supplied screws and dowels
Illustration B
1 Stand dowels (2 pieces)
② Screw M 4x20 (2 pieces)
③ Screw M 4x22 (2 pieces)
4 Screw M 4x16 (8 pieces)
Safety devices
CAUTION
Missing or modified safety devices
Safety devices are provided for your own protection.
Never modify or bypass safety devices.
Power switch
The power switch prevents unintentional operation of the device.
High-pressure gun lock
The lock locks the lever of the high-pressure gun and prevents the device from starting unintentionally.
Auto-stop function
If the lever of the high-pressure gun is released, the pressure switch turns off the pump and the high-pressure jet stops. The pump switches on again when the lever is pressed.
Motor circuit breaker
The motor circuit breaker shuts off the device if power consumption it too high.
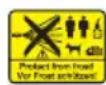
Symbols on the device
Do not aim the high-pressure jet may at persons, animals, live electrical equipment or the device itself.
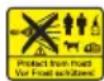
Protect the device against frost.

The device may not be connected to the public drinking water network.
Assembly
For the illustrations, refer to the graphics page.
Place the screws provided and matching screwdriver at the ready.
Fit the supplied loose parts onto the device before starting up the device.
Fitting the wheels
- Insert the wheels.
Note
Pay attention to the alignment of the hole. Illustration C
- Secure the wheels with 1 screw each.
Mounting the stand
- Insert the stand.
Illustration D - Insert the 2 dowels into the holes as far as they will go.
- Secure the base with 2 screws.
Installing the spray lance storage
- Hang the spray lance storage in position.
- Secure the storage with 2 screws.
Illustration E
- Secure the cover with 4 screws.
Illustration F
Mounting the transport handle
- Attach the transport handle.
Illustration G
- Secure the transport handle with 2 screws.
Mounting the accessory net
- Hang the accessory net on the hooks. Illustration H
Push the high-pressure hose through the hose guide
- Insert the high-pressure hose through the hose guide from the rear. Illustration I
Installing the water connection coupling
- Screw the water connection coupling onto the water connection on the device. Illustration J
Initial startup
- Place the device on a flat and level surface.
- Unwind the high-pressure hose completely and eliminate any loops and twists.
- Pull the high-pressure hose all the way forwards through the hose guide.
- Insert the high-pressure hose into the high-pressure gun until it audibly latches into place.
Note
Take care to ensure the correct alignment of the nipple. Illustration K
5. Check for a secure connection by pulling on the high-pressure hose.
6. Plug the mains plug into a mains socket.
Water supply
For the connection values, see the type plate or chapter Technical data.
Observe the water distribution company regulations.
ATTENTION
Damage through contaminated water
Contamination in the water can damage the pump and the accessories.
KÄRCHER recommends using the KÄRCHER water filter for protection(special accessory, order number 4.730-059).
Connection to the water line
ATTENTION
Hose coupling with Aquastop on the water connection of the device
Damage to the pump
Never use a hose coupling with Aquastop on the water connection of the device.
You can use an Aquastop coupling on the tap.
- Plug the garden hose onto the water connection coupling.
- Connect the garden hose to the water line.
- Open the water tap fully.
Illustration L
Sucking water from open containers
When used with the KARCHER suction hose with check valve (special accessory, order number 2.643-100) this high-pressure cleaner is suitable for sucking up surface water, e.g. from rain barrels or ponds (for the maximum suction height see chapter Technical data).
The water connection coupling is not required for vacuuming operation.
- Fill the suction hose with water.
- Screw the suction hose onto the device water connection and hang it in a water source (e.g. water butt).
Vent the device
- Switch the device on "I/ON".
- Unlock the lever of the high-pressure gun.
- Press the lever of the high-pressure gun. The device switches on.
- Allow the device for run a maximum of 2 minutes until the water escaping from the high-pressure gun is free of air bubbles.
- Release the lever of the high-pressure gun.
- Lock the lever of the high-pressure gun.
Operation
ATTENTION
Pump running dry
Damage to the device
If pressure does not build up in the device after 2 minutes then switch the device off and proceed according to the instructions in chapter Troubleshooting guide.
Power Control System
The pressure indicator on the high-pressure gun shows the currently set pressure level when operating with a Power Control spray lance.
Note
The sensitivity of materials can vary greatly depending on age and condition. The recommendations are therefore not binding.
Note
When operating with surface cleaner and other accessories, the pressure indicator is not accurate.
| Display Pres | ssure level | Recommended for e.g. |
| 3 HARD | HARD Stone | terraces made of pav- ing stones or washed con- crete, asphalt, metal surfaces, garden utensils (wheelbarrow, spade, etc.) |
| 2 MEDIUM | MEDIUM Cars / motorcycles, brick surfaces, plastered walls, plastic furniture | |
| 1 SOFT | SOFT Wooden surfaces, bicycle, sandstone surfaces, rattan furniture | |
| 0 MIX | MIX Operation with detergent | |
High-pressure operation
ATTENTION
Damage to painted or sensitive surfaces
Surfaces can be damaged when the jet is too close to the surface or an unsuitable spray lance is used. Maintain a minimum spray distance of 30~cm when cleaning painted surfaces. Do not clean car tyres, paint or sensitive surfaces such as wood with the dirt grinder.
- Insert a spray lance into the high-pressure gun and lock it by turning it 90^ .
Illustration M
- Switch the device on ("I/ON").
- Unlock the lever of the high-pressure gun.
- Press the lever of the high-pressure gun. The device switches on.
- Turn the Vario Power Power Control spray lance until the required pressure level is shown on the pressure indicator.
Operation with a washing brush
ATTENTION
Paint damage
Damage to surfaces through a dirty brush
Ensure that the washing brush is free from dirt or other particles before using it.
Note
The device operates at low pressure when using washing brushes. This means that detergent can be mixed with the water.
- Insert the washing brush into the high-pressure gun and turn by 90^ to fasten it.
Operation with detergent
DANGER
Failure to adhere to the safety data sheet
Incorrect handling of the detergent can seriously damage your health
Observe the safety data sheet of the detergent manufacturer, in particular the instructions on personal protective equipment.
Note
Detergent can only be mixed into the jet at low pressure.
Note
A Plug 'n' Clean detergent bottle is required for operating with detergent. KARCHER detergent can be purchased ready to use in a Plug 'n' Clean detergent bottle.
- Remove the cover from the Plug 'n' Clean detergent bottle.
- Plug the detergent bottle into the Plug 'n' Clean detergent connection with the opening facing down. Illustration N
- Use the Vario Power spray lance.
- Turn the spray lance towards "MIX" until "MIX" is displayed on the high-pressure gun. The detergent solution is mixed with the water jet during operation.
- You can optionally use the foam nozzle.
a Fill the detergent solution into the detergent tank. Adhere to the dosage specifications on the detergent container.
b Connect the foam nozzle to the detergent container.
c Insert the foam nozzle into the high-pressure gun and turn by 90^ to fasten it.
Illustration O
Recommended cleaning method
- Spray the detergent sparingly on the dry surface and let it work for a while (do not let it dry).
- Rinse off the loosened dirt with the high-pressure jet.
After operation with detergent
- Pull the Plug 'n' Clean detergent bottle out of the mount and close it with the cap before transporting the device lying down.
- Store the detergent bottle in the holder with the lid facing up.
- Flush the device with clear water for approx. 30 seconds.
Interrupting operation
- Release the lever of the high-pressure gun. The device switches off when the lever is released. The high pressure in the system is retained.
- Lock the lever of the high-pressure gun. Illustration P
- Place the high-pressure gun with the spray lance in the parking position.
- Switch the device off "0/OFF" during work breaks longer than 5 minutes.
Ending operation
CAUTION
Pressure in the system
Injuries from high-pressure water escaping uncontrollably
Only disconnect the high-pressure hose from the high-pressure gun or the device when the system is fully depressurised.
- Release the lever of the high-pressure gun.
- Close the water tap.
- Press the lever of the high-pressure gun for 30 seconds. The pressure remaining in the system is discharged.
- Release the lever of the high-pressure gun.
- Lock the lever of the high-pressure gun.
- Disconnect the device from the water supply.
- Switch off the device "0/OFF".
- Pull the mains plug out of the socket.
Transport
CAUTION
Failure to observe the weight
Risk of injury and damage
Be aware of the weight of the device during transportation.
Carrying the device
- Lift and carry the device by the carrying handles.
Pulling the device
- Pull the transport handle out until it audibly latches into place.
- Pull the device via the transport handle.
Transporting the device in a vehicle
- Before transporting lying down, pull the Plug 'n' Clean detergent bottle out of the mount and close it with the cap.
- Secure the device against slipping and tipping over.
Storage
CAUTION
Failure to observe the weight
Risk of injury and damage
Be aware of the weight of the device during storage.
Storing the device
- Place the device on a level surface.
- Disconnect the spray lance from the high-pressure gun.
- Press the separation button on the high-pressure gun and disconnect the high-pressure hose from the high-pressure gun.
- Store the high-pressure hose on the device.
- Store the mains connection cable and accessories on the device.
Observe the additional notes before storing the device for a long period of time, see chapter Care and service.
Care and service
DANGER
Danger of electric shock
Injuries due to touching live parts
Switch off the device.
Remove the mains plug.
The device is maintenance-free, i.e. you do not need to perform any maintenance work.
Frost protection
ATTENTION
Danger of frost
Incompletely emptied devices can be destroyed by frost.
Completely empty the device and accessories.
Protect the device from frost.
The following requirements must be satisfied:
The device is disconnected from the water supply.
- The high-pressure gun is disconnected from the high-pressure hose.
1. Switch the device on "I/ON".
2. Wait for a maximum of 1 minute until no more water escapes from the high-pressure hose.
3. Switch off the device.
4. Store the device in a frost-protected room, together with all accessories.
Clean the sieve in the water connection
ATTENTION
Damaged sieve in the water connection
Damage to the device through contaminated water Check the sieve for damage before inserting it in the water connection.
If necessary, clean the sieve in the water connection.
1. Remove the water connection coupling.
2. Pull the sieve out using flat pliers.
- Clean the sieve under running water.
Illustration Q
- Insert the sieve into the water connection.
Troubleshooting guide
Malfunctions often have simple causes that you can remedy yourself using the following overview. When in doubt, or in the case of malfunctions not mentioned here, please contact your authorised Customer Service.
DANGER
Danger of electric shock
Injuries due to touching live parts
Switch off the device.
Remove the mains plug.
Device not running
- Press the lever of the high-pressure gun. The device switches on.
- Check that the voltage specified on the type plate corresponds to the voltage of the power source.
- Check the mains connection cable for damage.
- If the motor is overloaded and the motor circuit breaker has triggered:
a Switch off the device "0/OFF".
b Allow the device to cool down for 1 hour.
c Switch the device on "I/ON" and resume operation.
Have the device checked by Customer Service if this fault occurs repeatedly.
The device does not start up, the motor buzzes
Voltage drop due to a weak mains grid or when using an extension cable
- When switching on, first press the lever on the high-pressure gun and then switch on the device "I/ON".
Device does not reach required pressure
The water supply is too low
- Open the water tap fully.
- Check the water inlet for an adequate flow rate.
The sieve in the water connection is dirty.
- Pull the sieve in the water connection out using flat pliers.
- Clean the sieve under running water.
Air is in the device.
- Vent the device:
a Switch on the device without a connected spray lance for a maximum of 2 minutes.
b Press the high-pressure gun and wait until the water escaping from the high-pressure gun is free of air bubbles.
c Connect the spray lance.
d Observe the maximum suction height during suction operation (see chapter Technical data).
Strong pressure fluctuations
- Clean the high-pressure nozzle:
a Use a needle to remove dirt from the nozzle drill.
b Rinse the high-pressure nozzle from the front with water.
2. Check the water supply volume.
Device leaking
- The device leaks a small amount for technical reasons. If the leak is severe, request authorised Customer Service.
Detergent is not sucked in
- Use the Vario Power spray lance and turn it to "MIX".
- Check that the Plug 'n' Clean detergent bottle is sitting correctly with the opening facing down in the detergent connection.
Warranty
The warranty conditions issued by our relevant sales company apply in all countries. We shall remedy possible malfunctions on your appliance within the warranty period free of cost, provided that a material or manufacturing defect is the cause. In a warranty case, please contact your dealer (with the purchase receipt) or the next authorised customer service site. (See overleaf for the address)
Technical data
Electrical connection
| Voltage | V |
| Phase | ~ |
| Frequency | Hz |
Power rating kW 2,1
Degree of protection IPX5
Protection class I
Power protection (slow-blowing) A 10
Water connection
| Feed pressure (max.) MPa | 1,2 | |
| Input temperature (max.) | °C | 40 |
| Input amount (min.) | l/min | 10 |
| Suction height (max.) | m | 0,5 |
Device performance data
| Operating pressure | MPa | 12,5 |
| Max. permissible pressure | MPa | 14,5 |
| Water flow rate | l/min | 7,5 |
| Maximum flow rate | l/min | 8,3 |
| Detergent flow rate | l/min | 0,3 |
| High-pressure gun recoil force | N | 20 |
Dimensions and weights
| Typical operating weight | kg | 14,8 |
| Length | mm | 402 |
| Width | mm | 306 |
| Height | mm | 588 |
Determined values in acc. with EN 60335-2-79
| Hand-arm vibration value | m/s2 | <2,5 |
| Uncertainty K | m/s2 | 0,6 |
| Sound pressure level LpA | dB(A) | 76 |
| Uncertainty KpA | dB(A) | 3 |
| Sound power level LWA+ K uncer- taintyWA | dB(A) | 92 |
Subject to technical modifications.
EU Declaration of Conformity
We hereby declare that the machine described below complies with the relevant basic safety and health requirements in the EU Directives, both in its basic design and construction as well as in the version placed in circulation by us. This declaration is invalidated by any changes made to the machine that are not approved by us.
Product: High-pressure cleaner
Type: 1.324-xxx
Currently applicable EU Directives
2000/14/EC
2014/30/EU
2006/42/EC (+2009/127/EC)
2011/65/EU
Harmonised standards used
EN 50581
EN 55014-1: 2017
EN 55014-2: 2015
EN 60335-1
EN 60335-2-79
EN 61000-3-2: 2014
EN 61000-3-3:2013
EN 62233: 2008
Conformity evaluation procedure used
2000/14/EC: Appendix V 230
Sound power level dB(A)
Measured: 89
Guaranteed: 92
The undersigned act on behalf and under the power of attorney of the company management.
H. Jenner

Chairman of the Board of Management
S. Reiser

Director Regulatory Affairs & Certification
Documentation supervisor:
S. Reiser
Alfred Karcher SE & Co. KG
Alfred-Karcher-Str.28-40
71364 Winnenden (Germany)
Ph.: +49 7195 14-0
Fax: +49 7195 14-2212
Winnenden, 2018/10/01
Contenu
Remarques generales 15
KARCHER Home & Garden App 15
Fusible principal (lent) A 10
2006/42/CE (+2009/127/CE)
2011/65/EU

H. Jenner
Chairman of the Board of Management

S. Reiser
Director Regulatory Affairs & Certification
Responsible de la documentation :
S. Reiser
Alfred Karcher SE & Co. KG
Alfred-Karcher-Str.28-40
71364 Winnenden (Germany)
Tel.: +49 7195 14-0
Télécopie:+49719514-2212
Winnenden, le 01/10/2018
Indices

H. Jenner
Chairman of the Board of Management

S. Reiser
Director Regulatory Affairs & Certification
71364 Winnenden (Germany)
Tel.: +49 7195 14-0
Fax: +49 7195 14-2212
Winnenden, 01/10/2018
Inhoud

H. Jenner
Chairman of the Board of Management
S. Reiser
Director Regulatory Affairs & Certification
71364 Winnenden (Germany)
Tel.: +49 7195 14-0
Fax: +49 7195 14-2212
Winnenden, 2018/10/01
2006/42/CE (+2009/127/CE)
2011/65/UE
Chairman of the Board of Management

S. Reiser
Director Regulatory Affairs & Certification
Responsible de documentacion:
S. Reiser
Alfred Karcher SE & Co. KG
Alfred-Karcher-Str. 28 - 40
71364 Winnenden (Germany)
Tel.: +49 7195 14-0
Fax: +49 7195 14-2212
Winnenden, 01/10/2018
Indices
Indicaoesgerais 38
Aplicacao KARCHER Home & Garden 38

Download on the App Store

Marca registada
2006/42/CE (+2009/127/CE)
2011/65/UE
Chairman of the Board of Management

S. Reiser
Director Regulatory Affairs & Certification
Winnenden, 01/10/2018
Relevant EU-directiver
2000/14/EF
2014/30/EU
2006/42/EF (+2009/127/EF)
2011/65/EU
2000/14/EF: Tillag V
50 Lydeffektniveau dB(A)
Malt: 892,1
Garanteret: 92
Chairman of the Board of Management

S. Reiser
Director Regulatory Affairs & Certification
71364 Winnenden (Germany)
Tlf.: +49 7195 14-0
Fax: +49 7195 14-2212
Winnenden, 2018/10/01
Indhold
Generelle merknader 49
KARCHER Home & Garden-app 49
Miljovern. 49
Forskiftsmessig bruk. 49
Tilbehør ogreservedeler 49
Leveringsomfang. 49
Beskrivelse av apparatet. 49
Sikkerhetsinnretninger 50
Symboler pà apparatet 50
Montering 50
Igangsetting. 50
Bruk 51
Transport 52
Lagring 52
2006/42/EF (+2009/127/EF)
2011/65/EU
Anvendte harmoniserte standarder
EN 50581
EN 55014-1:2017
EN 55014-2: 2015
EN 60335-1
EN 60335-2-79
EN 61000-3-2: 2014
EN 61000-3-3: 2013
EN 62233: 2008
Chairman of the Board of Management

S. Reiser
Director Regulatory Affairs & Certification
71364 Winnenden (Germany)
TIf.: +49 7195 14-0
Winnenden, 2018/10/01
Innehäll
Allman information. 54
KARCHER Home & Garden-app. 54
Miljöskydd. 54

H.Jenner
Chairman of the Board of Management

S. Reiser
Director Regulatory Affairs & Certification
Dokumentationsbefullmaktigad:
S. Reiser
Alfred Kärcher SE & Co. KG
Alfred-Karcher-Str. 28 - 40
D-71364 Winnenden (Germany)
Tfn: +49 7195 14-0
Fax: +49 7195 14-2212
Winnenden, 2018-10-01
Sisälto
Yleisia ohjeita 59
KARCHER Home & Garden App. 59

Download on the App Store

Tavaramerkit
Chairman of the Board of Management

S. Reiser
Director Regulatory Affairs & Certification
71364 Winnenden (Germany)
Puh.: +49 7195 14-0
Download on the App Store

Eπtopiokoσnμα
Google PlayTM kai AndroidTM εivai εμπορια σημata n Μηματα κατατεθέντα της Google Inc.
Apple Kai App Store Eivai Eptopika Omuata n Omuata katarateEvta Tc Apple Inc.
PpOoTaOia Tou TepiBaAloxToG

Ta ulika oukeuaiac eivai avakukwioiμa.
AToppittETe Tc oukeuaiec TEpiBaAovtik aoptoTIO.

Oi nAekptipkec kai nAektpovikec ouokuecs Tepieoxouv Toauiapa avakukwaiua uika kai, ouxva, eapntmuata otws mtaatapiec atlecs, ETTavaopoptoovec n Aia, ta oTioia e
Tepiwn Lavthetavns xnons n atoppipns
tropovva thouov oe kivduvo tv avpwtivn uyeia
kai to TepiBalov. Otoo, auta ta ouotatikc evai
atapaitna yia tn owatn leitoupyia tnc ouakeunc. OI
oukeues Tou fepvau To ouuBoo dev eTTpeTTaia
va atoppittovta paiz me Ta okiak a tonppmuata.
Epyaiec kathetaapioou Tou napayouv eaiouxa uypa atoBAnTa,pi.x. Pauon KIVntnpw n Tns katw Paeupac oxmuatov, MTOPOUV va EKTEALOUVTai mOvo 0e 0eis Pauvtpiou Tou eivai EgonAIOEvEc ME diaxwpiotn Aaidou.
Oi epyaiec me atoppuattavtko mtopoov va EKTLEAUVTai mvo OE udaototeyeic etikpaveies epyaiaac me ouvdeon oTo ouoTma atoppo ncaaaptou vepou.To atoppuattkodev TpeTciv a kataainye1ota unoyea udata n oTo edapoc.
H Any nepou ano oonpoie c Tnyec dev Etnptetar 0e opioevec xwpe.
YtOeIeIc oxETiKa e ouotatik (REACH)
Evnpwvec nnpopopiec oxetikα μe ta ouotatikα εivai δiaθεοιες ση δiεύθυνοη: www.kaercher.de/ REACH
Evδεδειγμένη xρήση
XpnoiIOInote Tn ouKeun kaOapiou uynAnC nEoans atOKAEOTiKa yia oikaiKn xpnon.
H oukeun kaapiaou uynnc trioepicetai yia tov kaapiau oynavnuatw, oxnuatw, oikobowv, epyaieiw, npooayew, bepavtwv, uynavnuatw knTou k.11. 1e pinn vepou uynnc
Na exTe diaoioe TIC npexoEvc Bioc kai to kaataaannkataogbiid.
Piv aTn Tnv evapx npoans ouvapmooynta luéva napexóeva eaptnmuata otuokueun.
EuapmoIoynonTwvtpoxwV
- TOTTOEETNOTE TOUC TPOXOUC.
Yrro8e1
KivduvoS nAeKToPAnnEiaS
Tpaunaiooi anty nTv eapn eapnata nou diappoeovraat o pua
OeTe Tn OuaKeun EkToC λeIroupyiaC.
AnouvoeTo oic aTnO Tnv npia
H oukeun dev xpeiazetaouvtnpnog, dnlaoh dev evivat anapaitnto va npaypatottoieite taktikec epyaioe ouvtnpnog.
AvTITAYETIK NpOoTaia
PPOOxH
Kivouos naeyou
OuakeuesouevexouvekewwthetaiApoe va kataotpapovu atoayetó.
AediaeTe TEAEiwS Tn OuKEun Kai Ta TapeLkOeVa.
PpOToTeUoTe Tn OUsKeun ano ToV pAeTe.
PpTeIvaioxuouvTaTapakatw:
H ouakeun exei aTIOOuv8e0ei aTTOV TApoxn vepou.
To TIOtoUynns TiEONS exeai aTTOOuv60ei aTOTov EUKaPTTO OwNVA Uynns TiEONS.
KivduvoS nAeKToPAnnEiaS
Tpaunaiooi anto tvn vapn u e xapniata nou diappoeovra ato pue
OeTe Tn OuaKeun EKToS λEIToupyiaC.
Chairman of the Board of Management

S. Reiser
Director Regulatory Affairs & Certification
71364 Winnenden (Germany)
Tnλ: +49 7195 14-0
Φaξ: +49 7195 14-2212
Winnenden, 2018/10/01
Iqindekker
Genel uyarilar 70
KARCHER Home & Garden App. 70
Cevre koruma 70

Download on the App Store

Ticari marka
2006/42/AT (+2009/127/AT)
2011/65/AT

H. Jenner
Chairman of the Board of Management

S. Reiser
Director Regulatory Affairs & Certification
Winnenden, 2018/10/01
CopepXaHne
O6uye yka3aHn7 75
KARCHER Home & Garden App. 75
3aunTaOkpykaIooe cpebl 76
IcnoIb3ObaHne no Ha3HaueHnIO 76
PpHaIeKHOCTn 3aNaChbIe Yactn .76
KOMNJIeKT NOCTABKN 76
OncanHe yctpoNCTBa 76
PpeOxpaHntBhIe yCtpoIcTBA 77
CIMBOJIHa yCTpoNCTBe 77
MOHTAK 77
BbD B 3KcnpnyatauH0. 77
78
TpaHcnpOpBbKa 79
Xpahene 79
Pomoub npn HncnpaBHOCTx 80
Texnueckne xapaKTepeNCTIKN 81
DeknapaunO COOTBETCBN CTahapTaM EC ... 81
Obune yka3aHnA
IpeepnepbIM npimeHeHneM yctpOInCTBa 03HaKOMNTbcra DaHHoOpunHahbHO HhCTpykUeN IO
3KcNpyatauIN N npNJaraembIMN yKa3aHnRA M NO TEXHKe 6e3oNaCHOCTN. DeIcTBOBaTb B COOTBETCTBn C HmN.
CoxpaHraTb o6e 6poWIOpbI dIaJIbHeIwero
nonb3OBaHnI nn dIyUoJero BnaJeBua.
KARCHER Home & Garden App
Прилоскене KARCHER Home & Garden App codepxnt:
- HOpmauO c6opKe n BBoe B 3KcnIyatauHIO;
- HΦopMaζη o cΦepax npImeHηn;
C O B E T bI N peKOMeHdaUu; - yacto 3aadaebmble BONPOcI C noipobHbIM OINCAHNEM yCTpaHeHn HENCnPABHOCTe;
- NOdkJIIOHeHne K cepBnCHOMy CEHTpy KARCHER.
PpUIOKeHHe MoKHO cKaaTaB 3DeCb:

TobapHb3HaK
- Google Play™ and Android™ are hot on TobapHbIMN 3HaKAMN 3apeHCTpnpOBHHbIMN TOBAPHbIMN 3HaKAMN Google Inc.
Apple n App Store JBnIOTc TOBaHbIMN 3HaKaMn nn 3apeNCTpnpoBaHHbIMN TOBapHbIMN 3HaKaMn Apple Inc.
3aunTa OkpyXaOoSei cpeDbI

YnaKOBouHbIe MaTePnAJIbI NOaIOCTcBTOpNHOIpepa6oTKe.YnaKOBky Heo6xOIMOyTNIN3npoBaT 6e3 yuepe6a dIra OkpyKaIOUebl.

3NeKtpueckne n 3NeKtpoHHbI ycTpoiCTBa
yacto coedepxa TceHHbI MaTePnAJIbI,
pnpOJHbI dIy BToPnHOI nepepa60Kn, I
3aayactyo TAKNe KOMnoHeHTb, KaK baTaPeN.
akymyITopbI Nm MacNo, KOtOpBie npn HnpaBnHOM oBaueHn Nn HeHaJnxKaSeey yTnI3aun npeDCTabJIOT nTeHcnaJIbHyO ONaCHOCTb dnn 3doPobBy n 3KoJorHn. Tem He MeHee, daHHBe KOMIOHeHTbI Heo6XoDMbl dnn ppaBnHoi pa60tby UcToPocTBa. UcToPocTBa, 6o3NaueHHbIE 3TNM CmBOJOM, 3anpeUHO yTuNIm3uPoBaTb BmecTe C 6bITOBbIMn OTxOdAmn.
PapotbI NO ouHCTke, B pe3yIbTaTe KOtOpbIX
6pa3yeTc TcOuHa BAo, CoepKaUaMa Macla,
HaNPmEp, IpomBIBKa DnIraTeJIa, MoKa DnIIua,
DOJXHbI POnI3BOIDHTbc TOJIbKO Ha MOeHbIX
PiOuaKax C MacIOOTDeJIInTeJIem.
Pa60tbcMOUcIMM CpeIcTBAMn DOJIHXbI npoBOINbCra ToJbKO Ha BOHOHePOHuaeMbIX pa6OuNX NOBepxHocTAX C NOkHoueHEm K 6bITOBoi KaHaJIIN3aUN. He OOnyckaTb NonaDaHnRA MOUx cpeCTB B BOOeMbI INN NOUY.
3a6op BOIbI N3 OTKpbITbIX BOIOeMOB B HEKOtOpbIX CTpaHAX He pa3peWeH.
Yka3aHnI IO KOMIOHEHTAM (REACH)
Дя поуеня akтуально Инфорmaци o komnoheHTax CM. www.kaercher.de/REACH
IcnoJIb3OBAHHe NO Ha3HaueHnIO
IcnoB3ObaTb MOUu annapaT BlicOKoro DaBHeHn ToJIbKO B 6by.
MoUu annapat BbICOKO RaBHeHn PpeHa3HaueH DnMaouK MaunH, ABTomoBnJe, CTpoEHn, HNCTpyMeHTOB, facaIOB, Teppac, caIBO-OROpOHOrO INHBeHTaP rN T. D. C NOMOuBcTpyN BOdbI NOD BbICOKM DaBJIeHNEM.
PnUype3MepHOM HAnpJxKeHNB CETN,3aUHTbIABTOMaT DnurTaTeN OTKNUOaET yCTpoIcTO.
CNMBOJIbHa yCTpOiCTBe
He HanpaBnTb CTpyo BOdbI NOI BbICOKM DaBnEHmHa IIODei, XNBOTHbIX, BKJIIOUeHHoe 3JIeKTPnueCKOE
obopyoBaHne HnHa cAmO yctpoNCTBO. 3aunuatayctpoNCTBOOTMOPO3a.

YcTpoIcTBO 3aIpeIaETCnIOKJIHouATb HeNOCpeIcCTBeHHO KOMMyHaJIbHOI Xo3raICTBeHHO-ITbEBoB BODonpOBoDHOI CETn.
MoHTax
PncyHKn cm. Ha cTpaHnca x pcncyHKamn.
IIOIOTOBHTB XOJAAUE B KOMNNEKT NOCTABKN BINTBI COOTBECTBYUO OTBEPKY.
IpeE BBODOM B 3KcNpyaTaUHO yCTaHOBnTb He3akpenHHeIe npInaeraMbIe Yactn Ha yCTpoiCTBe.
YctaHOBka KOJec
- Bctabntb kOJeca.
PpumeyaHue
Cneedmb 3a ebipa8hu8aHuem ombepcmu. PucyHOK C
- 3aKpeHnTb Koneca 1 BnHTom KaJdoe.
YcTaHOBka onopbl
- Bctabntb onopy.
PncyHok D - BCTaBnTb 2 IIO6eIa B OTBepcTna Do ynpa.
- 3aKpeNnTb onOpy 2 BnHTamn.
YcTaHOBka OTceKa dIyXpaHeHnCtpyHOn Tpy6Kn
- Habecntb otcek dЯхpaheHnA cTpyHn Tpy6Kn.
- 3akpenntb otcek nla xpaHHeHn 2 BuHTaMn.
PucyHok E
- 3aKpeINrB KpbIuKy 4 BnHTamn.
PcyHOK F
YcTaHOBka pyuKn IJra TpaHCnOpTnpOBKn
- Ппкpenite руку дя Трансортуровки. PucyHok G
- 3aKpeNTb pykny dIra TpaHcnpTnpoBkn 2 BnHTamn.
YctaHOBka cetkn InpHaIeXHocTe
- NObecntb cETky dIy npHaJIeXHocTeH Ha KpOchKn. PucyHok H
IpoTnBaHne 7Jahra BbICOKO daBHeHna Ype3 HapBaJIouyIO dJra 7Jahra
- ΜλaHr BbICOKOrO DaBnEHHaIpoJeTb c3aDn Ypee3 HappaBJIauOyU dJMyJHaHra.
PncyHok I
YcTaHOBka MyΦTbI Jnla NOdBa BObl
- PnBHTb MyfTy IJNA NOBDA BObl K naTp6ky IJN NOBDA BObl Ha yCTpoIcTBe.
PucyHOKJ
BBOD B 3KcnpnyaTaunio
- NocTabuTb yctpoNCTBO Ha poBHyIO NOBepXHOCtB.
- NpHocTbpo pa3MOTaTB IJNaHR BbcOKoro daBneHn npacnyTaTb netnn n nepekpyuBaHn (npn Hauynu).
3.Полнocью npotЯнть wlnaHr BbICOKOrДabJIeHnuepe3 HAnpaBnIooIyO. - BcTaBnTb ⅢNaHr BbICOKOraDabNeHnBaBbICOKOHAnOpHbI NCTOJe Tdo UeHNka.
PpumueaHue
Cneumb 3a npaeunbHbIM ebipaeHuBaHuem HUNNEPAcyHOK K
5. Поверпь наджноctь COeINHeHи,NotHyB 3a WlaHr BbICOKOrO daBHeHn.
6. BCTaBnTb WTeNceJIbHyIO BUNIky Bpo3eTKy.
Poaay Boa
IapametpbI dIy IIOKIIHcHEny yKa3aHbI Ha 3aBOJcOITabIuKe IIN B Tnabe TexHuYeCKueXapakmepucmuKu.
Co6nOdaT npednncanH npednpnraTn BDOCha6KeHH.
BHIMAHHE
PoepekeHua u3-3a 3a2p3HeHHou eodbl
3aepnHua, codepaueec6 bode, moym
6b136amb noepekdeHua Hacocau npuHaedKhcmeu.
Ina 3aumbki KomnaHua KARCHER pekomehyem
ucnoh3oamb bOdaHO uunbp KARCHER
(cneuaabhe npuHaedKhcmu, Homep dJa 3aka3a
4.730-059).
IopKIOUOHeN K BOOnpOBOy
BHIMAHNE
Ilaeogma Mycma c cucmemou Aquastop Ha odonpooHOM nampy6ke ycmpoucmea
PoepeXdeHue hacoca
Huoko3a He uonb3yume wnaHao6yIO Myfmy C cucmemou Aquastop Ha bOdo npoBodHom nampy6ke ycmpoucmea.
Bbl Moxeme uonb3oeamb Myfmy Aquastop Ha eodonpoeohom Kpahe.
- YctaHOBNTb caIObBI uJIaHr Ha MyOFTy IJRA NOdBODa BObl.
- POncoeHNHt bCaIOBbI WJIaHr K BOIoNpOBOy.
3.ПОнhoeТьОТКрыТь BOДОпоВODнь кран. PucyHOK L
IopaaBoBbI3OTKpbTbIXpe3epByapOB
Dahhbo MOUo annapat BbICOKO daBneHnco BCaCbBaIOUM mJNaHrom KARCHER n o6paTHbIM klanahom (CneuNbHbIe npHaadNexKHOCTn, HOpem dna 3aka3a2.643-100) npedHa3NaueH nla BCaCbBaHn BOdbi n3 OTKpbTbIX pe3epByapOB, HApnPmep n3 6oey dnoXDeBOB BOdbI NIN npyDob (MaKcMmaHBHyO BbICOTy BCaCbBaHn CM. B rnaBe TexHuYeCKue xapakmepucmu).
B pexnme BcacbHaHn He Tpe6yetc nCnoJb3OBAHn MyfblIgnoB0aBObl.
- 3aOJIHnITb BCaCbIbAHOuN WJHaHr BDOJ.
- PnBHTb BCaCbBaOuIshNaHr K nATpy6ky dIy NOBDA BObl Ha yCTpOJCTBE N NOMeCTNb B ICTOHNIK BObl (HaNPmep, B 6Ouy dIy DOxKeBOI BObl).
ydaenhe Bo3dyxa n3 yctpOcTba
- BkIIOHTb yCTpoiCTBO I/ON
- Pa36nOKupoBaTb pbHar BBICOKOHAnOpHOrO nuctoneta.
- HaxaTb pbUar BbICOKoHaOpHOrO nCTOneta. YCTPOINCTBO BKJIOHaETcR.
4.Даысгоступорботь В Teчehne MaKcHymM 2MHyT,нOKa BOda He NaHHT BbIXOДТь N3 BBICOKOHAnOPHOrO NICTOnTe 6e3py3bIPbKOB. - Otnyctntb pbiar BbICOKOHAnOpHOro nCTOneta.
- 3aФнсИрОВаТь рБИСг BBICOKOHaIOPHOro nuctOneTa.
3KcπIyatauia
BHIMAHHE
Cyxou xod hacoca
IoppekeHue ycmpoucmea
Ecnu ycmpoUcmeo He co3daem daeneHua meueHue 2 MuHym, bIKIOHMb ycmpoUcmeo u cneOeamb
UncmpyKuum e aane Epomou npu
HeucnpaBnocmX.
CucTeMa Power Control
HnDnKaTOp DaBHeHnHa NnCTOnTe BbICOKOro DaBHeHn NOKa3bIbAe TKeUyIu yCTaHOBHeHHbYPOBeHb DaBHeHn np pa6Ote Co cTpyHoi Tpy6KoIPower Control.
PpumeyaHue
YyecmeumenbHocmb MamepuanOB MOxem cunbHO pa3nuaymbc8 3abucumocmu om 6o3pacma u cocmoHn. I03momy peKOMeHdaauu He yenrioncna 6b3amEnbHbIMU.
PpumeyaHue
Hdukaua daeneu npu 3cknyamau c ouucumemn oepxHocme u dpyamu npuhadnekHocmmu HeuHqopMaueha.
Pexm pa6oTbI c MOUeJ TeKoJ
BHIMAHHE
NopekdeHua OKpaWeHHbIX NoepxHocmeu
NoepexdeHue noepxHocmeu 3-3a 3aep3HeHHou MOoueu emku
Ipeod ucnonb3o8aHEm y6edumbc, ymo Moouza. 1emka He codepkum apra3u unu dpyeux yacmuu.
PpumeyaHue
Ppuucno3o8aHuu mouux uemok ycmpoucmeo pa6omaem c Huzkum daBneHuem. P0momy moxho do6abnmb moouue cpedcmba.
- BctaBntb MOUyU ueTky B BBICOKHaOpHbI nCTOJET N3aΦNkCupoBaTb ee, NOBepHyB Ha 90^
Pexm pa6oTbI c MOUcM cpeCTBOM
ONACHOCTb
Hecobioheue nacnpma 6eonacnocmu
Cepbe3hB 6pe3d0p08bU 03-3a HenpaBulho2o
ucnoIb3OeAHn MOUe2o cpeOcmea
CobIIOamb nacnpm 6eONacHocmu npou3eOumEn MoUe2o cpeOcmea, e yacmHocmu
yka3aHn omHocumEnbHO cpeOcme uHDueuDyAnbHOJ
3aUumbl.
PpumeyaHue
Moouee cpedcmeo moxho doabnmb monbko npu HU3KOM daeneHu.
PpumeyaHue
Дя paobmс MOUUM cpedcmaMu HeoXodum KOmeuHep C MOUUM cpedcmeom Plug'n'Clean. MoUue cpedcmea KARCHER moKHO npuo6pecmu zOMOBIMKUCNOJIb3OeAHUO e cneuaIbHOM KOmeuHepe cucmembi Plug'n'Clean.
- ChrTb KpbIuKy KOHTeHepa C MOUcIM CpeCTBOM cnCTembl Plug'n'Clean.
- YctaHOBntb KOHTeHep C MOUcIM cpeCTBOM OTBepCTnEM BHN3 B pa3bEm IINI NOaH MIOUeO cpeCTBa cnCTembl Plug'n' Clean.
PncyHOK N
- IcnoJb3oBaTb cTpHyu Tpy6ky Vario Power.
4.Повораиbaite CTpyHHyTOpy6kyB HnpaBneHnN «MIX》,нokaHa nICTOte BbICOKOrO daBNeHnHe OTo6pa3ntcA«MIX>
BoBpempa6oTbI pactBop mouero cpeCTBa do6aBnraTcKCTpyeBObl.
Bbiknioumb ycmpoucm80.
U38neHb umencelbHyuBulky.
YcTpoIcTBo He Tpe6yeTeTexHnueCKOrO 0bClyKuBaHnA, To eCTb BbInOnHeHnpeRyIpaHrO TexHnueCKOrO 0bClyKuBaHnA He Tpe6yeTc.
3aunTa ot 3amep3aHnA
BHIMAHNE
Onachocmb 3aMep3aHua
He noJHocmbIO onopoxKHeHHbI ycmpoUcmba Moaym 6bIMnbospeKeHbI npu 803deUcmbuMop03a.
Ponnoocmbo onopoxhm ycmpoucmeo u npunadnexkocmu.
3auummb ycmpoicmeo om mopo3a.
DolXHbI 6blTb BbIINHeHbI CneDuOuNe ycIOBnA:
- YCTPOINCTBO OTOEENHEO OT CNTEmbl BOOCHNA6XeHnA.
-
TnCTOnET BbICOKO r DaBHeHr OTCoeUHeH OT WJHaHra BbICOKO DaBHeHr.
-
BkIIOuHTb yCTpoiCTBO «I/ON».
- Побождаты He 60Jee 1 MmHyTbI, NOka Ha WJIaHRe BbICOKOrO DaBHeHnE He nepeCTaHET BbICTyNaTb BOda.
- Bbiknounty yctpoiCTBO.
- XpaHntb yCTpoiCTBO I BCE pInHaIJIeKHOCTN B 3aunuEHHom OT MOpO3a NOMEueHEN.
OuNTka cetUaToro fHnIbTp a B natapy6Ke Dnra NOBbOda BObl
BHIMAHNE
NopexdeHHbI cemyambiu funbmp enampy6ke dna nodeoda oodbl
NoepexdeHue ycmpoucmea u3-3a 3a2p3Heu H e0dbI
Pnoepumb cemyambl uunbp mHa Hanuue
noepexdeHui, npexde yem ecmaenm b e2o e
nampy6ok dna nodeoda e0dbI.
OuetaB cetTaBn fNtBp B natpy6Ke dIy noDBoa BObl NO MEpe Heo6xOIMOCTN.
- ChTb MyfTy c natpy6ka IJn IOB0a BObl.
- BbHytbcetTuatbI nIbTp nIOckOry6aAMN.
- PpOmbTb ceTuatbI ΦnIbTp IOd npToHOBoDIO. PucyHOK Q
- Bctabntb cetahtbI nIbtpB natpy6ok dna NOdBODa BObl.
POMOuB npn HEnCnpaBHOcTAX
3aacTyIO HeNCpabHocTn IMeIOT npocTbe IpnuHbI, PO3OMy C NOMOuBcCneDyUoJero 0630pa Ix MOXHO yCTpaHHTb CAMOCToTeNbHO. B cnyae comHeHnI BO3HNKHOBeHm He OINCAHHbIX 3deCb HeNCpabHocTeN cNeDuYer 6paTaBcB aABTopn3OBaHHyO cepBnCHyO cnxy6y.
ONACHOCTb
Onachocmb nopaxehua 3nekmpuueckum mOKOM
TpaBmIe pezylbmae kacaHua mokoeeduyux yacmeu
BbIKHouumb ycmpoucm80.
U38ane4b umencenbHyio 8unky.
YcTpoNCTBO He pa6OtaeT
- HaxaTb pbUar BbICOKoHAnOpHOro NcToJeta. YCTPOINCTBO BKJIIOHaETCra.
- Поберпь COOTBETCTBNE HANPЯжен, yka3aHHoro Ha 3aBOdCKoT a6nUKe, HAnpЯжehIO nCTOuHnKa nITaHnJ.
- PpOBepntb cTeBoi Ka6eBHa noBpeKdHnA.
- Ecn n Dbrarntb neperpyxhen cpa6oTan 3aunTHbI aBtOMa T DbrarTeJr:
a BbIKNIOHTb ycTPOIcTBO «0/OFF».
b DaTb yCTPOINCTBy OCTbITb B TeueHne 1 yaca.
C BkHouHTb yCTpOncTBO «I/ON» n ChOba npnctynntb K pa6ote.
EcnHnncnpaBHOCTb NOAeTcMHOKpaTHO, npuyntb npOBepKy yCTpOInCTBa cepBnCHOn cnYk6e.
YcTPOIcTBo He BKNIOUaEcTc, DnurTaTeNb rYdNT
PaeHne HaprJKeHnI 3-3a Cna6oN 3NeKTPocETn IIN npnncnoB3ObaHHn ydnnHnteTn
- Пи Вкlioуени npexдe BCero HaxaTB pbiurвБИСКОнанOPHOrO NiCToJeTa, 3aTeM BKNIOUHTbycTpOiCTBO «I/ON».
JaBHeHBe BycTpoIcTBe He co3JaTeC
CnIshKOM cna6aI noJaA vOdbi
- NtHOCbIO OTKpbITb BOOpPOBDoHbI KpaH.
- PpOBepntb noaay BObI Ha DocTaOuHbI o6bEm.
CetuBbIΦnIbTpB nATpy6Ke NOBbOa BObl 3arpa3HeH.
- BbHyTb cetTuBmΦNJbTp n3 naTppy6ka noDbOa BOdbI NIOCKORY6aMn.
- PpombytbcetatbIeNJIbTpIOI npOTouHO BDOI.
BytpoIcTBe coIepKInTc Bo3dyx.
- YdaHntb Bo3dyx n3 yctpoiCTBa:
a BkHIOHTb yCTPOINCTBO 6e3 NOKJIIOUeHHoI CTpyHOB Tpy6Kn He 6OJee Yem Ha 2 MInHyTbl.
b HaxaTb BbICOKOHAnOpHbI NnCTOJET nNoDoxTaTb, NOKa Ha NnCTOJTe He HauchET BbICTyNaTb BOda 6e3 Ny3bIPbKOB Bo3dyxa.
c POnDoeHnHTb CtpnyHyTO Tpy6Ky.
D B pexnme BCacbIBaHnca6IIOaTb MaKc. BblcOTy BCacbIBaHn (CM. IJIaby TexHuYeckue xapaKmepucmu).
CnBhie nepenaabi daBJeHna
- OuHCTnTb cOnNo BbICOKOr DaBHeHnA:
a Ydaanntb 3arpa3HeHnI N3 OTBepCTnI cOnna nIIOJ.
b Ppombbconno BbcOKoro daBneHnBaOOn cnpeeni.
Data Bbinycka oTo6paXkaeTcH Ha 3aBOndcko Ta6nueK B3aKOpOBaHHOM BnDE.
Pn 3TOM OTdJIbHbIe UINpbl IMeIOT CneDyUoue 3HaueHHe::
Приимер: 30190
3 roB BbInycka
0 CTOnetne BbInycka
1 DecaTIneTne BbInycka
9 BTOPAIcPMAeCABbIycka
0 nepBaunpa Mecaa Bbinycka
TakIM 6pa3OM, B daHHOM npImpe kOd 30190 O3Haayet DaTy BbInycka 09/(2)013.
TexHnueckne XapaKTepNCTnKn
3NeKtpnueckoe noKnIoucheHne
| Haprägenne | V | 2 | 3 | |
| Фаза | ~ | 1 | ||
| Частota | Hz | 50 | ||
| Повпеблесь мошноctь | KW 2,1 | |||
| Стениь 3аци综合体 | IPX5 | |||
| КлASS 3aци综合体 | I | |||
| Сeteвои пededохсан综合体 (Инертун) | A | 10 | ||
Chairman of the Board of Management

S. Reiser
Director Regulatory Affairs & Certification
JIuO,OTBETCTBeHHoe3a BeeHne DOKyMeHTaun:
II. Pau3ep (S. Reiser)
Alfred Karcher SE & Co. KG
Alfred-Karcher-Str.28-40
71364 Winnenden (Germany)
Ten.: +49 7195 14-0
ΦaKc: +49 7195 14-2212
r.BHHHeHdeH,01.10.2018
Tartalom
Altalandos utasitasok 81
KARCHER Home & Garden alkalmazas. 81
Kornyezetvedelem 82
Chairman of the Board of Management

S. Reiser
Director Regulatory Affairs & Certification
Winnenden, 2018/10/01
Obsah
Obecné poukyny 87
Aplikace KARCHER Home & Garden 87
Ochrana zivotniho prostefedi 87
Pouziti ke stanovenemu ucelu 87
Prisluosenstvi a nahradni dily 87
Rozsah dodávky. 87
Popis pristroje 87
(2) Group M 4x20 (2 kusy)
③ Sroub M 4x22 (2 kusy)
4broub M 4x16 (8 kusu)
2006/42/ES (+2009/127/ES)
2011/65/EU
Aplikované harmonizovane normy
EN 50581
EN 55014-1:2017
EN 55014-2: 2015
EN 60335-1
EN 60335-2-79
EN 61000-3-2: 2014
EN 61000-3-3: 2013
EN 62233: 2008

H.Jenner Chairman of the Board of Management

S. Reiser
Director Regulatory Affairs & Certification
Zmocnenec pro dokumentaci:
S. Reiser
Alfred Karcher SE & Co. KG
Alfred-Karcher-Str. 28 - 40
Winnenden, 2018/10/01
Kazalo
Splošna navodila 92
Aplikacija KARCHER Home & Garden. 92
Zašcita okolja 92
Namenska uporaba 93
Pribor in nadomestni deli. 93
Obsegdobave 93
Opis naprave 93
2006/42/ES (+2009/127/ES)
2011/65/EU
Chairman of the Board of Management
S. Reiser
Director Regulatory Affairs & Certification
Pooblascena oseba za Dokumentaciono:
S. Reiser
Alfred Kärcher SE & Co. KG
Alfred-Karcher-Str.28-40
Winnenden, 1. 10. 2018
Spis tresci
Wskazowski ogolne 97
2006/42/WE (+2009/127/WE)
2011/65/UE

H.Jenner
Chairman of the Board of Management

S. Reiser
Director Regulatory Affairs & Certification
Administrator dokumentaci:
S. Reiser
Alfred Karcher SE & Co. KG
Alfred-Karcher-Str.28-40
71364 Winnenden (Germany)
Tel.: +49 7195 14-0
Directive UE relevante
2000/14/UE
2014/30/UE
2006/42/UE (+2009/127/UE)
2011/65/UE
Norme armonizate aplicate
EN 50581
EN 55014-1:2017
EN 55014-2: 2015
EN 60335-1
EN 60335-2-79
E12301000-3-2:2014
EN 61000-3-3:2013
EN 62233: 2008
Procedura aplicata de evaluates a conformitài
2000/14/UE: Anexa V
Nivel de putere acustica dB(A)
Măsurat: 89
Garantat: 92
Semnatarii actioneaza'in numele si prin imputernicirea
Chairman of the Board of Management

S. Reiser
Director Regulatory Affairs & Certification
Insarcinat cu elaborarea documentatiei:
S. Reiser
Alfred Kärcher SE & Co. KG
Alfred-Karcher-Str. 28 - 40
71364 Winnenden (Germania)
Tel.: +49 7195 14-0
Fax: +49 7195 14-2212
Winnenden, 2018/10/01
Obsah
2006/42/ES (+2009/127/ES)
2011/65/EU
2000/14/ES: Priloha V

H. Jenner
Chairman of the Board of Management

S. Reiser
Director Regulatory Affairs & Certification
71364 Winnenden (Germany)
Tel.: +49 7195 14-0
Fax: +49 7195 14-2212
Winnenden, 01.10.2018
Sadržaj
Opé napomene 114
Aplikacija KARCHER Home & Garden 114
Zašita okoliša 114

Download on the App Store

Zastitni znak
- Google Play™ i Android™ su oznake ili registrarani zašitni znaci tvrtke Google Inc.
- Apple® i App Store® su oznake ili registrarani zašitni znaci tvrtke Apple Inc.
Zašita okolísha
Ambalažni se materijali mogu reciklirati. Molimo odložite ambalažu na ekoloski prihvatljiv način.
Power Control sustay
Prikaz tlaka na visokotlačnoj ručnoj prskaliciPokazuje pri radu sa cijevi za prskanje Power Control trenutno postavljen stupanj tlaka.
Napomena
Osjetljivost materijala moze se uvelike razlikovati ovi-sno o dobi i stanju. Preporuke stoga nisu obvezujuce.
Napomena
Pri radu s uredajem za povrsinski ciscenje i drugim pri-borom prikaz tlaka nije mjerodavan.
| Prikaz Stup | anj tla- ka | Preporučuje se npr. |
| 3 HARD | HARD Kamene | terase od kamenih blokova ili hrapavog betona, asfalt, metalne povrsine, vrt- ni pribor (tačke, lopate, itd.) |
| 2 MEDIUM | MEDIUM Automobil / motocikli, povrsine od opeke, ožbukani zi- dovi, plastični namještaj | |
| 1 SOFT | SOFT Drvene | povrsine, bicikli, po- vrsine od pjesćenjaka, na- mještaj od ratana |
| 0 MIX | MIX | Rad sa sredstvom za Čišće- nje |
Rad's visokim tlakom
PAZNJA
Ostecenja lakiranih ili osjetljivih povrsina
Povrsine ostecuju pri premaloj udalenosti mlaza ili zbog odabira neprikladne cijevi za prskanje.
Održavajte udalenost mlaza od najmanje 30 cm pri pranju lakiranih povrsina.
Automobilske gume, lak ili osjetljive povrsine poput driveta ne cistite strugalom za prjavstinu.
- Cijev za prskanje utaknite u visokotlačnu ručnu prskalicu i uglavite je okretanjem za 90^ .
Slika M
- Ukljucite uredaj (I/ON" UKLJ.).
-
Deblokirajte ručicu visokotlacne ručne prskalice.
-
Pritisnite ručicu visokotlačne ručne prskalice. Urežaj se uključuje.
- Cijev za prskanje Power Control Vario Power okrenite sve dok se na prikazu tlaka ne prikaze zejeni stupanj tlaka.
2006/42/EZ (+2009/127/EZ)
2011/65/EU
Primijenjene uskladene norme
EN 50581
EN 55014-1:2017
EN 55014-2: 2015
EN 60335-1
EN 60335-2-79
EN 61000-3-2: 2014
EN 61000-3-3: 2013
EN 62233: 2008

H. Jenner
Chairman of the Board of Management

S. Reiser
Director Regulatory Affairs & Certification
2006/42/EZ (+2009/127/EZ)
2011/65/EU
Primenjene harmonizovane norme
EN 50581
EN 55014-1: 2017
EN 55014-2: 2015
EN 60335-1
EN 60335-2-79
EN 61000-3-2: 2014
EN 61000-3-3: 2013
EN 62233: 2008
Primerjeni postupak ocenjivanja usklaadenosti
2000/14/EZ:Prilog V
Nivo zvuocsgsnage dB(A)
Izmereno: 89
Garantovano: 92

H. Jenner
Chairman of the Board of Management

S. Reiser
Director Regulatory Affairs & Certification
Lice ovlasceno za Dokumentaciju:
S. Reiser
Alfred Kärcher SE & Co. KG
Alfred-Karcher-Str.28-40
71364 Winnenden (Germany)
Tel.: +49 7195 14-0
Winnenden, 2018/10/01
CbDpXaHne
O6uynka3aHn 125
PpIIOxHeNc KARCHER Home & Garden 125
3aunTa Ha OKoJHaTa cpea 125
YnoTepe6a no npedHa3NaueHne 125
Akecoapn peepBnu qactn 125
06xBaT Ha DocTabka 125
OncanneHa ypeda 125
Ipea3n yctpoCTBa 126
CnmboN Bbpxy ypea 126
MoHTaK 126
Ipyckahe B eKcnnoataaia 127
Eknpnoataua 127
TpaHcnpToPAne 129
CbxaheHne. 129
Pomou npn noBpei 129
Texnueckn daHHN 130
Deknapa3a cboTBcTbne Ha EC. 130
O6znyka3aHnra


Ppei npBpTO n3nO13BaHe Ha ypea npooyTeToBAOpHHaIHO pkoBOCTBO 3a EKcnloataun
npINOKeHTe yKa3aHn 3a 6e3OnacHOCT.
PpoeDpaTcCBOTBETHO.
3ana3eTe DBeTe KHNKn 3a NocneBaUo N3N0JI3BaHe nJIN 3a CNeDbaunr co6CTBHeNK.
Прилобенье KARCHER Home & Garden
PnnoxeneTo KARCHER Home & Garden cbDbpxka:
HOPMaZna 3a MOHTaKa N NyckaHeTo B EKcNlOaTaUN
HOpMaqna 3a oBnactnte Ha npJIOXeHne
CbBETn ncnoc6n
- FAQ c noponda n omoi npn nobpeu
Bpb3ka cbc cepbn3nna ueHb np KaKARCHER
PpnooxehneTo moxete Da n3TeTnIte OTyK:

TbproBka Mapka
Google PlayTM u Android™ ca Mapkn nn peHCTPnPAH TbPROCKn MapKn Ha Google Inc.
Apple 圆 n App Store ca mapkn nn peinctpnpaHn TbproBckn MapKn Ha Apple Inc.
3aunTa Ha OKoJHaTa cpeDa

OnakobbHnTe MaepnaJn noJnxKat Ha peunKnnpahe. MoJ, nXbPnJte OnakOBknte no Cbo6pa3EH cOKnHaTa cpeJa HauH.

EneKtpueecknte n eeneKtpoHHnte ypein cbdbpxat ceHHN MaTePnAIN, NOJnxAun Ha peuKNIpaHe, a YecTo N CbCTaBH N acTn, HApN. 6aTePnN, akMylaTopH N 6aTePnN uN MacNo,
KoITn HnnpabnHb6opabeHe nn n3XbpynHe MoRAT da npedctabIaBbT nTeHuaHa onaHcOCT 3a OBeWKOTo 3dpabe N 3a OKOHATA cpea.3a npabHnHTo FOHKUHOHpaHe Ha ypeDa BCE NaK Te3n CbCTABHn YACTn Ca Heo6xOdMn. O603NaeHIne Tc To3n CmBOJ ypeN He Tp8Ba Da 6bDat n3XBbPnHN 3aeDHO C 6bTOBnTE OTnAbu.
Pa60Tn no NOUcTBaHe, npu KOnTO ce noJyuaBAt CbDbpxkaMACNo OTnAHN BODn, HAnp. MneHe Ha DnBnraTeN, MneHe Ha KapOcePn, TprBa Da ce N3BbPwBaTeINHCTBeHO Ha MeCTa 3a n3MnBaHe C MACNOYIOBNTeN.
Pa6OTn C NouchTaBau npenapatn Tpr6Ba da ce n3BbPwBAT cMo Bbpxy HEnpOnyckaun TeuHoctn pa6OTn NOBbPxHOCTn CBp3ka KbM KaHaJIIN3aUra Ta 3a MpbCHA BOJa. He OanyckaIte NouchTaBau npenapatn Da nonadat BBB BoHN 6aceHH INB noVBata.

B HrKoN CtpaHb3emaHTo Ha B0daOT 6ObueCTBeHN BoDn BaceHn He e pa3peUHe.
Yka3aHn 3a cbCTabHn BeuecTba (REACH)
AkyaHa HOpMaun OTHOcH CbCTaBn BeueCTBa MOKeTe Da Hamepnte Tk: www.kaercher.de/REACH
YnoTpe6a no npedHa3HaueHne
I3noJ3BaTe ypea 3a noUcTbaHe nOd BnCOKo HJIraHe CAMO B YACTHO DOMAKINCTBO.
YpeBt 3a nouCTBaHe nOd BnCOKo HaIraHe e npEHa3HaueH 3a NoHCtBaHe Ha MaunHn, aBTOMobJIn, cTPOTeHN KOHcTpKUIn, INcTpymEnTH, facaN, Tepacn, rpaDnHckn ypeN nT.H. C BoDHa cTpy nO D BnCOKo HnlaRaHe.
Akcecoapn npe3epBHN qactn
I3no3BaTe cAmOpnHnHn Akcecoapn OpnHnHaJIH pe3epBn YacTn, NO To3n HaunocnpyraBe 6e3oNaChaTa N 6e3npo6mHaeknloataqna Ha ypea.
HOpMaun OTHOcH oKceCoap n pe3epBn Yactn 1e HamepuTe Tk: www.kaercher.com.
06XbaT Ha DoCTaBka
0xbatbHa doctabkata Ha ypea e n3o6pa3eH Bbpxy onakobkata. Pn pa3oNaKoBaHe npOBepete cbDbpxKaHeTo 3a cJIOCT. Pn nnncBaun akcecoapn nn np TpAHCnOpTHN UETN, MoN, o6bPHeTe ce KbM Baun daCTpn6yTop.
Описанne на урета
B ToBa yntbTaHe 3a pa60Ta e OnncaHO MaKcMaHnHOTo
obOpyDbAHe. B KOMnIeKTA Ha IOCTaBkata NMa pa3NknB 3aBNCIMOCT OT MoDeJa (BnKTe ONaKBkata).
BnKTe n3o6paXeHnraTa Ha cTpaHncaTa C rpaΦnKn Φnrypa A
① Onopa c npbkkka 3a HocHe
② IV3BOD 3a BOda c BrpaDeHa ceJa
3paHCnopTHoKoNeNo
④BnEHa
5 HanpaBnaBaa3a Mapkyu
⑥ Ппекьсва на урета "0/OFF" / "I/ON"
⑦ MЯCTO 3a CbXpaHEnHe Na Tp6n 3a pa3npbCKBaHc
8 Mapkyu 3a pa60Ta noD BnCOKo HaJraHe
9 *Bytnka 3a noocTbau npenapat Plug n' Clean
10 MRCTO 3a cbxpaHHeH /no3nua 3a napKpAne Ha nCTOJeta 3a pa6ota NOB BnCOKO Hnrahe
11Дрьжka 3a TpaHcnpTnpaHe, C Bb3MOxHOCT 3a N3BaXkaHe
12 Power Control trpb6a 3a pa3npbckBahe 3a ynoptn 3ambpcaBHa, cTeenHa HnlaRaHe: HARD
13 Power Control Tpb6a 3a pa3npckBaHe Vario Power 3a Hau-0buaHnTe pa6To n noNoCTBaHe, CTeneHn Ha HnraHa: HARD/MEDIUM/SOFT/MIX
14 Power Control nuctonet 3a pa6ota noB Bucoko Hajrahe
15 ByToH 3a OTdeJIraHe Ha MapkyuHa pa6Ota noD BucOKo HanaRaHe ot nCtOnTeHa pa6Ota noD BucOKo HanraHe
16 NocT Ha nuctoeta 3a pa6ota noD Bucoko HanaRaHe
17 INHnkaa3aHaJIraHe (0-MIX/1-SOFT/2-MEDIUM/3-HARD)
18БLOKINPOBkaHaNCTOJeTa3a pa6oTaNoD BUCOKO HAnraHe
19 DpbKka 3a HocHe
20 Hocay 3a Mapkya
21TnnoBaTa6eNka
22 YekmeJke 3a npHaJnEJnxHocTn
23 Kyka 3a 3akpenBaHe Ha MpeKa
24 Mpeka 3a yeKMeDke 3a npHaIeXHocTn
25 MpekOB 3axpaHbaKa6en c uencen
26 Kynnyr 3a n3B0da 3a BOda
27 **TpaHckn Mapkyc o6nKHOBeH KynIyH -ApMnpaH -MHHMaJIeH dAmEeTp b1/2 0Ja (13 mm) -MHHMaJHa DbJIxHa 7,5 m
28 **BcmykaTeIeH mapkyu KARCHER 3a 3axpaHbahe c BOJa OT OTKpTu pe3epBoapn (KaTaJIOKeH No 2.643-100.0)
29 DocTaBEn C ypeDa BnHTObe N IIO6eHn
30 *Ito3a 3a nHa c pe3epBoap 3a noHCTBa u npenapat IouHCTBaunr npenapat ce 3acMykBa OT pe3epBoapa nCe noNyUaba cnHa nHa OT noHCTBa unnpenapat.
3Bbptra ca yeetka 3a MneHe (Hanp. 3a NOuchTbaHe Ha aBTOMObnu)
- onционанно, **donьнHTeHnHo Heo6xOДIMo
OcTaBeHc ypeDa BnHTObe N IIO6eJIbIgrypaB
①Дибенза onopa(26po)
② BuHT M 4x20 (26poa)
③ BuHT M 4x22 (2 6po)
④ BuHT M 4x16 (86po)
PpeDna3Hn yCtpoNcTBA
△PENNA3NBOCT
Juncbau u npomeheu npedna3Hu ycmpoicma
IpeodnHume ycmpoucmea cnyxam 3a Bawama 3auuma.
Hukozha He npomehme uu npene6peaeaume npedna3hu ycmpoucme.
PpeKbCBAuHa ypeDa
IpeKbcbaytHa ypea npedotBpataBa HnpeDhamepeHOTnyckaHe B EKCnIooatauHa ypea.
PnroTBeTe DoCTaBeHIne C ypeDa BnHTObe N noDxOJaTa 3a TxA OTBepTkA.
Ppei nyckaHTo B EKcnIooataun MoHTnpaTe OTJeHNITE PnIOKeH YuactN KbM ypeJa.
MOHTnpaHe Ha KOJeJaTa
- NocTabete konenata.
Yka3aHue
Cneede 3a noopaenheaHemo ha omeopa.
Furpa C
2.ФИКСИРаTe KОЛЕнATA C NO 1 BINT.
MOnTnpaHe Ha onOpHaTa cToKa
- NocTaBete onopHaTa cToiKa. Φnrypa D
- ΠbxheTe 2-Ta IIO6eJa B OTBOpTe DOKpaI.
3.ФИКСИРаTe OIOPHATA CTOka C 2 BnHTa.
MOHTIpaHe Ha MrcToTO 3a CbXpaHeHne Ha Tpb6n 3a pa3npckBaHe
- 3aKaayete MRCOTO 3a CbXpaHHeH He TpB6nte 3a pa3npbCKBaHe.
2.ФИКСИРаTe MЯCTOTO 3a CbXpaHHeHc C 2 BnHTa.ФИrypaE
3.ФИКСИРаTe 6IeHДaTа c 4 BnHTa.ФИrypaF
MOHTnpaHe Ha dpbXkKaTa 3a TpaHCnOpTpnaHe
- NocTabete npbkkata 3a TpaHcnpTupahe. Urgya G
2.ФИКСИРаTeДрБЖКATA3aТраHСПОТИРаHe C 2BnHTa.
MOHTnpaHe Ha MpeKaTa 3a npHaadJeXHoCTn
- 3aKaYeMpexKaTa 3a npHaIeJXHocTn B KyKnte. H
PpokBaHe Ha Mapkyu 3a pa6Ota noD BnCOKo HnIraHe npe3 HnPaBnBaUaTa 3a Mapkyu
Iopepu npadu 3ambpche ooda
3ambpcraeaunma ebe eodama moa ma da noepedam nomnama u npunaadnexhocmume.
3a 3auuma KARCHER npenopbyea ynompe6ama ha eodnue pfimtpk KARCHER (cneuaHna npuHaedexKHomep 4.730-059).
Cbpb3BaHe KbM BODonpoBODa
BHIMAHHE
KynnyHa Mapkya c Aquastop Ha u3eoda 3a eoda Ha ypeda
HoepeaHa nomnama
HuKo2a He u3noJ3BaUme KynnyHn Ha MapKyu C
N3cMykBaHe Ha BOdaT a O T OKpTN pe3epBoapn
To3n ype3 3a noocTbaHe nOd BncoKo HaJraHe e noxodu 3a pa60Ta cBc CmyKaTeHnMa Mapky KARCHER C Bb3BpaTeH Klanah (CneuaHa npHaIeXHOCT, KaT. Homep 2.643-100) 3a n3cMyKBa HA BOda OT OTKPHTn pe3epBOapn, HApN. OT BapeIN cb6npaHe Ha IbXdoBHa BOda nnE3epa (MaKcMaBnCOUnHa Ha 3acMycKBaHe - Bk. rnaBa TexHuuecku daHHU).
PnppeKIM 3aCMyKBaHe He e HcOxOIM KynIyHbT 3a n3B0da 3a BOJa.
- HanbJIHHe TcMyKaTeJHnMa MapKyu C Boda.
- 3aBnHTe CmyKaTeHnH MaPkyu KbM N3BOda 3a BOda Ha ypeJa I rO 3aKaYeTe BbB BOJOn3ToUHnK (Ha npImep BapeJ 3a Cb6nPaHe Ha DbXkDObHa BOda).
06e3Bb3dyaBaHe Ha ypeda
- BkIIOUeTe ypea "I/ON".
- De6JIOKpaIte IocTa Ha nIcToIeTa 3a pa6Ota noD BnCOKO HAnraHe.
- HatncheTe NoCTa Ha nictoeta 3a pa6ota noB BnCOKO HAnraHe. YpeBbT ce BKJIIOUba.
- Octabete ypeda da pa60Tu MaKcImaHNO 2 MHyTu, Dokato BoData 3anOHe da n3Tu7a 6e3 Mexypeta ot NCTOJeta 3a pa60Ta NOBnCOKo HJIraHahe.
- IycheTe loCTa Ha nIcToJeta 3a pa6Ota noD BnCOKO HAnraHe.
6.Блokираite locta Ha nictoJeTa 3a pa6ota noB BncoKo HnlaRaHe.
Ekcnpnoataza
BHIMAHHE
Paboma ha cyxo Ha nomnama
PoepeHa ypea
Ako e pamkume Ha 2 Muhymu ypeobm He nocmua hanaane, u3knqueme ypeda u npouedeupaume cbalacno yka3aHura, daedehu e 2naea Pomou npu nopedu.
CncTema Power Control
IIO Bpeme Ha pa6oTaTc Tpb6a 3a pa3npbckBaHe Power Control INDnkaunraTa 3a HJaRaHe Ha NtctOJeTa 3a pa6oTa NOBnCOKo HaNraHe Noka3Ba HAcTpoHaTa B MOMeHTA CTeneH Ha HaNraHe.
YKa3aHue
UyecmeumnHocmma Ha Mamepuanme moKe da ce pa3nuaaba 3naumenHo e 3abucumocm om eb3pacmmu ccbcmorHuemo. 3amoea npenopbkume He ca 3adbIxumenHu.
yKa3aHue
Hdukauaema 3a Hnla2ane He e nokaameHa npu paBoma c ypeDu 3a noucmeAne Ha no8bpxHocmu u dpyu npuHadnexHocmu.
| Toka3aHn e | CTeEN Ha HaJIraHne | ПрелорьчБа ce habр. 3a |
| 3 HARD | HARD | Каменни Тераси OT павета или міец се бетон, acфалт,metални повыхноCTи,градински приhalдөжноCTи (рьчн КOLИЧКа,ЛОпати T.H.) |
| 2 MEDIUM | MEDIUM | пек.autомбил/ MOTOДСКЛЕТ,Тухлени ПовыхноCTи,Стetedи С Мазилka,Пл actмacoВа Meбел |
| 1 SOFT | SOFT | Дърveи ПовыхноCTи, Велосипед,пясьчни ПовыхноCTи,paразова Meбел |
| 0 MIX | MIX | Равота с поисваши пpenapatи |
Pa60Ta C BnCOKO HajraHe
BHIMAHHE
PoepeHaJaKupauHUnu yecmeumnH noBpxHocmu
NoBpxHocmume ce noepexkam npu mebpde manko pa3cmohue Ha cmpyma unu nopadu u36op Ha nenodxodya mpb6a 3a pa3npbckeahe.
Ipu noucmbaHe Ha JakupaHn noebpxHocmu cna3eaUme MuHmAlHo pa3cmOraHue 30 cm Ha cmpyma.
He noucmbaume aemomobunnu ymu, nau unu uecmbumenu noobpxHocmu kamo dbpeo cphi3ama 3a 3ambpceeaHua.
- ΠbXHETe Tpb6a 3a pa3npbckBaHe B nIcToIeta 3a pa60Ta IOD BnCOKo HaNJaHaHe NЯ φNkCnpaTe Cbc 3aBbPtaHe Ha 90^
ΦurpaM
- BkJIIOHeTe ypeJa ("I/ON").
- De6nKpaIte IocTa Ha nIcToIeTa 3a pa6Ota noD BnCOKO HAnraHe.
- HatncheTe loCTa Ha nictoJeTa 3a pa6ota noB BnCOKO HAnraHe. YpeDbT Ce BKJIIOUba.
- 3abptete Tpb6ata 3a pa3npbckBaHe Power Control Vario Power,dokaTo Ha INdkaunraTa 3a HanaRaHe ce nokaxe Heo6xOumTa CTeneH Ha HanaRaHe.
Pa6ota c yeTka 3a MneHe
BHIMAHVE
IoppeuHaJaka
Iopeda Ha noebpxhocmu nopadu 3ambpceHa yemka 3a MueHe
Yeepeme ce, ye yemkama 3a Muene e yucma om yacmuu MPbcomu unu dpyu yacmuu, npedu da ja u3noJ3eame.
yKa3aHue
Ipu ynompe6a Ha yemku 3a Muene ypeobm pa6omu c Hncko Hanraane. 3amoa Mozam da ce do6aern noucmeau npenapamu.
- ΠbXHETe YETkata 3a MmHe B NICTOJeta 3a pa6ota NOD BnCOKo HAnraHe I aΦHKcnpaTe Cbc 3abTpTaHe Ha 90^
Pa6oTa c nouHCTBaU nIpenapaTu
ONACHOCT
Hecb6nodoahe Ha uHphiopmauOHHu Jucm 3a 6e3oNaChocm
CepuO3Hu yEpeKdAnuHa 3dpaBEmo npadu HenpaBunHa ynOppeBa Ha noUcmbauu npenapam Cna3BaUmte unOpmauOnHnur lacm 3a 6e3onacHocm, npedocmaeH om npou3bOdumela Ha noUcmbauu me npenapamu, ocobHo yka3aHuraMa 3a nuHNo 3auumno obopydahe.
yKa3aHue
Pouucmeauum npenapam moke da ce doabra camo npu HUCKO Hanrahe.
yKa3aHue
3a pa6omama c noucmeau npenapamu e Heo6xoduma 6ymunka 3a noucmeau npenapam Plug n'Clean. Noucmeauume npenapamu KARCHER Mozam da 6bdam 3akynenu 2omou 3a ynompbae 6ymunka 3a noucmeau npenapam Plug n'Clean.
- CbaTe Kanaka Ha 6yTnIkaTa 3a NouchBaU npenapat Plug'n'Clean.
- Hatnche 6ytnIkaTa 3a noCtBaU npenapat c oTbopa HADony B n3BOda 3a noCtBaU npenapat Plug'n' Clean.
Фигура N
3.ИЗнэВаTe Tpb6aTa 3a pa3npbckBaHe Vario Power.
4. 3aBbPteTe Tpb6aTa 3a pa3npbckBaHe B nocoka "MIX",doKaTo Ha nIcTOneTa 3a pa6oTa noD BnCOKo haJraHaCe nokaxe "MIX".
IbpeHa pa6oTa pa3TbOpbT Ha noHCTBaU npenapat ce CmecBa c BODHaTcTpy.
- 13noJ3BaIte duO3aTa 3a naHa no u36op.
a HaJeIe pa3TbOp Ha noUcTbau npenapat B pe3epBoapa 3a noUcTbau npenapat. Pn TOBa c6IIOdaBaiTe INHOpMaunra 3a Do3npaHe, nocOeHa Bbpxy OnakOBkata Ha noUcTbaunte npenapatn.
b CbpxKeTe IIO3aTa 3a IHa c pe3epBoapa 3a nouchTbau npenapat.
c ΠbXHeTeДIO3aTa 3aЯHaВ nIcTOneTa 3a pa6Ota NOd BucOKo HaIraHe I aФИКсИpaIte Cbc 3aBbPtaH e Ha 90^
Φnrypa O
PpenopbuaH MeToa 3a noHCTBaHe
- HanpbckaIte IKOHOMNHy NOUcTBaUH npenapaT Bbpxv cyxAta NOBbpxHOCT uocTaBeTe da nOdeiCTBa (He n3CyuabaHTe).
- OTMnIte pa3TbOpeHaTa MpbCOTnBc CtpyraNoD BucOKo HaJIraHe.
Cnepa6ota c nouchtaaun npenapatn
1.ИЗваде 6утнкага c noчсТьц npenapat Plug n'Clean ot OTbopa nЯ 3aTbopete c kanaka.
2. 3a cbxpaHHeHne NOCTaBete 6yTNkata C noYnCTBaU npenapat C Kanaka Harope B OTbopa.
3.ИЗпаквайураза окю 30 секунс унста BOДa.
PpeKbcBaHe Ha pa6oTaTa
- IycheTe IocTa Ha nIcToIeTa 3a pa6Ota noD BnCOKo HnIraHe.
UOMIOCTbT Ce OTnyche, ypeIbT ce n3KJIIOuBa. BnCOKOTO HnIraHe B CnCTemata ce 3ana3Ba.
2.Блokираite locta Ha nictoJeTa 3a pa6To naBncoKo HnIraHe.ФИгураP - NocTabete nuctoeta 3a pa6ota noB BncoKo Hnrahe c Tpb6ata 3a pa3npbckBaHe Bno3uHra 3a napkupaHe.
4.Пипpeкбаня ha pa6otata 3a noBee ot 5 MHyTu n3KnHouTe ypeDa "0/OFF".
PpuknouBaHe Ha pa6oTaTa
△PENNA3NBOCT
HaIe aHe cucmemama
HapaHraHua npadu HeKoHmpolupaHo u3muUaua na bucoko Hnraehe boda
Omdenme mapkya 3a pa6oma nod bucoko HanraaHe om nucmonema 3a pa6oma noe bucoko HanraaHe uu om ypeda camo ako e cucmemama Hma HanraaHe.
- IycheTe loCTa Ha nICToIeTa 3a pa6Ota noD BnCOKO HAnIraHe.
- 3aTbOpTe KpaHa 3a BoDaTa.
- Hatnche TocTa Ha nctoeta 3a pa6ota noBncoKo HnraHe 3a 30 ckyHn. Bce oue hJInuHTo B cnCTema Ta HnraHe ce ocbo6oxdaBa.
- IycheTe loCTa Ha nIcToJeTa 3a pa6oTa noD BucOKO HnIraHe.
5.Блokираite locta Ha nuctoIeta 3a pa6ota noD BncoKo HJIraHe. - OTdeneTe ypea ot 3axpaHbAHeTo C B0da.
7.ИЗклочеураза"0/OFF".
8.ИЗвадеMupeжовицencelOT KOHTaKaTa.
TpaHcnpTnpaHe
△PENPA3NBOCT
Hecb6IIOdaaHe ha mezIono
Onachocm om hapaHaeaHua u nopedu
Ipu mpaHcnpmupane cb6nOdaeaume meaIono Ha ypeda.
Hocene Ha ypeda
- Повдигнелуpeда 3a Дрьхкпге 3a Нocheи Гocete.
TerneHa ypea
- ɪnɜbæte ἀπβækkaTа 3a TpɑhCnɒpɪnpaHé, ἀDKaTo ce yye φικcɪpaHé.
- Terne Te yepa 3a npkkaT a 3ra TpaHcnpTupahe.
TpaHcnpTnpaHe Ha ypeDa B npeBO3Ho CpeIcTB0
YpeBt He noctura HaJraHe
IopaBaHTo Ha BOba e TBbpde cna6o
1. OTBopTe HAnbJHo KpaHa 3a BOData.
2. IpoBepete noaBaHTo Ha BOna 3a DoCTaTbueH de6nt.
LcEkata B n3B0a 3a BOa e 3ambpceHa.
1.ИЗbaTeTe ueKataВиЗБОДа 3a BODa CпLOCKN KJIeш.
2. NouinCTe TeEckata noTteHaaBa Boda.
Bypea nMa Bb3dyx.
1.Obe3Bb3dnyuwe Te ypeJa:
a BkHoueTe ypea 6e3 Cbbp3aHa Tpb6a 3a pa3npbCKBaHe 3a MaKcImaJIHO 2 MNHyTu.
b HaTnCHHe TnCTOnTe 3a pa6oTa nOД BnCOKO HAnrAHe nN3uKaIte, DOKaTO BOJATA 3aNoUHe Da N3TuHa 6e3 MexyPcTe O T NtCToTe 3a pa6oTa nOД BnCOKO HAnrAHe.
c CbpxKeTe Tpb6ata 3a pa3npbckBaHe.
d PnppeKIM 3acMyKBaHe cb6nOdaBaIte MaKC. BnCOUHa Ha 3acMyKBaHe (Bk. InaBa TexHuYeCKu daHHU).
CUNHKOJIe6aHaHaHaIraHeTo
- NocntBaHe Ha I03aTa 3a BnCOKo HnIraHe:
a OTePahete 3ambpcraBaHnraT O TOBpa Ha IHO3aTa C NOMOuTa Ha INrna.
b N3nlaKHeTe IIO3aTa 3a BnCOKO HAnraHe OTnped C BOda.
- PpOBepeTe KOJInueCTBOTo Ha NOCTbNBAaTa BOJa.
YpeBtHe xepMeTnueH
- Manka Jnnca Ha xepMeTnHocTe o6ycnoBHea Texnueckn. PpN 3HaunTeJHa JInca Ha xepMeTnHocTe Ce o6bPheTe KbM OToPn3npaH cepBn3.
He ce 3acmykba nouictBaau npenapaT
- Изпоггьштбатурацьсванe Vario PowerияЗавртeteHa noJoxжeHne“MIX”.
- Повере Te Дали 6утнкata 3a noчntBaц npenapat Plug'n'Clean e noctabaHa c OTbopa HANOBy B n3BoDa 3a nochTBAц npenapat.
Rapanzna
BbB BcKa Ka BaNn Hn N3daeHnTe OHaan oTopu3npaH nctp6yTop rapaHnOHn yCNoBn. EBeHTyaHn NOpeDn Ha Baunu ypeI ue OTcTpaHm B paKnTe Ha rapaHnOHHn Cpok 6e3nPaTHo, aKO ce Kacae 3a DeΦeKT B MaTePnaJIte Nn npOn3BOdCTBeH deΦeKT. B cnyau Ha npedraBaHe Ha npaBo Ha rapaHn, ce 06bpHeTe KbMaBuaN dNcTp6yTop nNkM Hau-6nn3Kn OTo pNcTabTE KacOBaTa 6eNeKka. (Adepoc, Bx. 3aHaTa CTpaHa)
TexHnueckn daHHN

H. Jenner
Chairman of the Board of Management

S. Reiser
Director Regulatory Affairs & Certification
71364 Winnenden (Germany)
Ten.: +49 7195 14-0
ΦaKc: +49 7195 14-2212
Bünhendeh, 2018/10/01
Sisukord
Uldised juhised 131
KARCHER Home & Garden App. 131
Keskkonnakaitse 131
Siftotstarbeline kasutamine 131
Lisavarustus ja varuosad. 131
Tarnekomplekt 131
Toode: Korgsurvepesur
Tüpp: 1.324-xxx
Chairman of the Board of Management

S. Reiser
Director Regulatory Affairs & Certification
Dokumentatsionovlinik:
S. Reiser
Alfred Karcher SE & Co. KG
Alfred-Karcher-Str. 28 - 40
71364 Winnenden (Germany)
Tel: +49 7195 14-0
Winnenden, 2018/10/01
Satures
Visparigas norades. 136
KARCHER Home & Garden lietotne 136
Download on the App Store

Precuzime
- Google Play™ un Android™ ir Google Inc. preçu zi-mes vai registretas preçu zi-mes
- Apple® un App Store® ir Apple Inc. precu zimes vai registretas precu zimes
Chairman of the Board of Management

S. Reiser
Director Regulatory Affairs & Certification
Pilvarotais sagatavot dokumentaciju:
S. Reiser
Alfred Kärcher SE & Co. KG
Alfred-Karcher-Str.28-40
71364 Winnenden (Vacija)
Talr.: +49 7195 14-0
Fakss: +49 7195 14-2212

H. Jenner
Chairman of the Board of Management

S. Reiser
Director Regulatory Affairs & Certification
YcTaHOBJIeHHpyKnIJa TpaHCnOpTyBaHHa
- BctaHOBHTn pyky dny TpaHcnpTyBaHHa. ManHOHOK G
- 3akpiinr pyky dIra TpaHcnpTyBaHHa 2 rBnHTamn.
YcTaHOBHeHHcITKn dI npnaa
1.ПовicitиCitkyДлгпрпладяHa raukn. ManhoHok H
PpOryBaHHaNHaBnCOKoTnCKy Upe3 HAnpMHy dIaHra
- WlnaHr BncoKOro TnCKy npToTHyTu 33aNy Upe3 HnnpabNIOUcY dIg WnAHa. ManHOK I
BctaHOBJIeHHMyΦTnIJIπIDBeHHeBOO
- PnirBHTtMyfTy Iny NiBBeHHe BOn Do natapy6ky Iny NiBBeHHe BOn Ha npictpoi. ManIOHOK J
BBeDeHnB eKcnnyaTauiO
- NocTabNTn npncTpi Ha piBHy NOBepxHIO.
-
NobHicTIO po3MOtaTI uHaHR BnCOKOro TnCKy Ta po3NpyTaTI neTJI ta nepekpyeHHa (3a HaABHOcti).
-
Повсгю пotingуншалг Високо Тпckу черп. Наши PMHy.
- BCTaBHTUJNAHr BVUCOKOTo TnCKy y BVUCOKOHAnipHn niCToNETdo KnaCaHHra.
Bka3ieka
Cniokyamu 3a npabunbHM eupi8HoeaHHm HineJn ManHOK K
- Npebipntu HadiHictb 3'edHaHb, notraHyBwn 3a uHaH BucOKoro TnCKy.
- BctabNTn wTeNCeNbHy BNkY b po3eKy.
Iopdaa BODn
IapaMeTp nIa nIKNIOueHH 3a3HaeHi Ha 3aBOcBki I tabnui a6o B rnaBi TexHiX npakmepucmu. DotpmyBaTncb npinnciB niDnpneMCTBa BOONOCTaAHHA.
yBAGA
NoikokxeHHape3 3a6pydHeHy body
3a6pydHeHH, oO Micmmbc y bodi, Moxymb
cnpuHumu noKoKeHH hacoca i npunaed.
Ina 3axucmy padumo ckopucmamucb bodHum
fiIbmpom KARCHER (cneuaJIbHe npunaed, Homep
dn 3amoBnenn4.730-059).
IπkHoueHHa DO BODonpoBody
YBAGA
Ulaeoba Myma 3 cuscmeo 3axucmy eio npomikannn Aqastop Ha nampy6ky npucmpo0 dn niodeedeHHB odu
NoWKoDKeHHHaCoca
He eukopucmoeyime wnaHoeMyfmy 3 Aquastop Ha nampy6ky npucmpo0 dny iideedeHHa bdu. Myfmy Aquastop MoKHa eukopucmoeyama Ha eodonpoiDHomy kpaHi.
- BctaHOBNTn caOBn IJNaHr Ha MyfTy dIy nIDBeDeEHRA BOn.
- PnEHaTn caObN mNaHr Do BOOnpoBdy.
3.Повсгв BiДКрИТи BODОнрОВIDи KpaH. ManIOHOK L
IpaBHaHb BOa 3 BiKpnTnx pe3epByapib
Ley MIOHn anapaT BnCOKOro TnCKy 3i
BCMOKtyBaIbHM IJahrom KARCHER i 3BOpOTHM
KJIaHaHOM (CneJIaIbHe npJauDЯ, Homep dJa
3AmOBJIeHHra 2.643-100) npJ3NaHcHenn dJa
BCMOKtyBaHHr BOHN 3 BiIKPHTX pe3epByapIB,
HAnPKJIaAD 3 BoOOK dJa DOUOBOI BOHN a6O CTaKBiB
(MAKCMaJIbHy BnCOTy BCMOKTyBaHHra DnB. y rJIaBi
TexHiHi xapaKmepucmku).
YpeKIMi BCMOKTyBaHHB NIKOpNCtAHMyΦTnДЯ NiIDBeDEHHe BOH He NOTpi6He.
- 3aONBHnTn BCMOKTyBaJIbHn IJNaHr BOHO.
- PnurBnHTNTu BCMOKtyBaJIbHn IuaHaI NaTpy6Ka DnI niBeHeHHa BODn Ha npCTpoi i nomictntu B DkepeNo BoDn (HaepnklaD, B 6Oky Jna DooBOBoI BOIN).
BudaneHHnOBitpr3 npucpto
- Ybimkhny npictpiK I/ON
- P036nokyBaTn BaXjin BnCOKoHanipHoro niCToneta.
- HatncHytn Baxijb BncoKoHanipHoro nictoeta. Pnpctpi BMkaetbcra.
4.ДатиnpсntpoIO nonpaUOBaTN npOTAROM MaKcIMMyM 2XBUNH,POKN BOJa He NOUHe BUXOINTN 3 BnCOKOHApHOro nicToJeta 6e3 6yNb6aWOK. - Bldnyctntu Baxkib BucokohanipHoro nictoneta.
- 3aφikCyBaTn BaKijB BnCOKoHanipHOrO niCToJeta.
EkcnJnyatauia
YBARA
Cyxu xiδ hacoca
NookoKeHH npucmpo
Ku npucpii He cmeopoe mucky npomzom
2 xBunH, Bumkhymu npucpi i cnidyamu
Incmpyqiam e po3di I Donomoa 6 pa3i
Hecnpaehocme.
CnCTema Power Control
Плд ac роботи 3iструинноу Трубково Power Control iHdkaTOp TnCKy Ha BucOKoHaipHomy nicToIeTI noka3ye NOTOuHm 3aDaHn pIBeHb TnCKy.
Bka3ieka
Uymnueicmb Mamepianie Moke cunbHO biopishmucra 3aIexHo iD mepmHy ekcnnyamaui ma cmaHy. Tomy pekomehdaui He e o6o'3Koeumu.
Bka3ieka
Iid yac pobomu 3 ouuyeaem noeepxhi ma iHwum npunaadam inoukaia mucky heihopmameha.
Iid yac ouuueHH noapab6oBaHux noeepxohb dompumyeamucB iDcmaHi He MeHue 30 cm.
He ouuyeamu aemomobinbhi wunu, noqap6oabi
afo yumnusi noepxhi 3 bukopucmaHHa m 2p3boooi
fpe3u.
- BctabnTcTpymHHy TpykBy BvncokohanipHnictoneti 3aikcyBatn ii, nobepHyBnHa 90^ ManHOK M
- YbIMKHyTN npncTpii (I/ON).
- Po36nkyBAtn BaxiNb BucOKoHaipHOro niCToIeta.
- HatncHytn Baxijb BucokohanipHoro nictoneta. Pnucpii BMkaetbcra.
- Повертасту минни трубку Vario Power cncTeMn Power Control, пон ha iHДиkaTopi TUCky He BiO6pa3ntbса Heo6xIDHn piBeHb TUCky.
PeknMpo60Tu3MNUOIOUtiKIOU
yBAGA
NowkodkeHH noqap6oeaHux noeepxohb
NookKeHHnoeepxHb yepe3 3a6pyDHeHy MuOuy imky
Ipeed eukopucmaHHnnepekohamucu, uo Muoua icimka He Micmmb6pyd afo hux yacmuHok.
Bka3ieka
Y pa3i buKOpucMaHHa MuOuHx uimok npucmpiu npauoE 3 Hu3bKum muckom. Tomy MoXHa dodaamu MuHi 3acobu.
- BCTaBnT MmOuy UjITky B BVOCOKHAnipHN niCToNET i 3aqiKcyBaTu ii, NOBepHyBwn Ha 90^
Eknpnyataia 3 MnHm 3ac06om
HEBE3NEKA
Hedompumannnnaacnpma6e3neku
CepuO3Ha uKoda 3dop08'U yepe3 HenpaunbHe EukOpucmaHH MuHoo 3acoby
Dompumyamucnacnpmy 6e3neku eupo6huka MuH020 3ac06y, 3okpema 8ka3ie0k uodo 3ac06i iHduibyaIbHO2O 3axucmy.
Bka3ieka
MuHui 3aci6 moKe odaamucb minbku 3a Hua3bk020 mucky.
Bka3ieka
Дя робум 3MuHUMu 3ac6amU Heo6xidHu KoHmeuHep 3 MuHUM 3ac6om Plug'n'Clean.MuHi 3ac6u KARCHER MoXHa npud6amu zomOeumu do eukopucmaHHa e CneuaIbHomy KOHmeuHepi CuCmemu Plug'n'Clean.
-
3HATN KPNUky KOHTeINHepa 3 MmHMM 3acO6oM cnCTemn Plug'n' Clean.
-
BctaHOBHTN KOHTeHep 3 MmHm 3ac06om OTBOPOM BnH3 B po3'em IJIЯ nOJaI MmHOrO 3ac06y cnCTemn Plug'n'Clean.
MaHIOHOK N
PekomeHObaHm MeToD uHneHHA
- OuaJINBO po3nHNTM mHm 3ac6 Ha cyxy nobepxHIO n 3aJIuWHTn Ha deKm Yac (He BUNtpaTn).
- P03HHeHn 6pyd 3mHTn cTpymHeM BOn n iD BUCOKIM TNCOM.
Pio60tn 3 MmHm 3aco6om
- 3HrtnnIPLaUKy 3 MmHm 3acO6om Plug'n'Clean 3 KpInJIeHHra i 3akPHTn II KpnUkoIO.
- NocTabNTn PnRAuKy 3MNUOuHm 3aco6om y KpinneHHa KpuuKOo DOROpu.
- Помпглпсглчсгвдглпрггмпгн. 30ceKHyd.
PpeepuBaHHpo60Tu
- Biinyctntn Baxjnb BucOKOHanipHOro nicToeta. Kso Baxjnb BiPyckaetbCra, npncTpiB BMnKaetbCra. BucOKn TnCK B CnCTemi 36epiraetbCra.
- 3aΦiKCyBaTn BaXJIb BnCOKOHanipHOro nictoneta. ManHOK P
- BcTaHOBHTN BnCOKoHAnipHn nictOeTI cTpymHHy Tpy6ky B npKyBaIbHe noIOKeHHr.
4.Пдчаспервуpo6oti noHa5xBnInH npncpti cnid BmNkaTn «0/OFF»
3aBepueHHpo60Tu
OBEPEXHO
Tucky cucmemi
TpaMu BHaCnIOK HeKOHmpoBoeaHO2o buxOdy bOdu nID eUCOKUM muckOM
Bid'edhyeamu wanahe eucokozmucky eid eucokohaniphozo nicmonema abo npucmpoio minbku modi, kou b cucmemi iocymhui muck.
- BiDnyctuBn BaxKnB BuCOKoHAnipHoro nicToJeTa.
- 3akpnTu BOonpoBiHn KpaH.
-
Hatnckatn Baxinb BucokohanipHoro nictoneta npotraom 30 ckynd. Tnck, zo 3aJINWBcB B CNTeMi,CKndaetbcra.
-
BiDnyctnBaxjB BNCOKoHanipHoro nicToJeTa.
- 3aφikcyBaTn BaKiNb BucokohanipHoro nicToeta.
- BiD'eHaTu npucTpii BiD CnCTemN BODOnocTaaHna.
- BmKHyTu npucTpiu 0 / O F F
- BntaHryTu WtencJIbHy BuNKy 3 po3eTKN.
TpaHcnpTyBaHH
OBEPEXHO
Hedompumahna baza
He6e3neKa mpaMByeaHna ma nowkoDkeHb NiacmpaHcnpmyeaHna epaxoyeamu eaay npucmpoio.
IpeheHenHH npncTpoIO
1.Пднгпnpстpi3a pyкn i nepeHeCTn.
BolouinH npucpoI
- BntaHryTu pyky dny TpaHCnOpTyBaHHy do KnaCaHHy.
- Tarynt npncptpi 3a pyky dny TpaHcnopTybaHHa
TpaHcnpTyBaHHn npnctpoU B TpaHCnopTHOMy 3ac06i
Dorla Ta texhie He 6cnyroByBaHHa
HE6E3NEKA
He6e3neka ypaKeHHn eIekmuHm cmpymom
Tpaemu e pezylbmani mopkaHn cmpymoeedyux yacmuH
Bumkhymu npucmpiu.
Bumru umencelbny uuky.
Pnucpii He noTpe6yE TexHiuHoro 06cnyroByBaHHa, To6To BnKoHaHHa peryIpaHoro TexHiuHoro 06cNyroByBaHHa He notpi6Ho.
3axnct BiMopo3y
YBAGA
He6e3neka 3aMep3aHHa
He noeHicmIo eunopoxKHei npucmpoi Moxymb 6ymu nowkodxeHi uepe3 MOp03.
IobHicmIO cnopoxHumu npucmpiu ma doadamkoee.
ObnadHaHHa.
3axucmum npucmpiu 8id mopo3y.
Y npncTpoi He CTBOpoeTbcra Tnck
3aHaTo Cna6ka NoJaHbOuN
- NobHicTb BiDkPntu BoDOpPoBIdHn KpaH.
2.перевирнодау Bodи на достатни обсяг.
CituaCTnΦiNbTp B natapy6ky niDBeDeHnBODn 3a6pydHeHn. - BntaTn ciTuaCTn fInbTp 3 naTp6ka niBedeHn BOu n PNOCKORY6aMn.
- Ppomntn ciTuaCTHn pInbTp niD npOTouHO BOIOJ.
Y npntpoi MictuTbca Nobitpr. - Buaanitn noBITpr3 npncptpo:
a YbIMKHyTn npncTppi 6e3 NiikNIOUeHOI CTpyMmHHoT py6Kn He 6iNbwe HIX Ha 2 XBUNHn
b Hatncchytn Bucokohanipn niCtonet i noeKaTu, nOKn Ha niCtoneti He noHHe BnCTynatu BOa 6e3 6yIb6awok nobitpr.
cPnEHaTnCTpyMmHHy Tpy6Ky.
d Y pexnMI BCMOKTyBaHHaNoTpumyBaTnc MaKc. BNCOTN BCMOKTyBaHHa (nVB. po3in TexHiHxapakmepucmu).
Bennki nepenad Tncky
- OuHCTHTN CONJIO BNCOKO TCKY:
a BuaJIInI 3a6pydHeHHH 3 OTBOp cy oJIO.
b Ppomntn coTNO BnCOKoro TnCKy BoDoHO cnpepy.
- Ipepeipntn o6craB Oo noaetbcra.
Pnncptpi HeepMeTnHm
- He3haHa HeerpmTnHicb npncIpoIO o6yMOBneHa texHiHMN Oo6nNBOCTaM.N y pa3i CNJIbHOI HeerpmTnHocTi 3BepHyTnCra Do aBTOpn3OBaHOI cepBicHOI cnyk6n.
Mnouh 3acio He BcMOKTyEcBcA
- BnKOpNCToBvBaTn CTpyMmHHy Tpy6ky Vario Power i NOBepHyTN B HAnpRmKy «MIx».
- Npebepntu, uBCTaBHeHn KOHTeHep 3 MmHMM 3aco6om Plug'n' Clean OTbOpOM Bn3 y naTpy6ok noaqui MMHorO 3aco6y.
TapaHTia
YkoKhi KpaHII dIOHBiDnOBiHi rapaHTiHi yMOBn, BCTAHOBJIeHi yNOBHOaKeHO OpraH3aueHO 36Ty Haooi npOdyKuB B cH KpaHl. MoKniBi HecnpaBHOCTI npnA dy npTfrom rapaTIHorO CTpOKy MN ycBaEMo 6e3KOuTobH, kUO npuHa HecnpaBHOCTI nonrae B deEeKtax MATEPIANIB aBO BnPObHcMy 6paky. Y pasi BNHNKHeHHr NpeTeH3I npTOrOM rapaHTiHorO CTpOKy npoxAHRA 3BePTaTNCRA, MaOuN pRn C6i YeK npo NOKynk, do TOpROBEnbHOI opraH3aui, 10 npoDaNA npOdyKT, aBO Do HA8bNxKooI yNOBHOaKeHOI cnyXbCepBichoro 06cNoyROByBaHH.
(Adpecn nB. Ha 3Bopoti)
Texhichi XapaKTepncTnKi
EneKtpnue nidknoueHna
Chairman of the Board of Management

S. Reiser
Director Regulatory Affairs & Certification
Oco6a, BiinobiJaIbHa 3a BeJeHHra DOKymeHTaui: II. Pau3ep (S. Reiser)
Alfred Karcher SE & Co. KG
Alfred-Karcher-Str.28-40
71364 Winnenden (Germany)
Ten.: +49 7195 14-0
ΦaKc: +49 7195 14-2212
M. BiHHeHdEh, 01.10.2018

THANK YOU!
MERCI! DANKE! iGRACIAS!

Register your product and benefit from many advantages.
www.kaercher.com/welcome


Rate your product and tell us your opinion.
www.kaercher.com/dealersearch
Alfred Kärcher SE & Co. KG
Alfred-Karcher-Str. 28-40
71364 Winnenden (Germany)
Tel.: +49 7195 14-0
Fax: +49 7195 14-2212