TC30PM - Portable air conditioner HONEYWELL - Free user manual and instructions
Find the device manual for free TC30PM HONEYWELL in PDF.
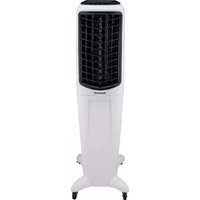
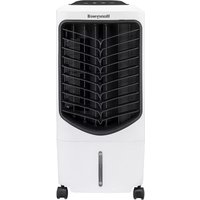
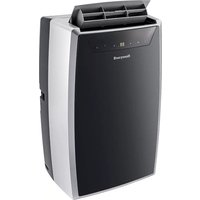
| Product Type | Portable Air Conditioner / Evaporative Air Cooler |
| Brand | Honeywell |
| Model | TC30PM |
| Main Functions | Ventilation, evaporative cooling, automatic louver oscillation |
| Fan Speeds | Low (I), Medium (II), High (III) |
| Water Tank Capacity | Approximately 20 L (estimate, actual capacity not specified) |
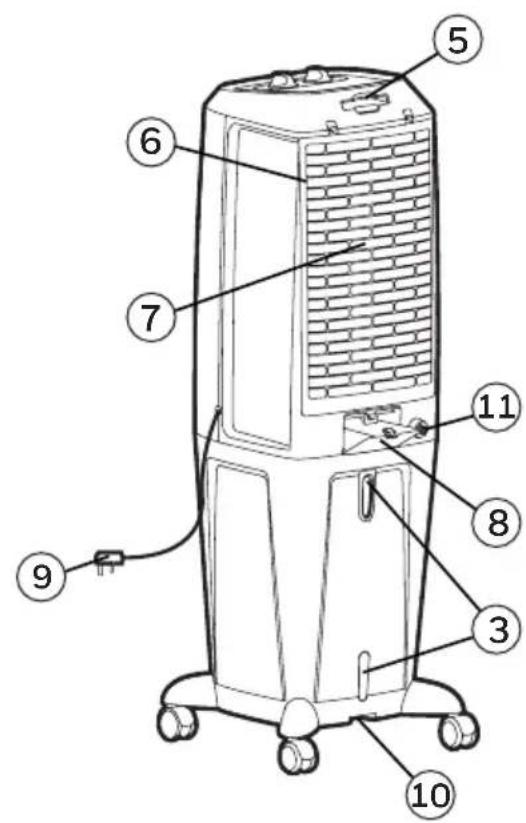
| Water Level Indicator | Yes, located at the rear of the unit |
| Continuous Water Supply | Possible via water inlet valve (garden hose not included, max pressure 0.5 MPa) |
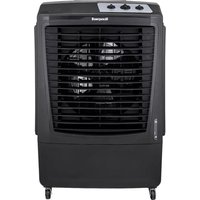
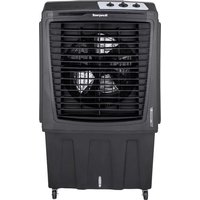
| Cooling System | Honeycomb pad (washable and replaceable) |
| Filter | Rear grille with water-washable filter |
| Power Supply | Mains 220-240 V ~ 50 Hz (estimate, not explicitly stated) |
| Castors | Yes, for easy mobility |
| Handle | Yes, for carrying |
| Vertical Airflow Adjustment | Manual |
| Horizontal Oscillation | Automatic (OSCILLATION button) |
| Tank Maintenance | Drain and clean regularly with clean water; do not use dirty or salty water |
| Honeycomb Pad Cleaning | Every 2 months or more depending on water hardness; allow to dry after use |
| Safety | Unplug before cleaning; do not use without rear grille; water pressure max 0.5 MPa |
| Materials | Not specified, but plastic tank and honeycomb pad system |
| General Information | Manufactured in China in 2020 by JMATEK Limited under license from Honeywell International Inc. |
Frequently Asked Questions - TC30PM HONEYWELL
User questions about TC30PM HONEYWELL
0 question about this device. Answer the ones you know or ask your own.
Ask a new question about this device
Download the instructions for your Portable air conditioner in PDF format for free! Find your manual TC30PM - HONEYWELL and take your electronic device back in hand. On this page are published all the documents necessary for the use of your device. TC30PM by HONEYWELL.
USER MANUAL TC30PM HONEYWELL
Read and save these instructions before use
www.honeywellaircomfort.com info@honeywellaircomfort.com
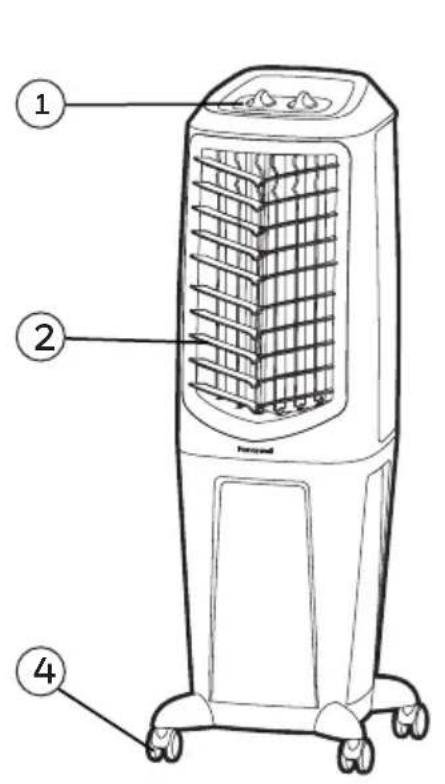
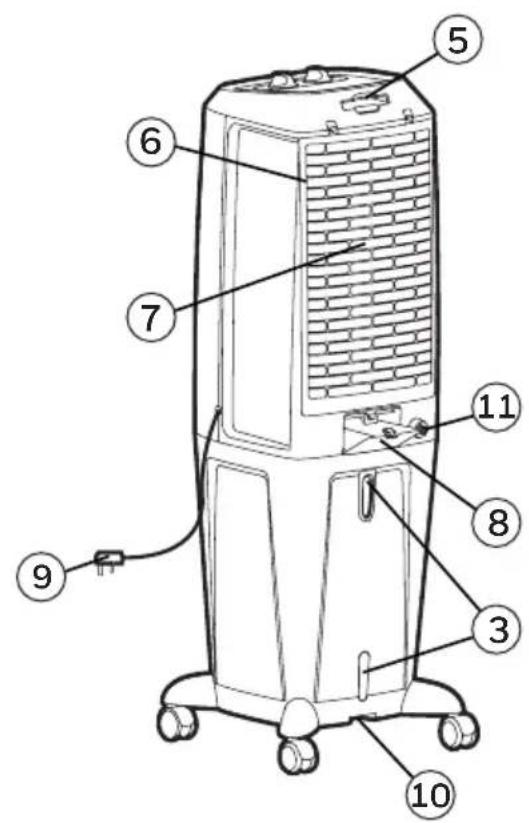
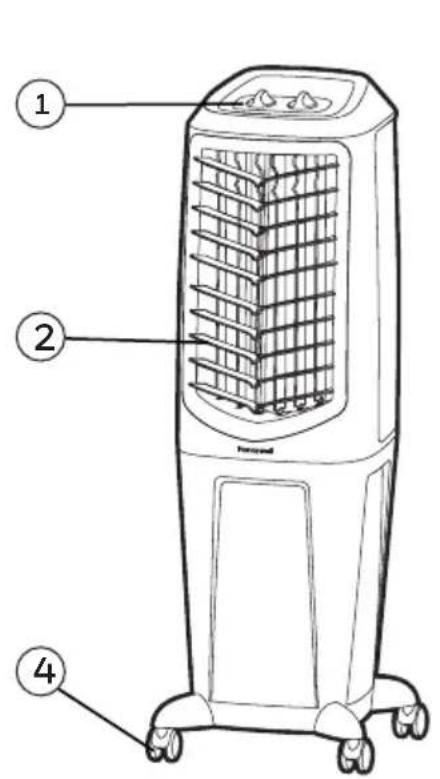
1) Control Panel 7) Honeycomb Cooling Media
2) Louvers 8) Water Fill Door
3) Water Level Indicator 9) Power Cord & Plug
4) Casters 10) Drain Plug
5) Handle 11) Water Inlet Valve*
6) Rear Grill & Mesh Filter
WARNING -- READ AND SAVE THE AIR COOLER SAFETY & MAINTENANCE GUIDE AND USER MANUAL BEFORE USING THIS PRODUCT. FAILURE TO FOLLOW THESE INSTRUCTIONS MAY DAMAGE AND/ OR IMPAIR ITS OPERATION AND VOID THE WARRANTY. IN CASE THERE IS ANY INCONSISTENCY OR CONFLICT BETWEEN THE ENGLISH VERSION AND ANY OTHER LANGUAGE VERSION OF THE CONTENT OF THIS MATERIAL, THE ENGLISH VERSION SHALL PREVAIL.
*Applicable for models with Water Inlet Valve only.
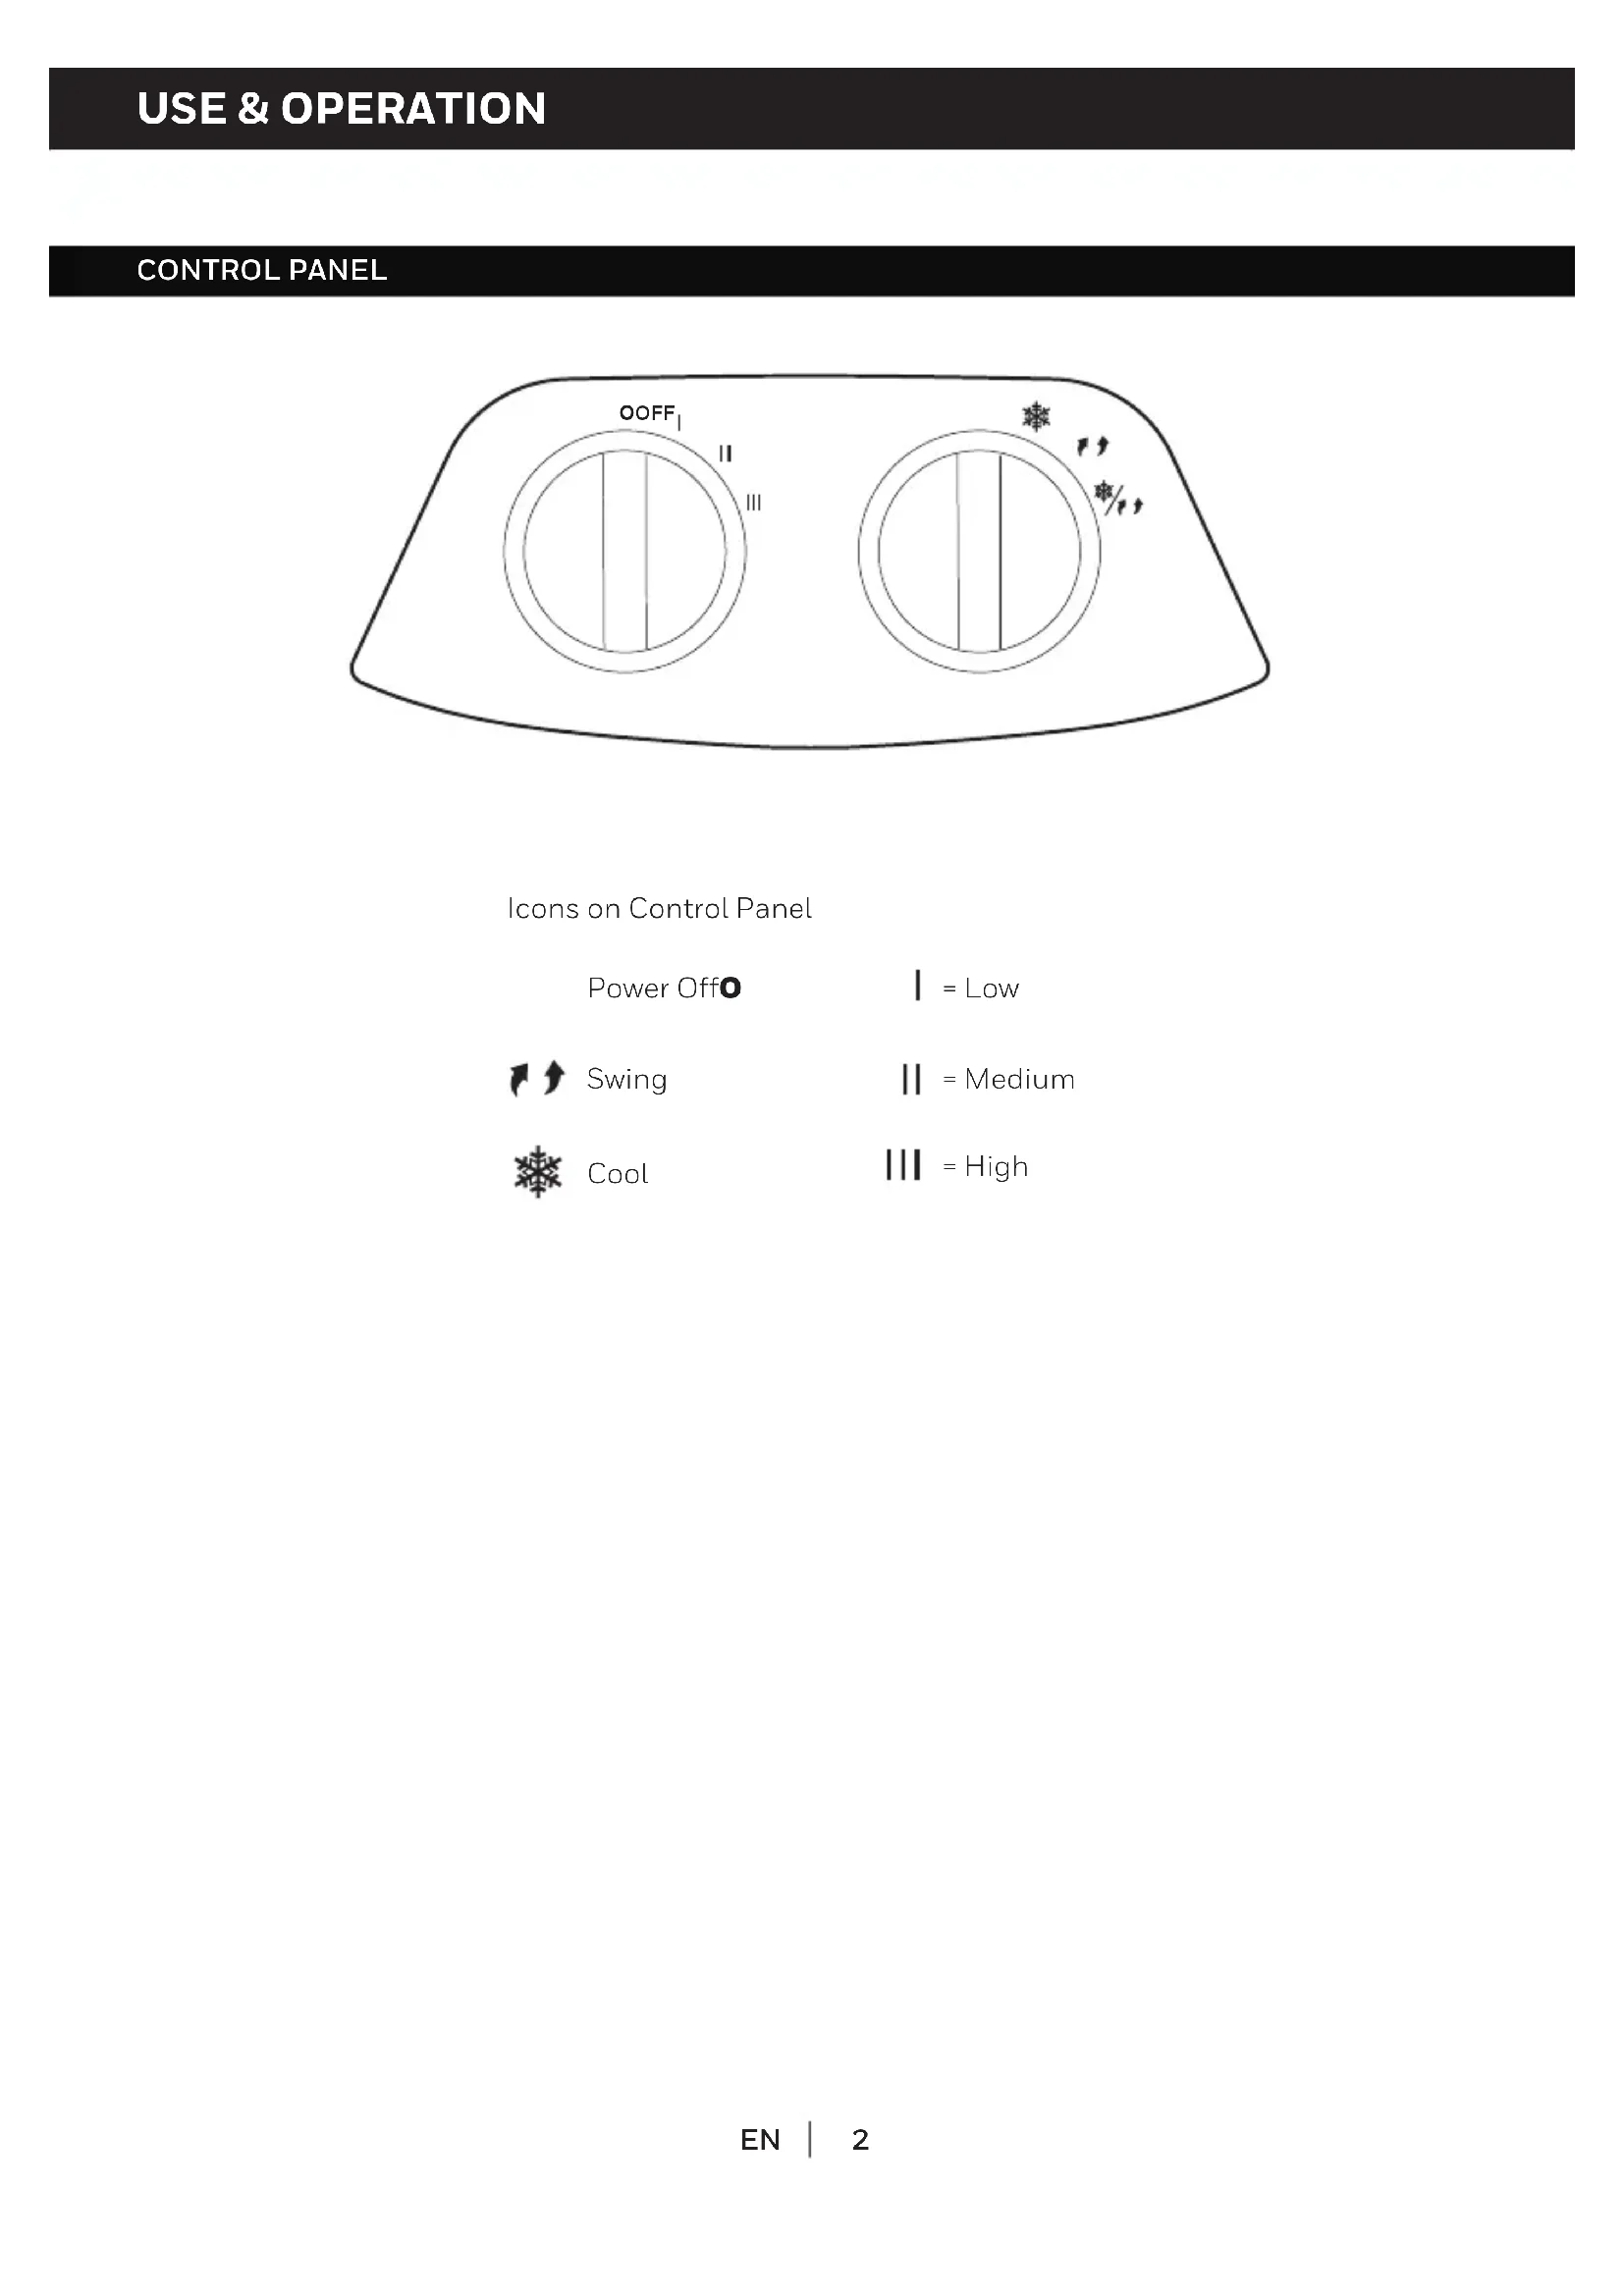
CONTROL PANEL

Icons on Control Panel
Power Off
= Low

Swing
=Medium

Cool
= High
FUNCTION BUTTONS
SPEED
Connect to the power supply and turn the SPEED knob. The fan will start. Change the speed from Low to High (I for Low, II for Medium and III for High fan speed). To switch off the unit, turn the SPEED knob to 0.
COOL/SWING
You must add water before operating the unit on Cool mode. Turn the COOL position to activate evaporative cooling. The water pump will operate and you will feel the cooler air after the Honeycomb Cooling Media is completely wet.
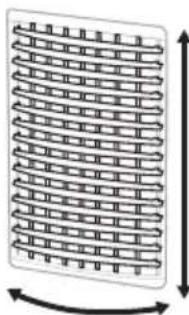
Turn the COOL / SWING position to activate evaporative cooling and the movement of the louvers. The louvers will begin to move left to right automatically. Vertical Air Flow - You can manually adjust the lever located at the front of the unit to change vertical air flow.
TurntheSWINGposition to activate the movement of the louvers.
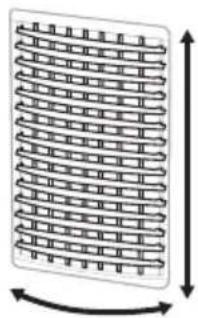
Louver Movement
COOLER LOCATION
Make sure to position the air cooler correctly before you set up and start using the product. Please refer to the COOLER LOCATION section of the separate Safety & Maintenance Guide.
FILLING WITH WATER
It is ideal to use the Continuous Water Supply* Connection to run the unit for long periods of time without refilling the tank. This also helps prevent pump failure in case the cooler is running with inadequate water in the tank.
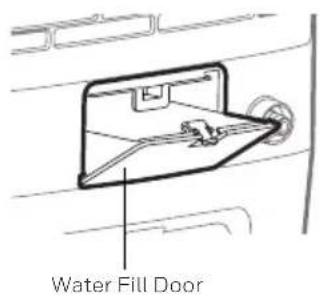
CAUTION: Unplug the unit from the electrical socket before emptying or refilling the water tank. Open the Water Fill Door located on the back of the unit.
Continuous Water Supply Connection*:
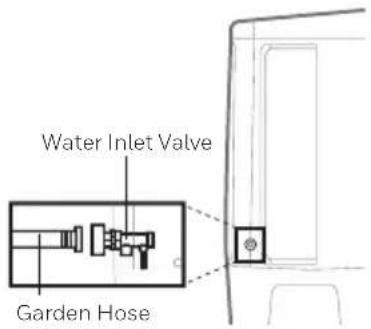
For a continuous water supply, you will need a garden hose that is connected to a mains water supply.
Note: The garden hose is not included. Please make use of a garden hose which is compatible with the unit connection.
- Locate the male connector at one end of the garden hose. Insert the garden hose connector into the water inlet valve of the cooler. Screw and tighten the water inlet valve onto the threaded part of the garden hose connector, making sure the hose connector is secured to ensure there will be no leaks. If there is a leakage, the hose and the water inlet valve may not be connected properly. Try to disconnect, replace and tighten the water inlet valve again.
- When the connection is secured, turn ON the water supply and the water will flow into the water tank of the cooler.
- The cooler is now set so the water refills automatically.
- When the water tank is full of water, the water inlet valve will automatically stop the water supply from overflowing the water tank.
WARNING: The maximum water inlet pressure is 0.5MPa .
*Applicable for models with Water Inlet Valve only.
FILLING WITH WATER(CONTINUED)
The Water Level Indicator is located at the back of the unit. Refill the water tank when water level is low. Do not fill water above the "Max." water level mark to avoid water droplets collecting on the louvers. Check the water level in the tank before running the COOL function. Make sure there is water in the tank by using the continuous water supply connection or by filling the tank up to the maximum indicator level. Running the unit in COOL mode with inadequate water may cause pump failure.
Note: The water capacity refers to the total volume of water that can be contained within the air cooler water tank and water distribution system. The water capacity in the tank at the "Max." indicator level may be lower than the actual water capacity of the air cooler.
WARNING: Do not fill water tank with dirty water or salt water. This can damage the unit and Honeycomb media.
CLEANING & DRAINING THE WATER TANK
Below are instructions on how to clean and maintain your air cooler. If the cooler will not be used for a long period of time, please refer to the STORAGE & MAINTENANCE GUIDELINES located in the separate Safety & Maintenance Guide.
WARNING:
Before cleaning the unit, power OFF the unit and disconnect from the electrical socket.
- Move the unit to a location where the water can be drained. Remove the cap from the drain plug located at the bottom of the unit. Allow the tank to empty.
- Refill the water tank with clean water, up to the maximum level and drain it completely.
- Use a damp cloth to remove the dirt and dust from the surface of the unit. Never use corrosive elements or chemicals to clean this product.
- When the product is not in use, store the unit in a dry place out of direct sunlight.
CLEANING THE MESH FILTER AND HONEYCOMB COOLING MEDIA
WARNING:
Before cleaning the unit, switch the unit OFF and disconnect the power adapter from the unit and electrical socket.
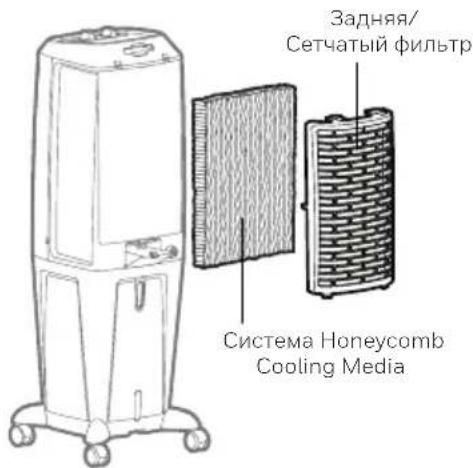
The appliance is supplied with a Mesh Filter and Honeycomb Cooling Media.
- The Mesh Filter and Honeycomb Cooling Media are located inside the Rear Grill. See Figure 1 for instructions on how to remove them from the unit for cleaning and maintenance.
- Do not run the unit in COOL mode with stale water in the tank. You must empty the water tank and refill with fresh water, especially if the tank has not been cleaned in a long time.
- The cleaning frequency for the Honeycomb media depends on local air and water conditions. In areas where the mineral content of water is high, mineral deposits may build up on the Honeycomb Cooling Media and restrict air flow. Draining the water tank and refilling with fresh water at least once a week will help reduce mineral deposits. If mineral deposits remain on the Honeycomb Cooling Media, the media should be removed and washed under fresh water. The media should be cleaned every two months or sooner, depending on your needs.
- For best results allow the Honeycomb Cooling Media to dry after each use by turning off the cool function 15 minutes before turning the unit off.
Removing the Mesh Filter and Honeycomb Cooling Media:
- Carefully pull out the rear grill / mesh filter from the cooler.
- Rinse the rear grill / mesh filter with clean water and let it dry before re-installing to the unit.
- Carefully pull out the Honeycomb Media.
- Replace or clean media with water and a damp cloth as needed.
WARNING: DO NOT operate the Air Cooler when the Rear Grill is removed from the Air Cooler, or if there is a loose-fitting Rear Grill. Doing so can cause serious injury or dangerous electrical shock.
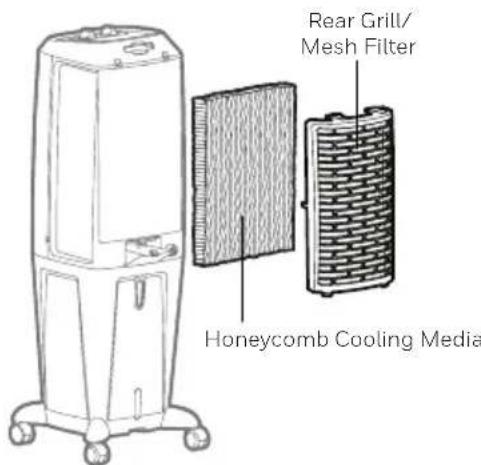
Figure 1:

TANKIN TYHJENNYS JA PUHDISTUS
SU DOLDURMA (DEVAMI)
Make sure to position the air cooler correctly before you set up and start using the product. Please refer to the COOLER LOCATION section of the separate Safety & Maintenance Guide.
Дижichte 3acnoHOK
YCTAHOBKA IPIPINBOPA
YTo6bI BbIbpaTb ONTMaJIbHoe MeCTO IJRA pa3MeUeHN RA KINMaTnueCKo YcTaHOBKn B NOMEuEHNN, NOxanyiCtA,O3NaKOMbTeCb C INHΦOpMaUeN B pa3dene VCTAHOBKA PnIBOPA PykoBoIcTBa no 6e30nacHOCTN IN TexHHueCKOMy O6cnyKINBaHIO.
3AIOJHENIEBOOJ
Длгдпгьног pa6obtby yctpojCTBa 6e3 nononHeHnpe3epByapa lyuwe BCero nCNoIb3OBaTb NOdklOyuHne C HeNpepbIBHO noDAueB BObl. 3To TaKHe No3BONT npedOTBpaTb NOBpeKdHne HacocA, ecn KlnMaTHueckar yCTaHOBka 6ydt pa6oTaTb npi HeIOCTaTOUHOM ypOBHe BObl B pe3epByape.
BHIMAHNE: OTKIIOHTe yCTpoiCTBO OT 3JIeKTPnueCKo po3eTKI nITaHnI nepeD oUcTko IINI 3aIpaBKO BODHO BoHOrO 6aKa. OTKpoTe IOTOK IInr BoDbI, KOtOpBn paCpIoJxHe B 3aIHe N acTn yCTpoiCTBa.
IopknioueHne HenpepbIBHORO BOOCha6KeHHN\*
Дя He npepbIBHOrO BODocHa6JxHnA Bam nOHaOnobntc caObBy I JIaHr, NODKJIuyeHHbI K BOIDonpoBODy.
Hnke npBBeHeBi HnCTpyKuN O ToM, Kaq YnCTnTb N 06CnyXnBaT b KInMaTHueCKyO yCTaHOBky. Ecnn yctaHOBka He 6ydt NcNoIb3oBaTbC B TeueHne dNtTeNbHOro nepNoDa BpeMeHN, NoKaanyIcTa, npocmOTpnte INHOPMALU O XPAHEHN I OBCJYHXIBAHIN, paCnoIooKeHHyO B OTdeNbHom PykoBoIDCTBe no Be3oNaChOCTn I TexHnueckomy 06CnyXnBaHIO.
PPEyPPEKDEHNE:
Ipeed ouncTkO BLOKA BBIKIOUHTe yCTPOINCTBO N OTCOEINHITe erO OT 3neKTPnuecko po3etkn.
- Perpemecnte yctaHOBky B MeCTO, rIe MoJHO CnITb BOy. OTKpoNTe KpbIshKy CnIBHO OTBepCTNA B HnKHe Yactn np6opa. BblneTe BOy n3 6aka.
3aonHnTe 6ak IJy BObI YnCTO BDOJ, O MaKcImaIbHOrO yPOBHa. - IcnoIb3yIte BnaJxHyo TkaHb, yTo6bl ydaJIntb rpr3b nIbIb c nobepxHocn yctpoIcTBA. HnkOrJa He IcNoIb3yIte Koppo3nHbIe 3JeMeHTbl nn XmMueckne BeIecTBA dIa OChCTKn 3TOI np6opa.
Korda npn6op He nCnoB3yeTc, xpaHnte erO B cyxOM MeCTe BdaIIN OT npraMbIX COJHeuHbIX Lyuei.
3KcπIyATAUINyIPABJIEHNE(PPOIOJXHEHNE)
ПЕДУПЕЖДЕНЕ:
Ipeed obcnykubahnem u nctko BbIKIOHTe yCTaHOBky u OTcoeHNHTe OT CETn NITAHN.
- YcTpoIcTBIO NOCTaBnETCRA C CeTuA bIM fNJIbTpOM N 3JeMeHToM OUcTKn UYBaJxHeHnR BO3dyxa.
- CetyaTbI ΦnBtp I 3IeMeHT OUHCTKn I yBnaJHHHeHn B03dyXa HaxOJaTcra 3a 3aHnepeWetKoI. PocMOTpTe Ha PucyHok 1 dIy nOlyueHn IHCTpyKuI O TOM, KaK n3BLeu b nx n3 yCTaHOBKn dIy OUHCTKn I o6CnyKuBaHn.
He nCnoIb3yInTe yCTaHOBky C BKNIOUeHHbIM BOJHbIM HAcOCOM IJI OXnJaXKeHnA, yBnaXHeHnN OOcTKn BO3Dyxa, ecNI BOa B 6aKe He MeHraNacb DoJrOe BpeM. PeryIpaHNo npoBoOnTe 3aMeHy BOdbI OuNCTKy 6aKa. - PernoHocb oucckn cncTeMb HONEYCOMB COOLING MEDIA 3aBucnt OT kauecTba BO3dyxa n BoIb. B paHOax, rJe MNepaun3aunr BOnb BbcOka, MNepaunbHbIe OTNOxHnHa KaanlBaOTcRa Ha cncTeMe Honeycomb 6bICTpo mOry T orpaunHT bnotk BO3dyxa. 3aMeHa BoDb I B ake Ha CBexyIO He pexe oHoro pa3a B HeJeIIO NOMOXET CHN3NTb MNepaunbHbIe OTNOxHn. PpN 06pa3oBaHHm MNepaunbHbIX OTNOxHn Ha cncTeMe HONEYCOMB cneJyET n3Bnueb cncTeMy n3 yCTaHOKn INPOMbITb YnCTOu BODo. CncTeMy HxKHO uCCTNTb KaJdIe DBA Mecaua nn YaSe, B 3aBNCMOCTN OT BaUnx Notpe6HoCTeN.
- PekomeHnyetc npocuHTb cncTeMy HONEYCOMB nocne pa6oTbI yCTaHOBKn B peKHeMe OxnaJdeHn, yBaJXHeHn I OuchTK Bo3dyxa.ДЯ 3TOrO BBIKHQUHTe BOJHOH HAcOC KHOHKOI COOL 3a 15 MHyT Do BBIKHQUHn YCTaHOBKn.
YdaneHne cetTuToO fNbTp a N 3nemeHa OuchKn n yBnaJxHeHn B03dyxa:
1.AKKypaTHO CHNMMTE C KINMaTnueeCKo yCTaHOBKn 3aHIO peWetKy N BbIHbTe CeTuA TbI ΦnIbTp.
2.ПомоTe 3aHIOpeWetky n cetTaBnФnIbTp qNCTO BODOn, n nepeJ yCTaHOBko O6paTHo BycTPOINCTBO DaTe npocoxHyTb.
3.AKKypaTHOBbIHbTeyueHcTbiJemeHT.
4.3aMeHnTe nn npomOte CnCTemy ncto BDoOn INBnaXHO TpAnKoN NO MEpe Heo6xOAnMOCTN.
BHIMAHHE:Bo n36eKaHne TpaBmbln ydapa TOKOM He BkIouaTe yCTaHOBky CO CHrTOI 3aDHei peWetKoI KOpNyCa yCTaHOBKn IIN C Ocna6JIeHHbIMN BNHTAMN KpePJIeHnI 3aDHei peWetKn.
PucyHOK 1:

EN Made in China
© 2020 JMATEK Limited. All rights reserved. The Honeywell Trademark is used under license from Honeywell International Inc. Honeywell International Inc. makes no representations or warranties with respect to this product. This product is manufactured by Airtak Int'l Corp. Ltd. (subsidiary of JMATEK Ltd.).
JMATEK Limited
Manulife Financial Centre, Kwun Tong, Hong Kong
Phone: 852-2559-5522
Email: info@jmatek.com
Web: www.jmatek.com