Protect Turbo AntiCalc GV9360 - Iron TEFAL - Free user manual and instructions
Find the device manual for free Protect Turbo AntiCalc GV9360 TEFAL in PDF.

User questions about Protect Turbo AntiCalc GV9360 TEFAL
0 question about this device. Answer the ones you know or ask your own.
Ask a new question about this device
Download the instructions for your Iron in PDF format for free! Find your manual Protect Turbo AntiCalc GV9360 - TEFAL and take your electronic device back in hand. On this page are published all the documents necessary for the use of your device. Protect Turbo AntiCalc GV9360 by TEFAL.
USER MANUAL Protect Turbo AntiCalc GV9360 TEFAL
"Auto off" - systeem
Important recommendations
Safety instructions
- Please read these instructions carefully before first use. This product has been designed for domestic use only. Any commercial use, inappropriate use or failure to comply with the instructions, the manufacturer accepts no responsibility and the guarantee will not apply.
- For your safety, this appliance conforms to the applicable standards and regulations (Low Voltage, Electromagnetic Compatibility, Environmental Directives, as applicable...).
- Your steam generator is an electrical appliance. It should be used under normal conditions. It is intended for domestic use only.
- Your generator is fitted with 2 safety systems:
- a pressure release valve which, in the event of a malfunction, releases any excess steam;
- a thermal fuse to prevent the appliance from overheating.
-
Always plug your steam generator into:
-
an electrical installation with voltage between 230V and 240V.
- an earthed socket.
Connecting to the wrong voltage may cause irreparable damage to the appliance and will invalidate your guarantee.
If you are using a mains extension lead, ensure that it is correctly rated (10A) with an earth, and is fully extended.
- Completely unwind the power cord from its storage space before connecting to an earthed socket.
- If the electric power cord or the iron-unit is damaged, it must be replaced by an Approved Service Centre in order to prevent any danger.
- Do not unplug the appliance by pulling on the cord.
Always unplug your appliance:
- before rinsing the anti-scale valve or filling the water tank,
- before cleaning your generator,
- after each use.
- The appliance must be used and placed on a flat, stable, heat-resistant surface. When you place the iron on the iron rest, make sure that the surface on which you place it is stable.
- This appliance is not intended for use by persons (including children) with reduced physical, sensory or mental capabilities, or lack of experience and knowledge, unless they have been given supervision or instruction concerning use of the appliance by a person responsible for their safety.
Children should be supervised to ensure that they do not play with the appliance. -
Never leave the appliance unattended :
-
when it is connected to the mains,
-
until it has cooled down (around 1 hour).
-
The soleplate and generator iron-rest can become very hot and cause burns: never touch these parts.
Never touch the electric cords with the soleplate of the iron. - Your appliance gives off steam which can cause burns. Handle your iron carefully, particularly when using the vertical steam function. Never direct the steam towards persons or animals.
- Before unscrewing the anti-scale valve cap, wait until the generator is cold (unplugged for more than 2 hours).
- If you lose or damage the anti-scale valve cap, have it replaced by an approved Service Centre.
- Never immerse your steam generator in water or any other liquid. Never hold it under the water tap.
- The appliance must not be used if it has fallen to the floor, shows evidence of damage, leaks or fails to function correctly. Never dismantle your appliance. To avoid any danger, have it inspected in an approved service centre.
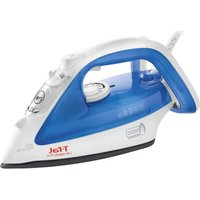
Description
- Steam control button
- Iron temperature control slide
- Iron thermostat light
- Ultracord system (depending on model)
5.Iron rest - Illuminated on / off switch
- Electric cord rewind button (depending on model)
- Power cord storage space
- Power cord and plug
- Turbo button (depending on model)
- Double protection cover.
- Carry handle
- Unlock button on protective cover
- Removable water tank
-
Removable water tank handle
-
Steam generator boiler (in the base unit)
- Iron-base steam cord
- Slide storage place for the steam cord
- Anti-scale valve cap
- Anti-scale valve
- Control panel a. "Water tank empty" light
b. "Auto off'light
C. Restart button
d. "Anti-calc" light
e. "Reset" button
f. "Steam ready" light
g. Steam output control dial
"PROTECT CONCEPT" safety system
Your generator is fitted with the "Protect Concept" system:
- Double protection cover.
- Cover automatically locks when it is folded up over the iron - fig.2 and open using the unlocking button - fig.3 .
- Carry handle - fig.1
Preparation
What water may be used?
- Your iron has been designed to operate using untreated tap water.
- Heat concentrates the elements contained in water during evaporation. The types of water listed below contain organic waste or mineral elements that can cause spitting, brown staining or premature wear of the appliance: water from clothes dryers, scented or softened water, water from refrigerators, batteries or air conditioners, pure distilled or demineralised water or rain water should not be used in your iron. Also do not use boiled, filtered or bottled water.
Filling the water tank
- Pull the cover up over the iron until the protection system automatically locks (you will hear a "click") - fig.2
- Remove the water tank by pulling on the handle (at the front of the generator) - fig.4.
- Fill the tank with water, taking care not to exceed the maximum level - fig.6. and fig.7.
- Slide the tank back into its housing until its "clicks" into place - fig.5.
- Press the unlocking button on the protective cover until you hear a click, and then fold it back on to the generator base unit -fig.3.
Ultracord System (according to model)
- Your iron is equipped with an extension cord system to prevent the cord from dragging over the laundry and creasing it again when ironing. It also keeps the cord out of the way of your hand.
Ironing with the Ultracord system:
-
The Ultracord system automatically tips back.
-
Each time you put the iron back on its base, the Ultracord system fits into the heel of the iron and opens back up automatically when you use the iron.
Storing the generator:
-
Push the connector back in the heel.
-
A magnet holds the connector to the heel, making your generator easy to store - fig.8.
Using your steam generator
The first time the appliance is used, there may be some fumes and smell but this is not harmful. They will not affect use and will disappear rapidly.
- Press the protection cover unlocking button until you hear a "click" and fold it back on to the generator base unit to release the iron - fig.3.
- Completely unwind the power cord and the steam cord from its storage space—fig.23.
- Plug in your steam generator to an earthed socket.
- Press on the on / off switch. The green light (located on the control panel) flashes and the boiler heats up - fig.14.
When the green "steam ready" light stops flashing (after 2 minutes approximately), the appliance is ready.
Use
Steam ironing
- Place the iron's temperature control slide according to the type of fabric to be ironed (see table below).
- The thermostat light comes on. Be careful! The steam generator is ready when the thermostat light goes out and when the green "steam ready" light stays on.
- Adjust the steam output control dial (located on the control panel).
- While ironing, the light on top of the iron and the steam ready light turn on and off, as the temperature adjusts without interrupting ironing.
- To obtain steam, press on the steam control button under the iron handle and keep it pressed – fig.10. The steam will stop when you release the button.
- When starting, and regularly while it is being used, your steam generator's electric pump injects water into the boiler. It makes a noise but this is quite normal. You may also hear a clicking noise which is the steam valve opening. Again this is normal.
- Always spray starch onto the reverse side of the fabric to be ironed.
Do not place the iron on a metal support. When taking a break from ironing, always place the iron on the iron rest plate of the unit. It is equipped with non-slip pads and has been designed to withstand high temperatures.
Always use a vented/mesh ironing board and be careful of hot steam when ironing close to the edges of the board.
Set the temperature and steam control
| SETTING THE TEMPERATURE AND STEAM OUTPUT ACCORDING TO TYPE OF FABRIC TO BE IRONED: | ||
| TYPE OF FABRICS | SETTING TEMPERATURE CONTROL | SETTING STEAM OUTPUT CONTROL DIAL |
| Linen, cotton | ●●● | |
| Silk, Wool | ●● | |
| Synthetics (polyester, acetate, acrylic, polyamide) | ● | |
Check the garment label if you are not sure what type of fabric it is made of.
To prime the steam circuit, either before using the iron for the first time, or if you have not used the steam function for a few minutes, press the steam control button several times in a row, holding the iron away from your clothes. This will enable any cold water to be ejected from the steam circuit.
- Iron temperature setting:
- Start with the fabrics to be ironed at a low temperature () and finish with those which need higher temperatures ( or Max).
- For mixed fibre fabric: set the ironing temperature to the setting for the most delicate fabric.
- Woollen garments: press repeatedly on the steam control button - fig.10 to obtain short bursts of steam, without placing the iron on the garment itself.
- Steam output setting:
- Thick fabric: increase the steam setting.
- At a low temperature : set the steam output control dial to the low position.
Dry ironing:
- Do not press the steam control button under the iron handle.
Vertical steam ironing
- Set the iron temperature control slide and the steam output control dial (located on the control panel) to the MAX position.
- Hang the garment on a coat hanger and hold the fabric slightly taut with one hand.
As steam is very hot: never attempt to remove creases from a garment while it is being worn, always hang garments on a coat hanger.
- Holding the iron in a vertical position, tilted slightly forwards, press repeatedly on the steam control button (underneath the iron handle) moving the iron from top to bottom - fig.9.
Refilling the water tank
- When the red "tank empty" indicator light turns on, there is no more steam - fig.11. The water tank is empty.
1.Close the protection cover until you hear a "click". fig.2.
2.Remove the water tank by pulling on the handle (at the front of the generator) and fill it, taking care not to exceed the maximum level.
3. Slide the tank back into its housing until its clicks into place.
4. Press the "restart" button on the control panel - fig.12. to continue ironing. When the green light stops flashing, the steam is ready.
5. Open the protection cover - fig.3.
TURBO Function (according to model)
-
Press the Turbo control 2 or 3 times when you need extra steam:
-
for ironing thicker fabrics,
- for getting rid of creases,
- for powerful vertical steaming.
Use the Turbo function with care as its exceptional steam power can cause burns.
Maintenance and cleaning Cleaning your generator
- Do not use detergent or descaling products for cleaning the soleplate base-unit.
- Never hold the iron or the base unit under the tap.
- Regularly clean the soleplate with a damp, non-metallic washing up pad.
- Clean the plastic parts of the appliance occasionally with a soft cloth.
Cleaning tip: For easier, non-corrosive cleaning of your iron's soleplate, use a damp sponge on the soleplate while it is still warm.
Descaling your generator easily:

Do not use any descending substances (vinegar, industrial descending products, etc.) when rinsing anti-scale valve: they could damage it. Before descending and cleaning your generator, you must let it cool down for at least 2 hours to avoid any risk of burns.
For longer generator life, and to avoid scale emissions, your generator is equipped with a built-in anti-scale valve. This valve, located in the tank, automatically removes the scale that forms inside.
Operation:
- An orange "anti-scale" light located on the control panel starts blinking to tell you that the anti-scale valve needs rinsing - fig.13

Caution: this operation must not be performed until the generator has been plugged for at least two hours and has completely cooled down.
When performing this operation, the generator should be placed near a sink as water may flow out of the tank when it is opened.
- Once the generator has cooled down completely, remove the anti-scale valve cap - fig.16
- Unscrew the anti-scale valve and remove it from the housing; it contains the scale that has built up in the tank - fig.17 and fig.18.
- To clean the valve properly, just rinse it under running water to remove the scale it contains -fig.19.
- Put the valve back into its housing and screw it in completely to keep it watertight - fig.20.
- Put the cap back on. The next time you use your iron, press the "reset" button on the control panel to turn off the orange "anti-scale" light.
"Auto off" System
- For your safety, the generator is equipped with an "auto off" system which switches the generator to standby mode if it is not used for 8 minutes or if you forget to turn it off.
- A red light blinks on the control panel to indicate that the appliance is in standby mode - fig.15.
- To reactivate the generator:
- Press the "Restart" button.
- Wait for the light on the "steam ready" button to stop blinking before your start ironing again.
- If the steam trigger is not pressed for at least 8 minutes, the "auto off" system will cut off your generator for your safety.
Storing your generator
- Place the iron on the iron rest of the generator
- Press the illuminated on/off switch and unplug the generator.
- Pull the cover over the iron until the protection system automatically locks (you will hear a "click")
- Store the steam cord in its slide storage place. Take it, fold it in two so as to make a loop. Put the end of this loop in the slide storage place then push gently until you see the end on the other side of the slide storage place - fig.24.
- Fold the Ultracord system back on the heel - fig.8.
Put the power cord away - fig. 22 - Leave the iron (and the iron rest) to cool down for 1 hour.
- You can then put your steam generator away, carrying it by the handle.
A problem with your generator?
| PROBLEMS CAUSES SOLUTIONS | ||
| The generator does not come on and the thermostat light and the on/off switch are not illuminated. | The appliance is not switched on. | Check that your appliance is correctly plugged in and press the illuminated on/off switch. |
| The "auto off" system is activated. | Press the "restart" button. | |
| Water runs out of the holes in the soleplate. | Water has condensed in the pipes because you are using steam for the first time or you have not used it for some time. | Press on the steam control button away from your ironing board until the iron produces steam. |
| The soleplate is not hot enough. | Decrease the steam output while ironing at low temperature (steam output control dial on the control panel). Wait for the thermostat light to go out before activating the steam control button. | |
| Contact an Approved Service Centre. | ||
| Water streaks appear on the linen. | Your ironing board is saturated with water because it is not suitable for use with a steam generator. | Make sure you have a vented/mesh ironing board. |
| White streaks come through the holes in the soleplate. | Your boiler has a build-up of scale because it has not been rinsed out regularly. | Rinse the valve (see the "descaling your generator" section). |
| Brown streaks come through the holes in the soleplate and stain the linen. | You are using chemical descaling agents or additives in the water for ironing. | Never add this type of product in the water tank or in the boiler (see "what water may be used"). Contact an Approved Service Centre. |
| Fabric fibres have accumulated in the holes of the soleplate and are burning. | Clean the soleplate with a non-metallic sponge. | |
| Your linen is not rinsed sufficiently or you have ironed a new garment before washing it. | Ensure linen is rinsed thoroughly to remove any soap deposits or chemicals on new garments which may be sucked up by the iron. | |
| The soleplate is dirty or brown and may stain the linen. | You are ironing at too high a temperature. | See our recommendations regarding temperature control setting. |
| You are using starch. Always spray starch | on the reverse side of the fabric to be ironed. | |
| There is no steam or there is little steam. | The water tank is empty (red light on). | Fill the water tank. |
| The steam output control dial is set at minimum. | Increase the steam output (control dial on the control panel). | |
| The soleplate temperature is set to the maximum. | The generator is working but steam is very hot and dry. As a consequence, it is less visible. | |
| The red "water tank empty" light is on. | The water tank is empty. Fill the water tank. | |
| Steam escapes from anti-scale valve plug. | The anti-scale valve plug has not been tightened correctly. | Tighten the anti-scale valve plug correctly. |
| The anti-scale valve is damaged Contact | an Approved Service Centre to order a new anti-scale valve. | |
| Steam or water escapes under the appliance. | The generator is faulty. Stop using the generator and contact an Approved Service Centre. | |

Environment protection first!
1 Your appliance contains valuable materials which can be recovered or recycled.
Leave it at a civic waste disposal centre.
If you have any problems or queries please call our Customer Relations team first for expert help and
advice:08456021454-UK
(01) 677 4003 - Ireland
or consult our website - www.tefal.co.uk
Recomendaciones
NASTAVENIE TEPLOTY A PRIETOKU PARY PODLA TYPU LÁTKY, KTORÁ SA MÁ ZEHLI:
| LÁTKY | NASTAVENIE REGULÁTORA TEPLOTY | NASTAVENIE REGULÁTORA PARY |
| Łan, Bavlna | ····· | ····· |
| Vlna, Hovváb, Viskóza | ····· | ····· |
| Syntetika (z polyesteru, acetátu, akrylu, nylónu) | ··· | ····· |
He BbIKIooaIte npnbOp,NotraHyB erO 3a IHHyp.
Bcerda BbIKIOuaye Baunpnpop:
- npexJe, cHm HanoHnTb pe3epByap IJRA BObl INI ONOIOCHyTB npoHaRpeBaTeJIb;
-празд,чemпои3BecTN erO OHTKy; -
NOCJIe KaKdoIg IcNoJIb3OBAHnI.
-
Pπi6bop cneJyET nCnoJIb3OBAbT yCTaHabJIbBaTb Ha yCToYHBOI NOBepxHOCTn. KorJa Bbl yctaHabJIbBaTe yTIOHa nOCTaBky, y6eNTeCb, YTO NOBepxHOCTb, Ha KOTopyIO Bbl ee nOCTaBnI, yCToYHBA.
-ДанньЭлекрпбор He Должен Испльбзовысг ЛцамN(B TOMЧСLE DeTbM) C ORpaHnueHHbIMNФИЗСКIMN,CEHCOPHBIM NIN YMCCTBEHHbIMN BO3MOXHOCTYIMN,АТСKE JIOДБM,He IMeIQUIXCOOTBETCBYIOUeero ONbITA NIN HeO6xODmBX 3HaH.N.Yka3aHHbIe JINa MOrTy INCNoJb3OBaTB DAHHOEyCTPONCTBO TOJIbKO NOd HabILODEHnEM NIN NOcIe NOJUeHnA INCHTPKUN NO erO 3KcNJaTAtaUN OT JIN,OTBeuAOxix 3a IN6 Be3ONaCoHCTb.CJeIInTe 3a Tem,HTObI DeTn He INrpaJIN C yCTPOINCTBOM. - HNKoIa He ocTabIyTe npIbOp 6e3 npICMoTpa:
-KoIa OH BKNIOueH B Cetb 3JIeKTPoNTaHnIa;
- NOKA OH He OCTbHET npi6n3nteIbHO B TeueHne 1 yaca.
Kakyu BODy nCNoJb3OBaTb?
EcIn BOda B BaWem
BODonpoBoDe
CINWKOM XeCTKa,
CMeaIte paBHOe
KOLNUeCTBO
BODonpoBOHOn I
DEmNHepaJn3NpOBaHH
OBI BoI N3 6yTbJIKN.
-ПиборпpeндазаундяИспьзованяСВОДпровODHOBOД.
- HnKOrda He noIb3yITeCb BOIo, CoepKaUe IIO6aBKn (KpaxMaI, OTduuKIn, apOMaTueckne IIN CMraIoune BeIecCTBa n T.n.), a TaKKe BOIO, CInTOI N3 CNCTEM OToJIeHnI INI KOHJeHCaTOM (HaNPmEp, BOIO I3 CyuKN IIN BcJIbA, BOIO, CInTOI IN3 XOIOuINbHnka, BOIO IN3 KOHNiOnHepa, DoXdeBOI BOIO). B HIX CoepKaTcOprAHueckne OTxOdbI INN MNHePaJIbHbIe BeIecCTBa, KOTOpIe KOHcHTpPyOTcN IOI, BO3DeJCTBnEM TeIIa IN Bbl3bIbAOT "PiEBAHnE" CONeI, KOPNUHeBbIe NOITekN INI npExKeDBepeMeHHb IN3HOC 3NeKTponPn6opa.
Hanoненье napoharpebaTeЯ
- Onyctnte 3acNoHky Ha yTIOI DO cpa6aTBiBaHnI npedeoxpAHnteJbHO nCTEmbl aBOMaTHueCKoB 6IOKnPOBKn (PnI 6IOKnPOBKe pa3daeTcR «IeJIHOK») - pnc.2
- CHINMITE cbeMHbI pe3epByap IJI RA BOdbIC NOMOuBIO pyKU (pacnoJoxeHHo Ha nepeDHe uactn naporehepaTopa)-pnc.23.
3anonHnTe pe3epByap BDOJ, He npeBbIaMakcImaJIbHO rPOBHRA «Max>.-pnc.4.n pnc.5. - ChOBA nOCTaBtpe pe3epByap C BOON B ppeHa3HaueHHOE IJRA HERO MecTO, 3aФИКСИРОВАВ ДО NOJIyEHIN «UeJIYKa». - pnc.24.
- Haxmnte Ha KhoNky pa36IokpOBKn npedeoxpaHntbHO 3acIOHKn do nolyuHnra «IeJka» nOnyCTnTe ee Ha pe3epByap - pnc.3.
Систema «Ultracord» (В заимости OT модали)
BaW yTIOOBpyOBOAH yCTPOINCTBOM BbIBOa TeIECKONHueCKORo WHaHra, YTObI 7nAHR He 3aDeBaJ IN He CMInHaHJ TKAHb. BlaROpApn IcNoJIb3OBAHnIO 3ToI CnCTeMb IuHyp NITaHnRA TaKxHe He bdyTe MeMaTb BaUIM DnXKeHnM, KOrDa Bbl TJaADNTe.
ДяИСПОЛБ3OBAHЯСИCTeMbI «Ultracord»:
CnCTema «Ultracord» aBToMaTnueckn HAnpaBnaeT UHyp NITaHn B 3aHIOU qAcTh pa6Oey NOBepxHOCTN.
- KaKdIpa3, KOrDa Bbl CTaBnTe yTIOHa NDoOuBy, BKlIOUaEcTcBCTPOeHHaB Hee CnCTema «Ultracord», OHa ABToMaTuYeCKn Cpa6aTaYBaET,ecNl Bbl CHOba BepeTe yTIOBpyKN.
Дяхраени naporehepaTopa:
-Onyctnte Dnykky Ha noDowby yTOra.
-C NOMOUIMO MArHnTa DyXKa yIepXnBaeTcHa NoIOoWBe yTOra, YTO 3NaHTeBHO ynpouaet XpaHeHne naporehepataopa-pnc.8.
ВКЛЮЧИТЕ BALI ПAPОГHEPATOP
Pn nepbom
NcnoJIb3OBAHm MOXeT
NoBntbc8e3BpeHbI
dbIM Hn 3anax.3TN
YBLeHn HnKaK He
NOBnAOT Ha pa6Ot
Pnp6opa n 6bICTpo
PpekpaTcra.
- Haxmnte Ha KhoNky pa36loKupOBKn npedoxpaHnteJbHo 3acLoHKn do NOJyHeHnra «IeJUka» n OJyCTnTe ee Ha pe3epByap dIra TORO, YTO6bl yTIOr MOXHO 6bILO CHrTb - pnc.3.
- PoiHocTbIO pa3MOTaIe 3JIeKTpUeCKn 5Hyp IN BbITaHInTe npoBOi 5JIaHr n3 erO HNI.
BkIouaTe BaI naporehepaTOp B 3JIeKtpnueckyIO pO3eTKy C 3a3EmHeHnEM. - Haxmnte Ha nepeKIOUaTeIb BkN/ByIK, pacnoIOKeHHbI Ha Kopnyce: 3eJIeHbI INdIkaTOp Ha naHeI ynpaBLeHnI 3aMnraE, n HarpeBaTeIb HaHHTe HArpeBaTbcr - pnc.7.
-Приимерно чес 2 МИнтусы CBETоюд посяпестан.TMгаТ.ЗTO O3нauаET,чTo naporehepaTOp roTOB K pa6Ote.
Приименке
I3rOToBnEHO Bo PhaHcHn Ha 3aBoDe Calor IyKOMnAHn "rpyna CEB", PhaHcHn
YbimKHeHnnaporehepaTopa
Azami Tamir Suresi : 30 is gunu
Belge Izin Tarihi; 05/03/2004