DW872 - Saw DEWALT - Free user manual and instructions
Find the device manual for free DW872 DEWALT in PDF.
Download the instructions for your Saw in PDF format for free! Find your manual DW872 - DEWALT and take your electronic device back in hand. On this page are published all the documents necessary for the use of your device. DW872 by DEWALT.
USER MANUAL DW872 DEWALT
WARNING: The declared vibration and/or noise emission
level represents the main applications of the tool. However if the tool is used for different applications, with different accessories or poorly maintained, the vibration and/or noise emission may differ. This may significantly increase the exposure level over the total workingperiod. An estimation of the level of exposure to vibration and/ or noise should also take into account the times when the tool is switched off or when it is running but not actually EC-Declaration of Conformity Machinery Directive Metal Cutting Chopsaw DW872 DeWALT declares that these products described under Technical Data are in compliance with: 2006/42/EC, EN62841-1:2015 + AC:2015, EN62841-3-9:2020 + A11:2020 asapplicable. These products also comply with Directive 2014/30/EU and 2011/65/EU. For more information, please contact DeWALT at the following address or refer to the back of themanual. The undersigned is responsible for compilation of the technical file and makes this declaration on behalf ofDeWALT. Markus Rompel Vice President of Engineering, PTE-Europe DeWALT, Richard-Klinger-Straße 11, 65510, Idstein, Germany
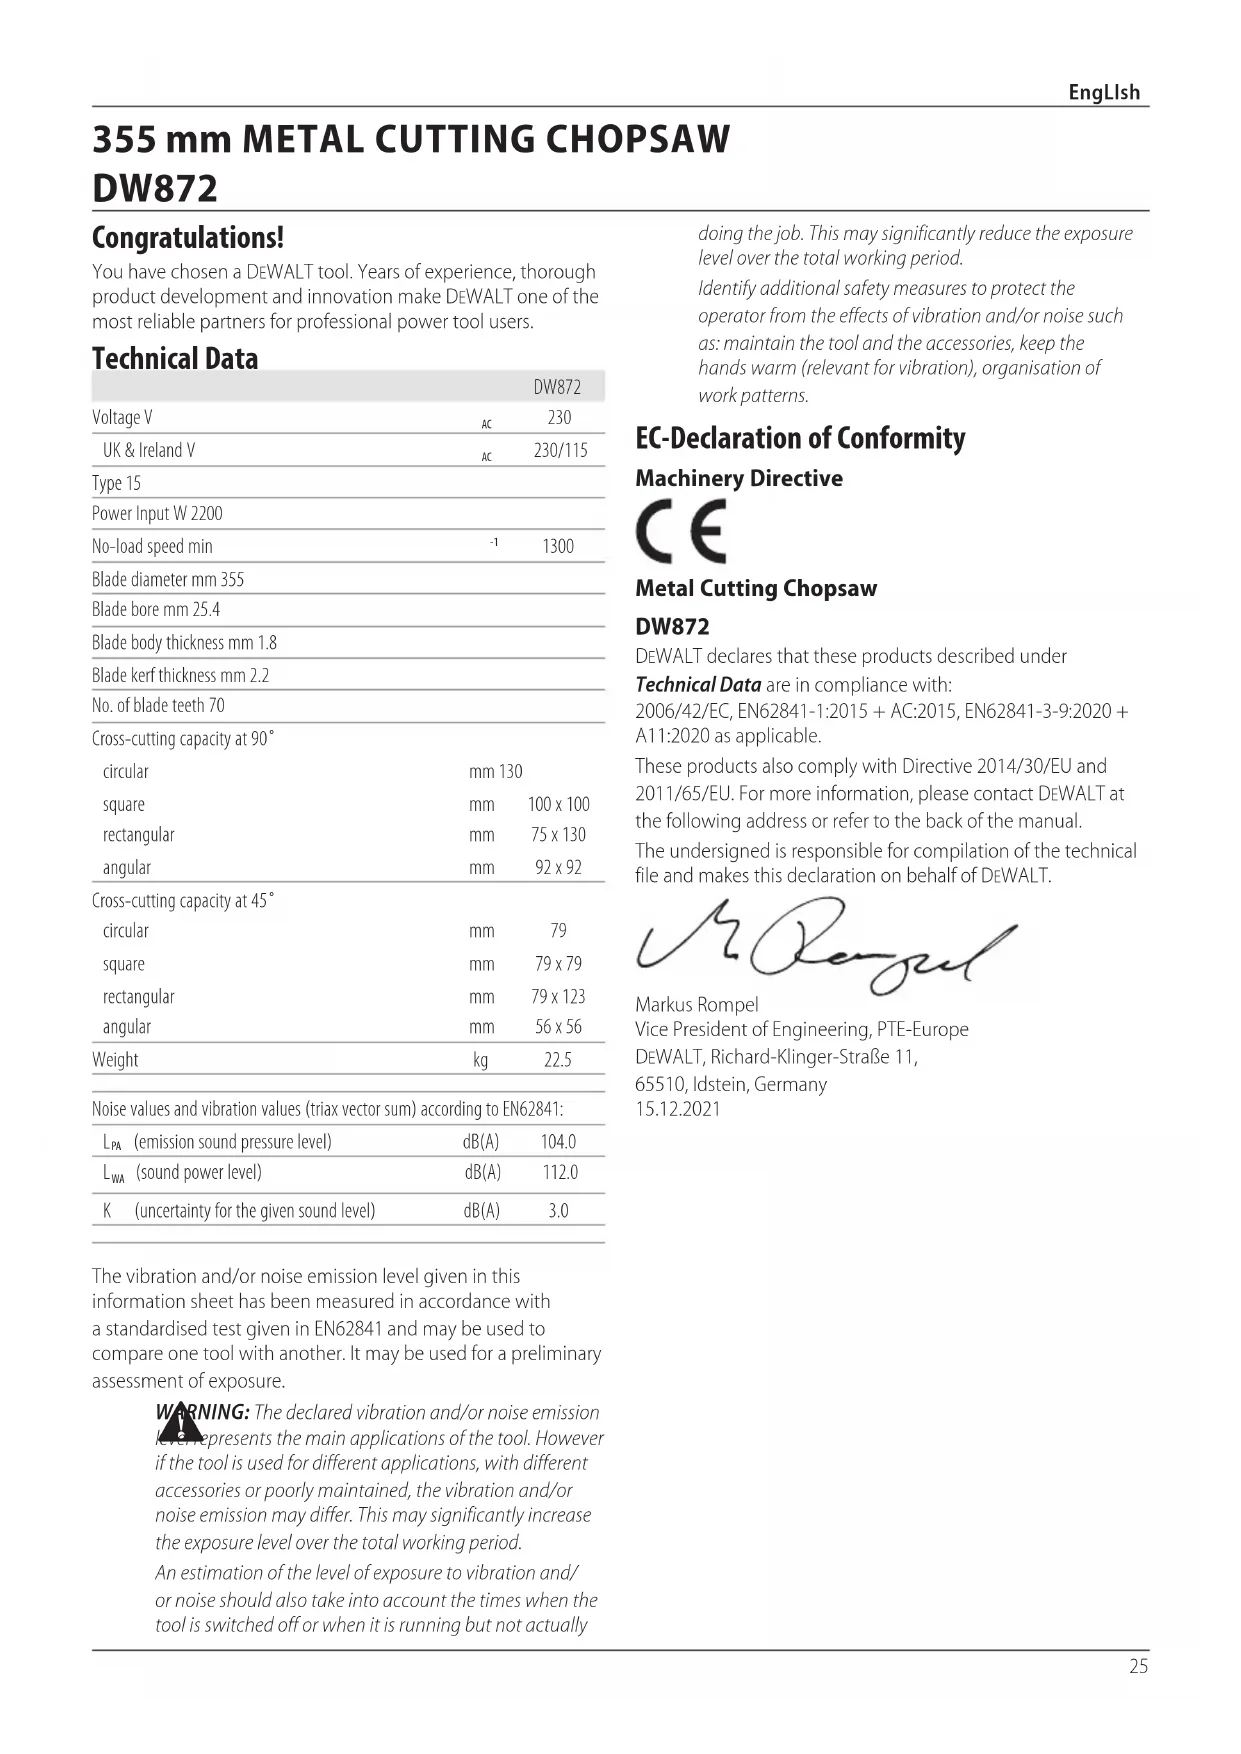
English (original instructions) 355 mm METAL CUTTING CHOPSAW DW872 Congratulations! You have chosen a DeWALT tool. Years of experience, thorough product development and innovation make DeWALT one of the most reliable partners for professional power toolusers. Technical Data doing the job. This may significantly reduce the exposure level over the total workingperiod. Identify additional safety measures to protect the operator from the effects of vibration and/or noise such as: maintain the tool and the accessories, keep the hands warm (relevant for vibration), organisation of workpatterns. DW872 Voltage V
(emission sound pressure level) dB(A) 104.0
(sound power level) dB(A) 112.0 K (uncertainty for the given sound level) dB(A) 3.026 EngLIsh
WARNING: To reduce the risk of injury, read the
instructionmanual. Definitions: Safety Guidelines The definitions below describe the level of severity for each signal word. Please read the manual and pay attention to thesesymbols.
DANGER: Indicates an imminently hazardous
situation which, if not avoided, will result in death or seriousinjury.
WARNING: Indicates a potentially hazardous situation
which, if not avoided, could result in death or seriousinjury.
CAUTION: Indicates a potentially hazardous situation which, if not avoided, may result in minor or moderateinjury. NOTICE: Indicates a practice not related to personal injury which, if not avoided, may result in propertydamage.
DECLARATION OF CONFORMITY
THE SUPPLY OF MACHINERY (SAFETY) REGULATIONS 2008 Metal Cutting Chopsaw DW872 DeWALT declares that these products described under Technical Data are in compliancewith: The Supply of Machinery (Safety) Regulations, 2008, S.I. 2008/1597 (as amended), EN62841-1:2015 + AC:2015, EN62841-3-9:2020 + A11:2020 asapplicable. These products conform to the following UK Regulations: Electromagnetic Compatibility Regulations, 2016, S.I.2016/1091 (as amended). The Restriction of the Use of Certain Hazardous Substances in Electrical and Electronic Equipment Regulations 2012, S.I. 2012/3032 (as amended). For more information, please contact DeWALT at the following address or refer to the back of the manual. The undersigned is responsible for compilation of the technical file and makes this declaration on behalf of DeWALT. Karl Evans Vice President Professional Power Tools EANZ GTS DeWALT UK, 270 Bath Road, Slough Berkshire, SL1 4DX England
WARNING: Read all safety warnings, instructions,
illustrations and specifications provided with this power tool. Failure to follow all instructions listed below may result in electric shock, fire and/or seriousinjury.
SAVE ALL WARNINGS AND INSTRUCTIONS
FOR FUTUREREFERENCE The term “power tool” in the warnings refers to your mains-operated (corded) power tool or battery-operated (cordless) powertool.
a ) Keep work area clean and well lit. Cluttered or dark areas inviteaccidents. b ) Do not operate power tools in explosive atmospheres, such as in the presence of flammable liquids, gases or dust. Power tools create sparks which may ignite the dust orfumes. c ) Keep children and bystanders away while operating a power tool. Distractions can cause you to losecontrol.
2) Electrical Safety
a ) Power tool plugs must match the outlet. Never modify the plug in any way. Do not use any adapter plugs with earthed (grounded) power tools. Unmodified plugs and matching outlets will reduce risk of electricshock. b ) Avoid body contact with earthed or grounded surfaces, such as pipes, radiators, ranges and refrigerators. There is an increased risk of electric shock if your body is earthed orgrounded. c ) Do not expose power tools to rain or wet conditions. Water entering a power tool will increase the risk of electricshock. d ) Do not abuse the cord. Never use the cord for carrying, pulling or unplugging the power tool. Keep cord away from heat, oil, sharp edges or moving parts. Damaged or entangled cords increase the risk of electricshock. e ) When operating a power tool outdoors, use an extension cord suitable for outdoor use. Use of a cord suitable for outdoor use reduces the risk of electricshock. f ) If operating a power tool in a damp location is unavoidable, use a residual current device (RCD) protected supply. Use of an RCD reduces the risk of electricshock.
a ) Stay alert, watch what you are doing and use common sense when operating a power tool. Do not use a power tool while you are tired or under the influence of drugs, alcohol or medication. A moment of inattention while operating power tools may result in serious personalinjury.
Denotes risk of electricshock.
Denotes risk offire.27 EngLIsh b ) Use personal protective equipment. Always wear eye protection. Protective equipment such as a dust mask, non-skid safety shoes, hard hat or hearing protection used for appropriate conditions will reduce personalinjuries. c ) Prevent unintentional starting. Ensure the switch is in the off‑position before connecting to power source and/or battery pack, picking up or carrying the tool. Carrying power tools with your finger on the switch or energising power tools that have the switch on invitesaccidents. d ) Remove any adjusting key or wrench before turning the power tool on. A wrench or a key left attached to a rotating part of the power tool may result in personalinjury. e ) Do not overreach. Keep proper footing and balance at all times. This enables better control of the power tool in unexpectedsituations. f ) Dress properly. Do not wear loose clothing or jewellery. Keep your hair and clothing away from moving parts. Loose clothes, jewellery or long hair can be caught in movingparts. g ) If devices are provided for the connection of dust extraction and collection facilities, ensure these are connected and properly used. Use of dust collection can reduce dust-relatedhazards. h ) Do not let familiarity gained from frequent use of tools allow you to become complacent and ignore tool safety principles. A careless action can cause severe injury within a fraction of asecond.
4) Power Tool Use and Care
a ) Do not force the power tool. Use the correct power tool for your application. The correct power tool will do the job better and safer at the rate for which it wasdesigned. b ) Do not use the power tool if the switch does not turn it on and off. Any power tool that cannot be controlled with the switch is dangerous and must berepaired. c ) Disconnect the plug from the power source and/ or remove the battery pack, if detachable, from the power tool before making any adjustments, changing accessories, or storing power tools. Such preventive safety measures reduce the risk of starting the power toolaccidentally. d ) Store idle power tools out of the reach of children and do not allow persons unfamiliar with the power tool or these instructions to operate the power tool. Power tools are dangerous in the hands of untrainedusers. e ) Maintain power tools and accessories. Check for misalignment or binding of moving parts, breakage of parts and any other condition that may affect the power tool’s operation. If damaged, have the power tool repaired before use. Many accidents are caused by poorly maintained powertools. f ) Keep cutting tools sharp and clean. Properly maintained cutting tools with sharp cutting edges are less likely to bind and are easier tocontrol. g ) Use the power tool, accessories and tool bits etc. in accordance with these instructions, taking into account the working conditions and the work to be performed. Use of the power tool for operations different from those intended could result in a hazardoussituation. h ) Keep handles and grasping surfaces dry, clean and free from oil and grease. Slippery handles and grasping surfaces do not allow for safe handling and control of the tool in unexpectedsituations.
a ) Have your power tool serviced by a qualified repair person using only identical replacement parts. This will ensure that the safety of the power tool ismaintained. Safety Instructions for Metal CuttingChopsaw
- Use clamps to support the workpiece whenever possible. If supporting the workpiece by hand, you must always keep your hand at least 100 mm from either side of the saw blade. Do not use this saw to cut pieces that are too small to be securely clamped or held by hand. If your hand is placed too close to the saw blade, there is an increased risk of injury from blade contact.
- The workpiece must be stationary and clamped or held against both the fence and the table. Do not feed the workpiece into the blade or cut “freehand” in any way. Unrestrained or moving workpieces could be thrown at high speeds, causing injury.
- Never cross your hand over the intended line of cutting either in front or behind the saw blade. Supporting the workpiece “cross handed” i.e. holding the workpiece to the right of the saw blade with your left hand or vice versa is very dangerous.
- Do not reach behind the fence with either hand closer than 100 mm from either side of the saw blade, to remove metal scraps, or for any other reason while the blade is spinning. The proximity of the spinning saw blade to your hand may not be obvious and you may be seriously injured.
- Inspect your workpiece before cutting. If the workpiece is bowed or warped, clamp it with the outside bowed face toward the fence. Always make certain that there is no gap between the workpiece, fence and table along the line of the cut. Bent or warped workpieces can twist or shift and may cause binding on the spinning saw blade while cutting. There should be no nails or foreign objects in the workpiece.
- Do not use the saw until the table is clear of all tools, metal scraps, etc., except for the workpiece. Small debris or loose pieces of metal or other objects that contact the revolving blade can be thrown with high speed.
- Cut only one workpiece at a time. Stacked multiple workpieces cannot be adequately clamped or braced and may bind on the blade or shift during cutting.
- Ensure the Metal Cutting Chopsaw is mounted or placed on a level, firm work surface before use. A level and firm28 EngLIsh work surface reduces the risk of the Metal Cutting Chopsaw becoming unstable.
- Plan your work. Every time you change the mitre angle setting, make sure the adjustable fence is set correctly to support the workpiece and will not interfere with the blade or the guarding system. Without turning the tool “ON” and with no workpiece on the table, move the saw blade through a complete simulated cut to assure there will be no interference or danger of cutting the fence.
- Provide adequate support such as table extensions, saw horses, etc. for a workpiece that is wider or longer than the table top. Workpieces longer or wider than the Metal Cutting Chopsaw table can tip if not securely supported. If the cut-off piece or workpiece tips, it can lift the lower guard or be thrown by the spinning blade.
- Do not use another person as a substitute for a table extension or as additional support. Unstable support for the workpiece can cause the blade to bind or the workpiece to shift during the cutting operation pulling you and the helper into the spinning blade.
- The cut‑off piece must not be jammed or pressed by any means against the spinning saw blade. If confined, i.e. using length stops, the cut-off piece could get wedged against the blade and thrown violently.
- Always use a clamp or a fixture designed to properly support round material such as rods or tubing. Rods have a tendency to roll while being cut, causing the blade to “bite” and pull the work with your hand into the blade.
- Let the blade reach full speed before contacting the workpiece. This will reduce the risk of the workpiece being thrown.
- If the workpiece or blade becomes jammed, turn the Metal Cutting Chopsaw off. Wait for all moving parts to stop and disconnect the plug from the power source and/ or remove the battery pack. Then work to free the jammed material. Continued sawing with a jammed workpiece could cause loss of control or damage to the Metal Cutting Chopsaw.
- After finishing the cut, release the switch, hold the saw head down and wait for the blade to stop before removing the cut‑off piece. Reaching with your hand near the coasting blade is dangerous.
- Hold the handle firmly when making an incomplete cut or when releasing the switch before the saw head is completely in the down position. The braking action of the saw may cause the saw head to be suddenly pulled downward, causing a risk of injury.
- Position yourself and bystanders away from the plane of the rotating saw blade. The guard helps to protect the operator from broken saw blade fragments and accidental contact withsaw blade.
- The rated speed of the accessory must be at least equal to the maximum speed marked on the power tool. Accessories running faster than their rated speed can break and fly apart.
- Always use undamaged saw blade flanges that are of correct diameter for your selected saw blade. Proper saw blade flanges support the saw blade thus reducing the possibility of saw bladebreakage.
- The outside diameter and the thickness of your accessory must be within the capacity rating of your power tool. Incorrectly sized accessories cannot be adequately guarded orcontrolled.
- The arbour size of saw blades and flanges must properly fit the spindle of the power tool. Saw blades and flanges with arbour holes that do not match the mounting hardware of the power tool will run out of balance, vibrate excessively and may cause loss ofcontrol.
- Do not use damaged saw blades. Before each use, inspect the saw blades for chips and cracks. If the power tool or saw blade is dropped, inspect for damage or install an undamaged saw blade. After inspecting and installing the saw blade, position yourself and bystanders away from the plane of the rotating saw blade and run the power tool at maximum no load speed for one minute. Damaged saw blades will normally break apart during this testtime.
- Wear personal protective equipment. Depending on application, use face shield, safety goggles or safety glasses. As appropriate, wear a dust mask, hearing protectors, gloves and shop apron capable of stopping small abrasive or workpiece fragments. The eye protection must be capable of stopping flying debris generated by various operations. The dust mask or respirator must be capable of filtrating particles generated by your operation. Prolonged exposure to high intensity noise may cause hearingloss.
- Keep bystanders a safe distance away from work area. Anyone entering the work area must wear personal protective equipment. Fragments of workpiece or of a broken saw blade may fly away and cause injury beyond immediate area ofoperation.
- Position the cord clear of the spinning accessory. If you lose control, the cord may be cut or snagged and your hand or arm may be pulled into the spinningsaw blade.
- Regularly clean the power tool’s air vents. The motor’s fan can draw the dust inside the housing and excessive accumulation of powdered metal may cause electricalhazards.
- Do not operate the power tool near flammable materials. Do not operate the power tool while placed on a combustible surface such as wood. Sparks could ignite thesematerials.
- Do not use accessories that require liquid coolants. Using water or other liquid coolants may result in electrocution orshock. Kickback and Related Warnings Kickback is a sudden reaction to a pinched or snagged rotating saw blade. Pinching orsnagging causes rapid stalling of the rotating saw blade which in turn causes the uncontrolled cutting unit to be forced upwards toward theoperator.29 EngLIsh
- DO NOT OPERATE ON ANYTHING OTHER THAN THE DESIGNATED VOLTAGE for the saw. Overheating, damage to the tool and personal injury mayoccur.
- DO NOT WEDGE ANYTHING AGAINST THE FAN to hold the motor shaft. Damage to tool and possible personal injury mayoccur.
- NEVER HAVE ANY PART OF YOUR BODY IN LINE WITH THE PATH OF THE SAW BLADE. Personal injury willoccur.
- NEVER APPLY BLADE LUBRICANT TO A RUNNING BLADE. Applying lubricant could cause your hand to move into the blade resulting in seriousinjury.
- DO NOT place either hand in the blade area when the saw is connected to the power source. Inadvertent blade activation may result in seriousinjury.
- NEVER REACH AROUND OR BEHIND THE SAW BLADE. A blade can cause seriousinjury.
- DO NOT REACH UNDERNEATH THE SAW unless it is unplugged and turned off. Contact with saw blade may cause personalinjury.
- SECURE THE MACHINE TO A STABLE SUPPORTING SURFACE. Vibration can possibly cause the machine to slide, walk, or tip over, causing seriousinjury.
- USE ONLY BLADES OF THE CORRECT SIZE AND TYPE specified for this tool to prevent damage to the machine and/ or serious injury (complying with EN847-1).
- INSPECT BLADE FOR CRACKS or other damage prior to operation. A cracked or damaged blade can come apart and pieces can be thrown at high speeds, causing serious injury. Replace cracked or damaged blades immediately. Observe the maximum speed marked on the sawblade.
- CLEAN THE BLADE AND BLADE CLAMPS prior to operation. Cleaning the blade and blade clamps allows you to check for any damage to the blade or blade clamps. A cracked or damaged blade or blade clamp can come apart and pieces can be thrown at high speeds, causing seriousinjury.
- THE MAXIMUM SPEED OF THE SAW BLADE shall always be greater than or at least equal to the speed marked on the rating plate of the tool.
- THE SAW BLADE DIAMETER must be in accordance with the markings on rating plate of the tool.
- DO NOT USE WARPED BLADES. Check to see if the blade runs true and is free from vibration. A vibrating blade can cause damage to the machine and/or seriousinjury.
- DO NOT use lubricants or cleaners (particularly spray or aerosol) in the vicinity of the plastic guard. The polycarbonate material used in the guard is subject to attack by certainchemicals.
- KEEP GUARD IN PLACE and in workingorder.
- AVOID UNCONTROLLED RELEASE of the saw head from fully down position. Otherwise there is a risk that the machine will tip over. Maintenance and Servicing
- Operator’s instructions on factors influencing exposure to noise (e.g. use of saw blades designed to reduce the emitted noise, saw blade and machine maintenance); Kickback is the result of power tool misuse and/or incorrect operating procedures orconditions and can be avoided by taking proper precautions as givenbelow.
- Maintain a firm grip on the power tool and position your body and arm to allow you to resist kickback forces. The operator can control upward kickback forces, if proper precautions aretaken.
- Do not position your body in line with the rotating saw blade. If kickback occurs, it will propel the cutting unit upwards toward theoperator.
- Do not “jam” the saw blade or apply excessive pressure. Do not attempt to make an excessive depth of cut. Overstressing the saw blade increases the loading and susceptibility to twisting or binding of the saw blade in the cut and the possibility of kickback or saw bladebreakage.
- When the saw blade is binding or when interrupting a cut for any reason, switch off the power tool and hold the cutting unit motionless until the saw blade comes to a complete stop. Never attempt to remove the saw blade from the cut while the saw blade is in motion otherwise kickback may occur. Investigate and take corrective action to eliminate the cause of saw bladebinding.
- Do not restart the cutting operation in the workpiece. Let the saw blade reach full speed and carefully re‑enter the cut. The saw blade may bind, walk up or kickback if the power tool is restarted in theworkpiece.
- Support any oversized workpiece to minimize the risk of saw blade pinching and kickback. Large workpieces tend to sag under their own weight. Supports must be placed under the workpiece near the line of cut and near the edge of the workpiece on both sides of thesaw blade. Additional Safety for Metal Cutting Chopsaw
- Do not use saw blades manufactured from high speed steel.
WARNING: Do not connect to the mains power supply
into the unit until complete instructions are read andunderstood.
- DO NOT OPERATE THIS MACHINE until it is completely assembled and installed according to the instructions. A machine incorrectly assembled can cause seriousinjury.
- OBTAIN ADVICE from your supervisor, instructor, or another qualified person if you are not thoroughly familiar with the operation of this machine. Knowledge issafety.
- MAKE CERTAIN the blade rotates in the correct direction. The teeth on the blade should point in the direction of rotation as marked on thesaw. Additional Safety Warnings
- TIGHTEN ALL CLAMP HANDLES, knobs and levers prior to operation. Loose clamps can cause parts or the workpiece to be thrown at highspeeds.
- BE SURE all blade and blade clamps are clean, recessed sides of blade clamps are against blade and arbour screw is tightened securely. Loose or improper blade clamping may result in damage to the saw and possible personalinjury.30 EngLIsh
- Report faults in the machine, including guards or saw blades, as soon as they arediscovered. Safe Operation
- Select the correct saw blade for the material to be cut;
- Do not use the saw to cut other materials than those recommended by the manufacturer;
- Lifting and transportation information. To lift and support the metal saw see FigureF.
- Do not use the saw without the guards in position, in good working order and properly maintained;
- Keep the floor area around the machine level, well maintained and free of loose materials e.g. chips and cut-offs;
- Provide adequate general or localised lighting;
- The operator is adequately trained in the use adjustment and operation of the machine;
- Use correctly sharpened saw blades. Observe the maximum speed marked on the saw blade;
- Ensure that any spacers and spindle rings used are suitable for the purpose as stated by the manufacturer;
- Refrain from removing any cut-offs or other parts of the workpiece from the cutting area while the machine is running and the saw head is not in the rest position;
- Ensure that the machine is always stable and secure. (e.g. fixed to a bench)
- To support long pieces see FigureC3.
WARNING: We recommend the use of a residual current
device with a residual current rating of 30mA orless. Residual Risks
- The following risks are inherent to the use of these machines: - injuries caused by touching the rotatingparts. - injuries caused by disruption of the cuttingdisc.
- These risks are most evident: - within the range of operation - within the range of the rotating machine parts
- In spite of the application of the relevant safety regulations and the implementation of safety devices, certain residual risks cannot beavoided. These are: - Impairment ofhearing. - Risk of accidents caused by the uncovered parts of the rotating cuttingdisc. - Risk of injury when changing thedisc. - Risk of squeezing fingers when opening theguards. Electrical Safety The electric motor has been designed for one voltage only. Always check that the power supply corresponds to the voltage on the ratingplate. Your DeWALT tool is double insulated in accordance with EN62841; therefore no earth wire isrequired.
WARNING: 115 V units have to be operated via a fail-safe
isolating transformer with an earth screen between the primary and secondarywinding. If the supply cord is damaged, it must be replaced only by DeWALT or an authorised serviceorganisation. Mains Plug Replacement (U.K. & Ireland Only) If a new mains plug needs to be fitted:
- Safely dispose of the oldplug.
- Connect the brown lead to the live terminal in theplug.
- Connect the blue lead to the neutralterminal.
WARNING: No connection is to be made to the
earthterminal. Follow the fitting instructions supplied with good quality plugs. Recommended fuse: 230V/13A plug , 115V/20Aplug. Using an Extension Cable If an extension cable is required, use an approved 3–core extension cable suitable for the power input of this tool (see Technical Data).The minimum conductor size is 1.5 mm
; the maximum length is 30m. When using a cable reel, always unwind the cablecompletelySafety Instructions for Cut-off Machines Package Contents The package contains: 1 Toothed Chopsaw 1 Cutting blade 1 Hex key 1 Vertical clamp 1 Instruction manual
- Check for damage to the tool, parts or accessories which may have occurred duringtransport.
- Take the time to thoroughly read and understand this manual prior tooperation. Markings on Tool The following pictograms are shown on the tool: Read instruction manual beforeuse. Wear earprotection. Wear eyeprotection. Keep hands 100 mm from either side of saw blade.
1. Follow the operating instructions
2. Motor shall reach full speed
3. Perform cut at clamped workpiece.31
, which also includes the year of manufacture, is printed into thehousing. Example: 2022 XX XX Year of Manufacture Description (Fig. A)
WARNING: Never modify the power tool or any part of it.
Damage or personal injury couldresult.
Hex key Intended Use Your professional DeWALT toothed chopsaw has been designed for the dry cutting of variously shaped metal materials: water and gas pipes, angular iron, U-profiles, T-bars, rods, bolts, etc. Using the appropriate cutting blade, it can cut hot and cold rolled carbon steel, construction steels according to DIN 1700 (ST33, ST37–2, ST52–3), non-ferrous metals (i.e. aluminum, brass, copper), stainless steel and synthetic materials (i.e. PVC). This tool is not intended to be used in cast-iron, brick, tile or ceramic materials. The tool is never to be used for cutting magnesiumworkpieces DO NOT use under wet conditions or in the presence of flammable liquids orgases. These chopsaws are professional powertools. DO NOT let children come into contact with the tool. Supervision is required when inexperienced operators use thistool.
- Young children and the infirm. This appliance is not intended for use by young children or infirm persons withoutsupervision.
- This product is not intended for use by persons (includng children) suffering from diminished physical, sensory or mental abilities; lack of experience, knowledge or skills unless they are supervised by a person responsible for their safety. Children should never be left alone with thisproduct.
ASSEMBLY AND ADJUSTMENTS
WARNING: To reduce the risk of serious personal
injury, turn tool off and disconnect tool from power source before making any adjustments or removing/ installing attachments or accessories. An accidental start-up can causeinjury. Bench Mounting (Fig. A) Mounting holes
have been provided to facilitate benchmounting. Removing and Fitting a Cutting Blade (Fig.A, B1,B2)
1. With the arm in the rest position, use the lip
back. Leave the guard retracted (Fig. B1).
2. Press and hold down the spindle lock
3. Rotate the cutting blade until itlocks.
4. Rotate the bolt cover
by turning counterclockwise and then remove the lock washer
and the retaining flange
. Make sure that the the new blade is placed onto the flange
in correct rotationaldirection.
7. Secure the blade with the retaining flange
8. Move the guard back down and release the spindle lock
WARNING: Wear gloves. The teeth of a new blade are
very sharp and can bedangerous. Clamping the Workpiece in Position (Fig.A,C1–C6) The tool is equipped with a material clamp
forward until the jaw
is almost touching theworkpiece.
until it engages with the clamp shaft
clockwise and clamp the workpiecesecurely.
5. To release the workpiece, rotate the
- Clamp the workpiece as far towards the operator aspossible.
- Set the clamping position for cutting downstroke as long as the thickness of the workpiece is not exceeding the maximum downstroke cutting capacity (Fig. C2). - The maximum downstroke cutting capacity is marked by slot
- Continue setting the clamping position as describedbelow.
- Always attemp to clamp the workpiece in a way to minimize the number of teeth cutting through the material (Fig. C4).
- Support long workpieces using a piece of wood
is used for upstroke cutting of wide and irregular shaped materials (Fig. C5).
1. Insert the vertical clamp in the hole
in the base (Fig.C6) until the clamp
rests on the workpiece (Fig.C5).
down to clamp theworkpiece.
to release the clamp
cuttingupstroke. Quick Travel Feature (Fig. C1) The clamp has a quick travelfeature.
- To release the clamp, rotate the handle
one or two turns counterclockwise and pull the lever
(Fig. C1) and pull out the location pin
to release the fence
back down to the cutting table
WARNING: If the clamp lever resistance is too light,
slightly tighten the two adjusting bolts on thefence. Setting the Angle of Cut (Fig. C1,C6) The tool can be used for mitre cuts up to 45°.
to release the fence
to the required angle. The angle can be read on the scale
as a reference (Fig. C6).
back down to the cutting table
to lock the fence (Fig. C1).
4. If additional clamping is required, the angle of cut can be
further fixed in the 90° and 45° cross-cutpositions. a. Align the fence
through the fence into one of the holes
Checking and Adjusting the Mitre Scale (Fig.C1,D1,D2)
to release the fence (Fig. C1).
2. Pull down the arm and lock it in this position by pushing in
and the left side of the cutting blade creating a perfect 90° (Fig. D1).
WARNING: Do not touch the tips of the blade teeth with
back down to the cutting table
to lock the fence (Fig. C1).
5. Pull out the lock-down pin
and return the arm to its upper rest position (Fig. D2).
6. Check that the 0° marking on the scale
aligns with the edge of the slot
7. If adjustment is required, proceed as follows:
with the edge of the slot
c. Retighten the screws
3. Tighten the screw
- Install the appropriate cutting blade. Only use sharp or correctly sharpened blades. The maximum rotation speed of the tool must not exceed that of the cuttingblade.
- Make sure the blade rotates in the direction of the arrows on the accessory and thetool.
- Secure theworkpiece.
- Make sure all locking knobs and clamp handles aretight.
- Always set the spark deflectorcorrectly.
- Do not attempt to cut excessively small pieces. Never perform cuts on small workpieces bundledtogether. OPERATION Instructions for Use
WARNING: Always observe the safety instructions and
applicableregulations.
WARNING: To reduce the risk of serious personal
injury, turn tool off and disconnect tool from power source before making any adjustments or removing/ installing attachments or accessories. An accidental start-up can causeinjury.
WARNING: Do not apply excessive pressure to thetool.
WARNING: Avoid overloading. Should the tool
become hot, let it run a few minutes under no loadcondition. Soft Start Feature Time Delay Relay (TDR) The soft start feature allows a slow speed run-up over 300ms to avoid an initial jerk when starting. This feature is also particularly useful when the installed fuse value is too low or not of inertcharacter. Performing a Cut (Fig. A)
WARNING: Wear gloves. Workpieces are hot and have
sharp edges after the cut.33 ENGLISH
1. Place the material to be cut against the fence
and as far towards the operator as possible. Secure using the material clamp
2. Switch on the machine and pull down the main handle
to cut the workpiece. Allow the motor to reach full speed before cutting.
3. Allow the blade to cut freely. Do not force.
4. After completing the cut, switch off the machine and return
the arm to its upper restposition. Switching On and Off (Fig. A) The on/off switch
is mounted in the main handle
To run the tool, press the on/off switch
Keep the on/off switch depressed while performing theoperation. To stop the tool, release theswitch.
WARNING: Do not switch the tool on or off when
WARNING: Do not cutmagnesium.
Transporting (Fig. F) The tool is equipped with a lock-down pin
which locks the tool in closed-down position forcarrying.
onto the cutting table
and secure the tool in this position by pushing in the lock-down pin
2. Transport the tool using the carrying handle
3. To release the tool, pull out the lock-down pin
WARNING: To reduce the risk of serious personal injury,
WARNING: To reduce the risk of serious personal
injury, ALWAYS hold securely in anticipation of a suddenreaction. Proper hand position requires one hand on the main handle
and the other hand holding the workpiece away from theblade.
- Never place your hands near the cuttingarea.
- Hold the workpiece tightly to the table and the fence when cutting. Keep your hands in position until the switch has been released and the blade has completelystopped.
- Do not cross yourhands.
- Keep both feet firmly on the floor and maintain properbalance. MAINTENANCE Your DeWALT power tool has been designed to operate over a long period of time with a minimum of maintenance. Continuous satisfactory operation depends upon proper tool care and regularcleaning.
WARNING: To reduce the risk of serious personal
injury, turn tool off and disconnect tool from power source before making any adjustments or removing/ installing attachments or accessories. An accidental start-up can causeinjury. Lubrication Your power tool requires no additionallubrication. Cleaning
WARNING: Blow dirt and dust out of the main housing
with dry air as often as dirt is seen collecting in and around the air vents. Wear approved eye protection and approved dust mask when performing thisprocedure.
WARNING: Never use solvents or other harsh chemicals
for cleaning the non-metallic parts of the tool. These chemicals may weaken the materials used in these parts. Use a cloth dampened only with water and mild soap. Never let any liquid get inside the tool; never immerse any part of the tool into aliquid. Optional Accessories