MaxoMixx MS8CM61X1 - Blender BOSCH - Free user manual and instructions
Find the device manual for free MaxoMixx MS8CM61X1 BOSCH in PDF.

User questions about MaxoMixx MS8CM61X1 BOSCH
0 question about this device. Answer the ones you know or ask your own.
Ask a new question about this device
Download the instructions for your Blender in PDF format for free! Find your manual MaxoMixx MS8CM61X1 - BOSCH and take your electronic device back in hand. On this page are published all the documents necessary for the use of your device. MaxoMixx MS8CM61X1 by BOSCH.
USER MANUAL MaxoMixx MS8CM61X1 BOSCH
MaxoMixx Accessories (Hand blender)
MSM8..
MS8CM6..
[de] Gebrauchsanleitung Zubehor (Stabmixer) 3
[en] Instruction manual Accessories (Hand blender) 13
[fr] Mode d'emploi Accessoires (mixer plongeant) 22
[i] Istruzioni per l'uso Accessori (Frullatore assiale) 33
[n] Gebruiksaanwijzing Toebehoren (Staafmixer) 43
[da] Brugsanvising Tilbehør (blenderstav) 53
[no] Bruksanvising Tilbehør (Stavmikser) 62
[sv] Bruksanvising Tillbehör (Stavmixer) 71
[fi] Käytöohje Varusteet (Sauvasekoitin) 81
[es] Instrucciones de uso Accesorios (Batidora de varilla) 90
[pt] Instruções de service Acessórios (Varinha magica) 101
[el] O8nyiec xphonc EExptnma (Avaeeutnpc) 112
[tr] Kullanim kilavuzu Aksesuar (El blenderi) 123
[p] Instruktura obsprugi Akcesoria (Blender ręczny) 133
[uk]IHCtpykuia3ekcnayataui IprnaaDpaunn6eep 143
[ru] INCTpyKuIy IIO 3KcIIaYatauIIN PpiHaAeXHoCTN (TOrpyKHOI 6Anep) 154
[ar] pdswJl 175
Honig-Apfel-Mischung (CNHR29C):
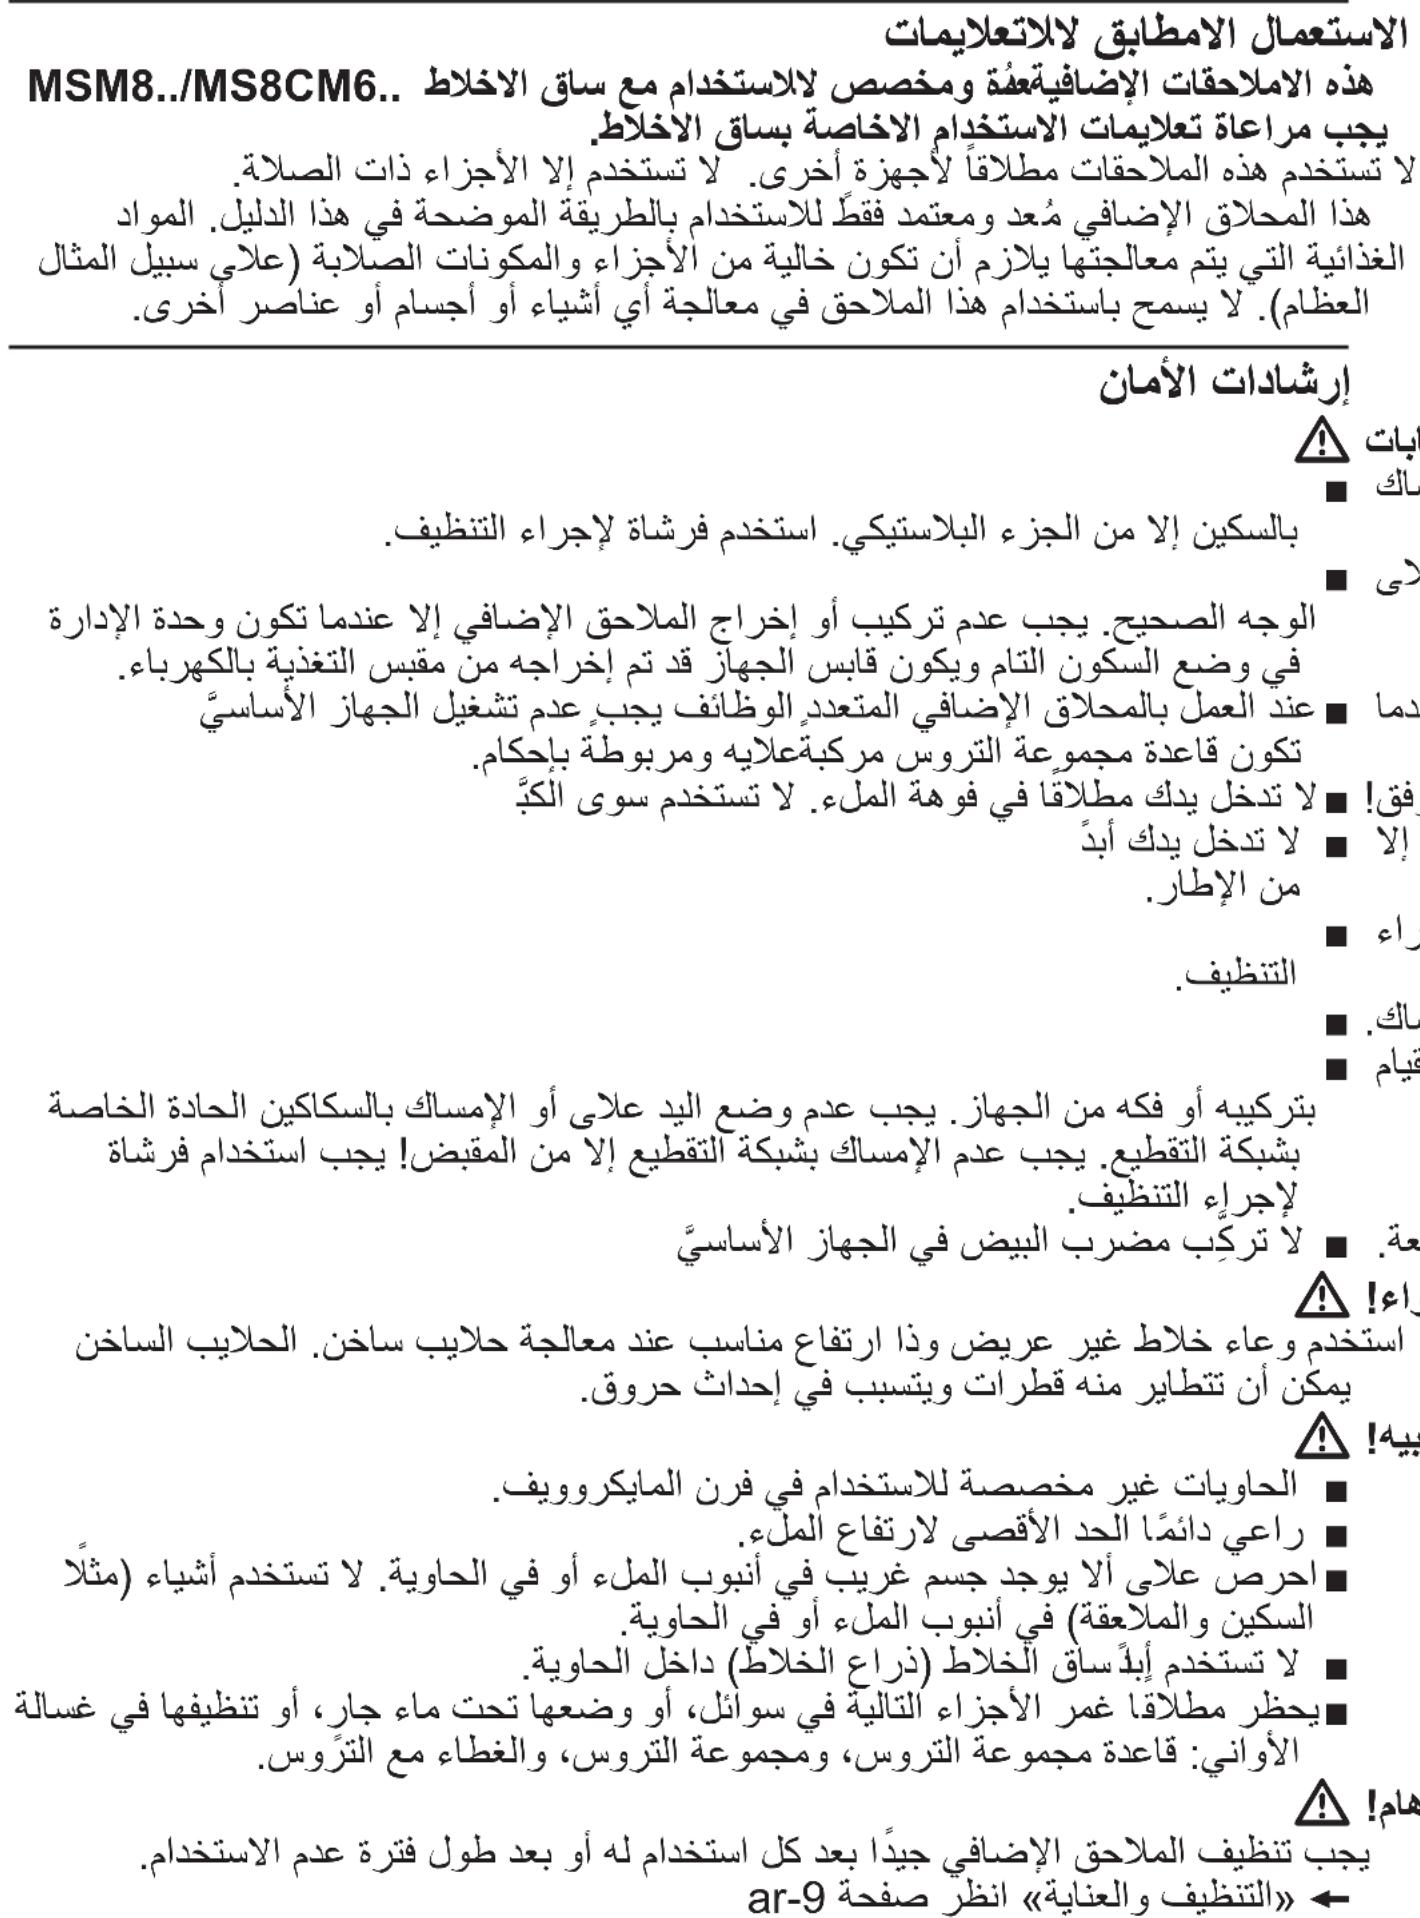
These accessories are designed for the hand blender MSM8.. / MS8CM6... Follow the operating instructions for the hand blender.
Never use these accessories for other appliances. Only use matching parts together.
The accessories are suitable only for the use described in these instructions. Food which is to be processed must not contain any hard components (e.g. bones). This accessory must not be used for processing other objects or substances.
Safety information
Risk of injury
- Do not touch the sharp edges of the blades with bare hands. When inserting and removing knives, grasp by the plastic only. Clean with a brush.
The accessory must be completely assembled before use. Before attaching or removing the accessory, always wait until the drive has come to a standstill and pull out the mains plug.
-
When working with the multifunction accessory, the base unit should be switched on only when the gear attachment has been fitted and is screwed on tight.
-
Never reach into the feed chute. Only use the pusher provided!
-
Never grasp the sharp blades or edges of the cutter inserts. Take hold of them by the edge only.
Note the shape and position when inserting into the carrier disc. Clean with a brush.
Take hold of the carrier disc by the designated recessed grips only.
-
When disassembling / assembling the dicer, take hold of the cutter disc by the plastic stud in the centre only. Do not grip the sharp blades of the cutting grid. Take hold of cutting grid by the edge only! Clean them with a brush.
-
Never insert the whisk in the base unit without the associated gear attachment.
Risk of scalding!
When processing hot milk, use a tall, narrow receptacle for blending. Hot milk may splash and scald you.
Warning!
The containers are not microwave-safe.
Always observe the maximum filling level.
- Check that there are no foreign objects in the feed chute or container. Do not insert objects (e.g. knives, spoons) into the feed chute or container.
- Never use the hand blender (blender foot) in the container.
- Never immerse the following parts in liquids, hold under running water or clean in the dishwasher: gear attachments, lid with gears.
Important!
It is essential to clean the accessory thoroughly after each use or after it has not been used for an extended period. "Cleaning and maintenance" see page 21
Before use, read these instructions carefully in order to become familiar with important safety and operating instructions for this appliance. Please keep the operating instructions in a safe place.
If passing on the appliance to a third party, always include the operating instructions.
Overview
Fig. A
1 Universal cutter L *
a Container
b Universal blade (L)
c Ice crusher blade (L)
d Gear attachment
e Lid
2 Universal cutter XL *
a Container
b Universal blade (XL)
c Gear attachment
d Lid
3 Multifunction accessory
a Container
b Kneading hook
c Universal blade
d Lid with gears
e Pusher
f Carrier disc for disc inserts
Disc inserts*
g Slicing insert - coarse
h Slicing insert - fine
i Shredding insert - medium
j Grating insert - coarse
Dicer
k Base holder
I Cutter disc
m Cutting grid, small (approx 9 mm)
n Cutting grid, large (approx 13 mm) *
Cutting grid cleaner (head can be rotated for different cutting grids)
4 Whisk*
a Gear attachment
- depending on the model
Before using for the first time
Before the new accessory can be used, it must be fully unpacked, cleaned and checked.
Warning!
Never operate a damaged accessory!
- Remove all accessories from the packaging and dispose of all packing materials.
Check that all parts are present and examine them for obvious damage.
→Fig.A
Thoroughly clean and dry all parts before using for the first time.
"Cleaning and maintenance" see page 21
Symbols and markings
| Symbol Meaning | |
| Caution! Rotating tools. Do not reach into the feed chute. | |
| Not suitable for dishwashers. | |
| Do not immerse in liquids or hold under running water. | |
| Position the lid on the container of the multifunction accessory (♂) and lock (♀). Insert the dicer in the lid (♂) and lock (♀). |
Universal cutter (size L and XL)
Warning!
Always observe the maximum quantities and processing times in the table.
→TableK
Universal blade: For cutting up meat, hard cheese, onions, herbs, garlic, fruit, vegetables, nuts and almonds.
Ice crusher blade (only size L):
For crushing ice cubes (crushed ice).
Optimum processing quantity: 4-6 ice cubes (max. 100g ).
Warning!
- Before cutting up meat, remove gristle, bones and sinews.
- The universal cutter is not suitable for cutting up very hard items (coffee beans, radishes, nutmeg) and frozen food (fruit etc.).
- Ice cubes should be processed only with the ice crusher blade
→Fig. 8
- Place the container on a smooth, clean work surface and press into position. Insert the universal blade or ice crusher blade.
Important: The blade must be positioned straight in the container.
2.Add food.
-
Place the gear attachment on the container and rotate clockwise until it clicks into position.
-
Place the base unit on the gear attachment and press until it clicks into position.
-
Insert the mains plug.
-
Hold the base unit and universal cutter firmly. Press Turbo button ①. The appliance remains switched on as long as the button is pressed.
-
Process the food with the universal cutter.
-
Release the button after processing. Wait until the drive comes to a standstill. Disconnect the mains plug.
-
Hold down both release buttons and remove the base unit.
-
Turn the gear attachment anticlockwise and remove.
-
Take out the blade.
-
Empty the container.
Clean all parts immediately after use. "Cleaning and maintenance" see page 21
Sample recipe: Honey cake with apples
Honey/apple mixture (CNHR29):
- 110 g forest honey (5 °C)
- 30 g apple in cubes (11 mm)
Add to the universal cutter and mix on Turbo speed for 3 seconds.
Honey/apple mixture (CNHR29C):
- 130 g forest honey (5 °C)
-
30 g apple in cubes (11 mm)
-
Add to the universal cutter and mix on Turbo speed for 2 seconds.
Cake:
-3 eggs
- 60 g butter
- 100 g plain white flour
- 60 g ground walnuts
-1 tsp cinnamon
- 2 packets vanilla sugar
- 1 tsp baking powder
-1 apple


Separate the egg yolks from the whites.
Beat the egg whites until stiff.
Beat the yolks and sugar, then add the softened butter and the honey/apple mixture.
- Mix the flour, ground walnuts, cinnamon and baking powder in a separate bowl. Add to the moist ingredients and mix in. Using a spatula carefully mix in the beaten egg whites.
Line a rectangular loaf tin (dimensions 35cm× 11cm with greaseproof paper and pour in the prepared mixture.
Peel the apple and slice. Arrange the slices on the cake.
Preheat the oven to 180^ and bake the cake for 30 minutes.
Multifunction accessory
The multifunction accessory is intended for the processing of foodstuff.
Risk of injury from sharp blades/rotating drive!
Never reach into the container while the appliance is operating. Always use the pusher to add ingredients. After switching off, the drive continues running for a short time. Change tools only when the drive is at a standstill. When working with the multifunction accessory, the base unit may only be switched on when the lid has been fitted and screwed on tight.
Warning!
Multifunction accessory must always be completely assembled before use!
Caution!
Before cutting up meat, remove gristle, bones and sinews.
The multifunction accessory is not suitable for cutting up very hard food (coffee beans, radishes, nutmeg) or frozen food (fruit, etc.).
Warning!
Always observe the maximum quantities and processing times. Table
After each operation cycle allow the appliance to cool down to room temperature.
Universal blade/kneading hook Universal blade
For cutting up meat, hard cheese, onions, herbs, garlic, fruit, vegetables, nuts and almonds.
Kneading hook
For kneading small amounts of dough.
Risk of injury from sharp blade!
Do not touch the sharp edges of the universal blade with bare hands. Take hold of the universal blade by the plastic handle only.
Fig. 6
- Place the container on a stable, smooth and clean work surface. Insert the universal blade or kneading hook.
Important: The blade / kneading hook must be positioned straight in the container.
2.Add food. - Place the lid on the container () and rotate anti-clockwise until it clicks into position. Insert the pusher in the feed chute.
Note: If fitting the lid is a bit stiff, turn the three-piece coupling on the underside of the attachment slightly and try again. - Place the base unit on the gear attachment and press until it clicks into position.
- Insert the mains plug. Hold the base unit and multifunction accessory. Press Turbo button ①. The appliance remains switched on as long as the button is pressed.
- Process the food.
Add ingredients:
Release the button. Wait until the appliance comes to a standstill.
- Remove the pusher and add ingredients through the filling opening.
- Replace the pusher and continue working.
7. Release the button after processing. Wait until the drive comes to a standstill. Disconnect the mains plug.
8. Hold down both release buttons and remove the base unit.
- Rotate the lid in a clockwise direction and remove.
- Take out the blade/kneading hook.
- Empty the container.
Clean all parts immediately after use.
"Cleaning and maintenance" see page 21
Sample recipes: Bread dough
Basic recipe
-250gflour
- 140 ml water
-7g sugar
-7g margarine
-0.5gyeast
-4g salt

Tool: kneading hook
- Add all ingredients except the water to the container.
Mix ingredients on Turbo speed.
After a few seconds add the water through the filling opening.
■ Process everything on Turbo speed.
Our recommendation: 1 12 minutes switch-on time
Maximum switch-on time: 2 minutes
Maximum quantity: 1x basic recipe
Short pastry
Basic recipe
- 250 g flour
- 125 g margarine or butter (room temperature)
- 125 g sugar
-1 egg - 1/2 packet baking powder
- 1 packet vanilla sugar
-1 pinch salt
Tool: kneading hook
- Add all ingredients to the container.
Mix ingredients on Turbo speed.
Chill the pastry dough.
Process further if required.
Maximum switch-on time: 2 minutes
Maximum quantity: 1x basic recipe
Carrier disc with disc inserts
Slicing insert - coarse
for slicing cucumbers, carrots, potatoes, etc.
Slicing insert - fine
for slicing cucumbers, carrots, beetroot, courgette, etc.
Shredding insert - medium
for shredding apples, carrots, cheese, etc.
Grating insert - coarse
for grating potatoes for dumplings, potato pancakes, fruit and vegetables for raw food salads.
Caution!
The disc inserts must not be used for cutting up very hard foods (Parmesan cheese, chocolate).
The disc inserts are only suitable to a limited extent for processing fibrous foods (leek, celery and rhubarb).
Risk of injury from sharp blade! Exercise particular caution when handling the inserts! Note the shape and position of the insert when inserting into the carrier disc ( Fig. D). Take hold of the carrier disc b the designated recessed grips only. Do no reach into the filling opening. Only use the pusher when adding more ingredients.
Fig. 1
- Fit the required insert into the carrier disc.
- Place the container on a stable, smooth and clean work surface. Grasp the carrier disc by the recessed grips and insert.
- Place the lid on the container () and rotate anti-clockwise until it clicks into position.
- Place the base unit on the gear attachment and press until it clicks into position.
- Insert the mains plug. Hold the base unit. Press Turbo button 1 . The appliance remains switched on as long as the button is pressed.
en Multifunction accessory
- Add the food to be processed to the feed chute. Cut up very large pieces beforehand. If required, push down the pusher by applying light pressure.
- Release the button once processing has finished or the processed food reaches the underside of the carrier disc. Wait until the drive comes to a standstill. Disconnect the mains plug.
- Hold down both release buttons and remove the base unit.
- Rotate the lid in a clockwise direction and remove.
- Grasp the carrier disc by the recessed grips and remove.
- Empty the container.
Clean all parts immediately after use.
"Cleaning and maintenance" see page 21
Sample recipe:
Potato patties

- 500 g potatoes
-1 large egg
-3 tbsp flour
Salt and pepper to taste
Tool: grating insert
Peel and grate the potatoes.
- Then mix the potatoes, egg, flour, salt and pepper.
If the mixture is too liquid, add some more flour.
Heat the oil in a pan. Then add a large spoonful of the mixture to the oil and shape into patties. Fry on both sides until golden brown.
Dicer
For dicing food, e.g. for salads, soups and desserts.
Risk of injury from sharp blades! When disassembling / assembling the dicer, take hold of the cutter disc by the plastic stud in the centre only. Do not grip the sharp blades of the cutting grid. Take hold of cutting grid by the edge only! Clean them with a brush.
When working with the multifunction accessory, the base unit may be switched on only when the lid has been attached and screwed on tight. Do not place fingers in the feed tube. Only use the pusher when adding more ingredients.
Warning!
Application guidelines!
The dicer is suitable for cutting:
- potatoes (raw or boiled);
- vegetables, e.g. carrots, cucumbers, tomatoes, peppers, onions, beetroot;
-e.g. bananas, apples, pears, strawberries, melon, kiwifruit; - eggs;
- cheese, e.g. Gouda, Emmental;
soft pork sausage (e.g. Mortadella); - boiled or fried poultry (after cooling, boned).
Very soft cheese (e.g. Mozzarella, Feta cheese) cannot be processed.
Very hard cheese (e.g. Parmesan) must not be processed.
Before processing pip and stone fruits (apples, peaches, etc.), remove the pips or stones. Before processing boiled or fried meat, remove the bones.
Food must not be frozen.
Do not exceed the maximum amount of food processed in one cycle. Before resuming work, leave the base unit to cool down for 30 minutes to room temperature.
Warning!
Application guidelines!
The maximum amounts are:
- raw and cooked ingredients
approx. 3500 g
(guideline figure: container 5 x filled)
- Cheese (e.g. Gouda, Emmentaler)
approx. 300 g
(guideline figure: container 2 x filled)
If these guidelines are not observed, the dicer, including the cutting grid and the rotating blade, may be damaged.
If the dicer is not used as intended, is modified or is used improperly, Robert Bosch Hausgeräte GmbH cannot assume liability for any resulting damage. Also excluded is the liability for damage (e.g. blunt or deformed blades) which result from the processing of unapproved food.
Important information:
- Fruit / vegetables should not be too ripe, as the juice may escape.
- Leave cooked food to cool down before dicing it, as it will then be firmer and the dicing result will be better.
The length of the cubes can be influenced by increasing or reducing the pressure on the pusher.
Fig. 6
-
Place the container on a stable, smooth and clean work surface.
-
Insert the cutting grid in the base holder. Observe the recesses!
- Undo the catches on the base holder and insert cutter disc into the base holder.
- Fasten the catches.
- Place the dicer under the lid (2) and turn all the way in an anti-clockwise direction. Lock must be turned all the way into the lid lug.
-
Place the lid on the container () and rotate anti-clockwise until it clicks into position. Lock on the handle must be correctly engaged.
-
Place the base unit on the gear attachment and press until it audibly clicks into position.
- Insert the mains plug. Hold the base unit. Press Turbo button ①. The appliance remains switched on as long as the button is pressed.
- Place the food to be diced in the feed tube. If required, push down the pusher by applying light pressure. If required, chop up food beforehand.
- Release the button once processing is finished or the dice almost reach the underside of the dicer. Wait until the drive comes to a standstill. Disconnect the mains plug.
- Hold down both release buttons and remove the base unit.
- Rotate the lid in a clockwise direction and remove.
Empty the container.
Clean all parts immediately after use.
"Cleaning and maintenance" see page 21
Sample recipes:
"Olivie" salad
(serves 2)
- 2 boiled, cooled potatoes
- 1 boiled carrots
- 2 hard-boiled eggs
- 100g cooked chicken breast
- 1 pickled gherkin or marinated cucumber
-1cucumber - 150 g peas (1 small tin)
Salt and pepper -
125 g mayonnaise
-
Dice the boiled, but already cooled potatoes, carrots, eggs, cucumbers and meat at turbo speed.
Mix all diced ingredients in a salad bowl with the peas.
Season to taste with salt and pepper.
Mix with mayonnaise and serve.

"Vinaigrette" salad
(serves 2)
- 2 boiled, cooled potatoes
-250gboiledbeetroot - 1 boiled carrot
- 1 pickled gherkin
-50gpeas - 1 / 4 leek (approx. 25 g)
Salt and pepper -
50 ml cooking oil
-
Dice the boiled, but already cooled potatoes, carrots, beetroot, leeks and pickled gherkins at turbo speed.
Mix all diced ingredients in a salad bowl with the peas. - Season to taste with salt and pepper.
- Dress with cooking oil.
"Stolichny" salad
(serves 2)
- 150 g mortadella
- 3 boiled, cooled potatoes
- 2 pickled gherkins or marinaded cucumbers
-1 boiled carrot - Peas, half a can
Salt and pepper
Dressing: - 1/4 carton of sour cream
- 1 / 4 glass mayonnaise
- Dice the boiled, but already cooled potatoes, carrots, ham and cucumbers at turbo speed.
Mix all diced ingredients in a salad bowl with the peas. - Season to taste with salt and pepper.
Mix all ingredients. Dress with sour cream and mayonnaise.
Crab salad
(serves 2)
- 150 g cooked chicken
- 150g boiled,cooled potatoes
- 100 g cucumbers
Green salad - 25 g crab meat
- 1-2 hard-boiled eggs
- 75 g mayonnaise


- Dice the boiled, but already cooled potatoes, eggs, cucumbers, crab meat and the cooked meat at turbo speed.
Finely chop the green salad.
Season to taste with salt and pepper. - Dress with mayonnaise.
"Okroshka" soup
(serves 2-3 persons)
-Kvass,1 litres
- 150 g cooked chicken breast
- 1-3 boiled, cooled potatoes
- 1-3 hard-boiled eggs
-1 / 2 bunch of radishes (4-5)
-1-2 cucumbers
- 1 / 4 leek (approx. 25 g)
- Parsley and dill
- 1-2 tbsp. sour cream
- mustard, sugar
The cooked but already cooled potatoes, eggs, cucumbers, radishes and the cooked chicken breast should be diced at turbo speed.
Thoroughly mix sour cream, chopped leek and the eggs with mustard and sugar and dilute with a little kvass.
Add the diced ingredients, chopped parsley and dill.
Season to taste with salt and pepper.
Whisk
For whipping cream, beating egg whites and milk froth from hot milk (max. 70^ ) and cold milk (max. 8^ ) as well as for making sauces and desserts.
Risk of scalding!
When processing hot liquids, use a tall, thin blending receptacle.
Warning!
- Never insert the whisk into the base unit without the gear attachment.
- Do not attach or remove the gear attachment with the whisk until the appliance is at a standstill.

→ Fig Ⅱ
- Place the prepared food in the blender jug or other suitable receptacle or process in the pan used for cooking.
- Place the gear attachment on the whisk and press until it clicks into position.
- Place the whisk with the gear attachment on the base unit and press until it clicks into position.
- Connect the mains plug.
- Set the required speed with the speed control (high speed recommended)
- Take hold of the base unit and blender jug and press the ON button ①.
- Process the food with the whisk.
- Release the ON button after processing. Wait until the drive comes to a standstill.
- Disconnect the mains plug.
- Hold down both release buttons and remove the whisk with the gear attachment from the base unit.
- Remove the gear attachment from the whisk.
Clean all parts immediately after use. "Cleaning and maintenance" see page 21
Cleaning and maintenance
The accessories used must be thoroughly cleaned after each use.
Risk of injury
Do not touch the blades of the universal cutter of the ice crusher, cutting attachment and dicer with bare hands. To clean, only grasp by the plastic and use a brush.
Warning!
- Do not use cleaning agents containing alcohol or spirits.
- Do not use sharp, pointed or metal objects.
- Do not use abrasive cloths or cleaning agents.
- Never immerse the following parts in liquids or hold under running water and do not clean in the dishwasher: gear attachment, cover of the multifunction accessory.
Please note:
- Do not wedge plastic parts in the dishwasher as they could become deformed.
- When processing food such as red cabbage or carrots, plastic parts may become discoloured. This can be removed with a few drops of cooking oil.
Fig. 1 gives an overview of how to clean the individual parts.
Universal cutter / whisk
Only wipe the attachment of the universal cutter and the gear attachment of the whisk with a soft, damp cloth and dry off.
Clean the other accessory parts with a detergent solution and a soft cloth or sponge or place them in the dishwasher. Clean the blades with a brush.
Multifunction accessory
Wipe lid of the multi-function accessory with a damp cloth only and dry.
The container, universal blade, carrier disc and cutting attachments are dishwasher-safe.
Carrier disc with disc inserts
Turn over the carrier disc to press out the inserts (fig. 3).
Disassembling dicer:
Fig. H
- Turn the dicer clockwise and remove from the lid.
- Undo catches and remove cutter disc.
- Remove remnants from the cutting grid using the cutting grid cleaner. Rotate cleaner head to the corresponding cutting grid size.
-
Take cutting grid out of the base holder.
-
Do not clean dicer parts in the dishwasher, blades will become blunt. Pre-rinse all dicer parts under running water. Clean parts with a brush.
Subject to change.
Sous reserve de modifications.
Uso corretto
-2patate cotte,raffreddate
-1 carote cotte
-2uova sode
Honing-appelmengeling (CNHR29C):

Honning-æble-blanding (CNHR29C):
- 130 g skovhonning (5 °C)
-30 g aebler i tern (11 mm)
Fyld det i minihakkeren, og blend det i 2 sekunder med turbo-hastighed.
Kage:
AEndringer forbeholds.
Korrekt bruk
Dette tilbehoret er beregnet for stavmikseren MSM8.. / MS8CM6.. Følg bruksanvisningen for stavmikseren.
Endringer forbeholds.
Avsedd användning
Omena-hunajaseos (CNHR29C):
Bal-elma karisimi (CNHR29C):
IpepaBaiTe iHCTpyKciIO 3 ekcnlyaTaucii HactynHM KOpNCyBaayam pa30m i3 npnanaom.
CTnCnI OrJaD
→MaJIIOHOK A
1 YhivepcaIbHn noDi6HOBaU L*
a NocyDnHa
b YHibepcaJIbHn HIX (L)
c HixnnaNbody (L)
d PeDyKTopHa HacaKa
e KpnuKa
2 YhivepcaIbHn noDpi6HOBaY XL*
a NocyDnHa
b YHiBepcaIbHn Hix (XL)
c PeDyKTopHa HacaKa
d Kpnwka
3 BaratoФункцioHaJIbHe npUaIaIaIaIaIaIaIaIaIaIaIaIaIaIaIaIaIaIaIaIaIaIaIaIaIaIaIaIaIaIaIaIaIaIaIaIaIaIaIaIaIaIaIaIaIaIaIaIaIaIa
a NocyDnHa
b Raayok dIy 3aMiuyBaHHr
c YHiBepcaIbHn HIX
d Kpnuoka 3 peDyKTopoM
e TTOBXaY
f DnCK-tpmMaH niD BCTaBKn
ДиСКОВIВCTaBKN
g BCTaBka dnnr rpy6oro Hapi3aHH
h Bctabka dnia dpio6Horo Hapi3aHHa
i Bctabka dna cepedhboro WaTKyBaHHa
j BctabKa dny rpyboro HaTnpaHn
HacaKa IЯ Hapi3aHHKy6nKaMa
k Ochoba
I NICK-HIX
m PixyuapeiTka,dpi6Ha (npn6J.9 MM)
n PixyuapeiItka,BeNkA (np6n.13 MM)
o PnpctocyBaHHn dny OunuHn npjyuoi pewiTKn (roiBka nobepTaecbca nny pi3Hnx pixyux pewiTOK)
4 BiHnUOK JIJI 36NBaHHJ*
a PeDyKTopHa npncTaBka
- 3aJexKHO BID MoJeni
Ipeed nepuIM BnKOpncTaHHaM
Ipeep noaTkom ekcnnyatauio HOBO npnnaDnno nOtpi6Ho nobHicH o3NakyBatn, ONUCTNT Ta nepeBipntn.
Ybara!
Hikon He BnKOpncToByTe NOnKoJKeHe npnilaIra!
BnIMtbyce npuJa3ynaKOBKa Ta 3HIMtB naKyBaJbHm MaTepiJ.
■ NpeBipTe Bci DeTani Ha KOMNJIeKTHiCt b i BnDnMI NOsKOJxEHHa. → ManHOHOK A
Ipeed nepuIM BnKOpncTaHnMa peTeNbHO OunchbTe Ta BnCyUtiB yci detani. «UuueHHma doaJad» due. cmop. 153
CnMBOJI Na IIO3HaUKN
Hix dny Ibody (nme po3mip L): nna npdi6HeHHa KybIKIB nbody (npuroTBAHHa IbODAHOI KpNXTu).
OnTmAbHa KInbKicTB dIra o6pO6Kn: 4-6 Ky6nKIBNbOdy (MaKc. 100 r).
ybara!
- Ppei nopi6HnHaM m'ca BndaIitb i3 Hboro xpa, KiCTKn Ta cyxoxnllna.
- YhivepcaIbHn IoDpi6HOBaH He npn3HaueHo IJn IoDpi6HeHHa Dyke TBepdx NpOdyKTIB (KaBOBnx 3epeH, peDbKN, MycKaTHNX ropixiB) i 3amOpoxeHnx IpOdyKTIB (fpykTIB Toio).
- KybuknIbOdy MoXHa o6po6JrTN BnKJIIOUHO HOXeM IINI NbOdy
→MaJIIOHOK B
- NocTaBTe NOcydHnHa pIBHy nUcTy po6Ouy NOBepxHIO i npNTncHITb ii. BCTaBTe yHIEpcalbHn HIX a6o hIX dIra IbOdy.
Baxnbo: hix y nocydnHi Mae 6ytnp03TaOBoAHN npraMo.
- 3aBaHTaKTe npOdykTn.
- YctaHObitb Ha nocuHny peDyKTopHy HacaIky I NOBepHiTb HacaIky 3a roDNHHKOBOIO CTpiIKOIO, 0o6 BOHa 3aΦikCyBaJnacr 3 xapaKTePHm 3Bykom.
- YcTaHOBIb OCHOBnH 6JOK npNJaDy Ha peDyKTOpHy HacaIky N HaTNCHTb, 06 BIn 3aΦiKcyBaBCa 3 XapaKTepHM 3BykOM.
- BCTaBTe 1TEnCeIbHy BNlky Bpo3eTKy.
uk BaratodpyHkuioHaJIbHe npnlaIaI
6.ПиТрИМУTe OCHOBнI 6nOK npUaDy n yHIBePcAJIbHn NODpi6HIOBaU. HATnCHiTb KHOJKy Tpy6OpExmMy 工 . IpnIaI npaIOBaTmE,doKn Bn He BiIDnyCTInTe KHOJKy.
7. 6p06iTb npOdykTu yHiBepcaIbHnM noDi6HIOBaUeM.
8.ПicЯперробк BiДиуctNTN KHONky BBIMKHeHHa.DOчeKaIteCs 3yINHeHHa npIBoJa.BuMItb wTeNCelbHy BnKy 3 po3eTKn.
9. HataChyBun yTpmyuOn oNDbIKHOKN pO36JOKyBaHHa, 3HIMITbOCHOBHN 6JOK npnnaDy.
10. NobephiTb peDyKTopHy hacaIky npOTn roDHHNKOBoi CTpiIKn i 3HIMtB ii.
11. BnIMiTb hiK.
12. BnnpoxhItb nocdyHny. Odpa3y nicIy BnKOpncTaHHra OuncTbTe Bci Detani. 4uueHna ma doanrdo due.cmop.153
PpNKpaD pecenTy: MeoBn npir 3 a6nykamn
MeYOBO-Я6nyuHa cymi# (CNHR29):
-110rnicoboroMey (5^)
-30rЯ6nyKky6nKaMn(11MM)
■PoknajitbByHibepcaIbHni nopi6HOBaui3cekyHn3MiuyTeHa Typ6oBnKocTi.
MeDObO-Я6nyuHa cymi# (CNHR29C):
-130 r nicoBoro Mey (5 °C)
-30rЯ6nyKky6nKaMn(11MM)
■PoknaiTbByHBepcalbHn noDi6HOBaUi2cekyHn3MiuyTeHa Typ6oBnKocTi.
Nipir:
-3yin
-60rBepuKOBOroMacna
-100r6iIoro6oPoUHa(Tin405)
-60rnoDpi6HeHnx nicOBnx ropixiB
-1u.n.kopnui
-2 naK. BaHInbHoro lykpy
-1u.II.po3nyuBaayTicTa
-1Я6nyko
■ BiДиinitь кOBТКВ iД 6iJIkIb.
KpyTo 36nITe 6iJkn.
36nTe KOBtKn i3 uKyPOM, a ToDi IdoaIte M'Ke MacNo N MeDoBO- 6nyHy cymiu.
3MiawTe B OKpemMnCci 60poHNO 3 noDi6HeHMn ropixamn, KopuceIO i po3nywBaayem ticTa. OdaIte DO BOJornx IHrpeiEHTIB i niDiMiawTe. ObepexHo NiDiMiawTe InonaToQKOo 36nti 6jkn.
■BuknaiItb npamokythy opmy (35x11cm) kyniHapn mnanepom i noknaiItb tydn niroTOBaHy cymiw.
■ПоунстыяблукиНашихту сkn6kaMu. Po3noДиитьяблuyни сkn6kn no npory.
■Порріп Te duxobkydo 180°C i BnikiakTe npir 30xbuINH.
BaratoФункцioHaJIbHe npIaIaIaIaIaIaIaIaIaIaIaIaIaIaIaIaIaIaIaIaIaIaIaIaIaIaIaIaIaIaIaIaIaIaIaIaIaIaIaIaIaIaIaIaIaIaIaIaIaIaI
BaratofoyHKioHaJIbHe npIaJa npn3NaYe He, 06 o6pO6JrTxapOoBi npOdyKTI.
He6e3neKa npaHeHHraocTpMMHoxamn / npuBODOM, 0oO6epTaecTbcra!
IodaaBHHnIHrpdiHtib:
■ BiDnyctiB KHonky. DooekaTecyaynHeHn npuIady.
■ BnIMiTb wTOBxaU i 3aBaHTaxTe iHrpeDiEHTN uepe3 3aBaHTaXyBaJIbHn OTBip.
3HOBy BCTaBTe wTOBXaU i npOIOBxyuTe po60Ty.
7.ПicЯ nepepo6kn BiDnyctHTn KHONky BBIMKHeHHa.DOyeKaItec3yNIneHHa npIBoDa.BuMItb 1TeNCelbHy BInKy 3 po3eTKn.
8. HataNCHyBn uTpMmyOuOnoNDbIKHONKn PO36JOKyBaHHa, 3HIMITbOCHOBn6nK npnaNy.
9. NOBepHItb KpNShky 3a roDHHNKOBOIO CTPIINKOTo Ta 3HIMITb II.
10. BnIMtB hIX / rayOK nra 3amIyBaHHa
11. BnnpoJHITb nocyDnHy.
Odpa3y nicra BnKOpncTaHHr OuNCTbTe Bci Detani. 4uueHna ma dozna d' due.cmop.153
PnKlaI peeentiB:
Ticto dny xni6a
OchOBHn peeent:
-250r6opoSHA
-140MЛВODIN
-7rUkykpy
-7rMaprapnHy
-0,5rnpixkxiv
-4rconi

3Hapra:raQOKnla 3amIyBaHHa
(→MaJIHOHOKD).NCK-TPMMAU MOXHa
6paTn TiIbKn 3a BiIDNoBiDiHi pyuKn-3arNn6JIeHnHa. He 3acOByIte nIaNbciB
y 3aBaHTaxyBaIbHn OTBip.ДЯпДшTOBxUBaHHЯ BnKOpncTOByTe TiIbKNшTOBxaY.
→ MaJIHOHOK F
- BCTaBTe notpi6Hy BCTaBky B DnCK-TPMaay.
- NocTaBTe nocyDnHy Ha CTiKy, pIBHy Ta YnCTy po6Ouy NOBepXHIO. Bi3bMitb DnCK-TPMa3a pyKn-3aIIn6JIeHHra TBCTaHOBiTb Ha Micue.
- YctaHObitb Ha nocuDInHy KpnUky ()i NOBepHITb npOTn rOHHNKOBoi CTpiJKN Do φikcaui 3 xapaKTEpHm 3BykOM.
- YctaHOBIb OCHOBnI 6JOK npNJaNy Ha peDyKTOpHy HacaIKy I HAtNCHITb, 06 BIn 3aΦiKcYBaBCa 3 XapaKTepHM 3BYKOM.
- BCTaBTe uTencelbHy BuNky B po3eTKy. PnITpMMyIte OCHOBHni 6Jok npuJaNy. HATnCHiTB KhoNkTy Typ6opexKmMy 日 . Pnpiaq npaIOBaTIme, DOKn BN He BiDnyCTnte KHOkKy.
- 3aBaHTaXTe o6po6JIbOBAHI npOdyKTH B rOpNoBnHy. 3aBeNki UMaTKn CnId 3a3dAnerIb NopDi6HnTu. Y pa3i Notpe6n NiDItOBxuYte npOdyKTH, 3JERKa HATnCKaUOn Ha StTOBXaU.
-
BiDnyctiB KhoNky, KOJI 3aBepuNTe o6po6Ky a6o 6oPo6JIOBaHI npOdyKTn CraHyTb HIXHbOrO 60ky DnCKa-tpImaHa. DoyeKaITeC8 3yINHeHHr npIBOda. BInMITb 7tEnceIbHy BNkY 3 pO3eTKn.
-
HataChyBwn yTpmyuOn o6nDbi KhoNpO36JIOkyBaHHra, 3HIMITb OCHOBHNI 6JOK npnaNy.
- NOBepHItb KpNkky 3a roDnHHNKOBIOCTpiJIKOIO Ta 3HIMITb II.
- Bi3bMitb DnCK-TPMaay 3a pyuKN-3aIIN6JIeHHa Ta BnMIb Noro.
- BnnpoxkHtB nocyduHy.
Odpa3ynicBnKOpncTaHHoUncTbTe Bci Detani. 《uueHma do2nAdue.cmop.153
Ppiknaid pecenty:
Деруни

-500rkaptonni
-1BeNkeJnCe
-3ct.π.6opousha
-Cinb,nepeub3a cMaKOM
3HapraIa: BCTaBka-TepTuIka
I OuaCTnT i HaTePTn KapTONJIIO.
■Notim 3MiwaTn KapToPnIoo,Яиce,60poShO,ciNb i nepeucb.
■Якwo Maca 3aHaTo pIDka,doaTu Μe TpOxN 60oSHA.
Pozirpiu oIIO y BeJIrkic knOBopoDi, OdoaTu Macy no OndHnB BeJIrkij loKci i HaadTu fOpMy oJaOk. ObcmaXHTu 3 06ox 6okIB Do 3oJNTnCTO-KOpNueBOrO KOJbOpY.
HacaKaДЯHapi3aHnHa Ky6nKamn
ДЯнариняпodyктIBКубикамN,Hap.ДЯ canatIB,cyniB i DecepTiB.
He6e3neka npaHeHHra roCTpIMN HOxamn!
IpoDyKTn He MaOTb 6yTN B 3amOpOxehomy CTaHI.
He nepeBnUyBaTu MaKcImaJIbHy KInbKiCtB npOdyKTIB, 10 nepepo6IaHObTbc3a OINn pInom. DaTN OCHOBHomy 6IOky OxOnoHyTu DO KIMHaTHoi TEMpepaTyPi npOTraRom 30 XBnIHn Nepei noaJIbWoIO nepepo6koJ.
ybara!
Bka3iBKn 3 BnKOpncTaHHa!
MaKcImaJIbHa KInbKicTb:
-cpii Bapehi iHrpeiEcHTn, np6I.3500 r
(opeHTnp: 5-pa3OBe 3anOBHeHHnocyDnHn)
-Cnp (Ha npKlaI, rayda, emMeHTaJIbCbKn) np6I. 300 r (opieHTnp: 2-pa3OBe 3anOBHeHn npocyDHH)
HeDToPmHaHnY uX Bka3iBok MoKe npNBecTn Do NoWKoJxKeHb HacaKn dJa HapizAAHry Ky6nKaMn, BKn. pIXyu pewiTkY i o6ePTOBn hix.
B pa3i BnKOpncTaHnHa cAdKn dJa Hapi3aHnKaBnKamn He 3a npn3HaueHHm, B 3MiHeHomy CtaHi a6o HeHaJIeXHM uHOM, KOMpaHia «Robert Bosch Hausgerate GmbH» He Hece HIAKOI BiINOBiAaJIbHOcTi 3a MoXnBi NOxKOJKeHHa. LcE BnKIOuAc TaKox BiINOBiAaJIbHicTb 3a NOnKOJKeHHa (HaNP., Tyni a6o DeΦopMOBaHI HOKi), Aki BnHKaIoTB B pe3yIbTaTI nepepo6Kn HEnpN3HaueHHx dJa cBoO pNoDyKTIB.
BaxKnBi Bka3iBkn:
-ФукTN / OBOci He NOBHHi 6yTN nepecninMn, iHaKsE 3 Hx MoKe BNTeKTN CiK.
-Bapehi npodyktn cnid nepei Hapi3aHHaM OXoNoDHTN, TOni BOHN cTaHyTB TyriuIMN, 0o 3a6e3neuHb Kpaui pe3yIbTaTn npn Hapi3aHHi.
-IOBXnHa Ky6nKiB 3aJIeXnTb BiD cnJHn HATnCKaHH Ha wTOBxAu NiI qac NiID wTOBxvBaHH.
→MaJIHOHOK
IocTaBTe nocyHnHy Ha cTiKky, piBHy Ta uNCTy po6Ouy nobepxHIO.
- BCTaBTe pi3aIbHy peWitKy B OCHOBY. 3BepHITb yBary Ha BnIMKn!
- BiДIMKHiTb 3aTnCKaChi Ha OCHOBi i BCTaBTe B Hei DnCKOBn HIX.
-
3aMKHiTb 3aTnCKaHi.
-
YctaHOBITb Ky6nKopi3ky NiД KpUshky (一) i do ynpOy NOBepHiTb npOTn roDHHNKOBoi cTpiIKN. IkCaTOp Ma6 6yTN Do ynpOy NOBepHyTu y HocNK KpUShKn.
- YcTaHOBItb Ha NocuDInHy KpnUkY (2) i NOBepHITb IpOTn rOINHHNKOBOI cTpiJIKN Do φikcaui 3 xapaKTePHNM 3ByKom. Φikcatop Ha pyuCi Mae npaBnIbHo 3aΦikCyBaTnCra.
- YcTaHOBITb OCHOBnH 6JOK npuJaHy Ha peDyKTopHy HacaIky N HaTncHiTB, 0o6 Bin 3aΦiKcyBaBCa 3 XapaKTepHM 3BykOM.
- BCTaBTe wTeNceIbHy BnKy B po3eTky. PnITpMnyTe OCHOBHn 6LoK npJaady. Hatncihtb KhoNkTy Typ6opexmMy 工 . Pnpiaad npaIOBaTIme,doKn BN He BiDnycTIte KHOKy.
- 3aBaHTaKyIte npOdyKTn IJIaHapi3aHH B 3aBaHTaKyBaJIbHy rOpNoBHy. Y pa3i notpe6n NiIuTobxUyTe npOdyKTn, 3nerKa HATNCKaHOn Ha uTobXaU. 3a Heo6XiHocTi cNoaTky nopixTe npOdyKTn MeHsIMM UMaTkAmn.
- KOnn Bn 3aBepuTe o6po6ky, a60 KOnn Ky6nKm MaJxke C7HyTb HNXHbOro 6oky Ky6nkopi3Kn, BiDnyCtITb KhoNkY. DooekaiTeCra 3ynHeHH npBOda. BnMItb wTeNCelbHy BnKy 3 po3eTKn.
- HATnchyBmN yTpMmyOuN o6nDbi KHOJKN pO36JOKyBaHHa, 3HIMITb OCHOBHNI 6JOK npnady.
- Поверпь кршky 3a ГдиНнКОВОCTPIДKOТа 3HIMITb II.
BunopoxkHtB nocyduHy.
Odpa3y nicra BnKOpncTaHHa OuHCTbTe Bci Detani. «UuueHna ma dozna d» duB. cmop. 153
PnKlaIpeuIeTIB: Canat «OJIb'c»
(2 nopui)

-2Bapehi,oxoIooJKeHI KaptonnI
-1BapeHaMopKBa
-2KpyTO BiDbapeHnxYn
-100rBapeHoI KypaOITpydkn
-1 coIohn a6o MapuHOBaHn oripok
-1caTnOriok
-150 r monodoro 3eleno roropoukky
-(1 HeBeJInKa KOHcepBHa 6aHka)
-cinb i nepeu
-125rmaiohe3y
Bapehi, aene bxe oxoJooJKeHi kapToJIHO, MOpKBy, rui, oripkn i M'rcO Hapi3aTn Ky6nKaMn Ha Typ6o-WBnDkoCTi.
Bci iHrpeDiEHTn, nop3aHi Ky6nKamn, nepemiusn B caNaTHi MNcI 3 3eJIeHM rOpOswkOM.
■Пиправити сilлю i nepцem 3a CMAKOM.
3MiataN 3 MaioHe3OM Ta NoidaBatn Ha cTIN.
Canat «BiHirpeT»
(2 nopuii)

-2Bapehi,oxoJooKeHi KaptonnI
-250rBapeHorouepBOHoro6ypka
-1BapeHaMopKBa
-1 coIOnHn oripok
-50rmonoIoro3eIeHoro ropoiky
- 1 / 4 nyuka u6yni-nopeo (npn6n.25r)
-cinb i nepeu
-50Mn cToJBOOoi oii
Bapehi, aane Bxe oxoJoxKei KapToIIO, MOpKBy, YepBOHn 6yprK, u6yIIO-nopei coLoHi oripKn Hapi3aTI pIBHomipHMn KybHKamn Ha Typ6o-WBnKocTi.
Bci iHrpeiEHTn, nopizai H KybKamn, nepemiuatn B caJatHi Mnci 3 3eJIeHM rOPOsKOM.
■Приправити сіл'tоі nepцем 3a cMaKOM.
3anpaBnTOnieIO.
CanaT «CTOJIuHnI»
(2 npucii)

-150 moptaeJIIN
-3Bapehi,oxonooxehi Kaptonni
-2 coIohnx a6o MapuHOBaHnx oripka
-1BapeHaMopKBa
-3eJHnI rOpoWeK, NOOBnHa KOHcePBHOI
-6aHKn
-cinb i nepeuB
- CanaTha 3anpaBka:
-146aHKn CMeTaHN
- 1 / 4 6aHKMaHOHe3y
Bapehi, aene bxe oxoJoxeHi kapToIIO, MOpKBy, uHHky i oripKn Hapi3aTu Ky6nKaMn Ha Typ6o-WBnDkoCTi.
Bci iHrpEiEcHTn, nopizai Ky6nKaMn, nepemiwatn B caNatHi Mnci 3 3eJIeHM rOpOwKOM.
■Пиправити сілlio i nepцem 3a cMaKOM.
Bci ihrpeiHCTn nepemiuatau. 3anpaBHTn CMeTaHOU Ta MaioHe3OM.
Canat 3 kpa6ib
(2 nopuzi)

-150rBapeHoI KypaTnHn
-150rBapeHOi,oxoJooKeHoI KapToonJI
- 100 r canaThoro oripka
-3eJIeHn caJnat
-25 r kpa6oBoro M'ra
-1-2 kpyTo BIDBapeHnx yin
-75rmaHOHe3y
Bapehi, aIe Bxke oxoJoxKeHi KapToJIHO, IaIy, oripKu, Kpa6OBe M'aco I BapeHe M'aco Hapi3aTN Ky6nKaMn Ha Typ6oWbNkOcTi.
Дибно nociktn 3eelenhcaanaT.
■Пиправити сілlio i nepцem 3a cMaKOM.
3a npabntu MaioHe30M.
Cyn «Okpoшka»
(2-3 nopuii)
- KBac, 1 nItp
-150rBvIbapeHoI KpyoI rpykn
-1-3 Bapehi, oxoJokKeHi KapToJIi
-1-3 kpyTo BiDbapeHnx yinca
-12 nyuok peinckn (4-5 wTuK)
-1-2 caIaTHnx oripka - 1 / 4 nyuka u6yni-nopeo (npn6n.25r)
-3eJIeHb neTpUwKn i Kpony
-1-2 cToJIOBi JIoKKn CMeTaHN
-ripnuu, uykop
3Bapeny ane oxoony kaptonlio,
yau, oripkn, peuCKy Ta BiDbapeHy
Kpyu rpykny hapiaTn Kyukamn 3
Typbo-WBndkicTIO.
PeteIbHO nepemiataH cMeTaHy, nocieHy u6yIIO-nopei Ta ra3 ripuueTo ta yKpOM Ta po36aBNTN KBacom.
Iodatn ihrpeiEHTN, nopi3aHI ky6nKaMn, a Takox nociyeHy 3eJehb neTpUkN i kpony.
■ПиправNTи сiЛIO i nepцem 3a CMAKOM.
BiiHuyokДЯ36nBaHHa
■IpeBepHiTbDnCK-tpMaay,io6 BNTNCHyTN BCTaBKN (MaJIHOK E).
Po36npaHnHa HacaKn dJa Hapi3aHnKaMn:
→MaJIIOHOK H
- NOBepHITb Ky6nKopi3ky 3a rOdHHNKOBIO CTpiIKoIO i BnIMtB II 3 KpNsKn.
- BiIMkhItb 3aTnCKaHi 3HIMITb INCKOBn HIX.
- Ppnsbepi3aHnshK 3 piaalbHOi peWitKn 3a DonomoroB iDnOBiDHorO uNCTnIbHoro npictpoIO. NobepHiT bOnOBky uNCTnIbHoro npictpoIO nID BiINOBiDnHPO3mip piaalbHOi pewiTkN.
- BnIMtB piaJbHy peWitKy 3 OCHOBN.
■ DeTani Ky6nKopi3Kn 3a6opOHeHO MNTN B NocydomnHi MaunHi, iHaKwe 3aTyIpybCra HOKi. CnoJIoCHiB yci DeTani Ky6nKopi3Kn NiD npotoHIO BOdoIO. NocCTbTe Detani UitKOIO.
Bnpo6nK 3aIIuAe 3a co6oI npaBO Ha BHeceHHa 3MIn.
IcnoJb3OBaHne no Ha3HaueHnIO
3Tn npHaJleJxHocTn npeJHa3HaueHbI dJyNORpyxHoro 6JIeHepa MSM8.. / MS8CM6... PyKOBODCTByntecb yka3aHnA MIn, nPnBeJehHbIMN B nHcTpyKcNn NO 3KcIIyaTauNn NORpyxHoro 6JIeHepa.
Kateropnueckn 3aPpeucaetc nCnoIb30BaTb 3Tu npHaJneKHOCTn dIpynx np6opOB. IcnoIb3yIte TOnbKO pOxDxOJaune dpyr K dpyr yactn.
He ncknoyeha onacnoctb TpaBMnpoBaHna
HoxI n3MeIbYeHnraNbda (ToNko pa3mep L): IJIa I3MeJIbYeHnRA Ky6NKOB Nbda. ONImaJIbHOe nepepa6aTbIBaEMoe KOJIueCTBO: 4-6 Ky6NKOB NbDa (MaKc. 100 r).
BhmuHne!
-перед Измельчением мяca удалие ИЗ Heroхрази, кости и сухожимя.
- YHnBepcaIbHbI N3MeJIbUHTeJIb He npriOdoEN IJN N3MeJIbUeHn OueHb TBepdbIX npoDyKTOB (KOpeiHbIX 3epeH, peDbKN, MyCKaTHbIX opEXOB) IN 3amOpOxeHHbIX npoDyKTOB (ppyKTOB nT. n.).
-NepepaTaBbBaTb Ky6nKn Ibda pa3peWaeTc ToJIbKO HOxOM nIa N3MeIbYeHnIbDa
→PncyHok B
- NocTaBbTe KOHTeHep Ha rJaKnyo, YnCTyIO pa6OuyIO NOBepxHocTb I npXMMte erO. BcTaBbTe YHnBePcaJIbHbI Hox IIN HOx DJIa N3MeJIbYeHnRA JbDa.
Baxho:HOJdoJIKeH HAXOHTbCBA KOHTeIHepe B BepTnKaIbHOM NOLOXeHN. - 3arpy3nte npoDyKtbl.
- YcTaHOBnTe peDyKTOpHyo HacaKy Ha KOHTeHep NIOBepHnTe NO YacOBoN CTpeJIke Do OHKcauN co UeJYKOM.
- YcTaHOBnTe OCHOBHOJ 6IOK Ha peDyKTopHyIO HacaIKy I HaxMnTe Do fNKcauN CO UeJIyKOM.
-
BCTaBbTe 1TEnCeIbHyIO BnIky Bpo3eTKy.
-
YdepxnBaTe OCHOBHOJ 6IOK n yHnBepcaJIbHbI N3MeJIbHTeJIb. HaxMnte Typ6o-KHONky 工 .Pnp6op ocTaeTcR BKNIOUeHHbIM, NOKa HaxKaTa KHOIIka.
7.Поьзясь уньерcaльныIM n3MeЛьчNTeJem,пepа6OTaTe npODYKТbl. - Iocne nepepa6oTKn OTnyCTntb KHOJky BKIOUeyHna. DoXdNTecb NOJHO OCTaHOBKn npNBOda. BbIHbTe 1TEnCeJIbHyO BVINKy n3 p03eTKn.
9.ДерханжаТьIMNобeKHONKn pa36JOKINPOBKN,CHIMITE OCHOBHOn 6JOK. - ПовернITE peуктори НаcadКу npOTINb YacOBoi CTpeKNI IN CHIMITE ee.
- BbIHbTe HOK.
- Onopoxhnte KOHTeHep.
OuHuaTe Bce qactn np6opa cpa3y nocne nCnoJb30BaHn. «Oucmka u yxod» cm. cmp. 164
MHorOpyHKUHOHaJIbHyIO npHnAdJeXHOCTb MOxHO IcNoJIb3OBaTb TOJIbKO B IOnHOCTbIO CO6paHHOM BnDe!
OctopokHO!
Ipeepn3MeIbueHHeM mca ydaJInte n3
Hero xpaun, KOCTn u cyxoxnnna.
MhorooyHKUOnHaNbHa npHaJNeXHoCTb
He npiroDa IJa n3MeIbueHnOueHb
TBepdbix npOdyKTOB (KOpeiHbIX
3epeH, peDbKn, MyCKaTHbIX opexOB) n
3amopoxKeHHbIX npOdyKTOB (ppyKTOB
nT.I.).
BHHMaHHe!
O6aTeIbHo co6IIOdaIte yka3aHHOe MaKcImaJIbHoe KOJIueCTBO INHpeIeHTOB n BpeMa nepepa6OTKn. Ta6nua
Iocne kaxdo ro pa6oeryu nKna daTe np6opy ocblb do KOMHaTHOH TemnepaTpybl.
YHnBepcaJIbHbI Hox/MecnJIbHa HaCaJa Ka
YHNBepcaJbHbIHOX
ДяИЗMeЛьЧЕнЯ МЯса,TВерДOrO cIpa,pENuTOrO Lyka,3eJIeHn,YeCHOKa, 4pyKTOB,OBOUe,IOpEXOB,MINДаJIЯ.
MecnIbHa HaCaJaKa
ДяЗамшанн HeбьшоRO KOINueCTBa Tecta.
OnachocTb TpaBMnpoBaHna octpbIM HoxOM!
He kacaTeCb roIbIMn pyKaMn ne3Bn yHnBepcaJIbHOrO HOka.
YHnBepcaIbHbI Hox CneIyET 6paTb TOJbKO 3a INaCTMaCCOByIO pyKy.
PncyHOK
- NocTaBbTe KOHTeHep Ha npOHyIO, rnaKyo u nCtTyO pa6OyIO noBepxHocTb. BcTaBbTe yHnBepcaIbHbI HOK IIN MeCnIbHyIO HacdKy.
BaxHo: HOx/MecnIbHaH hacaKa DOJXHbI HaxOHTbcR B KOHTeHHepe B BePTNkaJIbHOM IIOJoxEHNI.
- 3arpy3nte npoDyKtbl.
- YcTaHOBInTe KpbIuKy Ha KOHTeHep () INIOBepHInTe IpoTINb YacOBoN CTpeJKN DoΦnKcaunco UeJyKom.BcTaBaTe TOJkAteJIb B 3aRpy3OuHbI NaTp6ok.
Yka3aHHe: ecn npu yCTaHOBKe KpbIiKn
IMeET MeTO TyROXOD, HEMHOro
NOBepHnte TpexlonactHyIO MyO TY C
HNxHEn CTOpOHbI HacaDNN I NOBTOPNTe
NONblTKy.
- YctaHOBNTe OCHOBHOJ 6IOK Ha peDyKTOpHyIO HAcADky I HAXMNTe Do fNKCaUN CO UeJIYKOM.
- BCTaBbTe wTeNceIbHyIO BnIKy B po3eTKy. PnpIepXnBaIte OCHOBHO 6JOK mHOrOfYHKUHOHaJIbHyIO npHaIaJeXHocTb. HaxMITE Typ6o-KhONkY ①. Pnp6op ocTaetcR BKIIoueHHbIM, noka HaKaTa KhoNka.
PnHaJIeJXHOCTaMNOCHOBHO6JIOK
MOXHO BKIOUaTb TOIbKO C yCTaHOBJIeHHO H I N PLOTHO 3aKpyueHHo KpbIuKo. He ONyCKaTb pyky B 3arpy3OuHoe OTBepCTne.
ДяpoТанКВанЯИСпОЛь3OBaТTOЛьКOTOKaTeJIb.
BHMaHne!
Yka3aHnno no nCNoJb3ObaHnIoo!
HacaKaInHa Hape3aHnKy6nKaMn npiroHa InHape3aHn:
- Kaptoöpejra (cbyporo nijn Bapehoro);
- OBOUeN, KaK HApp.: MOpKOuN, OrypuOB, NOMIoPoB, CnaIaKOrO nepua, peNuTaTOrO Lyka, KpaChOn CBeKJIbI;
-ФpyKTOB, KaHanp.: 6aHaHOB, RaIOK, rpyu, Kny6HnKn, DbIHb, KNBn;
一
-cbipaKaKHa np.: «Tayda》, 《3MMeHTaJIbckn》;
-MaRkoB BapeHoi KOJIbAcbl (HaNP., «MopTaJeNbI»);
-OTBapHOrO INJIN JapeHOrO MraCa NTnUcbI (noCne oxJaXdEHHa, 6e3 KocTei).
OueHb MraKn CbIp (Ha np.: MoaapeJIna, 6pbH3a) He MOKeT 6bITb nepepaBoTaH.
OueHb TBepdbIcbIp (Ha np., «「PapMe3aH») HeNb3r nepepa6aTbIBaTb.
Ipeed nepepa60KoJ cEmeUKBbIX IN KocToCKOBbIX IIOoB (A6JIOK, NepcIKOB IN np.) Heo6xOIMO ydaNtB cEmeKn nn KocTock. Ipeed nepepa60KoJ BapeHoro nn JapeHoro Mca Heo6xOIMO ydaNtB KOCTN.
IpoDyKtbl He doJXHbI 6bITb B3amOpOxEHHom BnDe.
HeIb3npeBbIaTb MaKcImMaJIbHoe KOJIuYeCTBO IpOyKTOB, nepepa6aTbIbAembIX 3a OINn npneM.
Ipeed daJIbHeiwee nepepa60KoI DaTb OCHOBHOmy 6JOKy OCTbITb DO KOMHaTHOH TeMnepaTypbl B TeueHne 30 MNHyT.
BHMaHne!
Yka3aHnno nCNoJb3ObaHnIoo!
MaKcHmJaBHOe KOJnueCTBO COCTaBJIaTeT:
-cbipbIe IN BapeHbIe INHrpeDneHTbl,
nprm.3500r (opneHTnpoBOvHoe
3HaueHHe:5 HanoJIHeHn KOHTeHepa)
OTBETCTBeHHOCTb 3a NOBpeKdEHHa (Ha np.,
3aTyuNBWeNecsI INI DeOpMnPoBaHHbIe
HOXN),KOTOpbIE BO3HnKaIOT Bpe3yJIbTaTe nepepa6oTKn HeOnyucTmblx npOdykTOB.
Baxkhble npimmeuahna:
-ФpyKbI / OBOUH He DOJIKHbI 6bITb CJNUSKOM CNEJbIMN, INaYe N3 HNX MOXET BbITEyB COK.
-BapeHbIe npOdyKtbl OXnaIITb nepei Hape3KOJ, TaK KaK OHN NocNe 3TOrO CTaHyT TBepKe I 6yDyT JyUWe Hape3aTbcra.
- HaKImaHa ToIkKaTeIb CInIbHee IJIcna6ee npn noTaIKNBaHm, MoXHOpeRyIInPoBaTb DInHy KU6IKOB.
PncyHOK
IocTaBbTe KOHTeHep Ha npOHyIO, rnaKyIO uNcTyIO pa6OuyIO NOBepXHOCTb.
1. BcTaBbTe peJyUIO peWeTky B OCHOBaHne. O6paUaIe BHNMaHne Ha BBiEMKn!
2. OTKpoIte 3aJIMbI Ha oCHOBaHn I BCTaBbTe DnCK-HOX B OCHOBaHne.
3. 3aKpoIe 3aXIMbl.
4. HacayДЯну hare3Kny6nKaMnyCTaHOBNTe NOJ KpbIuKy (一) INOBepHInTe Do ynpa npOTNB YacBOOcTpeJIKN. BloKIpOBky Heo6xOIMOnOBepHyTb Do ynpa B HocNK KpbIuKN.
5. YCTaHOBInTe KpbIshky Ha KOHTeHep (12) INOBepHInTe npOTnB yacOBoi CTrpeJKN Do qKcaun Co ueJyKom. BloKIpOBka Ha pyUKe DOJXHa 6bITb PpaBnIbHo 3aΦNKcnpoBaHa.
6. YcTaHOBnTe OCHOBHOJ 6nOK Ha peDyKTOpHyO HacdKy N HaxMnTe Do fNKCaunn CO UeJNkOM.
7. BcTaBbTe 1IeBHyBnky B pO3eKy. PnpIepXnBaIte OCHOBHO 6IOK. HaxMnte Typ6o-KHONKy ①. Pnp6Op octaETcBKnUoyEHbIM, NOKa Haxkata KHONKa.
8. ПоложиTe npedHa3HаeHHbIe ДЯнapeЗКИnpOdyKTbI B 3aRpy3OuHbIcTBoI.При Heo6xOДIMocTn CJIerKaNoDTaIKBaIte TOLKATEJEM.EcNHyXHo, npedBapITeJIbHO I3MeJIbUHTe npOdyKTbl.
- ПО OKOHuaHn Nepepa6OTKn nI IN KOrda KybKNNoCTN DoCTnHyT HIXHei CTOpONbI HacAdKn dJIa Hape3Kn KybNKaMn, OTnyCTnte KNOpKy. DoXdntecb NOnHOJ OCTaHOBKn npIBoDa.BbInbTe uTeNCeIbHyIO BnIKy I3 pO3ETKn.
10.ДержанжаТьИМОБеKHONКI pa36ЛOKИРOBКI,CHIMITE OCHOBHOJ 6nok. - ПовернITE Крышky по чаков стpeлке и симпente ee.
OnopoxHnTe KOHTeHep.
OuHuaTe Bce Yactn np6opa cpa3y nocne nCnoJb3OBaHn. Oucmka u yxod》cm.cmp.164
$$ j \left{2 - \right. $$
$$ - \ddot {g} g d m u j j = 1 $$
$$ \mathrm {a b s i g m a} \mathrm {a b s i g m a} \mathrm {a b s i g m a} \mathrm {a b s i g m a} \mathrm {a b s i g m a} $$
$$ - \int_ {a} ^ {b} d x, c > 0 $$
$$ : \because \omega = \frac {1}{2} \omega_ {1} - $$
$$ \therefore \angle A C D = 1 8 0 ^ {\circ} $$
Laiydi ydi jui yjuyi yjui jui
(ω-2)
gduo 150-
150-
100-
aljus ibLw
25
四四四 1-2
75
y
y
.Turbo 1
.

«Vinaigrette» abi
( x,y,2 - y) ( 0, )
$$ - \delta \partial_ {i} \mathrm {与 芝} $$
$$ \text {g} \omega \omega \omega \omega \omega \omega \omega \omega \omega \omega \omega \omega \omega \omega \omega \omega \omega \omega \omega \omega \omega \omega \omega \omega \omega \omega \omega \omega \omega \omega \omega \omega \omega \omega \omega \omega \omega \omega \omega \omega \omega \omega \omega \omega \omega \omega \omega \omega \omega \omega \Omega 2 5 0 - $$
$$ - \vec {g} \cdot \vec {v} = 0 $$
$$ z \Delta z = 1 - $$
$$ \geqslant 5 0 - $$
( p - 2) ÷ 25 = ( p - 2) ÷ ( 1 - p) = ( p - 2) ÷ p > 14
12
$$ p a b \text {i} _ {j} y _ {s} 5 0 - $$
$$ \therefore \sin \angle A C B = \frac {1}{2} $$
1
L 1
a1 = 12,a2 = 52,b1 = 125,b2 = - 352
Turo 0
S OBC = S AOB + S_ BOC
a1 = 23,an + 1 = a_n - a
$$ \therefore \frac {1}{2} x - 1 > 3 - \frac {3}{2} x $$
1
Jc Jd 10g ()
j j 1
J 1
iayy Jaa 1 Jai cIb
()
Jy
j.
J 1
aal 4gll 15 0
P_1SA = 4t
J 1
- 12 < 4 < 5
-
aaiy baiy baiy no syy laa aall no
J
-3j
gai jie 15i
jie 1
G
elulos
ai = bij
1
1a
2
3.
Jalll
.
L
CgSo Jio Cua So Jc auiie 1go gubai j glal aoBlyg ayuoyl gblwll
1
J 1 1 1 1 1 1 1 1 1 1 1 1 1 1 1 1 1 1 1 1 1 1 1 1 1 1 1 1 1 1 1 1 1 1 1 1 1 1 1 1 1 1 1 1 1 1 1 1 1 1 000000000000000000000000000000000000000000000000000000000000000000000000000000000000000
!pa
1. a_4 = a_1 + 2d a_4 = 22
e bai 4wliog aellus cllsall
(a)glua 1
pabll jll gjll jll
jai jai g jai g jai g
aJgall g Jg jgall
g
J 10
()
(20 1
12 ailll jgai gai 50000000000000000000000000000000000000000000000000000000000000000000000
()g g g g g g g g g g g g g g g g g g g g g g g g g g g g g g g g g g g g g g g g g g g g g g g g g g g g g g g g g g g gg
siky.2g oysll boll iioi y Aiaill a g 4aall ic wssll oaiy lglbc
6
Jolal Joll jll lJl 0jnnn .oJdJ 1 1 1 1 1 1 1 1 1 1 1 1
7 sll pl
wulwJlq
8 0
9 piacl
10
11.
11111111111111111111111 1111111111111111111 1
J 1 J 1 1 1 1 1 1 1 1 1 1

-
- = S_ ACD
- 12
一
1
i 1.
Jaiali
J 1
1 1
i 1
5 - ar
aillgll 1
1 1
gabai juaai gao Jala 1
-
Lgulw Lg wBbBbBg jzjzjzj
eLi - 1
J 1
.
aegai buaia -
LgIgIgIgIgIgIgIgIgIgIgIgIgIgIgIgIgIgIgIgIgIgIgIgIgIgIgIgIgIgIgIg
-
jlll jllg, 111111111
a
1
y
()
y
()
1
Jalll ic aolis o y
iie g 1000
(D)()Jolal JjllgSjI 1y1Jolal Jjlly1p
y1pduuuiy. 1iSoll aalnlae gdyjduy
L
E
1
2
iJ 10
A
13
a 1
gaaagaaaegaae g jai
4
420 1
.
J 5
j.① jj j j 1
.

1
ar-9 4a
:
j 1
:
一
- el je
- 58( x - 1) ^2 + 4 = 0
-()
- = 0
- 2x = 0
j 5:1
.
1
.(Turbo)
A
.(Turbo)
1%0
2:
auiuui 1 10g
J 1
:
- 12a + b + c = 0
- ( 43j) 13j
- 58( x - 1) ^2 + 4
1
12
1
1
S OBC = S COD + S BOC - S BOC
.
5.2.2.1
.(Turbo)
.0jU 1i jnnnne aiee J
2:
3 - ar
(XL L)

| ### | ### |
| ### | ### |
| ### | ### |
| ### | ### |
| ### | ### |
| ### | ### |
| ### | ### |
| ### | ### |
| ### | ### |
| ### | ### |
| ### | ### |
| ### | ### |
| ### | ### |
| ### | ### |
| ### | ### |
| ### | ### |
| ### | ### |
| ### | ### ### |

Thank you for buying a Bosch Home Appliance!
Register your new device on MyBosch now and profit directly from:
- Expert tips & tricks for your appliance
- Warranty extension options
- Discounts for accessories & spare-parts
- Digital manual and all appliance data at hand
- Easy access to Bosch Home Appliances Service
Free and easy registration - also on mobile phones:
www.bosch-home.com/welcome
BOSCH HOME APPLIANCES SERVICE
Looking for help? You'll find it here.
Expert advice for your Bosch home appliances, need help with problems or a repair from Bosch experts.
Find out everything about the many ways Bosch can support you:
www.bosch-home.com/service
Contact data of all countries are listed in the attached service directory.