
MUM56740 - Food Processor BOSCH - Free user manual and instructions
Find the device manual for free MUM56740 BOSCH in PDF.
User questions about MUM56740 BOSCH
0 question about this device. Answer the ones you know or ask your own.
Ask a new question about this device
Download the instructions for your Food Processor in PDF format for free! Find your manual MUM56740 - BOSCH and take your electronic device back in hand. On this page are published all the documents necessary for the use of your device. MUM56740 by BOSCH.
USER MANUAL MUM56740 BOSCH
1 Päckchen Backpulver
125 ml Milch
Congratulations on the purchase of your new BOSCH appliance. In doing so, you have opted for a modern, high-quality domestic appliance. You can find further information about our products on our web page.
Contents
| For your safety | 16 |
| Overview | 18 |
| Operation | 20 |
| Cleaning and servicing | 23 |
| Storage | 23 |
| Troubleshooting | 23 |
| Application examples | 24 |
| Optional accessories | 26 |
| Disposal | 28 |
| Warranty conditions | 28 |
For your safety
Before use, read these instructions carefully in order to become familiar with important safety and operating instructions for this appliance. If the instructions for correct use of the appliance are not observed, the manufacturer's liability for any resulting damage will be excluded. This appliance is designed for processing normal household quantities in the home or similar quantities in non-industrial applications. Nonindustrial applications include e.g. use in employee kitchens in shops, offices, agricultural and other commercial businesses, as well as use by guests in boarding houses, small hotels and similar dwellings. Use the appliance for processing normal quantities of food for domestic use. Do not exceed permitted maximum quantities (see "Application examples"). This appliance is suitable for mixing, kneading and beating food. It must not be used for processing other objects or substances. Other applications are possible if the accessories approved by the manufacturer are used. Use the appliance with original accessories only. When using the accessories, follow the enclosed operating instructions. Please keep the operating instructions in a safe place. If passing on the appliance to a third party, always include the operating instructions.

General safety instructions
Electric shock risk
The appliance must not be used by children. The appliance and its power cord must be kept away from children.
Appliances can be used by persons with reduced physical, sensory or mental capabilities or lack of experience and knowledge if they have been given supervision or instruction concerning use of the appliance in a safe way and if they understand the hazards involved.
Children shall not play with the appliance. Do not leave the running appliance unattended.
en
Connect and operate the appliance only in accordance with the specifications on the rating plate. Only use indoors. Do not use the appliance if the power cord and/or appliance are damaged.
Before replacing accessories or additional parts, which move during operation, switch off the appliance and disconnect from the power supply. Always disconnect the appliance from the supply if it is left unattended and before assembling, disassembling or cleaning.
Do not place the power cord over sharp edges or hot surfaces.
To prevent injury, a damaged power cord must be replaced by the manufacturer or his customer service or a similarly qualified person. Only our customer service may repair the appliance.
Safety instructions for this appliance
Risk of injury
Risk of electric shock!
Do not insert mains plug until all preparations for working with the appliance are complete.
Never immerse the base unit in liquid or hold under running water.
Do not use a steam cleaner.
Do not adjust the swivel arm while the appliance is switched on.
Wait until the drive has come to a standstill.
Do not change tool/accessory until the drive is at a standstill - when the appliance is switched off, the drive continues running briefly.
Use only the rotary switch to switch the appliance on or off.
When the appliance is not in use, pull out the mains plug.
Before eliminating a fault, pull out the mains plug.
Risk of injury from the rotating tools!
Keep hands clear of rotating parts. While the appliance is operating, never place fingers in the mixing bowl. Attach the cover (12) before operating the appliance!
Do not change tools until the drive has come to a standstill – when the appliance is switched off, the drive continues running briefly and stops in the tool change position. Do not move the swivel arm until the tool has come to a standstill. For reasons of safety the appliance cannot be operated unless unused drives are covered with drive guards (5, 8).
Before attaching/removing the continuous-feed shredder, wait until the drive has come to a standstill and pull out the mains plug. Do not reach into the feed tube.
Risk of injury from sharp blades!
Do not grip the sharp blades or edges of the cutting discs. Take hold of cutting discs by the edge only. Do not touch blender blades with bare hands.
en
Risk of injury from sharp blades/rotating drive!
Never place fingers in the attached blender! Do not remove/attach the blender until the drive is at a standstill! Operate the assembled blender only and with the lid attached.
Risk of scalding!
If processing hot liquids, steam escapes through the funnel in the lid.
Add a max. 0.5 litres of hot or frothing liquid.
Important!
Use the appliance with original accessories only. When using the accessories, follow the enclosed operating instructions.
Use only one tool or accessory at any one time.
Explanation of the symbols on the appliance or accessory


Follow the instructions in the operating instructions.
Caution! Rotating blades.
Caution! Rotating tools.
Do not place fingers in the feed tube.
Safety systems
Start lock-out
See "Operating positions" table.
The appliance can be switched on in pos. 1 and 3 only:
-
when the bowl (11) has been inserted and turned until it locks into place and
-
the blender drive cover has been attached (8).
Restart lock-out
If the power is interrupted, the appliance remains switched on but the motor does not start running again when the power is restored. To switch the appliance on again, turn the rotary switch to 0/off, then switch on.
Overload protection
If the motor switches itself off while the appliance is being used, the overload protection feature has been activated.
A possible cause may be that too much food was processed at one time.
If a safety system is activated, see "Troubleshooting".
The operating instructions describe several models, see also overview of models Fig. 1). The appliance requires no maintenance.
Overview
Please fold out the illustrated pages. Fig. A
Base unit
1 Release button
2 Swivel arm
"Easy Armlift" function to support the upward movement of the arm (see "Work positions").
3 Rotary switch
When the appliance has been switched off (position 0/off), the appliance runs automatically to the optimum position for changing the tools.
MUM52...
0/off = Stop
M = Instantaneous switching at maximum speed, hold switch for required blending duration.
Settings 1-4, Operating speed:
1 = low speed - slow,
4 = high speed - fast.
M = Instantaneous switching at maximum speed, hold switch for required blending duration.
Settings 1-7, Operating speed:
1 = low speed - slow,
7 = high speed - fast.
4 On/Off display (MUM54/.55/.56.)
Is lit while the appliance is operating (rotary switch on M or 1-7).
Flashes if the appliance has been operated incorrectly, the electronic fuse has tripped or the appliance is defective - see section "Troubleshooting".
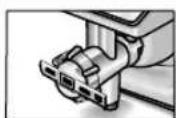
5 Drive cover
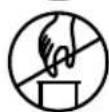
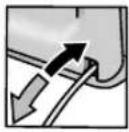
To remove the drive cover, press on the rear area and remove cover.
6 Drive for
-
Continuous-feed shredder and
-
Citrus press (optional accessory *).
When not in use, attach the drive cover.
7 Drive for tools (stirrer, whisk, kneading hook) and mincer (optional accessory *)
8 Blender drive cover
9 Drive for blender (optional accessory*)
When not in use, attach the blender drive cover.
0 Cord store
MUM52/.MUM54.:
Stow the cord in the cord store
MUM55/.MUM56..
Automatic cord winder
Bowl with accessories
11 Stainless steel stirring bowl
12 Lid
Tools
13 Stirrer
14 Whisk
15 Kneading hook with dough deflector
16 Accessories bag
For storage of the tools and cutting discs.
Continuous-feed shredder
17 Pusher
18 Cover with filling shaft
19 Cutting discs
19a Reversible slicing disc - thick/thin
19b Reversible shredding disc - coarse/fine
19c Grating disc - medium-fine
20 Disc holder
21 Housing with outlet opening
Blender
22 Blender jug
23 Lid
24 Funnel
- If an accessory is not included in the product package, it can be purchased via the trade or customer service.
Operating positions Fig. 1

Attention!
Before operating the appliance, attach the tool/accessory to the correct drive and in the correct position and place in the operating position according to this table.
The swivel arm must be engaged in every operating position.

Note:
The swivel arm features an "Easy Armlift" function which supports the upwards movement of the swivel arm.
Selecting the operating position:
- Press the Release button and move the swivel arm.
Support movement with your hand.
- Move the swivel arm until it engages in the required position.
| Position | Drive MUM52.. | MUM54.. MUM55.. MUM56.. | |
| 1 | 7 | 1-4 1-4 1-2 1-3 | |
| 2 | 7 | * | - |
| 3 | 6 | 2-4 2-3 3-5 | |
| 3-4 5-7 | |||
| 4 | 7 | 3-4 5-7 |
- Insert/remove whisk, stirrer or kneading hook. Add large quantities of ingredients.
en
Operation

Risk of injury!
Do not insert mains plug until all preparations for working with the appliance are complete.
Attention!
Do not operate the appliance without an accessory/tool in the operating position. Do not operate the appliance empty. Do not expose appliance or accessories to heat sources. Parts are not microwave-safe.
Before operating the appliance and accessories for the first time, clean thoroughly; see "Cleaning and servicing".

Important information
In these instructions for use the recommended reference values for the operating speed refer to appliances with a 7-setting rotary switch. For appliances with a 4-setting rotary switch you can find the values in brackets after the values for a 7-setting rotary switch.
These operating instructions contain a sticker with reference values for the operating speed of the appliance when using the tools or accessories.
We recommend attaching this sticker to the appliance (Fig. 9).
Preparation
- Place the base unit on a smooth, clean surface.
Pull out the power cord (Fig. 1).
MUM52./MUM54..
Cord store:
Pull out cable to the required length.
MUM55../MUM56..
Automatic cord winder: Pull out the cord in one go to the required length (max. 100cm ) and slowly release the cord is locked.
Reducing the cord length:
Pull gently on the cord and allow it to roll up to the required length. Then gently pull the cord again and slowly release; the cable is locked.
Warning!
Do not twist the cord when inserting it. If the appliance features an automatic cord winder, do not insert the cord manually. If the cord jams, pull out the cord all the way and then allow it to wind up.
- Insert the mains plug.
Bowl and tools

Risk of injury from rotating tools
While the appliance is operating, never place fingers in the mixing bowl. Attach the cover (12) before operating the appliance! Do not change tools until the drive has come to a standstill - when the appliance is switched off, the drive continues running briefly and stops in the tool change position. Do not move the swivel arm until the tool has come to a standstill.
For reasons of safety the appliance may only be operated when unused drives have been covered with drive guards (5, 8).

Attention!
se bowl with this appliance only.
Stirrer (13)
for stirring dough, e.g. cake mixture

Whisk (14)
for whisking egg whites, cream and light dough, e.g. sponge mixture
Kneading hook (15)
for kneading heavy dough and mixing in ingredients that ought not be cut (e.g. raisins and chocolate chips)

Working with the bowl and the tools Fig. 3
- Press the Release button and move the swivel arm to position 2.
-
Insert the bowl:
-
Tilt the bowl forwards and then set it down.
-
Turn anti-clockwise until it locks into place.
-
Depending on the processing task, insert the stirrer, whisk or kneading hook until it locks into position.
Note:
If using the kneading hook, rotate the dough deflector until the kneading hook can lock into position (Fig. E-4b).

en
- Put the ingredients to be processed into the bowl.
- Press the Release button and move the swivel arm to position 1.
- Attach the cover.
- Set the rotary switch to the desired setting.
Our recommendation:
- Stirrer: first stir in at setting 1 (1), then select setting 7 (4)
-Whisk: setting74),mix in at setting11 - Kneading hook: first stir in at setting 1 (1), knead at setting 3 (2)
Adding more ingredients
-
Switch off the appliance with the rotary switch.
Add more ingredients through the feed tube in the cover. or -
Remove lid.
- Press the Release button and move the swivel arm to position 2.
- Add ingredients.
After using the appliance
- Switch off the appliance with the rotary switch.
- Remove mains plug.
- Remove lid.
- Press the Release button and move the swivel arm to position 2.
- Take the tool out of the drive.
- Remove the bowl.
- Clean all parts, see "Cleaning and servicing".
Continuous-feed shredder

Risk of injury
Do not grip the sharp blades or edges of the cutting discs. Take hold of cutting discs by the edge only.
Before attaching/removing the continuous-feed shredder, wait until the drive has come to a standstill and pull out the mains plug.
Do not reach into the feed tube.
Warning!
The continuous-feed shredder must be completely assembled before use. Never assemble the continuous-feed shredder on the base unit.
Operate the continuous-feed shredder in the indicated operating position only.
Predetermined breaking point Fig. 1
The built-in predetermined breaking point protects the drive of the appliance. If an overload occurs, the drive shaft of the continuous-feed shredder breaks. However, the drive shaft can easily be replaced.
A new disc holder with drive shaft is available from customer service.
Reversible slicing disc - thick/thin for slicing fruit and vegetables.
Process at setting 5 (3).
Designation on the reversible slicing disc: "1" for the thick slicing side
"3" for the thin slicing side
Warning!
The reversible slicing disc is not suitable for slicing hard cheese, bread, rolls or chocolate.
Slice boiled, waxy potatoes only when they are cold.
Reversible shredding disc - coarse/fine
for shredding vegetables, fruit and cheese, except for hard cheese (e.g. Parmesan).
Processing at setting 3 (2) or 4 (3).
Designation on the reversible shredding disc:
"2" for the coarse shredding side "4" for the fine shredding side
Warning!
The reversible shredding disc is not suitable for shredding nuts. Shred soft cheese with the coarse side only at setting 7 (4).
Grating disc - medium-fine
for grating raw potatoes, hard cheese (e.g. Parmesan), cooled chocolate and nuts. Process at setting 7 (4).
Warning!
The grating disc is not suitable for grating soft cheese and cheese slices.
Working with the continuous-feed shredder Fig. G
- Press the Release button and move the swivel arm to position 2.


en
-
Insert the bowl:
-
Tilt the bowl forwards and then set it down.
- Turn anti-clockwise until it locks into place.

- Press the Release button and move the swivel arm to position 3.
- Remove drive cover from the drive of the continuous-feed shredder (Fig. 6-5a).
- Hold disc holder at the lower end, ensuring that the two tips are face up.
- Carefully place the required slicing or shredding disc onto the tips of the disc holder (Fig. 6-6a). In the case of reversible discs, ensure that the required side is face up.
- Grip disc holder at the upper end and insert into the housing (Fig. G-6b).
- Attach the cover (note mark) and turn all the way in a clockwise direction.
- Place continuous-feed shredder on the drive and rotate all the way in a clockwise direction, as illustrated in Fig. 6-8.
- Turn rotary switch to recommended setting.
- Put food to be processed in the feed tube and push down with the pusher.
Warning!
Prevent the cut ingredients from building up in the outlet opening.
Tip: To ensure even cutting results, process thin ingredients in bunches.
Note: If the food to be processed sticks in the continuous-feed shredder, switch food processor off, pull out mains plug, wait until the drive comes to a standstill, remove cover from the continuous-feed shredder and empty feed tube.
After using the appliance
- Switch off the appliance with the rotary switch.
- Rotate the continuous-feed shredder in an anti-clockwise direction and remove.
- Rotate the lid in an anti-clockwise direction and remove.
- Remove disc holder with disc. To do this, press finger from below against the drive shaft (Fig. H).
Clean parts.
Blender

Risk of injury from sharp blades/ rotating drive!
Never place fingers in the attached blender! Do not remove/attach the blender until the drive is at a standstill! Operate the assembled blender only and with the lid attached.

Risk of scalding!
If processing hot liquids, steam escapes through the funnel in the lid. Add a max. 0,5 litres of hot or frothing liquid.
Warning!
Blender may be damaged. Do not process deep-frozen ingredients (except ice cubes). Do not operate blender when empty.
Working with the blender Fig. 1
- Press the release button and move the swivel arm to position 4.
- Remove the blender drive cover.
- Attach blender jug (mark on the handle on mark on the base unit) and turn all the way in an anti-clockwise direction.
- Add ingredients.
Maximum amount of liquid = 1.25 litres; maximum amount of frothing or hot liquids = 0.5 litres;
Optimal processing capacity - solids = 50 - 100g
- Attach the cover and turn anti-clockwise all the way into the blender handle.
The cover must be locked in position. - Set the rotary switch to the desired setting.
Adding more ingredients Fig. 1-8
- Switch off the appliance with the rotary switch.
- Remove the lid and add ingredients or
- remove the funnel and gradually add solid ingredients through the refill opening
or
- pour liquid ingredients through the funnel.


en
After using the appliance
- Switch off the appliance with the rotary switch.
- Rotate the blender in a clockwise direction and remove.
Tip: It is recommended to clean the blender immediately after use.
Cleaning and servicing
Attention!
Do not use abrasive cleaning agents.
Surfaces may be damaged.
Cleaning the base unit

Risk of electric shock!
Never immerse the base unit in water or place under running water. Do not use a steam cleaner.
- Remove mains plug.
- Wipe the base unit and drive cover with a damp cloth. If required, use a little detergent.
- Then dry the base unit.
Cleaning the bowl and tools
The bowl and tools are dishwasher-proof. Do not wedge plastic parts in the dishwasher, as they could be permanently deformed during the washing process!
Cleaning the continuous-feed shredder All parts of the continuous-feed shredder are dishwasher-proof.
Tip: To remove the red film after processing e.g. carrots, pour a little cooking oil on a cloth and rub the film off the continuous-feed shredder (not the cutting discs). Then rinse the continuous-feed shredder.
Cleaning the blender

Risk of injury from sharp blades!
Do not touch blender blades with bare hands.
The blender jug, lid and funnel are dishwasher-proof.
Tip: After processing liquids, it is often sufficient to clean the blender without removing it from the appliance. Pour a little water and washing-up liquid into the attached blender. Switch on the blender for several seconds (setting M). Pour out the water and rinse out the blender with clear water.

Important information
If required, clean accessories bag. Follow care instructions in the bag.
Storage

Risk of injury!
When the appliance is not in use, pull out the mains plug.
Fig. K
- Store tools and cutting discs in the accessories bag.
- Keep accessories bag in the bowl.
To store in the original packaging, see Fig. 1.
Troubleshooting

Risk of injury!
Before eliminating a fault, pull out the mains plug.

Important information for MUM54./. MUM55./MUM56..
The Operating indicator flashes if the appliance has been operated incorrectly or the electronic fuse has tripped or the appliance is defective.
The swivel arm must be engaged in every operating position.
Initially try to eliminate the problem which has occurred with the help of the following information.
Fault
Appliance does not start.
Remedial action
- Check the power supply.
- Check the mains plug.


en
- Check swivel arm. Correct position? Engaged?
- Screw on blender or bowl as far as possible.
- Attach the blender cover and screw on as far as possible.
- Attach drive cover to unused drives.
- The safety lock is active. Switch appliance to 0/off and then back to the required setting.
Fault
Appliance switches off during use.
The overload protection feature has been activated. Too much food was processed at one time.
Remedial action
- Switch off the appliance.
- Reduce processing quantity. Do not exceed permitted maximum quantities (see "Application examples").
Fault
While the drive was running, the release button was inadvertently pressed.
The swivel arm moves up. The drive switches off, but does not stop in the tool change position.
Remedial action
Set the rotary switch to 0/off.
- Move swivel arm to position 1.
- Switch on appliance (setting 1).
- Switch off appliance again. Tool stops in tool change position.
Fault
Blender does not start working or stops during use, the drive is "humming". Blade is blocked.
Remedial action
- Switch off the appliance and pull out the mains plug.
- Detach the blender and remove the obstruction.
- Re-attach the blender.
- Switch on the appliance.

Important information
If the fault cannot be eliminated, please contact customer service.
Application examples
Whipped cream
100g-600g
Whip cream with the whisk for 112 to 4 minutes at setting 7 (4) depending on the quantity and properties of the cream.
Egg white
1 to 8 egg whites
- Beat egg white with the whisk for 4 to 6 minutes at setting 7 (4).
Sponge mixture
Basic recipe
2 eggs
2-3 tbs. hot water
100 g sugar
1 packet of vanilla sugar
70 g flour
70 g cornflour
Baking powder if required
-
Beat the ingredients (except flour and cornflour) with the whisk for approx. 4-6 minutes at setting 7 (4) until frothy.
-
Rotate switch to setting 1 (1) and spoon in the sifted flour and cornflour within approx. 12 to 1 minute.
Maximum quantity: 2 × basic recipe
Cake mixture
Basic recipe
3-4 eggs
200-250 g sugar
1 pinch of salt
1 packet of vanilla sugar or peel from 12 lemon
200-250 g butter or margarine (room temperature)
500 g flour
1 packet of baking powder
125 ml of milk
- Mix all ingredients with the stirrer for approx. 12 minute at setting 1 (4), then for approx. 3-4 minutes at setting 7 (4).
Maximum quantity: 1,5 x basic recipe
Short pastry
Basic recipe
125 g butter (room
temperature)
100-125 g sugar
1 egg
1 pinch of salt
A little lemon peel or vanilla sugar
250 g flour


en
Baking powder if required
Using the stirrer, process all ingredients for approx. 12 minute at setting 1 (1), then for approx. 2-3 minutes at setting 6 (3).
From 500g flour:
- Knead the ingredients with the kneading hook for approx. 12 minute at setting 1 (1), then for approx. 3-4 minutes at setting 3 (2).
Maximum quantity: 2 × basic recipe
Yeast dough
Basic recipe
500 g flour
1 egg
80 g fat (room temperature)
80 g sugar
200-250 ml lukewarm milk
25 g fresh yeast or 1 packet of dried yeast
Peel of 12 lemon
1 pinch of salt
- Process all ingredients for approx. 12 minute at setting 1, then for approx. 3-6 minutes at setting 3 (2) using the kneading hook.
Maximum quantity: 1,5 x basic recipe
Pasta dough
Basic recipe
300 g flour
3 eggs
1-2 tbs. (10-20 g) cold water as required
- Process all ingredients for approx. 3-5 minutes at setting 3 (2) until a dough forms.
Maximum quantity: 1,5 x basic recipe
Bread dough
Basic recipe
750 g flour
2 packets of dry yeast
2 tsp. salt
450-500 ml warm water
Process all ingredients for approx. 12 minute at setting 1, then for approx. 4-5 minutes at setting 3 (2) using the kneading hook.
Mayonnaise
2 eggs
2 tsp. mustard
1/4 oil
2 tbs. lemon juice or vinegar
1 pinch of salt
1 pinch of sugar
Ingredients must be at the same temperature.
-
Process the ingredients (except the oil) in the blender for several seconds at setting 3 (2) or 4 (3).
-
Switch the blender to setting 7 (4) and slowly pour the oil through the funnel and mix until the mayonnaise emulsifies.
Eat the mayonnaise immediately, do not store.
Honey bread spread
30 g butter (from refrigerator, 7^ )
190 g honey (from refrigerator, 7^ )
- Cut butter into small pieces and put into the blender.
- Add honey and blend for 15 seconds at setting 7 (4).


en
Optional accessories
MUZ5ZP1
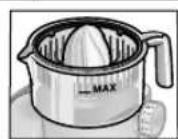
Citrus press
For squeezing oranges, lemons and grapefruits.
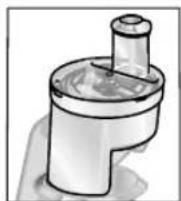
MUZ5CC1
Dicer
For cutting fruit and vegetables into equally sized cubes
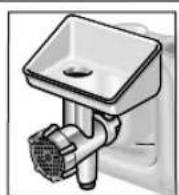
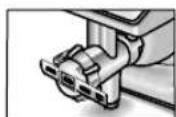
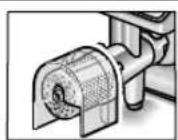
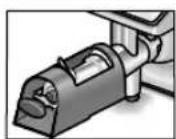
MUZ5FW1
Mincer
For cutting fresh meat for steak tartare or meat loaf.
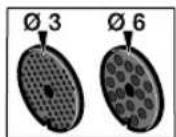
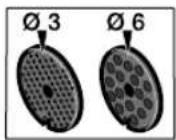
MUZ45LS1
Perforated disc set fine (3 mm), coarse (6 mm)
For the mincer MUZ5FW1.
Fine disc for pasties and spreads, coarse disc for sausages and bacon.
MUZ45SV1
Viennese whirl attachment
For the mincer MUZ5FW1.
With metal template for 4 different pastry moulds.
MUZ45RV1
Grater attachment
For the mincer MUZ5FW1.
For grating nuts, almonds, chocolate and dried bread rolls.
MUZ45FV1
Juicer attachment
For the mincer MUZ5FW1.
For pressing soft fruit, except raspberries, tomatoes and rose hips, to a pulp. At the same time e.g. currants are automatically stemmed and pitted.
MUZ45PS1
Chipper disc
For the continuous-feed shredder MUZ5DS1.
For slicing raw potatoes for chips.

MUZ45AG1
Asian vegetable disc
For the continuous-feed shredder MUZ5DS1.
Slices fruit and vegetables into fine strips for Asian vegetable dishes.


en
| MUZ45RS1 Grating disc coarse | For the continuous-feed shredder MUZ5DS1. For grating raw potatoes, e.g. for potato pancakes or dumplings. | |
| MUZ45KP1 Potato fritter disc | For the continuous-feed shredder MUZ5DS1. For grating raw potatoes for rostis and potato fritters, for cutting fruit and vegetables into thick slices. | |
| MUZ5ER2 Stainless steel stirring bowl | Up to 750 g of flour plus ingredients can be processed in the bowl. | |
| MUZ5KR1 Plastic mixing bowl | Up to 750 g of flour plus ingredients can be processed in the bowl. | |
| MUZ5MX1 Plastic blender attachment | For blending drinks, for pureeing fruit and vegetables, for preparing mayonnaise, for cutting fruit, nuts, for crushing ice cubes. | |
| MUZ5MM1 Multi-mixer | For chopping herbs, vegetables, apples and meat, for shredding carrots, radishes and cheese, for grating nuts and cooled chocolate. |
If an accessory is not included in the product package, it can be purchased via the trade or from customer service.
en
Disposal
This appliance is identified according to the European guideline 2012/19/EU on waste electrical and electronic equipment - WEEE.
The guideline specifies the framework for an EU-wide valid return and re-use of old appliances.
Please ask your dealer or inquire at your local authority about current means of disposal.
Warranty conditions
The guarantee conditions for this appliance are as defined by our representative in the country in which it is sold.
Details regarding these conditions can be obtained from the dealer from whom the appliance was purchased.
The bill of sale or receipt must be produced when making any claim under the terms of this guarantee.
fr
Prudence! Lames rotatives.

Prudence! Accessoires rotatifs.
Sécurité anti-surcharge
MUZ5ZP1 Presse-agrumes
4" for den fine raspside OBS!
Vende-raspskiven er违法犯罪 til rasping af nodder. Blod ost ma kun raspes pa den grove side pa trin 7 (4).
Riveskive - middelfin
MUZ45RV1 Rivcylinder
- Colocar el recipient:
e as ferramentas Fig. 1
13 Epyaaleio avoaeuans
14 Epyaia xTunmuToC
15 Epyaaleio zmuwaoToc m Tepaxio axoanc zuu
16 OnKn EApTnpaw
Tn Tn 0uAeN Twv Epyaew Kai Twv
biokw konnc.
KoΦtns biapkeia
17 NIEOTnC
18 KaTakki eXwvi nPwoonc
19 Diokoi Konin
19a iokoc konnc doo nAeupov - xovtpo/psiO kOpsiO
Epyaleio xTunmuToC (14)
TIA TO xTuINmu aepEykac, oavTIy i Kai YIA TO xTuINmu eAaPpiAc zmuic, n. X. Zmu nIIOKOTou.

Epyaaleo zmuomegaoc (15)
Tia to zmuwα Bapicc zuuK Kai yia Tny avauiE n uikwv, ta oioia dev npTei va konouv (n. x. otaxipdec, KokoAxtac)

Hpokxio-tnλ:2810-321.573
KunpoC: Apx. Makoipou 39, Eykwun
Aeukwaia - Foaykntpio Tnλ.: 77778007


tr
(Doner salter M veya 1-7).
Bosch Bosch Bosch Bosch Bosch Bosch Bosch Bosch Bosch Bosch Bosch Bosch Bosch Bosch Bosch Bosch Bosch Bosch Bosch Bosch Bosch Bosch Bosch Bosch Bosch Bosch Bosch Bosch Bosch Bosch Bosch Bosch Bosch Bosch Bosch Bosch Bosch Bosch Bosch Bosch Bosch Bosch Bosch Bosch Bosch Bosch Bosch Bosch Bosch Bosch Bosch Bosch Bosch Bosch Bosch Bosch Bosch Bosch Bosch Bosch Bosch Bosch Bosch Bosch Bosch Bosch Bosch Bosch Bosch Bosch Bosch Bosch Bosch Bosch Bosch Bosch Bosch Bosch Bosch Bosch Bosch Bosch Bosch Bosch Bosch Bosch Bosch Bosch Bosch Bosch Bosch Bosch Bosch Bosch Bosch Bosch Bosch Bosch Bosch Bosch Bosch
Orun Ismi
Din Hiku
Muri Mitsu
Kiyoh Kiyoh
Cay Saito
Bam Narayan
Suei Taku
Suei Taku
Kata Mitsu
Makinas
Kesisi
Kazatma Mak,
Kus (Ketile)
R Robotu
Odegimeri
Makinas
Urumta Mak
Makinas
Clyte Siskag
Tartesi
Bak Sag Masa
Tü Supurgesi
Her
Eki Bendirici
Evya Siskag
Aletleri
Belge Numaras:
86094 29.06.2010
86018 29.06.2010
86095 29.06.2010
86099 29.06.2010
87040 13.07.2010
87042 13.07.2010
85999 29.06.2010
86102 29.06.2010
86035 29.06.2010
86067 29.06.2010
86104 29.06.2010
86037 29.06.2010
89990 26.08.2010
87182 15.07.2010
87404 16.07.2010
87187 26.07.2010
87180 15.07.2010
87182 15.07.2010
87181 15.07.2010
58537 05.08.2010


Degerli Musterimiz
He KopnctyBaTnca npooounyBaueM.
He nepectabJrTn noBOpOTn BaKjIb, nOKn npnaB BViMKeHn.
3auekaTcna NOBHO 3yNnHKn npBOdy.
HacaKn/npnaIaI MoXHa MiHTu TIlbKn NiCJI 3yINHKn npNBOy - npNBID npOIOBKyE pyxATNC Ie DeAkn Yac NiCJI BIMKHeHHA.
PpHJaB BMnKaTu Ta BmNkATo BNKIOUHO NOBOPOTHM NepemHKaueM.
Pn HeBnKOpncTaHHi npnilady BnHrTn wTeNcIbHy BnIky 3 po3eTKn.
BnHrTn 7TeNcEbnHy BnKy 3 po3eTKn nepeD Tm, k npncTypaTn do yCyHeHHr HEnoJaKn.
uk
He6e3neka npaHennr o6epTOBmN HacaKaMn!
He TopkaTnca ObeptOBnx DeTalei. Iid yac po60TH HikoN He BCTpOMJrTH pyKn Do yaSi. PpaHOBaTH NlWe 3i BCTaHOBJeHOIO KpnUkoHO (12)!
Hacadkn Moxha Minr TiiBkn nicJ 3ynnKn npBOdy - npVBid npoobkye pyxatncn ige deAkn yac nicBnMKHeHH Ta 3ynnReTbcB noloxeHHI dJy 3mHi HacaDok. BaKilb pyxatn Inwe nicna NOBHOi 3ynnHKn Hacadkn.
3 MipkyBaHb 6e3neKn npnaJ moKHa eKcnnyaTyBaTH nIWe, kKIO npNBOi, kI He BnKOpNCTOBHyOTbcra, 3aKpNTi 3axnCHmN KpnUkamn dIy npNBoiB (5,8).
BaratoФункioHaJIbHy Hapi3ky MoKHa BCTaBJIaTH/3HIMaTH TINbKn nicra 3yynHKn npNBOdy i nicra BmMaHHa BUNKn 3 po3ETKn. He BcTpOMJrN pyk Do npHOMHO6yHkepy.
He6e3neKa npaHennr roCTpIMN HOXAMN!
He TopkaTnca roctpnx HOXIB i KaHTiB DnCKiB dIa noDipeHHeHH.
ДиСКДЯ NOДPI6HeHЯ MOЖHa 6paTn TINbKN 3a KpaI!
He topkaTnca HOXIB 6JIeHepa OOrJeHmN pyKaMn.
He6e3neKa npaehnra roctpmm HOXAMN/O6epTOBm npHBODom!
Hikon He BCTpOMnT pyK Do BCTaHOBneHoro 6JeHepy! BJeHep MOxHa 3HiMaTH/BCTaHOBnIOBaTH TiIbKN NiCJN 3yNNHKn npBOdy! BJeHep MOxHa BnKOpNCTOByBATn TiIbKN y 3iOpaHOMy CTAHI Ta 3i BCTaHOBNeHOIO KpnUkoIO.
He6e3neKa OwnapIOBaHHa!
Пд час посябкг rapячх пpoуктВ 6лендepi 3 ВоронКВ кршци вистураe пapa. 3anOBHOBaTN MaKcHmYm 0,5 Лтпв rapячоia60 пин stoi piinn.
BaKJIbBO!
PpnaM OXHa BnKOpNCTOBByBaTH NlUe 3 OpnHaJIbHm npuaIaIaM.
Ipn BnKOpNCTaHHI npnaDЯ cIiD dOtpnMyBaTnCRA OdaHnx Ihctpykui 3 BnKOpNCTaHH. OndohacHO MOxHa KOpNCTyBaTnCRA TIlbKn Ondie HacaKOHO a6o ODHm PnpnaDЯM.

POnsHeHHcMbOJIb Ha npilaI a6o npilaIaI

ДотримуbatисьВka3iBOK iHCTpyKu3 BnKOpncTaHHa.

ObepeKHo! ObeptoBi HoxKi.

ObepeKHo! ObeptoBi hacaKn.
He BCTpOMJIaTIpyKdo 3aBaHTaJyBaJIbHOrO OTBOPY.
uk
CnCTemN 6e3neKn
BnokyBaHHH npOTN BBIMKHeHH
INB. Ta6nio «Po6ooyi nOJOKeHHA»
PpnaB BMnKaTbC B noI.13nnse ToDi:
- KONUaHa (11) BCTaBnHeHa i NOBepHyTa B 3aΦIKCOBaHe NONOKeHH Ta
-3axncha Kpnka npBoby 6neHepa (8) 3akpnta.
BLOKYBaHHNoBTOPHOro BBIMKHeHH
Piud nepepBn B noaui ctpmy npna3aIIuHaTbc BAIMKHeHm, ane DBNrH He 3aOoHTbc ni3Hiwe npn noaui ctpmy. IIN NOBTOPHORo BBIMKHeHHy yCTaHOBITb nepemkau Ha O/off, a NOTIM BBIMKHITb.
3axnCT BiD nepeBaHTaKeHHA
B pa3i camocTINHO BmKHeHH DnRyHa nid yac ekcnnyatau, 3axnCT BiD nepeBaHTaXeHHA kTNBOBaHn. Lc moKe 6ytN cnpunHe OndOchHO nepepo6KO1 3aHaTO BeNKoI KInbKOci npOdyKTIB.
3axoB pa3i BBIMKHeHH CnCTeM N 6e3neKn onncahi B po3diN «DOnomora npn HenoaKaX>.
IHa IHctpyK3 BnKOpNCTaHH ONCyE pi3Hi BnKOHaHH npnaDy, DVB. TaKoX ORnA Moene (MaHOnK M). PpnaD He notpe6ye TexHCHOrO dOrnAry.
Kopotkn oIa
Bynb lacka, posrhopHtB CTopiHKN 3 MaJIHOHKaMn. MaJIHOHK A
OCHOBHn6JOK
TayokI3aMiyBaHHI (15)
J3aMiUyBaHHBaxKOro Ticta Ta
NidMiUyBaHHIHrpeiEHTIB,AKI He
NOBHNI NOpi6HOBaTnCra (HaP.:pO3nHOK,
WOKoJaHNx nactib)
Po60Ta 3 yaSeI Ta HacaKaMmMaIIOHOK E
HaTnCHyTH Ha KhoNky po36JIOKYBaHHa Ta nepeBecTH IOBOPOTHm BaKInb B NOJIOKeHHa 2.

- YctaHOBka qa: -BCTaHOBHTN qaUy HaxnHeHO BnepeTa NOCTaBHTn pIBHO, -NOBepHyTN npOTn rOdHHNKOBoi CtpiKN do fikcaui.
B 3aJIeKHOCTi BiD Metn nepepo6Kn BCTaBHTN y npNBiD BIHcNK-MIuaNky, BIHcNK-3bBaNKy YI rauOK dJa 3aMIyBaHHr Do fikcaii. Bka3IBKa: IOBepHITb BiXINIOBaTicTa Ha ray dJa 3aMIyBaHHr TaK, Uo6 rauOK M BBIn T B Na3 (MaJIOHOK E-4b).

uk
3aBaHTaXHTn npOdyKTn dIy nepepo6Kn do yawi.
HaTnCHyTu Ha KhoNkpyo36JOKyBaHHa Ta nepeBecTHIOBOPOTn BaxiNb B NOJXKeHHa1.
BCTaHOBHTN KPNiKy.
BCTaHOBHTIOBOPOTHNIpePMKau Ha bKaHn CTynHb.
Haapaekomehaia:
-BiHnOcK-MiWanKa: cnouatky nepemiuBAtn Ha CTyneni 1 (1),notim BBIMKHyTN CTynih7(4)
-BiHnOK-36uBaJIka: CTynIb 7744, nIMiUyBaTu Ha cTyneHi 1 (1)
-ΓaoukДЯ3amiyBaHHcNooyKBy BMiuyBaTHHa CTyneHi «1» (1),BmiiuYBaTH Ha CTyneHi «3» (2)
DobaHTaXeHHH iHrpeJeHtIB
BmKHyTH npHJa3a DOnOMoTOIO NOBOPOTHO nepEMKaaya.
-ДодаВаТи iHRpeДiEcHTn chepe3 OTBip ДЛЗ 3aBaHTaЖуВaHHB KpNiUci. a60
3HRTKPNWKy.
HaTnCHyTu Ha KhoNkypo36NoKyuBaHH Ta IpeBecTuNOBOpOTn BaKinb B NonoXeHH2.
3aBaHTaXHTn iHrpeDiEHTN.
Picjra po6oTu
BmKHyTn npHua 3a donomoro noBOPoTHOro nepemkaaya.
BnHrTH WTeNCEbHy BnKy 3 pO3eKn.
3HrTKnPnUKy.
HaTnchTyHa KhONky po36IOKyBaHHa Ta IpeBecTH IOBOPHTH BaxiIb B NOJoxeHHA 2.
BnHrTaHacaKy 3 npNBOy.
BnHATn yawy.
- NouncHTN Bci DeTani, DnB. «OunueHHa iD0IJIAD
BaratoyHKioHaJIbHa Hapi3ka
He6e3neKa npaHeHHA
He TopkaTnca roctpnx HOKIB i KaHTIB NCKIB IINI NOpiOHeHH. INCKN IINI NOpiOHeHH MOHHa 6patu TINbKN 3a KpaII! BaratoOyHKUioHaNbHy HApIsKy MOHs BCTaBnATN/3HIMAtu TINbKN IICNA 3yYNHKn PnBODY I NcN BnMaHn BnIKN 3 p03eTKN. He BCTpOMnTn pyk Do npWOMHOro OyHKepy.
ybara!
BaratoyHKioHaBHy Hapi3ky BnKOpHCTOByBatn TInbKn B NobHICTO 3iopaHOMy cTahi. BaratoyHKioHaBHy Hapi3Ky HikOn He 3bpaTH Ha OCHOBHOMy 6noui.
BaratofoyHKUioHaIbHy Hapi3ky BnKOpHCTOByBaTH NIIe B 3a3HaueHOMy pOboOMy nIOXKeHHi.
3axnCT BiD nepeBaHTaXeHHMaIIOHOK
Lio nonepeintn 3NaHni noKoJKeHH npnaB y pa3i nepeBaHTaKeHH
6araToOyHKioHaJIbHOI Hapi3Kn, Ha npBOHOMy Bany 6araToOyHKioHaJIbHOI Hapi3Kn 3po6NeHa HaciYka (MICcE 3aHaHO 3lOMy). V BnPaNky nepeBaHTaKeHH npNBIDHN BaI 3nAmyETbcR B cboMy MiCi. HOBn BAN dJa DnCKIB 3 npNBIDHM BaIOM MoKH naD6aTN B CnyKoi cepBicy.
IBOCTOPOHHII INCK IIN HAPI3aHHH - HA TOBCTI/TOHKI CKIOKNI

IINCK-TeptKa He npuaTHn IJI HAtipaHH M'AKORI i Hapi3Horo CHPY.
Po60Ta 3 6araToΦyHKUioHaJIbHOIO Hapi3KoIO ManIOHOK


HaTnCHyTu Ha KhoNky po36NoKyBaHHa Ta nepeBecTu NOBOPOTNu BaxJB NIOJKeHHa 2.
- YctaHObKa yau: -BCTaHOBHTn YaUy HaxIneHO BnepeTa NoCTaBHTn pIBHo, -IOBepHyTN IpOTN rOINHHNKOBoi CTrIKN Do fikcaii.
HaTnCHyTu Ha KhoNky po36IOnkyBaHHa Ta nepeBecTH IOBOPOTnBaxJB NIOJKeHH3.
3HIMITb 3axnchy KpnuKy 3 npNBOy 6araTOyHKUioHaJIbHOI Hapi3Kn (MaIOHOK-5a).
- TpIMaTn MiUHO TpIMaU dNcKIB 3a HxHHi KHeCb, pRi cBOMy O6uNbBA BnCTyPi NOBHHI BKa3yBaTn Bropy.
BaxKaHn DNCK DnH Hapi3aHHa 60 WATkyBaHH NOKJaITb OepeKHO Ha 3y6u Bala DnH DNCKIB (MaIIOHOK G-6a). PnBnKOpNCtAHHi DBOCTOPOHHX DNCKIB, CTeKHTN 3a TmM, IO6 BaKaHa CTOPOHa BkA3yBaNA BROPY.
Bi3bMitbBanIaNcKIB3aHnKHi KHeCb IBCTaBTe B Kopnyc (MaHHOHK-6b).
BctaHOBTn KpnuKy (3BepHyTu yBary Ha no3HaKy) i NOBepHyTu 3a roDHHNKOBOc TpINKoDo ynpoy.
- YctaHObitb 6araTofoHkuioHaIbHy Hapi3ky Ha npBID TaK,ЯK 3o6paKeHo Ha MaJIIOHKy -8,i NobepHITb II 3a roDHHHO CTPIKKO DO yNopy.
BctaHOBTn NOBOPOTn NEpeMkay Ha peKOMeHDoBaHn CTynIHb.
3aBaHTaKHTn IpoDyKTn IJIr nepepo6Kn B npHOMHn 6yHKeP Ta NiIITOBxByTaN ITOBXaYem.
ybaral
YHKaTH HAKONNUyBaHHH Hapi3AHX npOdyKTt y BnNcKHomY OTBopi.
Iopada: pibHomipnHex peyltatIB TOhki npodykTN nepepo6nTn nykaMn.
Bka3iBa:V pasi 3aTnCHeHH npOdyKtIB nepepo6Kn B 6aratoyHKioHaIbHi Hapi3ci KxOHnn KOMbaH CII D BKNIOHTN, BnHnBnKky 3P0eTK, 3aueKaTH 3ynHKn npINBOy, 3HnT 3 6garatoyHKioHaIbHOI HAp3Kn KpNIkKy i cnycTOuHTn npHOMn 6yHkep.
Picna po60tn
BmKHyTn npnla3a donomoroIO NOBOPOTHO nepemkaaya.
NobepHyTu 6araToOyHKUioHaJIbHy Hapi3Ky npOTn rOdHHNKOBOI cTpiIKu i3HrTN.
- NObepHyTn KpnuKy npOTn rOHHNKOBoi CtpiKn i 3HrtN.
BnHrTn TpMaay DnCKiB pa30m i3 DnCKOM. INa 2bOro HATNCHYTN NaJIbueM 3HN3y Ha npNbiDn BAI (MAIOHOK H).
- Nounctitb detani.
Bn

He6e3neKa npaehHHroCTpMM HOKAMN/OBepTOBMn pHBOOM!
Hikon He BCTpOMnATn pykdo BCTaHOBneHoro 6neHepy! BneHep MOxHa 3HIMATN/BCTaHOBnOBaTn TINbKn Nicra 3ynHKn npNoody! BneHep MoXHa BHKOPNCTOByBaTN TINbkN y 3iopaHOMY CTahi Ta 3i BCTaHOBneHO KpnWkoIO.

Hebe3neka ownapobHnra!
Iiuc nepepo6kn rapuynx npoaytib B 6neHepi3 BOPOHKn B Kpnui BuCTyna napa. 3anOBHKoBaTH MaKcHmym O,5 nitpiB rapaoyi aOo nHHctoi pIDHH.
OuHHeHH OCHOBHOro 6noky

Hebe3nEka BpaXeHHa eNKeTpHMM TOKOM!
Hi B JAKOMy pa3i He 3aHypbObaTH OCHOBHn 6IOK B BODY Ta He TpMaTH nID npOTouHO BOIOJ.
He KopnctyBaTnca npooynuBaaym.
BnHnTn 1eNcIbHy BnKy 3 po3eKn.
IpoTePtn OCHOBHn 6JOK Ta 3axnChy KpnKny npNBOy BOJORO raHupko. 3a notpeOn MoXHa CKOpHCTyBaTnC HEBENKOHO KJIbKICTHMOHOrO 3acOby.
-ПисяцьогорpoTeptn npHnaD hacyxo.
OuHueHHaHJI Ta HacaDOK
YauTa HacaKMOKHa MHTN B NocydomnH MaunHi. He 3aTnckatn PnaCTMaOBI eJeMeHTN B NocydomnH MaunHi, ce MoKe np3BecTN Do ix ctaIoI deOpmauiPiJ Yac MTT!
HueHHa 6aratoyHKioHaJIbHOI Hapi3Kn Bci Detani 6araTOyHKIOHaJIbHOI HAPI3K MoKHAMTNB NOcyDOMNHI MaUNHi.
Iopada: IyuycyeHHaepBOHOHaJIbOtu nicn nepepoKn, HAp., MOpKBn, HaHTn TPOxN xapOBoI OIIHa TKaHHy I npoteTp HEO baratofHKioHaJIbHy HAp3Ky (3a BInHATKOM DnCKIB DNn NOpI6HeHH). NcIeBorO baratofHKioHaJIbHy HAp3Ky cNoJIOCHyTu.
OuHnHHoEHepepy

He6e3neKa Iopaehnra roctpMMHoxkami!
He TopKaTnca HOXIB 6JIeHJepa orOJIeHMn pyKaMn.
Keinx 6JeHepy, KpuKy Ta BOpOHky MOXHa MHTB NocyDomnHiMiunHi.
Iopada: OuHHeHH 6JeHepa nicnnepepoKni piINH qacto Heoob'3KOBO3Himatn Ioro 3 npnaNy. Ia UboRo HaJInTu TPOXn BOn 3 MIOUHM 3acObOM DOBCTAHOBJIeHO 6JeHepa.BBIMKHyN6JeHepHa DeKiNbKa cekyHd (CTynih «M»).
BnNTn noIOckaJIbHy BOy Ta npOMTn 6JeHep YNCTOIO BOIOI.

uk

BaxklnBa Bka3iBka
Cymky nI npnlaIaNoIcTb 3a notpe6n. DOrpmyTeCn peKomeHdaui 3doJIyB Cymci.
36epiraHHH

Hebe3neKa npaHnHa!
Pn HeBnKOpCTaHHI npnaDy BnHATN WTeNCbHy BuNKy 3 P03eTK.
ManhoHok K
- POKnaIb HacaKn i DnCKn Dnna Pndpi6HeHH Do cymkn dnn npnaa.
36epiraTe nIDCTaBky dny npnaDn Byaui - Lioo 36epiraHHB opurihbHi ynaKobci DnBiTBcMaHIOHOK
Дономога пи Ненидкай.

Hebe3neKa npaehnra!
BnHHTN WTeNCeNBHy BNJKy 3 PO3ETKNnepeT Nm, NK PnCTynATn DO yCyHeHHHHeNoJaKn.

BaxklnBa Bka3iBka dna MUM54../MUM55./MUM56..
B pa3i HenonadKn B ynpablinHi npnady, npn cnpaucobahhi enektpoHHoro 3anobixHnka a6o dephiKti npnady 6JnMae iHdkatopHe Ta6No.
Iobopothn Baxinb nobHEn 6ytn 3aipKcoBaHM B na3y B KOxHOMy poOoumy noJoxKeHHi.
Cnpo6ynte cnoatky ycyHyTN BnHnKny npo6IeMy 3a donomoroHO HAcTyNHX BkA3iBOK.
Helenaika
PnJaHbMnKaetbcra.
UcyHeHH HeNoJaKn
- Ipepebiptn noauy ctpmy.
- IpeBipTNuTEnCeIbHy BnKy.
- PpOKoHTpoJIHOte BaKijIb. YI npaBnIbHe NOJokHeH? YI 3aΦiKcOBAHn B na3y?
- BneHnep quaay noBepHitb do ynopy.
BcTaHOBIb KpIMKky 6IeHepy Ta 3aKpyITb Do ynpy.
3aKpHTn 3axNCHM KpuuKaMn npBOOn, Aki He BHKOpNCTOBYOTbcA.
3axnCT BiI NOBtOPHOro BBIMKHeHHaKTNBOBaHn.IpeMkHytn npHaJHa «0/off》,a Notim Ha3aH Na 6aKaHcy CTynHb.
Helenaika
PnnaB BmNkAcTbC nI yac BNKOpCTaHH. 3axnCT BiD nepeBaHTaXeHHaKTNbOBaHn. 3aHaTo 6arato npOdyktibnepepo7nncr ODHoyacHo.
UcyeHHe HEnoJaIKN
BumkhHItb npnla.
3MeHHTKINbKiCTb nepepeo6IOBaHNx npOdyKTIB.He npeBnuyte dOnyctmoi MaKcImaJIbHOI KInbKOCTI npOdyKTIB (DnBITbcR“PpNKJaN dJr BnKOpNCtAHHa)!
Helenaika
Piucpo6oTnpB0dyMMOBiNbHO6yHaHTnCHyTa KhoNka po36NoKyBaHHa.
Iobopothn Baxinb nHimaetbcn DOBepxy. PnBID BmNkacBcA, OHaK, He 3aIIwaaTbcB IIOJKeHHI dJI 3MiHn HacaDok.
UcyneHHH HeNoJaKn
BctaHOBHTN NOBOPOTHNIpeMnKaHa 0 / off
- NobopOTnB BaXJIb npNBEdiTb B nOJKeHHr 1.
BbIMKHytn npnlaad (ctynihb «1»).
- Pnla3HOBy BmKHyTN. HacaKa 3aIIuHaetbC B NOIOKeHHI DIA 3MIHn HacaDOK.
Henonadka
BneHep He nouHae npauBoaTu a6o 3ynnnReTbc nIq uac poBoTu, npuBID «rDntb>. Hix 3a6loKOBaHn.
UcyhenHHeNoIaKn
BmKHytn npnla Ta BnHrTa BnKy 3po3eTkn.
3HTN 6eHep Ta ycyHyTN nepeWKoIy.
3HOBy BCTaBHTN 6JHeHep.
BvIMKHyT npnla.

BaxklnBa Bka3iBka
Akuo Bn He MoKeTe yCyHyTu HEnOnaAdKy TaKIM YINHom, TOni 3BepHiTbcr, 6yNb IacKa, Do cnYk6n cepBicy.
uk
PnKlaDn IaBnKOpncTaHH
36ntiBepuKn
100r-600r

BepuKne nepepo6nTn BiHnKOM- 36nBaJIKOIO 112 -4 XBNHH Ha CTyneHi 7 (4) (B 3aJeKHOCTI BiD KINbKOCTI Ta BnactNBOCTeBepuKIB).
HeuHn 6iJok
BID 1do86iKIB

IhrpeiEHTN NOBHHI MaT N OHaKOBy TEMnepaTyP.

IhrpeiEHTN (Kpim OII) DeKeINbKa cekyHn nepepeoBnB 6neHepi Ha cTyniHi «3» (2) afo «4» (3).
-Блелдерпескolyчт ha CTynihb «7» (4)i 3anBaTn nobilho onio uepe3 BOPOHky -36BaTn Do Tnx nip, POKM MaHOHe3 He emyIbrye.
MaHOHe3 BnKOpNCTaTn AKHaiuBnDushe, He 36epiratn Horo.
MeNoBa 6yTepeOpDHa Maca
30 r BepuKOBoro Macna
(i3xonodnblHnka7°C)
190 r mey (i3 xoJIOHbHnka 7°C)
Bepukobe Macno po3diHn Ha maneHbki MMATOck Ta NOKlaCTn do 6neHepa.
-ДоатMuMeTа36nBaTu15ceKyHHaCTyneni «7»(4).

CneuaJIbHi npIpaIaIaIaI
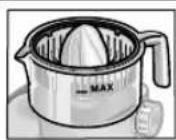
MUZ5ZP1
PpeCnIur nItpycobnx
IINBnAABNIOBAHHcOky3aNEbCnHIB,IMMOHIB i rpeinΦpyTIB.
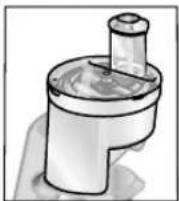
MUZ5CC1
HacaKa dHa HapiaaHH KybKaMa
Hapi3aHHpkykTB Ta OBOyIB Ky6nKamPiBHomipHOI BENuHH
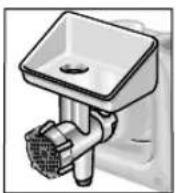
MUZ5FW1
M'ncopyka
IINIOJNOPI6HENH CBIKORMO'M'ACAДNФAPWY TAPTAP aOcCTpab3py6JIeHOroM'Hca.
MUZ45LS1
KoMnIeKT peWitKOBnx DnCKIB dpioHo (3 mm), KpynHO (6 mm)
Дл МссорубMuZ5FW1.
3 MaJIIMM OTBOPAMN dIa NaIeTeTIB Ta 6yTepebOHNX Mac, 3 BEJIHKIMM OTBOPAMN dIa JapeHnx KOBoBaC i c a Ia .
MUZ45SV1
Hacaika nIeYnBa
Дл МсорубMuZ5FW1.
3MetaebmIa6noHOMd4p3HxΦoMneuBa.


uk
OchoBHO6JOK HN B KOEM Cnyae He norgyKaTb B JnKIOCTb N He depKAtb POn IpOTouHOBOD. He nCNoJIb3OBaTb napoouchnteIb. He n3MeHATb PNOJKeHne NOBOPOTHO KPOHHTeHa NOKa np6Op BKIOUeH. DoXdaTbcraonHO octAHOBKn npVBoHa. HacaDN/ npHaADJeXHOCTN MOXHO 3aMeHATb TOJIbKO NocLe OCTAHOBKn npVBoDa - npVBOD DBNXETc eSe HeKOTOpoe Bpemr NocLe BbIKIOUeHn. BKIOUaTb N BblKIOUaTb np6Op MoxHO NCKIOUHTeBlHO C NOMOUsbIO NobOPOTHO nepeKIOUaTeJI. PnHeNCNoJIb3OBaHHnp6Opa N3BLeueb StTeCNcehHyO BVNKY N3 p03ETKN.
Ipeed yctpaHHeHem HeNCnPaBHOCTn 3BLeueb 7TeNCEJIbHyIO BNIky n3 pO3eTK.
Onachoctb TpaBMnpoBaHn8 06 octpbie HOxN!
He Tporatb OCTpbie HOxN I BblCTyIbI DnCKOB-n3MeJIbHTeJe.
DnCKn-n3MeJIbHTeJIb6paTb ToJIbKO 3a KpaJ!
He Tporatb HOxN 6JIeHdepa rOJIbIMn pyKaMn.
Onachoctb TpaBMnObaHnOB octpblc Hoxn/BpaauoHnCn npNBOI
HnkOrda He onyckatb pyKn B yctaHOBHeHHb 6JeHep! BneHep
MOxHo CHmMaTb/YCTaHaBnBaTb TOlbKO NocLe OCTaHOBKn PnpBOda!
BleHep MOxHo nCpONb30BaTb TOlbKO B CObpaHOM BnDe
n C yCTaHOBHeHHo KpbUkO.
Onachoctb ownapBauHnI!
Pn nepepaotke B 6blnepe ropnyx npOdyKTOB uepe3 BOpOHky
B KpbIwKe BbIXoJNT nap. 3aNoJIHTb MaKcMym 0,5 IITpa ropayen
HIn CNlbHOHeHsEeJcKIOCTN.
Baxho!
Pnp6op MOxHO hCnOJb3OBaTb TOJbKO C opnHnHaJIbHbIMn
pnuHaIeXKHOCTAMN. Pn HcNoJb3OBaHNn PpuHaIeXKHOCTe
pyKOBOdCTBOBaTbCAcoTBETCTBYIOUHMn IHCTpyKUAMN NO
3KcPiyaTaun, BXODAUMB KOMPiKeT NOCTABKN.
OndOBpeMeHNO MoxHO hCnOJb3OBaTb TOJbKO OdHy HaCaIky IIN
pnuHaIeXKHOCTb.
ru

Pa3bRcHHe cIMBOIob Ha npIbope nII npHaJdJIeKHOCTaX

Co6HpaTb yka3aHnB INHCTpyKcnn no 3KcPnyatau.

OcToPoxHo!BpaaIounecHoxN.

OctopoJHo!BpaaHouIeScHaCaIKn.
He onyckatb pyky B 3arpy30uHoe OTBepctne.
CnCTembl 6e3OnaCHOCTN
Блokровka Bкlioуеня
Cm. Tabnuy «Paboune noLoKeHna»
Pn6op BkHouaetcB non.1 n 3 TOnbkoBTOM Cnyue:
-ecn CmecntbHaH YaHa (11)
BCTaBHeHa I NOBepHyTa Do ΦNKcaunn I
-3aunTHna KpbIuKa npNBOda 6JeHepa (8) yctaHOBHeHa.
BLOKINPOBKA NOBOTPHorO BKNIOUeHNA
Pn nepepbBe B 3neKtpoCha6KeHn npbOp octaetcB KJIIOUeHHbIM, HO DnIraTeNb NocLe 3TORo He 3anyckaETc CHOba. IINr NOBtPOHO BKNIOUeHn IOBepHyTb NOBOPOTbN NepeKIOUaTeNb Ha 0 / off , a 3aTEM BKNIOHTb.
3aunta ot neperpy3kn
EcnBnTeBBO BpeMHCnonb30BaHnCAMOCTeBbHO BbIKIOUaETC,TO 3TO3NaHT,TOAKTNBnPOBaIocb yCTpoIcTBO3aunblOTnepepy3Kn.Bo3MOKhbIMnPnUHHAMN 3TOrO MOyT 6bITb ODHOBpeMeHNHa nepepaOTKa CnUkOM 6oJbWoroKoJIueCTBa npOdyKTOB.
O npabHbHom NOBeHn npn cpaBtBHaHN ODNHO3 CNCTeM 6e3oNaCHO, CM. «IOMoCb npu yctpaHeHH HeCNpabHOcTe".
B daHHo HnCTpyKuH No 3KcNlyatauH OINCbIbAHTC np6Opby pa3JNUHbIX NCNOJI HeH, CM. TaXke 063op MoJeE (PcCyHOK). DaHHbI np6Op He HyxJaetcB B TexHnueCKOM 06CnyKnBaHN.
KOMJIeKTHbI O63Op
PoxaJyHcTa,OTKpoIeCTpaHnUbIC pncyHKamn.PncyHOK A
OCHOBH06JOK
1 KhoNka pa36JIOKnpOBKn
2NoBOpOTHbI KPOHHTeH ΦyHKUaR «Easy Armlift» -ДЛЯ NOДeрЖКИ DBNKeHnK KPOHHTeHa BBepx (cM. «Pa6OuNe noLoXeHnA»).
3 Nobopothbni nepeknioyateIb
Piocne BblKnIOUeHnna (noJooKeHne 0 / off " ) np6Op aBTOMaTHueCKn
OCTaHaBnBaETCR B ONTMaJIbHOM
NOJoxKeHHn dJIa CMeHbI HacaDOK. MUM52... .. < 0 / off > = OCTaHOVBKa
M MHOBOEHoe BKIOUeHne Ha MakcImaJIbHOe YNCIO O6OpOTOB, yDePKHBt nepeKIIIOuATEIb B TeueHne HeoXoDMOro BpemeHH nepepa6OTKn. CtyneHn 1-4, paOoya CKOpocTb:
«1» = Hn3KOE qncIIO 06OpOTOB - MeDJIeHHO,
«4» = BBICOKOE YNCSIO 06OPOTOB -6bICTPO.
MUM54./MUM55./MUM56..
0 / off OCTaHOBka
M> MTHOBEHHO BKNIOUeHHe Ha MaKcImaJIbHOe YNCIO O6OpOTOB, yDePKHBtpeKJIIOuATEJB TteHHe HEOxOIMORo BpeMeHN pepepaOToKn. CTyIeHN 1-7, paOouaH CKopoCTb:
«1» = HN3KOE YNCNo O6OpOTOB - MeDnEHHO,
7> BBICOKOE YNCSIO 06OPOTOB -6bICTPO.


ru
4 INHdkatop pa6oero coctoHnM (MUM54./55./56.)
CBETNTCA BO BpempaOtbl (noBopOTbI nepeKIOUaTeIb Ha «M» nn1-7).
Miraet B cnyae ownbok ynpablenn npbopom, npc cpabaBHH 3JIeKTOHHORO npeDOxpaHNTeI IIN npn HeNCpabHOCTN npbopa, cm. pa3den «POMoCb npu ycTpaHEHN HeNCpabHOCTeN
53aunTHaKpbuKaIpynBOda ⅡA CHTIN3aUNTHOKNpBILIKN C pNBODa HkaTaHa 3aHIOU qactb NCHrTB KpbIWKY.
6PnBOd nIyHnBepcaJIbHOJpe3KN InpceCaIJIaIHTpyCObIX (CneuaJIbHbIe npHaJdJeKHOCTN*). Pn HEnCNoJIb3OBAHmYcTaHOBNTb 3aUHTHyKpbIuKyHa npBOD.
7ПивODДЯнHacaDOK(BEHчNKДЯпЕрмшИВаHЯ,BEHчNKДЯB36NBAHЯ,MecnIbHaHЯHacdKa)ИМсOPYбк(CpeuaJIbHbIePnHaJNeKHOCTN*)
83aunthnKpbuKaIpynBOda 6neHepa
9PnBODIa6neHepa (cneunabHbIe npHaIeXHOCTN*) Pn HncnoJIb3OBAHm yCTaHOBTb 3aHTyKpblkky Ha npBOD 6neHepa.
10 OtceK dIy xpaHeHHa Ka6eMaMUM52./MUM54.:Y6paTb Ka6eB B OTcEK dIy Ka6eMaMUM55./MUM56..ABTomatHueckoe CMatbHaHne Ka6eMa
CmehtbHaayaC npHnAdJeXHOCTM
11 Cmecntbnaa u3 Hepkaeoue CTaH
12 Kpbuuka HacaKn
13 BeHnK dJa nepeMeuBaHHa
14 BeHnK DnB36nBaHHa
15 Mecnblha HacaKa c OTKIOHITeIeM Tecta
16 Cymka nI npHaadneKHOCTe IxpaHHeHn HacaDOK N DnCKOBn3MeJbUHTeJI.
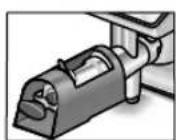
YHnBepcaJIbHaI pe3Ka
17 ToIkaTeIb
18 Kpbiuka c 3arpy3oHbIM CTBOJOM
19ДИСКИ-имьчITeI
19a IBycTOPOHHN INCK-pe3Ka TOJCTbIE/TOHKNE JOMTNKN
19b DByctOpOHn DNCK-UNHKOBA - KpyNHO/MeJIKO
19cДИСК-ТЕРКa-cpeДнe
20 DepeKaTeB dIa DnCKOB
21 Kopnyc c BbInyckHbIM OTBepCTHeM
Бленьер*
22 CtaKaH 6JIeHepa
23 KpbliKka
24 Bopohka
*PnHaJNeKHOCTN, KOTOpBIE He BXOJAT B KOMNNEKT NOCTaBKN,MOXHO npNo6peTn B TOPROBne N B CepBnCHOn cnjxkoe.
Pa6oue nOIOXKeHHn PcyHok E
BHHMaHne!
Pn6bOp MOHNO HcNoJIb3OBA Tb TOnbKO B TOM cnUyae,ecnHa HacaKa/npHaJaNEXHoCTb 6bIa YCTaHOBNeHa Ha IpaBnHbHom IpNbObe n HaxoHTCB pa6OeM NOnOKeHH, B COOTBETCBn C daHHoT Ta6NueE. NOBOPoTHbIKPOHwTeH DoJKeH 6bITb 3aΦHKCuPoBaH B KaKdOM pa6OeM NOnOKeHH.
i PpimMeaHne
Iobopothb KPOHHTeH OCHaueh
fYHKnei "Easy ArmliftKOTOPa
IOdepKnBaET DnHexHeNt NOBOpOTHO
KPOHHTeHa BBePx.
YctaHOBka pa6oeryo noJoxeHHa:
HaKaTb Ha KOnKy pa36IoknpoBKn Hm3MeHnTb IOnJKeHne NOBOpOTHO KPOHHTeHa. PdepKNaTb DnHexHe OndH pyKoN.
- NobopoThbKpoHHTeHnpeBecTH BKeNaeMOeNoIOXKeHHne DoΦHKcaUN.
ru
| Поло-жение | Пробoded | MUM52.. | MUM54.. MUM55.. MUM56.. | |
| 1 | 7 | 1-4 | 1-7 | |
| 1-4 | 1-7 | |||
| 1-2 | 1-3 | |||
| 2 | 7 | * | - | - |
| 3 | 6 | 2-4 | 3-7 | |
| 2-3 | 3-5 | |||
| 4 | 9 | 3-4 | 5-7 | |
| 7 | 3-4 | 5-7 |
*YCTAHOBKa/CHRTHe BEHcIKOB IJIa NEPeMeuBaHHN B3bHaHHI MecnblHoH HacaK; DoabJeHne 60JIbWOrO KOJIueCTBa nepepaatbla BaEMbIX npOdyKTOB.
3Kcnpnyataua

Onachoctb TpaBMnpoBaHHa!
LITencbHyBnKy MOKHO BCTaBnATb Bpo3eTKY TOnbKO Nocne NOHORO OKOHuaHnNoIroTOBKn KpaOte C npHoOpom.

BhimaHne!
Pn6op MoKHO NcN0b3OBaTb TOnbKO eCNI
PnHaJdJIeXHOCb/HacaJa HaxOHTc
BpaOoemNoIOKeHH.
He BKnIOuATb NyCTOH np6Op.
Pn6op n PnHaJdJIeXHOCTH He NODBepratb
BO3JeHCTBnHO NcTOUHNKOB TeTTa. JEtAHI He
IpeJHa3HaueHbI dIra NcNOb3OBaHH
BMIKPOBOLHOBOIneH.
- Пеед порвим ИспOLTБОВАнем TшаTeьно NOчИСТиТь пИбор И пИнадлесховсTи, CM. «ЧИСТКУ Y X OД » .

BaxkhoepnmeaHne
PeKOMeHDoBaHHbIe B daHHo IHCTpyK
ZHnIO NcNoJIb3OBAHNIO OpNEHTNPO
BOUHbIe 3HaueHnRApoOeCKOpOCTn
Yka3aHbI dIg npi6OBoB C7-CTyNEHuaTbIM
NOBOPOTbHM IpeEKnIOuATeTeM.
DJIg npi6OBoB C4-CTyNEHuaTbIM
NOBOPOTbHM IpeEKnIOuATeTeM 3HaueHnRA
PnPBedeHbI 3a HMM B CKO6KaX.
B DaHHo IN HCtpyKcHn IO NCNoJIb3O
BaHnIO COePKeITcH aKLeNkA C OpiEHTH
POBOUHbIMN 3HaueHnAMM dJIra pa6OeH
CKOpOCTn Pnp6Opa Prn NCNoJIb3OBAHN
HacaDOK IIIN pRnHaJNeJHKHOCTeN.
MbI peKOMeHdyem npKlneNTb 3Ty
HaKNeIky Ha np6OB (pncyHok).
IoiroTOBka
IOCTaBtB OCHOBHOJOK Ha rJaKyoH uNCTyIO NOBepxHocTb.
- BbITAHyTb Ka6eNb (pucyHOK MUM52./MUM54.. OTcEK DnIg XpaHeHHa Ka6eNb: BbITAHyTb Ka6eNb Ha KeNaeMyo dInHy.
MUM55../MUM56..
ABTomatnueckoe
CMaTbIBaHne Ka6eHa:
BbITAHyTB Ka6eNb 3a OOnH pa3
HaKeNaeMyIO DnHy (MaKc.
100cm) n MeDInEHNO OTNCTNTb; Ka6eNb 3aΦNKcnpyETcR.
YMeHbWeHne paOoey dINHb Ka
CnerKa NotrHb 3a Ka6eNb n da
CMOTaTbCn DO KeNaeMoN dINHb
CHOBA CnErKa NotrHb 3a Ka6eN
m MeDInEHNO OTNCTNTb; Ka6eNb
3aΦNKcnpyETcR.

BHIMAHHe!
He nepekepyuBaTb KaBEn npn erO 3anpaVe.
B npbopax c aBTOMaTnueckm CMaTbIbAHnem KaenKaenb HEnb3aIpaBnATb BpyHyIO.Ecnn Kaenb 3aknnHnO, CneyET BbitAHyt bero NOIHOCtBu H 3aTeM DaTb eMY CMOTaTbCRA.
BCTaBnTb WTeNCEJIbHyIO BnIky Bpo3eTKy.

ru
CmeiTeBHaYaHaN HacaAkn

Onachoctb TpaBMnpoBaHnOBpaAIOUmeCAHaK
Bo Bpemr 3KcnpnyatauHnKOrda He ONyckatb pyKN B CMECNTbHyO yaUy. Pa60taTb TOnbKO C yCTaHOBNEHHo KpbIshKo (12)!
HacaKy MoKHo 3aMeHbToNbKO NocLe OCTaHOBKn PnBODa -PnBOd DBNKetc Eue HeKOTOpoe BpEMr NocLe BbIKIOyeHn HOctaHaBJIbBaETC B NIOXKeHn Ia CMeHb HacaDOK. H3MeHb NIOKHeHne NOBOPothoro KPOHHTeHa MOKHo TOnbKO NocLe OCTaHOBKn HacaDkn. U3 COOpaKaHEn 6e30NaChOCTn PnpOp MOKHo HcONb3OBaTb ToNbKO TOrda, KOrDa HEnCNoIb3YeMbIe PnBODbHaKpbITbI 3aUHTbIMN KpbUkAMu (5,8).
BHIMAHNE!
CmecntenbHyu yaWy HcNoB3OBaTb TOnbKO dna paOToI c daHHbIM npHOpOM.
Benchd npepemwbaHn (13)
Длп пошьнг TeCTa, HAp., Cdo6HOrO Tecta

BenchikДЯВ36NBaHnR(14)
ДЯВ36NBAHЯ RAUHbIX 6eKOB, CINBOKIДЯ B36NBAHЯ JERKORO TECTA,HaNP.6NCKBHTHO

MecnBnaH haca (15)
Ja 3aMeuBaHn TaKeNoTeCTa
N Jn NOMeuBaHn HrpeDneHTOB,
KOTOpbIe He DoJIKHbI N3MeJIbYaTbCn
(Hanp.: N3HOMa, WOKOJaHbIX PnactnHOK)

Pa60a Co CmecntelbHoi 1uuei Hacaikamn PncyHOK A
HaKaTaB Ha KhoNky pa36JIOKnpOBKn I nepeBeCTn NOBOPOTbI KPOHHTeH B NNoOKeHne 2.
- YctaHOBka CMEcHTeHbHOu qaun: -HaKIOHeHHyO Bnepeq YAswy yCTaHOBnTb N 3aTeM ONyCTnTb, - NOBepHyTb ee npOTNB YacOBoB CTpeJIKN Do fHKcaUN.

B 3aBnCmOCTOn OT BnDa nepepaTaBtBaEMbIX npOdyKTOB BCTaBHTb B npINBOJdo FHKcaUN BeHnK DnA nepeMeuBaHn, BEHnK DnA B36NBaHn INMecInbHyO HacaNk.
Приимейанке:
Pn yctaHOBKe MecInbHoi HacaKn OTKIOHNTEJIb TcTeA NOBepHyTb, TaK YTObI MeCINbHaH HACAkCA CMOrna 3aΦHKcnpoBaTbCR (pncyHok E-4b).
3arpy3ntb CmecntenbHyu yaLy npedHa3HaueHHbIe Ina nepepa6OTKn INHpeJeNHTbl.
HaKaTaB Ha KhoNky pa36JIOKIpOBKn HnepeBecTn NOBOPOTbI KPOHHTeH B NpOKeHne 1.
- YCTaHOBtB KpbilKy.
VcTaHOBHTb NOBOPOTbI nepeKIOUaTeJIb Ha JKeJaEMyIO CTyneHb.
Haapaekomehdaun:

-BenydknpepeMeWbAHn:
He Tporatb octpbiE HOHN BbCTyNBI
HnCKOB-H3MeBHTeNEI. NnCKn
H3MeBHTeN 6paT ToNbKO 3a Kpa!
YHBepCaIbHyIO pe3Ky MOxHO yCTaHaB
INBaTb/CHIMAtb TONbKO NOcne OCTaHOBKn
PnBOda H n3BNeueHnBnKN H3 P03ETKn.
He onyckatpyKn B 3arpy3OuHbI CTBOJ.
BHMMaHne!
YHnBepcaIbHyIOpe3KyHCNOJb3OBaTb TOIbKO B NONHOCTbIO CO6paHHOM BVIDE. HNKOrda He CO6HpTa b YHnBepcaIbHyIO pe3Ky HA OCHOBHOM 6IOKe. YHnBepcaIbHyIOpe3KyMOXHO NCNoJIb3ObaTbTOJIbKO BYKa3aHHOM paOoeym IIOJOKeHHN.
3aunTa oT nepepy3Kn PncyHok
YTo6bI npEDoTbPaTnTB 3HaunTeNbHbIe
NoBpeKdEnHn BaWero npNbopa Bo BpeM
neperpy3Kn yHNBePcAIBHO pe3KN,
npINBOHDHO BAy HNBepCaJIbHO Pe3KN
Cha6KeH HaceKo (3aDaHHoe MeTO
Cnoma).B cnyae neperpy3Kn npINBOHDHO
BaI NOMaETCB 3tOM MecTe.
HObI DEpKaTeNb DnA DINCKOB
C npINBOHDbIM BaIOM MOxHo npNObpeCTN
B cepBnCHOH CnyX6e.
Дысторонни днck-peзka -TOJICTbIe/TOHKnE JOMTNKN
Hape3Kn FpyKToB n OBOUeN.
Ipepea6oTKa Ha CTyneHn 5 («3>).
O6o3HaueHn Ha DByCTOpOHHeM DnCKepe3Ke:
«1»-CTOPOHaДЯHape3KNHaTOJCTbIE JOMTNK
3-CTOPoHaIaHape3KaHaTOHKne JOMTNK
BHIMMaHHe!
IBycTOPOHHN IINCK-pe3Ka He npHrOeH IINHape3KN TBepDoro cbipa, Xne6a, BynoueK HwokonaJa. Bapehbi, Hepa3BapnBAIOUncra KapToΦJIb Hape3aTb TOnbKO NOCNE OXNAJKeHnA.
BBycTOPOHHN DnCK-UNHKOBA -KpynHO/MeIKO
ДЯ LИИнКOBKN OBOUeN,ФpyKTOBи cIpa, KpOME TBePDoRo cIpa(HaNP.,«Парм经3Ha>).пepepa6OTka Ha CTypeHn «3»(«2») IIN «4»(«3»).
O603HaueHnHa DBycToPOHHem DnCKe-
2 -CTOPOHAДЛЯКpyнHOI SHINKOBKN 4 -CTOPOHAДЛЯМENKOJSHINKOBKN BHIMAHNE!
ByctopoHHN DnCK-UNHKBKa He npHroDeH DnA UHHKOBKn OpexOB. MArKn Cbip MOKHO UHHKOBaTb TOnbKO Ha CTOpOHe dna KpyTHOH UHHKOBKn Ha CTyneHn 7 (4).
Диck-Терка-cpeДнe
ДЯНТИРаHЯСБIPORO KAPTOФЕЯ, TВЕРДОТСБIPA(HANP.,«ПарMe3aHa>), OXЛАЖДЕнHOrO WOKОнадa n opexOB. Пepepa6OTka Ha CTyNeHn «7»(«4>)
BHHMaHHe!
IINCK-TePKa He npHroDEn dHaTHpaHNA MARKOHO Hape3HOrO cbipa.
Pa60Ta c yHnBepcaIbHoI pe3KoPncyHok G
HaKaTaB Ha KhoNky pa36JIOKINPOBKn H IpeEBeCTn IOBOPOTbI KPOHHTeH B NONOKeHne 2.
- YctaHObKa CMEcHTeJIbHoH YaIIN: -HaKNOHeHHyIO BnepeD YaIy yCTaHOBHTb N 3aTeM ONyCTNTb, - NOBepHyTb ee IpOTnB YaCobOBI CTpeJIK Do OHKcaUN.
HaKaTb Ha KhoNky pa36JIOKnpOBKn HnepeBecTH NOBOPHTbI KPOHHTeH B NONOKeHne 3.
CnTb 3aunTHyIO KpbIuKy C npNBoya yHNBepcaIbHOH pe3Kn (pncyHOK 6-5a).
- YdepeKHBaTb DepeKaTeIb IJI AnCKOB 3a HxHnKOHeU, pN 3OM O6a BbICTyna DOJXHbI yKa3bIBaTb BBepx.
Kennaembl DNCK-pe3ky nIN DNCK- WHHKOBYOCTOPOXHO NOLOXHTb Ha BByCTybl DEPKaTeIg DnA NCKOB (pncyHOK G-6a).Pn INCNOB3OBAHN DByCTOPOHHX DNCKOB, CNeDNTb 3a TEM, YTObI Kennaemar CTopoHa yKa3bIBana BBepx.
B3rB depKaTeIb IIN DCIOB 3a BepxHn KOHeu N BCTaBHTB B KOpNyc (pncyHOK G-6b).
- YctaHOBHTb KpbIuKy (O6paTbTBHIMaHHe Ha MapKInpOBky) INOBepHyTbNo YacOBoN CTpeNke Do yNopa.
- YcTaHOBnTe yHnBepCaJIbHyIO pe3Ky Ha npINBOe TaK, KaK n3OpaKeHo Ha pncyHke G-8, n NOBepHnTe ee no XoMy qacOBOn CTpeKN Do ynopa.


ru
- YctaHOBHTb NOBOPOTbI nepeKIO- yateJIb Ha peKOMeHdyemyO CTyneHb.
3arpy3ntb npOdykTbI nInepepa6OTKn B 3arpy3OCHbI CTBOJI N NODTaJIKNBaTb TOKAteMeM.
BHHMaHHe!
H36eRaTb cKoNneHnHape3aHHbIX npOdyKTOB B BblNyCKhbIM OTBepCTHM.
PekomeHdaun: nn noyuhen paBHOMepbIX pe3yIbTaTOB TOHKne npOdyKtI dIa Hape3KN nepepa6aTbIBaTb nyKaMn.
PnmeaHne: B cnuyae 3aknnnBaHH nepepa6aTbIbAembIX npOdyKTOB yHNBepCaBHO pe3Ke CNeDyET BblIOHTb KxOHnBkOM6aH, n3BNEy bTeNCEbHyO BNky N3 pO3eTK, DoXDaTbC8 OCTaHOBKn npBOda, CHrTB KpbIwKy c yHNBepCaBHO pe3KN ONyCTOWNTb 3arpy3OuHb CTBOJ.
Pocne pa6oTbi
BbIKIOuHTb np6Op c NMOoubIO NOBOPOTHOpeKIOUOATEJIa.
- NObepHyTb yHnBepcaIbHyU pe3Ky npOTNB YacOBOy CTpeJIKN CHATb.
- NObepHyTb KpbIuKy npOTNB yacOBOn CTpeJKN I CHrTb.
N3BLeueb DeepKateIb IINCKOB BMeCTe C DnCKOM. IINH 3TOIHO HAKaTb Ha npIBoHOB BaI CNH3y NaJIbUcEM (pncyHOK H).
PpOBecTuNCTKy TaJeI.
BneHepa

Onachoctb TpaBMPOBaHHo 06 octpble HOHN/BpaUauOuHnCn npHBOD!
HnkOrda He onyckatb pykn B yctaHOJIeHHbl 6IeHep! IeHep MOKHO CHIMATb/YCTaHaBJIbBaTb TOnbKO nOcJIe OCTaHOBN npVBOA! IeHep MOKHO NcONb30BaTb TOnbKO B CO6paHHOM BnDE H C yCTaHOJIeHHo KpbIshKoN.

Onachoctb owinapnBaHHa
Pn nepepa6oTke B 6neHedepe ropauHX npOdyKTOB yepe3 BOpOHky B KpbIiKe BbIXoHT nap. 3aONHtB MaKCHMym 0,5 ntpa ropeu Hnn CnIbHOHeHueeJc HnIDKOCTN.
BhimaHne!
BneHep MOxHO NOBpeHtB. He nepepaabaBaTa 3aMOpOKeHHbIe INHrpEHeHTbI (3a NCKIOUeHNEM KyOKNOB Ibda). He BKnIOuATb NyCToN BneHep.
Pa6oTa c 6JIeHepom PncyHOK
HaKaTaB Ha KhoNkIy pa36JIOKIpOBKn H nepeBeCTn NOBOPOTbH KnPOHHTeH B NpOKeHne 4.
- ChTb c npBODa 6IeHepa 3aunTHyIO Kpbllky.
- YctaHOBHTb cTaKaH 6JIeHdepa (MapKINPOBka Ha pyUke HAnpoTnB MapKINPOBKn Ha OCHOBHOM 6IOKe) I NOBepHyTB IpOTnB YacOBoI CTpeKN Do ynpa.
3arpy3ntb INHpeJeHNTbl. MakcImaJIbHOe KOJIueCTBO KINKOCTN = 1,25 nITpa; MakcImaJIbHOe KOJIueCTBO CnIbHOneHJUHXCn INI rOpAUX XIKOCTeN = 0,5 nITpa; ONTImaJIbHOe KOJIueCTBO dIJI nepepa6OTKn TBepdbIX INHpeJeHTOB = 100 rpaMM;
- YctaHOBnTB KpbIuKy 3aBepyTb ee npOTNB yacBOB CTpeKN Do ynpa B pyKy 6JeHepa. KpbIuKa dONKHa 3aΦNKcnpOBaTbCra.
- YctaHOBHTb NOBOPOTbI INepeKnHOuATEJIb Ha JeJaEMyIO CTyneHb.
D03arpy3ka HnHpeJeHHeTOB pncyHOK 1-8
BbIKHouHTb np6Op c nOmoIbIO NOBOPOTHO nepeKIOUoTaTeJI.
CHrTB KpbIuKy N 3aRpy3NtB INHpeDneHTbl HIN
N3BNeUb BOPOHKy I NOCTeNEHHO 3aRpyKaTb TBepDble INHRpeDneHTbI Yepe3 3aRpy3OuHoe OTBepCTne
HNN
3aJIITb JnKKe INHPeDneHTbI Yepe3 BOPOHKy.
Pocne pa6oTbi
BbIKHouHT npHOBc NOMOuHIO NOBOPTHORo NEpeKluOHaTeJI.
- NObepHyb 6JeHdep no yacBOB CTpeJIke n CHaTb.
Pekomehdaun: BneHep nyuwe BCero nouchntb cpa3y nocne nCnObn30BaHn.


ru
UHCTKa n yXoJ

BHHMaHHe!
He nCnoB3oBaTb abpa3nBhIe uHCTaIune cpeIcTBa. NobepxHOCTn npH6opa MoIyT 0bIb NOBpeKdEhl.
UcTka OCHOBHoro 6Joka

Onachoctb npaKeHHa 3JnKtpueckm TOKOM!
OchOBHO6nOK HN B KOEM Cnyuae He norgyKaB B OBOY HHe DepeKaTb NOI npOTouHO BDOH. He hCnONb30BaTb napoouchTeNB.
N3BLeueb wTeNCeIbHyIO BnIKy n3 pO3ETKn.
- PpoTepeTb OCHOBHON 6JOK N 3aunTHbIe KpbIuKN pnpBOoB BnaXHOH TKaHbIO. Pn HeoBXOIMOCHTN CNOJIb3OBaTb HEMHOrO CpeCTBa DIA MblTBIOcYdI.
B 3aKJIouHHe BbItepeTb npIbOp Hacyxo. UcTka CmecnteBHOu Haun HacaDOK
CmeCNTeIbHyU qaUy HacaKMOxHO MbTb B NocyDOMOeHOr MaunHe.
PnaactMaccoBbIe DetanHe 3aKImaTb B NocydomOeHOn MaunHe, TaK KaB B PnoceCE MbITb BO3MOxHa IX NOCToHHa DeOpMaun!
YnCTka yHnBepcaJIbHOJ pe3KN
Bce deTani yHnBepcaIbHOI pe3KMOxHO Mblb B NOCyDOMoeuHOI MaUNHe.
PekomeHa:ДЯ yctpaHEnKpachHOro HaJeTa nocne nepepaBOTKn, HAp., MOpKOBn,HaInbHeMHoro pactHTeIbHoro Macna Ha TpAnKy u npotepeTb eio yHNBepCaIbHyO pe3Ky (He DnCKN-H3MeIbHuTei). Pocne 3tOro npomblb yHNBepCaIbHyO pe3Ky.
YnCTka 6JIeHepa

Onachoctb TpaBMnpoBaHna 06 octpbie HOHN!
He Tporatb HOKn 6neHepa rONbIMN pykam.
Ctakah 6JIeHepa, KpbIshky I BOpOHKy MOKHOMbITbB NOCyDOMoeuHO MaUNHe.
Pekomehdaqra: Pocne nepepa6otkn KNDKoCTe 3aacTyIO DOCTaTOHNO NOHCNTb 6JIeHep, He cHmam erO c npnbopa. IINr 3TOrO 3aINTb B yCTaHOBHeHHb I6JIeHep HEMHOrO BOdy CO CpeCDTBOM IINrMbITbI NocydbI. BKIOuHTb 6JIeHep Ha HeCKoJIbKO ceKyuHd (ctynHe bM). Bblntb MbIbHyIO BOdy nPOMbITb 6JIeHep YnCToB BODoI.

BaxkhoepnmeuHne
Cymky InpnHaIeKHOCTe YIcHTb npn HeoXoIMOCTN. CneIOBaTb yka3aHnM nO yxOy B cyMke.
XpaHneHne

Onachoctb TpaBMnpoBaHHa
Pn HEnCNoB3OBaHn np60pa n3BneYb WTeNcBHyIO Bnky n3 pO3eTK.
PncyHOK
- YI0XHTb HacaKn IINCKN IN3MeJIbUHTeINB CymKy DInr npHaJdJeKHOCTeN.
Cymky npHaJnHexHOcte XpaHntb BcmecntelbHOu Haue.
ДяхраheньВОригианьhoe yanaKOBKe CM.pucyHOK
IOMOuB npu ycTaPaHHeHH HeNCpabHocTei

Onachoctb TpaBMnpoBaHHa
Ipey yctpaHeHnEM HeCnpaBHOCTn 13Bneueb WTeNCeNbHyIO BnIKy H3 PO3eTKN.

BaxkhoepnmueyaneMUM54./MUM55./MUM56..
Ha owN6ky B ynpaBHeHH np6bOpom, cpaBaTbBAHne 3JIeKTPoHHbIX npdoxpaHnteNe Hn HeNCpnaBHOCTb np6bopa yKa3bIbAet MraIOuIN INdIKaTOP pa6Oyero COCTOHHH.
Iobopothb KPOHHTeH DOJKeH 6bITb 3aΦHKCHPOBaH B KaKdOM pa6Oyem NOJIOKeHH.
PonbItaeTcB ChaJa yctpaHtB Bo3NkUyIO npo6IeMy C nOMOuBIO cJeDyUOx yKa3aHn.


ru
HeincpaBHOCTb
Pn6op He BkHouaetc.
YcTpaHHeHne
PpOBepntb Hannue 3neKtpocha6KeHn.
- PnoBepntb utenceIbHyIO BnIKy.
PpOBepntb NOBOPOTbI KPOHHTeH. BnpabNbHOM NNoOKeHH? 3aΦHKcnpoBaH?
- PnKpyTb 6JIeHep nIcMecHTbHyU qaWy do ynopa.
- YctaHOBNTb KpbIuKy 6JeHepa
N npKpyTntb Do ynpa.
HaKpbItb3aunHTbIMN KpbIuKaMn dna npBOIOB HeNCNoJIb3yEmblpe npBODbI.
- AKTNBnPOBaHa 6JIOKnPOBka NOBTOpHOro BKNIOUeHHa. NpeKNIouHTb npNOp B NIOJKeHHe 0 / off n 3aTeM Ha3aHa Na KeNaEMyO CTyNeHb.
HnpaBHOCTb
Pn60p BbIKIouaETcBO BpeM nCNoB3OBAHn. AKTINBnPOBaHa 3aunTa OTneperpy3Kn. OndOBpeMeHHo nepepaBaTBiBaIOCB cNIuKOM 6OJIbLoe KOINueCTBO npOdyKTOB.
YcTpaHHeHne
OTKJIIOUHTb npH6Op.
CokpaHTb KOJIneCTBO nepepa6aTbI BaEMbIX npOdyKTOB. He npeBbIaTb MaKcHMaJIbHO DOyCTHMOrO KOJIneCTBa npOdyKTOB (CM. «ПрIMePbI NCNoJIb-3OBaHnA»)!
HcnpabHoctb
Bo Bpempa6oBtI npB0da cnyuahHO 6bina HaKaTa KHONKa pa36JIOKINPOBKn.
Iobopothki KpOHTeH npeDburaetc BBepx. PnBOD OTKIOUcaETc, Ho He OCTaHaBNIbaETC B NIOJOKeHH dJI CMeHbI HacaDOK.
YcTpaHHeHne
- IpepeBecTN IOBOPHTbI nepeKIOUaTeIb B IIOJOKHeNc «0/off>.
- IpeBecn noBopOtHbI KPOHHTeH B nONoKeHne 1.
BknoHTb np6op (ctyneHb «1»). - ChOBA BbIKIOUHTb npI6Op. HacaIka OCTaHaBnBaETcB nIOJKeHn Dn CmEhbl HaCaIOK.

HeincpaBHOctb
BleHep He hauHaeT pa6oTa b nnOCTaHaBJIbAeTCB BO BpeM nCNoJb30BaHH, pINBOD «YdNT».Hok 3a6nOKupOBaH.
YcTaPaeHne
OTKIOHTb npHOp n H3BLeyb TTeNCEbHyO BnIKy n3 pO3eTKN.
CHATb 6neHep u ydaIHT npenrTCTBHe.
- Choba yctaHOBnTB 6neHep.
BkIIOHTb npn6op.

Baxknoe npimmeaynne
Ecn taKm o6pa3OM He ydaIocb ycTaHnTB HncnpaBHOCTb, NOKaIyIcTa, 6paTntecb B cepBnCHyIO cnyK6y.
PpHMepeIHCNOB3OBaHH
B36ntbIe CINVBK
100r-600r
- IpepebaTbIbTaB CnBKn OT 1½ Do 4 MNHyT Ha CTyneHn «7» («4») - B 3aBNCIMOCHT ON KOJIHcECTBa H CBOYCTB CInBOK, C NOMOuBo BEHUnKa DnB B36NBAHn.
HnHyb6eNoK
OT 1do8nnhbx6eIKOB
- IpepebaTaBbTaB 6eKnOT4do 6MnHyT Ha CtyeHn «7»(«4») C NOMOu BO BEHnKa DJIa B36nBaHn
BnCKBTHOe TECTO
OchOBHOH peueeTT
2a
IIN3MeInbueHnCBExKeRoMcAINaTapTaPaNpyneta n3py6JeHoroMca.

MUZ45LS1
KOMnneKT
ΦopMOBOUHbIX
INCKOB,MeIko,
(3MM),KpynHO(6MM)
ДлmaMácopyби MUZ5FW1.
MeIko dIra naHTeOB n6yTepebOHNbIX Macc, KpynHO dIra JkapehBIX KOIbAcOK n cana.
MUZ45SV1
HacaKa-ua6NoH ⅡA BbIeKu
ДлmaMRCopy6KIMUZ5FW1.
CMetaeckmwaohom4pa3nHbIX fOpM BbIeKn.
MUZ45RV1
Hacaikka-Tepka
HnHa HnpaHnOpexOB, MnHaJIH, IOKoJaHa n cyxnx 6ynoyeK.
MUZ45FV1
Hacaika-npecc dIa OTKIMACOKA
n1q-ysoqMMM//:dy HxHxOg OHHeaXuOgo O u HcOo hndoHdde E h bdoHx xHhoaded ead
BHEHMMERETIK TEG000629


AR46
he-14
n nn nn
n nn nnnn nnnn nnnn nnnn nnnn nnnn nnnn nnnn nnnn nnnn nnnn nnnn nnnn nnnn nnnn nnnn nnnn nnnn nnnn nnnn nnnn nnnn nnnn nnnn nnnn nnnn nnnn nnnn nnnn nnnn nnnn nnnn nnnn nnnn nnnnn nnnnn nnnnn nnnnn nnnnn nnnnn nnnnn nnnnn nnnnn nnnnn nnnnn nnnnn nnnnn nnnnn nnnnn nnnnn nnnnn nnnnn nnnnn nnnnn nnnnn nnnnn nnnnn nnnnn nnnnn nnenn
ywnn pio nix yin
Dn 2012/19/EG nnn nn nnn nn nnnn (WEEE - nnnnnnnnnnnnnnnnnnnnnnnnnnnnnnnnnnnnnnnnnnnnnnnnnnnnnnnnnnnnnnnnnnnnnnnnnnnnnnnnnnnnnnnnnnnnnnnnnnnnnnnnnnn

mnnn nn

he-13
| .MUZ5DS1 n°780000000000000000000000000000000000000000000000000000000000000000000000000000000000000000000000000000 | MUZ45AG1 n°78000000000000000000000000000000000000000000000000000000000000000000000000000000000000000000000000 |
| .MUZ5DS1 n°780000000000000000000000000000000000000000000000000000000000000000000000000000000000000000 | MUZ45RS1 n°78000000000000000000000000000000000000000000000000000000000000000000000000000000000000000000000 |
| .MUZDS1 n°78000000000000000000000000000000000000000000000000000000000000000000000000000000000000000000000 | MUZ45KP1 n°780000000000000000000000000000000000000000000000000000000000 |
| .MUZ5ER1 n°780000000000000000000000000000000000000000000000000000000 | MUZ5ER1 n°7800000000000000000000000000000000000000000000000000 |
| .MUZ5KR2 n°78000000000000000000000000000000000000000000000000000 | MUZ5KR2 n°7800000000000000000000000000000000000000000000 |
| .MUZ5MX1 n°7800000000000000000000000000000000000000000000000 | MUZ5MX1 n°78000000000000000000000000000000000000 |
| .MUZ5MM1 n°7800000000000000000000000000000000000000000 | MUZ5MM1 n°78000000000000000000000000000000 |
wnnnn nn nnnnnnnnnnnnnnnnnnnnnnnnnnnnnnnnnnnnnnnnnnnnnnnnnnnnnnnnnnnnnnnnnnnnnnnnnnnnnnnnnnnnnnnnnnnnnnnnn
innnnn nn nnnn off/0 anan nn
nannnnnnnnnnnnnn
#
ninnnnnnnnnnnnnnnnnnnnnnnn
ywnn nn nnnn nn nnnn nn nnnn nn
1
mry
.
A
Pn2 Pnnnnnnnnnnnnnn
(WINDINNAT
nbpn
nnnnnnnnnnnnnnnnnnnnnnnnnnnnnnnnnnnnnnnnnnnnnnnnnnnnnnnnnnnnnnnnnnnnnnnnnnnnnnnnnnnnnnnnnnnnn
ynnn nn nnnnnnnnnnnnnnn
0000000000000000000000000000000
#
. off/0
1
(1nynnnn)wnn nn
nnn nn nnnnnnnnnnnnnnnnnnnnnnnnnnnnnnnnnnnnnnnnnnnnnnnnnnnnnnnnnnnnnnnnnnnnnnnnnnnnnnnnnnnnnnn
#
yannnnn nn nnnn nn nnnnn
ypon nynnynn
mry
wnnnynnnn nn nnnnnnnnnn nn

ninnnnnnnnnnnnnnnnnnnnnnnnnnnn
ninnnnnnnnnnnnnnnnnnnnnnnnnnnnnnnnnnnnnnnnnnnnnnnnnnnnnnnnnnnnnnnnnnnnnnnnnnnnnnnnnnnnnnnnnnnnnnnn


he-9
n nn nnnnnnnnnnnnnnnnnnnnnnnnnnnnnnnnnnnnnnnnnnnnnnnnnnnnnnnnnnnnnnnnnnnnnnnnnnnnnnnnnnnnnnnnnnnnnnnnnnnnnnnnnnnnn
IONX
inno ndo

yannnnn nn nnn npnnn nrn
K
y
mynn 0nnn nnnn
LNNN NNNNNNNNNNNNNNN
nbn npnnna nny
InyNn

nennnnnnnnnnnnnnnnnnnnnnnnnnnnnnnnnn
ynnn

MUM54./MUM55./MUM56..
y
n nn nnnnnnnnnnnnnnnnnnnnnnnnnnnnnnnnnnnnnnnnnnnnnnnnnnnnnnnnnnnnnnnnnnnnnnnnnnnnnnnnnnnnnnnnnnnnn
nbn
1
#
wn np90N npT
DNN?1000000000000000000000000000000
?n
n nnnn nn nnnn nnnn nnnn nnnn nnnn nnnn nnnn nnnn nnnn nnnn nnnn nnnn nnnn nnnn nnnn nnnn nnnn nnnn nnnn nnnn nnnn nnnn nnnn nnnn nnnn nnnn nnnn nnnn nnnn nnnn nnnn nnnn nnnn nnnn nnne
00000000


he-8
n#n

n nn nnnn nn nnnn nn nnnnnnnnnnnnnnnnnnnnnnnnnnnnnnnnnnnnnnnnnnnnnnnnnnnnnnnnnnnnnnnnnnnnnnnnnnnnnnnnnnnnnnnnnnnnnnnnnnnnnnnnnnnnnnnnnnnnnnnnnnnnn
Innn
nnnnnnnnnnnnnnnnnnnnnnnnnnnnnnnnnnnnnnnnnnnnnnnnnnnnnnnnnnnnnnnnnnnnnnnnnnnnnnnnnnnnnnnnnnnnnnnnnnnnnnnnnnnnnnnnnnnnnnnnnnnnnnnnn
#

ywn y
ynnn nn nnnn nn nnnn
4x的nnnn
yannnnn nn nnnnnnnnnnnn
ynnn nn nnnn nn nnnn nn nnnn nn nnnn nn nnnn nn nnnn nn nnnn nn nnnn nn nnnn nn nnnn nn nnnn nn nnnn nn nnnn nn nnnn nn nnnn nn nnnn nn nnnn nn nnnn nn nnnn nn nnnn nn nnnn nn nnnn nn nnnn nn nnnn nn nnnn nn
1,25=0n 1n n 1,5=nnnn nn nnnn nnnn nnnn
100 50
y yynnnn nn nnnnnnnnnnn
yannnnn nnnnnnnnnnnnnnnnnnnnnnnnnnnnnnnnnnnnnnnnnnnnnnnnnnnnnnnnnnnnnnnnnnnnnnnnnnnnnnnnnnnnnnnnnnnnnnnnnnnnnnn
nnnnnnnnnnnnnnnnnnnnnnnnnnn
1-8
#
10000000000000000000
1K
Dipin nn nnnn nn nnnn nn nnnn nn nnnn
1K
19nnnnn nn nnnnnnnnnnnn
nTyn D0y
.
.
wnnnn nn nnnn nn nnnn nn
INIKIINNIOINNININININ
(G-6b)nnn nn n nn
INIKIOI (yoynn) noonn nn
ywnnynnnn nn nnnn
Pnnnnnnnnnnnnnnnnnnnnnnnnnnn
n 8
#
n
.
#
noan noan noan noan noan noan noan noan noan noan noan noan noan noan noan noan noan noan noan noan noan noan noan noan noan noan noan noan noan noan noan noan noan noan noan noan noan noan noan noan noan noan noan noan noan noan noan noan noan noan noan
nnnnn nn nnnn
n nn nnnnnnnnnnnnnnnnn
nennnnnnnnnnnnnnnnnnnnnnnnnnnnnnnnnnnnnnnnnnnnnnnnnnnnnnnnnnnnnnnnnnnnnnnnnnnnnnnnnnnnnnnnnnnnnnnnnnnnnnnnnnnn
yni yin nn in Dn nn nnn nnn nnn
1
y
nno nnnn nnne nnnn nee

he-7
he-6

(15) nwn
DIOIOIOIOIOIOIOIOIOIOIOIOIOIOIOIOIOIOIOIOIOIOIOIOIOIOIOIOIOIOIOIOIOIOIOIOIOIOIOIOIOIOIOIOIOIOIOIOIOIOIOIOIOIOIOIOIOIOIOIOIOIOIOIOIOIOIOIOIO
日

nyn 0ny np ny
2 2
n nn nnnn nn nnnnnnnnnnnnnnnnnnnnnnnnnnnnnnnnnnnnnnnnnnnnnnnnnnnnnnnnnnnnnnnnnnnnnnnnnnnnnnnnnnnnnnnnnnnnnnnnnnnnnnnnnnnnnnnnnnnnnnnnnnnnnnn
yynn 1000nnn nn nnnn nn nnnn nn nnnn nn nnnn nn nnnn nn nnnn nn nnnn nn nnnn nn nnnn nn nnnn nn nnnn nn nnnn nn nnnn nn nnnn nn nnnn nn nnnn nn nnnn nn nnnn nn nnnn nn nnnn nn nnnn nn nnnn nn nnnn nn nnnn nn nnnn nn
11 11
(回-4b
.
ynnn nn nnnn nn nnnn
yannnnnnnnn 100
nnnnnnnnnnnnnnnnnnnnnnnnnnnnnnnnnnnnnnnnnnnnnnnnnnnnnnnnnnnnnnnnnnnnnnnnnnnnnnnnnnnnnnnnnnnnn
:的n的nn
-
(1) 1 nnnn nn nn nn
(4)7nwnnnn nn nnnn
X 7 7
(1) 1nna nnnn
(1) 1 nnnn nn nn (2) 3 nn nn nn nn
Dninn noin
ninn n90in n9 nnn nnynn nnin 190in
1K
noonnnn
y
.2 1nnn
MUM55/MUM56.
nnnnn nn nnnnnnnnnnnnnnnnnnnnnnnnnnnnnnnnnnnnnnnnnnnnnnnnnnnnnnnnnnnnnnnnnnnnnnnnnnnnnnnnnnnnnnnnnnnnnnnnnnnnnnnnnnnnnnnnnnnnnnnnnnnnnnnnnnnnn
n nn nnnn nnnn nnnn nnnn nnnn nnnn nnnn nnnn nnnn nnnn nnnn nnnn nnnn nnnn nnnn nnnn nnnn nnnn nnnn nnnn nnnn nnnn nnnn nnnn nnnn nnnn nnnn nnnn nnnn nnnn nnnn nnnn nnnn nnnn
n nn nnnnnnnnnnnnnnnnnnnnnnnnnnnnnnnnnnnnnnnnnnnnnnnnnnnnnnnnnnnnnnnnnnnnnnnnnnnnnnnnnnnnnnnnnnnnnnnnnnnnnnnnn
12in
n nn nnnnnnnnnnnnnnnnnnnnnnnnnnnnnnnnnnnnnnnnnnnnnnnnnnnnnnnnnnnnnnnnnnnnnnnnnnnnnnnnnnnnnnn
nnn nn nnnnnnnnnnnnnnnnnnnnnnnnnnnnnnnnnnnnnnnnnnnnnnnnnnnnnnnnnnnnnnnnnnnnnnnnnnnnnnnnnnnnnnnnnnnnnnnnnnnnnnnnn
myn myn
00000000000000000000

y 12 nnnn nn nnnn nn nnnn nn nnnn nn nnnn nn nnnn nn nnnn nn nnnn nn nnnn nn nnnn nn nnnn nn nnnn nn nnnn nn nnnn nn nnnn nn nnnn nn nnnn nn nnnn nn nnnn nn nnnn nn nnnn nn nnnn nn nnnn nn nnnn nn nnnn nn nnnn
no'nin
ynnn nn nnnn nn nnnn nn nnnnnnnnnnnnnnnnnnnnnnnnnnnnnnnnnnnnnnnnnnnnnnnnnnnnnnnnnnnnnnnnnnnnnnnnnnnnnnnnnnnnnnnnnnnnnnnnnnnnnnnnnnnnnnnnnnnnn
(8,5) Dnannn
#
at won by mwn nnnn nn mnp ennne

(13)
y

(14) npnn
nnnnn nnnn nn nnnn nnnn nnnn nnnn nnnn nnnn nnnn nnnn nnnn nnnn nnnn nnnn nnnn nnnn nnnn nnnn nnnn nnnn nnnn nnnn nnnn nnnn nnnn nnnn nnnn nnnn nnnn nnnn nnnn nnnn nnnn nnnn nnnn nnnn nn

to inshewine nn in yuys onn with
700nn 712nn 713 nn
#
aannnnn nn nnnn nn nn nn nn
nniin nnnn
Dninn nn nn nn nn nn nn nn nn nn
710
n nn nnnnnnnnnnnnnnnnnnnnnnn
NNTIOIOTNIHIN
Pn Pn Pn Pn Pn Pn Pn
npiinn
myn myn

nnnnnnnnnnnnnnnnnnnnnnnnnnnnnnnnnnnnnnnnnnnnnnnnnnnnnnnnnnnnnnnnnnnnnnnnnnnnnnnnnnnnnnnnn
n nn nnnnnnnnnnnnnnn
onnnn nn nnnn 7
nannnnn nnnnnnnnnnnnnnnnnnnnnnnnnnnnnnnnnnnnnnnnnnnnnnnnnnnnnnnnnnnnnnnnnnnnnnnnnnnnnnnnnnnnnnn
yyn yin nnynnn nn nnnn nn
y
y
C
non
n#
000nnn nn nnnnnnnnnnn
()nnn nn nnn
.MUM52./MUM54..
wnn on w jionnn
wnnn nn nn nn
1
B
#
#
A
ywn nn nnnn nn nn noannnn
nannnnnnae
n nn nnnnnnnnnnnnnnnnnnnnnnnnnnnnnnnnnnnnnnnnnnnnnnnnnnnnnnnnnnnnnnnnnnnnnnnnnnnnnnn
myn

nnonnnn nnnn nn nnnnnnnnnnnnn
y
:
ynnn nn nnnn nn nnnn nn nnnn
nN
ninn nnnn nn nnnn nnnn


he-4
he-3
n nn nnnn
nno n no n nn nnn nnnnnnnnnnnnnnnnnnnnnnnnnnnnnnnnnnnnnnnnnnnnnnnnnnnnnnnnnnnnnnnnnnnnnnnnn
nnpnnrnnny
niiin n 1
n nn nnnn nn nnnnnnnnnnnnnnnnnnnnnnnnnnnnnnnnnnnnnnnnnnnnnnnnnnnnnnnnnnnnnnnnnnnnnnnnnnnnnnnnnnnnnnnnnnnnnnnnn
INIOOIOIOIOIOIOIOIOIOIOIOIOIOIOIOIOIOIOIOIOIOIOIOIOIOIOIOIOIOIOIOIOIOIOIOIOIOIOIOIO
n nn nnnnnnnnnnnnnnnnnnnnnnnnnnnnnnnnnnnnnnnnnnnnnnnnnnnnnnnnnnnnnnnnnnnnnnnnnnnnnnnnn
nno nnnn nn nnnn
n#
yannnnn nn nnnnnn nnnn nnnn nnnn nnnn
05y 1n nn nnnn nn nnnnnnnnnnnnnnnnnnnnnnnnnnnnnnnnnnnnnnnnnnnnnnnnnnnnnnnnnnnnnnnnnnnnnnnnnnn
in
pnnn nnnnnnnnnnnnnnnnnnnnnnnnnnnnnnnnnnnnnnnnnnnnnnnnnnnnnnnnnnnnnnnnnnnnnnnnnnnnnnnnnnnnnnnnn
yinnn nnnn nn nn nn nnnn
TNNNINrnnnnynnn
nnnnn nn nn nnnon nn nnn
non 0

nnnnnnnnnnnnnnnnnnnnnnnnnnnnnnnnnnnnnnnnnnnnnnnnnnnnnnnnnnnnnnnnnnnnnnnnnnnnnnnnnnnnnnnnnnnnnnnnnnnnnnnnnnnnn
ninn
y
wnn nniy nnnn nnn off/0
n ony ninn nn
N NINIOINNNTNNIINN
n nn nnnnnnnnnnnnnnnnn
1
Tn
HJyNn nn nnnn nnnn nnnn
"nnn mny nnnn nnn
nynnninoojnn
y
n 3-1 nnnn nn
:kan nn nnnn
nno nnnnne (11) np
1nynnnny
ninn nnnn (8) 1
ninnnnnnnnnnnn
nN nnn nn npnn
nnn npnnn nn nnnn nn
he-2
gaii gaii gaii gaii gaii gaii
MU25FW1

a1s10 1000000000000000000000000000000
jL+1J#

gll gwlxyl lall all! no sall pac ally
xaoiia 5e Jwai1pso
L

oaii
600 100
gjai aal yall faaill gaa
(4)7aJJIgJgJgJgJgJg
( a1 + a2 + a_3) = 10

J 1
j8j1
gii 1
.47aJJIg64

i:ii:iii:45
aWwW81ySla
LwLo c3Lo 3J!2
100
L1L1u≤1
2x - 6 = 2 + 2k ,
70
jglg(LuiJg uaiIacLo)uig
(4)7aJdJIgclgla6Jl40nab
aigc, cai jg waill
1 1 1
aolo aolai y hyl Lill
jz j0 1
ED = 1,OE AB
aaww8jolal 105lae 4os gai
L 1
C
11 12
aai jglglaia
a 1
Llloaossioo 012
aLg310!
(jzlljla/1j)off/o gao jg 1
gaggai jajglcabaoa
1
jolil jbjg. pJinw81 fui JooJI 0e aegjI jg
a aos 120, g u! j
1g 1g
131 13
j1 1
Pc 1g100 g11 a051 Jai
aioj jai) 4: gao wu1 gao aai ci oai jg3
(1) 若 P ( 2k ) P k^2 - 2k + 2k 若 P ( k ) P ( k ) P k^2 - 2k + 2k 若 P ( k ) .
山
L 1
jLs! jzg 1jLac! oaoio g
a 1
JzJI 1g] g
1

off/0 1
(1)
1.1 gJgJgJgJgJgJgJg
(1)
gagjJooJIolJgJJUaLlaLlaL
Jooai 1
山
sliJooJIc aagjg jooJIg 12x
juiu jiu 11.
1
jla1nla 1aag jla1 Jaa
SL2ASLLa
aaiy aaiyaiyao yao bdo 1
Ji
ar-10
jLd
1,2,3\

a 1531 1111 1111 1111 1111 1111 1111 1111 1111
K
Sg 10000000000000000000000000000000000000000000000000000000000000
4y 4y 4y 4y 4y 4y 4y 4y 4y 4y 4y 4y 4y 4y 4y 4y 4y 4y 4y 4y 4y 4y 4y 4y 4y 4y 4y 4y 4y 4y 4y 4y
1 1

1531 121 1131 a11;

/MUM55./MUM54. jI J MUM56..
111 111 111 111 111 111 111 111 111 111 111 111 111 111 111 111 1
g 100000000000000000000000000000000000000000000000000000000
1
Joo 122xjg31
1c 111 111 111 111 111 111 111 111 111 111 111 111 111 111 111 111 111 111 1
JooJI 01g Icog J
aajll aaycill ab131 a
Jwll Alaa aagaaal ababla 1g 1 Jwic ailo
alss 1 gll lgl 1al 1: aol ool
jll jll Jw wle, aai al 1g 1scl
paoa aea ae bie ploall cuj no Jlall gao (eaii sajg) aayaa aai aai aai Coo
LLA aayaaiaaiaaiaaiaaia
by 31
15

S ACD = S COD + S BDO - S CDO
aLslo jwlll alIg callg blll g 1j
J L
A J
Lg w lgl
y Bk1
Lg k
Lg 100
Lg 100
Lg 100
Lg 100
Lg 100
Lg 100
Lg 100
Lg 100
Lg 100
Lg 100
Lg 100
#

aLslll aL 105 aai pajlln aai jll l aiglll aiee eee eee
ar-9
LgSll aai
1,25=ALwolg0,a0SLL
gagjLaiqsoalilwslgo,aoc
- 0,5 =
100 50=00g,aJ1111c81 a
100 100
aogjLg juaiolgoagluw
pSb: aaggo g jaiw wj psl bll.
1
(U-8gJ)Lig≤14A
jglall alw! jg1 Jai
LgSll aLalg ll
9
0g 00d1 cglg51 dcll aag gaoa
aaiia jyix 100
Lg≤1
9
gai JLi 10 ailluui Li gll aiLai
Joell Joelgii 1
jgllll alw! jg1 Jai ai
aag aclwll yac oolg jolb1j 0
4
jglai21 jg bxl31 i:ii Jia 81 j0:
dolsi
jLgLj.
1
aiis 150 aaii iio plasimol pcc
1 1
a_2 = ( ab + ab) /2
wuwj1jgl
1
SLGLaizil Jaa 1Jgla 1
aagjglgjjlllglgawLwJ1Jg31
Lai a allo o lae ae bae gnn Jdo o
Jilwcbio no Jllo piaiui aai jll sic
JLae aea Jgai aia
aag aegall aayyai all alol jslb c1j 1
ailliaio
JooJIooIgiiI
jglall alwjlg1
ol1 u5c y aagaiyaoaiiaabla 1
Lg>1n 1
aclll yac oolsc glaalj
S OBC = S COD + S_ BOC
aii iipaiu uuiu uuiuuiuuiuuiuuiuui
jglgagcglkaiilglolw
(H aJgJ)
bok
jaiuaii iay, aaiSlo jai
gSi gjLbuiyaiyaiyaiyaiyaiyaiyaiyaiyaiyaiyaiyaiyaiyaiyaiyaiyaiyaiyaiyaiyaiyaiyaiyaiyaiyaiyaiyaiyai
pJIJg<wI gog aagoo
1
y jg jg jg jg jg jg jg jg jg jg jg jg jg jg jg jg jg jg jg jg jg jg jg jg jg jg jg jg jg
JooLusilgog)joo goc joo JgJg
jssy jgsaegnla jusie
gJ 1 gJgJgac JgAs1 JSc. gAsll iic
S OAB = S AOB + S_ OBC
- 12ab + 10( a^2 + 5b^2) = 0
a 153
.(3)5a
gj gai jyglc ggl jao jol oclj
10001 10001
2.11 2.11 a.11 3
1
Ebaill Clllo jic uadagall yg Ebaill yj
aibj = 0
jgllll alwgljg jzai jai
LigS11 aLw! axo Jx no LgS11 axoai
1
s
1
3x - 6 = 2 + 2k ,k z
2ggljglcgljgljdl
LigSll aolai
JooJIooIgiiI
jgllll alwjl jglil jaii jai
SLSSJ 1
1

a_i Q. = P( 1 - P^2)
2ggljglgljgljgl
a101010000000000
S_ LBC = 12 · ( CD + BC) = 12 × 2t
aIg aIbIJI>JbI,1j>JI aILs aIbI
lg2 = 2^2
aagai aaiiaai 1
S OBC = S COD + S BOC - S BOC

g>g>515 111081 g>g>21 g>g>21
S OBC = S AOB + S_ OBC
81 aygall aygaiill abolj 1y/ucsj pac y
an + 1 = 2 - anan + 1 1an + 1 = 12 - 1an = 13 - 1an
S AOB = S COD + S BOC - S BOC
aill iie jll Jlsc
1
Loic 21 aygall ayyolll abjil plasimul puc y
aalbo aag yann sill JolS gog
yIaJI JgJ1 1c aIgai IaIgai IabJ1
g21 ayagall ayayail abyl plasainl pac yplasinil calei g aic yogaiill jznilll
.0.

(13)
gJitll Jgl, jai
aaii iiei jilgill Jogillll
aui 1
aLwI gJgJgJgJgJgJgJgJgJgJgJgJgJgJgJgJgJgJgJgJgJgJgJgJgJgJgJgJgJgJgJgJgJgJgJgJgJgJgJgJgJgJg
Jugillll Jb:Jgai Sjai jay
Lw:0a0g 1c y
1
gillglllglllllgllpae gdo
4yolil aygill glls
1111 1111 1111 1111 1111 1111 1111
1111 1111 1111 1111
y jyjySll Jyogill lllw Jlinil allg y.
aaii jaii jaii jaii jaii jaii jaii
1.
SLJLj 1
JcJgJcLgJI
Jocill cglg Jxu on cullug jus
0.0121
sllslgll jks! pcc aalba oogag
89.2018 31 Jg31 Jzni pae jg31 Jzni
1420ggo gLgSgo (12) golgl
0123 0208 09Si Iocic 8! JooJIol oJoi pOc
1
zog y aegggyaagaae 0j12 jbj0j0j0
- 1,2,3,4,5,6,7,8 的个数.
pill 195 wll 20g g cooal 24 Jall alol
Coomer 2 jie 1 jie zoohmjjoloo
aossinnll ycbysy1 c1sog syl oic 21 al
(8,5) ① | x,y| = 1 ( 0,1)
1
jolilgJoell gJglcI plssuulpcc
bà
1.22 = 3
11111110

aiai jie 1
S_ OBC = 12 · CO · BC = 12 × CD × 5
Joaill gai aol aojoll coioc
14 个
gao/1oacolai 5jxjxjxjxjxjx
Jinill gao dc Ighao gao
Ee 1
jolal aolcoilll cllldlg jglj jzj pcc
jg= gplssnWdAeLwzg12aigsn
(1) 1,2,3,4 1,2,3,4 ,S = 1
aLslll lal1g] jolllg] pssil
jglgall glaljgi
(20
Jocel jace1
aikig aiginno a jlc jglgns
(D)
MUM52./MUM54.
JwglllLw!
x1 = 32 x2 = - 4 ( 0 < x)
gJgSJI JUogJI U
gall Jgall:
ar-5
回
J
1
galll/laol 1s l5 13181 14
jg211 123 4200 g a 10000
Tnall gag aannall b121 0g glc
S ACD = S COD + S_ CDA
gill aagoo g1 2000s:
Jusitell Eos 0a 2015

"Easy Armlift" a1b0jg0c0jll
aai aiaIgII oiaq,(ajgGw Gjll E,
1
:J
133g jyLx1 p<>j+g3 13jjnai
a 1
glll jll lgl 1111111
jaiw 10g5 g> a3,3 jaiw81 20a
y
| MUM54.. MUM55.. MUM56.. | MUM52.. | \( \therefore \) \( \left( {x,y}\right) \) |  | |
| 1-7 1-7 1-3 | 1-4 1-4 1-2 |  |  | 1 |
| - | - | - | 7 | 2 |
| 3-7 | 2-4 |  |  | 3 |
| 3-5 | 2-3 |  | ||
| 5-7 | 3-4 |  |  | 4 |
| 5-7 | 3-4 |  |  |
L5, gjgj11 1111111111111111
glll gll 0a ays S y
le : y = - 12x^2 + 14x + 3 Be
10
JUUGUULJL:MUM52./MUM54..
1111 1
JUUG:UM55./MUM56..
S OBC = S COD + S_ BOC
iLcs iLcLg 0sLc
12x 2 xg jy yu li sIg 11
elb 12
Joc 1gai
gj1 13
14
15
aLsill Lss16
gabai jolj gaoi oglge biau
24
gdsilgbw17
aie jiaie cIb# 18
19
19a
19b
IogaiI IaWio - jui Jao 19c
Jolal 20
C1s! 21
S ACD = S COD + S_ CDA
22
23
24
aLcS1111g>10s11Lo aJg
Caaal aagllc aaggo gL
Jiei jil 1sclj 0jolil
a 1000
g 12xJxJxJxJxJxJx
aJ 1
(jz)ll (zj/2)off/0 2g jg jg lal
100 Joc
Jiljll Jcnnlln nn jolil
aagjglplsl 15Lo aJLg
JaiI JALoc! jlb! 2gS Jil
0o 8s aos sao gai ai jia j
1g 1g
JLac! gUb! JIg aaiu Lwui Ic Eubu
Jg jyj yj 001001001
Ji i 1
jgl 10 aalisi o jlr bai yg c liy g
aolc bci
a
wJl
1
2
(aJgGcgljllgJl)“EasyArmlift”
gljglgjjllgljllas>ac
(1) 1,2,·s ,n
ar-3
!LwJilgWJxo g
Jlss! pacc aalba ooggag jg 10n o yglj gblbji gll Jls! pacc
(12) yIgJgJgJgJgJgJgJgJgJgJgJgJgJgJgJgJgJgJgJgJgJgJgJgJgJgJgJgJgJgJgJgJgJgJgJgJgJgJgJgJgJgJgJgJgJgJgJgJg
1400gL5
J 1
L 1
aillgssggs
1 1
.8,5) aJxI cJgJgJgJgJgJgJgJgJgJgJgJgJgJgJgJgJgJgJgJgJgJgJgJgJgJgJgJgJgJgJgJgJgJgJgJgJgJgJgJgJg
g o g o 121 o o g o S i L o i c 21 a g aill a r y aill abl 31 1 s l s p
SLgSLJ 1000000000000000000000000000000000000000000
ailliao gJlLpac
151 151
a
1
p<11g<11g<11g<11g<11g<11g<11g<11g<11g<11g<11g<11g<11g<1
0g 1 g 1 g 1 g 1 g 1 g 1 g 1 g 1 g 1 g 1 g 1 g 1 g 1 g 1 g 1 g 1 g 1 g 1 g 1 g 1 g 1 g 1 g 1 g 1 g 1 g 1 g 1 g 1 g
ar-1
Lg-
ar-1. 以 S_ OLM Jol
ar-4. 2olo 12
ar-6. 13.1
ar-9
ar-10
Ji#g# sic oxclwll L
ar-10
ar-11
ar-13
aill 200
ar-15 a ≤ 1 g = am( a - 1)
ar-15
jla 112a05il, jw gic jilgill gdoi pdo
BOSCH 45,La 100
12
100 200 300 400 500 600 700 800 900
Liyol3i ciyyjggo gLiIaio JgClogell
05:0x10
y
jlg11g jolz JnJyIg 0xwnl jLoo LsLjgl
aio Jo3 pao aIc wjy jg yll plaii w8ly aoil laoeill biipj121 pao
1J3 200 a3111 j381 c aJgmo a28j4
pIiuiuIg aJg JLoaiuU Iao uJg jilpliaiuwU bao lgo jglis
j 100000000000000000000000000000000000000000000
yabgll aoll fll lglplasil Jll Jw Lj jll plss
jLgJyssuclscLis. gJxJooJI xLgog jIg JgJgJgLoJI
Lds Lg oai jgl gig i 10
1
1
ailiic sgo gao jcg uai J wioj cJL jg11i
sulicg pLwgl sI 120 gJg
jLg1 pIiwiJ Soll Jo ngS jlg 10 oio Joo ooiieil aoloo aiLai iip
sui liu hui
aLsOlll cIaI11 pIaI11 aIaIaI11 21 jIg31 JzwiPc
JLJSggiyolglsslll:aaalplasxlaeolclj
AE United Arab Emirates,
a
BSH Home Appliances FZE
Round About 13
Plot Nr MO-0532A
Jebel Ali Free Zone - Dubai
Tel.: 04 881 4401
mailto:service.uae@bshg.com
www.bosch-home.com/ae
AL Republika e Shqiperise, Albania
AERTECH SH.P.K.
Rruqa Qemal Stafa
Pallati ri perball Prokuroris se
Pergiithshme
Hyrj C Kati 10
Tirana
Tel.: 066 206 47 94
mailto:g.volina@aertech.al
HEATHERTON, Victoria 3202
Tel.: 1300 368 339
mailto:bshau-as@bshg.com
www.bosch-home.com.au
BA Bosna i Hercegovina, Bosnia-Herzegovina
"HIGH" d.o.o.
Gradačka 29b
71000 Sarajevo
Info-Line: 061 100 905
Fax: 033 213 513
mailto:delicnanda@hotmail.com
BE Belgique, Belgie, Belgium
BSH Home Appliances S.A.
European Trade Center Building, 5th floor
1784 Sofia
Tel.: 02 892 90 47
Fax: 02 878 79 72
mailto:informacia.servis-bg@
bshg.com
www.bosch.home.bg
BH Bahrain,
Khalafat Company
Manama
Tel.: 017400553
mailto:service@khalaifat.com
BY Belarus, Benapycb
OOO"BCX BbITOBaTexHnka"
Ten.: 4957372961
mailto:mok-kdhl@bshg.com
CH Schweiz, Suisse, Svizzera, Switzerland
BSH Hausgeräte AG
Werkskundendienst fur
Hausgeräte
Fahrweidstrasse 80
8954 Geroldswil
+7 snt/min (alv 23%)
+17 snt/min (alv 23%)
FR France
BSH Electroménager S.A.S.
To arrange an engineer visit, to
order spare parts and accessories
or for product advice please
www.bosch-home.co.uk
or call
*Calls from a BT landline will be charged at
up to 3 pence per minute. A call set-up fee of up to 6 pence may apply.
GR Greece, Eλας
BSH Ikiakes Siskeves A.B.E.
Central Branch Service
17 km E.O. Athinon-Lamias &
Potamou 20
14564 Kifisia
Unit 1 & 2, 3rd Floor
North Block, Skyway House
3 Sham Mong Road
Tai Kok Tsui, Kowloon
Hong Kong
Tel.: 2565 6151
Fax: 2565 6681
mailto:bosch.hk.service@bshq.com
www.bosch-home.cn
HR Hrvatska, Croatia
BSH kučni uredaji d.o.o.
Kneza Branimira 22
10000 Zagreb
Tel.: 01 640 36 09
Fax: 01 640 36 03
mailto:informacije.servis-hr@
bshg.com
www.bosch-home.com/hr
www.bosch-home.com/hu
IE Republic of Ireland
BSH Home Appliances Ltd.
Unit F4, Ballymount Drive
Ballymount Industrial Estate
Walkinstown
Dublin 12
Service Requests,
Spares and Accessories
Tel.: 01450 2655
Fax: 01450 2520
www.bosch-home.co.uk
IL Israel,
C/S/B Home Appliance Ltd.
Uiel Building
2, Hamelacha St.
Industrial Park North
71293 Lod
Tel.: 089777222
Fax: 08 9777 245
mailto:csb-serv@zahav.net.il
www.bosch-home.co.il
IN India, Bharat
BSH Customer Service Front Office
Shop No.4, Everest Grande,
Opp. Shanti Nagar Bus Stop,
Mahakali Caves Road, Andheri East
Mumbai 400093
IS Iceland
Smith & Norland hf.
Noatuni 4
105 Reykjavik
Tel.: 0520 3000
Fax: 0520 3011
www.sminor.js
IT Italia, Italy
www.bosch-home.com/it
KZ Kazakhstan, Ka3aKcTah
IP Turebekov Yerzhan
Nurmanovich
Jangeldina str. 15
Shimkent 160018
Tel.: 0252 31 00 06
mailto:evrika_kz@mail.ru
LB Lebanon,
Teheni, Hana & Co.
Boulevard Dora 4043 Beyrouth
P.O.Box 90449
Jdeideh 1202 2040
Tel.: 01 255 211
mailto:Info@Teheni-Hana.com
LT Lietuva, Lithuania
Senuku prekybos centras UAB
Jonavos g. 62
44192 Kaunas
Tel.: 0372 12146
Fax: 0372 12165
www.senukai.lt
LU Luxembourg
BSH electromagens S.A.
13-15 ZI Breedeweues
1259 Senningerberg
Tel.: 26349300
Fax: 26349 315
mailto:lux-service.electromager@
bshg.com
www.bosch-home.com/lu
LV Latvija, Latvia
General Serviss Limited
Bullu street 70c
1067 Riga
Tel.: 07424137
mailto:bt@olimpeks.lv
Elkor Serviss
Brivibas gatte 201
1039 Riga
Tel.: 067 0705 20; -36
Fax: 067 0705 24
mailto:domoservice@elkor.lv
www.servisacentrs.lv
MD Moldova
S.R.L. "Rialto-Studio"
yn. LycceBa 98
2012 KnuinHeB
TeJ./paKc:022238180
mailto:bosch-md@mail.ru
ME Crna Gora, Montenegro
Elektronika komerc
U.Slobode 17
84000 Bijelo Polje
Tel./Fax: 050 432 575
Mobil: 069324812
mailto:ekobosch.servis@
t-com.me
MK Macedonia, MaKeDoHnja
GORENEC
Jane Sandanski 69 lok.3
1000 Skopje
Tel.: 022 454 600
Mobil:070697463
mailto:gorenec@yahoo.com
MT Malta
Oxford House Ltd.
Notabile Road
Mriehel BKR 14
Tel:021442334
Fax: 021 488 656
www.oxfordhouse.com.mt
MV Raajeyge Jumhooriyyaa, Maledives
Lintel Investments
Ma. Maadheli, Majeedhee Magu
Male
Tel.: 0331 0742
mailto:mohamed.zuhuree@
lintel.com.mv
Unit F 2, 4 Orbit Drive
Mairangi Bay
Auckland 0632
Tel.: 09477 0492
Fax: 094772647
mailto:bshnz-cs@bshg.com
www.bosch-home.co.nz
PL Polska, Poland
SA Kingdom Saudi Arabia,
BSH Home Appliances
Saudi Arabia L.L.C.
Bin Hamran Commercial Centr.
6th Floor 603B
Jeddah 21481
Tel.: 800 124 1247
mailto:service.ksa@bshg.com
www.bosch-home.com/sa
SE Sverige, Sweden
BSH Hushàllsapparater AB
Landsvagen 32
169 29 Solna
Tel.: 0771 11 22 77 local rate
mailto:Bosch-Service-SE@
bshg.com
www.bosch-home.se
SG Singapore,
BSH Home Appliances Pte. Ltd.
TECHPLACE I and
Mo Kio Avenue 10
Block 4012 #01-01
569628 Singapore
Tel:67515000
Fax: 6751 5005
mailto:bshsgp.service@bshg.com
www.bosch-home.com.sg
SI Slovenija, Slovenia
BSH Hišni aparati d.o.o.
Litostrojska 48
1000 Liublana
Tel.: 015830701
Fax: 01 583 08 89
www.bosch-home.com/tr
4th floor, No. 112 Sec 1
Chung Hsiao E Road
Taipei ROC 100
Tel.: 02 2321 6222
mailto:Bosch@achelis.com.tw
UA Ukraine, YkpaHa
TOB "5CX NóbyToBa TexHika"
TeJ.:044 490 2095
mailto:bsh-service.ua@bshg.com
gama-electronics.com
XS Srbija, Serbia
BSH Kučni aparati d.o.o.
Milutina Milankovica 11^a
11070 Novi Beograd
Tel.: 011 205 23 97
Fax: 011 205 23 89
mailto:informacije.servis-sr@
bshg.com
www.bosch-home.rs
ZA South Africa
BSH Home Appliances (Pty) Ltd.
15th Road Randjespark
Private Bag X36, Randjespark
1685 Midrand-Johannesburg
Tel.:086 002 6724
Fax: 086 617 1780
mailto:applianceserviceza@
bshg.com
www.bosch-home.com/zao


