
Diábolo - Vacuum Cleaner PALSON - Free user manual and instructions
Find the device manual for free Diábolo PALSON in PDF.
| Product type | Robot vacuum cleaner |
| Brand | PALSON |
| Model | Diábolo |
| Power supply | Rechargeable battery (230V / 50-60 Hz adapter) |
| Charging time | 4 to 5 hours (8-9 hours for first use) |
| Runtime | 30 to 60 minutes depending on selected mode |
| Cleaning modes | 3 modes: S (small room), M (medium), L (large) |
| Suitable area | S: 10-15 m², M: 15-25 m², L: more than 25 m² |
| Sensors | Infrared, drop detection (avoids falls) |
| Functions | Virtual wall, intelligent cleaning, auto shutdown |
| Brushes | Main brush, side brush (replaceable), rubber brush |
| Filter | Removable and washable filter |
| Included accessories | Virtual wall unit, charger, cleaning tool, spare side brush, filter, cleaning brush |
| Maintenance | Regular cleaning of dustbin, filter, brushes, and intake cover |
| Safety | Do not use on thick carpets, supervise children, low battery shutdown |
| Environmental protection | Recyclable – do not dispose of with household waste |
| Spare parts | Side brush, screw, rechargeable battery |
Frequently Asked Questions - Diábolo PALSON
User questions about Diábolo PALSON
0 question about this device. Answer the ones you know or ask your own.
Ask a new question about this device
Download the instructions for your Vacuum Cleaner in PDF format for free! Find your manual Diábolo - PALSON and take your electronic device back in hand. On this page are published all the documents necessary for the use of your device. Diábolo by PALSON.
USER MANUAL Diábolo PALSON
Robotic vacuum cleaner
Robot aspirateur
Robo aspirador
Staubsaugerroboter
Robot aspiratutto
Robotstofzuiger
Hεktpikn σkoúπa pouπó
Pobot-ntbIneCoc
ailliljys
Porszívó robot
Robot elektrik sūpūrgesi
Ppaxocmykaayka-po60T
Diabolo
COD. 30595
E
MODO DE EMPLEO
GB
OPERATING INSTRUCTIONS
F
MODE D'EMPLOI
P
MODO DE EMPREGO
D
GEBRAUCHSANLEITUNG
1
ISTRUZIONI
NL
GEBRUIKSAANWIJZING
GR
TPOIOE XPHES
RU
INHCTPYKLIIM
AR
JaeuW
HU
HASZNÁLATI UTASITÁS
TR
KULLANMA SEKLI
BG
HCTPYKUN 3A YNOTPE6A
E ESPANOL. 6
GB ENGLISH 12
F FRANÇAIS. 18
P PORTUGUES. 24
D DEUTsCH 30
ITALIANO 36
NL NEDERLANDS. 42
GR EAHNIKA 48
RU PYCKN 54
AR 65
HU MAGYAR 66
TR TURKGE. 72
BG 78
- Virtual wall unit
2 Battery charger
3 Spoon
4 Side brush
5 Filter
6 Infrared sensor
7 Carrying handle
8 Battery level indicator
9 Start buttons
10 Removable tank
11 On/off switch
12 Main brush
13 Dirt inlet cover
14 Sensors
15 Rechargeable battery
16 Battery recharging socket
17 Cleaning brush
Our products are developed to reach the highest standards of quality, functionality and design. We hope you enjoy your new PALSON DIABOLO robotic vacuum cleaner.
IMPORTANT INSTRUCTIONS
The robotic vacuum is recommended exclusively for indoor use. It is suitable for hardwood floors, linoleum, tile and shallow or medium carpets. To make sure you get the most out of your robotic vacuum, please read this instruction manually carefully.
- Before starting your robotic vacuum, make sure the battery is fully charged.
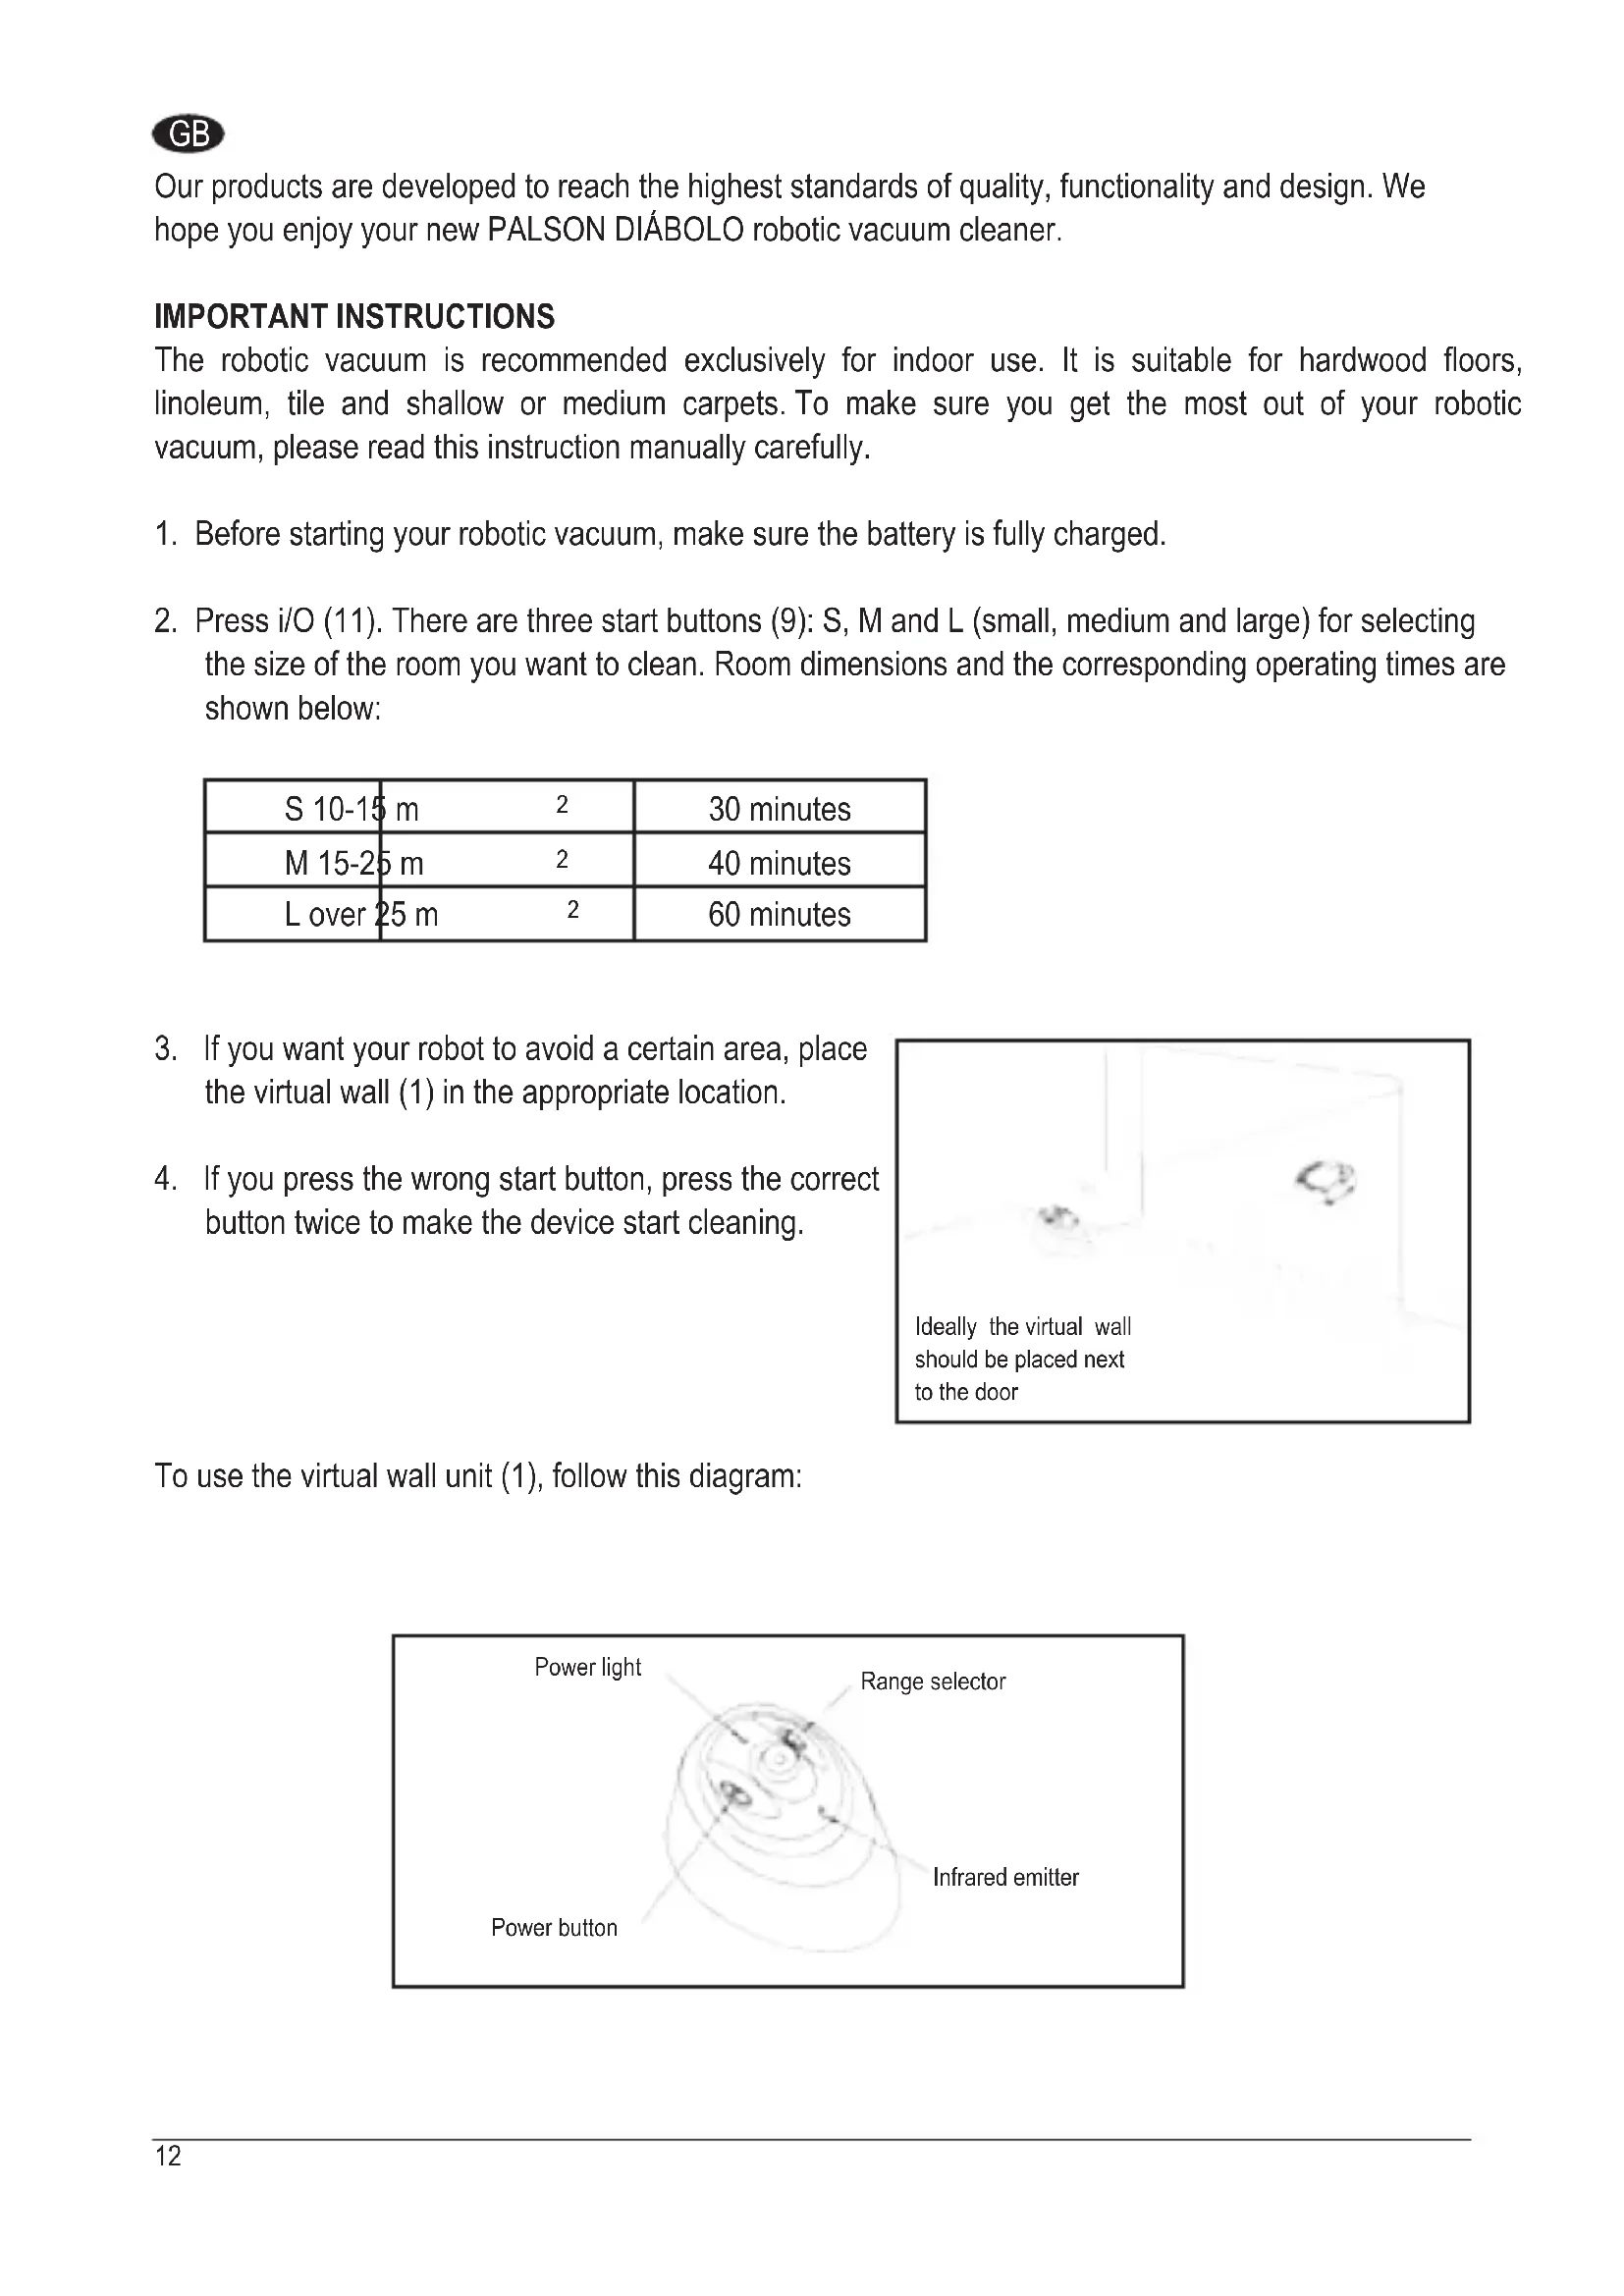
- Press i/O (11). There are three start buttons (9): S, M and L (small, medium and large) for selecting the size of the room you want to clean. Room dimensions and the corresponding operating times are shown below:
| S 10-15 m | 2 | 30 minutes |
| M 15-25 m | 2 | 40 minutes |
| L over 25 m | 2 | 60 minutes |
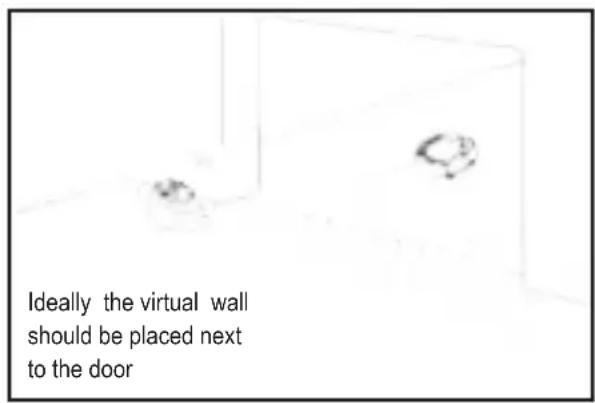
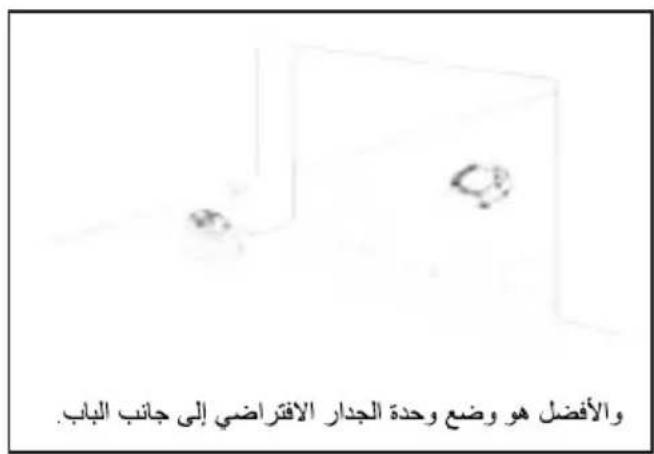
- If you want your robot to avoid a certain area, place the virtual wall (1) in the appropriate location.
- If you press the wrong start button, press the correct button twice to make the device start cleaning.
To use the virtual wall unit (1), follow this diagram:
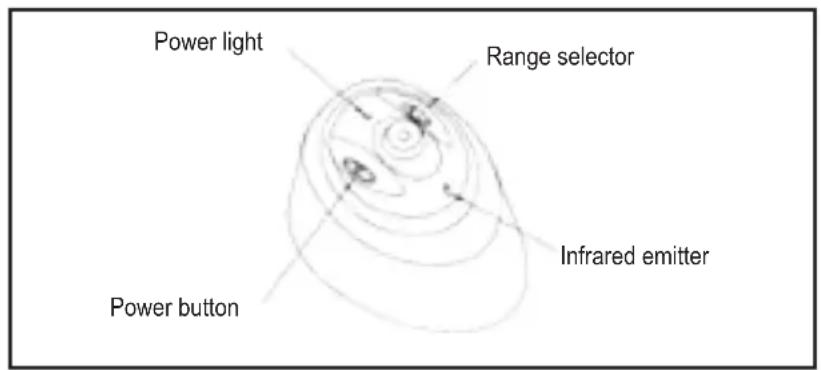
The virtual wall unit (1) uses two batteries (LR20) to divide the infrared emission distance into three options, as shown in the following diagram:
Over 7 metres
3-7 metres
0-3 metros
Select one of these options according to what you want to clean. CAUTION: Do not look at the infrared light.
-
After pressing one of the three start buttons (9), you will hear a sound and the vacuum will start working.
-
The device will take 30-60 minutes to clean a regular sized room. When the battery is running low, the battery level indicator (8) will turn red and the system will switch off automatically. The robotic vacuum is simple to use and requires minimal maintenance. To guarantee optimum performance, always follow these steps:
Cleaning the removable tank (10)
There are two ways to remove dust and dirt from the tank:
- Empty the removable tank (10):
a) Turn off the device.
b) Depress the tab on the tank (10) and remove it as shown in the following diagrams:
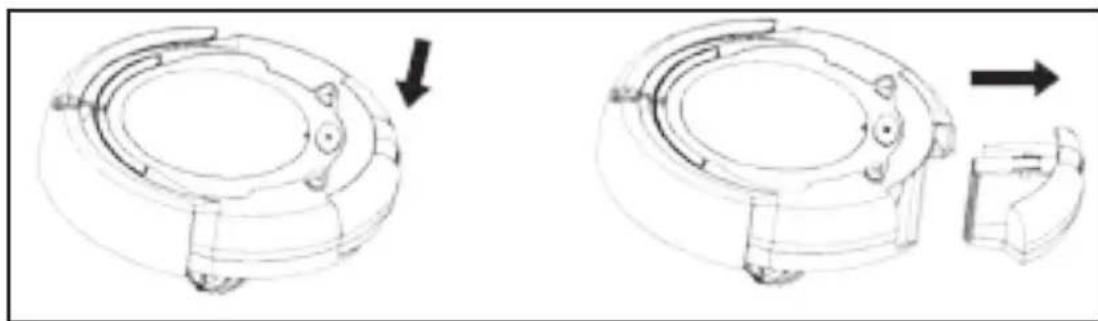
c) Clean the tank (10).
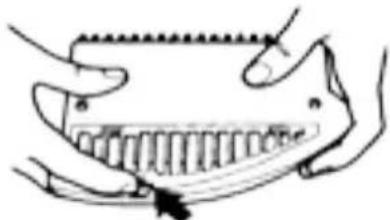
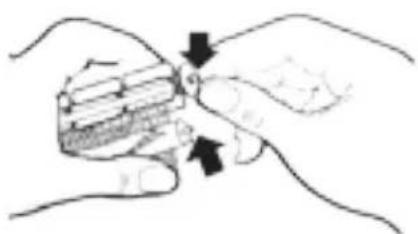
- Clean the filter (5):
a) Place the tank (10) upside down.
b) Lightly press the button and remove the filter (5) as shown in the following diagram:
GB
c) Clean the dirt from the filter (5).
d) Replace the filter (5) into the tank (10).
e) Press down the tab lightly and reinsert the tank (10) into the robotic vacuum.
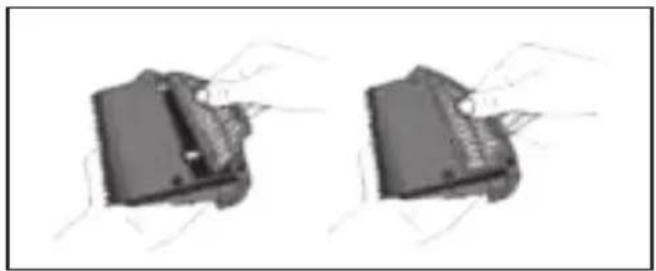
Cleaning the main brushes (12) on the robotic vacuum.
- Turn off the robotic vacuum and place it upside down on a flat surface.
- Use a star-head screwdriver to remove the right attachment screw, then remove the main brush (12), rubber brush and brush connector, as shown in the following diagrams:
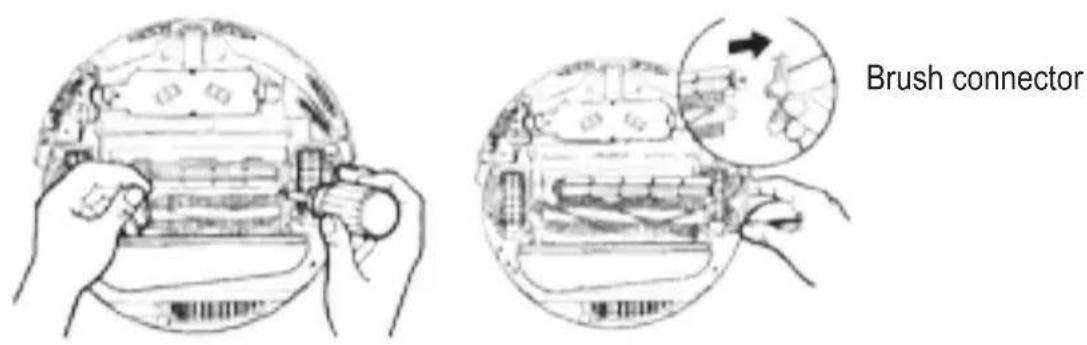
- Clean the brush chamber and remove any detritus from the brush and rubber brush.
- Clean off any dirt found on the shaft, the metal connecting bracket and on the brushes (this may not be necessary after every use) as shown in the following diagrams. Apply lubricant if necessary.
- Reinstall the brush connector and brushes and tighten the screw.
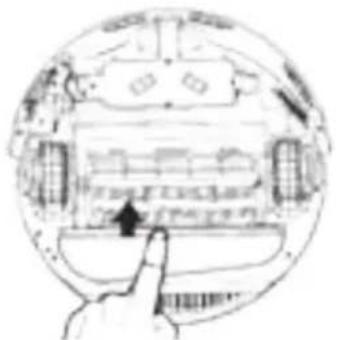
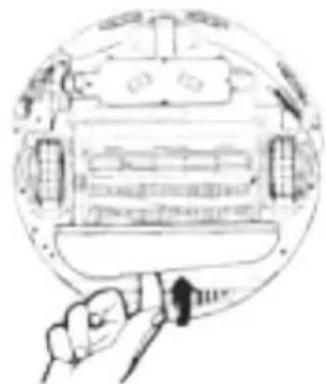
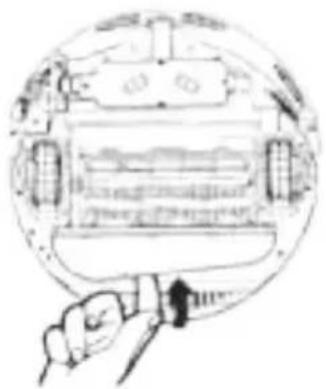
Cleaning the robotic vacuum inlet cover (13)
1) Turn off the device. Place the robotic vacuum upside down on a flat surface.
2) Place the robotic vacuum inlet cover (13) as shown in the following diagram.
3) Clean the robotic vacuum inlet cover (13) and the fan-shaped mechanism to ensure correct ventilation.
4) Carefully seat the connecting tabs on the robotic vacuum inlet cover in their corresponding holes.
Recharging
The robotic vacuum must be recharged after each use. The light, robust charger is designed for 230V outlets (voltages differ from country to country) with a frequency of 50/60Hz . It is especially designed for our robotic vacuum; please do not charge the device with any other charger.
How to recharge
- Turn off the device. Put it in a safe place.
- On the right hand side of the device there is a socket and a recharging light. Total recharging time is around 4-5 hours.
- When recharging, the robotic vacuum indicator light will turn on, indicating that the device is charging correctly. After 4-5 hours, the battery will be fully charged and the charger should be unplugged.
Once fully charged, unplug the charger to avoid overloading the battery which may affect its working life.
CAUTION
- The charger (2) supplied with this unit is designed with a particular voltage, stability and reliability and is to be used exclusively with the rechargeable battery provided. Do not use the rechargeable battery (15) or charger with other products.
- To prolong the working life of the battery, charge it for 8-9 hours after its first use or when reusing it after a long period of inactivity.
- The battery will reach its optimum performance level after 2-3 full drainage and recharging cycles.
GB
Side brush replacement (4)
Study the following diagram to ensure correct replacement.
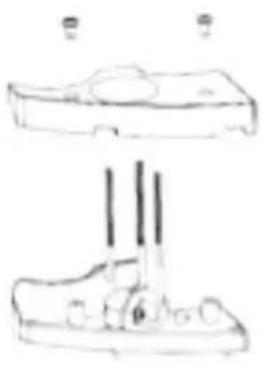
Fig 1
Fig.2
- Remove the screws as shown in Fig. 1.
- As per Fig. 2, rotate the side brush (4) until you can insert a screwdriver, the loosen the screw, remove the used brush and replace it with a new one.
- Assemble the brush and bottom cover in reverse order.
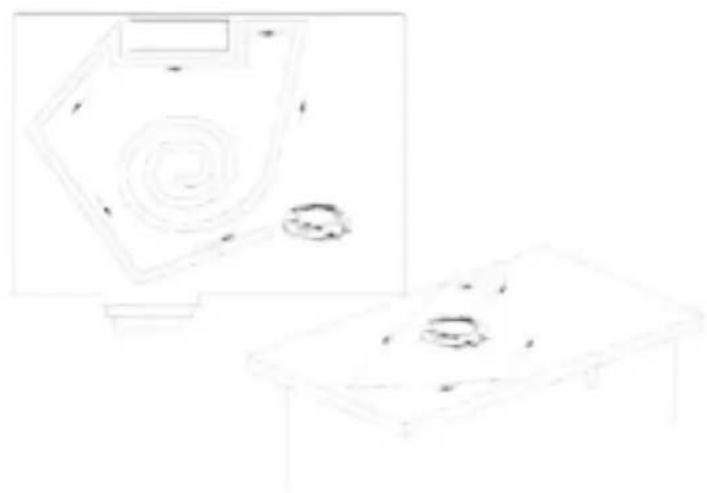
Intelligent guidance
The robotic vacuum is intelligently controlled for efficient operation and to avoid obstacles, as well as to prevent it from falling over, off a table or down stairs.
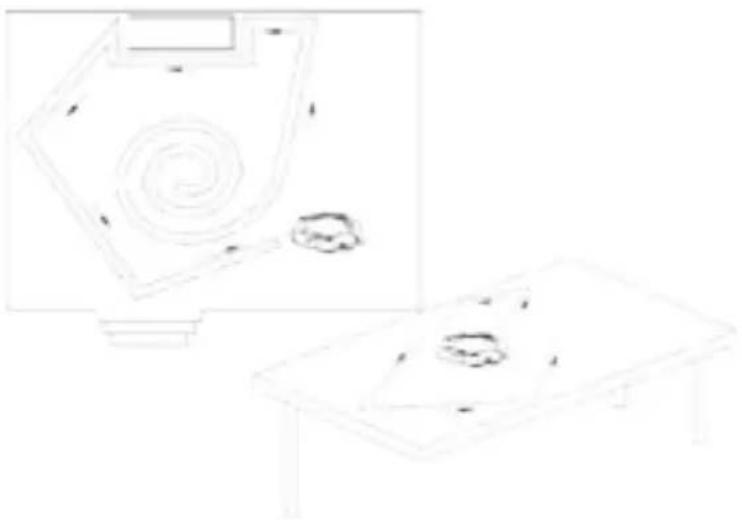
NOTE: Before using the robotic vacuum, remove any small objects such as containers, small paper bins, etc. from its path that are likely to fall over during cleaning.
Take the following points into consideration:
- If the system is running but switches off after the tone sounds, the battery may be low and the device needs charging.
- Do not use the robotic vacuum on thick rugs.
-
Avoid using the robotic vacuum in places where clothing, cables, towels, etc. are likely to become tangled in its brushes.
-
If the device is unused for a long period of time, it must be fully charged.
- After prolonged use, clean the top and bottom of the robotic vacuum using a dry cloth.
NOTE: To ensure the best possible use of the robotic vacuum, read the following description on correct troubleshooting methods:
- If the front wheel of the robotic vacuum falls over the edge of a staircase, use the cleaning brush (17) or a dry cloth to remove the dust build-up from the bottom sensor (14) on the front bumper.
- If the power to the robotic vacuum is cut off during cleaning and all S/M/L light indicators are on, the robot is not functioning correctly. Follow these steps to resolve the problem:
a. Turn off the robotic vacuum and turn it over, checking inside the central brush for any large fluff build-ups that may be blocking the central brush wheel, and remove all dirt. The device should now be working correctly.
b. Check for any built-up dirt inside the right/left wheels. If present, turn the wheel to remove the dirt; the device should now work correctly.
c. When the device is full, empty it to improve its efficiency and to prevent overloading during use, resulting in a safety shut-off.
- When the robotic vacuum rotates back to its original position, check for any built-up dirt in the right and left wheels. Remove any debris stuck inside.
- If the virtual wall unit is not locking properly, make sure the robot is correctly fitted; if the green indicator is flashing continuously, change the battery in the unit.
- Do not allow children to obstruct the path of the robotic vacuum, and avoid unnecessary damage caused by throwing it down stairs.
- This product may not be used by minors or other unsupervised persons who, due to physical, sensorial or mental conditions, are unable to use it safely. Children must be supervised at all times to ensure they do not use the product as a toy.
- If the power cable is damaged, for safety reasons it must be replaced by the manufacturer or its authorised technical support service, or by a qualified technician.
ENVIRONMENTAL PROTECTION
Used electrical products must not be discarded with household waste. This device must be taken to a local recycling centre for safe disposal.
Thank you for purchasing one of our products.
F
BbMOKeTe Bb6paTb OINH 3tNX peKIMOB B 3aBNCMOCn OT TORO, YTO XOTNe y6paTb.
BHIMAHNE: ɪs36eraɪte nonaɪdɪnnaɪyʊ nɪhɒpɑkpaːchɔrə nɪʒnuːtæŋB rɪlaɪaʒa.
alaii iie jie 1i jia yjaiy jiall caii gaii
aay aay ay yll jn nn nnnn nn nnnn
i1i i 1
(4)
a
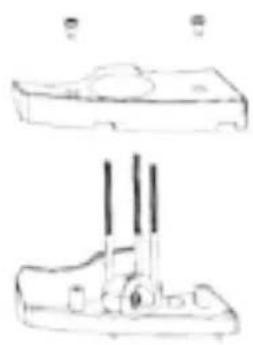
Fig.1

Fig 2
JyI JyI yI yI yI yI yI yI yI yI yI yI yI yI yI yI yI yI yI yI yI yI yI yI yI yI yI yI yI yI yI yI yI yI yI yI yI yI yI yI yI yI yI yI yI yI yI yI yI yI yI yI
S AOB = S AOC + S_ OBC
.3
sill jlll jil
e 1
- 3.1.2
i 1
Aaill baii
jiey jy bllbl
1
1.24 2
3
1
Jlll y jall cjll aill abg prsiu, ayb zal jglll pisiu la la.4
J 5
(13) 4
1
.1111 15 (13) jlll Jssolbce 2
aiXall aygill jaiial a gall jajll (13) jajll jadell 3
aaii lglal jaiil Jals jll Jld 1bce gie (4
4.1.3.1
| 30 | 15, 10 | S |
| 40 | 25, 15 | M |
| 60 | 25 | L |
abii jyjySll aikall jg jyj p13
(1) yjyJl JjL 4
(1)j

HU
Disposal of old Electrical & Electronic Equipment (Applicable throughout the European Union and other European countries with separate collection programs)
This symbol, found on your product or on its packaging, indicates that this product should not be treated as household waste when you wish to dispose of it. Instead, it should be handed over to an applicable collection point for the recycling of electrical and electronic equipment. By ensuring this product is disposed of correctly, you will help prevent negative consequences to the environment and human health, which could otherwise be caused by inappropriate disposal of this product. The recycling of materials will help to conserve natural resources. For more detailed information about the recycling of this product, please contact your local city office, household waste disposal service or the retail store where you purchased this product.


- Diabolo
- IMPORTANT INSTRUCTIONS
- Cleaning the removable tank (10)
- GB
- Cleaning the main brushes (12) on the robotic vacuum.
- Cleaning the robotic vacuum inlet cover (13)
- Recharging
- How to recharge
- CAUTION
- Side brush replacement (4)
- Intelligent guidance
- ENVIRONMENTAL PROTECTION
- F
- HU
- Disposal of old Electrical & Electronic Equipment (Applicable throughout the European Union and other European countries with separate collection programs)
Brand : PALSON
Model : Diábolo
Category : Vacuum Cleaner