GD40BV - Blower GREENWORKS - Free user manual and instructions
Find the device manual for free GD40BV GREENWORKS in PDF.
User questions about GD40BV GREENWORKS
0 question about this device. Answer the ones you know or ask your own.
Ask a new question about this device
Download the instructions for your Blower in PDF format for free! Find your manual GD40BV - GREENWORKS and take your electronic device back in hand. On this page are published all the documents necessary for the use of your device. GD40BV by GREENWORKS.
USER MANUAL GD40BV GREENWORKS
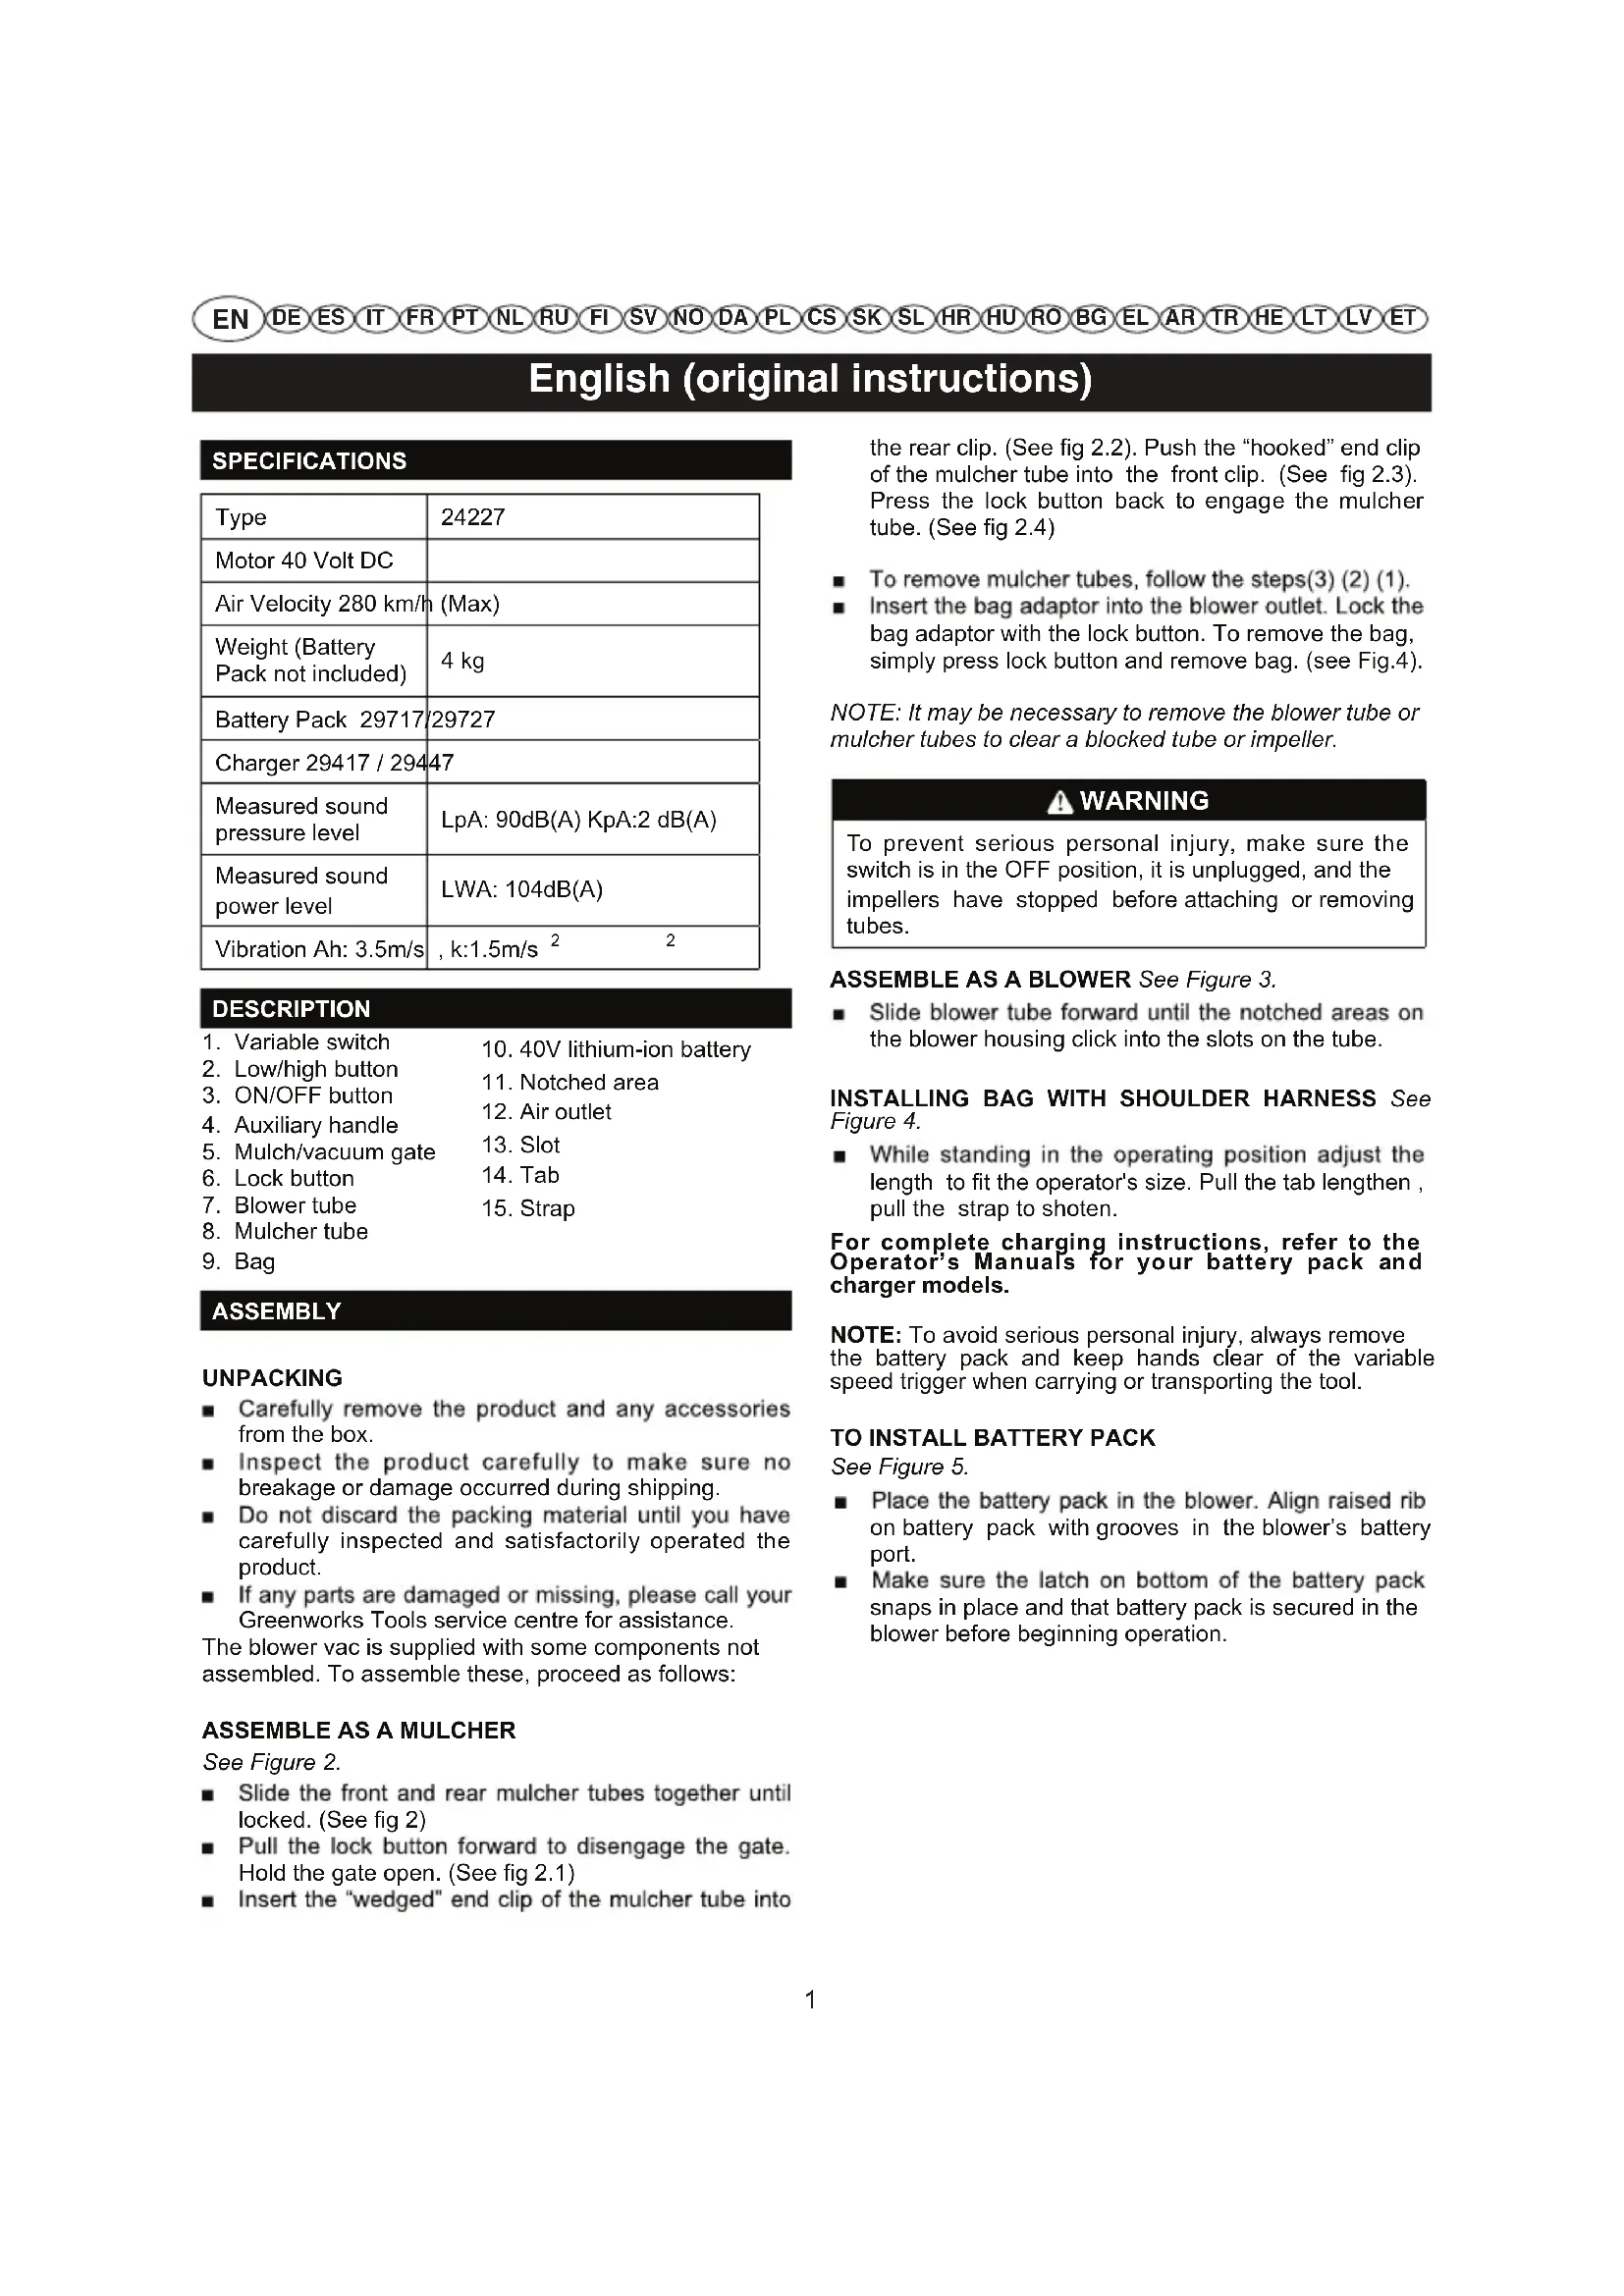
English (original instructions)
SPECIFICATIONS
| Type | 24227 |
| Motor 40 Volt DC | |
| Air Velocity 280 km/h (Max) | |
| Weight (Battery Pack not included) | 4 kg |
| Battery Pack 29717 | 29727 |
| Charger 29417 / 294 | 47 |
| Measured sound pressure level | LpA: 90dB(A) KpA:2 dB(A) |
| Measured sound power level | LWA: 104dB(A) |
| Vibration Ah: 3.5m/s | k:1.5m/s22 |
DESCRIPTION
| 1. Variable switch | 10. 40V lithium-ion battery |
| 2. Low/high button | 11. Notched area |
| 3. ON/OFF button | 12. Air outlet |
| 4. Auxiliary handle | |
| 5. Mulch/vacuum gate | 13. Slot |
| 6. Lock button | 14. Tab |
| 7. Blower tube | 15. Strap |
| 8. Mulcher tube | |
| 9. Bag |
ASSEMBLY
UNPACKING
Carefully remove the product and any accessories from the box.
- Inspect the product carefully to make sure no breakage or damage occurred during shipping.
- Do not discard the packing material until you have carefully inspected and satisfactorily operated the product.
If any parts are damaged or missing, please call your Greenworks Tools service centre for assistance. The blower vac is supplied with some components not assembled. To assemble these, proceed as follows:
ASSEMBLE AS A MULCHER
See Figure 2.
- Slide the front and rear mulcher tubes together until locked. (See fig 2)
Pull the lock button forward to disengage the gate. Hold the gate open. (See fig 2.1)
Insert the "wedged" end clip of the mulcher tube into
the rear clip. (See fig 2.2). Push the "hooked" end clip of the mulcher tube into the front clip. (See fig 2.3). Press the lock button back to engage the mulcher tube. (See fig 2.4)
To remove mulcher tubes, follow the steps(3) (2) (1).
- Insert the bag adaptor into the blower outlet. Lock the bag adaptor with the lock button. To remove the bag, simply press lock button and remove bag. (see Fig.4).
NOTE: It may be necessary to remove the blower tube or mulcher tubes to clear a blocked tube or impeller.
WARNING
To prevent serious personal injury, make sure the switch is in the OFF position, it is unplugged, and the impellers have stopped before attaching or removing tubes.
ASSEMBLE AS A BLOWER See Figure 3.
- Slide blower tube forward until the notched areas on the blower housing click into the slots on the tube.
INSTALLING BAG WITH SHOULDER HARNESS See Figure 4.
- While standing in the operating position adjust the length to fit the operator's size. Pull the tab lengthen, pull the strap to shotgun.
For complete charging instructions, refer to the Operator's Manuals for your battery pack and charger models.
NOTE: To avoid serious personal injury, always remove the battery pack and keep hands clear of the variable speed trigger when carrying or transporting the tool.
TO INSTALL BATTERY PACK
See Figure 5.
- Place the battery pack in the blower. Align raised rib on battery pack with grooves in the blower's battery port.
Make sure the latch on bottom of the battery pack snaps in place and that battery pack is secured in the blower before beginning operation.
English (original instructions)
CAUTION
When placing battery pack in the blower, be sure the raised ribs on the battery pack align with the grooves in the top of the blower. Make sure the battery is fully seated, and it latches into place properly. Improper installation of the battery pack can cause damage to internal components.
TO REMOVE BATTERY PACK
See Figure 5.
- Release the variable speed trigger to stop the blower.
Press and hold the button at the bottom of the battery pack.
Remove battery pack from the blower.
STARTING/STOPPING THE BLOWER/MULCHER See Figures 6.

- Press the On/Off ( ) Switch and you will hear beeping sounds, and the blower will turn on in low speed.
- Roll the variable speed dial forward to increase speed from 110km / h to 210km / h
-
Press the low/high switch ( ) to increase the speed options from 130km / h to 280km / h .
-
To Turn off, press the on/off switch (
IMPORTANT: TURBO-MULCH by pressing the "LOW HIGH button, with the variable speed dial set to high speed.
HOLDING THE BLOWER/MULCHER See Figures 7.
Before operating the unit, stand in the operating position. Check for the following:
Operator is wearing proper clothing, such as boots, safety glasses or goggles, ear/hearing protection, gloves, long pants and a long sleeve shirt.
WARNING
To avoid serious personal injury, wear goggles or safety glasses at all times when operating this unit. Wear a face mask or dust mask in dusty locations.
A WARNING
To prevent serious personal injury or damage to the unit, make sure the blower tube or the mulcher tubes and the bag are in place before operating the unit.
| STATUS | LED S O L V E | METHOD |
| hall fault protection | Green light off red light on; flash 7 times; each time keep 1hz interval: 3s; keep 60s buzzer alarm | Off the trigger and restart it |
| low-voltage protection | Green light off red light on; flash 5 times; each time keep 1hz interval: 3s; keep 60s buzzer alarm | Off the trigger and restart it or Charging the battery |
| Over load protection | Green light off red light on; flash 4 times; each time keep 1hz interval: 3s; keep 60s buzzer alarm | Off the trigger and restart it |
| Battery jam protection | Green/Red light off; Unit stop running | Resetting the blower vac by removing the battery for 5 seconds |
| Abnormal battery temp | Led off When the temp. of the battery low down, the blower can run well | |
OPERATING TIPS
See Figure 8.
The bag is installed and zipped closed (when used as a mulcher).
- Be sure the bag is zipped closed before operating the unit.
Assure the unit is not directed at anybody or any loose debris before starting the unit.
- Verify that the unit is in good working condition. Make sure the tubes and guards are in place and secure.
Always hold the unit with both hands when operating.
- Keep a firm grip on both the front and rear handle or grips.
To reduce the risk of hearing loss associated with sound level(s), hearing protection is required.
Use the shoulder strap when using unit as a mulcher.
Operate power equipment only at reasonable hours not early in the morning or late at night when people might be disturbed. Comply with times listed in local ordinances. Usual recommendations are 9:00 am to
English (original instructions)
5:00 pm, Monday through Saturday.
To reduce noise levels, limit the number of pieces of equipment used at any one time.
To reduce noise levels, operate power blowers at the lowest possible speed to do the job.
Use rakes and brooms to loosen debris before blowing.
In dusty conditions, slightly dampen surfaces.
- Conserve water by using power blowers instead of hoses for many lawn and garden applications, including areas such as gutters, screens, patios, grills, porches, and gardens.
NOTE: Please ensure that the Mulch/Vacuum Gate is completely closed and locked.
AIR VENTS
Never cover air vents. Keep them free from obstructions and debris. They must always remain clear for proper motor cooling.
WARNING
To avoid serious personal injury, do not wear loose fitting clothing or articles such as scarves, strings, chains, ties, etc., that could get drawn into the air vents. To make sure long hair does not get drawn into the air vents, tie back long hair.
Hold the blower firmly. Sweep from side to side with the nozzle several inches above the ground or floor. Slowly advance the unit, keeping the accumulated pile of debris in front of you. Most dry blowing operations are better suited to low speeds, rather than high. High speed blowing is a better way to move heavier items like large debris or gravel.
OPERATING AS A MULCHER
Hold the vac firmly, tilting the mulcher tubes (2-4 in. or 5-10 cm), and use a sweeping action to collect light debris. The debris will flow into the bag. Items such as small leaves and twigs will be mulched as they pass through the fan housing. For longer bag life and increased performance, empty the bag often.
CLEANING THE COLLECTION BAG
- Empty the collection bag after each use to avoid deterioration and obstruction of the air flow which will
reduce the performance of the unit.
Clean the collection bag as needed. With eye protection on, turn the dust bag inside out after initial emptying and vigorously shake out the dust and debris.
CLEARING A BLOCKED TUBE /IMPELLER
WARNING
To avoid serious personal injury, be sure the unit is OFF and unplugged before clearing the impeller..
WARNING
To avoid serious personal injury, always wear gloves to protect yourself from the impeller blades or other sharp objects.
- Press the on/off ( ) button and wait for the unit to come to a complete stop.
- Remove the battery pack.
- Remove the blower tube or mulcher tubes and the bag.
- Carefully remove material blocking the tube or impeller. Inspect the blades to ensure no damage has occurred. Rotate the impeller blades by hand to ensure the blockage is completely cleared.
- Reinstall the blower tube or mulcher tubes and the bag.
- Insert the battery pack into the unit.
English (original instructions)
MAINTENANCE
WARNING
When servicing use only identical replacement parts Use of any other parts may create a hazard or cause product damage.
Avoid using solvents when cleaning plastic parts. Most plastics are susceptible to damage from various types of commercial solvents and may be damaged by their use. Use clean cloths to remove dirt, dust, oil, grease, etc.
WARNING
Do not at any time let brake fluids, gasoline, petroleum based products, penetrating oils, etc. come in contact with plastic parts. They contain chemicals that can damage, weaken or destroy plastic.
WARNING
Do not attempt to modify this tool or create accessories not recommended for use with this tool. Any such alteration or modification is misuse and could result in a hazardous condition leading to possible serious personal injury.
WARNING
To avoid serious personal injury, always remove the battery pack from the tool when cleaning or performing any maintenance.
STORING THE BLOWER
Clean the blower thoroughly before storing. Store the blower in a dry, well-ventilated place that is inaccessible to children. Keep away from corrosive agents such as garden chemicals and de-icing salts.
Store and charge your batteries in a cool area. Temperatures above or below normal room temperature will shorten battery pack life.
- Never store batteries in a discharged condition. Wait for battery pack to cool and fully charge immediately.
All batteries gradually lose their charge. The higher the temperature, the quicker they lose their charge. If you store your unit for long periods of time without using it, recharge the batteries every month or two. This practice will prolong battery pack life.
English (original instructions)
| TROUBLESHOOTING | ||
| PROBLEM POSSIBLE CAUSE SOLUTION | ||
| Unit will not blow or mulcher. | 1. Bag full 1. Empty the bag. | |
| 2. Linked tube 2. Clear the blockage. | ||
| 3. Linked impeller 3. Clear the blockage | ||
| 4. Torn bag 4. Replace the bag. | ||
| 5. Bag unzipped 5. Zip up the bag. | ||
| 6. Battery is not secure. | 6. To secure the battery pack, make sure the latches on the top of the battery pack snap into place. | |
| 7. Battery is not charged. | 7. Charge the battery pack according to the instructions included with your model. | |
| Unit will not start. | 1. Battery is not secure. | 1. To secure the battery pack, make sure the latches on the top of the battery pack snap into place. |
| 2. Battery is not charged. | 2. Charge the battery pack according to the instructions included with your model. | |
| 3. Power/speed switch is in the OFF position. | 3. Press the on/off switch. | |
| 4. Defective power switch. 4. Call toll free helpline: +004922129242919. | ||
| 5. Vac tubes are not correctly installed. | 5. Check vac tubes to ensure that they are allowing the switch to be engaged when correctly installed. | |
| 6. Intake gate/cover is not closed. | 6. Ensure that gate/cover is fully closed and locked. | |
- Empty the collection bag after each use to avoid deterioration and obstruction of the air flow which will reduce the performance of the unit.
Clean the collection bag as needed. With eye protection on, turn the dust bag inside out after initial emptying and vigorously shake out the dust and debris.
PULIRE UN TUBO/UNA VENTOLA BLOCCATI
ALS MULCHER MONTEREN (afb. 2)
BbINOHNHTb INx c60pky, DeiCTByIte CneNyIOUIM 06pa3OM:
C6OPKA JIJI 3KCIJNYATAUIN MYJIbHEPA (PNC.2)
CoeHnHe Dpyr C pyrom Do fHKcauN NpeaHne 3aHne Tpy6K Mybepa. (CM.pnc.2)
BbITAHNTe KHOHky 6nOKnPOBKn Bnpei, qTO6bl OCBO6OaHTb 3acNOHky. DePKnte 3acNOHky OTKpbIToi. (CM.pnc.2.1)
BctabbTe "ckoohhh" KOHcEBo3aXm Tpy6k Mybepa B 3adHn 3axm. (CM.pnc.2.2).BCTabbTe "N3OrHyTb" KOHcEBo3aXm Tpy6k Mybepa B nepeHn 3axm. (CM.pnc.2.3).BdaBte Ha MeTo Ha KHONky 6IoknpOBKn dJra coeHNHeHn Tpy6k Mybepa. (CM.pnc.2.4)
Yto6bIOTcoeHNHTb Tpy6KN Mynbpepa, BblnoJHnTe. warn(3) (2) (1).
BCTaBbTe aanTep MeuKa B BbIXoHoe OTBepCTne BO3dyxOyBKn. 3aΦnKcnpyTe aanTep MeuKa npn NOMOuN KhoNkn 6IoknpoBKn. 4TO6bl CHrTB MeWOK, npocTo HaxMnte Ha KhoNky 6IoknpoBKn nOTcoeDHHte MewOk. (CM.pnc.4)..
ПРИМЕЧАНЕ:Умобblочимьзabokupobahnyуmpу6ky unu paoboye koneco,mokem nompe6obambcraomcoedunumbmpy6ky 8o3dyxodykUnu mpy6kuMylbepa.
PPEOCTEPEXEHNE
Ipeed yctahOBko nnOTcoeHHeHnem Tpy6ok, 706bl npedotBpatntb cepbe3hble TpaBMbl, Heo6xoJIMO y6eJntbcra, 70 nepeekuOateNb HaxoJNTcB nnoJoxehnn BblKJI., yctpoiCTBO OTKnIOHcEO NT NCTOCHNkA nHTAHn, a pa6Oyne Koneca NOINHOCTbHO OCTaHOBNInCb.
C6OPKAДЛЯ3KCIPIYATAUINBO3DXYOyBHOYCTPOICTBA(PNC.3)
CdbnHbTe Tpy6ky Bo3dyxOyBKN BnepeI Do Tex nop, noka 0bnactn C BbiEKMamn Ha Kopnyce Bo3dyxOyBKn He 3aueNkHyTcR B na3ax Ha Tpy6ke.
YCTAHOBKA MELUKA C PIIEBBIM PEMHEM (PNC.4)
CToBpa6oeynnoxehnn,OTperyynpynte nnHy no pa3mepy onepatopa. NotaHnte 3a DByxueenebyo npkky,ytobbl ydnHHbpeMeh,notaHnte 3a peMeWok,tyobbl yMeHBnTb nnHy.
Noip06HbIe HnCTpyKun No 3apJKe yctPoIcTBA cm, B pyKOBOdCTBaX no 3KcnHyatauN BaWen aKKMynTOpHOn batapEn n MoDelen 3apAaHbIX yctpOCTB.
Pycckn (IpebeO d opuHaJIbHbIX nHcTpyKcn)
NPMMEAHHE: Yo6b N36eKaTb Cepbe3HbIX TpaBM, npn nepeHOCKe n TpaHCNOPTnpOBKe NHCTpyMeHTa BcERda BbIHMaIte AkkMyJrTOp n He KacaIteCb pyKAMn peryNpyeMoro NepeKnIOuOAtenckOPOCTn.
YCTAHOBKA AKKYMNYTOPHO BATAPEI
CM.puc.5.
I NomeCTnTb aKKyMnyrTOphyO 6aTapeo B BO3DxyOxOyBHOe yCTPOINCTBO. COBMeCTnTb nOINHrTbe pe6pa Ha aKKyMnyrTOphO 6aTapee C na3amn B NOPTe aKKyMnyrTOpa BO3DxyOxOyBHOrO yCTPOINCTBa.
10 Haayana pa6oTb Heo6xOJIMo y6eIITbcra, 3aueKHa HnXHeu qactn akMyJrTOpHOn 6atapen 3aFHKcnpOBanacb Ha MeCTe, n 4TO akMyJrTOpHAn 6ataper HaexHo 3akpenneHa B Bo3dyXoYBHom yctpoNCTBe.
A OCTOPOXHO
Ipn yctahOBke aKKymyIaTOPOHoi 6aTapei B BO3dyxOyBHOE yCTpoIcTB Heo6xoIIMo y6eNTbcra, YTO NOHNrTbIE pe6pa Ha aKKymyIaTOPOHoi 6aTapee COBMeueHb C Na3AMN B BepxHe N qactn BO3dyxOyBHorO yCTpoIcTBa. Y6eNTecb, YTO aKKymyIaTOPOHai 6aTapei NoHOCbIO BCTABNeHa N fHKcpyETc DOJXhIM O6pa3OM. HenpabINbHaa YCTAHOBka aKKymyIaTOPOHoi 6aTapei MoKet npNBecTe K NOBpeXKeHIO BHYtpeHHIX KOMNoHEHTOB.
N3BJIeEHNE AKKYMJYTOPHO BATAPEI
CM.puc.5.
OtnyctntbTprrepperynipOBKnCKopoCtN(no3n1 1)nnoctaHOBKn BO3dyxOyBHor yCTpoHCTBa
Haxatb N ydepxnbatb KnabuWy 3aueKn aKKymJrTopa Ha HxKHe Yactn aKKymJrTopHO 6atapen.
N3BneyakKymyIaTOpHyIO6atapeIO u3 BO3dyxOyBHOYcTPOIcTBA.
S3ANYCK/OCTAHOBKA BO3DyXOyBKN/MyIbHEPA
(CM.pUC.6)
- HaxMMTe nepeKIOuOaTeB BKNIOUeHn / BbIKIOUeHn
(),NOCNE3TOrO Bbl yCnblHNTe 3ByKOBbIE CNrHaNbI,N BO3dYxOyBkA HauHET pa6oTaTb Ha Hn3Ko CKOpocTN.
- NpepeBnHbTe perynpyembl nepeKIOuataIb Bnepe, yTo6bl yBeINHTb ckopocTb notoka co 110 km/4do 210 km/4.
- Haxmnte nepeknouateIb Hn3KoB / Bbcokoi

Ipy6ka BO3dyxOyBKN HnTpy6Kn Mybepa Mewo yCTAHOBHeHa MeTo.
HCHTPKUINNO3KCNJYATAUIN(PNC.7)
Mewok yctaHOBneH 3aKpbIT Ha MoHHIO (npn HcNoJIb3OBAHH B KaueCTBe MyIbYepe).
Ipepe3KcnnyataaueyctpoiCTBaHeo6xOAnMo y6eINtbcra,HToMeWOK3akpbitHaMOJHIO.
Y6eIntecb, YTO yCTpoIcTBO He HanpaBHeHO Ha KoroHn6ydb Hn HA KaKo-Nn6o Mycop nepeD 3anyckom HnCTpyMeHTa.
Y6eIntecb, YTO yCTpOHTBO HAXODITcB XOPOwEM pa6oem coCTOHH. TaKKe CNEpyET y6eINTbcR, YTO Tpy6n 3aunTHbIE KoxyXn npabNtBHO HaedxHO yCTaHOBJHeHb HA CBOEM McTe.
Bo Bpem 3Kcnnyataunn Bcerda depxnte yctpoNCTBO o6eMMpykamn.
Kpenko depknte yctpoictBO 3a nepednne n 3adnne pyu.
YTO6bI yMeHbWntb pNCK yXyDWeHn CnyxHa 3-3a yPOBnE(EN) 3Byka, Heo6xOIMMo HaeBaTb cpeCTBa 3auNTb opraHOB Cnyxa.
IcnoB3yTe nneueBOB peMeH npn 3Kcnnyatauyn yctpoNCTBa B KaeeCTBe MyIbepa.
3Kcnnyatnpynte 3neKtpoobopyoBaHne TOnbko B pa3ymhoe Bpem - He paHO yTpOM HnN No3dHO HocbIO, KOrda MoXHO NO6ecNOKoNTb DpyrNX NIOeB. Co6JIOaIte nepnoDBi BpeMeHN, yKa3aHHbIe B npedncaHnx MecThbIX opraHO BnactN. O6bIHO peKomeHdyETc npHO dBpeMeHN c 9:00 yTpa do 5:00 Behepa, c noHeJeBnka no cy6bOty.
Yto6bI yMeHbWntb ypoBeH bWyMa, cneDyert orpaHnHbAtb KOInYeCTBO eHNu o6OpdyoBaHna, nCNoJIb3yEmblx ODHOBpeMeHHO.
Ia CHnKeHn yPoBn WyMa Bo BpeM 3KcNpyataun BO3DyXoYbKn CNeDyET BbCTabNtB Ha 3JIeKtpOnHCTpyMeHT MaKcImaIbHO Hn3KyIO CKopoCtB.
Ncnoj3yntepa6nH metJIbI,HTo6bI OTdennt MycopOT nobepxHOCTn, npexde HEMNCNoB3OBaTB BO3dyXOyBky.
Pycckn (IpebeO d opnHaJIbHbIX nHcTpyKcn)
BycnoBnax CnblHo3aBbIeHHocTn CneDyET cnerKa HAMOHTb NOBepXHOCTN.
3KOHOMbTe B0dy, HcNoJb3yra KkyMyIaTOpHbIe BO3DyXoYbKn BMeCTO UNaHROB npn y6OpKe MHornx ra30HOB n Ha TaKnx caIOBbIX 30Hax, KaK JeIo6a, peWetKn, BHyTpEHnE DBoPKN, rpnN, noDbE3dbI n CaDbI.
O6paaTe BHMaHne Ha Deten, DOMaHnX KINBOTbIX, OKpbITbIe OKHa HnN HeDaBHO BbIMbITbIe ABTOMO6nN, n CdyBaTe MycOp Ha 6e3oNaChom OT HNXpacCToHHN.
Iocne HcnoJb3OBAHnBa03dyXoYbKn n Dpyroe 606pyoBaaHne Heo6xOaMo nouchntb. TaKxe cJeMyet yTnIn3uPoBaTb Mycop HaJIeKaaum 6pa3OM.
ПРIMEЧАНЕ: Heo6xOДМубeДNTьС, YTO 3acNoHka MyIbYepeA / nbIeNecOca NOHOCbIO 3aKpbIa N 3a6nOKIpOBaHa.
BEHTINRAUHOHHbIEOTBEPCTN
3anpeaetc 3akpbibatb BeHTnlaHNoHHbIe OTBepctna. Heo6xOIMO cneHt, yTo6bl OTBepCTnHa He 3abuHncb Mycopom mnn noCTOpOHmM npedMetamn. BeHTnlaOnHOHbIe OTBepCTnBa Bcerda dOnKhbl OCTaBaTbcra Cbo6oHNbIMn nna Hndnexaero oxnaJdeHn 3JeKTPOBnIrataTeN.
PPEOCTEPEXEHNE
YTo6bI n36ExaTb cepbe3HbIX TpaBM, He Hocnte CBo6oHyO odexy nn TaKne npedMeTbI, KaK Wapfbl, 3aBra3Kn, ceno4kn, rAnCTyKn I.T.D., KOTOpbiE MOrTy BTHryTbCBA BBeHTnlaRauONHHbIE OTBepCTN. CNeDyET noD6nPaTb DnINHbIE BOnOCbl, YTo6bl OHn He nonanB BeHTnlaRauONHHbIE OTBepCTN.
3KcIpyATAURA YCTPOIcTBABKAeCTBE BO3dYxOyBKN
Kpenko Depxknte Bo3dyxodybky. Cnerka noBoDnTe yctpoiCTBOM n3 CTOPOHbI B CTOPOHy, yapedXNBaB O3dyxodybky TAKIM o6pa3OM, YTO6bl pacctoHne OT HacaKn Do 3emn nnno CoCTABnNo HeckonbKO caHTmepOB. MeIeHHo npoDBnraTecb BnepeD, c6bnpa MycOp B Kuy nepe Bam. BolwnHCTBO onepaun C nCnonb3ObaHem cyxoro cnocoba BbyBaHn BO3dyxa Lyuwe BblOnnHrTa Ha Hn3knx ckopocTx, a He Ha Blicoknx. Blicokar ckopocTB BbyBaHn BO3dyxa 60nbwe NoxDxOUnIT dNcBnra
60nee TaeKeBbIX npedMeTOB, TaKx KAK KpynHbMyCOp Hn rpaBn.
3KcIyATAURA YCTPOINCTBA B KAYECTBE MYJIbyePA
Kpenko depknte yctpoiCTBO, Hanpabnra Tpy6kn Mybepa noHaknoHom (2-4 dnoMa nnn 5-10 cm), a Taokke He6bictpo NOBODITE HNCTpyMeHTOM n3 CTOPHO B CTOPOHy dna c6opa nerKoro Mycopa. Mycop 6ydet NoCTynatb B MeoK. Takoi Mycop, kak Menkne IncTbry n Betkn 6ydet MybUnpOBaHb BO Bpem npoxOKeHnAyepe3 Kopnyc BeHTnIaTopa.Дя yBeHHeHnCpoka cnJx6bl MeWka n ynyuWeHn npOn3BODITeNbHOCTN Heo6xoIMOp perLyapHO BbITPxAIBaTb MycOp n3 MeWka.
OuNTKA MEUKA JIJIa CBOPA MYCOPA
OnopoxhnyTe Mewok dna c6opa Mycopa nocne kaxdoro nCnoB3OBAHn, yTo6bl n36eXaTB erO n3HaunBaHHn n 3aTpynHeHn npoxxJeHn BO3dyuHOro Notoka, yTO MoXET CHN3NTb npOn3BODntelbHOCTb yCTPOCTBa.
OuHauTe MeWOK dIa c6opa Mycopa no Mepe Heo6xOAnMocTn. CneNyET HAdETb cpeCTBa 3aunTb rna3, BbIePhyTb MeWOK dIa c6opa Nblnn Nocne nepBOHaayabHorO onOpoxHeHHN N BbITpXHyTb Nblb N Mycop nyTEM 3HeprNuHoro BCTpXuBaHH.
OuHCTKA 3A6IOKNPOBAHHOH TPYEKN / PABOYERO KONECA
A PPEDOCTEPEXEHNE
Yto6bln36ekaTb cepbe3hIX TpaBm,nepeoHCTko pa6oero koneca Heo6xoJIMO y6eIHTbcra, YTO yCTpOJIcTBBO BbIKIOUeHO NOTCOEINHEHO OTNCTOHHKA nHTAHIA.
A PPEDOCTEPEXEHNE
YTo6bI n36ExaTb cepbe3hBx TpaBM, Heo6xoDnMo BcERda HadeBaTb nepaTKn dJa 3auNTb OT nonacte pa6oero koneca nn npytnx ocTpbx npedMeTOB.
HaxMnte Ha KONky BKNIOUeHn/ BbIKNOUeHn n noDOxNITE do noHnOHN octaHOBKn pa6oeryo Koneca yCTPOIcTBa.
13BnKeNTeakMyTApTOp.
OToeHnHTe Tpy6ky Bo3dyxOyBKn nn Tpy6Kn MyIbYepa N MeoK.
Pycckn (IpebeO d opnHaJIbHbIX nHcTpyKcn)
TuaTeNbHO ydaIInTe MaTePnAn, 6nokpyuOuI np8ky nIpa0oee koneco. PpoBepbTe nonactn, 4to6bl y6eINTbcra, 70 OHn He nobpeXdeHb. BpyHyIO npOBepHnte nonactn pa6oeryo koneca, 4to6bl y6eINTbcra, 70 6nokpyuOuIne npedMeTbI nonHOCTbIO ydaIeHb.
NoBToPnO npncOeHNHte Tpy6ky BO3dyXoYbKn nn Tpy6kn MyIbHepa n MeWok.
BCTaBBTe aKKyMyJrTOp B yCtPOiCTBO.
TEXHMUECKOE OBCNYXMBAHNE
A INPEDOCTEPEXEHNE
Pn 06cnyxuBaHn nCnoJb3OBaTb TOnbKO nDeHTNCHBe 3anachbIe qactn. NcNoB3OBAHne IIO6bIX dpyrnx qacteM MoKET CTaTb PnUHHo ONaCHO cnTyauu nn npnbectn K NOBpeXdHIO N3dEINy.
I36eraIte nCnObl3OBaHnpaCTbOpNTeEnIg ONUCTKn nlaCTNKOBbIX DeTanei. BoJbUHNCTBO nNactMacc nOdBepKeHbI pa3pyuWeHnIO npu BO3DeEChTBn pa3NHybIX TINOB KOMMEpuecknx pactbOpNTeEN MOryT 6bITb NOBpeXdHebl npx NcNoJIb3OBaHn. NOnb3yIteCb YICToI TKaHbIO DnY yDAnEHn rP83N, Nbln, MaCna, KOHCNCTeHTHO CMA3Kn I T.D.
A PPEDOCTEPEXEHNE
He donyckaIte, TTo6bI TopMo3HbIe XmIKoCTn, 6eH3nH, npOyKtI Ha HeΦTЯHO OCHOBE, npOHnKaIOUne Macna n T.D. KOHTaKTHpOBaJI N C NlaCTNkoBbIMN DeTaJIaMNI. Coepkaunecr XmMueckne BeuecTeBa MoryT nobpeNTb, ocNa6ntb Hn pa3pyuNTb NlaCTMaCCy.
PPEOCTEPEXEHNE
He nbitaTaeb MoDnΦuNPOBaT bHCTpyMeHT nIcDenatb akceccyapbl, He peKoMeHDoBaHHbIe dIaNCNoJIb3OBAHnA C daHbIM HhCTpyMeHTOM. IIO6oe TAKOE N3MeHeHne Nm MOnΦuKaunr RaBnEeTcHApUWeHem npabUN 3Kcnnyataunn MOnKeT npNBecTN K onaCHO cHTyaun, BeDyuee K BO3MOXHbIM cepbe3HbIM TpaBMam.
A PPEOCTEPEXEHNE
YTo6bI n36ExKaTb cepBe3HbIX TpaBM, Heo6xOaIMo Bcerda n3BNeKaTb akKymyIaTOphyIO 6aTaapeIO n3 IHCTpyMeHTA npn erO OChTke NIN BblONHeHHN JIO60rTexHueckoro 6cJnyKbAHn.
XPAHEHNE BO3DyXOyBHOY YCTPOIcTBA
Ipej xpaHHeHem Heo6xOdHMO TuaTeNbHO OuHCTNtB 0B3dyXoYbHoe yCTPOJcTBQ. XpaHNTe BO3dyXoYbKy B CYXOM, XopoIO npOBetPnBaEMOM MceTe, HDoCTyTHOM DnA detEn. YcTOpCTBO CneDyET XpaHNTb BdaNN OT NCTOCHIKOB KoppO3N, TAKNX KAK CaOBBe XmMHueckne BeuecTBA n aHTNO6NeDeHntEbnHbIe CoIN.
XpaHnTe n 3apKaJte akKymyIaTOPhIe 6aTapeB INPOxHaHOM MecTe. TempePaTypa BbIe HIN HNKe HopMaJIbHOH KOmHaTHOH TempePaTypb COKpaUaET cPOK cnYk6bl AkKymyIaTOPHO6aTapeN.
3anpeuaetcxaHHTb aKKyMnTOpHbIe 6aTapeB pa3prKeHHOM coCToHHN. Heo6xoHMo nOdoKdTaB noka aKKyMnTOp OXJaNTbcR, a 3aTeM cpa3y Je NOHOCTBIO 3apAHTb.
Bce akkymyIaTOPbIe 6atapen noCTeneHNO TepaOT 3apJky. Yem Bblwe TemnepaTpya, Tem 6bictpee OHN TepaOT 3apJky. EcnBaIe yCTpoiCTBO xpaHITcB TeueHne IINTeNbHorO nepNoDa BpemeH 6ez NcnoJIb3oBaHnra, Heo6xOIMO nepe3apXkAtb aKKymyIaTOPbI KaKdbI MeCau nn Dba. 3Ta npakTka yBeInuHT cPok cnYk6bl aKKymyIaTOPHO 6atapen.
Pycckn(HepeBOd n3 nepBOHaayalbHbIX HNCTpyKcun)
| БыяВLEHNE И UCTPAHHE HENCSNPAHBOCTEIN | ||
| ПОНБЛЕМА | BO3MOXHЯ ПИЧИHA | PEWEHNE |
| Устючно Не ВеливаET Воздунный notok, по- не Васьев. изменhaet Mycop. | 1. Meшок полестою заолинец | 1. Onорожнио.Tе Meшок. |
| 2. Трубka 3аблакирован | 2. Удалпente 6лоруюшце пedingметы. | |
| 3. Рабочee кoleсо 3аблакировао | 3. Удалпente 6лоруюшце пedingметы. | |
| 4. Meшок пован | 4. 3amehite Mešok. | |
| 5. Meшок He 3akpbT ha молнио | 5. 3acteRTHte MOnHniO MeSHka. | |
| 6. Аккулагог He 3akpenlen Должныm образом. | 6.Чтобу征集akpenltbakkyмлгог,在еобхODIMо, Чтобу征集ашелк ha ворх然ч actn akkymлгога BCTaTI NaHa MeCTo. | |
| 7. Аккулагог He 3apяжен. | 7. 3apядnte Akkymлгогу 6atapeMu B СоТВETCTBиC INHCTpyKUZIMN, NOCTABNREМы МВ КOMПLEKTe C BaSEi MoDElbI. | |
| Устючно Зап栓аETС. | 1. Аккулагог He 3akpenlen Должныm образом. | 1. ChTo6bI 3akpenltbakkyмлгог,在eobxODIMо, Чтобу征集ашELк ha ворх然ч actn akkymлгога ВCTaII NaHa MeCTo. |
| 2. Аккулагог He 3apяжen. | 2. 3apядnte Akkymлгогу 6atapeMu B СоТВETCTBиC INHCTpyKUZIMN, NOCTABNREМы МВ КOMПLEKTe C BaSEi MoDElbI. | |
| 3. Пerekliuohatelb ритань/ сокорstii haboditcrg b noLOXeHsin ВыIKI. | 3. НaxмITE nepekliuohatelb вkloueHsin / ВыIKIQUeHsin. | |
| 4. Пerekliuohatelb ритань НeICnравен. | 4. ПОЗBOHITe lo 6ecplnatHomу тelenФону rongayel ЛIMNI: +004922129242919 | |
| 5. Трубki BCasblanraHЯ He npabvlnbHo yctahOBnHeI. | 5. Проверfte Trp6bKi BCasblanraHЯ,чTo6bI y6eDHTbCry, ЧTo OHI He npenrTCTByIOT BVkloueHIO nepekliuohelny при павilhoу uCTahOBke. | |
| 6. 3acNoHka / Крtska BnysckHoro OTBepCTrna He 3akpbIa. | 6. Y6eDlTeCb,чTo 3acNoHka / Крtska ПОПсOTbU Зakрытia n 3a6lOKNPOBaHa. | |
TUOTTEEN TEKNISET TIEDOT
ANVÄNDNINGSTIPs (Fig.8)
MONTAZ MULCOVACE (Obr.2)
To avoid serious personal injury, wear goggles or safety glasses at all times when operating this unit. Wear a face mask or dust mask in dusty locations.
VAROVÁNÍ
To prevent serious personal injury or damage to the unit, make sure the blower tube or the mulcher tubes and the bag are in place before operating the unit.
INSTALAREA SACULUI CU HAMIL PENTRU UMÄR
A se vedea Figura 4.
Hold the blower firmly. Sweep from side to side with the opening several inches above the ground or floor. Slowly advance the unit, keeping the accumulated pile of debris in front of you. Most dry blowing operations are better suited to low speeds, rather than high. High speed blowing is a better way to move heavier items like large debris or gravel.
OPERAREA CA APARAT PENTRU COMPOST
BbIrrapckn(IIpeBOD OT opnHnHaHnHTe NHCTpyKcnn)
CNEUΦNKAU
PnIOCTabkata Ha ypea 3a 6bDyXbaHe/3acMyKbaHe HANKOMNHOHTH He ca MoHTnpaH. 3a da rMOHTnpaTe, HanpaBeTe CneHOTO:
CTIO6BAHE KATO MYLUP Bx. quaypa 2.
■ПьзHTe npeHATA n3aHATA Tpb6a Ha MyupepaEDHOBpEmeHHO,doKaTO ce 3aknouyAT.(BnxФИrpya2)
Дрнгетунаа 3а зкуньане Hanpen,за DeakTNBnPate BpataKATA.3aDpXTe BpTnKATA OTBOpeHa.(BxkФnrypa2,1)
BkapaTe KInHOBNHata" kpaHa cKo6a Ha Tpb6aTa Ha MyupeBa 3aHaTcKo6a. (BnKΦnrypa 2,2). HATncHeTe N3BnTaTa" kpaHa cKo6a Ha Tpb6aTa Ha MyupeBa npeHaTcKo6a. (BnKΦnrypa 2.3). HATncHeTe 6yToHa 3a 3aknOuBaHe Ha3aI, 3a da 3akpenTe Tpb6aTa Ha Myupea. (BnKΦnrypa 2.4)
3a da MaxheTe Tpb6nTe Ha Mynepa, CneDbaTcCTbIKN (3) (2) (1).
BkapaTe aanTepa Ha Top6nKkTa B n3xoJaHa ypeDa 3a 06dyXbaHe. 3aknOHTe aanTepaHa TOp6nKkTa C 6yToHa 3a 3aknOHTbe. 3a da MAXHETe Top6nKkTa, npocTo HATNCHEte 6yToHa 3a3aknOHTBaHe I Ra N3BaTe. (Bx. Fmrypa4)
3A5EENKKA: Moke da ce Hanox da npemaxhete Tpb6ata Ha ypeda 3a 06dyXbahe nn Tpb6nte Ha Mynepa, 3a nouchnte 6nokpana Ta Pb6a nn potopa.
A PENEYNPEXDEHNE
3a da npdeoTbpaTte cepno3Ho fN3nuecko HapaHraBaHe, ce ybepeTe, ye npebKIOUbaTeIe Ha no3nucr OFF (N3KIOUcEH), ye ypeBt e N3KIOUcH eO T 3axpaHbaHeto n potopnte ca cnpEn da ce Bbptr NO INepu, npdi Da npnkpenBaTe nn da MaxaTe Tpb6n.
CTIO6RAHE KATO YPEI3A O6DyXBAHEBx. duypa 3.
■ПьзHETe Tpb6aTaHa ypeDa 3a 06dyXbaHe HAnpei, DOKATO 3OHaTc Hape3n Ha Kopnyca Ha ypeDa 3a 06dyXbaHe UpaKHe B XJNe6oBeTe Ha Tpb6aTa.
MOHTNPAHE HA TOPENKATA C PEMbK 3A PAMO Bx. Phuypa 4.
PerynnpaIte bIKNHATA,doKATO CTe B No3Ncua 3ap6oTa,3a Da cBoTBcTcBA Ha PbCTa N pa3MepeNTHa onepaTopa. DpbHHeTe uΦTa,3a Da yDbJNKHTe,nn dpbnHeTe pmbka,3a da ro CKbcnte.
3a nJIHnTE HnCTpyKm 3a 3apeXdaHe BnXTe pkoBOcTBOTa Onepatopa 3a BaunTe KOHKpeTHM MoJeN aKymnatopHa 6atepn H 3apAHO yCTpoIcTBo.
3A6EIXKKA: 3a da n36erHete cepno3HNnHn3ueckn HapaHbAHnB, BnHaHn n3BaKaJaTe akyMnaTOpHata
Hanpimep 3aTbOpeHH OByBKn, 3aunTHN OUnna, aHTnFOHN, pKaBnCn, nBn NaHTaNoH n Pn3a C dNbIb rPbKaB.
PNEyPKeXDeHne
Binharn korato pa6oTnte cypea, Hocete 3aunTHn OuHa, 3a da npedotbpaTnte cepno3Hn fnsueckn HapaHbAHH. B npaHn ycNoBna HocTe macka 3a JInue nnMacka npOTNB npax.
A PENEYPENKDEHNE
3a da npedotbpaTne cepno3Hn fN3uueckn HapaHbAHnI NOBpeNi No ypeNa, ppeN 3anoUbaHe Ha pa6oTa ce yBepTe, Ye Tpb6ata Ha ypeDa 3a 06dyXbaHe, Tpb6nte Ha MytpeHa TOp6nKata ca MecTaTa Cn.
PABOTA C YPEDA KATO MYJUEP
Дрькту урда здраво,нakпаший КТьбnte 2-4Инчан ил 5-10сm)изпалзвайтseЗамхыци Движени,за da cb6epeTe Лкпte OTнадьч.OT纳дьчтse 6ьдат 3acmykaHnВ Topbukkata.Прдmetи KATO MaNKи Лuctа и КLOнки УSe 6ьдAT МЛЧИРаHIpynpi npI pyemNHabaHeto npes KOPnyca Ha BeHTInaTopa.NsPnA3BaIte YecTo Topbukkata,3a DA yDJIKNTe JKNBOTa NД noNoobpnte mpOn3BODINTEJHOCCTA.
IOUHCTBAHE HA TOPBNUKATA 3A OTNADbUN
N3npa3BaIte Top6uKaTa 3a OTnAbuCneBcya ynoTpe6a, 3a Da n36eHHeTe BNOsaBaHe IINpErpaxDahe Ha Bb3dyuHnI NOtOK, KOEt Ue DOBeDeDo NOnKabAHe Ha npOu3BODInTeHOCCTHa YpeJa.
Ipn Heo6xOIMOCn ONUCTBaHTe TOp6Nkata 3a Cb6npaHe.HocTe 3aunTHn OUnna,Korato NOUcTBate yyBana;Mnpa3Hete yyBaNa,06bpHETe IOTBbTpHe HABn ITo pa3DpycaTne EhepruHo,3a Da ce OTdEJaT OTnadBuNTe npaxTa.
1
1
1
Greenworks Tools
31: 2020-05-26 17:48 p.m. (TU=BQ-ÖULCH) 2020-05-26 17:48 p.m. (LQW H9XH), 2020-05-26 17:48 p.m.
7.
JU UUUuUuuuUuuu
1 1 1 1 1 1 1 1 1 1 1 1 1 1 1 1 1 1 1 1 1 1 1 1 1 1 1 1 1 1 1 1 1 1 1 1 1 1
| A |
| A |
| Udjiya | Udjiya Udjiya | Udjiya Udjiya |
| Udjiya3UdjiyaUdjiya | Udjiya UdjiyaUdjiyaUdjiyaUdjiyaUdjiya | Udjiya UdjiyaUdjiyaUdjiya |
| Udjiya6Udjiya6 | Udjiya UdjiyaUdjiyaUdjiyaUdjiyaUdjiya | Udjiya UdjiyaUdjiyaUdjiya |
| Udjiya6Udjiya6 | Udjiya UdjiyaUdjiyaUdjiyaUdjiya | Udjiya UdjiyaUdjiyaUdjiya |
| Udjiya6Udjiya6 | Udjiya UdjiyaUdjiyaUdjiya | Udjiya UdjiyaUdjiya |
Greenworks Tools. nnnn nn nnnn nnnn nnnn nnnn nnnn nnnn nnnn nnnn nnnn nnnn nnnn nnnn nnnn nnnn nnnn nnnn nnnn nnnn nnnn nnnn nnnn nnnn nnnn nnnn nnnn nnnn nnnn nnnn nnnn nnnn nnnn nnnn nnnn nnnn
n 4.
n 2)
n nn nnnnnnnnnnnnnnnnnnnnnnnnnnnnnnnnnnnnnnnnnnnnnnnnnnnnnnnnnnnnnnnnnnnnnnnnnnnnnnnnnnnnnnnnnnnnnnnnnnnnnnnnnnnnnnnnnnnnnnnnnnnnnnnnnnn
nno nn no nno 7y nnnn (nnn 2.2).nno nn no y no nn no nno nno nnnn (nnn 2.3).ny nn nn nn nn nn nn nn nn nn nn nn nn nn nn nn nn nn nn nn nn nn nn nn nn nn nn nn nn nn nn nn nn nn nn nn nn nn nn nn nn nn nn nn nn nn nn nn nn nn nn nn nn nn nn nn nn nn nn nn nn nn nn nn nn nn nn nn nn nn nn nn nn nn nn nn nn nn nn nn nn nn
nnonnnnnnno7,nyy yyy (3)(2)(1).
n nn nn nn nn nn nn nn nn nn nn nn nn nn nn nn nn nn nn nn nn nn nn nn nn nn nn nn nn nn nn nn nn nn nn nn nn nn nn nn nn nn nn nn nn nn nn nn nn nn nn nn nn nn nn nn nn nn nn nn nn nn nn nn nn nn nn nn nn nn nn nn nn nn nn nn nn nn nn nn nn nn nn nn nn nn nn nn nn nn nn nn nn nn nn nn nn nn nn nn nn
y: "n nn nnnnnnnnnnnnnnnnnnnnnnnnnnnnnnnnnnnnnnnnnnnnnnnnnnnnnnnnnnnnnnnnnnnnnnnnnnnnnnnnnnnnnnnnnnnnnnnnnnnnnnnnnnnnnnnnn

#
Tnnn nn nnnnnnnnnnnnnnnnnnnnnnnnnnnnnnnnnnnnnnnnnnnnnnnnnnnnnnnnnnnnnnnnnnnnnnnnnnnnnnnnnnnnnnnnnnnnnnnnnnnnnnnnnnnnnnnnnnnnnnnnnnnnnnnnnnnnnnnnn
mnnn nn 3.
nynnnnnnnnnnnnnnnnnnnnnnnnnnnnnnnnnnnnnnnnnnnnnnnnnnnnnnnnnnnnnnnnnnnnnnnnnnnnnnnnnnnnnnnnnnnnnnnnnnnnnnnnnnnnn
nnnn nn nn nn nn nn 4.
n nn nnnnnnnnnnnnnnnnnnnnnnnnnnnnnnnnnnnnnnnnnnnnnnnnnnnnnnnnnnnnnnnnnnnnnnnnnnnnnnnnnnnnnnnnnnnnnnnnnnnnnnnnnnnnnnnnnnnnnnnnnnnnnnnnn
ninn nnin huynn, nnnnnne nohnnn
Greenworks Tools Warranty Policy for DIY machines
PERIOD OF WARRANTY
All new Greenworks Tools machinery is supplied with a 2 year parts and labour warranty from original date of purchase. A 30 day warranty is available for machines used professionally as Greenworks Tools are designed primarily to be used by DIY consumers.
This warranty is non-transferable.
LIMITATIONS
This warranty applies only to defective parts/components and does not cover repairs due to:
- Normal wear and tear.
- Routine tune up or adjustment.
- Damage caused by improper handling/abuse/misuse or neglect.
- Overheating due to lack of maintenance.
- Damage due to fittings/fasteners becoming loose/detached through lack of maintenance.
- Damage caused by cleaning with water.
- Machines serviced or repaired by non-authorised Greenworks Tools service centres.
- Machines incorrectly assembled or adjusted.
- Damage caused by improper use of the machine.
- Damage caused by improper winterisation (pressure washers)
-
Items considered as consumable parts are not normally covered by the warranty, including but not limited to:
-
Batteries
Electric cables - Blade and blade assemblies
- Belts
- Filters
-
Chucks and tool holders
-
Certain products may contain components such as engines, transmissions from an alternative manufacturer, these items will be subject to the appropriate manufacturer's warranty policy except where Greenworks Tools Europe GmbH agrees to underwrite any claims outside the said manufacturer's warranty period.
- Second hand goods are not covered under this warranty policy.
- The fitting of spares, replacements or extra components which are not supplied or approved by Greenworks Tools Europe GmbH.
Warranty
To claim a warranty on any product under this policy a proof of original purchase is required. Credit card statement do not qualify as sufficient proof of purchase. In the first instance of a warranty event occurring the consumer should return the product to the original place of purchase with their proof of purchase. The machine will be sent to our central service facility and an inspection made. If the machine be found to be at fault it will be repaired and sent back to the address of the consumer free of charge. Machines that retail for less than €100 euros including sales taxes will generally be replaced.
If the central service facility finds that machine is not found to be at fault then the consumer will be advised they will need to pay for the cost of the repair.
This warranty policy is subject to change from time to time to accommodate the needs of new products. A copy of the latest warranty policy will be available at www.greenworkstools.eu.

Topyaa HnH: +74997132292
Pocn,MockBa,2-ΓpaBOpOBckn npoe34 48
TexHOceBpnc
PpOxDnHa 3aB0Da «CaTpyn»
IN Ocnn
+74997132292

Greenworks Toolsin takuukaytonta TI-laitelle
TAKUUKAUSI
Greenworks Tools garanti for hobbymaskiner
GARANTIPERIOD
r'3'nta v. fi -i6),nibila I. +++.gr'n+,rk6t,16.2
BG
TapaHnOHH npaBnHa Ga Greenworks Tools
3a cAmOeHNMaunHn
NEPNOI HA TAPAHUNRA
BcMnMaHnHa Xr"n+rk6T,16 ce npedoctabrt c 2-roHnha rapaHn3a cepu3Ha deHocnt n pe3epBuN qactn, CHTAHO OT dAATA ha 3aknyBaHe Ha npOyKa. PnpoCTaBce caMo 30-dHeBHa rapaHnna 3a npopecnoHAnHO nNoJ3BaHnte MaHNH, 3auTo npOyKTte Ha Xr"n+,rk6T,16 ca npedHaueHn npedmHO 3a KIneHTn,paBoteu n cbC camOdeHH MaunHH.
Hactoata rapaun He moke da ce npexbprna.
ORPAHnueHn
Haactoata raata rapaiae 8eanndha cama 3a depekTHn cactn/KOMNOHEHTN He NkPbBA pemOHNT, npOdoEN OT:
-
HopMaHHO n3HOCBaHe n aOpTu3aUra.
-
PyTHHn HAcTpoKn INIeHOCtN OpeRyIpaHe
-
IopBepi, pniunHEni OT HeipabnHIO 60abeHe/3noynOTpe6a/rpeHo HnnpN3BaHE INI PPOBA HA he6pEHHoCT.
Greenworks Tools (DIY)
p28U
e e 1s Greenworks Tools Ue 2p 3u 4u 5u 6u 7u 8u 9u 10 u 11 u 12 u 13 u 14 u 15 u 16 u 17 u 18 u 19 u 20 u 21 u 22 u 23 u 24 u 25 u 26 u 27 u 28 u 29 u 30 u 31 u 32 u 33 u 34 u 35 u 36 u 37 u 38 u 39 u 40 u 41 u 42 u 43 u 44 u 45 u 46 u 47 u 48 u 49 u 50 u 51 u 52 u 53 u 54 u 55 u 56 u 57 u 58 u 59 u 60 u 61 u 62 u 63 u 64 u 65 u 66 u 67 u 68 u 69 u 70 u 71 u
U.S
111111111111111111
山
-
Lda
-
UUUU, UUUUUUUU
3.1u
4.1jUJz0u 1
EC DECLARATION OF CONFORMITY FOR MACHINERY
Manufacturer:Changzhou Globe Co., Ltd.
Address: No.65 Xinggang Road Zhonglou Zone Changzhou, Jiangsu 213000
P.R.China
Name and address of the person authorised to compile the technical file:
Name: Ted Qu Haichao (Quality Director)
Address: Greenworks Tools Europe GmbH
Wankelstrasse 40.
50996 Koln
Germany
Herewith we declare that the product
Category CORDLESS BLOWER
It is used to propel air out of a tube to move yard debris such as leaves.
Model 24227
Serial number. See product rating label
Year of Construction . See product rating label
-
is in conformity with the relevant provisions of the Machinery Directive
-
is in conformity with the provisions of the following other EC-Directive
MD Machinery Directive 2006/42/EC
2014/30/EU (EMC-Directive), and
2000/14/EC (Noise-Directive) incl. modifications (2005/88/EC)
And furthermore, we declare that
- the following (parts/clauses of) European harmonised standards have been used
EN60335-1,EN50636-2-100
EN 62233, EN ISO 3744; EN 55014-1;
EN 55014-2
Measured sound power level
LWA:101dB(A)
Guaranteed sound power level
104 dB(A)
Conformity assessment method to Annex V/ Directive 2000/14/EC
Place, date: Changzhou, 22/07/2016
Signature: Ted Qu Haichao
Quality Director
Ted qu
DE
MD Machinery Directive 2006/42/EC
MD Machinery Directive 2006/42/EC
Yadelmas,declaremosque
MD Machinery Directive 2006/42/EC
MD Machinery Directive 2006/42/EC
2014/30/EU (Directive EMC), et
Endereço: No.65 Xinggang Road Zhonglou Zone Changzhou, Jiangsu 213000
China
MD Machinery Directive 2006/42/EC
2014/30/EU (Directiva EMC).e
MD Machinery Directive 2006/42/EC
RU 3AABNEHIEO COOTBETCTBNA TPEBOBAHARM EC
PpOaBODnTeNb:Changzhou Globe Co.,Ltd.
Anpec No.55 Xinggang Road Zhonglou Zone Changzhou, Jiangsu 213000 China
MRA aappec nua,DTBETCTBEHHORO 3a noDRO8ky TeXHHNECKoro paHna
MRA: Tei Ky Xauqao (DnpekTop no kauectby)
Aspec: Greenworks Tools Europe GmbH
Wankelstrasse 40.
50996 Koln
Germany
HACTORUMM MM 3AEBGREM, YTO DAHHN NPODyKT
Katero pma 6ECNPOBOHOE BO3dyXOyBHOYCTPOICTBO
YCTPOVCTBOHCNONb3yETcA DnBbDyBaHAR BO3dyxA V3 Tpy6kN DnR nepeMeueHn
MYCOPA BO DEOPE, HANDPMED, NCTBEB.
Moge n. 2427
3aBODCK O HOMeP. CM.nacnoptHyIO ra6nHcy npOyKTA
TogBbinycka CM.nacnoptHyTo Tabnykny npodykTa
COOTBETCTBYT BCEM BAXHEHIM NOLOXKEHBM DMEKTHBB NO MEXAHHECKOMO
COOTBETCTBYETBCEMNOJIOXEHRM CnEpyouxHnpeKTHEC
MD Machinery Directive 2006/42/EC
2014/30/EU(DhpskmaEMC).e
2000/14/EC (DHPDEKTHBA NO WMY) C3MHeHARM (2005/88/EC)
KPOME 3TOO, M# SAHHHEM, STO
6-5bimnncnbsbaHcneDyouuue Hactn nnctbnyeponeckcx cornaosaaHnx CTAHdapt08
EN60335-1,EN50636-2-100
EN 62233, EN ISO 3744: EN 55014-1;
EN 55014-2
H3MepeHHy yPOeBb 3ByKOBO M OOHOC T LWA:101 dB(A)
TapaHTpyEmb ypoBHeB 3BykoB044B(A)
OueHka cooTBetCTBn npoBeHea cornaCHO npnoKeHHIO V K DnpeKTHae 2000/14/EC
MecTo, data: Changzhou, 07/22/2016
Noimcb:TeKyXaHao
DuplekTop no KaueCTBy
Ted qu

LAITTEIDEN EY:N VAATIMUSTENMUKAISUUSVAKUUTUS
MD Machinery Directive 2006/42/EC
2014/30/EU (EMC-direktivi) ja
Adress: Greenworks Tools Europe GmbH
Wankelstrasse 40.
50996 Kohn
Germany
MD Machinery Directive 2006/42/EC
MD Machinery Directive 2006/42/EC
2014/30/EU (EMC-Direktivet), og
2000/14/EC(Stoydirektiv) inkl. endringer (2005/88/EC)
I tillegg erklaerer vi at
- folgende (elementer/bestemmelser i) harmoniserte europeiske standarder er
benytet
EN 60335-1, EN 50636-2-100
EN 62233, EN ISO 3744; EN 55014-1;
EN 55014-2
Malt lydeffektniva LwA:101 dB(A)
Garantert lydeffektnivá 104 dB(A)
MD Machinery Directive 2006/42/EC
2014/30/EU (EMC-direktivet) og
2000/14/EØF (stj)dektivet) inkl. modifikationer (2005/88/EØF)
Vi erklaerer desuden, at
der er anvendt falgende (dele/klausuler af) europaeiske harmonisered
standarder:
EN 60335-1, EN 50636-2-100;
EN 62233, EN ISO 3744; EN 55014-1;
EN 55014-2
Malt lydeffektniveau
Garanteret lydeffektniveau
LWA:101 dB(A)
104 dB(A)
Overensstemmelsesvurderingsmetode iht. Tillaeg VI / Direktiv 2000/14/EOF
Sted, data: Changzhou, 22/07/2016
Underskrift: Ted Qu Haichao
Kvalitetsdirektor
Ted qu

DEKLARACJA ZGODNOSCI WE DLA MASZYN
Produce: Changzhou Globe Co., Ltd.
Adres: No.65 Xinggang Road Zhonglou Zone Changzhou, Jiangsu 213000 P.R.
Chiny
MD Machinery Directive 2006/42/EC
MD Machinery Directive 2006/42/EC
MD Machinery Directive 2006/42/EC
2014/30/EU (Smemica EMC) a
2000/14/EC (Smerica pre hluk) vratane modifikacif (2005/88/EC)
MD Machinery Directive 2006/42/EC
MD Machinery Directive 2006/42/EC
2014/30/EU (EMC-Direktiva)
2000/14/EC (Direktiva o buci) ukjuucujuti preinake (2005/88/EC).
MD Machinery Directive 2006/42/EC
2014/30/EU(EMC iranyel) es
2000/14/EK (Zaj iranyel), beieertve a modositaksokat (2005/88/EK) is.
- este ? n conformitate cu prederite urmatoarelor Directive CE in conformity with the provisions of the following other EC-Directive
MD Machinery Directive 2006/42/EC
(Directiva EMC) 2014/30/EU s
(Directiva privind emisia de zgomot) 2000/14/EC inclusiv modificarile (2005/88/EC) in plus,declare lam.
CepnH HOpE BvKTE eTKeTc HOMNHAHTHe CTOHHOCTM
TQHnHa Hn npo3BocCTBO BHXTe ETMKeTa C HOMNHAnHHe CTOHOC
OTOBAPR hCtOBETBHNTe PA3N0P6BnH A HmpeKbVbA tOHOCHMOaHINHTe OTOBAPR hA P3N0P6BnH hCnEhNHte Dpyr HApDKNBbH e AO
MD Machinery Directive 2006/42/EC
2014/30/EU (Директma 3a EMC) n
2000/14/EC (Mambaan ym OT Maunn H cbopbkeHH, KOHTO paBOTr HA OTKPto)
BKNIOHNTENHO npOMeHNTE (2005/88/EC)
OcBEN TOBA DExnnapHpAme, He
ca cnaaehn (yactwknayno) cnegnthe oouthe ebponeckn CTanaptn
EN60335-1,EN50636-2-100
EN62233,ENISO3744;EN55014-1;
EN55014-2
HImpeho HVBO HA UyM
LWA:101 dB(A)
RapaHTpaho HBO HA LIYM
104 dB(A)
MetnHa OueHbAHe HcBtBeTCTBmETo Cb6pa3Ho npAnoxeHne V ot DipeKTHBa
2000/14/EC
MRCTO, data: Changzhou, 22/07/2016
TnDmC: Ted Qu Haichao (DnpeKTop KaHeCTBO)
Ted qu

Address: Greenworks Tools Europe GmbH
Wankelstrasse 40.
50996 Koln
Germany
Aiaou npovoc onawoupe on to pioiv
Katnyopla AYPMATO ΦHTHPA
To ynauvma juaonomoei tvi tv wthn aepa pao aywoo oe koto tn pataikvny
Mortale 24227
ApaBpuoc eipac .BA. EriKetra BaBovOpunnc npoiovtroc
EtoKataoeknBCA.ETiKTeBaBpuovounnc TpoIovToc
Eivai ouqwvo pe 1s oxetke biataek ts Oyniaa Mxavnauw
To 3014/07/EE (OSyria EMC) KAI
2000/14/EK (O8nyia 8opou) ouu npiaaavovuvv uuv pnonarv (2005/88/EK)
Kai emmavov nawoupe on
oi akouhie (pion / pntpe) Ta eupotaiikv evapoviojeva npotua exouv xpnoiortoei
EN60335-1,EN50636-2-100
EN62233,ENISO3744;EN55014-1;
EN 55014-2
Metpnevo emineo evtaangxou
LWA:101dB(A)
Eyyunuvo Ettmedo Evtaang hou
104 dB(A)
MéBoδoc aioλoynos ouuoppwong npoc napaptnua V/Oδnyia 2000/14/EK
Place, date: Changzhou 22/07/2016
Yrropa: Ted Qu Haichao
AieuovntNoiotntac
Ted qu

100000000000000000000000000000000000000
UwuaChangzhou Globe Co., Ltd.
Ue: No.65 Xinggang Road Zhonglou Zone Changzhou,
Jiangsu 213000 P.R.China
U
Uc:ccs,d,gsd,(2g)Ue
Greenworks Tools Europe GmbH
Wankelstrasse 40.
50996 Koin
Germany
gocn 1000
2427
Unit Unit Unit Unit Unit Unit Unit Unit Unit
wèle 10. k【考】
·
EC-Directives
2014/30/EU (Ue e Ue uuue uuuuue)
2000 14 EC (Ueue Ueue Ueue) rueu Ueue (2005 BB7/
· = ·
the following (parts/clauses of) European harmonised standards have been used
EN60335-1,EN50636-2-100
the following (parts/clauses of) European harmonised standards have been used
EN60335-1,EN50636-2-100
EN 62233, EN ISO 3744; EN 55014-1;
EN55014-2
Olcalen ses gucu seviyesi:
101dB(A)
Dian: No.65 Xinggang Road Zhonglou Zone Changzhou, Jiangsu 213000 P.R.China
00000000000000000000000000000000000000000000
wD: wD: Ted Qu Haichao (m#n)
Address: Greenworks Tools Europe GmbH
Wankelstrasse 40.
50996Koin
K
the following (parts/clauses of) European harmonised standards have been used
EN60335-1,EN50636-2-100
EN62233,ENISO3744;EN55014-1;
EN55014-2
yannwen
101 dB(A)
yannn
enynn nnnn nnno 2000/14EC
100, 200: x'xun, 22/07/2016
Signature: Ted Qu Haichao (m)
Ted qu

EK [RENGIMU ATITIKTIES DEKLARACIJA
Gamintojas;,Changzhou Globe Co., Ltd."
Adresas: No. 65 Xinggang Road Zhonglou Zone Changzhou, Jiangsu 213000 P.R.
Kinija
MD Machinery Directive 2006/42/EC
2014/30/EU (EMC-direktva).i
2000/14/EK (Triuksmodirektyva)skaitant pakeitimus (2005/88/EK)
Razotais: Manufacturer:Changzhou Globe Co., Ltd.
Adrese: No.65 Xinggang Road Zhonglou Zone Changzhou, Jiangsu 213000
P.R.China
Personas, kas pilinvarota sastadit tehnisko dokumentaciu, vards, uzvards un
adrese
Vards, uzvards: Ted Qu H aichao (kvalitates direktos)
Adrese: Greenworks Tools Europe GmbH
Wankelstrasse 40
50996Koln
Germany
MD Machinery Directive 2006/42/EC
2014/30/EU (Elektromagnetiskas atbilistbas (EMC) direktiva), un
2000/14/EK (Direktiva par trokšnu emisilju), leskalot grozijumus (2005/88/EK)
Turklat, mēs pazinojam, ka
- ir tikuši izmantoti sekojos ie Eiropas saskanotie standarti (dajas / panti)
EN 60335-1, EN 50636-2-100;
EN 62233, EN ISO 3744: EN 55014-1:
EN 55014-2
Izmerttais skanas jaudas Imeris
Garantéais skanas jaudas limenis
Atbistibas novertesana saskapä ar pielikumu V/ 2000/14/EK direktiva
Vieta, datums: Changzhou, 22/07/2016
Paraksts: Ted Qu H aichao
kvalitates direktors
Ted qu

MASINA EC VASTAVUSDEKLARATSIOON
Tootja:Changzhou Globe Co., Ltd.
Aadress: No.65 Xinggang Road Zhonglou Zone Changzhou, Jiangsu 213000
P.R.China
MD Machinery Directive 2006/42/EC
2014/30/EU (elektromagnetilise uhilduvuse direktiv) ja