EY0L10 - Battery charger PANASONIC - Free user manual and instructions
Find the device manual for free EY0L10 PANASONIC in PDF.
| Product Type | Battery Charger |
| Brand | Panasonic |
| Model | EY0L10 |
| Weight | 0.6 kg (1.3 lbs) |
| Power Supply | Mains (voltage indicated on charger) |
| Compatible Batteries | Panasonic Li-ion and Ni-Cd standalone batteries |
| LED Indicators | Green light (charging/full charge), amber (standby/temperature) |
| Protection | Electronic shut-off at end of charge, overheat protection |
| Charging Temperature | 0°C to 40°C |
| Charging Time (Li-ion 3.6V 1.5Ah) | Useful charge (80%): 15 min; full charge: 30 min |
| Functions | Smart charging, temperature detection |
| Safety | Do not expose to rain, use only with recommended batteries |
| Maintenance and Cleaning | Unplug before cleaning, use a dry cloth |
| Spare Parts and Repairability | Repair by an authorized specialist; power cord replaceable only by an authorized workshop |
| Environmental Information | Recycling in accordance with WEEE and used battery directives |
Frequently Asked Questions - EY0L10 PANASONIC
User questions about EY0L10 PANASONIC
0 question about this device. Answer the ones you know or ask your own.
Ask a new question about this device
Download the instructions for your Battery charger in PDF format for free! Find your manual EY0L10 - PANASONIC and take your electronic device back in hand. On this page are published all the documents necessary for the use of your device. EY0L10 by PANASONIC.
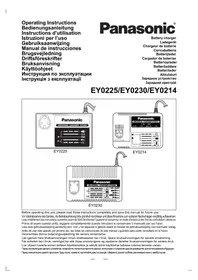
USER MANUAL EY0L10 PANASONIC
Before operating this unit, please read these instructions completely and save this manual for future use.
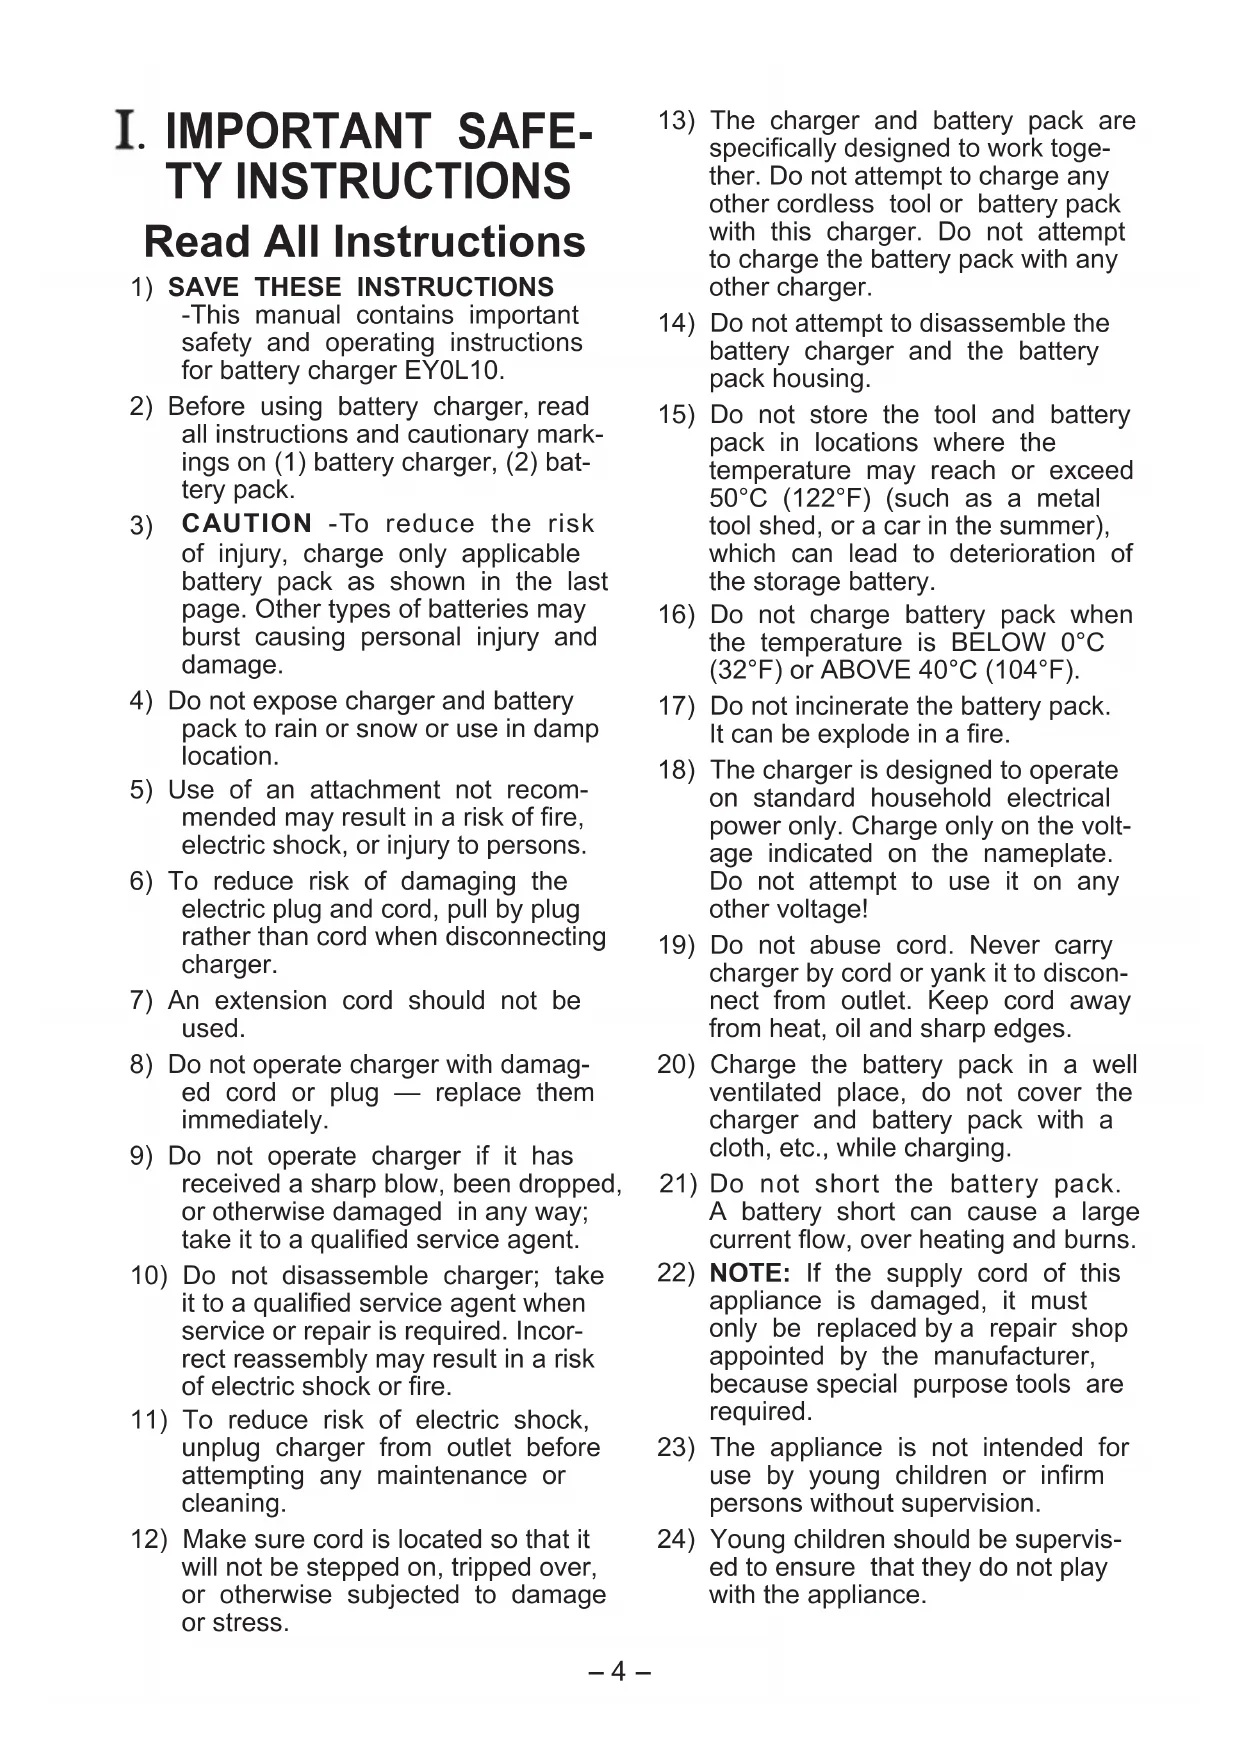
Read All Instructions
1) SAVE THESE INSTRUCTIONS
-This manual contains important safety and operating instructions for battery charger EY0L10.
2) Before using battery charger, read all instructions and cautionary markings on (1) battery charger, (2) battery pack.
3) CAUTION -To reduce the risk of injury, charge only applicable battery pack as shown in the last page. Other types of batteries may burst causing personal injury and damage.
4) Do not expose charger and battery pack to rain or snow or use in damp location.
5) Use of an attachment not recommended may result in a risk of fire, electric shock, or injury to persons.
6) To reduce risk of damaging the electric plug and cord, pull by plug rather than cord when disconnecting charger.
7) An extension cord should not be used.
8) Do not operate charger with damaged cord or plug — replace them immediately.
9) Do not operate charger if it has received a sharp blow, been dropped, or otherwise damaged in any way; take it to a qualified service agent.
10) Do not disassemble charger; take it to a qualified service agent when service or repair is required. Incorrect reassembly may result in a risk of electric shock or fire.
11) To reduce risk of electric shock, unplug charger from outlet before attempting any maintenance or cleaning.
12) Make sure cord is located so that it will not be stepped on, tripped over, or otherwise subjected to damage or stress.
13) The charger and battery pack are specifically designed to work together. Do not attempt to charge any other cordless tool or battery pack with this charger. Do not attempt to charge the battery pack with any other charger.
14) Do not attempt to disassemble the battery charger and the battery pack housing.
15) Do not store the tool and battery pack in locations where the temperature may reach or exceed 50^ C ( 122^ F) (such as a metal tool shed, or a car in the summer), which can lead to deterioration of the storage battery.
16) Do not charge battery pack when the temperature is BELOW 0^ C ( 32^ F) or ABOVE 40^ C ( 104^ F).
17) Do not incinerate the battery pack. It can be explode in a fire.
18) The charger is designed to operate on standard household electrical power only. Charge only on the voltage indicated on the nameplate. Do not attempt to use it on any other voltage!
19) Do not abuse cord. Never carry charger by cord or yank it to disconnect from outlet. Keep cord away from heat, oil and sharp edges.
20) Charge the battery pack in a well ventilated place, do not cover the charger and battery pack with a cloth, etc., while charging.
21) Do not short the battery pack. A battery short can cause a large current flow, over heating and burns.
22) NOTE: If the supply cord of this appliance is damaged, it must only be replaced by a repair shop appointed by the manufacturer, because special purpose tools are required.
23) The appliance is not intended for use by young children or infirm persons without supervision.
24) Young children should be supervised to ensure that they do not play with the appliance.
| Symbol Meaning | |
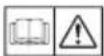 | Read the operating instructions before use. |
 | For indoor use only. |

WARNING:
- Do not use other than the Panasonic battery packs that are designed for use with this rechargeable tool.
- Do not dispose of the battery pack in a fire, or expose it to excessive heat.
- Do not drive the likes of nails into the battery pack, subject it to shocks, dismantle it, or attempt to modify it.
- Do not allow metal objects to touch the battery pack terminals.
- Do not carry or store the battery pack in the same container as nails or similar metal objects.
- Do not charge the battery pack in high-temperature location, such as next to a fire or in direct sunlight. Otherwise, the battery may overheat, catch fire, or explode.
- Never use other than the dedicated charger to charge the battery pack. Otherwise, the battery may leak, overheat, or explode.
II. CHARGING THE BATTERY
Common Cautions for the Li-ion/Ni-Cd Battery Pack
NOTE:
- When a cold battery (of about 0°C or less) is to be charged in a warm room, leave the battery in the room for at least one hour and charge it when it has warmed up to room temperature. (Failing to do so may result in less than a full charge.)
- Cool down the charger when charging more than two battery packs consecutively.
- Do not insert your fingers into contact hole, when holding charger or any other occasions.
CAUTION:
To prevent the risk of fire or damage to the battery charger.
- Do not use power source from an engine generator.
- Do not cover vent holes on the charger and the battery pack.
- Unplug the charger when not in use.
Li-ion Battery Pack
NOTE:
Your battery pack is not fully charged at the time of purchase. Be sure to charge the battery before use.
Battery charger (EY0L10)
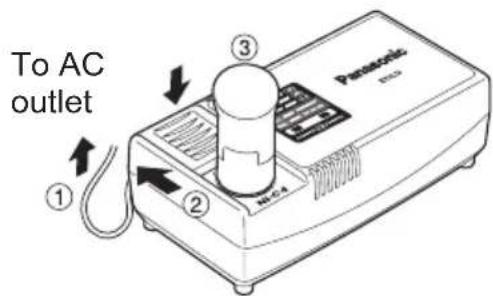
- Plug the charger into the AC outlet.
NOTE:
Sparks may be produced when the plug is inserted into the AC power supply, but this is not a problem in terms of safety.
- Slide the battery dock cover back to allow insertion of the Li-ion battery pack.
- Verify that the cover is locked securely in place.
- Insert the battery pack firmly into the charger.

- During charging, the charging lamp will be lit.
When charging is completed, an internal electronic switch will automatically be triggered to prevent overcharging.
- Charging will not start if the battery pack is warm (for example, immediately after heavy-duty operation). The orange standby lamp will be flashing until the battery cools down. Charging will then begin automatically.
- The charge lamp (green) will flash slowly once the battery is approximately 80% charged.
- When charging is completed, the charging lamp will start flashing quickly in green color.
- If the temperature of the battery pack is 0^ C or less, charging takes longer to fully charge the battery pack than the standard charging time.
Even when the battery is fully charged, it will have approximately 50% of the power of a fully charged battery at normal operating temperature.
- If the power lamp does not light immediately after the charger is plugged in, or if after the standard charging time the charging lamp does not flash quickly in green, consult an authorized dealer.
- If a fully charged battery pack is inserted into the charger again, the charging lamp lights up. After several minutes, the charging lamp may flash quickly to indicate the charging is completed.
Ni-Cd Battery Pack
NOTE:
When you charge the battery pack for the first time, or after prolonged storage, charge it for about 24 hours to bring the battery up to full capacity.
Battery charger (EY0L10)
- Plug the charger into the AC outlet.
NOTE:
Sparks may be produced when the plug is inserted into the AC power supply, but this is not a problem in terms of safety.
- Slide the battery dock cover back to allow insertion of the Ni-Cd battery pack.
- Verify that the cover is locked securely in place.
- Insert the battery pack firmly into the charger.
- During charging, the charging lamp will be lit.
When charging is completed, an internal electronic switch will automatically be triggered to prevent overcharging.
- Charging will not start if the battery pack is warm (for example, immediately after heavy-duty operation). The orange standby lamp will be flashing until the battery cools down. Charging will then begin automatically.
- When charging is completed, the charging lamp will start flashing quickly in green color.
- If the charging lamp does not light immediately after the charger is plugged in, or if after the standard charging time the charging lamp does not flash quickly in green, consult an authorized dealer.
- If a fully charged battery pack is inserted into the charger again, the charging lamp lights up. After several minutes, the charging lamp may flash quickly to indicate the charging is completed.
LAMP INDICATIONS


Green Lit
Charger is plugged into the AC outlet.
Ready to charge.
Green Flashing Quickly
Charging is completed. (Full charge.)
Green Flashing
Battery is approximately 80% charged. (Usable charge. Li-ion only)
Green Lit
Now charging.
Orange Lit
Battery pack is cool.
The battery pack is being charged slowly to reduce the load on the battery. (Li-ion only)
Orange Flashing
Battery pack is warm. Charging will begin when temperature of battery pack drops.
Charging status lamp
Left: green Right: orange will be displayed.
Both Orange and Green Flashing Quickly
Charging is not possible. Clogged with dust or malfunction of the battery pack.
If the temperature of the battery pack is -10^ or less, the charging status lamp (orange) will also start flashing. Charging will begin when the temperature of the battery pack goes up. (Li-ion only)
Information for Users on Collection and Disposal of Old Equipment and used Batteries

These symbols on the products, packaging, and/or accompanying documents mean that used electrical and electronic products and batteries should not be mixed with general household waste.
For proper treatment, recovery and recycling of old products and used batteries, please take them to applicable collection points, in accordance with your national legislation and the Directives 2002/96/EC and 2006/66/EC.
By disposing of these products and batteries correctly, you will help to save valuable resources and prevent any potential negative effects on human health and the environment which could otherwise arise from inappropriate waste handling.

For more information about collection and recycling of old products and batteries, please contact your local municipality, your waste disposal service or the point of sale where you purchased the items.
Penalties may be applicable for incorrect disposal of this waste, in accordance with national legislation.
For business users in the European Union
If you wish to discard electrical and electronic equipment, please contact your dealer or supplier for further information.
[Information on Disposal in other Countries outside the European Union]
These symbols are only valid in the European Union. If you wish to discard these items, please contact your local authorities or dealer and ask for the correct method of disposal.
Note for the battery symbol (bottom two symbol examples):
This symbol might be used in combination with a chemical symbol. In this case it complies with the requirement set by the Directive for the chemical involved.
III. SPECIFICATIONS
| Model EY0L10 | |
| Electrical rating See the rating plate on the bottom of the charger. | |
| Weight 0.6 k | g (1.3 lbs.) |
[Li-ion battery pack]
| Charging time | Voltage | 3.6 V DC (3.6 V x 1 cell) |
| 1.5 Ah | EY9L10Usable: 15 min.Full: 30 min. |
[Ni-Cd battery pack]
| Charging time | Voltage 2.4 V 3.6 V | ||
| 1.2 Ah | EY902115 min. | EY902515 min. | |
NOTE: This chart may include models that are not available in your area. Please refer to the catalogue.
ONLY FOR U. K.
IV. ELECTRICAL PLUG INFORMATION
FOR YOUR SAFETY PLEASE READ THE FOLLOWING TEXT CAREFULLY
This appliance is supplied with a moulded three pin mains plug for your safety and convenience.
A 5 amp fuse is fitted in this plug.
Should the fuse need to be replaced please ensure that the replacement fuse has a rating of 5 amp and that it is approved by ASTA or BSI to BS1362.
Check for the ASTA mark or the BSI mark on the body of the fuse.
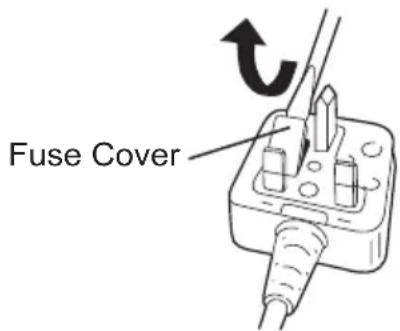
If the plug contains a removable fuse cover you must ensure that it is refitted when the fuse is replaced.
If you lose the fuse cover the plug must not be used until a replacement cover is obtained.
A replacement fuse cover can be purchased from your local Panasonic Dealer.
IF THE FITTED MOULDED PLUG IS UNSUITABLE FOR THE SOCKET OUTLET IN YOUR HOME THEN THE FUSE SHOULD BE REMOVED AND THE PLUG CUT OFF AND DISPOSED OF SAFELY.
THERE IS A DANGER OF SEVERE ELECTRICAL SHOCK IF THE CUT OFF PLUG IS INSERTED INTO ANY 13 AMP SOCKET.
If a new plug is to be fitted please observe the wiring code as shown below.
If in any doubt please consult a qualified electrician.
IMPORTANT:
The wires in this mains lead are coloured in accordance with the following code:
Blue: Neutral
Brown: Live
As the colours of the wire in the mains lead of this appliance may not correspond with the coloured markings identifying the terminals in your plug, proceed as follows.
The wire which is coloured BLUE must be connected to the terminal in the plug which is marked with the letter N or coloured BLACK.
The wire which is coloured BROWN must be connected to the terminal in the plug which is marked with the letter L or coloured RED.
Under no circumstances should either of these wires be connected to the earth terminal of the three pin plug, marked with the letter E or the Earth Symbol 12
How to replace the fuse: Open the fuse compartment with a screwdriver and replace the fuse and fuse cover if it is removable.
This apparatus was produced to BS800.