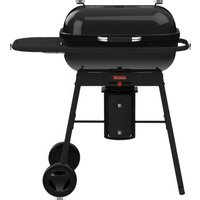
Billy - Barbecue BARBECOOK - Free user manual and instructions
Find the device manual for free Billy BARBECOOK in PDF.

Download the instructions for your Barbecue in PDF format for free! Find your manual Billy - BARBECOOK and take your electronic device back in hand. On this page are published all the documents necessary for the use of your device. Billy by BARBECOOK.
USER MANUAL Billy BARBECOOK
Thank you for purchasing a Barbecook appliance! A whole new world is waiting for you to explore, whether it be in the peace and quiet of nature or amidst the hustle and bustle of the city. Become a grill master in our #barbecook community and let us put your grill skills in the spotlight. Register your Barbecook appliance online and get some major benefits:
- You get access to the full user manual and get to know every bit of your appliance.
- You benefit from a personalized after sales service, allowing you to quickly find spare parts and to profit from an optimal warranty service.
- We inform you about product updates and give you tips, tricks and grillspiration to bring out the grill master in you. Ready for an adventure? Register your product and join the #barbecook community!
For more information about registering your appliance, go to www.barbecook.com.
Barbecook respects your privacy. Your data will not be sold, distributed or shared with third parties.
This manual is composed of two parts. The first part is the one you are reading now. It includes instructions for the assembly, use and maintenance of your appliance. The second part starts on page 37. It includes all kinds of illustrations:
- Exploded views, parts lists and assembly drawings of the appliances described in this manual.
- Illustrations that support the most important instructions of the first part of the manual.
If there is an illustration available for a particular instruction, you find a reference to that illustration in the instruction. These references are preceded by a pencil icon, like the one you see here on the left. 3 IMPORTANT SAFETY INSTRUCTIONS
3.1 Read and follow the instructions
Read the instructions before using the appliance. Always follow the instructions carefully. Assembling or using the appliance differently can cause fires and material damage.
Damages caused by not following the instructions (improper assembly, misuse, inadequate maintenance...) are not covered by the warranty.
3.2 Use your common sense
Use your common sense when working with the appliance:
- Do not leave the appliance unattended when in use.
- Warning! Keep children and pets away from an appliance in use.
- Warning! The appliance will become very hot. Do not move it during operation.
- Use appropriate protection when handling hot parts.
- Keep flammable materials, flammable liquids and dissoluble objects away from an appliance in use.
- Keep a bucket of water or sand at hand when using the appliance, especially on very hot days and in dry areas.
- Warning! Do not use indoors.
- Do not use the appliance as a heater.
- Do not use the appliance in strong winds.
3.3 Select an appropriate location
Use the appliance outdoors only. Using it indoors, even in a garage or shed, can cause carbon monoxide poisoning. When selecting an outdoor location, always:
- Make sure the appliance is not under an overhanging structure (a porch, a shelter...) or under foliage.
- Put the appliance on a firm and stable surface. Never put it on a moving vehicle (a boat, a trailer...).
To prevent formation of rust on stainless steel, avoid contact with chlorine, salt and iron. We recommend not using the appliance near the coast, near railways or near swimming pools.
4 ASSEMBLING THE APPLIANCE
4.1 Safety instructions
- Do not modify the appliance when assembling it. It is very dangerous and not allowed to alter parts of the appliance.
- Always follow the assembly instructions carefully.
- The user is responsible for the correct assembly of the appliance. Damages caused by improper assembly are not covered by the warranty.
4.2 To assemble the appliance
You need a cross-slotted screwdriver. 1 Put the appliance on a flat and clean surface. 2 Assemble the appliance as shown on the assembly drawings.
You find the assembly drawings in the second part of this manual, after the exploded view of your appliance.
5 GETTING THE APPLIANCE READY
FOR USE You need charcoal, firelighters (complying with EN 1860-3) and a long match.
5.1 Which charcoal should I use?
Always light your appliance with traditional charcoal, never with briquettes. Once the appliance is lit, you can add briquettes. Use good quality charcoal to light the appliance, preferably complying with EN 1860-2. Good quality charcoal is composed of large, shiny bricks and does not give off much dust.
Close your bag of charcoal properly before storing it. Always store it in a dry place, do not store it in a cellar. MAN_BILLY_FULL_BBC_170308_A.book Page 5 Wednesday, March 8, 2017 12:37 PM6 www.barbecook.com
5.2 Step 1: Lighting the appliance
The main steps of this task are illustrated in Figures 1 through 3, on page 42. 1 Cover the bottom of the bowl with charcoal and add 3 firelighters. Tips:
- Do not use too much charcoal. The bowl should only be filled one third.
- Use small pieces of charcoal to light the appliance. You can add larger bricks afterwards. 2 Put the stainless steel spacer on the bowl and fix it with the clips. 3 Open the air supply holes at the bottom of the bowl. 4 Take a long match and light the firelighters.
When using the appliance for the first time, let it burn for 30 minutes. This removes any remaining manufacturing greases from the appliance.
Do not put the grill on the appliance yet. An empty grill can deform when held in the heat for too long.
Caution! Do not use spirit, petrol or comparable fluids for lighting or re-lighting the appliance. Only use firelighters that comply with EN 1860-3.
5.3 Step 2: Placing the grill and food
The main steps of this task are illustrated in Figures 4 through 5, on page 42. 1 Put the grill on the appliance. 2 Wait until the charcoal is covered with a thin layer of white ashes. Normally, this takes about 15 minutes. 3 Put your food on the grill.
6 USEFUL TIPS AND TRICKS
6.1 Adjusting the fire intensity
You can adjust the intensity of the fire by opening and closing the air supply holes at the bottom of the bowl:
- The more you open the holes, the more air is sucked into the bowl and the more intense the fire will be.
- The more you close the holes, the less air is sucked into the bowl and the less intense the fire will be.
6.2 Preventing food from burning
To prevent your food from burning:
- Never start grilling when there still are flames in the bowl. Wait until the charcoal is covered with a thin layer of white ashes.
- Avoid exposing your food to excessive heat. You can reduce the heat by (partially) closing the air supply holes at the bottom of the bowl.
6.3 Preventing food from sticking
To prevent your food from sticking to the grill:
- Oil the food lightly with a brush before you put it on the grill. You can also oil the grill itself.
- Do not turn the food too quickly. Let it catch some heat first.
1 Put gloves on. Keep them on during the entire procedure. 2 Remove the grill from the appliance and add the charcoal to the bowl. 3 Put the grill back on the appliance.
6.5 Avoiding flare-ups
Flare-ups are sudden flames that spark from the bowl when you are grilling. They are usually caused by dripping fat or marinade. During grilling, some flare-ups are normal. Too many flare-ups, however, increase the temperature in the appliance and can ignite accumulated fat. To avoid flare-ups:
- Make sure the appliance is clean before you start grilling. We recommend cleaning the appliance after each use.
- Remove excess fat and marinade from the meat. You can also use a grill pan for fatty and/or marinated meat.
7 MAINTAINING THE APPLIANCE
7.1 Cleaning the appliance
We recommend cleaning the appliance after each use. Proceed as follows: 1 Let the appliance cool down completely. 2 Remove the grill and clean it as described in “7.2 Cleaning the grill”. 3 Release the clips and remove the stainless steel spacer. 4 Unscrew the bottom shell of the appliance. 5 Put the bottom shell and the stainless steel spacer in the dishwasher.
You can also clean these components by hand, using a soft sponge or cloth and a regular detergent.
7.2 Cleaning the grill
We recommend cleaning the grill after each use, with the Barbecook cleaner. Proceed as follows: 1 Let the grill cool down completely. 2 Spray the foam on the grill and let it act for a while. The foam discolours, as it soaks off the dirt and greases. 3 Remove the foam with a soft sponge and water and rinse the grill thoroughly. 4 Dry the grill well and store it in a dry place. This prevents formation of rust.
You can also put the grill in the dishwasher or clean it with a soft detergent or with sodium bicarbonate. Never use oven cleaners on the grill.
7.3 Storing the appliance
Store the appliance indoors after each use.
Make sure the appliance is completely dry before you store it. This prevents formation of rust. MAN_BILLY_FULL_BBC_170308_A.book Page 6 Wednesday, March 8, 2017 12:37 PMwww.barbecook.com 7
7.4 Maintaining stainless steel, chrome
and powder coated parts The appliance is composed of stainless steel, chrome and powder coated parts. Each material has to be maintained differently:
To prevent formation of rust on stainless steel, avoid contact with chlorine, salt and iron. We recommend not using the appliance near the coast, near railways or near swimming pools.
Damages caused by not following these instructions are regarded as inadequate maintenance and are not covered by the warranty. Below the exploded view of your appliance (second part of the manual), you find a list with all parts of which the appliance is composed. This list includes a symbol that specifies the material of each part, so you can use it to check how you have to maintain a particular part. The parts list uses the following symbols:
7.5 Ordering spare parts
Parts that are directly exposed to fire or intense heat have to be replaced from time to time. To order a spare part: 1 Look up the reference number of the part you need. You find a list of all reference numbers below the exploded views in the second part of this manual and on www.barbecook.com.
If you registered your appliance online, you will automatically be guided to the correct list. 2 Order the spare part at your point of sale. You can order parts both under and outside warranty. 8 WARRANTY
Your appliance comes with a warranty of two years, starting from the date of purchase. This warranty covers all manufacturing defects, provided that:
- You used, assembled and maintained your appliance according to the instructions in this manual. Damages caused by misuse, incorrect assembly or inadequate maintenance are not regarded as manufacturing defects.
- You can present the receipt and the unique serial number of your appliance. This serial number starts with a letter, followed by 15 digits. You can find this number: - On this manual. - On the packaging of the appliance. - On the inside of a foot of the appliance.
- The Barbecook quality department confirms that the parts are defective and that they proved defective under normal use, correct assembly and adequate maintenance. If one of the above conditions is not met, you cannot claim any form of contribution. In all cases, the warranty is limited to the repair or replacement of the defective part(s).
The following damages and defects are not covered by the warranty:
- Normal wear and tear (rusting, distortion, discolouration...) of parts that are directly exposed to fire or intense heat. It is normal to replace these parts from time to time.
- Visual irregularities that are inherent to the manufacturing process. These irregularities are not regarded as manufacturing defects.
- All damages caused by inadequate maintenance, incorrect storage, improper assembly or modifications made to pre-assembled parts.
- All consequential damages caused by careless or non-compliant use of the appliance.
- Rust or discolouration caused by external influences, the use of aggressive detergents, exposure to chlorine... These damages are not regarded as manufacturing defects. Material How to maintain this material Stainless steel and chrome
- Do not use aggressive, abrasive or metal detergents.
- Use soft detergents and let them act on the steel.
- Use a soft sponge or cloth.
- Rinse thoroughly after cleaning and dry well before storing. Powder coated
- Do not use sharp objects. Use soft detergents and a soft sponge or cloth.
- Rinse thoroughly after cleaning and dry well before storing. Symbol Material Stainless steel Chrome Powder coated MAN_BILLY_FULL_BBC_170308_A.book Page 7 Wednesday, March 8, 2017 12:37 PMwww.barbecook.com 8
7 VEDLIKEHOLD AV APPARATET
MAN_BILLY_FULL_BBC_170308_A.book Page 38 Wednesday, March 8, 2017 12:37 PMwww.barbecook.com 39
MAN_BILLY_FULL_BBC_170308_A.book Page 39 Wednesday, March 8, 2017 12:37 PMwww.barbecook.com 40 1xC 1xB
1xC 1xB 1xC 1xB MAN_BILLY_FULL_BBC_170308_A.book Page 40 Wednesday, March 8, 2017 12:37 PMwww.barbecook.com 41
MAN_BILLY_FULL_BBC_170308_A.book Page 41 Wednesday, March 8, 2017 12:37 PM42 www.barbecook.com
MAN_BILLY_FULL_BBC_170308_A.book Page 42 Wednesday, March 8, 2017 12:37 PMwww.barbecook.com 43 MAN_BILLY_FULL_BBC_170308_A.book Page 43 Wednesday, March 8, 2017 12:37 PMREGISTER NOW & GET ACCESS TO:
- Barbecook Challenges
Barbecook® is a registered trade mark of SAEY Home & Garden N.V. Industrielaan 4, B-8501, Heule (Kortrijk) Belgium MAN_BILLY_FULL_BBC_170308_AMAN_BILLY_FULL_BBC_170308_A.book Page 1 Wednesday, March 8, 2017 12:37 PM