
PLH 28 E - Drill MILWAUKEE - Free user manual and instructions
Find the device manual for free PLH 28 E MILWAUKEE in PDF.
| Brand | Milwaukee |
| Model | PLH 28 E |
| Product type | Rotary hammer (hammer drill) |
| Supply voltage | 220-230 V single-phase |
| Rated power | 800 W |
| Useful power | 400 W |
| No-load speed | 0-1500 min⁻¹ |
| Max. load speed | 0-1000 min⁻¹ |
| Max. impact drilling speed | 0-4000 min⁻¹ |
| Impact energy (EPTA) | 4.1 J |
| Drilling diameter in concrete | 28 mm |
| Drilling diameter in steel | 13 mm |
| Drilling diameter in wood | 40 mm |
| Core bit diameter | 82 mm |
| Clamping collar diameter | 54 mm |
| Weight (according to EPTA) | 3.4 kg |
| Sound pressure level | 90.5 dB(A) (K=3 dB) |
| Sound intensity level | 101.8 dB(A) (K=3 dB) |
| Vibrations - hammer drilling | 10.6 m/s² (K=1.5 m/s²) |
| Vibrations - chipping | 6.81 m/s² (K=1.5 m/s²) |
| Protection class | II (double insulation) |
| Main functions | Drilling, hammer drilling, chipping |
| Safety equipment | Side handle, hearing protection |
| Maintenance | Clean ventilation slots, replace brushes if worn |
| Spare parts | Available from Milwaukee after-sales service |
| General information | Intended use: hammer drilling and chipping in masonry, concrete, wood, metal, plastic |
Frequently Asked Questions - PLH 28 E MILWAUKEE
User questions about PLH 28 E MILWAUKEE
0 question about this device. Answer the ones you know or ask your own.
Ask a new question about this device
Download the instructions for your Drill in PDF format for free! Find your manual PLH 28 E - MILWAUKEE and take your electronic device back in hand. On this page are published all the documents necessary for the use of your device. PLH 28 E by MILWAUKEE.
USER MANUAL PLH 28 E MILWAUKEE
The vibration emission level given in this information sheet has been measured in accordance with a standardised test given in EN 60745 and may be used to compare one tool with another. It may be used for a preliminary assessment of exposure.
The declared vibration emission level represents the main applications of the tool. However if the tool is used for different applications, with different accessories or poorly maintained, the vibration emission may differ. This may significantly increase the exposure level over the total working period.
An estimation of the level of exposure to vibration should also take into account the times when the tool is switched off or when it is running but not actually doing the job. This may significantly reduce the exposure level over the total working period.
Identify additional safety measures to protect the operator from the effects of vibration such as: maintain the tool and the accessories, keep the hands warm, organisation of work patterns.

WARNING
Read all safety warnings and all instructions. Failure to follow the warnings and instructions may result in electric shock, fire and/or serious injury.
Save all warnings and instructions for future reference.
HAMMER SAFETY WARNINGS
Wear ear protectors. Exposure to noise can cause hearing loss. Use auxiliary handle(s), if supplied with the tool. Loss of control can cause personal injury.
Hold power tool by insulated gripping surfaces, when performing an operation where the cutting accessory may contact hidden wiring or its own cord. Cutting accessory contacting a "live" wire may make exposed metal parts of the power tool "live" and could give the operator an electric shock.
Additional Safety and Working Instructions
Use protective equipment. Always wear safety glasses when working with the machine. The use of protective clothing is recommended, such as dust mask, protective gloves, sturdy non-slip footwear, helmet and ear defenders.
The dust produced when using this tool may be harmful to health. Do not inhale the dust. Use a dust absorption system and wear a suitable dust protection mask. Remove deposited dust thoroughly, e.g. with a vacuum cleaner.
Keep mains lead clear from working range of the machine. Always lead the cable away behind you.
Do not machine any materials that present a danger to health (e.g. asbestos).
When working in walls ceiling, or floor, take care to avoid electric cables and gas or waterpipes.


Switch the device off immediately if the insertion tool stalls! Do not switch the device on again while the insertion tool is stalled, as doing so could trigger a sudden recoil with a high reactive force. Determine why the insertion tool stalled and rectify this, paying heed to the safety instructions.
Possible causes can be:
- it is tilted in the workpiece to be machined
- breakage of the material to be used
- the power tool is overloaded
Do not reach into the machine while it is running.
The insertion tool may become hot during use.
WARNING! Danger of burns
- when changing tools
- when setting the device down
Chips and splinters must not be removed while the machine is running. Clamp your workpiece with a clamping device. Unclamped workpieces can cause severe injury and damage.
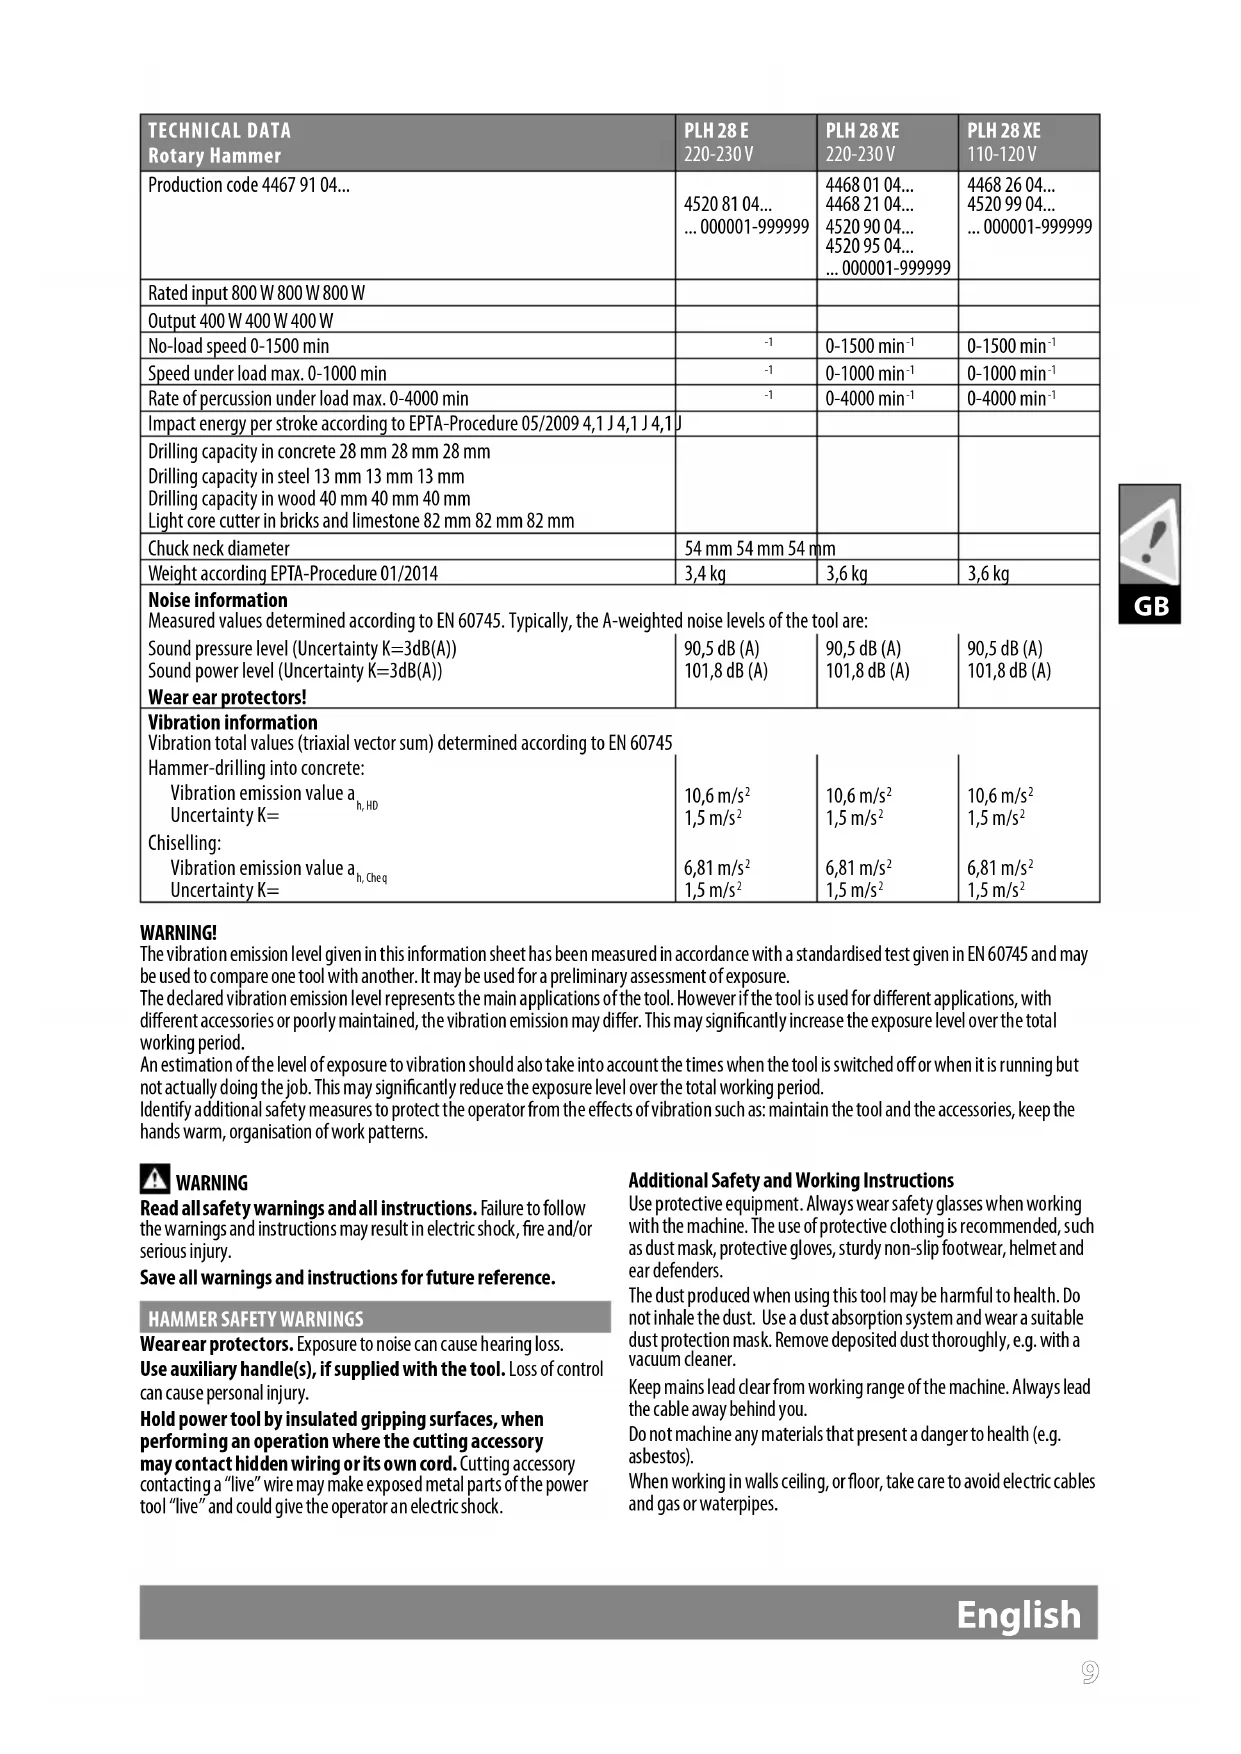
Always disconnect the plug from the socket before carrying out any work on the machine.
OPERATION
Cold Starting
If this tool is stored for a long period of time or at cold temperatures, it may not hammer initially because the lubrication has become stiff.
To warm up the tool
- Insert and lock a bit or chisel into the tool.
- Pull the trigger and apply force to the bit or chisel against a concrete or wood surface for a few seconds. Release the trigger.
- Repeat until the tool starts hammering. The colder the tool is, the longer it will take to warm up.
MAINS CONNECTION
Connect only to single-phase AC system voltage as indicated on the rating plate. It is also possible to connect to sockets without an earthing contact as the design conforms to safety class II.
Appliances used at many different locations including wet room and open air must be connected via a residual current device (FI, RCD, PRCD) of 30mA or less.
Only plug-in when machine is switched off.
Under the effect of extreme electromagnetic interferences from the outside, temporary variations in the speed of rotation could arise in particular cases.
SPECIFIED CONDITIONS OF USE
The rotary pneumatic hammer can be used for hammer drilling, chiselling in stone and concrete and drilling in wood, metal as well as plastic.
MAINTENANCE
The ventilation slots of the machine must be kept clear at all times.
If the supply cord of this appliance is damaged, it must only be replaced by a repair shop appointed by the manufacturer, to avoid hazardous situations.
Important note! If the carbon brushes are worn, in addition to exchanging the brushes the tool should be sent to after-sales service. This will ensure long service life and top performance.
Use only Milwaukee accessories and Milwaukee spare parts. Should components need to be replaced which have not been described, please contact one of our Milwaukee service agents (see our list of guarantee/ service addresses).
If needed, an exploded view of the tool can be ordered. Please state the Article No. as well as the machine type printed on the label and order the drawing at your local service agents or directly at: Techtronic Industries GmbH, Max-Eyth-Straße 10, 71364 Winnenden, Germany.
EC-DECLARATION OF CONFORMITY
We declare under our sole responsibility that the product described under "Technical Data" fulfills all the relevant provisions of the directives
2011/65/EU (RoHS)
2006/42/EC
2014/30/EU
and the following harmonized standards have been used.
EN 60745-1:2009+A11:2010
EN 60745-2-6:2010
EN 55014-1:2017+A11:2020
EN 55014-2:2015
EN 61000-3-2:2014
EN 61000-3-3:2013
EN IEC 63000:2018

Winnenden, 2020-11-30

Alexander Krug / Managing Director
Authorized to compile the technical file
Techtronic Industries GmbH
Max-Eyth-StraBe 10, 71364 Winnenden, Germany
GB-DECLARATION OF CONFORMITY
We declare as the manufacturer under our sole responsibility that the product described under "Technical Data" fulfills all the relevant provisions of the following Regulations
S.I. 2012/3032 (as amended), S.I. 2008/1597 (as amended),
S.I. 2016/1091 (as amended) and that the following designated standards have been used:
BS EN 60745-1:2009+A11:2010
BS EN 60745-2-6:2010
BS EN 55014-1:2017+A11:2020
BS EN 55014-2:2015
BS EN 61000-3-2:2014
BS EN 61000-3-3:2013
BS EN IEC 63000:2018
Winnenden, 2020-11-30

Alexander Krug / Managing Director
Authorized to compile the technical file
Techtronic Industries GmbH
Max-Eyth-StraBe 10, 71364 Winnenden, Germany
English
SYMBOLS

CAUTION! WARNING! DANGER!

Please read the instructions carefully before starting the machine.
Always disconnect the plug from the socket before carrying out any work on the machine.

Accessory - Not included in standard equipment, available as an accessory.

Do not dispose of electric tools together with household waste material. Electric tools and electronic equipment that have reached the end of their life must be collected separately and returned to an environmentally compatible recycling facility. Check with your local authority or retailer for recycling advice and collection point.

European Conformity Mark

British Conformity Mark
Ukraine Conformity Mark
EurAsian Conformity Mark


Winnenden, 2020-11-30

Max-Eyth-Straße 10, 71364 Winnenden, Germany

SYMBOLE

Winnenden, 2020-11-30

Alexander Krug / Managing Director
Max-Eyth-Straße 10, 71364 Winnenden, Germany
Français
SYMBOLES

ATTENTION! AVERTISSEMENT! DANGER!

Winnenden, 2020-11-30

Alexander Krug / Managing Director
Max-Eyth-Straße 10, 71364 Winnenden, Germany

SIMBOLI

ATTENZIONE! AVVERTENZA! PERICOLO!

Winnenden, 2020-11-30

Alexander Krug / Managing Director
Max-Eyth-Straße 10, 71364 Winnenden, Germany
Espanol
SIMBOLOS

ATENCIONI;ADVERTENCIA!PELIGRO!

Winnenden, 2020-11-30

Alexander Krug / Managing Director
Max-Eyth-Straße 10, 71364 Winnenden, Germany

SYMBOLE

ATENÇAO! PERIGO!

Techtronic Industries GmbH, Max-Eyth-Straße 10, 71364 Winnenden, Germany.
EC-VERKLARING VAN OVEREENSTEMMING
Winnenden, 2020-11-30

Alexander Krug / Managing Director
Max-Eyth-Straße 10, 71364 Winnenden, Germany
SYMBOL

OPGELET! WAARSCHUWING! GEVAAR!

Winnenden, 2020-11-30

Alexander Krug / Managing Director
Max-Eyth-Straße 10, 71364 Winnenden, Germany

SYMBOLER

VIGTIG! ADVARSEL! FARE!

Laesbrugsanvisingennogeforibrugtagning.

Winnenden, 2020-11-30

Alexander Krug / Managing Director
Max-Eyth-StraBe 10, 71364 Winnenden, Germany
SYMBOLER

OBS! ADVARSEL! FARE!

Winnenden, 2020-11-30
Alexander Krug / Managing Director
Max-Eyth-Straße 10, 71364 Winnenden, Germany
SYMBOLER

OBSERVERA! VARNING! FARA!

Läs instruktionen noga innan du starter maskinen.

Winnenden, 2020-11-30

Alexander Krug / Managing Director
Max-Eyth-StraBe 10, 71364 Winnenden, Germany
SYMBOLIT

HUOMIO! VAROITUS! VAARA!

Aiaβaote oεc tic Ynoδεεic aoapaleiac kat tic Obnyiec.
Aeiec kata nyn npon tw npoeiointikw unoeiewv
nnpoi va npokaloeovn kxtponnxiia, kivduo npkayiac /ka
ooapocpaupatouoc.
OualeTe oAeTic npoeiDonointikec unodEieic kai odnyie cyia kaote eAovtki xipon.
OAHHIEZ AΦAIAIAGIIA NEPIETPOΦIKO ΣΦYPI
Opate wtoaonidec. H enipaaon tou oopou mopei va npokaleia anwlaia koic.
Xpouonoiitee T oukeun Tc npouneovuec npoo0etec xepolalbc. H anwia eEyxou uopei va odynnoe oTpaupatioo.
Na niave to nAeKtpio epyaleio mvo ano tic
npoBlenopeve cy' auto to oKonO movwveec enipaveiec
tou,otav kTealeite epyaocic otic onoiEc unapxiei
kivduvoc to epyaleio nou xpnoaonoiite va ouvavtroe i
nAeKtpopopocaywooc n to diko tou nAeKtpio kaawdio.
H enaipnTwv kontkiw epyaleiwmuayyo tpoopodooiac taonc npopei va theeia taetaikata nucovkeun un'otaon kai va npokaloei nektonnaia.
Pepaipewooyieacaaopaleiackaixpoewc
Xpnooie npootatevtko eonlaio. Kata tv npyaia me t n xavn opatne na vta npootatevtka yuaia. suviotoue enionnpootatevtikn evdujaia onc enion paataoc avanvoic, npootatevtika yvta, otaepa kai aopaa nTv oiothnon unodnata, kpavoc kai wtoaonidec.

H nmuoyouveyn kata nTv epyoia oKovn eivai ouxyva eniBaNc
via tnu uyia kai dev npenei va epxetae enaqne to ouaia.
Xpnojmoieite mia diataen avappopnonc tnc okovnc kai popate
etinaleov mia katalnn npoownida npootaaic ano tn okovn.
Anopakpuvete eniuewct n paZeenuv okovn, n.x. ne avappopnon.
Kpatate to kalwouveonc naVTote pakpi ano tvnpioh
dpaoont c nC uXavnc. Pepvate to kalwo navtoe niow ano tn
unxavn.
Mny eEepyaceote eikivduva yia tvv uyeia uika (n.x. aiaivtoc). Kata tic epyaiec oe toixo, opopn n danso npooexete yia tuxov nektpiKa kalwioia kai yia owne c aepiou kai vepou.
Winnenden, 2020-11-30

Alexander Krug / Managing Director
Eeouioobotnevoaovtaleiovtoxvko pakeAo.
Techtronic Industries GmbH
Max-Eyth-Straße 10, 71364 Winnenden, Germany
ΣYMBOA

IPOZOXH! IPOEIOI0IH2H! KINADYNOZ!

Iapakaaw diaβaote oxolaotikacocnyiecx npnoC npiv ano Tnv evapenlambdaoupyiac.

Piv ano ka3e epyaia oTn mXavn Tpaatae to pic ano nV npici.

Eapntmuata -Ev nepiaaabovvta ola knapadoon, ouviotouevn npooekn ano to npoypma Eapntmuatw.

Winnenden, 2020-11-30

Alexander Krug / Managing Director
Teknik evraklan hazirlamakla gorevendirilmistir.
Techtronic Industries GmbH
Max-Eyth-StraBe 10, 71364 Winnenden, Germany
SEMBOLLER

DIKKAT! UYARI! TEHLIKE!

Winnenden, 2020-11-30

Alexander Krug / Managing Director
Max-Eyth-Straße 10, 71364 Winnenden, Germany
SYMBOLY

POZOR! VAROVÁN! NEBEZPEÇİ!

CE-VYHLASENIE KONFORMITY
Winnenden, 2020-11-30

Alexander Krug / Managing Director
Max-Eyth-StraBe 10, 71364 Winnenden, Germany
SYMBOLY

POZOR! NEBEZPECENSTVO!

Pred pvym pouzitim pristroja si pozorne precitajte navod na obsluhu.

Pred kazdou pracou na stroji vytiahnite zastrcku zo zasuvky.

Prisluşenstvo - nie je sučastou standardnej vybavy, odporucané doplenie z programu prisluşenstva.

Winnenden, 2020-11-30

Alexander Krug / Managing Director
Max-Eyth-Straße 10,71364 Winnenden, Germany

SYMBOLE

UWAGA! OSTRZEZENIE NIEBEEPIECZENSTWOI

Winnenden, 2020-11-30

Alexander Krug / Managing Director
Max-Eyth-Straße 10, 71364 Winnenden, Germany

Mag
Magyar
SZIMBOLUMOK

FIGYELEM! FIGYELMEZTETÉS! VESZÉLY!

UPORABA V SKLADU Z NAMEMBNOSTJO
Udarni vrtalnik je univerzalno uporaben za udarno vrtanje in klesanje v kamnu in betonu in za vrtanje v lesu, kovini ter umetni masi.
VZDRZEVANJE
Winnenden, 2020-11-30

Alexander Krug / Managing Director
Pooblascen za izdelavo spisov tehnicne dokumentacije.
Techtronic Industries GmbH
Max-Eyth-StraBe 10, 71364 Winnenden, Germany
SIMBOLI

POZOR! OPOZORILO! NEVARNO!

Prosimo, da pred uporabo pozorno preberete to navodilo za uporabo.

Winnenden, 2020-11-30

Alexander Krug / Managing Director
Ovlasten za formiranje tehnicke dokumentacije.
Techtronic Industries GmbH
Max-Eyth-Straße 10, 71364 Winnenden, Germany
SIMBOLI

PAZNJA! UPOZORENIE! OPASNOST!

ATBILSTIBA CEN NORMAM
Winnenden, 2020-11-30

Alexander Krug / Managing Director
Pilvarotais tehniskas dokumentacijas sastadiisana.
Techtronic Industries GmbH
Max-Eyth-StraBe 10, 71364 Winnenden, Germany
SIMBOLI

UZMANIBU!BISTAM!!

Pirms sakt lietot instrumentu, ludzu, izlasiet lietoanas pamacibu.

Pirms jebkadiem darbiem, kas attiecas uz masinas apkopi, masinu noteikti vajag atvienot nokontaktligzdas.

Piederumi - standartaprikojuma neietvertas, bet ieteicamas papildus komplektacijas detalas no piederumu programmas.

Elektroiekartas nedrikst izmest kopa ar sadzives atkritumiem. Elektriskas un elektroniskas iekartas ir jasavac atseviski un janodod sparstrades uzemumam, kas no tam atbrivosies dabai draudziga veida. Meklejet otreizejas sparstrades poligonus un savaksanas punktus vietjas parvaldes iestades vai pie preces spardeveja.
II aizsardzibas klases elektron instruments.
Elektroinstruments, kuram aizsardziba pret elektrisko trecienu ir atkariga ne tikai no pamata izolacijas, bet ari no ta, ka tiek piemeroi papildu aizsardzibas pasakumi, piemeram, dubulta izolacija vai pastiprinata izolacija. Aizsarga pieslegsanai instrumenti nav paredzeti.

Eiropas atbilstibas zime

Winnenden, 2020-11-30

Alexander Krug / Managing Director
Igaliotas parengti techninius dokumentus.
Techtronic Industries GmbH
Max-Eyth-StraBe 10, 71364 Winnenden, Germany
SIMBOLIAI

DÉMESIO! JSPÉJIMAS! PAVOJUS!

Max-Eyth-StraBe 10,71364 Winnenden, Germany.
EU VASTAVUSALDUS
Winnenden, 2020-11-30

Alexander Krug / Managing Director
Max-Eyth-Straße 10, 71364 Winnenden, Germany
SÜMBOLID

ETTEVAATUST! TÄHELEPANU! OHUD!

YKA3AHMIO B6E30NACHOCTN DJIPEPOPATOPA
NcnoB3yTe HayuHnKn! Bo3eInCTBne Wyma MoXeT npNBecTN K noTepe Cnyxa.
HcnoB3yIte BCnOmaTeNbHbIe pyKoRTKn, NoCTaBnaEmble BMeCTe CnHCTpymEtom. IOpTePA KOHTpOJa MOxET CTaTb npuHHoT TpaBMbl.
Diepknte 3neKtpoHnCTpyMeHT TOnbKOa n30nIpOBaHHble NOBepxHocTH pykoTOK,ecn BbY BbINOHnHaTe pa6Otbl, npN KOToPbIX pa6OuHnHCTpyMeHT MoKeT nonactb Ha CkpbItyo 3neKtpoNPoBOdky HnHa Co6CTBeHHb NHyp NoKnouehn NHTAHy. KoHTaKT peXyUero INCTpyMeHTa C ToKOBdUyIM PPOBOOM MOKeT CTaBtB NOD HanpJxHeHne MetaJIInueckne qAcTn pnp6opA, a TaKke pnpBOOITb K YdApy 3neKtpuCeCKM TOKOM.
Pycckn
DOnonHnTeBhIe yka3aHnaNo 6e3oNachoctn pa60Te
Ib30BaTcpeCTBAMn 3aunItb. Pa6oTaTc nHCTpyMeHTOM Bcerda B 3aunTHbIX OyKaX.PekOMeHnyETc CneOJeKJa: nbile 3aunTHaMaCKa, 3aunTHbIe nepuATKn, npouHaN HeckoJb3aJauo6yBb, KAcKa N HayuHNKn.
IbIb,6pa3yOuaaRc np pa6oTe c daHHbIM HHTpyMeHToM, MoKET 6bITB BpeHa IIN3OpOBBy INNONACTb Ha Teno.
Ib3yTeBcCCTeMoNbIeYdAeHnHaDeBaTeNoDxOaHy 3aunTHyO MaCKy.TaateLbHO y6uPaTe cKaJIINBaIOUyOcR Nblb (Hanp. nIecocom).
Depknte cnoBoI npOoB Bhe pa60ey 30HbI HcTpyMeHa.
Bcerda npoknaDbBaIte Ka6eb 3a cnHNoi.
3anpeaetc06pa6aTbIbTaMbTePnAbI, KOtOpBIE MoryT HaeCTn Bep 3DopOBbIO (Happ., a6ecT).
Pp npab0Te BCTeHax, nOToJIkX uNn NOny CneIte 3a Tem, YTO6bl He nobpeIb TNeKTPnueckne KaBEnu Nn BOOnpoBOHbIe Tpy6bl.
Pn6I0KpOBaHm nCOnb3yEmo HNCTpyMeHa HeMeDHeHb BbIKNoHTb np6Op! He BkIOuayTe np6Op DoTex nop, NOKa nCOnb3yEmbIn NHCtpyMeH 3a6NOKpOBaH, B pOToNBOM Cnyae MoXeT Bo3HNKHyTB OTdauCA BbICOKM peAKTUBHbIM MOMHTOM. OnpeDeIeNTe uCTpaHIne npuHnHy 6NOKpOBaHn HcNoB3yEmo INCTpyMeHa C yueToM yka3AHn No 6e3OnacHOCTn.
B03MOXHbIMnPnUHAMnOCTaHOBKmMOrY6bItb:
- nepekoc 3arotobkn, nojnekaaeoi6pa6oTke
pa3pyuwenHe MaTePnAa,poIeXaUero o6pa60Tke; - nepepy3ka ənEKeTpOuHCTpyMeHTa
He npukacatbca K pa6oTaioJeMy TaHky.
NcnoB3yembI INCTpyMeHT MoKeT HarpeBaTbCBA Bo BpeMa npMHeHn.
BHIMAHHE! Onachoctb nonyuhenoxora
-ПИССМЕСЕОСHACTКI
- pnpyKnaDbBaHm npu6opa
HeybupaTe onnknu n oblomKn npn BkIoueHHOM uHCTpyMeHe.
3aФнксуп Te BaUy 3aToTOBky C NOMOьHIO 3aJIM HOr npncnoc6bHeH. He3aФнксUpOBaHHbIe 3aToTOBKn MOryt npNBecTn K TJaKeJIbIM TpaBMam I NobpeKdEHNAM.
Ipeep BbInOnHeHemKaKx-Im6o pa60 nO 6cnyKuBaHIO HnCTpyMeHTA BceJa BbIHMaTe BUNky I3 pOeTKN.
3KCNYYATAUN
XoJIoNbHbI 3aNyck
EcnI 3OT INHCTpyMeHT xpaHNTcB TeueHHe DnITeNBHorO BpeMeHN nnPn HN3KNX TemNepaTpyax, NoHaayany OH MoKeT nIOxO pa6oTaTB N3-3a 3aTBepeBaHH Cma3Kn.
ДяnporpeBaHnИнчтymeHTa
- BctaBbTe B uHcTpymeHT CBePNO Nn DOnTo N 3aΦNkCnpyIteero.
- Haxmnte KhoNky 3anycka u npnte DoIto nn CbePNO B 6etoHnyu nn DepeBaanHyIO NOBepxHOCTb Ha HeckoIbKO CeKyHd. OTnycTe KhoNky 3anycka.
- NOBTOPRnTe Do Tex nOp, NOKa INHCTpyMeHT He HauHET COBepuATb ydaPHe BnXeHHa. YemXoJIoDHe INHCTpyMeHT, TeM DOnbWe OH 6ydt npOrpeBaTcbr.
NOKKIOUOHEHMEK3NEKTKPOCETM
IOncoeHnHbToBkoKoOJHOfo3HoCteNpeMeHHOrTOKa C HAnpRaeHEmc, COOTBeTCTByUoUm Yka3aHHOMy Ha UHCTpyMeHTe. 3NeKtpOnHCTpyMeHT UMeet BtOpoi KlaCC 3aunTbI, YTO N03BOJAre TNOkKnIOu4bEro K pOstETkAM 3NeKtpOnTuHaH6e3a3emJIOUeRO BbIBOda.
3NeKtpOnp60bpI,NCNoIb3yeMble BO MHOrIX pa3NmUHbIX MeCTax, B TOM uCIE Ha OTKpbITOM BO3DyXe, DIOJXHbI NIOKJIIOuHaTcY uepe3 yCtpoiCTBO, PpeoTbpaauOooee pe3Koe NOBbIeHne HapnjaKeHHa (FI, RCD, PRCD).
BCTaBnIe BnIky Bpo3Eky TOnbKO npN BbIKIOueHHOM nHCTpymente.
B O TdIeNbHbIX CnUyAax B03MoXhbl BpeMeHHbIe N3MeHeHnckOpocTn BpaUeHnB Pe3yJbTaTe CnJIbHbIX BHeUHNXAnEKeTPOMaTHnTHbIX NOMEX.
NCHOJIb3OBAHNE
ДанньпорфopatopMOKTeОДиHAKOBOUCNOb3OBAtCBaДудapHOrO CBepHeHnIДоJI6HeHnB KAMHe N 6eToHa,Bbpy6Kn BKaMHe N pIPOCTOrO CBepHeHnB DepeBe,MeTaNII NПlaCTnKe.
OBCJYXUBAHNE
Bcerda depknte oxnaqdaioune oTbepctny uctbIM.
PnnoBpeKdHnCteBOrO coeHHTelbHoro Ka6enr er0 3aMeHy npOn3BOuNT Cnyk6a TexHueckoN NODeepKKN KInHeTOB, TAK KaK dIy ETO Tpe6yeTcneuaHbHIN HCTpyMeH.
PnH0ce yrOblbIX 1eTOK, B DOnOJIHeHne K 3aMeHe 1eTOK nHTpymENT CNeIyET NPOBepNTB C cepBnCHOM CEHTpe. 3To o6ecNEuHT DoJrrn CpOK EKnpyataun, a TaKKe IIOCToHHyTO TOBHOCTb IHCTpymEnTa K pa6Ote.
Tb3yTecb akcceccyapam n 3anaChbIMn qactmMilwauke. Bcnyae Bo3HKnHOBeHH Heo6xOIMMoCTn B 3aMeHe, KOtopaH He 6bIa onncAna, o6paaaiTeCb BOIN N3 cepBnchbIX ceHTpOB No 06cnyiBaHIO 3neKTPoIHCTpyMeHToB Milwauke (cm. cIncoK cepBnchbIX opraHn3aun).
PnHHeo6xOIMOCtN MoKeT 6bItb 3aKa3aH ueptex uHCTpyMeHTa C TpeXmepHBIM N3O6paXeHem JeTaJIe. NoxanyIcTA, yKaKNTe HOpE n TIN INHCTpyMeHTa N 3aKaJXte ueptex y BaWix MeCTbIX areHTOB mIIHN HeocpeIcTBehHOy Techtronic Industries GmbH, Max-Eyth-StraBe 10,71364 Winnenden, Germany.
DEKJIAPAUNO COOTBETCTBNN CTAHAPTAM EC
MbI Hecem NCKNIUHTeNBHyIO TBETCTBHeHOCtB 3a To, 4TO u3DeJIne, onncaHHoe B pa3dJeNE «TexHueckA INΦOpMaJua» COOTBeTCTByeT BCEm npIMMeHMbIM NOLOXeHNrM DInpeKtUB 2011/65/EU (RoHS)
2006/42/EC
2014/30/EU
aTaKxE CneDyIOUIM COrIacoBaHHbIM CTaHdApTaM
EN 60745-1:2009+A11:2010
EN 60745-2-6:2010
EN 55014-1:2017+A11:2020
EN 55014-2:2015
EN 61000-3-2:2014
EN 61000-3-3:2013
EN IEC 63000:2018

Winnenden, 2020-11-30

Alexander Krug / Managing Director
YynoHMOouEn Ha coCTaBHeMe TexHnueckoI DOKymeHTaUIM.
Techtronic Industries GmbH
Max-Eyth-Straße 10, 71364 Winnenden, Germany

CNMBOJIbI

BHHAMHIE! IPIEyIpyEKDEHNE! ONACHOCTb!

IoxaIyIcTa, BHMATEJIbHO IpoUHTe INHCTpyKuIIO nICNoIb3OBAHnIO nepeJ HauJOM JIO6bIX OIepaIcN cIHCTpymEHTOM.

IpepeBbINOHeHemKaKx-Jn6o pa60 no 06cnyKBAHHIOHCTpyMeHTA BcERda BbHMaTe BNJKy n3 pO3eTKN.

PnHaJNeXHOctN-BCTaHdApTHyIO KOMnIeKtauHHe BXoIIT, NOCTaBJIeTcB KaYeCTBe DOnONHmTeNbHO npHaJNeXHOctN.

3JIeKTPnueckne yCTpoIcTBa HeIb38yTINIM3NpOBA Tb BMeCTc
C6bITOBbIM MycOpOM.3JIeKTPnueckne MJIeKTPoHbIe
yCTPOIcTBa CIEJyET COBnPaTb OTdIbHo N CdaBaTb B
CNEuAIN3nPoBAHHyIO yTINIm3NpyIOU KOMnAnIO IIN
yTINIm3aUIN B COOTBeTCTBM C HopMaMn OxpaHbI OKpyKaHOUeI
Cpebl.CBeDEHnO U CEHTPax BTOpUHNO PepeBaOToN INnyKTax
Cbopa MoXHo NOnyHTb B MeCThBX OPraHax BNaCTN ININ Y
BaWero CNEuAIN3nPoBAHHOr DInepa.

3JIeKToHCTpyMeT C KJIaCCOM 3aUHTbI.
3JIeKToHCTpyMeT, B KOtOpom 3aUHTa OT 3JIeKTPueckoro yDapa 3aBNCHT He TOnbKO O TOCOBHO N3OJLIM, HO IOT TORO, YTO pINHMAMOTc DOJONHITeNbHBe 3aUHTbIE Mepbl, TAKHe KaK DBoHnA N3OJLIM UIn YCuNHeHHa N3OJLIM. Het yCTPOICTBa DnI NOkLIuOeHHa 3aUHTHO rpoBOda.

Ebponeckn 3HaK COOTBETCTBNA

BpTaHckn 3hak COoTBcTbN

YkpaHnckn 3HaK COoTBcTbN

EBpoa3nATCKN 3HaK COOTBECTBNA

PYC
| TEXHUNCHECKI DAHNI Перфоратop | PLH 28 E 220-230V | PLH 28 XE 220-230V | PLH 28 XE 110-120V |
| Проблемы Довец HОМЕР 4467 91 04... | 4520 81 04... ... 000001-999999 | 4468 01 04... 4468 21 04... 4520 90 04... 4520 95 04... ... 000001-999999 | 4468 26 04... 4520 99 04... ... 000001-999999 |
| Номинална консуmpлара на мошноct | 800 W | 800 W | 800 W |
| Одавана мошноct 400 W 400 W 400 W | |||
| Овороти на праzenх од 0-1500 min | -1 | 0-1500 min-1 | 0-1500 min-1 |
| Овороти при натуарвае макс. 0-1000 min | -1 | 0-1000 min-1 | 0-1000 min-1 |
| Макс. бroy на удAPIпес пri натуарвае макс. 0-4000 min | -1 | 0-4000 min-1 | 0-4000 min-1 |
| Енера на сбгласно EPTA-Procedure 05/2009 | 4,1 J | 4,1 J | 4,1 J |
| Диаметьр на сбравлною за SFTOH 28 mm 28 mm 28 mm | 40 mm | 40 mm | 40 mm |
| Диаметьр на сбравлною за CTOMАHA 13 mm 13 mm 13 mm | |||
| Диаметьр на сбравлною за дърво | |||
| Лека вороча за об揪ковени и за симлиatingухлìn | 82 mm 82 mm 82 mm | ||
| Диаметьр на OTВORA на natponнікa | 54 mm | 54 mm | 54 mm |
| Тergл�ын поцедураты EPTA 01/2014 | 3,4 kg | 3,6 kg | 3,6 kg |
| Инфомразmaя зшума Изм扼енист StOй�ости са почени Stббразно EN 60745. Oценист с А НИВО на ШУMa на урда e СьOTВETNo: | |||
| Равнице на Звкового налягане (HecuypнocT K=3dB(A)) | 90,5 dB(A) | 90,5 dB(A) | 90,5 dB(A) |
| Равнице на мошноctта на Звуka (HecuypнocT K=3dB(A)) | 101,8 dB(A) | 101,8 dB(A) | 101,8 dB(A) |
| Да с пося реладно ср徳ст BO за сныа! | |||
| Инфомразmaя з ВИБрацимп Овsi ITE StOй�ostи на ВИБрацимпт(EвКТOPнСа СUMа на Тprп ПОСКИ) са onpevelenii B StOBТВETСВИЕСEN 60745. | |||
| ПробимBERе SFToH: Стойост на Emиси на ВИБрацимпe a HcngyrphocT K= Дьлбаенe: Стойост на Emиси на ВИБрацимпe a HcngyrphocT K= Дьлбаенe: | 10,6 m/s2 1,5 m/s2 | 10,6 m/s2 1,5 m/s2 | 10,6 m/s2 1,5 m/s2 |
| 6,81 m/s2 1,5 m/s2 | 6,81 m/s2 1,5 m/s2 | 6,81 m/s2 1,5 m/s2 | |
BHIMAHHE!
IocouheHOTBteu HNCTpyKcun HnBO HA Bn6paunTE e N3MepeHO B cboTBcTbne CbCTaHaPbA H EN 60745 n3MepeBaTeHe MeTOIMoKe Da ce I3NoJ3Ba 3a CpaBHeHHe Ha eJeKtpueckn IHCTpyMeHTn NOMeKdy IM. IodxoJaE u 3a BpemHa OueHka HaB6paunOHTo HATOBapBaHe.
Iocouehoto HnBO Ha Bn6paunite npedctabO OCHOBHTe npnoXeHna Heektpueckn HNCTpyMeT. Ako oabe eektpuecknRT HNCTpyMeT Ce n3non3Ba C pyro npedha3HaueHne, CpaznHm CmeHemaM NHCPTpMeHTn nn pnp HeoCTaTbHa TExnuecka NoDpbjKka, HNBOTo Ha Bn6paunite Moke da e pa3nHTo. ToBa yBCTBnTeJHO MOKe da yBeHmN Bn6paunHTO HtOBAPBaHe no BpeMaHa cenna Pa6toE hKnbl.
3a ToHaTa OeHka Ha Bn6paunOHTo HATOBapBaHe Tp6Ba Da Ce B3eMaT npeBmN NepnoNTe OT BpMe, B KOnTO ypeBt E N3KIOUeHnn pa60n, HO B DeIcTBnTeHNOCT He ce M3nO3Ba. ToBa YyBCTBnTEHMOKe Da HamaII Bn6paunOHTo HATOBapBaHe NO BpMe Ha cienna pa6oTeH uKbI.
Onpeene TOnbHnTeHN MepKn no TexnKa Ha 6e3onacHocB 3aunTa Ha 0cbnyBaunpa6oTHNK OT B3neCTBNETo Ha
B6paunTe KaTO HApMep: Texnuecka NaDpBxka Ha eNeKtpueckn INcTpymENT n CmehreMeNTu INcTpymENTn, NOdIbpxHa
PbueTe ToNN, opraHn3aunHa pa6oTHN cKbJ.

BHIMAHWE
Ipooyete yka3aHnraTa 3a 6e30nacnoCT n cbbetute.
PpOynckn npn cna3BaHeto Ha yKa3aHnIa NHa HNCTpyKuInTe 3a 6e3oNaCHOCT MoT a Da IOBeaT Do TOKOB yIap, IIOxap N/INI TeKKn HapaHbAHn.
3ana3e BCn4Kyka3aHn INHCTpykun 3a 6e3onacnoct 3a 6bdeueto.
HHCTPYKUN 3A BE30NACHOCT NEPOOPATOP
Hocete cpeCTBO 3a 3auNTa Ha cnlyxa. UymbT MoKe da doBe de 03ary6a Ha cnlyxa.
H3non3BaIte doCTaBeHITe Cypeda DonbHHTenHH pBkoXBAtKn. 3ary6ata Ha KOHTpO MoKe Da DoBeDe Dn HapaHBAHN.
IpbkTe ypeDa 3a n30nnpaHnTe pKoXBaTK, KOrato N3BbPwBaTe pa60Tu, npu KOnto pexKeunr HNCTpymENT MOKe Da 3aceHne cKpNTe eneKTPonHCTanaOnHH Ka6enn NN Co6CTBeHnra cn Ka6en. KoHTaKTbT Ha peKeunr HNCTpymENT CTOKOBODeu IpOBDoHNK MoKe Da npdaeHanpeXeHneTO Bbpxy MetaJIHn uactn Ha ypeDa n da DoBeDe do TOKOB yap.
IOnbHnTeHH yKa3aHna 3pa6oTa n 6e3onacnoct
Ja ce n3non3BaT npedna3Hn CpeCTBa. Pnp pa6ota C mAsHHata BnHaHn Hocete npedna3HN OuHa. PpenopbYBaT ce 3aunTHO 06neKnIO npaxo3aunTHa MaCKa, 3aunTHn pbKaBUN, 3JpaBN HExNb3raUnc Ce o6yBKN, KACKa N npedna3HN CpeCTBa 3aClyxa.

Pnpa6oHa OTKpnto HIN KOrTaB MaunHata Morat da nonaHaT Bnara HIn npax, Ce npenopbUba ypeBt Da ce Cbbp3Ba ue3 3aunTeH npeKbcBauch aYteueh ToK cMaKcImaHno 30 mA ToK Ha 3aDeiCTBaHe.
Cbbp3Baunr Ka6eBn BnHa Da ce bpxn n3BbH pa6oTHna 06cer Ha MaunHaTa. Ka6eBt da ce OTBeKDa ot MaunHaT a BnHaN Ha3aD.
He pa3peeHa 6pa60kata Ha MaTePnAIn, KOnTo npEcdTabnBaT onaCHOCT 3a 3dpabeto (Hnp. a36ect).
Ppna60TaBCTeHN,TaBaHnIINIOOBe BHMaBaTe 3a Ka6eN,ra3OpBoDmN BODonpoBODm.
Ako n3no3BaHnT nHCTpyMeT 6IOKnpa, n3KIOUcTe BeDnara ypeLa! He BkIOuBaHTe ypeLa OTHOBO, DOKaTO n3NO3BaHnT nHCTpyMeT e 6IOKpAH; TOBa 6n MoNTo Da IOBeDe Do OTKaT C BnCoka peakTNbHa cna. OTkpuTne N OTCpaHeTe npuHaTa 3a 6IOKpAHeto Ha n3No3BaHn HnCTpyMeT mMaKn B ppeBnD nHCTpyKmTE 3a 6e3oNaCHOCT.
Bb3MoXHa pIpuYHa 3a TOBa MoKe Ja b6Je:
3aknHbHe B 06pa6oTbaHaTa qact
Ipeynbahe Ha o6pa6oTBaHn MaTePnA
- PteHaToBapBaHe Ha eIeKTpUeCKn IHCTpyMeHT He 6bPKaTBe B MaunHaTa, DOKaTO Ta pa60Tu.
N3no3BaHnIHT INCTpyMeHT MoKe Da 3arpee No BpeMe Ha ynoTpe6a.
BHIMAHHE! OnachocT on3rapaHn
- pnp CMRAHa HaMHCTpyMeHTa
-ПИО OCTABAЯн Ha ypeДа
CtpyKnn nIIN OTcynEnH napYeTa da He ce OCTpaHbAT,doKaTo MaunHa pa60Tu.
3aKpeTe 6b60TaHata cTcYCTBO 3a 3axBaUaHe. He3aKpeEnu cAtn 3a 6pa60Ka MOrat Da npuHrT cepno3Hn HapaHaBnMaTePnAnHn 5eTu.
IpeNi KaBnTo N da e pa6OTn N MaunHaTa N3BaTe Ue nceLa OT KOHTaKaT.
ONEPAÇU
CtyeHo CtapTnpaHe
Ako INCTpyMeTbT He e 6wn IOn3BaH npOdbnKInTeHNO Bpe Me nn E 6wn CbxpHaRbAH Ha CTyeHO, e Bb3MOXHO NbpBOHaayHIO Da He ycnee da n3BbPm 3a6NBaHe NopdN BTBbpRABaHe Ha cMa3KaTa. 3a da 3arpeete INCTpyMeHTa
1.ПoctabeTe 6byprnI INIcKaU B INHCTpyMeNTa I rO 3akniouteHa nO3nuiy.
2.Дрьн electу Клочи npituche6byprna/cekaa KbM 6eToHHa mIbPBeHa NOBbpxHOCT B npOdbJxKeHne Ha HkoJIco cekynm.OcbobodetnyckOBnKIOU.
3.Поваряte,ДOKATOИНСТРМЕHTbTЗANOЧЕд 3a6иБа.KoIKOToNo-CTyEnEИNCHTpMeyHbT,TOIkoBaNOBEue BpeMe ue My e HxKHo,3a da 3arpee.
3AUNTA HA DNBATENB 3ABNCMOCT OT HATOBAPBAHETO
Ja ce Cbbp3Ba CaMO KbM eHNOΦa3eH IpomHeNIB TOK U CaMO KbM MpeKoBO HAppeKeHne, NocOueHO Bbpy 3aBODcKaTa Ta6eJIka. Bb3MoXHo e N CBp3BaHe KbM KOHTAK, KOITHO eOT TIN, WY Ko" NOHexe KOHCTpyKuIraT a oT 3aUInTe HKnac II.
KohtaKTITE BvB BbHnHTe yAcTbU Tp6Ba da 6bDaT o6OpyDbAHc CbC 3aUnTHn PpeKbCBaun 3a yTeueh TOK (FI, RCD,PRCD).ToBa n3ncBA ppeDnucHneTO 3a nHCTanIpaHe 3a eKeTpueckata nHCTana. MoJr cna3BaTe ToBA npu n3non3BaHe Ha Baun ypeJ.
Cbbp3BaIte MaunHaTa KbM KOHTa CaMo B N3KIOueHo NOIOKeHne.
PnB3dEeCTBHeHaekTpeMHN BbHUNeEKeTpOMaTHN CMyueHn BOTJeHH CNyauMOra Ta Bb3HNKHAT BpeMeHH KOle6aHn Ha YecToTa Ha BbpTeHe.
N3I0JI3BAHE NO IPEDAHA3HAUYHNE
NepopatopbT MoKe yHMBepcaIHO da ce I3NON3Ba 3a nepOpnpaHe nDbIb6aeHe B KaMbK n6eToH n3a np6nBaHe B DbpBO, MeTaI nPiactMaCa.
PbXKA
BeHTnauoHHTe ⅢuHa MaunHaTa Da Ce noDbpxkT BnHaTn
Ako Ka6eJbT Ha 3axpaHbHaTe o NOBpeDeH, To 3aHeceTe rto 3a CmHa B cepBn3, Tb' KaTo 3a TOBa Ca Heo6XoDmN CneuaJIHn HnCTpyMeHTn.
AkoBbIeHOBITEyKnCaN3HOCEHn,TeTp6BaJaCe CMeHrIT NdoTbIHHTeHNOe Heo6XoDnM ppeJIeB CepBn3.TOba Uye yIbJxNk EKcPiOaTaUIOHHnCpOK Ha MaUINHaTnRapaHTnpa NOCTOHHa EKcPiOaTaUIOHHa RotOBHocT.
Ja ce n3no3BaT cmo akcecoapn Ha Milwaukee n pe3epBn qactn Ha Milwaukee. EneMeHTN, YraTa noMnHa He e onncAna, Da ce daat 3a noMnHa B cepBn3 Ha Milwaukee (BuxTe 6poWypata ,RapaHnna n aDpeCn Ha cepBn3n).
Ipn Heo6xOIMOC MoKeTe da nonckate 3a ypeDa ot Baunie cepBn nn DnpeKTHo ot Techronic Industries GmbH, Max-Eyth-StraBe 10,71364 Winnenden, Germany, ueptex 3a B cnUyah Ha ekCnIO3NIA, KaTo nocOHTe TIna Ha MaUnHaTa N HOMep Bbpxy 3aBODcKaTa Ta6eNka.
CE-DEKJIAPAU3A CbOTBETCTBVE
HneKeKnapnapeM, n3qnoHa Ha hsaOTROBOPHOCT, ye npOyKTB, onncaH B, TeXhNueCKn daHH", CbOTBeTcTBa HA BCNUKN Heo6xOIMM N3NCBAHNA HnpeKtNBITE
2011/65/EC (RoHS)
2006/42/E0
2014/30/EC
Iue Ca n3nOJI3BaHn CneIHNTe XapMOHn3IpaHn CTaHdApTN EN 60745-1:2009+A11:2010
EN 60745-2-6:2010
EN 55014-1:2017+A11:2020
EN 55014-2:2015
EN 61000-3-2:2014
EN 61000-3-3:2013
EN IEC 63000:2018

Winnenden, 2020-11-30

Alexander Krug / Managing Director
YpbHOMOSeH 3a CbCTaBHe Ha TexHnueckKaTa DOKyMeHTaun
Techtronic Industries GmbH
Max-Eyth-Straße 10, 71364 Winnenden, Germany
CNMBOJIY

BHMAHHE!PENEYIPEKJEHNE!ONACHOCT

IpeHnpyckaHeHa ypeBaBdEChTBMe MOJnpOyTeTe BHIMATEJIHO INCHtpKUHTa 3a N3N03BaHe.

IpeKaKaBnTo n Da e pa6Ot N O MaunHaTa N3BaTe UeCenota OT KOHTAKTa.

Akecoapn - He ce cbdpkat B 06ema Ha doctabkata, npenopbvaHO donblheneoT nporpaMaTa 3a akcecoapn.

EneKtpnuecknte ypeHne Tpr6Ba da ce n3xBpIaT 3aeHNO C6bTOBnTe OTnabu. EneKtpnueckto u eNEKTPoHHO TO 06OpUBAHe Tpr6Ba da ce cb6upat pa3dJIHo N da ce npedaBAt Ha cnyk6nte 3a peunKnnpaHa H OtnaDbuNTe Cnopei 13NCKBaHnraTa 3a ona3BaHe Ha OKONHATA cpea. HhOfOpMpaHte Ce npn MeCTHnTe cnyk6b nnPi npn MeCTHnTe cneuaJIIN3paHn TbPROzIO NTHOCHO MeCTaTa 3a cb6npaHe N CEHTPOBete 3a peunKnnpaHa H OtnaDbu.

EneKtpoHCTpyMeHT O3aunTe HKnac II.
EneKtpoHCTpyMeHT, pRn KoITo 3aunItata O t EneKtpuYeckn yap 3abnc He cAmO OT OCHOBHATA N30aua, a nOT 06cToreTcBtO, ye Ce I3noJI3BaT dOnbJInHeNn 3aunTHm MepKu KaTo DBOHa N30aua Nn YcUHe Ha N30aua. Hama npncoc6beHe 3a npCbeDMHBAe Ha 3aunTe HnpoBDHk.

Ebponeckn3nak3aCbOTBeTCTBNE

YKpaHnCK3HaK3aCb0TBETCTBNE

EBpo-a3MaTCKn 3HaK 3a CbOTBeTCTBNE

Winnenden, 2020-11-30

Alexander Krug / Managing Director
Imputernicit sā elaboreze documentatia tehnica.
Techronic Industries GmbH
Max-Eyth-Straße 10, 71364 Winnenden, Germany
SIMBOLURI

PERICOL! AVERTIZARE! ATENTJE!

Va rugamiti cu atentie instructiunile inainte de pornirea masinii

Intotdeauna scoatei stecarul din priza inainte de a efectua intervenzione la masina.

Winnenden, 2020-11-30

Alexander Krug / Managing Director
OnonHOMOHTEN3aCoCTaByBaHeHaTexnUkataDOKymeHTaunja.
Techronic Industries GmbH
Max-Eyth-Straße 10, 71364 Winnenden, Germany
MaKeDoHcKn
CNMBOJIY

BHHMAMHE! IIPEDYIPTPEYBAHBe! ONACHOCT!

Be moJIIMme nped Ja ja cIapTyBaTe MaunHata 06pHeTe BHMaHne Ha yNaTcBtA ta yNtpe6a.

CekoraI Kora npe3eMaTe aKTHBHOCTn Bp3 MaUNHaTa Ncknyte ro Ka6eNoT od ctpyjata.

IOnonHntHa onpema - He e BknyueHa BO CTaHapHaTa, a DOCTaHa e KaKO DoaTOK.

EneKtpnHnTe anapatHe CMeaT da ce pIaT 3aeHNO cO domaunHnot OTnA. EneKtpnHnTe n eneKtpoHcTne anapatN tpe6a da ce coBnpaat OndenHO n da ce OndheCat BO COODBETHNOT norOH 3apaHn HNBHO pIaHe Bo CKlaad Co Hauenata 3a 3aHTMa HA OKOIINHATA. IHOpMnpajte c Kej BaWite MeCTHN CnyXb IIM Kaj CneuJANIIHpaHnOT TpROBCN IpETCTABHKn, KaDe IMMa TAKBN NOHn 3a peUKNlaka N CObMPn CTAHNI.

EneKtpnHOp opyne o3aWmTHata KateropnJa II. EneKtpnHOp opynie uJawTo 3aWHTa od eneKtpnyeh yap He 3aBNCn cAmO od OCHOBHaTn 3oLaunja Tyky n OD Toa dAnKe ce npImeHaT DOnONHmTeHNHe 3aWHTHm MepKn KaKo WTO ce 12BOCTpyknte 3oLaunn NnNojauHaTn 3oLaunja.He Nocton HnKaKbHa npaba 3a npknnyuBaHe Ha HeKoj 3aWmTeH BOD.

EBponika 03HaKa 3a c0o6pa3HocT

BpntaHcKa 03HaKa 3a coo6pa3HoCT

YkpanHcKa 03HaKa 3a Coo6pa3HOCT

Ebp0a3nka 03HaKa 3a Coo6pa3HocT


| TEXHUIHIXAPAKTEPNCIKN Перфоратop | PLH 28 E 220-230 V | PLH 28 XE 220-230 V | PLH 28 XE 110-120 V |
| Homeb wro6y 4467 91 04... | 4520 81 04... ... 000001-999999 | 4468 01 04... 4468 21 04... 4520 90 04... 4520 95 04... ... 000001-999999 | 4468 26 04... 4520 99 04... ... 000001-999999 |
| Homina hana cnojmba ha notykhnicb 800 W 800 W 800 W | |||
| Bidiababa notykhnicb 400 W 400 W 400 W | |||
| KilbkiCTb o6eptiX xonocToRo xOdy 0-1500 min | -1 | 0-1500 min-1 | 0-1500 min-1 |
| KilbkiCTb o6epti N iD hauhTaJxehnAm MAcC. 0-1000 min | -1 | 0-1000 min-1 | 0-1000 min-1 |
| KilbkiCTb yadip B iD hauhTaJxehnAm MAcC. 0-4000 min | -1 | 0-4000 min-1 | 0-4000 min-1 |
| Sila okpeMoro yadap zrIdNo 3 npoceDpyo EPTA 05/2009 4,1 J 4,1 J 4,1 J | |||
| ø cvepdlinna 6eToHy 28 mm 28 mm 28 mmø cvepdlinna CTaJI 13 mm 13 mm 13 mmø cvepdlinna DepeBunu 40 mm 40 mm 40 mmLerka cvepdlinba H KoprOHa dIa ceRNI Ta CnilkataHoi ceRNI | 82 mm | 82 mm | 82 mm |
| Shiika 3atNcK,ø | 54 mm 54 mm 54 mm | ||
| Bara 3rIdNo 3 npoceDpyo EPTA 01/2014 | 3,4 kg | 3,6 kg | 3,6 kg |
| InΦopmaizia pro shymВimipirni 3naChenBa B3NaChenI 3rIdNo 3 EN 60745. PBeHb 7umUy „A" npiJaDy cTahOBuB T B TINOBOMy BUnaDky: | |||
| PivEnb 3ByKobOrO TnCKy (nox6ka K = 3 db(A)) | 90,5 dB (A) | 90,5 dB (A) | 90,5 dB (A) |
| PivEnb 3ByKobOI npTuXHoCTi (nox6ka K = 3 db(A)) | 101,8 dB (A) | 101,8 dB (A) | 101,8 dB (A) |
| BvKnOpHCTOBVbATn 3acO6n 3axNcty orpAnHb CnUxy! | |||
| InΦopmaizia zuoD o B6pauiiCymapri 3naChenBa B6pauii (BekTopHa cyMa Tpbox NaPramKIB), BCTaHOBneHl 3rIdNo 3 EN 60745.ydApHe cvepdlinna 6eToHy:3naChenBa B6pauii a hHDno6mA K= | 10,6 m/s21,5 m/s2 | 10,6 m/s21,5 m/s2 | 10,6 m/s21,5 m/s2 |
| Довбаня:3naChenBa B6pauii a h.Cheqno6ka K= | 6,81 m/s21,5 m/s2 | 6,81 m/s21,5 m/s2 | 6,81 m/s21,5 m/s2 |
NONEPEDXEHH
Pibb Biopaui, Bka3aHn B ui IHcTpykui, BmipIOBAC 3rIHO 3 MeToOM BmipIOBaHH, HopMOBaHm CTAHApTom EN 60745, i MoKe BnKOpNCTOByBaTncA DnA nopIBHHH eNEKTPOIHCTpymeHTi. Bih npu3HaueHn TAKoX dnonepHbooi OuiHKn HabaHTaKeHHaBID biopaui.
Bka3aHn pibeh Bi6pauii BiIDnoBIAe OCHOBHM cfepaM BIKOPNCaHHN eNEKtpoiHCTpymeHT. Ane kuo eNEKtpoiHCTpymeHT BIKOPNCOByETbCraI INHOI MeTN, 3 IHUNM BCTABHN M HCTpMeHTAMn a60 npn HeIOCTaTHbOMy texHINOMy 6cNtRObyBaHHi, pibeh Bi6pauii Moke 6yTu INHUM. Ye MoKE 3NaHNO iINBUNTn HABHaTaeHHe BID Bi6pauii 3a BeCb nepioD po60TN.
IaTOHIOUcIHKN HabaHTaxeHHBID Bbpaui Heo6xHn ToKb BpaxOByBaTu Yac, KOIN npnaB BmKHeHn a60 yBIMKHeHn, anE
fakTNHO HE BnKOpNCBOyETc.ue MoKe 3NaHo 3MeHUnTn HabaHTaxeHH Bid Bi6paui 3a BeCb nepioD po6OtN.
Bn3haTcdoaTkoBiaaxoDbe3neKnIa3xNCTy onepatopaBidiiBipaui, Hanpukna: Texhniye 06cyrobybaHH eneKtpoiHcTpymEny Ta BCTabHNx IHcTpmeHtIB, 3irpiBaHH pyk, oprahiaqia po6OuNx npouecib.

NONEPEJXEHH
IpouHTaTe BcI Bka3IBKn 3 TexhIKN 6e3neKN Ta IHCTpyKcuII. UnyueHHn npDotpmaHHI Bka3IBOK 3 TexhIKN 6e3neKN Ta IHCTpyKcuIMoKyTB npIm3BecTn DO ypaKeHHN eJKeTpnuHm CTpyMOM, NoXeKi Ta/abO TAAKKx TpaBM.
36epiraTe Bci Bka3iBkn 3 Texhikn 6e3neKn Ta iHCTpyKuII Ha MaH6yTHc.
BKA3IBK N 3 TEXHIK N B3NEK N JIA NEPOOPATOPIB
Kopntyteca3ac06am3axncty oprahIB cnyxy.BnnB My MoKe cnpuHHNTBtpaTy cnyxy.
BnKOpNCtOByBaTn DoaTkOBi pyKoTKn, 0n OocTaauOTbc3 npnaom. Btpata KOHTpOIO MoKe Pnp3BeCTn Do nowkoJxKeHb.
IiicBkoHnHpo6itTpmaTe eNekTPOIHCTpymENT 3a i0nbObaHi nobepxhi pykOaTOK, kXIO BCTaBHNI
InCTpyMeHT MoKe HATpanNTn Ha npNXOBaHI eNEKTPuHNIiHII a6o Blachm MepexeBn Ka6enb. KoTAKT 3 JInieO nnHanyTO MOKe npzBcTeN Do NOABn HAnpyr B MetaneBnx qactnHex npunady Ta do ypaXeHHE eNEKTPuHIM CTpyMOM.
Dodatkobi inctpykuii 3Texhikn 6e3nekn taekcnnyatauii BukopncTOByte iHnBiyanbhi 3ac0n 3axnCTy. Pid qac pO6OTn 3MaunHO 3aBXn HocNTn 3axNCi OKyIpaRn. PaNIMOBukopncTOByBaTn 3axnCHM OJr, RHaPnKlaM Macky DnA 3axnCTy BiD nniy, 3axNCi pyKaBnCi, Miue Ta HeKOB3He B3yTT, kacky Ta 3ac06n 3axnCTy opraHIB Cnyx.
NII,IOYTBOPOETbca NIDacpo6oTn,CACTO6yBaEWKiDNBIM
DnI3DOPO8'B;BINHE NOBUNHENOTPANJITN BOPRAHI3M.
BHKOPACTOBYBATN3AC0BINJNBIICMOKTYBAHHNAUYTA
DOaTkoBOHOcHTNBIINOBINHYMACKYJN3AXUCTyBIDNNY
Biklndnny peteNo BuaJnT, Hapnikad, nnoococom.
YKpaIHcbKa
3'ENhyBaJbHn Ka6eJb 3aBXJn TpMaTn 3a MeXaMn paIyCa II Maunnn. Bectn Ka6eJb 3aBXJn nO3aNy Maunnn.
He moxha 6o6nTm MaTepiA, He6e3neuHi Ina 3doPoB' (HapnKnaIa, a36ecT).
Iiic p60tHa CTihax,CTeHX a6o NiJIO3i 3BepTaY yBary Ha enektpnHi Ka6eni, r3oBi Ta BODonpObiH iHH.
Ipn6IokyBaHHI BCTaBHorO IHCTpyMeHTy HeaHOB BMKHyTN npnA! He BMKaIte npnA,I, AIO BCTaBHN IHCTpyMeHT 3a6IOkOBaHm; npnCbOMy MOKe BNHKaTb BiJa4a3 BNCOKM 3BOPoTHIM MOMeHTOM. Bu3HaHTTu yCyHrN pnpuHry 6IokyBaHHB BCTaBHorO IHCTpyMeHTy 3ypaxBaHHRM Bka3IBOK 3 texhIKn 6e3neKn.
PpunHIO MOKe 6yTu:
- Ipekeic B 3arotobui, 0o 6p06nTbcra
Ipo6nBaHHo6pO6nIOBaHOr MaTepiAly
-ПepeBaTахжнэ eJekTpoiHctpymeHTa
YactuHnTiHa He NobHHI NtpannB MaunHy, KOIN BOHa npauc.
BCTABHIN IHCTPymeHT MOXe HarpibaTcN iN qac po60TN. IIOPEPEDHEH! He6e3neKa onIKIB
- npn3aMini iHCTpyMeHTy
- npn BiDknadaHn npnana
He moxha Buaanr ta cykky a0yamkn, KOn MaunHa npaioe.
3aikcybnt 3arotobky B 3atnckhomy npctpoi. He3akpinnehi 3arotOBKN MOxyt npnbECTN Do TAKKnx TpaBM Ta noIKoJKeHb.
Ipeed 6ydb-akmmu p0oTaMu Ha MaunHIBNTaHyTu wTeKep i3 wTencelhoi po3eKn.
EKCPIYATAUIA
XoJIoHn3aNyck
Opa3y nicra Tpnbaloro 36epiraHnra Tpnbaloro ayc npn Hn3bKnx TemnepaTypax IHcTpyMeHT MoKe IoraHo npauoBaTu Chepe3 3aTBePdInH MaCTnla.
PiεdHaTm MaunHy Do WTencelbHoi pO3eTK TIlbkN BBMKHeHomy CTaHI.
Пд ДИСЮнДЗВЧАн HO BEЛКИХ 3OBHIшХ eNEKТРOMaHITHINX 3aBaД B OKPemIX BUNaДКах MOKyTb MaTи MlCte TmUcOBI KONBAHH KINbKOci TI o6eptIb.
BKNOPUCTAHHA 3A IPN3HAUEHH
Nepopatop MoxHa BnKOpncTObyBaTu yHibepcAnbHo dJa yDapHoro CBePdInHH Ta DoB6aHH KaMeHIO i 6eToHy, a TakoK dJa CBePdInHH DepeBuHH, MeTanIB Ta nonIpemHx MaTepiAniB.
OBCJyTOBYAHH
3aBxdiPiTpMByatn UcCTOy BeHTnlaicHnx OTbopiB.
KkO MepeXeBn Ka6enb XNBHeHn NoWkoJKeHn, To NOro NOBHHa 3AmHnT cepbHa CnyK6a, 0o6 yHKnHyTn He63neKn.
Pn3HOWeHHIByrIbHnxUitOKdoaTkoBO Do 3AmHNuITOK Heo6xIOHO BkOHaTN cepBcIe O6CnyroByaHnB CepBICHomy ueHTpi. Ie NiBnuye TepMin ekcnnyataaMaunHn Ta rapaHTye noctiHy roTOBHCtB do eKnnyataaII.
BukopuctobyBatn TiNbKn KomnneKtyuoyi Ta 3aunactHn Milwauke. DeTani, 3amHa JkNx He onncyTbCra, 3amHIOBAtn TiNbKn B BiDini o6cnyrobyBaHH KJIeHTIB Milwaukee (3BepHt bYbary Ha 6pOwpy ,rapaHTia / aDpecn cepBiChnx ueHTpiB").
Ypa3i Heo6xHocT MoKHa 3aPocnTu KpcneHH 3
306paKeHHb By3nIB MaunHb N bepcneKTUBHomy BuRnI,
IaBorO nOtpi6HO 3BepHyTncBa Baw BiDin OcbnyroByaHH
KnieHTIB a6oBe3nocepeHbO Techtronic Industries GmbH,
Max-Eyth-StraBe 10,71364 Winnenden,HimeyuHa,Ta Bka3aTn TIN MaWuHn Ta WeCTn3HaUHn HOpE Ha φipMOi Ta6nHci 3 DaHUMMaWuHn.
CEPTNOKAT BIDIOBIDHOCTIBMOTAMEC
Mn 3aBbIeMo Ha BnacHy BiINOBiJaIbHicTb, IIO Bpi6, OINcAHN B,TexHiHnx DaHnx", BiNobiDa EBCIM 3actocOBHM NONOKeHHM DupeKtBu
2011/65/EU (RoHS)
2006/42/EC
2014/30/EU
Ta HAcTyHnHr RapMOHi3OBAHnHm HopMaTnBnHm DOKyMeHTaM:
EN 60745-1:2009+A11:2010
EN 60745-2-6:2010
EN 55014-1:2017+A11:2020
EN 55014-2:2015
EN 61000-3-2:2014
EN 61000-3-3:2013
EN IEC 63000:2018

Winnenden, 2020-11-30

Alexander Krug / Managing Director Yonobovachehen i3 cknaDaHHa TeXnHooI DokyMeHaTauii.
Techtronic Industries GmbH Max-Eyth-Straße 10, 71364 Winnenden, Germany

CNMBOJI

YBATA!IIONEPEIXKENHH!HE6E3IeHNO!

YBaXHo npouTaiTe IHCTpyKciu 3 ekCnnyataaui nepeBBeHeHHM npuaLy BIO.

Ipeep 6yNb-kaMMpo6oTaMnHaMaunHIBNTaHTN WTekep i3 wTeNCbHoI po3eKn.

KOMNekTyOHi-He BXOaTbB O6cra NoCTaHNN, peKOMeHNoBaHI dONOBHeHH 3 npOrpaMn KOMNekTyOuNX.

EneKtpnHi npIaHn He MoKHa yTuNl3yBaTn 3 No6yTOBMM BixxOamn. EneKtpnHi ta eneKtpoHHi npIaHn Heo6xIdHO 3bnpatn OkpemTo Ta 3daBatn B Cneuaian3obAHi NiDnPmEMCTBa dnytunlaaui, uO He WKOJNb HabKONMnhbOMy cepEOBmUy. 3BepHITbcn Do MucBeBnx opraHb a60 Do BaUoro DInHepe, uO6 oTpMaTn aDpeCn PYNKTIB BTOPNHHoi nepepo6Kn Ta PYNKTIB npHOMy.

EneKtpoiHCTpyMeHT KnaCy 3axuTy II.
EneKtpoiHCTpyMeH, BRAKOy 3axnct BiBpaXeHH
eneKtpuHm CTpyMOM 3aJIeXnTB He IINue BiB 6a3OBoI 3oJaui,
ane BIB BIKOpNCTOByBaHnx DOaTkoBIX 3ac0bIB 3axncty,
TAKxN KIOBInHa 1O3oJia 460 NocUHe H3oJua. Hemae
npCTpoB DnA nIKJIOUeHHa 3axnCHoro 3'EDHaHHa.

EBponebckni3nakBIDNOBIDHocti

BpuTaHcbKm3nak BiIDNObiDHOCTi

YkpaHcbKn 3NaK BiNObiDnOci

Ebp0a3iaTcbkN 3HaK BiDnObiHnOci

| PLH 28 XE 110-120 V | PLH 28 XE 220-230 V | PLH 28 E 220-230 V | الإستعمالالترجمةالترجمةالترجمةالترجمةالترجمةالترجمةالترجمةالترجمةالترجمةالترجمةالترجمةالTRL الإستعمالالترجمةالTRL الإستعمالالترجمةالTRL الإستعمالالTRL الإستعمالالTRL الإستعمالالTRL الإستعمالالTRL الإستعمالالTRL الإستعمالالTRL الإستعمالالTRL الإستعمالالTRL الإستعمالالTRL الإستعمالالTRL الإستعمالالTRL الإستعمالالTRL الإستعمالالTRL الإستعمالالTRL الإستعمالالTRL الإستعمالالTRL الإستعمالالTRL EN 60745 م,…م,…م,…م,…م,…م,…م,…م,…م,…م,…م,…م,…م,…m,…m,…m,…m,…m,…m,…m,…m,…m,…m,…m,…m,…m,…m,…m,…m,…m,…m,…m,…m,…m,…m,…m,…m,…m,…m,…m,…m,…m,…m,…m,…m,…m,…m,…m,…m,…m,…m,…m,…m,…m,…m,…m,…m,…m,…m,…m,…m,…m,…m,… m,…m,…m,…m,…m,…m,…m,…m,…m,…m,…m,…m,…m,…m,…m,…m,…m,…m,…m,…m,…m,…m,…m,…m,…m,…m,…m,…m,…m,…m,…m,…m,…m,…m,…m,…m,…m,…m,…m,…m,…m,…m,…m,…m,…m,…m,…m,…m,…m,…m,… |
| 4468 26 04... | 4468 01 04... | 4467 91 04... | ### |
| 4520 99 04... | 4468 21 04... | 4520 81 04... | ### |
| ...000001-999999 | 4520 90 04... | ...000001-999999 | ### |
| ...000001-999999 | ...000001-999999 | ...000001-999999 | ### |
| 800 W800 W800 W | ### | ||
| 400 W400 W400 W | ### | ||
| 0-1500 min-1 | 0-1500 min-1 | 0-1500 min-1 | ### |
| 0-1000 min-1 | 0-1000 min-1 | 0-1000 min-1 | ### |
| 0-4000 min-1 | 0-4000 min-1 | 0-4000 min-1 | ### |
| 4,1 J4,1 05/2009 م,…ر پوره پوره پوره پوره پوره پوره پوره پوره پوره پوره پوره پوره پوره پوره پوره پوره پوره پوره پوره پوره پوره پوره پوره پوره پوره پوره پوره پوره پوره پوره پوره پوره پوره پوره蒲- ### | ### | ||
| 28 mm28 mm28 mm | ### | ||
| 13 mm13 mm13 mm | ### | ||
| 40 mm40 mm40 mm | ### | ||
| 82 mm82 mm82 mm | ### | ||
| 54 mm54 mm54 mm | ### | ||
| 3,4 kg3,6 kg3,6 kg | 01/2014 م,…ر پوره پوره پوره پوره پوره پوره پوره پوره پوره پوره پوره پوره پوره پوره پوره پوره پوره پوره پوره蒲- ### | ||
| 90,5 dB (A) 101,8 dB (A) | 90,5 dB (A) 101,8 dB (A) | 90,5 dB (A) 101,8 dB (A) | 3 = ### ### ### ### ### ### ### ### ### ### ### ### ### ### ### ### ### ### ### ### ### ### ### ### ### ### ### ### ### ### ### ### ### ### ### ### ### ### ### ### ### ### ### ### ### ### ### ### ### ### ### ### ### ### ### ### ### ### ### ### ### ### ### ### ### ### ### ### ### ### ### ### ### ### ### ### ### ### ### ### ### ### ### ### ### ### ### ### ### ### ### ### ### ### ### ### ### ### ### ###### |
| EN 60745 م,…م,…م,…م,…م,…m,…m,…m,…m,…m,…m,…m,…m,…m,…m,…m,…m,…m,…m,…m,…m,…m,…m,…m,…m,…m,…m,…m,…m,…m,…m,…m,…m,…m,…m,…m,…m,…m,…m,…m,…m,…m,…m,…m,…m,…m,…m,…m,…m,…m,…n |
1234567890
EN60745 4444444444444444444444444444444444444444444444444444444444444444444444444444444444444
Techtronic Industries (UK) Ltd
Fieldhouse Lane
Marlow Bucks SL7 1HZ
UK

- WARNING
- HAMMER SAFETY WARNINGS
- Additional Safety and Working Instructions
- OPERATION
- Cold Starting
- MAINS CONNECTION
- SPECIFIED CONDITIONS OF USE
- MAINTENANCE
- EC-DECLARATION OF CONFORMITY
- GB-DECLARATION OF CONFORMITY
- English
- SYMBOLS
- CAUTION! WARNING! DANGER!
- SYMBOLE
- Français
- SYMBOLES
- ATTENTION! AVERTISSEMENT! DANGER!
- SIMBOLI
- ATTENZIONE! AVVERTENZA! PERICOLO!
- Espanol
- SIMBOLOS
- ATENCIONI;ADVERTENCIA!PELIGRO!
- ATENÇAO! PERIGO!
- EC-VERKLARING VAN OVEREENSTEMMING
- SYMBOL
- OPGELET! WAARSCHUWING! GEVAAR!
- SYMBOLER
- SYMBOLIT
- OAHHIEZ AΦAIAIAGIIA NEPIETPOΦIKO ΣΦYPI
- Pepaipewooyieacaaopaleiackaixpoewc
- ΣYMBOA
- IPOZOXH! IPOEIOI0IH2H! KINADYNOZ!
- SEMBOLLER
- SYMBOLY
- CE-VYHLASENIE KONFORMITY
- Magyar
- SZIMBOLUMOK
- FIGYELEM! FIGYELMEZTETÉS! VESZÉLY!
- UPORABA V SKLADU Z NAMEMBNOSTJO
- VZDRZEVANJE
- ATBILSTIBA CEN NORMAM
- SIMBOLIAI
- EU VASTAVUSALDUS
- SÜMBOLID
- YKA3AHMIO B6E30NACHOCTN DJIPEPOPATOPA
- Pycckn
- DOnonHnTeBhIe yka3aHnaNo 6e3oNachoctn pa60Te
- 3KCNYYATAUN
- XoJIoNbHbI 3aNyck
- NOKKIOUOHEHMEK3NEKTKPOCETM
- NCHOJIb3OBAHNE
- OBCJYXUBAHNE
- DEKJIAPAUNO COOTBETCTBNN CTAHAPTAM EC
- CNMBOJIbI
- BHHAMHIE! IPIEyIpyEKDEHNE! ONACHOCTb!
- BHIMAHHE!
- BHIMAHWE
- HHCTPYKUN 3A BE30NACHOCT NEPOOPATOP
- IOnbHnTeHH yKa3aHna 3pa6oTa n 6e3onacnoct
- ONEPAÇU
- CtyeHo CtapTnpaHe
- 3AUNTA HA DNBATENB 3ABNCMOCT OT HATOBAPBAHETO
- N3I0JI3BAHE NO IPEDAHA3HAUYHNE
- PbXKA
- CE-DEKJIAPAU3A CbOTBETCTBVE
- CNMBOJIY
- BHMAHHE!PENEYIPEKJEHNE!ONACHOCT
- SIMBOLURI
- PERICOL! AVERTIZARE! ATENTJE!
- MaKeDoHcKn
- BHHMAMHE! IIPEDYIPTPEYBAHBe! ONACHOCT!
- NONEPEDXEHH
- NONEPEJXEHH
- BKA3IBK N 3 TEXHIK N B3NEK N JIA NEPOOPATOPIB
- EKCPIYATAUIA
- XoJIoHn3aNyck
- BKNOPUCTAHHA 3A IPN3HAUEHH
- OBCJyTOBYAHH
- CEPTNOKAT BIDIOBIDHOCTIBMOTAMEC
- CNMBOJI
Brand : MILWAUKEE
Model : PLH 28 E
Category : Drill