
CR 4011 - Juicer CAMRY - Free user manual and instructions
Find the device manual for free CR 4011 CAMRY in PDF.
| Features | Details |
|---|---|
| Device type | Juicer |
| Power | 150 W |
| Speed | 1 speed |
| Pulp container capacity | 1.5 L |
| Juice container capacity | 1 L |
| Material | Stainless steel and plastic |
| Dimensions | 20 x 20 x 40 cm |
| Weight | 3.5 kg |
| Usage | Ideal for extracting juice from fresh fruits and vegetables |
| Ease of cleaning | Removable and dishwasher-safe components |
| Maintenance | Clean after each use, check parts regularly |
| Safety | Overheat protection system, non-slip feet |
| Warranty | 2 years |
| Included accessories | Jugs for juice and pulp |
Frequently Asked Questions - CR 4011 CAMRY
User questions about CR 4011 CAMRY
0 question about this device. Answer the ones you know or ask your own.
Ask a new question about this device
Download the instructions for your Juicer in PDF format for free! Find your manual CR 4011 - CAMRY and take your electronic device back in hand. On this page are published all the documents necessary for the use of your device. CR 4011 by CAMRY.
USER MANUAL CR 4011 CAMRY
GENERAL SAFETY CONDITIONS. IMPORTANT INSTRUCTIONS ON SAFETY OF USE PLEASE READ CAREFULLY AND KEEP FOR FUTURE REFERENCE
- Before using the device, read the operating manual and follow the instructions contained therein. The manufacturer is not liable for any damages caused by the use of the device contrary to its intended use or improper operation.
- The appliance is intended for domestic use only. Do not use for other purposes not in accordance with its intended purpose.
- The device must only be connected to an earthed socket 220 - 240V 50Hz . In order to increase the safety of use, many electrical devices should not be connected to one electric circuit simultaneously.
- Be especially careful when using the device when children are in the vicinity. Do not allow children to play with the device and do not let children or people unfamiliar with the device use it.
- WARNING: This equipment may be used by children over 8 years of age and people with reduced physical, sensory or mental capabilities, or people with no experience or knowledge of the equipment, if this is done under the supervision of a person responsible for their safety or has been provided to them. Instructions on the safe use of the device and are aware of the dangers associated with its use. Children should not play with the equipment. Cleaning and user maintenance should not be performed by children, unless they are over 8 years old and these activities are performed under supervision.
- Always remove the plug from the outlet after use, holding the outlet with your hand. DO NOT pull on the cord.
- Do not immerse the cable, plug and the entire device in water or any other liquid. Do not expose the device to weather conditions (rain, sun, etc.) or use it in high humidity conditions (bathrooms, damp mobile homes).
- Periodically check the condition of the power cord. If the power cord is damaged, it should be replaced by a specialist repair shop in order to avoid a hazard.
- Do not use the appliance with a damaged power cord, or if it has been dropped or damaged in any way, or if it is not working properly. Do not repair the device yourself as there is a risk of electric shock. Take the damaged device to an appropriate service center for inspection or repair. Any repairs may only be performed by authorized service points.
Incorrectly performed repairs can pose a serious threat to the user. - Place the device on a cool, stable, even surface, away from any kitchen appliances that heat up, such as: electric cooker, gas burner, etc.
-
Do not use the device near flammable materials.
-
The power cord must not hang over the edge of the table or touch hot surfaces.
- Do not leave the device or the power supply in the socket unattended when it is switched on.
- For additional protection, it is advisable to install a residual current device (RCD) in the electrical circuit with a rated residual current not exceeding 30mA . A specialist electrician should be consulted in this regard.
- Before turning on the device, make sure that all parts are properly installed.
- Use only accessories provided by the manufacturer.
- Be careful not to overload the machine, do not exceed the top edge of the grain hopper (1).
- Always disconnect the device from the mains and disconnect the power cord from the device when it is not in use or you want to start cleaning it.
- Do not disassemble the juicer while it is connected to a power socket.
- Do not use abrasive pads or aggressive cleaning agents for cleaning.
-
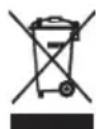
After use and the device heater has cooled down, it is recommended to disassemble and wash the elements thoroughly.
-
The device includes a heating element to facilitate drainage of the oil and to obtain more of it. After finishing work, wait approx. 20 minutes for the heater to cool down and only after that time you can dismantle it, clean it from
seed residues and wash the device.
- The maximum operating time of the device is 45 minutes. After this time, the device turns off to protect the engine from overheating and damage. Wait 20 minutes before restarting the device.
- The device is used for extracting oil from oil plants : nuts, seeds, seeds and grains , the oil content of which is greater than 30% . It is forbidden to use the device with olives, olive pits , soybeans , vegetables , fruits, mushrooms .
Device Description:
- Hopper
- Cover lid
3.Filter - Socket
5.Keypad - Hopper cover
- Pressing chamber cover and heating unit
- Oil Container
- Pomace container
- Pressing chamber buckle
- Outside cover lid
-
Pressing shaft
-
Pressing chamber
Keypad Description:
14. Power Button
15. Reverse Button
16.Start/Pause button
Before first use:
Please note that before use you should take out all of the pieces out of the box and clean the device with a damp cloth and soap water. Then please dry the device with a dry paper towel and let dry. This will make sure that there is no residue factory grease and other pieces of after production dirt from the device.
WARNING: All accessory parts are NOT SUITABLE FOR CLEANING IN THE DISHWASHER.
PLEASE NOTE:
The device should be assembled in the package.
You will have 2 pressing shafts in the package.
The pressing shaft with the RED O ring is used for smaller nuts and grains.
The pressing shaft with the BLACK O ring is used for bigger nuts and grains.
To exchange the pressing shaft:
- Take out the EMPTY hopper (1) by pulling on it upwards. It should slide out without any problems. As shown on Picture H on page 4.
NOTE: Please make sure it is empty since the contents of the hopper will spill out. - Push the Pressing chamber buckle to the unlocked position as shown on picture I on page 4. The upper part of the picture is the unlocked position and the lower is the closed position.
- Push the Pressing chamber cover and heating unit (7) as shown on picture J on page 4.
- Take the heat resistant glove from the set or any heat resistant oven glove.
- Remove the pressing chamber (13) as shown on picture K on page 4.
- Pull out the pressing shaft and replace it with the desired one.
- Push the Pressing chamber (13) back into place and slide the pressing chamber buckle (10) into the locked position.
- Close the Pressing chamber cover and heating unit (7) down into the closed position.
- Put the hopper (1) into the proper starting position making sure it is a tight fit.
Device Use:
To use the device please make sure you have the proper pressing shaft installed.
To do so please use the instructions mentioned before this chapter.
After making sure the proper pressing shaft is installed follow the below instructions:
- Open the Cover lid (2) as shown on picture E on page 3.
- Fill the hopper (1) with the desired grain or nuts as shown on picture F on page 3.
NOTE: The raw material to be processed must not be larger than peanuts or hazelnuts. If necessary, crush them to ensure optimum processing.
- Close the hopper (1) with the Cover lid (2) making sure it is in the proper position and the seal is tight or the device will not turn on. The protrusion on the lid needs to be inserted in the proper holes in the hopper.
- Put the oil strainer onto the oil container (8) to make sure no additional material from the oil pressing process gets into the oil as shown on picture G on page 3. Put the oil container under the pressing shaft making sure the oil goes into the container.
- Put the Pomace container (9) under the pressing shaft so the pomace will fall only into the container.
- Plug the device into the mains power using the power cable from the set.
- Turn on the device by pressing the Power Button (14). It will light up.
- Press the Start / Pause button (16).
- The Power Button (14) will start to blink and show the device is warming up.
- After warming up the device will start.
- When the hopper (1) is empty and the Pressing chamber is also empty the device will stop.
Please note that after working for 45 minutes or the hopper being empty for more than 1 minute. The device
will stop.
Please note than if the seed or nut is too big or gets stuck the device will stop. Please then turn the device off and mix the seeds or nuts in the hopper with an wooden spatula. NEVER PUT YOUR HAND INTO THE HOPPER IF THE DEVICE IS POWERED.
If the device does not start please press the REVERSE (15) button for a few seconds. Then press the Start / Pause button again and check if the device is working again.
WARNING: The appliance motor will stop after a short while after pressing the Stop button. It is to ensure the device from clogging. Please wait for the motor to stop. Then open the lid of seed container.
NOTE: The device is not designed for pressing SOYA BEANS OR OLIVES.
TIP: Start processing with a small amount to test the quality and the moisture content.
Special notes:
- Peanut oil: To ensure the device is not getting stuffed and the engine does not stop. Please fry the peanuts dry before pressing. The size, hardness and quality are different in each batch.
- Please make sure to use the highest quality nuts and seeds.
- Please make sure to choose 90% dryness material. We suggest to fry the materials with low temperature for half an hour or put out into the sun for one hour.
- Please press only as much oil as you need per day. The health benefits of fresh pressed oils are the best and if not stored correctly will dissipate fast.
Guide to the control panel lights:
Status of the light = Machine status
Quick flashing red light = Pre Heating
Constant red light = Powered on but the start not pressed
Slow flashing red light = Paused
Green light = Working
Quick flashing green light = Reverse gear
Flashing green and red light with noise = Machine not working correctly. Please check if assembly is correct and nothing is blocking the oil press. If the machine is assembled and not blocked please contact the seller or warranty service for support.
Technical details:
Voltage: 220 - 240V 50 / 60Hz
Power: 650 W

Please transfer cardboard packaging to waste paper. Pour the polyethylene bags (PE) into the plastic container Worn device should be returned to the appropriate point storage because it is dangerous in the device ingredients may pose a threat to the environment. The electrical device should be handed over to limit its reuse and use. If in the device there are batteries you have to take out and give to the point stored separately.
(DE) DEUTSCH
OPSTI USLOVI SIGURNOSTI
VAŽNE SIGURNOSNE UPUTE MOLIMO VAS PAŽLJIVO PROČITAJE I ČUVAJTE ZA BUDUCU REFERENCE
- Pije korištenja urežaja pročitajte upute za uporabu i slijedite upute sadržane u njemu. Proizvodačnice odgovoran za bilo kakvu štetu nastalu upotreptom urežaja suprotno namjeni ili nepravilnom radu.
- Aparat je namijenjen samo za kućnu upotrebu. Ne koristite u druge svrhe koje nisu u skladu sa namjenom.
- Urešaj se smije prikljuciti samo na uzemljenu uticnicu 220-240 V ~ 50 Hz. Kako bi se povećala sigurnost upotrebe, mnogi elektrčni urešaji ne bi trebali biti spojeni na jeder elektrčni krug istovremeno.
- Budite posebno oprezni kada koristite uredaj kada su djeca u blizini. Ne dopustite djeci da se igraju s uredajem i ne dopustite djeci ili osobama koje nisu upoznate s uredajem da ga koriste.
- UPOZORENJE: Ovu opremu mogu koristiti djeca starija od 8 godina i osobe sa smanjenim fizickim, osjetilnim ili mentalnim sposobnostima, ili osobe bez iskustva ili znanja o opremi, ako se to radi pod nadzorom osobe odgovorne za njihovu sigurnost ili im je dostavljeno. uputstva o sigurnoj upotrebi uredaja i svjesni su opasnosti povezane s njegovom upotrebom. Djeca se ne smiju igrati's opremom. Cijscenje i oderžavanje korisnika ne smiju obavljati djeca, osim ako su starija od 8 godina i ako se te aktivnosti izvode pod nadzorom.
- Uvjek nakon upotrebe izvucite utikač iz utičnice, držeči utičnicu rukom. NE vucite za kabel.
- Ne uranjajte kabel, utiaka i cijeli uredaj u vodu ili bilo koju drugu tekućinu. Ne izlažite uredaj vremenskim uslovima (kiša, sunt ce itd.) Niti ga koristite u uslovima visoke vlažnosti (kapatila, vlažne mobilne kućice).
- Kovremeno provjeravajte stanje kabela za napajanje. Ako je kabel za napajanje ostecen, potrebno ga je zamijeniti u ovlastenom servisu kako bi se izbjegla opasnost.
- Ne koristite uredaj sa ostecenim kablon za napajanje, ako je pao ili je na bilo koji nacin ostecen, ili ako ne radi ispravno. Ne popravlajte uredaj sami jer postoji opasnost od strujnog udara. Osteceni uredaj odnesite u odgovarajuci servisi centar na pregled ili popravak. Popravke mogu izvoditi samo ovlasteni servisi. Pogresno izvedene popravke mogu predstavljati ozbiljnu prijetnju za korisnika.
- Postavite uredaj na hladnu, stabilnu, ravnu povrsinu, dalje od svih kuhnjskh aparata koji se zagrijavaju, poput elektricnog stednjaka, plinskog plamenika itd.
- Ne koristite uredaj u blizini zapaljivih materijala.
- Kabel za napajanje ne smije visjeti preko ruba stola niti dodirivati vruce povrsine.
- Ne ostavlajte uredaj ili napajanu u uticnici bez nadzora kada je ukljucen.
- Za dodatnu zašitu, preporučljivo je u elektrčni krug ugraditi zašitnu struju (RCD) s nazivnom zaostalom strujom koja ne prelazi 30 mA. S tim u vezi treba se obratiti strucnom
elektricaru.
-
Prije uključivanja ureža provjerite jesu li svi dijelovi pravilno instalirani.
-
Koristiteismo dodatnu opremu koju je dao proizvodač.
-
Pazite da ne preopteretite stroj, nemoje prelimaziti gornju ivicu spremnika za zrno (1).
-
Uvijek isključite urežaj iz elektrickne mreže i iskopčajte kabel za napajanje iz urežaja kada se ne koristi ili akoŽelite početi s Čišćenjem.
-
Ne rastavlajte soskovnik dok je spojen na uticnicu.
-
Za cisćenje nemojte koristiti abrazivne podloge ili agresivna sredstva.
-
Nakon upotrebe i kada se grijac uredaja ohladio, preporucije se rastavljanje i temeljito pranje elementata.
-
Urešaj sadrži grijaci element koji olakšava ispustanje ulja i dobiva ga visje. Nakov završetka rada, pricekajte otprilike 20 minuta da se grijac ohladijiter nakon tog vremena možete ga demontirati, očistiti od ostataka sjemena i oprati urešaj.
-
Maksimalno vrijeme rada uredaja je 45 minuta. Nakon tog vremena uredaj se isključuje kako bi zaštitio motor od pregrijavanja i ostecenja. Prčekajte 20 minuta prije ponovnogPokretanja uredaja.
-
Urešaj se koristi za vačenje nafte iz ulja biljaka : orasi, sjemenke, sjemenke i Žitarice, Čiji je sadržaj ulja je veća od 30%. Zabranjeno je koristiti urešaj s maslinama, košticama maslina, sojinim zrnom , povrćem , voćem, gljivama .
Opis uredaja:
- Spremnik
- PoklopacPoklopca
3.Filter - Uticnica
- Tastatura
- Poklopac rezervaora
- PritisnitePoklopac komore i jedinicu za grijanje
- Posuda za ulje
- Kontejner za jabuku
- Kopca komore za prešanje
- Poklopac vanjskogPoklopc
- Pritisna osovina
- Komora za prešanje
Opistastature:
- Dugme za uključivanje
- Dugme za povratak
16.Dugme Start/Pauza
Prije prve upotrebe:
Status lampice = Status masine
BaBHO TpeKaHe Ha CpBeHo CBeTNo =Pay3npaHO
3eJHeCBeTNo Pa60THo
IocToHHbI KpaChbI CBET = NITaHHe BKnIOeHO, HO NyCK He HaxKaT
MeDneHNO mraUoui KpaChbY cBeT = nay3a
3eJehbI CBET = pa6oyn
BbICrpo MmraHouu 3eHehBcBET nepeDaHa 3aAdHero XoDa
MiraHou m 3eIeHb I KpaChbI CBET C yMOM = MaunHa pa6oTaET He npabnBHO. IoxaIyIcTa, npOBepbTe npabnBHOCTb c6OpKn HnHTo He 6JIOKIPye T MacnHb I pceC. EcnMaunHa co6pHa I He 3a6IokIpObaHa, o6paTntEc b 3a IopdePcko K npodaBu y nIN B rapaHTnHbI cepBnc.
TexHHueckne npDpo6HocTn:
HapraJxHe:220-240B\~50/60T
MoUHocTB:650BT
3a60TcB o6 OkpykaHoue CpeE..YnakOBky n3 KapToHa nepeaIte,noXaIyIcTa,Ha MaKynAtpy. POniN3TmneHOBBie MeuKn (PE) BbIKDaTb B pe3epByap dIy INaCTMaCCbl. N3HOWeHHoe yCtpoIcTBo HApO nepeDaTb B COOTBeTcTByUOyTOk Ky xpaHeHna, TAK KaHoxDJIueCEB yCtpoIcTBeONAcHbIe CoCTabNIOUe MOrY RnIbTCra YrPo3oJ dIy OKpyKaIOSe cpebl. 3NeKtpnHeCKoe yCtpoIcTBo HApO nepeDaTb TaKM O6pa3OM, yTObbl OrpAnHHTb Ero IOBtPOHe yNtpe5JeHme IICNoJIb3OBAHne. Ecln B yCtpoIcTBe HaxOJaTc8 BaTapeH, IN HaIO BbITAHyTb I nepeDaTb TOkY XpaHEnHOr OTdeJIbHO. YCtpoIcTBo He BBkDaTb B pe3epByap dIy KOMMyHaJIbHbIX OTxODob!
ALGEMENE VEILIGHEIDSVOORWAARDEN
BELANGRIJKE VEILIGHEIDSINSTRUCTIES LEES ZORGVULDIG DOOR EN BEWAAR VOOR TOEKOMSTIGE REFERENTIE
ONIHTN YCIOBNBE3BEOHOCTN
BAKHE YIYTCTBA 3A BE3BENDHOCT MOJIMOBAC PAXJBNO IPOHTAJTE IN UYBAJTE 3A Byuyny PEΦEPEHcy
- Пpe коршениya урehaja, почитajte уутстvo 3a уnotpeby и следITE уутства саджана уъем. Пponзвогаче одrobapа 3a utety hactany ynoTpebom урehaja cynpOTHO hamen nIIHнравинHom paHy.
- Anapat je Hameh en cmo 3a Kyhny ynoTpe6y. He KopnCTte y npyre cbpxe koje Hncy y cknaIy ca npedBnHem HameHom.
- Ypehaj ce cmiJe npKbUHTn camo Ha y3emJbeHy yTuHnCy 220-240 B 50 X3 . Da 6n ce noBehana 6e36eHnOCT yNoTpe6e, MHOr n eIeKtpuHn ypehajn He 6n Tpe6aNo da 6ydu NOBe3aHn Ha jeDHo eIeKtpuHNO KOLO NCTOBpeMeHO.
4.Будnte noc6bno onpe3n Kaada kopnstte ypehaj Kaada cy deca y 6bn3nHn. He Do3BOJNTe Deu da ce irpajy ca ypehajem Hne Do3BOJNTe Deu nn Oco6ama Koje Hncy yno3HaTe ca ypehajem da ra Kopnstte. - YIIO3OPEHbE: Oby onpemy mory kopnCTn Djeca cTapnja od 8 roDHa n ocObe ca CMaJIbeHIM φn3nUkIM, ocjETnIHm IIN MeHTaJIHm CnOCo6hOCTnMa, IIN ocObe 6e3 NCKyCTBa IIN 3HaJa O ONpeMn, aKO CE TO paDN IOd Hau3OpOM ocObe ODROBOPHe 3a HInXOBv 6e3BeJHOCT IIN cy IM dAta yNytCTBa O 6e3BeJHOJ yNOTpe6n ypeJaja n CBecHN cy OnaCHOCTI NOBe3AHx Ca HErOBOM yNOTpe6om. Deua CE He CMeju nrpatu ca ONpemOM. YIshHe i OndjKabHe Kopncnka He 6n Tpe6aNo da N3BODe Deua, OCIM aKO cy cTapnja od 8 roDHa n aKO CE Te aKTNBHOCTn N3BODe POd Ha3OpOM.
- YBek n3BaJnte yTnKaU n3 yTnHnCe hakOH yNoTppe, dpKehny TnHnCy pykom. HE ByuTe Ka6I.
- He ypaJIte Ka6JI, yTuKaU n Zeo ypeJy y BODy IIN NO KoJy dpyrTy TeuHocT. He n3JaXnTe ypeJy BpeMeHcKIM ycNoBIMa (KIIa, cyHnce NTd.) N HemoJTe ra KopncTtN y ycNoBIMa BnCOKe BnaxHoCTn (KypaTnA, BnaXHe Mo6nHe KyHnCe).
- Повремно повераяг te StaHe Ka6la 3a HanajaHe. Ako je Ka6n 3a HanajaHe owTeHEn, Notpe6Ho ra je 3amehHTu OblauhHeHom cepBucy kaKo 6n ce n36erna onachOCT.
- He kopructte anapat ca oxtehenm ka6lom 3a Hanajahe, ako je nao nI ne Ha 6nlo Koju naun Oxtehen, nI aKO he padu nCnpabHNo. He nonpaBbajTe ypehaj camn jep noctojn onachocT od ctpyjhor ydapa. Oxtehen ypehaj odncite y odrobaayn cepBnCHn ceHTap Ha npereNd nIIN nonpaBky. IoprabKe mory n3BODNTn camo OBnaShene HcPBCn. HenpaBnHNO n3BeDeHe nonpaBke mory npedCTabTaN O3bHy npetby 3a Kopuschnka.
- Noctabite ypehaj ha xnaHy, ctaBnHy, paBHy noBpHHy, daJbe od CBNX KyxNbCKnx anapata kojnc 3arpebajy, kao wTO cy: eJeKtpuHn WnOpet, rachn ropnoHK nTd.
- He kopnstte ypej y 6n3nH 3anaBbNx MaTepnjana.
-
Ka6JI 3a HanajaHe He CME Da BnCn IpeKO IVBnCe CTOJa HNTI Da DoOppye BpeJe NOBpUHe.
-
He octabjte ypehaj nnn hanahe y ytnuHnCi 6e3 na3opa kaJa je yKbUyeH.
- 3adoaTHy 3aHTu, npenopyuNbBO je y eJeKtpnHc KOLO yrpaNTn 3aHTNHy ctpjy (PLD) ca Ha3NBOM 3aoCTanom cTpyjom Koja He npela3n 30 mA . Y TOM cmncny Tpe6a KOHCytobATn CneunjAncte eJeKtpnapa.
- Ппс HeroшTo yKbByuTe ypehaj, поверпTe Дa Лс СВдeЛOBи паВино ИНстлари.
- KopinCTte cmo doaTHy onpemy kojy je obe3eNo npOn3Bohau.
- Па3nte Да He пpeontepetite MaunHy, He nppea3nte rohby nBnCy pe3epBoapa 3a XHTO (1).
- YBek nckjbyuhte ypehaj n3 eJektpnue He mpexe n 3ByuTe Ka6I 3a HanaJaHe n3 ypehaja kada ce He KopnCTn nn JxJIte da NoyHeTe ca NshHeM.
- He pactabjbajte cokOBnK dok je npNKbuyen Ha yTuHnUy.
- He kopructte abpa3nBHe noJIORe IIN arpeCnBHa cpeCTBa 3a YnshHe.
-
HakoH ynoTpebe n KaDa ce rpejau ypehaja oxlaDi, npenopyyje ce paCTaBbaHe n TeMeJbIto npaHBe eJeMeHaTa.
-
Ypehaj caapxng rpejHn element koJn OJaKwaba nCnyTaBe yJbAn do6nBa ra Bnwe. HakoN 3aBpWeTka paDa, cauekajTe oKO 20 MInyTa da ce rpejau Oxpani N TeK HaKOH Tora MoXeTe ra DeMOHTnpaTN, OUnCTNTN
-
Мaksиманно Врeme рада уpeнaja je 45 минута. Након тог Врemeна уpeнaj сенибуче касо би зашитою motop od перревая и оштehа. Саужайтze 20 минута пп пононог покета на уpeнaja.
- Ypehaj cnjxn 3a Bahebe HaTe n3 HauTHnx 6bIbaka HyTC, cemeHa, cemeHa n 3pHa, od KoJnx je caPjak yba je BeHn oD 30% . 3a6paHbEHO je KopuShHe byepehaja ca MacInHaMa, KooTnCaMa MaCInHa, coJom, NobpHem, BOHem, neUypKaMa.
Onucypehaja:
1.Левak
2.Пoklonац noklonua
3.ФиNTep
4. CoUkET
5. TactaTypa
6.Пokлonaцpezeрьара
7.Пи捜нсунпоклonaц коморе и ггеву ѷедницу
8. KoHTeJhep 3a yIbe
9. KoHTeJHep 3a jabky
10. Konya 3a npecBaHbe KOMope
11. CnoIbaIbI noKlnonau
12.Ппесвно Вразино
13. Komopa za npecobahe
OnncTacTaTatype:
14.Дугме 3a yKbyyBaHbe
15.Дугм Pebpce
16.ДугмeСтapТ/Пay3a
Ipe npBeynoTpe6e:
ImajTe Ha ymy da npe ynoTpeMoPaTe N3BaDuTn CBe DeNoBe N3 KyTuJe N OOnCTuN Typehaj BnaxKHom KpNoM N BODoM ca canyHOM.
3aTMM ocyuHnTe ypehaj cyBIM napanpHm ybpycom n octabnTe da ce ocu. OBO he ocNrypatn da Hema octataka fappnke mactn I dpynx deNoBa 3aoctane npbABWTnHe ca ypehaja.
YNO3OPEHbE: Cbn dnoBn doaThe onpeMe HNCy IIOODH 3A YINIeHbE Y IEPNIuIcN 3A nocye.
MOJIIM OBPATNTE IAXHbY:
Ypehaj tpe6a cacTabn y nakeTy.
YnakobHy heTne mMaTu 2OCOBHe 3a npecoBaHe.
Ppeco BpaTnlo ca LpBEHmO npctehom KopncTu ce 3a Mahe opaxe n 3pHa.
Ppeo BpaTnlo ca EJALK O npctehom KopncTc ce 3a Behe MaTnue n 3pHa.
UpbEHO CBeTIO KOJE 6p3o TpeNepn = PpeIrpBaHbE
CTaHNo UpBeHo CBetno = YKbByeHo, aN CTapr Hnje npTuChyT
Ponako Tpenhyhe UpbHeo CBeTNo = Pny3npaHo
3eIeHcBcTnO = PaDn
Брзо тpenhyне 3eNeHcBETno = cTeEN npeHoca 3a BoxHy yHa3aД
Tpenepn 3eIeHNO uPBeHO CBeTIO ca WymOM = MaunHa He paDi NcnpaBHO. PpOBepnte da Jn je cKnON nCnpaBAn n Da HnSta He 6Nokupa npsey 3a yIbe. Ako je MaunHa cacTabJbEha n Hnje 6NOKupaHa, KOHTAKTupajTe npodabca nnn rapaANTHy cnYk6y 3a noDpshky.
TexHnUckn DeTaBn:
Hanoh: 220-240 B ~ 50/60 X3
Chara: 650 B
3a 3aunTu JxNBOThe cpeHHe: MOJIMBO Bac da OndBojnte KapTOHcKe KyTne I PnactuYe Kece N OndIOXHTe INy y odroBapajyhe Kahte 3a CmeHe. KopuShehn Uyehaj Tpe6a Da byde Ncnpuyen Ha HameHcKe cacynbAte Taueke 36or oWtpx KOMnoHETN, wTo MoKe yTucaTn Ha XINBOTHy cpeHHy. HeMoJTe Ondaratn Obaj Uyehaj y 3ajeHNUky Kopny 3a OTnATke.
(DK) DANSKI
GENERELLE SIKKERHEDSBETINGELSER
VIGTIGE SIKKERHEDSINSTRUKTIONER LAES VENLIGST OMHANDLIGHT OG HOLD TIL FREMTIDIG REFERENCE
Lysets status = Maskstatus
Hurtigt blinkende rdt lys = Foropvarmning
3AΓΑJIbHI yMOBn BE3πEKN
BAJKINBI IHCTPYKUII 3 TEXHIKN BE3NEKN IPOUYTAITE YBAXJIINBOI BEPEXITb DJIa MAIBYTHBOI IOBIDKN
- Перацькористанялпсгю почитaleнсгкцio 3 ekcnnyataci Ta doTPmytecb inhctpykui, loMICTRA b hi. Bnpo6nK He Hece BiDnOBiDaIbHocTi 3a 3bntkn, cnpuHHeHlвКOPcStahHЯm pncgtoIO, lo cynepeuHTb npn3HaueHHIO abo HehaJeXHi ekcnnyataci.
- Пплад пиз nauseю тільки дя DOMaшього використань. He BИКОРИСТОВУ.Te Дя iHux zuine, lo He BiДnobiДaHTb nepeD6aueHOMy пиЗ nauseMu.
- Ппсстри сдд пдклочати Лше до 3a3eмлесною розтkn 220-240В\~50Гц . 3 MeToIO pIDBnueHЯ 6e3neKn BnKOpncTaHЯ 6araTO eJektpoPnPuaIb He cnd piDkLIOUATNdo ODHoro eJektpuHoro KOJa ODHouacHo.
4.Бydte ocobnBO obepexHmN pIac BnkOpncTahnry npntpoH, KOJI nITn 3haxoJTBcra no6n3y.He do3Bolnye dITram rpatn 3 npntpoem i He do3BOJnTe dITaM a6o He3HaHOMM 3 Hm npntpoem KOpNCtYBaTnCra Hm. - NOPEPENKHH: LIM O6nHaHMMoKytb KOpNCTyBaTncdITn CTapwe 8 pOKIB Ta IIOIN 3I 3HNKeHMMn o3nHMM, CEHCOPHMMn a6o PO3ymOBHMn 3Di6HOCTaMn, a6o IIOIN 6e3 DoCBiDy Ta 3HaHb 0do O6nAHaHNN, kUO Ue POBtbc NlD HargJOM OC6N, BIDNOBdaIbHOI 3a ix 6e3neKn a6o 6yIn HaadHi IM iNCTpykci II 0do 6e3neHoro BIKOPNCaHNN npICPTPO TO Ta YCBiDomJIIOuTb He6e3neKy, NOB'3aHy 3 NOrO BIKOPNCaHNN. DITN He NobHHI rpaTN 3 O6nAHaHNM. OUnSeHHra TcTexHicHe 06CnyroBvAHN He NOBHHI BIKOHByBaTNI dITN, kUO BOHn He DoCraTn 8 -pIHoro BiKy i ci 3axODn BIKOHYOTbcN PId HargJaDM.
- 3aBxDn BnMaIte BnKy 3 po3eTKn nicJy BnKOpNCtAHHry, TpImaOCh p03eTKy pyKOIO. HE TaryHITb 3a shHyP.
- He 3aHpyoIte Ka6eIb, BnIky Ta BeCb npncpti y BDOy a60 6yIb -Aky iHsy pIDHy. He nidaBaIte npncptiN IORoHNM yMOBaM (doU, COHcE TOIO) Ta HE BnKOpNCTOByTe NOro B yMOBax NiDnIeHOI BOIoroCTi (BaHHi KIMHaTn, BOJorI MObIbHi 6yDInHKn).
- Перiodуно поевирaite сан унура кивления. Кцошур кивления поdkxeн, НOrO сдд зamihTu y cpeziaiizobahi MaicTeprHi, Uo6 yHnKHyTu He6e3neKn.
- He BnKOpNCToBvIe npInaI i3 noXKOJKeHm shHypom XnBJIeHHa, a TaKoX y pa3i Ioro naIHHa 60 noXKOJKeHHa 6yIb -aKIM cNoOCobom a6o kIIO BIn He npaIcOe HaneXHM uHOM. He pemOnTyIte npncTpii camocTiINHO, ockIbKn icHy e pn3NK ypaXeHHa eNeKtpuHm CTpyMOM. BiNecITb noXKOJKeHm npncTpii DO BIDNOBIDHO cepBicHoro ceHTpy dIra orIy a6o peMOHTy. Byd -aKi peMOHTn MOxytb npOBODTcR TlkbN B ABTOpN3OBaHnx cepBicHx ceHTpax. HenpaBnIbHo BnKOHAn pemONT MoXe CTAHOBTn cepNo3Hy 3arpo3y dIra KOpNCtYBaUa.
- NocTaBTe npicrpii Ha npoxoJOnHy, cTabiHy, pBHy nobepxHIO, noaIi BiD 6yDb - KkX KuxOHnX npnaID, kI HarpBaIObCra, HapnKJa: eJeKTpruHoi I PNTN, ra3OBoro
PnJIbHnKa TOo.
- He BnKOpncToBvIe npicTpii no6n3y Ierko3aMnCTnx MaTePiaJIb.
12.Шну ржавеленя He поинец 3ВиCatn 3a Край сToIy Ta TopKaTnca rapaunx nobepxOHb. - He 3aIIuAaTe npucTpii a6o 6Iok XINBHeHn B po3eTu i 6e3 Hargy, KOJI N BOHN yBIMKHeHi.
- ДяdoTKOBOrO 3axncty doziNbHO BCTaHOBuTb B eJeKtpuHy IaHcIor npicTpiri DnΦepeHciAlbHoro cTpyMy (Y3O) 3 HOMiHaJIbHIM 3aJNшKOBm CTPymOM, IIO He nepeBnUye 30 mA . 3 zuoro npnbody cnid 3BepHyTncsdo cneiaJicTa -eNeKtpnka.
- NpeD yBIMKHeHnM npNCTPOH nepekoHaTecr, 0o BcI qactuHn BCTaHOJIeHi HaJIeXHM YINOM.
- BnKOpncToBvIe IInse akcecyapn, HadaHI BnPo6HnKOM.
17.Будыобержн,иб HeпeрвантaxnTmAsInHy,HeпeрВиуTe BepxHIO KpOMky 6yHkepa dny 3epHa (1). - 3aBxDn Bi'd'cHnyTe npncpti BID eJeKtpomepexi Ta Bi'd'cHnyTe shHyp XNBneHnB BID npncTpoU, KOJI N BI H He BnKOpNCtOByEcTbcra abo kIIO BV XOyeTe p03NoaTN YNueHHN.
- He po3bnpaIte cokOBxImaIky, KOJI BOHa pIDKIOUeHa do po3ETKn.
-
He BnKOpncToBvIe Ira YnueHna 6pa3nBHi npoknaKn a6o arpecnBhi 3acO6n.
21.Пись ВИКОРИСТАнгЯ та oxOLOДжЕння HarpiВача пиСТpoI peKOMeHdYcTBcR po36bupatn ta peTeNbHO MNTN eLemeHTN. -
onctpii miCTntb HarpibalbHn eIeMeHT dJa nonerweHHa 3JINBy
MaCna Ta OTPmHaHnI Ioro 6iNbOoi KInbKocTi. PicJra 3akInHeHHa Po6it 3aueKaIte np6n3Ho 20 XbUlnH, nOKn HarpIBaU oxoLoHe, iNlSe nicJra CbOro MoXHa DeMOHTyBaTu Ioro, OUnCTiTn BiD 3aJIuKkIB HacIHNa Ta
PpOMNTn pncTpiN.
- MaKcImaJIbHn yac po6OTn npIcTpoIO cTaHOBNTb 45 XBIIHH. Ype3 uey qac npIcTpiB BmNkaETbcra, 06 3axnCTHTn DBNrHy N BiD nepeRpiBy Ta noWkoJKeHHa.
3auekaite 20 xBnInH, nepsh hix nepe3aBaHTaxnTnpncTpir.
24.Прострии ВИКОПСТОВЕТБСА ДЯ ВИЧЕHENЯ OЛII 3 OЛINHХ рослин : ropixiB, habinna, habinna Ta зерна , BMICT OЛII Bякх пеевши龟 30% . 3abopoHENo ВИКОПСТОВУВATN Proustrii 3 OINBkAMN, OINBKOBIIMKICTOUKM , COEBIMN 6ObAmN , OBOaAMN , ФрКТamN, ГбамN .
Onnc npnctpo:
- Byнкер
2.Kpnikka Kpnikn - i n b t p
- P03eTka
- KnabiaTypa
- Kpnuika 6yHkepa
- HatnckaHHa KaPikky Kamep Ta HarpiBaIbHm 6Iok
- KoHTeHep dIy Macna
- KoHTeHep dIy nOMeNy
- PpKa KaMepn npecyBaHHa
11.3OBHIiHnKpnIka KpnIkn
j5uclj12gacbaial g isall.
p 150
pplal 2ac Jnall 2aBlack O jol g
jiesy
- j 1 (1) 0 4 4 4 4 4 4 4 4 4 4 4 4 4 4 4 4 4 4 4 4 4 4 4 4 4 4 4 4 4 4 4 4 4 4 4 4 4 4 4 4 4
12] p j o 0 0 0 0 0 0 0 0 0 0 0 0 0 0 0 0 0
a
jglal jbiabaiyaiia jaii jai bai glll jglal sla
jgl 1y jby 1s lgl 1golioi golioioia oio!. aboill ll gllbc! g2j1 y
Jia 5i jzj
Juaia
220-240 50/60
yall:
(BG)БылгAPСКИ
OBUYCIOBIA 3A BE3OJACHOCT
BAJHIN INCHTPYKUIN 3A BE30PACHOCT MOJI, IPOUYETETEBHIMATEJIHO IN PA3ETE 3A BbDEUAPPEPHCIN
- Ппеди да ИЗПОЛЗВATE устpoіCTBOTO, поче Te INHCTpyкцИTe 3a ekспloataця И сддваіт e INHCTpyкцИTe, сьдьржаши ce B Hero. ПпоиЗБODиТЕЯТ He HOCN OTROBOPHOCT 3a шETи, приинени OT ИЗПОЛЗВАнeto Ha yстpoіCTBOTO B потиворец c пп徳нэзнayehneTo My илн He npabnlnha pa6ota.
- YpeDbT e npedHa3HaueH cAmO 3a DomaUHa ynoTe 3a dpyrN ceN, KOINTo He CbOTBcTBAt Ha npedHa3HaueHnETo My.
- UcpoiCTBOTO Tp6Ba Da 6bJe CBbp3aHo cAmO KbM 3a3eMeH KOHTaKT 220-240 V ~ 50 Hz . 3a Da ce NOBUns 6e3OpacHocTtA Ha N3IOJ3BaHe, MHOrO eJIeKtpnueckn yCTpoiCTBa He Tp6Ba Da 6bDat CBbp3aHn KbM eHa eJIeKtpnuecka Bepira eHNOBpeMeHHO.
- Быдete особени вимаелни, korato ИЗПОЛ3ВATE yCTpoIcTBOTO, korato B 6ЛИЗOTIMа Deca. He nO3BOJЯBAITE Ha Deцata Da InrgaT C yCTpoIcTBOTOи He nO3BOJЯBAITE HaDeza Илихopa, kONTO He ca 3anO3HaTN C yCTpoIcTBOTO, da ro n3POn3BAT.
- ПРЕДУПЕЖДEHNE: Това оборудвае може за се ИЗПОЛЗВА OT Deца на Вьзразнад 8 ratини ихopa с hamалени Фиизуеск, сетивни плу умстveни спосбости, плxхopa 6e3 onnt ilnno3наня 3a obopudbaheTo, akO TOBA ce npabN IOd habл�eHneTO Ha JIuce, OTROBOPHO 3a TЯХнata 6e3ОпасноCTИнс ca IM npedocTaBEHи INHCTpyKUIM 3a 6e3ОпасноTO nIIN3BaHe Ha yctpoiCTBOTo I ca HЯСHO C ONaCHOCHTte, CBbp3aHn C HeROBOTo nIIN3BaHe. DeцаТ He Trp6Ba dA nrgaTc cypeNTe. Почисванeto n IODPbXkata Na Notpe6IteJIITE He Trp6Ba dA ce IN3BbPswBat OT Deца, OCBEN aKO Te He ca Na Bv3pacT NaI 8 ratinи и Te3N DeHOCTHc Ce IN3BbPswBat NOd HabLODEHne.
- Виharу n3вадаи Te uencela ot KOHTaKta cnei ynoTppe6a, kato nbpxnte KOHTaKta Cpbka. HE nbpnaite ka6ena.
- He notanrte kaeba, uencela n cyaIOTO yctpoCTBO BbB BOda nIIN dpyra TeuHOCT. He n3naTe yctpoCTBOTO Ha aTMocpepn ycNoBn (dJxD, CJIbHcE n T.H.) n HE rO n3noJ3BaIe npu ycNoBnHa BnCOKa BlaXHoCT (6aHN, BlaXHn MObUHn KbUn).
- Перношино праваяпсьстоне на захсанься кабел. Ако захсаньсят Кабел e пореен, тов Тразбва да Бдe смени OT спесиалниран серви3, 3a Да се Изberг He onachoct.
- He u3no13BaIte ypeDa c noBpeDeH 3axpaHbAaK Ka6eI, IIN aKO e u3nyChaT IIN NOBpeDen IO HЯkaKbB NaunH, IIN aKO He pa6OTn npabInHo. He pEmoHTnpaIte camu YcTPOJCTBOTo, Tb' KATO CbIeCTByBa PnCK OT TOKOB yIap. 3aHeceTe NOBpeDeHOTO YcTPOJCTBO B NODXODIaCepBn3eH ZeHTbp 3a nPoBePKa IIN peMOHT. PeMOHTbT MoKe Da Ce u3BbPbBA cAmO OT OTOpN3IpaH cepBn3. HenpaBnHNO u3BbPseHnte peMOHTn MOrat Da npedCTabJIbBAT cepNo3Ha 3aAnlaxa 3a Notpe6nteJ.
-
Пocтавete устюсвOTO нахлада, сабинha, равна NOВьрховс, далech OT BCЯкви Кухн检уpeи, кontо ce HarpЯВAT, kaTO: eJIeKTPnuecka Neчka, ra3Oba ropeлka и др.
-
He n3noI3BaIte yCTpoIcTBOTO B 6n3ocT do 3aIaIIMM MaTePnaJI.
- 3axpaHbAunr Ka6eI He Tp6Ba Da BnCn Ha Macata N da DokocBa ropeu INOBbpxHOCTN.
- He octabraye yctpoiCTBOTo INI 3axpaHbaHeTo B KOHTaKta 6e3 Ha3Op, KOraTo ca BKJIIOUcEHN.
- 3a Довлнелна зашита e пениорьчтелно на Исталирау устюв Здостацен ток (RCD) в посяпескatingа ВерURA с Номинален OCTатуен TOK, които не над��шава 30 mA .В таши Врьзka Трава на ce консулtnupa спецлпостеякtpotexнik.
- Праздд вкючite устpoиctBOTo, уверete ce, чь BCnuk quactn ca npabnHOn HHCTaIInpaHn.
16.ИЗползваite само akcecoapn,празoctаBEH NO T pОиЗВODИТЕЯ. - BhimabaTe da He npetobapBaTe MaunHaTa, He HAdBnBaAte rOpHna 6yHkepa 3a 3bphO (1).
- Binhari n3KJIIOUBAIte yCTPOINCTBOTO OT eJNEKTPIUeCKaTa MpeJa n 3KJIIOUBAIte 3axpaHbAun Ka6eJ ON T yCTPOINCTBOTO, KOrato He Ce n3PON3Ba NnN NCKaTe Da 3aNoCHTe Da rO NOuHCTBaTe.
- He pa3rno6raIte cOKoN3CTnCKBaUkata, dOKaTo e CBbp3aHa KbM eJleKtpnueckn KOHTaKT.
- He n3noI3BaIte a6pa3nBn noIIOJxKn IJIa rpeCnBn cpeCTBa 3a noUcTbaHe.
- Сnéд уnotpe6а и награвATEЯТ Ha yctpoiCTBOTO ce oxлaxda, ce npenopbчba pa3rno6raBaHTo И n3mmbaHTo Ha eIemEHTte CTapaTeJIHO.
- YcTPOICTBOTO BKIOUBA HArpeBaTeJIeH eJIeMeHT 3a yIneCHRAHe Ha n3TOUBAHTo HA MacJIoTO u 3a IOnUyABaHe Ha NOBeue OT Hero.CJeI prNKIOUBAHe Ha pa6OTATA n3uKaIte np6JIu3ntEJIHo 20 MInHyTN HArpeBaTeJrTa Da ce OXJaIu N eDBA CJIeT TOBa MoKeTe Da rO
dmoHTnape, da ro nouchte OT OCTaTbnte OT cemeHa n da N3MneTe yctpoiCTBOTO.
- Мaktionално Врeme на paбota на усточьоTo e 45 мнутп. След това време усточьоTo ce ИЗк nullчы, за дд пedingи Двигаеля OT пергаян NOВpeда. Изчakайte 20 мнутп, пedingи дд ресартупату усточьоTo.
- UcTpoIcTBOTO ce n3no3Ba 3a n3BnUaHe Ha MacNo OT MacNoaHn pacteHn: JaKn, CeMeHa, CemHa N 3bPHeHxpaHn, YHeTo CbDbPxHaHne Ha MacNo e No -rOJaMo OT 30% . 3a6paHeHO e n3no3BaHeTo Ha UcTpoIcTBOTO C MacInHn, KocTNkN OT MacInHn, CoR, 3eJeHcyu, PNODBe, Tb6n.
CbctoHnHeHaJAMnata = CbctoHnHeHaMaunHnata
IocToHHaYepeBaHa CBeTnHa=BkNIOueH,HO CTapTbT He eHaHTnCHaT