
ER1411 - Beard trimmer PANASONIC - Free user manual and instructions
Find the device manual for free ER1411 PANASONIC in PDF.
| Product Type | Beard Trimmer |
| Brand | Panasonic |
| Model | ER1411 |
| Dimensions (L x H x D) | 4.5 cm × 16.8 cm × 4.4 cm |
| Weight | 150 g |
| Power Supply | AC adapter (RE9-41) or built-in rechargeable Ni-MH batteries |
| Motor Voltage | 2.4 V DC |
| Charging Time | 1 hour (full charge); 8 hours for first charge |
| Runtime | Approximately 80 minutes of continuous use |
| Noise Level | 64 dB(A) re 1 pW |
| Included Accessories | Cutting combs (9 mm/12 mm and 15 mm/18 mm), AC adapter (RE9-41), cleaning brush, lubrication oil |
| Main Functions | Professional hair and beard trimming; corded or cordless use; charge indicator |
| Maintenance and Cleaning | Clean with a slightly damp clean cloth and mild detergent; brush blades after each use; lubricate regularly |
| Safety | Do not immerse in water; avoid contact with hair products; do not use on animals |
| Repairability | Have it checked by an authorized service center; do not attempt to repair the power cord; batteries are not replaceable |
| Environmental Information | Recycle Ni-MH batteries; do not dispose of with household waste |
Frequently Asked Questions - ER1411 PANASONIC
User questions about ER1411 PANASONIC
0 question about this device. Answer the ones you know or ask your own.
Ask a new question about this device
Download the instructions for your Beard trimmer in PDF format for free! Find your manual ER1411 - PANASONIC and take your electronic device back in hand. On this page are published all the documents necessary for the use of your device. ER1411 by PANASONIC.
USER MANUAL ER1411 PANASONIC
Operating Instructions
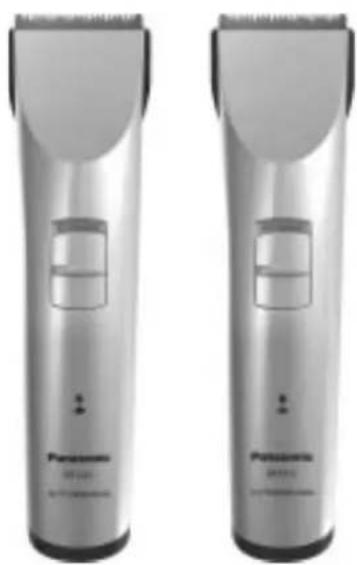
AC/Rechargeable Professional Hair Clipper
Model No. ER1421/ER1411
| English 2 | Dansk 32 | Česky 62 |
| Deutsch 7 | Português 37 | Slovensky 67 |
| Français 12 | Norsk 42 | Magyar 72 |
| Italiano 17 | Svenska 47 | Română 77 |
| Nederlands 22 | Suomi 52 | Türkçe 82 |
| Español 27 | Polski 57 |
natural_image
Two identical Panasonic electric toothbrush models with black trim and white jaw (no text or symbols visible)Before operating this unit, please read these instructions completely.
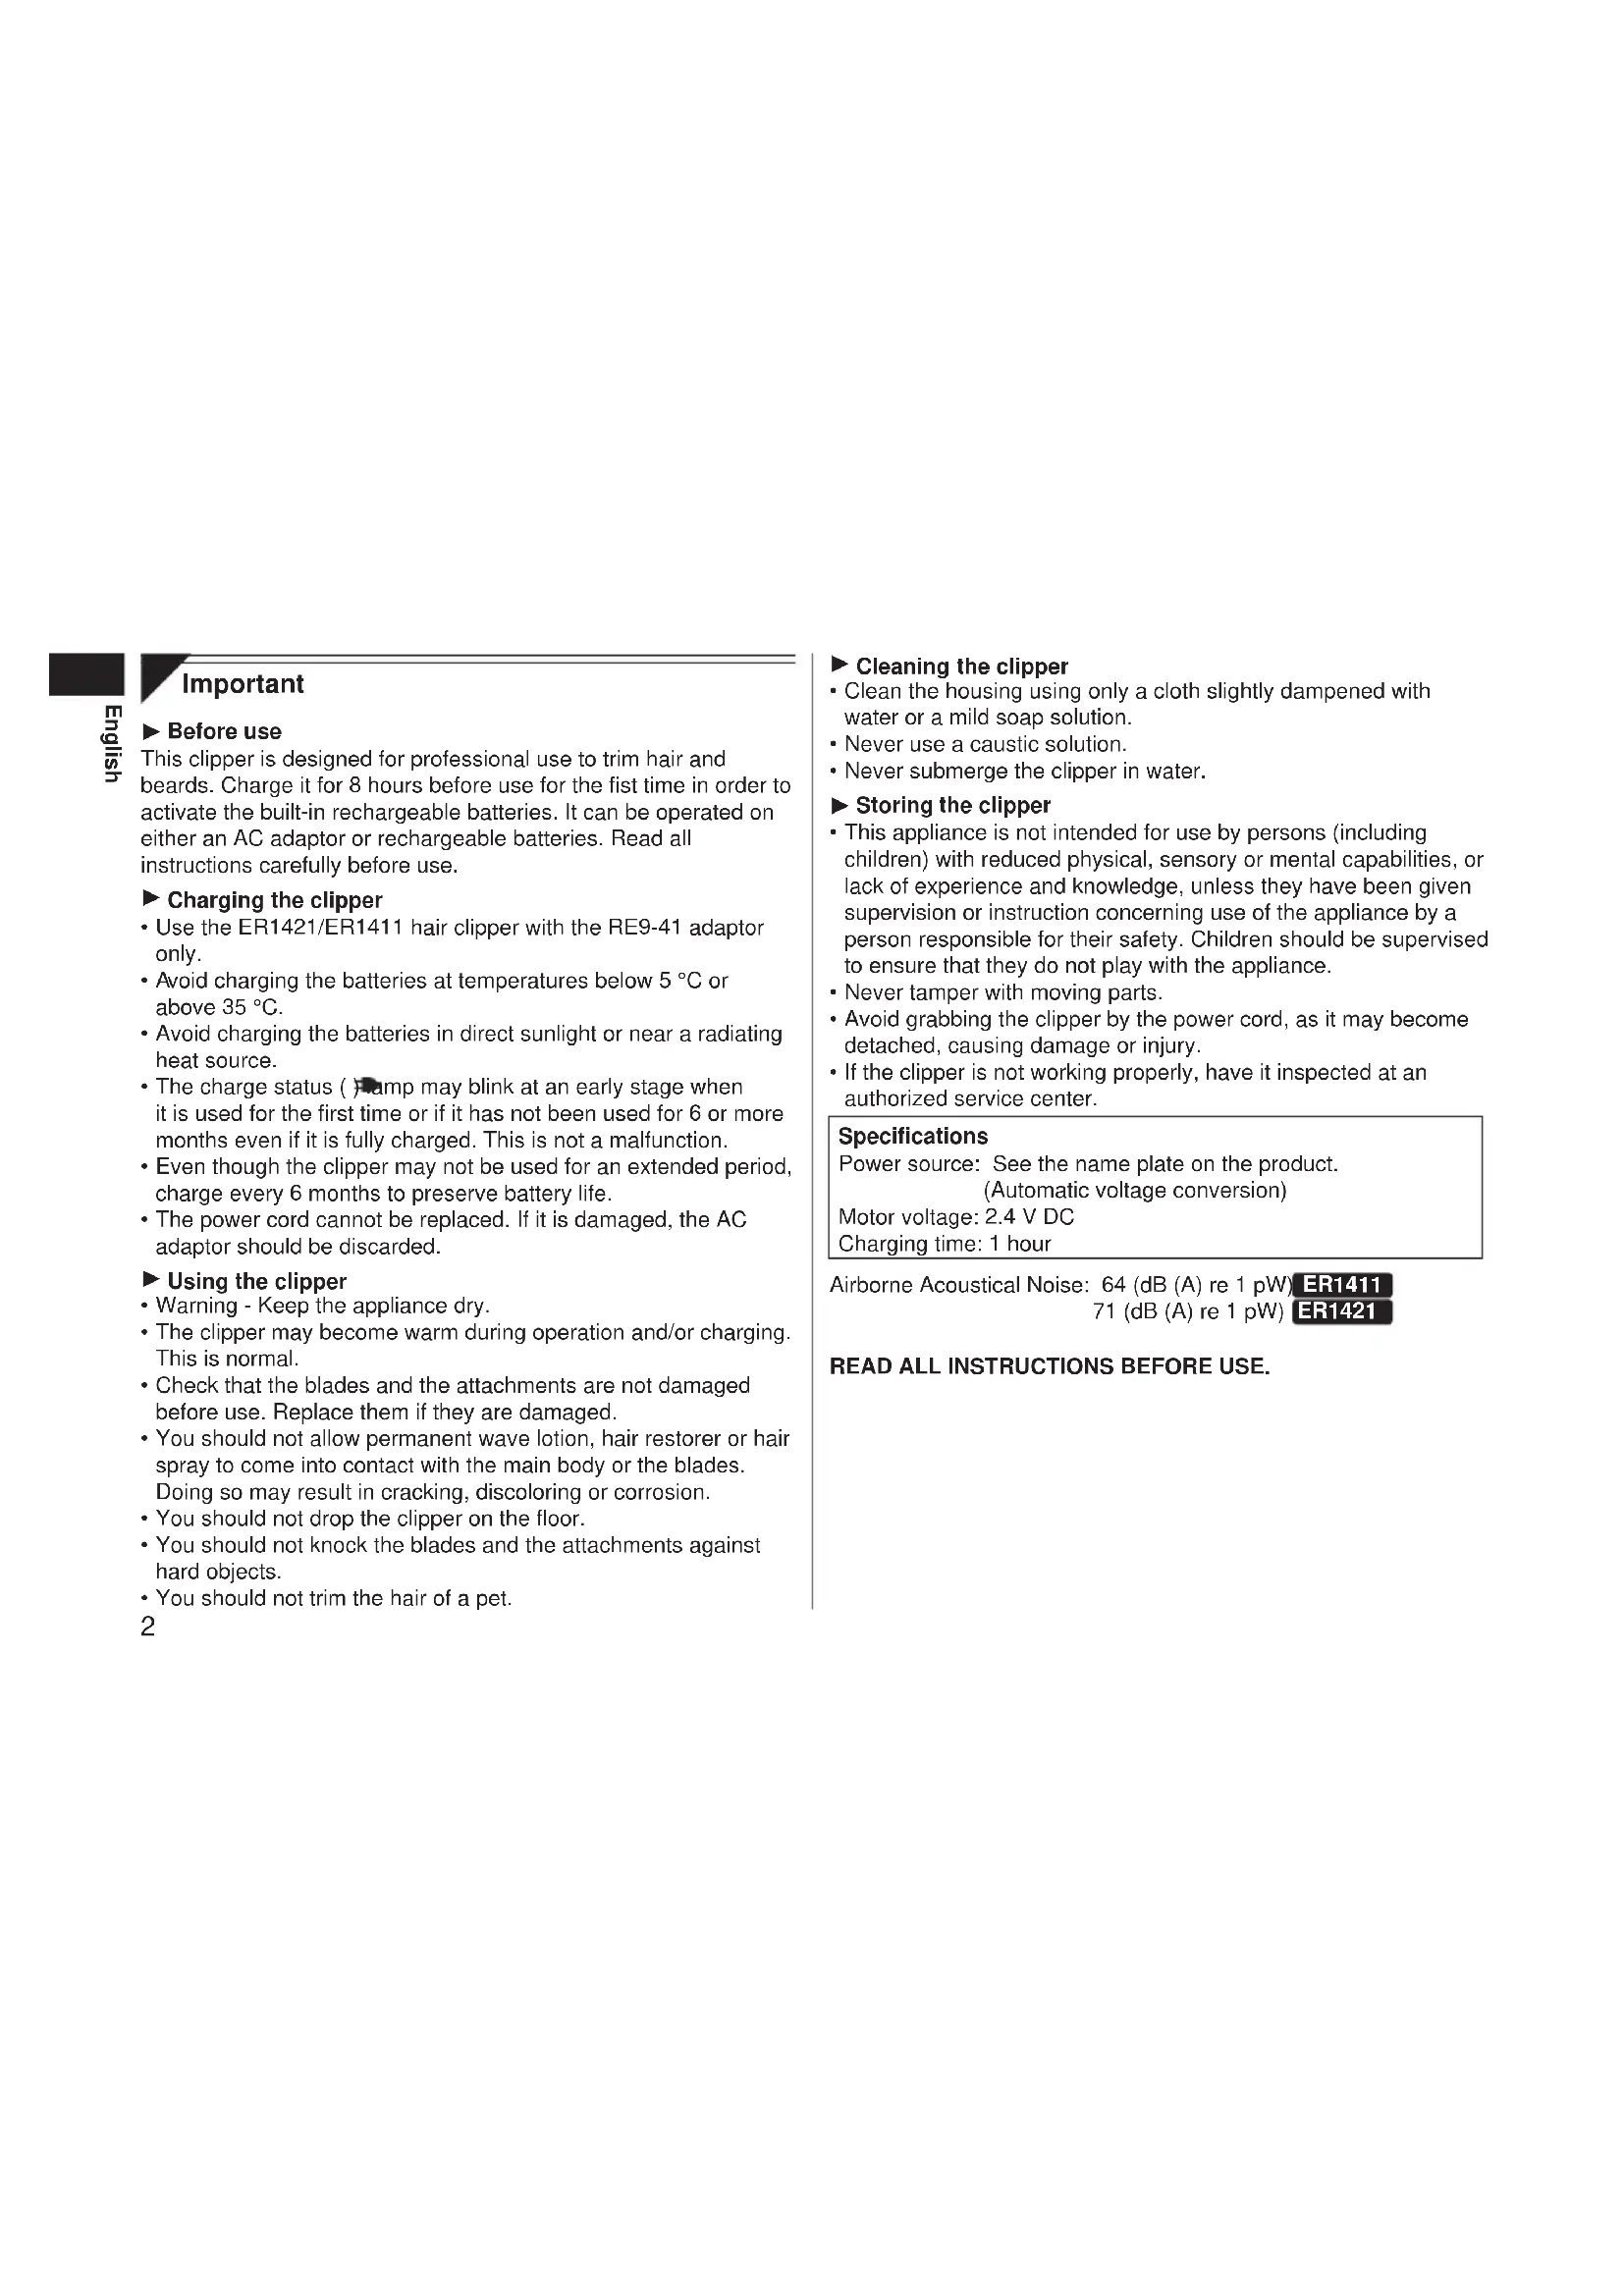
Important
▶ Before use
This clipper is designed for professional use to trim hair and beards. Charge it for 8 hours before use for the fist time in order to activate the built-in rechargeable batteries. It can be operated on either an AC adaptor or rechargeable batteries. Read all instructions carefully before use.
▶ Charging the clipper
- Use the ER1421/ER1411 hair clipper with the RE9-41 adaptor only.
- Avoid charging the batteries at temperatures below 5 °C or above 35 °C.
- Avoid charging the batteries in direct sunlight or near a radiating heat source.
- The charge status ( ) clamp may blink at an early stage when it is used for the first time or if it has not been used for 6 or more months even if it is fully charged. This is not a malfunction.
- Even though the clipper may not be used for an extended period, charge every 6 months to preserve battery life.
- The power cord cannot be replaced. If it is damaged, the AC adaptor should be discarded.
▶ Using the clipper
- Warning - Keep the appliance dry.
- The clipper may become warm during operation and/or charging. This is normal.
- Check that the blades and the attachments are not damaged before use. Replace them if they are damaged.
- You should not allow permanent wave lotion, hair restorer or hair spray to come into contact with the main body or the blades. Doing so may result in cracking, discoloring or corrosion.
- You should not drop the clipper on the floor.
- You should not knock the blades and the attachments against hard objects.
- You should not trim the hair of a pet.
▶ Cleaning the clipper
- Clean the housing using only a cloth slightly dampened with water or a mild soap solution.
- Never use a caustic solution.
- Never submerge the clipper in water.
▶ Storing the clipper
- This appliance is not intended for use by persons (including children) with reduced physical, sensory or mental capabilities, or lack of experience and knowledge, unless they have been given supervision or instruction concerning use of the appliance by a person responsible for their safety. Children should be supervised to ensure that they do not play with the appliance.
- Never tamper with moving parts.
- Avoid grabbing the clipper by the power cord, as it may become detached, causing damage or injury.
- If the clipper is not working properly, have it inspected at an authorized service center.
Specifications
Power source: See the name plate on the product. (Automatic voltage conversion)
Motor voltage: 2.4 V DC
Charging time: 1 hour
Airborne Acoustical Noise: 64 (dB (A) re 1 pW) ER1411
71 (dB (A) re 1 pW) ER1421
READ ALL INSTRUCTIONS BEFORE USE.
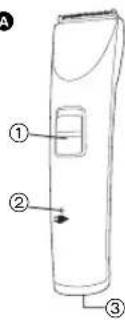
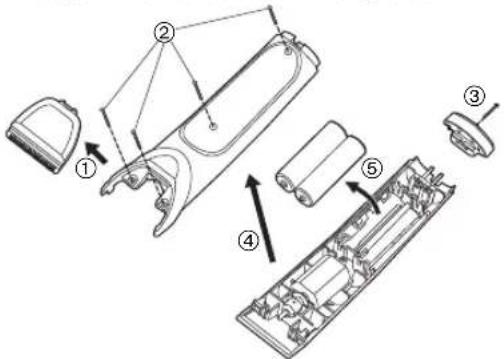
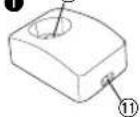
Parts identification
A
B

©

D

E

F

G

H

J

K

A Main body
① 0.CHARGE/1 switch
② Charge status ( ) lamp
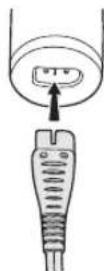
③ Appliance socket
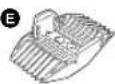
B Blade
④ Mounting hook
⑤ Cleaning lever
⑥ Moving blade
⑦ Stationary blade
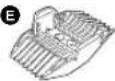
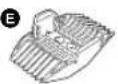
© 3 mm/6 mm comb attachment
D 9 mm/12 mm comb attachment
E 15 mm/18 mm comb attachment
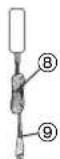
F AC adaptor (RE9-41)
⑧ Power cord
⑨ Appliance plug
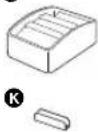
G Cleaning brush
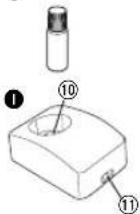
H Oil
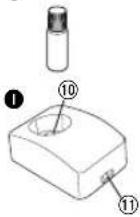
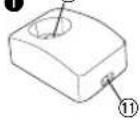
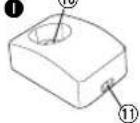
① Charging stand ER1421
⑩ Charging plug
⑪ Socket
J Comb attachment shelf
ER1421
k Connector ER1421
Charge
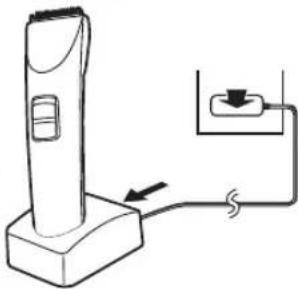
Charging the hair clipper
▶ Charging with the charging stand ER1421
1 Connect the power cord to the charging stand.
2 Slide the 0-CHARGE/1 switch to "0-CHARGE".
3 Place the clipper on the charging stand and plug in the adaptor into a household outlet.
- Charge status ( ) clamp glows in red and charging starts.
- Charging is completed when Charge status ( )amp blinks in red once every second. (Max. 1 hour later)
- 10 minutes after charging is completed, the charge status ( )amp blinks in red once every 2 seconds.
- 1 full charge will provide approximately 80 minutes of continuous operation.
natural_image
Line drawing of a handheld device with an attached cable and plug, showing no text or symbols.Connecting the comb attachment shelf to the charging stand ER1421
Determine the connection position for the charging stand and comb attachment shelf. Firmly insert the connector into the slot at the bottom of the charging stand.
- If the unit wobbles, then further push in the connector since it has not been firmly inserted.

natural_image
Technical line drawing of a mechanical assembly with no visible text or symbols▶ Charging without the charging stand
- Slide the 0-CHARGE/1 switch to "0-CHARGE", and insert the appliance plug into the clipper.
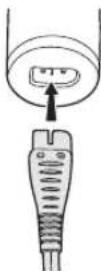
- Plug in the adaptor into a household outlet.
▶ AC operation
If you connect the AC adaptor to the clipper in the same way as for charging, and turn on the power, you can use it even if the battery capacity is low.
- If the clipper does not operate, charge the clipper for approximately 1 minute.
- Be careful not to discharge the battery completely with the power left turned on. It results in shortening the battery life.
Cut
Using the hair clipper
▶ Using the comb attachments
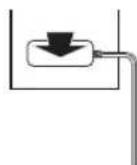
1 Select the trimming heights indicated on the insides and sides of the attachments.
2 Mount the attachment to the clipper as illustrated.
Removing the attachment from the clipper
Slide one side of the attachment off the mounting in direction indicated with the arrow.
Care
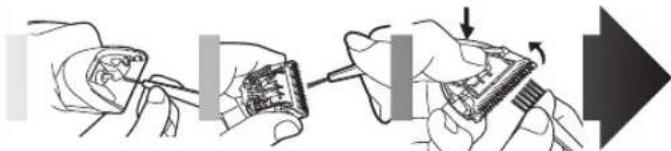
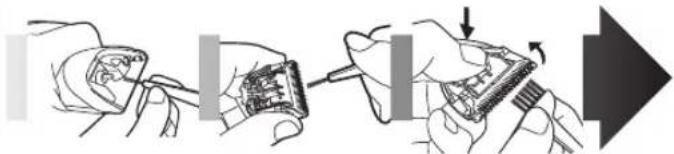
Blade maintenance
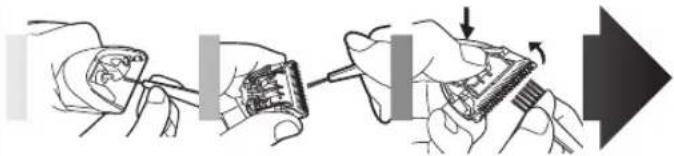
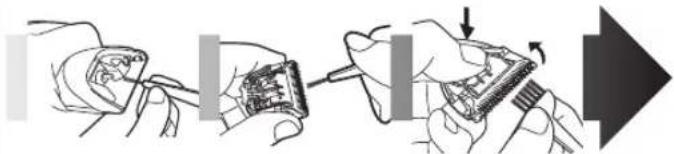
Removing and mounting the blade
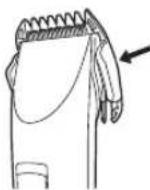
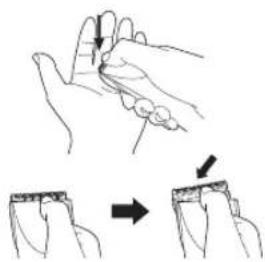
▶ Removing the blade
- Hold the clipper with the switch facing upward and push the blade with your thumb while catching the blade in your other hand.
- Be sure to turn off the power before you remove the blade.
natural_image
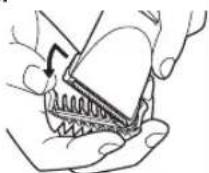
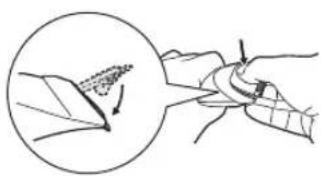
Illustration of a hand holding a finger with arrows indicating movement, showing a step to press or attach (no text or symbols present)▶ Mounting the blade
- Fit the mounting hook into the blade mounting on the clipper and push in until it clicks.
natural_image
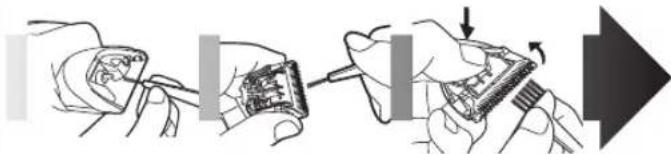
Illustration of a hand holding a tool with a magnified inset showing a tool interacting with a piece of wood (no text or symbols present)Cleaning the blade
natural_image
Illustration of hands assembling electronic components with a tool, showing step-by-step assembly (no text or symbols)-
Brush off any hairs from the clipper and from around the blade.
-
Remove the blade and brush off the hairs from the blade edge.
-
Brush the hairs out from between the stationary blade and the moving blade while pressing down on the cleaning lever to raise the moving blade.
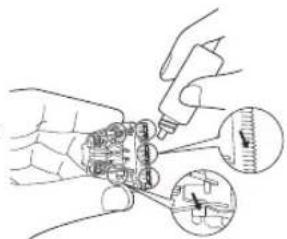
Lubrication
- Apply a few drops of the oil to the space between the stationary blade and moving blade.
- Apply the oil to the clipper before and after each use.
- Remount the blade on the clipper.
Removing the built-in rechargeable batteries
Remove the batteries as illustrated.
- Disconnect the clipper from a household outlet.
• Fully discharge the batteries. - Be careful not to short-circuit the batteries.
WARNING - Do not attempt to replace the batteries for the purpose of reusing the clipper. This could result in the risk of fire or electric shock.
Important notice regarding environmental protection
The built-in rechargeable Nickel-Metal Hydride batteries contain substances that may be environmentally harmful. Please remove the batteries before discarding your clipper.
For environmental protection and recycling materials
This clipper contains Nickel-Metal Hydride batteries. Please make sure that the batteries are disposed of at an officially assigned location, if there is one in your country.
Please read "Information for Users on Collection and Disposal of Old Equipment and used Batteries" on page 87.
Wichtig
B

©

D
E

F

G

H

J

K
natural_image
Line drawing of a handheld device with an attached cable and plug, no text or symbols presentnatural_image
Technical line drawing of a mechanical assembly with no visible text or symbolsnatural_image
Illustration of a hand holding a finger with an arrow indicating movement, showing a step to cut the finger (no text or symbols present)natural_image
Illustration of a hand holding a pen and measuring a leaf with a magnified inset showing the tip (no text or symbols)natural_image
Illustration of hands assembling electronic components with a tool, showing a close-up and directional arrow (no text or symbols)B

©

D
E
F

2、代理公司

H

J

K

A Boîtier
© Accessoire peigne 3 mm/6 mm
natural_image
Line drawing of a handheld device with an attached cable and plug, showing no text or symbols.Français
natural_image
Technical line drawing of a mechanical assembly with no visible text or symbolsnatural_image
Illustration of a hand holding a finger with an arrow indicating movement, showing a step to cut the finger (no text or symbols present)▶ Installation de la lame
natural_image
Illustration of a hand holding a tool with a magnified inset showing a tool interacting with a piece of material (no text or symbols present)natural_image
Illustration of hands assembling electronic components with a tool, showing a close-up and directional arrow (no text or symbols)B

©

D
E

F

G

H
J
A Corpo principale
① Interruttore
0.CHARGE/1
© Accessorio 3 mm/6 mm
D Accessorio 9 mm/12 mm
E Accessorio 15 mm/18 mm
natural_image
Line drawing of a handheld device with an attached cable and plug, showing no text or symbols.natural_image
Pure mechanical assembly diagram without any text, numbers, or symbolsnatural_image
Illustration of a hand holding a finger with an arrow indicating movement, showing a step to cut the finger (no text or symbols present)natural_image
Illustration of a hand holding a pen or tool, with a magnified inset showing a pointed tip and arrow (no text or symbols)Pulizia della lama

natural_image
Illustration of hands assembling electronic components with a tool, showing a close-up and directional arrow (no text or symbols)B

©

D
E
F

G

H
J

K

A Hoofdbehuizing
① 0.CHARGE/1-
schakelaar
② Laadstatuslampje (→)
③ Stroomaansluiting
B Mesje
④ Bevestigingshaak
⑤ Reinigingshendel
⑥ Bewegend mesje
⑦ Stationair mesje
© Kamopzetstuk 3 mm/6 mm
D Kamopzetstuk 9 mm/12 mm
E Kamopzetstuk 15 mm/18 mm
F Wisselstroomadapter (RE9-41)
natural_image
Line drawing of a handheld device with an attached cable and plug, showing no text or symbols.natural_image
Technical line drawing of a mechanical assembly with no visible text or symbolsnatural_image
Illustration of a hand holding a finger with an arrow indicating movement, showing a step to cut the finger (no text or symbols present)natural_image
Illustration of a hand holding a tool with a magnified inset showing a pointed tool (no text or symbols)Het mes reinigen

natural_image
Illustration of hands using a tool to adjust or install electronic components, with no visible text or symbols.B

©

D
E

F

G

H

1

J

K

A Cuerpo principal
① Interruptor
0.CHARGE/1
natural_image
Line drawing of a handheld device with an attached cable and plug, showing no text or symbols.natural_image
Technical line drawing of a mechanical assembly with no visible text or symbolsnatural_image
Illustration of a hand holding a finger with arrows indicating movement or force (no text or symbols)natural_image
Illustration of a hand holding a tool with a magnified inset showing a tool interacting with a piece of material (no text or symbols present)natural_image
Illustration of hands holding a circuit board with a tool, showing a close-up and directional arrow (no text or symbols)B

©

D
E

F

G

H

J

K
A Hoveddel
1 0·CHARGE/1 kontakt
natural_image
Line drawing of a handheld device with an attached cable and plug, showing no text or symbols.
natural_image
Pure mechanical assembly diagram without any text, numbers, or symbolsnatural_image
Illustration of a hand holding a finger with arrows indicating movement or force (no text or symbols)▶ Montering af bladet
natural_image
Illustration of a hand holding a tool with a magnified inset showing a tool interacting with a piece of material (no text or symbols present)Rengøring af bladet
natural_image
Illustration of hands assembling electronic components with a tool, showing a close-up and directional arrow (no text or symbols)B

©

D
E

F

•

H

1

J

K

A Corpo principal
① Interruptor
0.CHARGE/1
natural_image
Line drawing of a handheld device with an attached cable and plug, showing no text or symbols.natural_image
Technical line drawing of a mechanical assembly with no visible text or symbolsnatural_image
Illustration of a hand holding a finger with an arrow indicating movement, showing a step to cut the finger (no text or symbols present)natural_image
Illustration of a hand holding a tool with a magnified inset showing a pointed tool interacting with a piece of material (no text or symbols present)Limpeza da lâmina
natural_image
Illustration of hands assembling electronic components with a tool, showing a close-up and directional arrow (no text or symbols)B

©

D
E

F

G

H

J

K

A Hovedhus
① 0.CHARGE/1 bryter
② Ladestatus ( ) lampe
③ Pluggmottak
B Blad
④ Festekrok
⑤ Rensespake
⑥ Bevegelig blad
⑦ Fast blad
© 3 mm/6 mm kamfeste
D 9 mm/12 mm kamfeste
E 15 mm/18 mm kamfeste
F Vekselstrømsadapter (RE9-41)
⑧ Strømkabel
⑨ Utstyrsplugg
G Rensebørste
H Olje
Ladestativ ER1421
⑩ Ladeplugg
⑪ Pluggmottak
J Kamfeste hylle ER1421
K Stikkontakt ER1421

Lade hårklipperen

Lade med ladestativet ER1421
1 Kople strømkabelen til ladestativet.
2 Skyv bryteren 0·CHARGE/1 til "0·CHARGE".
3 Sett klipperen i ladestativet og plugg adapteren i strømnettets uttak.
- Ladestatus ( )ampen lyser rødt og ladingen starter.
- Ladingen er ferdig när ladestatus ( )ampen blinker i rødt en gang i sekundet (maksimalt 1 time senere).
- 10 minutter etter at ladingen er ferdig vil ladestatus ( ) lampen blinke i rødt hvert 2 sekund.
• 1 full lading vil gi cirka 80 minutters kontinuerlig drift.
Kople kamfeste hyllen til ladestativet ER1421
natural_image
Line drawing of a handheld device with an attached cable and plug, showing no text or symbols.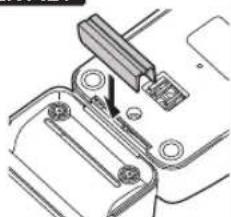
natural_image
Technical line drawing of a mechanical assembly with no visible text or symbols▶ Lading uten ladestativ
natural_image
Illustration of a hand holding a finger with an arrow indicating movement, showing a step and directional arrow (no text or symbols)▶ Montere bladet
natural_image
Illustration of a hand holding a pen and a tool, with a magnified inset showing a pointed tip (no text or symbols)Rense bladet

natural_image
Illustration of hands assembling electronic components with a tool, showing a close-up and directional arrow (no text or symbols)Fjerne de innebygde oppladbare batteriene
B

©

D
E
F

G

H

1
J

K

A Huvuddel
① 0-CHARGE/1-knapp
© 3 mm/6 mm distanskam
D 9 mm/12 mm distanskam
E 15 mm/18 mm distanskam
F Nätadapter (RE9-41)
⑧ Nätkabel
⑨ Stickpropp
G Rengöringsborste
H Olja
Bordsladdare ER1421
⑩ Laddningskontakt
⑪ Kontakt
J Distanskamhylla ER1421
K Koppling ER1421
Laddning
natural_image
Line drawing of a handheld device with an attached cable and plug, showing no text or symbols.natural_image
Technical line drawing of a mechanical clamp or bracket assembly (no text or symbols)▶ Ladda utan bordsladdaren
natural_image
Illustration of a hand holding a finger with an arrow indicating movement, showing a step to press or attach (no text or symbols present)Att sätta på bladet
natural_image
Illustration of a hand holding a pen and measuring a tool, with a magnified inset showing the tip of the pen (no text or symbols present)Göra rent skärbladet

natural_image
Illustration of hands using a tool to adjust or install electronic components, with no visible text or symbols.B

©

D
E

F

G

H

J

K
A Runko
natural_image
Line drawing of a handheld device with an attached cable and plug, showing no text or symbols.natural_image
Technical line drawing of a mechanical assembly with no visible text or symbolsnatural_image
Illustration of a hand holding a finger with an arrow indicating finger movement (no text or symbols present)▶ Terän asentaminen
natural_image
Illustration of a hand holding a pen and measuring a piece of material, with a magnified inset showing the tool's tip (no text or symbols present)Terän puhdistaminen

natural_image
Illustration of hands using a tool to adjust or install electronic components, with no visible text or symbols.B

©

D
E

F

G

H

1
J

K

A Korpus
natural_image
Line drawing of a handheld device with an attached cable and plug, showing no text or symbols.natural_image
Technical line drawing of a mechanical assembly with no visible text or symbolsnatural_image
Illustration of a hand holding a finger with arrows indicating movement or force direction (no text or symbols)▶ Mocowanie ostrza
natural_image
Illustration of a hand holding a tool with a magnified inset showing a tool interacting with a piece of wood (no text or symbols present)Czyszczenie ostrza
natural_image
Illustration of hands assembling electronic components with a tool, showing a close-up of the circuit board (no text or symbols present)B

©

D
E

F

G

H

J

K

A Hlavní část
① Přepínač
0.CHARGE/1
natural_image
Line drawing of a handheld device with a cable and plug, no text or symbols presentČesky
natural_image
Technical line drawing of a mechanical assembly with no visible text or symbolsnatural_image
Illustration of a hand holding a small object with arrows indicating movement or change (no text or symbols present)▶ Připevnění čepele
natural_image
Illustration of a hand holding a tool with a magnified inset showing a tip and arrow (no text or symbols)Čištění čepele

natural_image
Illustration of hands using a tool to adjust or install electronic components, with no visible text or symbols.B

©

D
E

F

G

H

1

J

K

A Hlavná čast' strihača
① Prepínač
0.CHARGE/1
② Kontrolka ( )tavu nabíjania
natural_image
Line drawing of a handheld device with an attached cable and plug, showing no text or symbols.natural_image
Technical line drawing of a mechanical assembly with no visible text or symbols▶ Nabíjanie bez nabíjacieho stojana
- Prepínač 0·CHARGE/1 posuňte do polohy "0·CHARGE (0·NABÍJANIE)" a zástrčku pristroja zasuňte do strihača.
natural_image
Illustration of a hand holding a small object with arrows indicating movement or change (no text or symbols present)▶ Nasadzovanie čepele
natural_image
Illustration of a hand holding a tool with a magnified inset showing a tool interacting with a piece of wood (no text or symbols present)Čistenie čepele

natural_image
Illustration of hands assembling electronic components with a tool, showing a close-up and directional arrow (no text or symbols)-
Kefkou odstráňte akékol'vek vlasy zo strihača a z okolia čepele.
-
Odoberte čepel' a kefkou odstráňte vlasy z okraja čepele.
-
Kefkou odstráňte vlasy z priestoru medzi nepohyblivou a pohyblivou čepel'ou pri stisnutej čistiacej páčke, pomocou ktorej sa nadvihne pohyblivá čepel'.
Mazanie
B

©

D
E

F
•

H

J

K
A Törzs
natural_image
Line drawing of a handheld device with an attached cable and plug, showing no text or symbols.natural_image
Technical line drawing of a mechanical assembly with no visible text or symbolsnatural_image
Illustration of a hand holding a small object with arrows indicating movement or change (no text or symbols present)natural_image
Illustration of a hand holding a bird wing with an arrow pointing to the leaf (no text or symbols)A penge tisztítása
natural_image
Illustration of hands assembling electronic components with a tool, showing a close-up and directional arrow (no text or symbols)B

©

D
E

F

G

H

1
J

K

A Corpul principal
① Comutator
0.CHARGE/1
natural_image
Line drawing of a handheld device with an attached cable and plug, showing no text or symbols.natural_image
Technical line drawing of a mechanical assembly with no visible text or symbolsnatural_image
Illustration of a hand holding a finger with arrows indicating movement or force (no text or symbols)▶ Montarea lamei
natural_image
Illustration of a hand holding a pen, with a magnified inset showing a pen tip and blade (no text or symbols)Curățarea lamei

natural_image
Illustration of hands assembling electronic components with a tool, showing a close-up and directional arrow (no text or symbols)B

©

D
E

F

G

H

J

K

A Ana gövde
① 0·CHARGE/1 düğme
© 3 mm/6 mm tarak eki
D 9 mm/12 mm tarak eki
E 15 mm/18 mm tarak eki
F AC adaptörü (RE9-41)
⑧ Elektrik kablosu
⑨ Cihazın fışı
G Temizleme fırçası
H Yağ
Şarj yuvası ER1421
⑩ Şarj etme fisi
⑪ Fiş yuvası
J Tarak eki rafi ER1421
K Konektör ER1421
Sarjetme
natural_image
Line drawing of a handheld device with an attached cable and plug, showing no text or symbols.natural_image
Technical line drawing of a mechanical assembly with no visible text or symbolsnatural_image
Illustration of a hand holding a finger with an arrow indicating finger movement (no text or symbols present)▶ Biçağı takma
natural_image
Illustration of a hand holding a tool with a magnified inset showing a tip and arrow (no text or symbols)Biçağı temizleme

natural_image
Illustration of hands assembling electronic components with a tool, showing a close-up and directional arrow (no text or symbols)Information for Users on Collection and Disposal of Old Equipment and used Batteries
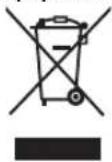
These symbols on the products, packaging, and/or accompanying documents mean that used electrical and electronic products and batteries should not be mixed with general household waste.
For proper treatment, recovery and recycling of old products and used batteries, please take them to applicable collection points, in accordance with your national legislation and the Directives 2002/96/EC and 2006/66/EC.
By disposing of these products and batteries correctly, you will help to save valuable resources and prevent any potential negative effects on human health and the environment which could otherwise arise from inappropriate waste handling.
For more information about collection and recycling of old products and batteries, please contact your local municipality, your waste disposal service or the point of sale where you purchased the items.
Penalties may be applicable for incorrect disposal of this waste, in accordance with national legislation.
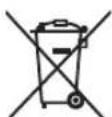
For business users in the European Union If you wish to discard electrical and electronic equipment, please contact your dealer or supplier for further information.
[Information on Disposal in other Countries outside the European Union]
These symbols are only valid in the European Union. If you wish to discard these items, please contact your local authorities or dealer and ask for the correct method of disposal.
![PANASONIC ER1411 - [Information on Disposal in other Countries outside the European Union] - 1](/content/2026/03/439366/images/fb226ed4dd54890b80ad9d97b0ebc5cfdd52cc7c80e826cd3e10b080f5545766.jpg)
Note for the battery symbol (bottom two symbol examples):
This symbol might be used in combination with a chemical symbol. In this case it complies with the requirement set by the Directive for the chemical involved.
Deutsch


- Important
- ▶ Before use
- ▶ Charging the clipper
- ▶ Using the clipper
- ▶ Cleaning the clipper
- ▶ Storing the clipper
- Specifications
- Parts identification
- Charge
- Charging the hair clipper
- ▶ Charging with the charging stand ER1421
- Connecting the comb attachment shelf to the charging stand ER1421
- ▶ Charging without the charging stand
- ▶ AC operation
- Cut
- Using the hair clipper
- ▶ Using the comb attachments
- Removing the attachment from the clipper
- Care
- Blade maintenance
- Removing and mounting the blade
- ▶ Removing the blade
- ▶ Mounting the blade
- Cleaning the blade
- Lubrication
- Removing the built-in rechargeable batteries
- Important notice regarding environmental protection
- For environmental protection and recycling materials
- Wichtig
- A Boîtier
- ▶ Installation de la lame
- Pulizia della lama
- Het mes reinigen
- A Hoveddel
- ▶ Montering af bladet
- Rengøring af bladet
- Limpeza da lâmina
- Lade hårklipperen
- Lade med ladestativet ER1421
- Kople kamfeste hyllen til ladestativet ER1421
- ▶ Montere bladet
- Rense bladet
- Fjerne de innebygde oppladbare batteriene
- Laddning
- ▶ Ladda utan bordsladdaren
- Att sätta på bladet
- Göra rent skärbladet
- A Runko
- ▶ Terän asentaminen
- Terän puhdistaminen
- A Korpus
- ▶ Mocowanie ostrza
- Czyszczenie ostrza
- ▶ Připevnění čepele
- Čištění čepele
- ▶ Nabíjanie bez nabíjacieho stojana
- ▶ Nasadzovanie čepele
- Čistenie čepele
- Mazanie
- A Törzs
- A penge tisztítása
- ▶ Montarea lamei
- Curățarea lamei
- Sarjetme
- ▶ Biçağı takma
- Biçağı temizleme
- Information for Users on Collection and Disposal of Old Equipment and used Batteries
- [Information on Disposal in other Countries outside the European Union]
- Note for the battery symbol (bottom two symbol examples):
- Deutsch
Brand : PANASONIC
Model : ER1411
Category : Beard trimmer