DWP352VS - Sander DEWALT - Free user manual and instructions
Find the device manual for free DWP352VS DEWALT in PDF.
| Product Type | Belt Sander |
| Brand | DeWalt |
| Model | DWP352VS |
| Voltage | 230 V / 115 V |
| Power Consumption | 1010 W |
| Belt Speed (230 V) | 270 - 440 m/min |
| Belt Speed (115 V) | 235 - 380 m/min |
| Sanding Surface | 140 x 75 mm |
| Belt Length | 533,4 mm |
| Belt Width | 76,2 mm |
| Weight | 5,0 kg |
| Sound Pressure Level (LpA) | 92 dB(A) |
| Sound Power Level (LWA) | 103 dB(A) |
| Vibration Emission Value (ah) | 2,7 m/s² |
| Variable Speed | Yes, 6 positions |
| Dust Collection | Dust bag + vacuum adapter |
| Switch | Trigger with lock button |
| Abrasive belt | Unidirectional or bidirectional |
| Intended Use | Professional sanding of wood, metal (without dust extraction), paint |
| Protection Class | Class I (with grounding) |
| Included Accessories | Dust bag, sanding belt, dust collector, manual |
| Maintenance | Regular cleaning of ventilation slots, no lubrication required |
| Repairability | Spare parts available from DeWalt service |
Frequently Asked Questions - DWP352VS DEWALT
User questions about DWP352VS DEWALT
0 question about this device. Answer the ones you know or ask your own.
Ask a new question about this device
Download the instructions for your Sander in PDF format for free! Find your manual DWP352VS - DEWALT and take your electronic device back in hand. On this page are published all the documents necessary for the use of your device. DWP352VS by DEWALT.
USER MANUAL DWP352VS DEWALT
RSEL:For at reducere
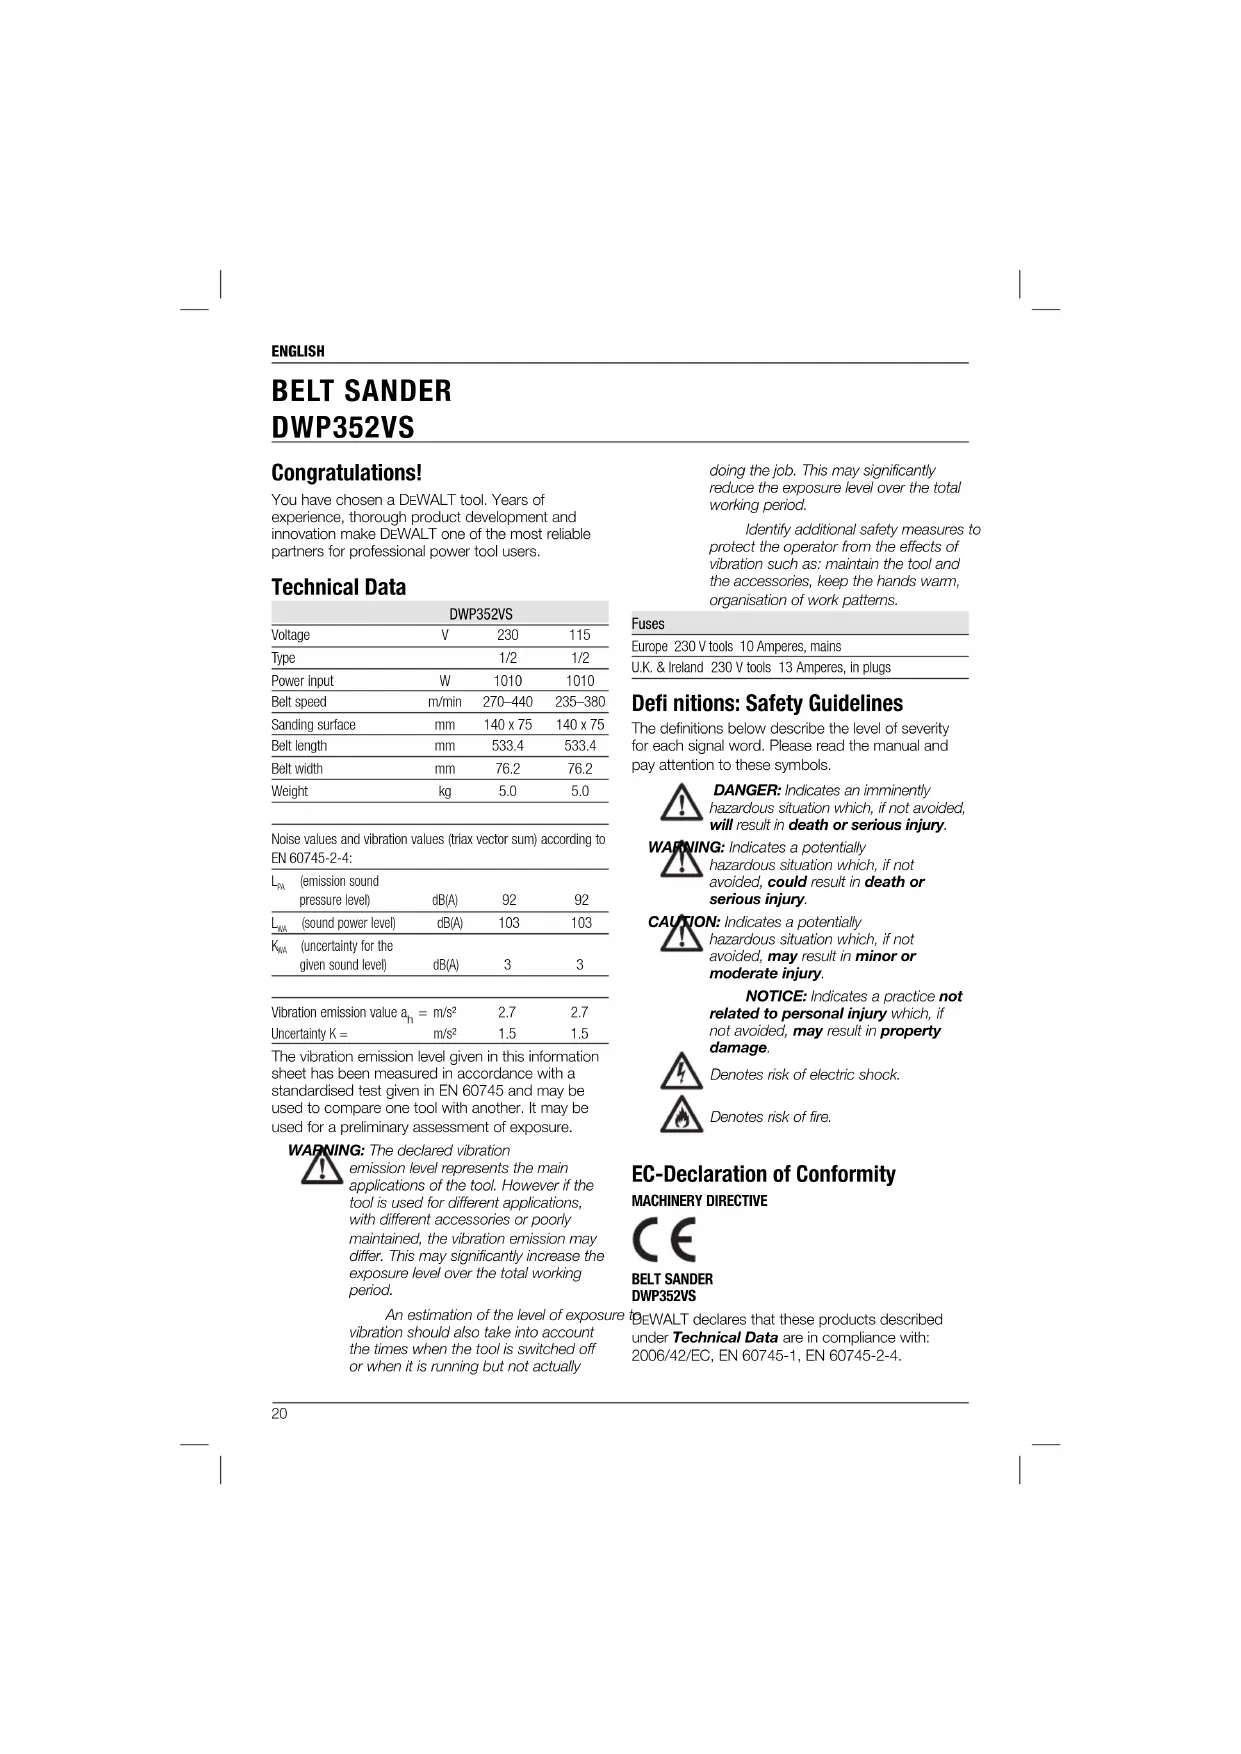
You have chosen a DEWALT tool. Years of experience, thorough product development and innovation make DEWALT one of the most reliable partners for professional power tool users.
Technical Data
| DWP352VS | |||
| Voltage | V | 230 | 115 |
| Type | 1/2 | 1/2 | |
| Power input | W | 1010 | 1010 |
| Belt speed | m/min | 270-440 | 235-380 |
| Sanding surface | mm | 140 x 75 | 140 x 75 |
| Belt length | mm | 533.4 | 533.4 |
| Belt width | mm | 76.2 | 76.2 |
| Weight | kg | 5.0 | 5.0 |
Noise values and vibration values (triax vector sum) according to EN 60745-2-4:
Vibration emission value a_h = m / s^2 2.7 2.7 Uncertainty K= m/s² 1.5 1.5
| Lem | (remission sound pressure level) | dB(A) | 92 | 92 |
| Lm | 的声音 power level) | dB(A) | 103 | 103 |
| Km | (uncertainty for the given sound level) | dB(A) | 3 | 3 |
The vibration emission level given in this information sheet has been measured in accordance with a standardised test given in EN 60745 and may be used to compare one tool with another. It may be used for a preliminary assessment of exposure.
WARNING: The declared vibration emission level represents the main applications of the tool. However if the tool is used for different applications, with different accessories or poorly maintained, the vibration emission may differ. This may significantly increase the exposure level over the total working period.
An estimation of the level of exposure vibration should also take into account the times when the tool is switched off or when it is running but not actually
doing the job. This may significantly reduce the exposure level over the total working period.
Identify additional safety measures to protect the operator from the effects of vibration such as: maintain the tool and the accessories, keep the hands warm, organisation of work patterns.
Fuses
Europe 230V tools 10 Amperes, mains
U.K. & Ireland 230 V tools 13 Amperes, in plugs
Definitions: Safety Guidelines
The definitions below describe the level of severity for each signal word. Please read the manual and pay attention to these symbols.

DANGER: Indicates an imminently hazardous situation which, if not avoided, will result in death or serious injury.
WARNING: Indicates a potentially hazardous situation which, if not avoided, could result in death or serious injury.
CAUTION: Indicates a potentially hazardous situation which, if not avoided, may result in minor or moderate injury.
NOTICE: Indicates a practice not related to personal injury which, if not avoided, may result in property damage.

Denotes risk of electric shock.

Denotes risk of fire.
EC-Declaration of Conformity
MACHINERY DIRECTIVE

BELT SANDER DWP352VS
BEWALT declares that these products described under Technical Data are in compliance with: 2006/42/EC, EN 60745-1, EN 60745-2-4.
ENGLISH
These products also comply with Directive 2004/108/EC (until 19.04.2016), 2014/30/EU (from 20.04.2016) and 2011/65/EU. For more information, please contact DEWALT at the following address or refer to the back of the manual.
The undersigned is responsible for compilation of the technical file and makes this declaration on behalf of DEWALT.

Horst Grossmann
Vice President Engineering
DEWALT, Richard-Klinger-Strasse 11,
D-65510, Idstein, Germany
10.11.2014

WARNING: To reduce the risk of injury, read the instruction manual.
General Power Tool SafetyWarnings

WARNING! Read all safety warnings and all instructions. Failure to follow the warnings and instructions may result in electric shock, fire and/or serious injury.
SAVE ALL WARNINGS AND INSTRUCTIONS FOR FUTURE REFERENCE
The term "power tool" in the warnings refers to your mains-operated (corded) power tool or battery-operated (cordless) power tool.
1) WORK AREA SAFETY
a) Keep work area clean and well lit.
Cluttered or dark areas invite accidents.
b) Do not operate power tools in explosive atmospheres, such as in the presence of flammable liquids, gases or dust. Power tools create sparks which may ignite the dust or fumes.
c) Keep children and bystanders away while operating a power tool. Distractions can cause you to lose control.
2) ELECTRICAL SAFETY
a) Power tool plugs must match the outlet. Never modify the plug in any way. Do not use any adapter plugs with earthed (grounded) power tools. Unmodified plugs and matching outlets will reduce risk of electric shock.
b) Avoid body contact with earthed or grounded surfaces such as pipes, radiators, ranges and refrigerators. There is an increased risk of electric shock if your body is earthed or grounded.
c) Do not expose power tools to rain or wet conditions. Water entering a power tool will increase the risk of electric shock.
d) Do not abuse the cord. Never use the cord for carrying, pulling or unplugging the power tool. Keep cord away from heat, oil, sharp edges or moving parts. Damaged or entangled cords increase the risk of electric shock.
e) When operating a power tool outdoors, use an extension cord suitable for outdoor use. Use of a cord suitable for outdoor use reduces the risk of electric shock.
If operating a power tool in a damp location is unavoidable, use a residual current device (RCD) protected supply. Use of an RCD reduces the risk of electric shock.
3) PERSONAL SAFETY
a) Stay alert, watch what you are doing and use common sense when operating a power tool. Do not use a power tool while you are tired or under the influence of drugs, alcohol or medication. A moment of inattention while operating power tools may result in serious personal injury.
b) Use personal protective equipment. Always wear eye protection. Protective equipment such as dust mask, non-skid safety shoes, hard hat, or hearing protection used for appropriate conditions will reduce personal injuries.
c) Prevent unintentional starting. Ensure the switch is in the off position before connecting to power source and/or battery pack, picking up or carrying the tool. Carrying power tools with your finger on the switch or energising power tools that have the switch on invites accidents.
d) Remove any adjusting key or wrench before turning the power tool on. A wrench or a key left attached to a rotating part of the power tool may result in personal injury.
e) Do not overreach. Keep proper footing and balance at all times. This enables better control of the power tool in unexpected situations.
) Dress properly. Do not wear loose clothing or jewellery. Keep your hair, clothing and gloves away from moving
ENGLISH
parts. Loose clothes, jewellery or long hair can be caught in moving parts.
g) If devices are provided for the connection of dust extraction and collection facilities, ensure these are connected and properly used. Use of dust collection can reduce dust-related hazards.
4) POWER TOOL USE AND CARE
a) Do not force the power tool. Use the correct power tool for your application. The correct power tool will do the job better and safer at the rate for which it was designed.
b) Do not use the power tool if the switch does not turn it on and off. Any power tool that cannot be controlled with the switch is dangerous and must be repaired.
c) Disconnect the plug from the power source and/or the battery pack from the power tool before making any adjustments, changing accessories, or storing power tools. Such preventive safety measures reduce the risk of starting the power tool accidentally.
d) Store idle power tools out of the reach of children and do not allow persons unfamiliar with the power tool or these instructions to operate the power tool. Power tools are dangerous in the hands of untrained users.
e) Maintain power tools. Check for misalignment or binding of moving parts, breakage of parts and any other condition that may affect the power tool's operation. If damaged, have the power tool repaired before use. Many accidents are caused by poorly maintained power tools.
f) Keep cutting tools sharp and clean. Properly maintained cutting tools with sharp cutting edges are less likely to bind and are easier to control.
g) Use the power tool, accessories and tool bits etc., in accordance with these instructions taking into account the working conditions and the work to be performed. Use of the power tool for operations different from those intended could result in a hazardous situation.
5) SERVICE
a) Have your power tool serviced by a qualified repair person using only identical replacement parts. This will ensure that the safety of the power tool is maintained.
Additional Safety Instructions for Belt Sanders
- Hold power tool by insulated gripping surfaces, because the belt may contact its own cord. Cutting a "live" wire may make exposed metal parts of the tool "live" and could give the operator an electric shock.
- Do not sand metal of any kind with your sander. Sparks may be generated by sanding screws, nails or other metals which may ignite dust particles.
- Do not wet sand with this sander. Liquids may enter the motor housing and cause electric shock.
- Empty dust bag frequently. Especially when sanding resin coated surfaces such as polyurethane, varnish, shellac, etc. The accumulation of fine sanding dust particles may self ignite and cause fire.
- Do not operate this tool for long periods of time. Vibration caused by the operating action of this tool may cause permanent injury to fingers, hands, and arms. Use gloves to provide extra cushion, take frequent rest periods, and limit daily time of use.
- Sanding of lead-based paint, chemically pressure treated lumber or other materials that may contain carcinogens is not recommended. Sanding of these materials should only be performed by a professional.
- Clean out your tool often, especially after heavy use. Dust and grit containing metal particles often accumulate on interior surfaces and could create a risk of serious injury, electric shock or electrocution. ALWAYS disconnect the sander from the power source before cleaning. ALWAYS WEAR SAFETY GLASSES that conform to ANSI Z87.1.
- ALWAYS disconnect tool from the power source before changing abrasive belts or sheets. Such preventive safety measures reduce the risk of starting the power tool accidentally.
- ALWAYS maintain a firm grip with both hands on the belt sander handles with both hands to prevent loss of control.
- ALWAYS keep fingers away from the moving belt and areas where the belt enters the housing to avoid severe abrasion.
- Do not operate belt sander without all guards and covers securely in place.
- To avoid injury, do not use this tool in a stand that would invert it for use as a
stationary belt sander. This tool is not made for that application.
WARNING: We recommend the use of a residual current device with a residual current rating of 30mA or less.
Additional Safety Rules For Paint Removal
- Sanding of lead based paint is NOT RECOMMENDED due to the difficulty of controlling the contaminated dust. The greatest danger of lead poisoning is to children and pregnant women.
- Since it is difficult to identify whether or not a paint contains lead without a chemical analysis, we recommend the following precautions when sanding any paint:
PERSONAL SAFETY
- No children or pregnant women should enter the work area where the paint sanding is being done until all clean up is completed.
- A dust mask or respirator should be worn by all persons entering the work area. The filter should be replaced daily or whenever the wearer has difficulty breathing. See your local hardware store for the proper NIOSH approved dust mask.
- NO EATING, DRINKING or SMOKING should be done in the work area to prevent ingesting contaminated paint particles. Workers should wash and clean up BEFORE eating, drinking or smoking. Articles of food, drink or smoking should not be left in the work area where dust would settle on them.
ENVIRONMENTAL SAFETY
- Paint should be removed in such a manner as to minimise the amount of dust generated.
- Areas where paint removal is occurring should be sealed with plastic sheeting of 4 mil (0.10mm) thickness.
- Sanding should be done in a manner to reduce tracking of paint dust outside the work area.
CLEANING AND DISPOSAL
- All surfaces in the work area should be vacuumed and thoroughly cleaned daily for the duration of the sanding project. Vacuum filter bags should be changed frequently.
- Plastic drop cloths should be gathered up and disposed of along with any dust chips or other removal debris. They should be placed
in sealed refuse receptacles and disposed of through regular trash pick-up procedures. During clean up, children and pregnant women should be kept away from the immediate work area.
- All toys, washable furniture and utensils used by children should be washed thoroughly before being used again.
Residual Risks
In spite of the application of the relevant safety regulations and the implementation of safety devices, certain residual risks cannot be avoided.
These are:
Impairment of hearing.
Risk of personal injury due to flying particles.
- Risk of burns due to accessories becoming hot during operation.
- Risk of personal injury due to prolonged use.
Markings on Tool
The following pictograms are shown on the tool:

Read instruction manual before use.

Wear ear protection.

Wear eye protection.
DATE CODE POSITION (FIG. 1)
The date code (j), which also includes the year of manufacture, is printed on the nameplate.
Example:
2015 XX XX
Year of Manufacture
Package Contents
The package contains:
1 Belt sander
1 Dust bag
1 Sanding belt
1 Dust chute
1 Instruction manual
- Check for damage to the tool, parts or accessories which may have occurred during transport.
ENGLISH
Take the time to thoroughly read and understand this manual prior to operation.
Description (fig. 1)
WARNING: Never modify the power tool or any part of it. Damage or personal injury could result.
a. Dust bag
b. Dust spout
c. Main handle
d. Front handle
e. Lock button
f. Trigger switch
g. Variable speed dial
h. Lever
i. Idler pulley
j. Date code
INTENDED USE
This heavy-duty bell sander has been designed for professional sanding at various work sites (i.e., construction sites).
DO NOT use under wet conditions or in the presence of flammable liquids or gases.
This heavy-duty belt sander is a professional power tool.
DO NOT let children come into contact with the tool. Supervision is required when inexperienced operators use this tool.
- Young children and the infirm. This appliance is not intended for use by young children or infirm persons without supervision.
- This product is not intended for use by persons (including children) suffering from diminished physical, sensory or mental abilities; lack of experience, knowledge or skills unless they are supervised by a person responsible for their safety. Children should never be left alone with this product.
Electrical Safety
The electric motor has been designed for one voltage only. Always check that the power supply corresponds to the voltage on the rating plate.
Your DEWALT tool is designed in class I (grounded) according to EN60745. Earth wire is required.
WARNING: 115 V units have to be operated via a fail-safe isolating transformer with an earth screen between the primary and secondary winding.
If the supply cord is damaged, it must be replaced by a specially prepared cord by the DEWALT service organisation.
Mains Plug Replacement (U.K. & Ireland Only)
If a new mains plug needs to be fitted:
- Safely dispose of the old plug.
- Connect the brown lead to the live terminal in the plug.
- Connect the blue lead to the neutral terminal.
- Connect the yellow/green lead to the earth terminal.
Follow the fitting instructions supplied with good quality plugs. Recommended fuse: 13 A.
Using an Extension Cable
If an extension cable is required, use an approved 3-core extension cable suitable for the power input of this tool (see Technical Data). The minimum conductor size is 1.5mm^2 ; the maximum length is 30m .
When using a cable reel, always unwind the cable completely.
ASSEMBLY AND ADJUSTMENTS
WARNING: To reduce the risk of injury, turn unit off and disconnect machine from power source before installing and removing accessories, before adjusting or changing setups or when making repairs. Be sure the trigger switch is in the OFF position. An accidental start-up can cause injury.
WARNING: To reduce the risk of serious personal injury, secure the workpiece and maintain a firm grip on the sander. Friction between the sanding belt and the work will tend to move the work backward and the sander forward.
WARNING: To avoid severe abrasion, ALWAYS keep fingers away from the moving belt and areas where the belt enters the housing.
WARNING: Severe laceration hazard. If installed backwards, unidirectional sanding belts may not track properly and may overhang the housing, possibly causing severe lacerations.
Installing a New Belt (fi g. 1)
- Place the sander on its left side.
- Pull the lever (h) out toward the front of the machine as shown. This will retract the idler pulley (i) and release the tension on the abrasive belt.
- Remove the old belt.
- Install the new belt with the arrow (printed on the inside of the belt) on the top and pointing TOWARD the idler pulley.
NOTE: Some sanding belts are bi-directional. These belts will not have arrows printed on them. They can be installed to run in either direction.
- Engage the front pulley by pushing the lever (h) back to its original position.
To Start and Stop the Belt Sander (fi g. 1)

WARNING: To reduce the risk of injury, make sure the sander is not resting on the workpiece when the switch is turned on.

WARNING: To reduce the risk of injury, check to see that the belt guard is in place, secured, and working correctly.
- Be certain that the the switch is off and the power circuit voltage is the same as the voltage shown on the specification plate. Connect the machine to the power circuit.
- Squeeze the trigger (f) to start the motor. Release the trigger to stop the motor.
- To allow the motor to run without constantly holding the trigger, press the trigger switch (f), push and hold the lock button (e) while releasing the trigger switch.
- To release the lock button, squeeze the trigger and release.
Variable Speed (fi g. 1)
The operating speed is adjustable between 270 m/min [meters per minute] and 440 m/min for the 230V DWP352VS. For the 115V DWP352VS the operating speed is adjustable between 235 m/min and 380 m/min.
The speed is adjusted by turning the variable speed dial (g). The first position provides the slowest operating speed (270/235 m/min) while position 6 is the fastest (440/380 m/min). The speed can be changed either when the motor is running or is stopped.
Tracking the Abrasive Belt (fi g. 2)

WARNING: Severe laceration hazard. Properly adjust the tracking of the belt to avoid it overhanging the housing. A running belt overhanging the housing can cause severe lacerations.

CAUTION: To reduce the risk of injury, always be sure the switch is off before connecting the tool to power source.
To prevent excessive wear on both the sander and belt, NEVER allow the abrasive belt to rub on the sander frame. To make sure that the belt is tracking correctly, do the following:
- Turn the tool over. Hold the rear handle with the left hand so that the ring finger and the little finger rest on trigger.
- Squeeze the trigger to start the motor.
- Tum the belt aligning knob (k) in either direction until the edge of the belt is even with the outer edge of the rear rubber-covered pulley. The edge of the belt will extend beyond the edge of the front pulley.
- Release the trigger to stop the motor. Allow the tool to come to a COMPLETE STOP before turning it over and putting it down.
Dust Collection (fi g. 1, 3, 4)

NG: To reduce the risk of injury, turn unit off and disconnect it from power source before installing and removing accessories, before adjusting or when making repairs. An accidental start-up can cause injury.

WARNING: Empty dust collection system frequently, especially when sanding resin-coated surfaces such as polyurethane, varnish, shellac, etc. Dispose of coated dust particles according to the finish manufacturer's guidelines, or place in a metal can with a tight fitting metal lid. Remove coated dust particles from the premises daily. The accumulation of fine sanding dust particles may self ignite and cause fire.

WARNING: Shock hazard. The use of a vacuum hose and vacuum adapter with the belt sander may generate static electricity that could result in startling static discharge.
ENGLISH

WARNING: Fire hazard. Do not use a dust collection device when sanding metal. Doing so creates a fire hazard, which may cause serious personal injury and/or damage to the tool.

CAUTION: To reduce the risk of injury, do not operate the tool without a dust bag.
Before installing the dust chute, place the O ring (n) onto the dust spout (b) between the two ribs (Fig. 3).
To install the dust chute (l), place the end with the threaded knob (m) over the dust spout (b) and rotate to preferred position. Tighten knob (m) to secure dust chute to dust spout (Fig. 3).
To use with the dust bag (a), push dust bag onto dust chute (l) until secure. Then position bag so that the internal wire is on top. For the most efficient operation, empty the dust bag when it is approximately half full. Pull the dust bag off of the dust chute, unzip the rear of the bag, and shake out the dust. Every so often, turn the bag inside out and brush the accumulated dust from the inside.
The dust chute utilizes the DEWALT AirLock connection making it compatible with the DEWALT dust extractor and AirLock accessory DWV9000 (Fig. 4).
OPERATION
Instructions for Use
WARNING: Always observe the safety instructions and applicable regulations.
WARNING: To reduce the risk of injury, turn unit off and disconnect machine from power source before installing and removing accessories, before adjusting or changing set-ups or when making repairs. Be sure the trigger switch is in the OFF position. An accidental start-up can cause injury.
Proper Hand Position (fi g. 1)
WARNING: To reduce the risk of serious personal injury, ALWAYS use proper hand position as shown.
WARNING: To reduce the risk of serious personal injury, ALWAYS hold securely in anticipation of a sudden reaction.
Proper hand position requires one hand on the front handle (d), with the other hand on the main handle (c).
To Operate
WARNING: To reduce the risk of serious personal injury, do not use this tool in a stand that would invert it for use as a stationary belt sander. This tool is not made for that application.
CAUTION: To reduce the risk of injury, secure the work and maintain a firm grip on the sander. Friction between the sanding belt and the work will tend to move the work backward and the sander forward.
CAUTION: To reduce the risk of injury, always be sure the switch is off before connecting the tool to power source.
- Hold the sander off the work before starting the motor.
- Lower the sander to the work, touching the rear part of the bell first. Level the machine when moving it forward.
- Guide the machine over the work in overlapping strokes. Allow the sander to do the work.
- Avoid applying excessive pressure. The weight of the machine is usually sufficient for a fast smooth finish. A slight increase in pressure may speed removal of material, but too much pressure will slow the motor and decrease removal.
- Work back and forth over a fairly wide area to obtain an even surface.
- Do not let the tool tilt. The edge of the belt can make a deep cuts into the surface.
- Do not pause in any one spot during the sanding operation. The belt will eat into the work and make the surface uneven.
- Lift the tool from the work before turning the motor off.
- Always be sure that the motor has completely stopped before putting the tool down.
MAINTENANCE
Your DEWALT power tool has been designed to operate over a long period of time with a minimum of maintenance. Continuous satisfactory operation depends upon proper tool care and regular cleaning.
ENGLISH

WARNING: To reduce the risk of injury, turn unit off and disconnect machine from power source before installing and removing accessories, before adjusting or changing set-ups or when making repairs. Be sure the trigger switch is in the OFF position. An accidental start-up can cause injury.

Lubrication
Your power tool requires no additional lubrication.

Cleaning

WARNING: Blow dirt and dust out of the main housing with dry air as often as dirt is seen collecting in and around the air vents. Wear approved eye protection and approved dust mask when performing this procedure.

other harsh chemicals for cleaning the non-metallic parts of the tool. These chemicals may weaken the materials used in these parts. Use a cloth dampened only with water and mild soap. Never let any liquid get inside the tool; never immerse any part of the tool into a liquid.
Optional Accessories

WARNING: Since accessories, other than those offered by DEWALT, have not been tested with this product, use of such accessories with this tool could be hazardous. To reduce the risk of injury, only DEWALT recommended accessories should be used with this product.
Consult your dealer for further information on the appropriate accessories.
Protecting the Environment

Separate collection. This product must not be disposed of with normal household waste.
Should you find one day that your DEWALT product needs replacement, or if it is of no further use to you, do not dispose of it with household waste. Make this product available for separate collection.

Separate collection of used products and packaging allows materials to be recycled and used again. Re-use of recycled materials helps prevent environmental pollution and reduces the demand for raw materials.
Local regulations may provide for separate collection of electrical products from the household, at municipal waste sites or by the retailer when you purchase a new product.
DEWALT provides a facility for the collection and recycling of DEWALT products once they have reached the end of their working life. To take advantage of this service please return your product to any authorised repair agent who will collect them on our behalf.
You can check the location of your nearest authorised repair agent by contacting your local DEWALT office at the address indicated in this manual. Alternatively, a list of authorised DEWALT repair agents and full details of our after-sales service and contacts are available on the Internet at: www.2helpU.com.
ESPANOL
LIJADORADEBANDA
DWP352VS
Enhorabuena!
BANDSCHUURMACHINE DWP352VS
WAARSCHUWING! Lees alle
BEWAAR ALLE WAARSCHUWINGEN EN INSTRUCTIES ALS TOEKOMSTIG REFERENTIEMATERIALAAL
POSITIDATUMCODE(AFB.[FIG.1]
LIXADORA COM CORREIRA DWP352VS
Parabens!
LIXADORA COM CORREIRA DWP352VS
Vice President Engineering
DEWALT, Richard-Klinger-Strasse 11,
D-65510, Idstein, Germany
10.11.2014
PAIVAMARAKOODIN SIJAINTI (KUVA [FIG.1]
WARNING: Severe laceration hazard. If installed backwards, unidirectional sanding belts may not track properly and may overhang the housing, possibly causing severe lacerations.
This heavy-duty belt sander is a professional power tool.
MHN apnve Ta tiaia va epoxovai e eranp n To epyaleio. Attatei Tneipaeyn otav to epyaieo auto xpnoipotoeitai ao n epteipous xeiipotc.
To Tpoiov auto dev Tpooipietai ia xphon ato atoata (Tepiaaavouevw Taidiw) Tou exoue iewuivcs oomegakec, aohtnpiaekc n Tveuajtikcs kavotnes, eAeeiun eptiepiac kal/yywns kal diotntuv, ektoc av ta atoata etiBbvtovatto ato atofo uteuBtuvo yia tvv aopaleia touc Ta taiia dev Tpietevaevouv troe mova touc me auto to Tpoiov.
Hλεκτρικήσαφάλεια
O nKtpiKos KIVtnpac exE oxEdiaotei yia Aetoupyia mvo OE ia taon. EeYxETe TAVTOTE eav n Tpoopooia avatokpivetai otyn taon tou avaypapetai OTNV ETIYPaPn ME TA EdoEva.
To DEWALT epyaieio oac exei oxebiaotei wC kainyopiaI (yeiwov) ouwovva e to TpotTO EN60745. Aatateiai aywoos yeiowns.
Av exi UTOeI cHua To KaWio pEuMAtos, auto TpeTIE va aVtKaataotaei ie EIOkakatakeuaoevo KaWio atto DikTuO ePbic TNS DEWALT.
Xpnoon ppoektao
Av aattetra kalawio etektao, xpooiotoinote Eykepigevo kalwio etktao3 aywyov KataaAao yia tny io autou tou epyaleiou (BA.
Texvika 8e0oEv)To Eaixto MeyEBOc Tou ayyou eivai 1.5 mm2, evw to meyo Tojko eivai 30m.
OtaXpnoiOIOTe KAwOio ce poAo, va CETuAlyEe TAVTO TE KAwOio EVTEAω.
EAAHNIKA
SYNAPMOAOHSH KAI PYOMIIEI

IPOEIOIHSH: Ia va
eattwote tov kivduvo
tpauatioou, atevepyoioite
to outnja kai anouuvdeet o
unxavna atno tv tropooboaia
tpiv ano tv tonotetnol n
qapieon napekoeuv, piv tn
puoumn n tv alayn egapntuow
kai kata n v npayarotoin
ETIOKEUW. Beauiwei on o
diakontnc evpeyotoianc bioketai
otn thon OFF (ATevepyoioan). H
tuxaekivnon mtopevi npokaleoi
tpauatioo.

IPOEIONOIHsH: Ia va To Kivduvo oBapou tpaunaiouo, Otepewote To Teaxio epyaiaoc kai biatneite oTaeepi AaBn OTo LEaivnpa. H TpiBn MeTu Tou iavta LEaivanskai Tou TEaixiou epyaoias, ta Teiveva Kivnoeio To TEaXIO epyaiois npos Ta Niow kai To LEaivnpa pOg ta EInpOs.

IPOEIONOIH2H: Ia va aTOpuyTe Ooapop Tpaumaiou lo Aoyw TpiBn IANTA va Kpatare Ta kaktua oac paKpia anr Tov KIVOUMEvo Iavta KAI atro TEPIOXe OTou O iAvTAc EIOEPxERAt OTO PEPiBnua.

IPOEIOHOH: 2oBapoc Kivouoc xiaimuotc.Av Eykataafoov avriopoa,oi iua kateuuvonigavtes aeavons mtopei va unnv Kivovtai owta kai va Tepaoov Ew anto Tepilnma, Tpokalawvtac EvexoeewosObapa aioiuata.
EykataoTaon véou iavta (EK.1)
- TOTTOEHTOte TO AIAVTnpa Wote VA OTnpicetai OTNV apIOTEPH TOUTAEPuA.
- TpaBnETo moXo (h) EwTPOs TO mPTooTIO VEOPOS TO uXavHuaTO 6TWC BExVey n EIOVA. Me ToV pTO auto Ta avaupoei n apyn TPOxAia (i) Kai Ta eAuOepeuEei n TPOeVTaON aTOvIaVTA aeivans
-
ApaipoeToV TAtioIyTa
-
EYkataaTnOte To VEO IaVTo BeLoC (Tou Eiva TUTWUEo OTNV EOWTEPIK TIAEUPa Tou IaVTo) TPOc TIV TAVU Peia KAI VA DEIXVEI POES TIV aepytn Tpoxaia.
EHMEIO2H: Opiouloi iavtcAeiaovcivai duo kateuovewv.Autoi iavteCev0a exouv bItnuwa TAVW touc. MTOPOUV VA ekataoataouwote va KIVOUVTAI KAOTICdo kATEUOBVoei.
5.Σμπλεξτην μιποσινή τροχαία ωθώντας Σ Μχλό (h) πάλι στήν αρχίκη του θέοη.
Tia va oEoTe OE aeitoupyia kai va otapatnoeTo aeiavtnpa iavta (EK.1)

NPOEIADONIOH: Ia va i Tov Kivouvo tpaumioou, ono iiavtas eviva eTnapn me to Tejaxio epyaiaos otav Evepytoite to biakottn.

IPOEIONOIHsH: Ia va Tov kivouvo tpaumauoou, eAevxi ia va oite ono npovukntpac iavta elai otn thonou, oTepewEvoc kai leioupyei owot.
- Beaowte OI O diakottnc evai
atevepyoToinmuoc kai taon Tou
KUKwpatoc peuatoC evai iia ME tvN
Taon TPO eapavicietai ony tivaia
Tpodlaypawv. Suovote To epyaaleoTo
KukwpapeuatoC - NiEOTn OKavdaHn (f) ia va theoTe oE aeitoupyia to potep.EeUePwote Tn OKavdaHn ia va otatnatoei to potep.
- Ia va etinptpeyete n ouvexn aeitoupyia tou
muotep xwpi ca kpatate ouvexwc nattneyn
tn okaovan, TIOEto doiakotttn okaovdaIc
(f) kai katotiv wOthote kai ouykpatniote to
koumti aarpalionc (e) evw atteleueepwve
to biakottno kavodlaIc. - Ia va eueuepwote Koupti aopdaioc, TIEOTE nKavdaan kai apnoTe nV.