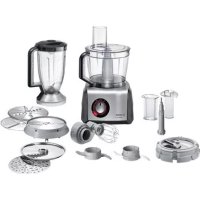
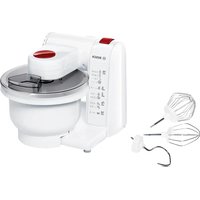
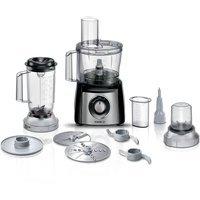
USER MANUAL Multitalent 8 MC812M865 BOSCH
Compact food processor
MC812....
[de] Gebrauchsanleitung Kompakt-Kuchenmaschine 3 [en] Instruction manual Compact food processor 17 [fr] Mode d'emploi Robot culinaire compact 30 [it] Istruzioni per l'uso Macchina da cucina compatta 45 [nl] Gebruiksaanwijzing Compact-keukenmachine 59 [da] Brugsanvisning Kompakt-køkkenmaskine 73 [no] Bruksanvisning Kompakt-kjøkkenmaskin 86 [sv] Bruksanvisning Kompaktmatberedare 99 [fi] Käyttöohje Pieni monitoimikone 111 [es] Instrucciones de uso Robot de cocina compacto 124 [pt] Instruções de utilização Máquina de cozinha compacta 139 [el] Οδηγίες χρήσης 153 [tr] Kullanım kılavuzu Kompakt mutfak robotu 170 [pl] Instrukcja obsługi Kompaktowy robot kuchenny 186 [uk] Інструкція з експлуатації Компактний кухонний комбайн 201 [ru] Инструкция по эксплуатации Компактный кухонный комбайн 215 [ar] دليل الاستخدام 247
This appliance is intended for domestic use only. Use the appliance only for normal amounts of food and for normal amounts of time. The appliance is suitable for mixing, kneading, and shredding food. The appliance must not be used for other substances or objects. Only use accessory parts approved by the manufacturer or genuine parts approved for use with this appliance. Only use the appliance indoors at room temperature and at altitudes up to 2000 m above sea level.
Important safety notices
Read and follow the instruction manual carefully. Enclose these instructions when you pass the appliance on to someone else. If the instructions are not observed, the manufacturer's liability for damage will be excluded.
This appliance can be used by persons with reduced physical, sensory or mental capabilities or lack of experience and knowledge if they have been given supervision or instruction concerning use of the appliance in a safe way and if they understand the hazards involved. Keep children away from the connecting cable and do not allow them to use the appliance. Do not let children play with the appliance. Cleaning and maintenance must not be performed by children.
Risk of electric shock and fire!
- Connect and operate the appliance only if the specifications on the rating plate match your mains supply. Do not use the appliance if the power cord and/or appliance are damaged. Service may repair the appliance, e.g. by replacing the power cord, in order to avoid hazards. Never connect the appliance to a timer switch or controllable sockets. Never leave the appliance unattended while it is switched on!
- Do not place the appliance on or near hot surfaces. The power cord must not come into contact with hot parts or be pulled across sharp edges. Never immerse the base unit in water or wash it in a dishwasher. Do not steam-clean the appliance. Do not touch the appliance with damp hands.
After each use, whenever the appliance is being assembled, disassembled, or cleaned, and in the event of a fault, the appliance must always be disconnected from the mains. If the power is interrupted, the appliance switches off and restarts when the power is restored.
Risk of injury!
Before replacing accessories or additional parts during operation, the appliance must be disconnected from the power supply. After it has been running, wait until it comes to a standstill. While operating the appliance, never reach into the filling shaft with your hands. Always use the provided ingredients. Do not insert any objects (e.g., spoons) into the bowl or filling shaft. Care should be taken when handling sharp blades, emptying the container, and during cleaning. Do not touch the sharp edges of the universal cutter with bare hands. When not in use, always store the blade guard. Do not grasp the sharp blade or cutting discs. Take hold of the cutting disc by its edges. Never reach into the attached blender jug. Do not reach into the blender jug until the drive has stopped. Do not touch the blender blades with bare hands. Never grasp the sharp blades or edges of the cutter disc and cutting grid. When the dicer insert is not in use, always leave it with the blade guard fitted.
Risk of scalding!
When processing hot liquids, steam escapes through the lid. Add a maximum of 0.4 litres of hot liquid.
Risk of suffocation!
Do not allow children to play with the packaging.
Caution!
We recommend that the appliance is never switched on longer than is necessary to process ingredients. Do not expose the blender jug to temperature extremes.
Important!
It is essential to clean the appliance thoroughly after it has not been used for an extended period. See "Maintenance" on page 27.
Explanation of the symbols on the appliance:

Follow the instructions in the operating manual.

Caution! Rotating blades.

Caution! Rotating tools.
Do not reach into the filling opening.
Congratulations on the purchase of your new Bosch appliance. For further information, visit our website.
Contents
Intended use
Important safety notices
Overview
Before using the appliance for the first time
Parts and operating controls. Preparation
Use of tools
Cutting discs
Citrus press
Juice centrifuge
Blender
Sample recipe for the blender
Dicer
Universal cutter
Cleaning and maintenance
Troubleshooting
Special accessories 1
Disposal
Guarantee.
Overview
You can find the illustrated parts overview on the fold-out page.
1 Base unit
a Rotary switch b Illuminated ring (operation) c Drive (2 or 3-speed *) d Cable storage compartment
2 Bowl 3 Drive shaft 1 (grey) 4 Drive shaft 2 (black) *
5 Lid 20
a Pusher b Pusher insert
6 Tools
a Tool holder b Universal blade with blade c Kneading hook (plastic) d Stirring whisk 25 e Drive housing for stirring
7 Disc holder
8 Cutting discs 27
a Reversible slicing disc 2g b Reversible shredding disc coarse / fine c Grating disc medium-fine d Grating disc coarse e Potato fritter disc f French fries disc g Asian vegetable disc
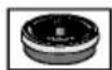
9 Citrus press
a Strainer basket b Pressing cone
10 Juice centrifuge
a Grating container b Filter basket c Lid d Pusher for juice centrifuge
11 Dicer
a Base holder b Catch container c Cutting grid d Slicing disc e Blade guard
f Cutting grid cleaner
12 Universal cutter
a Jug with drive b Lid
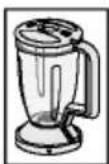
13 Blender
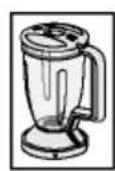
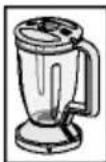
a Blender jug made of Tritan b Blade insert c Lid d Filling opening e Funnel (depending on model)
Parts and operating controls
Important!
The bowl, lid / jug of the universal blender jug are not suitable for the microwave.
Colour coding
The appliance has a 2 or 3-speed (depending on the model). Every setting is identified with a different colour (black, grey and red).
The coding system can also be found on the accessories. The accessory is automatically connected to the
Low speed, black with drive shaft 2
For using the dicer.
Medium speed, grey with drive shaft 1
For using the cutting discs, citrus press and juice centrifuge.
High speed, red without drive shaft
For using the blender and cutter.
Before using the appliance juice centrifuge.



For the first time
Before the new appliance can be used, the blender and universal it must be fully unpacked, cleaned and checked.
Before the new appliance can be used, the blender and its accessories must be fully unpacked, cleaned, and checked.
Caution!
Never operate a damaged appliance!
Remove the base unit and accessories from the packaging unit and dispose of the packing materials. Check that all parts are present and examine them for obvious damages. The rotary switch is used to set the required speed or to switch the appliance on and off. The integrated illuminated switch is used to set the required speed or to switch the appliance on and off during operation. If there is a defect, the appliance must not be operated.
See Fig. A
Thoroughly clean and dry the appliance before using it for the first time. If the appliance has a defect, do not switch it on. See "Cleaning and maintenance".
page 27
Rotary switch with illumination
See Fig. B
During operation, the electronic fuse may trip. If the appliance has a defect, it will no longer switch on and the illumination will not work.
Caution!
Only use the rotary switch to switch the appliance on and off. Switching it on and off by opening the lid will damage the appliance.
Settings
M
Instantaneous switch at maximum speed. Hold switch for required speed.
0/off
Stop / Switch off
min
Operating speed step adjustable from low to high speed.
Pulse
i. Intermittent operation speed. Recommended for e.g. milkshakes in the
Risk of injury!
When operating the appliance, keep hands away from the bowl or filling shaft. Do not insert any objects (e.g. spoons) into the bowl or filling shaft.
Blade
For cutting and chopping
at maximum. Risk of injury!
Do not touch the sharp edges of the blender blade with bare hands.
Cable storage compartment: Always store the appliance with the blade guard. Take hold of the blade guard.
The appliance is equipped with a cable storage compartment. The length of the power cord can be adjusted as required by pulling it out or pushing it back. After use, push the power cord into the storage compartment.
For ingredients which are not to be overmixed (e.g. chocolate chips), use pulse mode.
Storage compartment: Push the power cord back in by jerking it.
Preparation
- Place the base unit on a stable surface. Pull out the power cord to its full length.
Risk of injury!
- Do not insert the mains plug until all preparations for work are complete.
- While operating the appliance, do not reach into the bowl or filling shaft until the appliance has come to a standstill.
- After switching off, wait until the drive has come to a standstill before removing the lid.
Only attach the lid with the push tools / accessories when the drive is at a standstill.
at a standstill.
- Rotate the lid clockwise as far as possible.
Important!
- Do not switch the appliance on unless the mains plug is inserted. Set tools or accessories have been switched to the desired settings completely attached. Adding more ingredients
- The appliance cannot be operated with more ingredients, so unless the bowl has been inserted to 0/off. Remove the pure correctly and closed with the lid and add ingredients through the lug must be fully inserted in the opening of
- the bowl handle. - Only use the rotary switch. The switch can be used for appliance on and off. measuring jug.
- After processing, set the output width
0/off. Disconnect the mains plug.
Emptying the bowl
- Rotate the lid anti-clockwise.
- Take the tool holder with blade or kneading hook out
Remove the tool from the tool holder
- Rotate the bowl anti-clockwise. Empty the bowl.
Clean all parts immediately → “Cleaning and maintenance”
page 27
Do not grasp the sharp blades
the cutting discs. Take hold of the edge only. Do not reach into
the opening. Always use the pusher of the bowl.
tool holder
Reversible slicing disc thick / thin
For slicing fruit and vegetables.
Clean after use. Marking on the reversible slicing disc: "1" for the thick cutting side.
"3" for the thin cutting side.
Stirring whisk
For cream, egg whites, and light dough. Not suitable for solid ingredients.
→ Fig. 田
Caution!
The reversible slicing disc is for slicing hard cheese, bread, and chocolate. Only slice boiled food when it is cold.
- Attach the bowl. Observe marking (∇) when doing so, turn bowl clockwise as far as possible.
- Place the drive shaft on the drive except hard cheese (e.g., Parmesan).
- Insert the stirring whisk, marking on the drive reversible shred housing until it locks into position 02, the coarse shredding side.
- Attach the drive housing to the drive fine shredding side shaft, rotating slightly.
- Add ingredients.
- Attach the lid with the pusher. Observe the marking (/) when doing for shredding nuts. Shred soft
- Rotate the lid clockwise as far as side only.
Grating disc - medium- fine
- Insert the mains plug. Seorthreatrionarryaw potatoes, hard switch to the desired settphrese (e.g. Parmesan), chilled
After processing, set the ndotnarty.s switch to
0/off. Disconnect the mains Calutg on! ■ Clean all parts immedi at they agfrta ngs disc is not suitable →“Cleaning and maintenansoft cheese and cheese slices.
page 27
Grating disc - coarse
For grating raw potatoes e.g. f potato pancakes or dumplings.
Potato fritter disc
For grating raw potatoes for red and potato fritters and for cut vegetables into thick slices.
French fries disc
For slicing raw potatoes for chips
Asian vegetable disc
For slicing fruit and fine strips for Asian
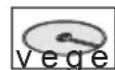
Clean all parts immediately
Vegetables. Doing so prevents residue from drying on. Cleaning and maintenance
Note: Attach french fries disc page A57
vegetable disc with the blade facing up.
Discs suitable for other purposes are available from specialist outlets (see chapter "Special accessories"). Process food and empty the edge of the disc holder.
Pusher with insert
→ Fig.
Note: Add chocolate before switching
and cover with the pusher. After
The pusher can be used in two ways, push down with the pusher.
Variant 1: For e.g. herbs,
Insert the pusher in the opening
leeks, carrots
Citrus press
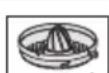
Push down the food to be processed, squeezing juice out of citrus
the pusher insert. fruits, e.g. oranges, grapefruit
Variant 2: For e.g. apples, pears, etc.
Position the pusher insert. The pusher must be completely rotated until both parts are assembled before use.
down the food to be processed with the
pusher.
→ Fig. 6
- Attach the bowl. Observe
marking ( ∇ ) when doing so.
- Attach the bowl. Observe the marking (π/2) when doing so. Rotate the drive shaft on the bowl clockwise as far as possible. Place the strainer basket over
- Place the drive shaft on the bowl. Observe the marking (
- Take the disc out of the packaging. Place the disc on the disc holder. The lug on the disc must be fully inserted. Place the disc on the disc holder with the desired slicing/shredding side face up. Turn the disc holder until the lug engages with the disc. The disc must rest on the bowl handle.
holder so that the drive shaft engages with the disc. Press the on/off switch. Set the mains plug. The disc must rest on the last setting min.
the disc holder. 6. Press one half of the citrus
- Attach the disc holder to the pressing machine. The juice rotating it slightly. the container.
- Attach the lid with the pusher. After processing, set the rotary switch to 0/off. Disconnect the mains plug.
- Rotate the lid clockwise as far as possible. Doing so prevents residue from remaining on all parts immediately.
- Insert the mains plug. Set the switch to the desired setting (see page 27).
- Add the ingredients for sautéing or shredding and push down with the pusher, applying light pressure. Cut 1000 ml fruit juice beforehand if necessary.
After processing, set the rotary switch to
0/off. Disconnect the mains plug.
Juice centrifuge
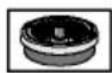
For juicing pip fruit (e.g. apples, pears), soft fruit, pitted stone fruit, vegetables (e.g. carrots, tomatoes).
→Fig.1
- Attach the bowl. Observe the marking (γ/•) when doing so. Rotate the bowl clockwise as far as possible.
- Place the drive shaft on the drive.
- Place the filter basket in the grating container.
- Turn anti-clockwise until it locks into place.
- Place the juice centrifuge in the bowl.
- Attach the lid of the juice centrifuge with the pusher. Observe the marking (ν/•) when doing so.
- Rotate the lid clockwise as far as possible.
- Insert the mains plug. Set the rotary switch to the setting min.
- Add fruit or vegetables to the filling shaft and push down with the pusher, applying light pressure. Cut up beforehand if necessary. After processing, briefly set the rotary switch to the setting max and let the appliance run until the pulp is fully squeezed out. After processing, set the rotary switch to 0/off. Disconnect the mains plug. Clean all parts immediately after use. See "Cleaning and maintenance" on page 27.
Caution!
Empty the bowl in good time:
after processing max. 500 g before the juice reaches the grating container.
Blender
For mixing liquid or semi-solid food, for cutting/chopping raw fruit and vegetables and for pureeing food.
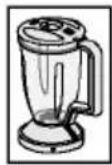
Blender jug made of Tritan
Tritan is an unbreakable plastic with no discernable taste or smell. Blender jugs made of Tritan can be used to process ice cubes and frozen food.
Risk of injury
Never reach into the attached blender! Do not remove/attach the blender until the drive is at a standstill. Do not touch the blades of the blade insert with bare hands.
Risk of scalding!
When processing hot liquids, steam escapes through the funnel in the lid. Add a maximum of 0.4 litres of hot or frothing liquid.
Caution!
Do not expose the blender jug to temperatures above 80°C.
→Fig.
- Attach the blender. Observe the marking (π/2) when doing so. Rotate the blender clockwise as far as possible.
- Add ingredients.
| Processing quantities |
| Solid food | For optimum results 80 g |
| Liquids | max. 1.5 l |
| Hot or frothing liquids | max. 0.4 l |
- Attach the lid and rotate clockwise. The lid lug must be fully inserted in the slot of the blender handle.
Caution!
- Do not operate the blender when empty. The blender will not operate until the lid is screwed on tight.
- Insert the mains plug. Set the rotary switch to the desired setting.
Adding more ingredients
- To add more ingredients, set the rotary switch to 0/off. Remove the lid and add ingredients, or
- remove the funnel and gradually add solid ingredients through the filling opening.
- Pour liquid ingredients through the funnel.
After processing, set the rotary switch to 0/off. Disconnect the mains plug. Clean all parts immediately after use. → "Cleaning and maintenance" see page 27
Tip: To preclean, pour a little water with detergent into the attached blender. Switch to setting M for several seconds. Discard the water and rinse the blender with clean water.
Sample recipe for the blender
Sports drink
- 270 g honey (from the refrigerator, 5°C)
- 5 g cinnamon, 230 g milk. Put the honey and cinnamon in the blender and blend at setting M. After 5 seconds add the milk and blend for 3 seconds.
Note the recommended processing quantities and times. → Fig. 2
Dicer
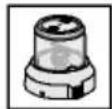
Dicer for cutting food into cubes.
△ Risk of injury from sharp blades/rotating drive!
Never reach into the attached dicer! Do not remove/attach the dicer until the drive is at a standstill.
When disassembling/assembling the dicer, grasp the slicing disc by the plastic stud in the centre only.
Guidelines for usage
The dicer is only suitable for cutting potatoes (raw or boiled), carrots, cucumbers, tomatoes, peppers, onions, bananas, apples, pears, strawberries, melons, kiwifruit, eggs, soft sausage (e.g. mortadella), boiled or fried boneless poultry meat. - Very soft cheese (e.g. mozzarella, sheep's cheese) cannot be processed. In the case of sliced cheese (e.g. Gouda) and hard cheese (e.g. Emmental), the quantity processed in one cycle must not exceed 3 kg. Before processing pip and stone fruit (apples, peaches, etc.), remove the pips or stones. Before processing boiled or fried meat, remove the bones. Food must not be frozen.
Caution!
If these guidelines are not observed, the dicer including the cutting grid and the rotating blade may be damaged. If the dicer is not used as intended, is modified or used improperly, Robert Bosch Hausgeräte GmbH cannot assume liability for any resulting damage. Also excluded is liability for damage (e.g. blunt or deformed blades) which result from processing unapproved food.
Food must not contain any bones, pips or other solid constituents. - Fruit/vegetables should not be too ripe as the juice may otherwise escape. - Leave cooked food to cool down before dicing it as it will then be firmer and the dicing result will be better. The length of the cubes can be influenced by increasing or reducing the pressure on the pusher when pushing down. The dicer will not operate until the lid is screwed on tight.
Select the operating speed depending on the food to be diced.
Caution!
When working with the dicer, never use intermittent operation (Pulse).
Low operating speed (min):
boiled potatoes, carrots, eggs, cucumbers, bananas, strawberries, melons.
Medium operating speed:
raw potatoes and carrots, soft sausage (e.g. mortadella), sliced cheese, hard cheese, peppers, tomatoes, onions, apples, kiwifruit.
→Fig.
- Insert the cutting grid in the base holder. Observe the recesses.
- Insert the slicing disc with the blade guard in the base holder.
- Press in the 3 catches until they engage.
- Place drive shaft 2 on the drive.
Caution!
Always use drive shaft 2 for the dicer (Fig. A - 4).
- Attach the bowl. Observe the marking (π/2) when doing so. Rotate the bowl clockwise as far as possible.
- Place the dicer in the bowl. The marking on the dicer must be exactly aligned with the bowl handle. The dicer must be fully positioned on the drive shaft. If necessary, use the blade guard to turn the cutter disc to the right position.
- Remove the blade guard.
- Attach the lid with the pusher. Observe the marking (ν/•) when doing so.
- Rotate the lid clockwise as far as possible. The lid lug must be fully inserted in the slot of the bowl handle.
- Insert the mains plug. Set the rotary switch to the desired setting.
- Add the food to be processed to the filling shaft and push down with the pusher, applying light pressure. Cut up beforehand if necessary.
Caution!
Empty the bowl in good time:
after processing max. 500 g, before the cubes reach the lower edge of the dicer.
Emptying the bowl
After processing, set the rotary switch to 0/off. Disconnect the mains plug. Rotate the lid anti-clockwise and remove. Fit the blade guard. Take the dicer out of the bowl. Rotate the bowl anti-clockwise and remove. Empty the bowl. Clean all parts immediately after use. → "Cleaning and maintenance" see page 27
Universal cutter
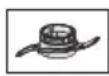
For cutting up small quantities of meat, hard cheese, onions, parsley, garlic, fruit and vegetables. It is not permitted to cut up coffee beans, peppercorns, sugar, poppy seeds and horseradish.
△ Risk of injury
Do not remove/attach the universal cutter until the drive has stopped. Do not touch the blades of the blade insert with bare hands. Never reach into the jug of the universal cutter! To remove chopped food, use a suitable implement (e.g. spoon).
Caution!
The universal cutter will not operate until the lid is screwed on tight.
→Fig.
- Attach the jug. Observe the marking (一) when doing so. Rotate the jug clockwise as far as possible.
- Add ingredients.
- Attach the lid and rotate clockwise. The lid lug must be fully inserted in the slot of the jug.
- Insert the mains plug. Turn the rotary switch to setting M and hold.
Note: The longer the appliance is switched on, the finer the ingredients will be cut. With herbs the desired result may be achieved very quickly.
Switching the appliance on for a short time may be sufficient.
Setting M may be sufficient.
■ After processing, release the switch. Disconnect the mains plug.
After using the appliance, clean it.
After using the appliance, dishwasher as they could be permanently deformed
clockwise and remove. - Take care when handling sh
Remove the rest of the chopped food from the jug using a suitable utensil (e.g. spoon). Grasp the universal blade by the edge of the plastic handle. Clean all parts immediately. Grasp tube cutting discs by the plastic handle. Never grasp the sharp blade. See “Cleaning and maintenance”.
of the dicer insert. Grasp it
by the plastic stud in the c
Cleaning and maintenance
The appliance requires no maintenance. Use a brush to clean the cutting discs. Thorough cleaning will guarantee service life.
service life.
General information
Risk of electric shock!
Unplug the appliance before cleaning.
Clean all parts immediately after use.
This will prevent residues from drying
on and possibly attacking the plastic. Never immerse the base unit in water or hold it under running water. (e.g. essential oils in herbs).
When processing food such as carrots, the dishwasher. Do not and red cabbage, plastic parts may the appliance.
become discoloured. This can now be removed with a few drops of cooking oil, use a little detergent.
oil. Then dry the base unit.
Cleaning the bowl, tools and accessories
It is recommended rinsing under running water immediately after use. Take accessories apart before cleaning. Do this in reverse order as the individual chapters. After cleaning, allow all parts to dry thoroughly or rub dry.
Taking the stirring whisk apart and cleaning the blender
Cleaning
The stirring whisk can be taken apart for dishwasher cleaning. Clean the blade insert in the
→ Fig. M
1. Remove the stirring whisk and take the blade insert apart for cleaning.
- Push in the lug and lift off the gear cover. 1 Turn the
- Remove both gear wheels from the blade insert anti-clockwise housing. Clean carefully with wings. The blade insert will
- After cleaning and drying, reassemble all parts in reverse order. The sealing ring.
Cleaning the juice center if After cleaning and drying,
To clean the juice centrifuge, remove the blade insert.
Filter basket from the grating insert. Prerinse the parts under running water and rotate close to secure. Caution!
Clean the slats of the filter basket carefully so as not to damage them. Insert so that the wing matches up with the mark on the blender jug.
Cleaning the dicer
Taking the dicer apart for cleaning: the blade insert with
→ Fig. N
- Fit the blade guard. It's recommended cleaning the bowl.
- Open the catches. Remove the cutter disc with the blade guard immediately after use. RISK OF INJURY! Possibly attacking the plastic oils in herbs.
Grasp the cutter disc and cubing grid with the plastic part only. Clean in the dishwasher but under running water.
- Remove any remaining pieces of food. Do not leave in water. Using the cutting grid, clean the jug with the drive facing up.
- Force out the cutting grid with the cleaner from below.
Clean the base holder in the dishwasher.
Prerinse all other parts under running water.
Clean parts with a brush.
Troubleshooting
Risk of injury!
Before dealing with any fault, disconnect the mains plug.
Important information:
The illuminated ring (operating indicator) will flash if there is an error, the electronic fuses have tripped, or the appliance has a defect.
Fault:
Appliance is no longer working
Possible cause:
The appliance has been overloaded (e.g. tool jammed by food). The electronic fuse has tripped.
Remedial action:
Set rotary switch to ■. Disconnect the mains plug. Eliminate the cause of the overload. Switch the appliance back on. Dispose of packaging in an environmentally friendly manner. The appliance is labelled in accordance with European Directive 2012/19/EU concerning used electrical and electronic appliances (waste electrical and electronic equipment - WEEE). The guideline determines the framework for the return and recycling of used appliances as applicable throughout the EU.
Possible cause:
An attempt was made to attach the blender to the appliance while
Remedial action:
Set rotary switch to 0/off. ■ Disconnect the mains plug. - Attach the bowl or blender. Switch the appliance back on
Fault:
Appliance does not start.
Possible cause:
Parts not correctly attached completely.
Remedial action:
Set rotary switch to 0/off. These conditions can be ob ■ Disconnect the mains plug he dealer from whom the a ■Attach parts correctly acquired to the bill of sal instructions and close the helip occurred between making an ■ Switch the appliance backt on tagrnn of this guarantee these conditions can be ob It he dealer from whom the air purchanged to the bill of salabel ipocumedetweevn making an t h e t a g r a n s h o f this guarant e
Important information:
If the fault cannot be eliminated, please re-reviewed contact customer service (see customer service addresses at the end of this booklet).
Special accessories
(available from a specialist out included with the appliance) French fries disc (MUZ45PS1) For slicing raw potatoes for ch Asina nnde geatt abl) e disc (MUZ45AG1) Forn sIni cipreg aftin wint, and vegetable s tprpels ofr hAsian vegetable dish Grating disc coarse (MUZ45RS1) For grating raw potatoes e.g. f mncakes or dumplings. Potato fritter disc (MUZ45KP1)
Fordegrating raw potatoes for radafnirdi ttheirs and for cutting fruit into thick slices.
Disposal
in accordance with European Directive 2012/19/EU on waste electrical and electronic equipment. This directive sets out the requirements for the return and recycling of used appliances throughout the EU. Please ask again.
and electronic equipment - The guideline determines the work for the return and recycling of used appliances as applied throughout the EU. Please try again.
specialist retailer about disposal facilities.
The lid is not closed. The guarantee conditions are as defined by our representative in the country in which it is sold.
Spare parts are reserved.
If the fault cannot be eliminated, please contact customer service (see customer service addresses at the end of this booklet).
Attention! Rotating blades.
Compartment derangement of the cord blade

Figure 6
Universal blade
"2" for the coarse grating side
"4" for the fine grating side
4" for the finer side
The whisk is not suitable for
and electronic equipment - WEEE).
This directive sets the framework for
return and recycling of
appliances valid throughout the EU. You
can find more information about
High speed, gray, with drive shaft 1
High speed, red, without drive shaft
Variant 2: E.g., for apples, pears. Set
Kneading hook (plastic)
- To clean the blades and attachments
- PPiv qTaoEIO XUoC OTO DOxEio TPIImuatoC.
Miεp
Tia nV avaeiEyn uypov n avioToixa nIOTepewv TPOPIUW, YIA TO KoIIO/ TpiuO wuw PpouTow kai Laxavikw kai YIA nTV IIOAITOnn qayntw
Kizartmalik patates kesme diski (MUZ45PS1)
Patates hamuru diski (MUZ45KP1)
www.bosch-home.com/tr
www.bosch-yetkiliservisi.com
Tarcza do frytek (MUZ45PS1)
He BCTpOMIyTe pyKn Do 3aBaHTaKyBaJIbHOrO OTBOpY.
Unpo Bitaembo Bac i3 NOKyNkoIO HOBOrOpnilady fipmBosch. DodaTkoByiHopmaio npo NaSy npodukciIO BN3HaNdTe Ha NaShOmy caTi.
3mict
BnKOpncTaHHa npn3HaueHHaM . . . . .
IpaBnlaTexHikn6e3neKeN
CTnCJn orJyD
PepedepuIMBnKOpNCaHHaM
Control elements
Preparation
Requesting a map
Grinding discs
Pulp press
Juicer-centrifuge
Blender
Roller for centrifuge
Cubing
Universal grinder
Price list
Safety instructions
Special accessories
Waste
Warranty conditions
CTnCnI Orla
Po3rophitb CTopiHKn 3 MaJIIOHKAmN.
→MaJIHOHOKA
1 OchoBnI 6Jok npHaNy
a NoboporTHn nepemkau
b CbitnoBekibce
(iHnKatoppo6oOro cTaHy)
c· TpHBOd (2-a6o 3-cTyneHeBn *)
d BicikJnla 3oepiraHna Ka6eIIO
Uaua 203
BaJ npB0da 1 (cipn)
204 BaJI npIbOda 2 (UOpHn) *
Kpnka 205
a·山toBxa· 205
b·BCTaBAKaD0 WToBxa9a
Before starting operation of the new device, it is necessary to completely disassemble the disk grater, wash and check it. Do not put the device into operation if it is damaged! Check the main unit and all attachments for packaging and remove packaging material.
10 Cokobnxmalka-entpnpyra
a NocyDnHa dIe npetepToi mac b ΦinbTp-KoWNK c Kpnwka d トOBxauДЯ COKOBIXIMaIKN-ueHTpnpytn
11 Ky6nKopi3ka*
a OchoBa b ΦikcyBaIbHa cko6a c PizanbHa pewiTka d PizalbHn DnCK e 3axnchniyoxoHoxa
f Pnucptpi JIy OunuHn p3aIbHOi pewiTkn
12 YHbepcaIbHn NoDiPi6HOBaY
a 3 npNBOOM b KpnuKa
13 BneHdep
a Yama 3 TpntaHy b HoxoBa BCTaBka c KpnuKa d 3aBaHTaXyBaIbHn OTBip e BopoHka
Ipeed nepshm BnKOpncTaHHaM
Ybara!
■IpepeBipTe Bci DeTani Ha KOMnJIeKTHiCt b i BnIMI NOsKOJxEHn. → MaHOnOk A ■Пердпершим ВИКОРИСТАнгМ peTeьбо OчИстБе Та ВИСУШITь уci DeТani.
→ «UuueHnma doaIaD» duE. cmop. 212
Pike φpykTn OBOUi TOHKMn CMyKkAmNДЯ npiroTyBaHHO OBOeBux CtpaB a3iatcboKi KyXHi.
Blades for cutting vegetables in the Asian style. Blades sold separately for other models can be purchased at specialized stores (see section "Special accessories").
Installing the pusher
→ Figure F
The pusher can be used in two ways.
Option 1: For example, for cabbage, carrots, or potatoes. Insert the pusher into the feed tube. Push the products with the pusher into the feed tube.
Option 2: For example, for onions or potatoes. Insert the pusher into the feed tube and turn it so that the parts lock together. Push the products with the pusher.
→ Figure
- Install the blade. Pay attention to the marking (1/2). Turn the blade clockwise to the stop.
- Install the drive shaft on the drive.
- Remove the disc from the protective cover. Place the disc on the disc holder. Select the desired slicing/shredding speed. Install the disc on the disc holder so that the lugs on the holder fit into the holes of the disc. The disc must lie flat on the white guides of the holder.
- Install the disc holder on the drive shaft, turning it slightly.
- Install the cover with the feed tube. Pay attention to the marking (∇/●).
- Turn the cover clockwise to the stop.
- Insert the power plug into the outlet. Turn the switch to the desired position.
- Load the products for slicing or shredding; push them slightly with the pusher. If necessary, add more products. After finishing work, turn the switch to the 0/off position. Remove the power plug from the outlet.
Citrus press
Immediately after use, clean all parts. Thanks to your care, the product will last a long time. → "Cleaning and maintenance" see page 212
Warning!
Finish the work, unplug the device, before cleaning or storing the product, let it cool down.
Note: Do not immerse the device in water or rinse it under running water. After cleaning, dry the device.
Citrus press
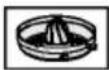
For extracting juice from citrus fruits, such as oranges, grapefruits, and lemons.
Warning!
The citrus press can only be used when fully assembled.
→Juicer
- Install the juicer. Pay attention to the mark (1/2). Turn the juicer clockwise until it stops. 2. Install the drive shaft on the drive.
- Install the juicer cone on the drive shaft. Pay attention to the mark (1/2). Turn the juicer cone clockwise. The juicer cone should fit into the opening on the base.
- Install the pulp container and press it down.
- Insert the power plug into the outlet. Turn the switch to the on position.
- Attach the citrus fruit pulp container to the pulp container. The juice will flow into the bowl. After finishing the work, turn the switch to the off position. Remove the power plug from the outlet. Immediately after use, clean all parts. Thanks to your care, the product will last a long time. → "Cleaning and maintenance" see page 212
ybara!
3BaKaIe Ha pBeHb HAnOBHeHHa. MaKcMaNbHa 06pO6NIOBaha KINbKiCTb: 1000 MnФpyKTOBOrO COKy.
COKOBUNKIMaIka-ueHtpnФuга
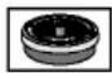
ДЯ BИАВЛОВАнНА COKY 3 HAcIHHEBIX NIOIIB (HAnpNKnAD,Я6nyK, rpyu),ЯiD, KICTOCHOBNX NIOIIB i3 BnDAJIeHOIO KICTOCHOO, OBOUIB (HAnpNKnAD, MOpKBN, NOMIDOpIB).
→ ManIOHOK
- YctaHObitb yawy. 3BepHITb ybary Ha no3HaKy (1/2) . Do ynopy nobepHITb yaSy 3a rOIMHHNKOB0IO cTpiKIO.
- YCTaHOBIT npBODHn BaH Ha npBOd.
- BctabTe pInbTp-KoWnK y nocuHy dna nepeteproI macn. 4.Повертання npOTn rOHHNKOBOI cTPIKN.
- BCTaBTe COKOBHXmAnKy-ueHTpNpyry B aIy.
- YcTaHOBITb KpUkky COKOBHmMaJIKN-ueHTpNpyr pa30m 3I UTOBxAqEm. 3BepHITb yBary Ha No3HaCy (1/2)
- Do ynpy nobephitb kpiuky 3a roHHNKOBOIO CTPIKOO.
- BCTABTE WITENCEbHy BNkky B PO3eTKy. NobepHITb NEpeMnKau y noNoXeHHa min. 3aBaHTaxTeΦpyKTHuOBOUcIBrOpNoBHy,3JIerKa NiIDTuOBxuyOuH uTobXaUeM.3a Heo6XiHocTi 3a3dAnerIb noDpi6HITb npOdykTN.3aBepuoyu np6Oty,HeHaIOBRO NOBepHITb nepemkay y nonOKeHHra maxi daTe npnlaDy nonpaTOBaTH,DOKN BeCb cIK He Bnnde 3 M'AKOTi. 3aBepuBpupo6Ty, noBepHitb nepemukay y nooKeHH 0/off. BnMItb UTencelbHy BuKy 3 po3eKu. Odpa3y nicnBnKOpuctaHnOuNCTbTe Bci Detani. → 4uueHHma doanrdo du. cmop.212
Ybara!
Cboeayacno cnopoxkHouTe yauy:
- 06p06nBmMakcmyM 500r,
- The blades are worn out.
Blender
For blending fruits or hard products, for chopping products and vegetables, for making puree.
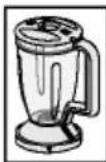
Chopper with lid
The chopper contains a blade without smell and taste. You can put ice cubes and frozen products into the chopper.
Safety during use
It is strictly forbidden to operate the blender without the installed lid. The lid can only be removed/installed when the drive is stationary. It is forbidden to touch the blades with your hands.
Safety for users!
When blending hot products, the lid must be opened to let steam escape. Do not exceed the maximum level of 0.4 liters.
→ Operation
- Install the blender. Pay attention to the mark ( ). Turn the blender clockwise until it stops.
- Add the ingredients.
The universal chopper works only with the lid closed.
→ Operation
- Install the bowl. Pay attention to the mark (1/2). Turn the bowl clockwise until it stops.
- Check the ingredients.
- Install the lid by turning it clockwise. The lid tab should fit into the opening.
- Insert the power plug into the socket. Turn the switch to position M and hold it there.
Note: Before first use, wash the parts that will come into contact with food. The degree of grinding can be adjusted even after a very short time of operation. Short operation time may be sufficient.
After finishing work, release the switch. Remove the power plug from the socket.
Operation
Turn the universal grinder counterclockwise and remove it. Check the universal grinder; ground products will fall into the lid. Remove the lid. Turn the auger counterclockwise and remove it. Remove the grating discs from the device and clean them with an auxiliary tool (such as a brush). Immediately after use, clean all parts. → Cleaning should be done on page 212
Cleaning and Care
The device does not require special maintenance! Regular cleaning guarantees a long service life.
General Instructions
Immediately after use, clean all parts. This prevents food residues from sticking and the spread of odors (for example, from strong oils contained in spices). When processing products such as carrots, cabbage, or plastic elements, staining may occur. Such stains can be removed with a few drops of food oil.
Attention!
- Do not use cleaning agents containing alcohol. Do not use sharp or metal objects. Do not use abrasive sponges or cleaning agents.
- Do not put plastic parts in the dishwasher, as this may cause irreversible deformation! - Clean the filter and chopper carefully to avoid damage.
Risk of injury!
Sharp blades - be careful. - The universal blade can only be held by the plastic handle. - The chopping discs can only be held by the edge. Never touch the sharp blades and the sharp edges of the insert - the cube cutter. The cutting disc can only be held by the plastic handle in the middle! Do not touch the blades of the blender and the universal chopper with your hands. - Clean the blades and the chopping discs with a brush.
Danger of electric shock!
Before cleaning the appliance, pull the plug out of the socket.
Cleaning the base unit
It is forbidden to immerse the base unit in liquid, hold it under running water or put it in the dishwasher. Do not use steam cleaners. If the base unit gets wet, wipe it with a damp cloth. If necessary, use a small amount of mild detergent. After wiping, dry the appliance.
Cleaning the attachments
Immediately after use, rinse all parts under running water. Disassemble the parts before cleaning. To do this, follow the reverse order of the steps described in the relevant sections. After cleaning, let all parts dry well or wipe them dry.
Disassembling the blender jug before cleaning
To clean the blender jug, it can be disassembled.
→ Figure M
- Remove the blender jug from the drive unit.
- Turn the jug and lift the drive cover.
- Remove the gear wheel from the housing. Carefully insert the shaft. 4. After cleaning, reassemble the parts in the reverse order.
Cleaning
Juicer attachment - centrifuge
Ioo6 nouHCTHTCOKOBHXMaJKy-ueHTpn- cyry,3HIMITb fInbTp-KoWNk i3 NocyDnHn dJa nepeTeptoi Macn.
ybara!
Hikon He BnKOpNCTOByIte HOXOBy BCTaBky 6e3 yuiNbHIOBaHa!
UHnueHHyHbepcaIbHoro nOpi6HOBaHa
YHIBePcAhnnoDpi6HOBauchekOMeHnyEcTbcnCTHTN BiDpa3yKnicJ3actocyBaHH.Le 3anobiraepncxahHHo3aIIuKIB npOdyKTiB i po3'idaHHIO nlaCTMaCn (HaapanknaI,niBnINbOM ephiipnx OJI,io MICTaTBc y npnPpabax).
Ua7y 3 npBODOM MInTe He B NocyDoMnHi MaunHia, a NiD npOTOHIO BOIOO 3a DonomoroI OiTKn. He 3aIIuAaTe JexKatNy BoDi!
Дя синноctавteЧу npвodom Doropn.
YcyHeHH HeCnpaBHOCTe
He6e3neka TpaBmyBaHHa!
BnmiTb wTeNceJIbHy BnIky 3 po3eTKn, nepu HIX noUHaTu ycHHeHHa HeCnpaBHOCTi.
BaxKnBa Bka3iBka
Y pa3i nomnkn ynpabHnHn npnaDom, cnpaIouBaHH nEKeTPOHHOr 3anobIXnHa Ka6o deFeKTu npnaNy 6nMa cBtNoBe KInbue (iHnKaTOp po6ooro cTaHy).
HecnpaBHiCTb
PpnaI npnnHnB npaIObATn.
MoxnBa npuHa
It is overloaded (for example, the product has jammed the drive), and the electronic protection has tripped.
Remedy
■Turn the knob to position 0/off. Unplug the power cord from the outlet. Eliminate the cause of the overload. Switch the appliance back on.
Possible cause
An attempt was made to install the bowl in the blender while the appliance was switched on.
Remedy
The part is not installed correctly. The lid is not closed completely.
Remedy
■Turn the knob to position 0/off. Unplug the power cord from the outlet. ■Install the part correctly according to the instructions, close the lid completely. Switch the appliance back on.
Important note
If the fault cannot be eliminated in the manner described, contact the service department (addresses of service centers are given at the end of this document).
Special accessories
(Can be purchased in specialized stores, if not included in the package)
Option 2: For example, for apples, potatoes. Insert the pusher insert into the pusher and turn until both parts are connected to each other. Push the products with the pusher insert.
Figure
- Close the mixing bowl. Note the position of the mark (/). Turn the mixing bowl clockwise until it stops.
- Place the drive shaft onto the drive.
- Remove the disc from the protective housing. Place the disc on the disc holder. Turn the disc to the required side (cutting/grating) facing up. Place the disc on the disc holder so that the disc holder's catches fit into the disc's openings. The disc must lie on the side supports of the disc holder.
- Place the disc holder onto the drive shaft, turning it slightly.
- Install the lid with the pusher. Note the position of the mark (ν/).
- Turn the lid clockwise until it stops.
- Insert the plug into the socket. Set the rotary switch to the required mode.
- Load the products for cutting or grating, gently pushing them with the pusher. If necessary, pre-cut the products. After processing the products, set the rotary switch to the 0/off position. Remove the plug from the socket. Rinse all parts of the appliance immediately after use. This prevents residues from drying on. → "Cleaning and care" see p. 227
Attention!
Finish processing and empty the mixing bowl before the products to be processed reach the lower edge of the disc holder.
Note: Load the chocolate before switching on and push it down with the pusher. After switching on, keep pushing with the pusher.
Citrus juicer
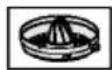
For extracting juice from citrus fruits, e.g., oranges, grapefruits, lemons.
Attention!
Use the juicer only when fully assembled.
Figure 1
- Install the mixing bowl. Take into account the position of the mark (1/2). Turn the mixing bowl clockwise until it stops.
- Install the drive shaft on the drive.
- Install the sieve on the drive shaft. Take into account the position of the mark (1/2). Turn the sieve clockwise. The sieve spout must fit into the slot of the mixing bowl handle.
- Install the juicer cone and press it.
- Insert the plug into the socket. Set the rotary switch to the min position.
- Press the fruit half against the cone. The juice flows into the container. After processing the products, set the rotary switch to the 0/off position. Unplug the plug from the socket. Rinse all parts of the device immediately after use. This way, residues will not dry. See "Cleaning and Care" on page 227.
Attention!
Watch the filling level. Maximum quantity for processing: 1000 ml of fruit juice.
Juicer
For extracting juice from pome fruits (e.g., apples, pears), berries, stone fruits without pits, and vegetables (e.g., carrots, tomatoes).
- Install the mixing bowl. Take into account the position of the marks (). Turn the mixing bowl clockwise until it stops.
- Install the drive shaft on the drive.
- Insert the filter in the form of a basket into the container for the chopped mass. 4. Rotation counterclockwise.
- Insert the juicer into the socket.
- Install the juicer lid with the pusher. Take into account the position of the mark (1/2)
- Turn the lid clockwise until it stops.
- Insert the power plug into the socket. Set the rotary switch to the min mode. Load the fruits into the loading opening of the barrel, slightly pushing them with the pusher. If necessary, pre-cut the products. At the end of the working process, set the rotary switch to the max mode and do not turn off the appliance until all the juice has been extracted without residue.
After processing the products, set the rotary switch to the 0/off position. Remove the power plug from the socket. Clean all parts of the appliance immediately after use. → See "Cleaning and care" on page 227
Attention!
The mixing bowl should be emptied in a timely manner:
- after processing max. 500 g of products,
- before the juice level rises to the capacity of the bowl.
Blender
For blending hot liquids, for chopping/grinding raw fruits and vegetables, for making purees.
Tritan blender jar
Tritan is a durable plastic, neutral in taste and odor. You can blend ice cubes and frozen products in the Tritan blender jar.
Risk of injury is not excluded.
Never put your hands into the installed blender! The blender can only be removed/installed after the drive has stopped. Do not touch the sharp blade insert with bare hands.
Danger of scalding!
When processing hot products in the blender, steam escapes through the opening in the lid. Pour in no more than 0.4 liters of hot, strongly foaming liquids.
Attention!
Do not expose the blender jar to temperatures above 80°C
Figure
- Install the blender. Take into account the position of the mark (1/2) . Turn the blender clockwise until it stops.
- Load the ingredients.
Do not use aggressive cleaning agents containing alcohol or spirits. Do not use metal or sharp-pointed objects, as well as objects with sharp edges.
- Do not use rough cloth for cleaning the device.
Do not wash plastic parts in the dishwasher, as deformation is possible! On the juicer, the filter plates and the basket should be cleaned carefully so as not to damage them.
Danger of injury!
Be careful when handling sharp knives. - The universal knife can only be held by the plastic handle. - The chopping discs can only be held by the edge. - Never touch the sharp knives and the edges of the chopping disc with your hands. When cutting, hold the disc only by the plastic handle in the middle! Do not touch the blender knives and the universal chopper with wet hands. - For cleaning the knives and chopping discs, use a brush.
Danger of electric shock!
Before cleaning, disconnect the power cord from the mains.
Cleaning the main unit
Never immerse the main unit in liquids, do not wash it under running water or in a dishwasher. Do not use steam cleaners. Wipe the main unit with a damp cloth. If necessary, use a small amount of dishwashing liquid. Finally, dry the appliance thoroughly.
Cleaning the mixing bowl, attachments and accessories
Immediately after use, rinse all parts under running water. ■ Before cleaning the attachments, disassemble them. The sequence of actions should be the reverse of the description in the individual sections. ■ After cleaning, carefully dry or wipe all parts dry.
Disassembling the whisk for mixing with the cleaning brush
The whisk for mixing can be disassembled for cleaning.
Figure M
- Remove the whisk from the gear unit.
- Press the button and remove the gear unit cover.
- Remove both gears from the housing. Carefully clean them with a brush.
- After cleaning and drying all parts, reassemble in reverse order.
For the OUNCTK COKOVYH KIMAIKN, remove the filters in the form of a basket with a capacity for the product mass. Rinse the parts thoroughly with water.
Attention!
Before troubleshooting, unplug the device from the power outlet.
Important note:
An error in the operation of the device, the triggering of electronic fuses, or a malfunction of the device is indicated by the illumination of the indicator (operating status).
Malfunction
The device has stopped working.
Possible cause
The device has been overloaded (for example, the attachment is blocked by the product), and as a result, the electronic fuse has tripped.
Troubleshooting
Set the rotary switch to the 0/off position. Unplug the power cord from the outlet. Eliminate the cause of the overload. ■ Continue operating the device.
Possible cause
An attempt was made to install the mixing bowl or blender on the device while it was turned on.
Troubleshooting
Set the rotary switch to position 0/off. Pull the mains plug out of the socket. Install the mixer tap or shower. ■ Continue operating the appliance.
Fault
The appliance does not switch on.
Possible cause
The parts are installed incorrectly.
The lid is not closed completely.
Remedy
Set the rotary switch to position 0/off. Pull the mains plug out of the socket. Install the parts correctly according to the instructions and close the lid completely. ■ Continue operating the appliance.
Important note:
If you have not been able to rectify the fault in this way, contact the service department (see addresses of service centers at the end of this brochure).
Special
accessories
(available in specialized stores, if not included in the delivery)
24-hour service hotline*: 8 (800) 200-29-61
Official website on the Internet: www.bosch-home.ru
A list of authorized service centers, as well as all information on service, is available on the official website on the Internet: www.bosch-home.ru.
We recommend that you use the services of only authorized service centers.
Original accessories and care products for Bosch household appliances can be purchased in our online store: www.bosch-home.ru/store. You can familiarize yourself with the terms of delivery on the website. You can also purchase original accessories and care products at authorized service centers.
1. Product
- Model
Items 1-2 should be filled in only if the data is not contained in the purchase documents of the product (cash receipt and/or sales receipt, sales receipt).
3. This warranty applies to small household appliances of the Bosch brand: coffee makers, coffee machines, coffee grinders, scales, kitchen combines, mixers, vacuum cleaners, cutters, toasters, irons, hair dryers, hair straighteners, electric shavers, juicers, grinders, blenders, ironing boards, hair clippers, floor scales, irons, steam stations, ironing boards and similar products.

- Dear Sirs, we inform you that confirmation of conformity of our products to the mandatory requirements in accordance with the legislation is carried out in the form of mandatory certification and declaration of conformity.
Information on mandatory confirmation of conformity of products, including data on the certificate of conformity number (declaration of conformity) and its validity period, can be obtained from LLC "BSH Household Appliances".
The manufacturer is BSH Hausgerate GmbH, address: Carl-Wery-Str. 34, 81739 Munich, Germany (BSH Hausgerate GmbH, Carl-Wery-Str. 34, 81739 Munchen, Germany).
The organization that performs the functions of a foreign manufacturer, authorized by the manufacturer on the basis of an agreement with it, is LLC "BSH Household Appliances", 198515, St. Petersburg, Peterhof, st. Karl Sipnesa, 1, letter A, and in Moscow: 119071, st. Malaya Kaluzhskaya, 1, phone (495) 737-2777, fax (495) 737-2798.
- Mandatory information on the technical characteristics of the device is given on the nameplate of the device or on its label and/or in the accompanying documentation.
6. Accessories and care products
For trouble-free operation of your appliance and care for it, we recommend using only original accessories and care products. Original accessories are developed by the manufacturer, they are ideally suited specifically for your appliance. Original accessories and care products meet the highest quality requirements of the Bosch brand, they undergo factory tests to ensure maximum reliability of operation. For all questions related to accessories and care products for your household appliance, you can contact authorized service centers or by phone of the support service.
7. Manufacturer's warranty
This product is manufactured in accordance with the legislation of the Russian Federation with a warranty period of 1 year. For products purchased in the Republic of Belarus, if a warranty card was issued at the time of purchase, the warranty conditions that do not contradict the legislation of the Republic of Belarus apply.
8. Attention! Important information for the consumer
This appliance is intended for use exclusively in household, domestic, and similar non-commercial applications, not related to entrepreneurial activity, to satisfy household needs in a family, institution, or organization. Use of the appliance in conditions other than those specified above is a violation of the rules of operation.
The nameplate with the model and serial number is on the appliance! Please make sure it is present and keep it on the appliance for the entire service life of the appliance. Removing the nameplate leads to decommissioning of the appliance and possible violations of its operating rules.
The manufacturer is not responsible for defects in the appliance if the service center determines that they arose after the transfer of the appliance to the consumer due to violation of the rules of use, transportation, storage, exposure to third parties, force majeure (fire, natural disasters, etc.), ingress of household insects and rodents, exposure to external factors, as well as due to significant violations of technical requirements specified in the operating instructions, including instability of electrical network parameters established by GOST 32144-2013.
To confirm the date of purchase of the appliance during warranty repair or presentation of other claims provided by law, we kindly ask you to keep documents about the purchase (receipt, cash receipt, other documents confirming the date and place of purchase).
Failure to follow the recommendations and instructions contained in the operating instructions (rules of use) may lead to malfunctions in the operation of the appliance and its maintenance.
Faulty appliances during the warranty period are repaired free of charge or replaced with new ones. The decision on the feasibility of replacement or repair remains with the service centers.
9. Service information
After the warranty period expires, our service centers and workshops of our partners are always ready to offer you their services. The list of addresses of authorized service centers is on the official website on the Internet: www.bosch-home.ru.
The service life of small household appliances (except for kitchen machines and vacuum cleaners) is 2 years. The service life of kitchen machines and vacuum cleaners is 5 years. The service life of the product is calculated from the date of its purchase, or if it is impossible to determine, from the date of manufacture of the product indicated on the nameplate of the product in accordance with the manufacturer's standard. The date of manufacture is marked as FD MM, where YY is the year of manufacture (e.g., 1920), and MM is the month of manufacture. To determine the year of manufacture of the appliance, add the number YY to 1920.
*Free round-the-clock telephone for calls on the territory of the Russian Federation.
Information about household appliances manufactured under the control of BSH Hausgeräte GmbH, Carl-Wery-Str. 34, 81739 Munich, Germany, in accordance with the requirements of the Federal Law of the Russian Federation dated November 23, 2009 No. 261-FZ, legislation on technical regulation, and legislation on consumer protection of the Russian Federation.
Products: juicers, mixers, blenders, knives, food processors, meat grinders, slicers, shredders.
Trademark: Bosch
ATTENTION! The product range is constantly updated. Technical characteristics of products, including energy efficiency, are constantly improved. Products undergo mandatory certification for compliance in accordance with current legislation. Information about the details of current certificates of conformity and their validity periods, current information about the class and characteristics of energy efficiency of products, information about the current product range can be obtained from the organization performing the functions of the supplier and manufacturer on the territory of the Russian Federation: LLC "BSH Household Appliances", 198515, St. Petersburg, Gorelovo, st. Karla Simensa, d. 1, lit. A, branch in Moscow, 119071, st. Malaya Kaluzhskaya, d. 15, tel. (495) 737-2777, fax (495) 737-2798.
The company LLC "BSH Household Appliances", 198515, St. Petersburg, Gorelovo, st. Karla Simensa, d. 1, lit. A, branch in Moscow, 119071, st. Malaya Kaluzhskaya, d. 15, tel. (495) 737-2777, fax (495) 737-2798, carries out its activities to confirm the conformity of products with the requirements of the manufacturer on the unified customs territory of the Eurasian Economic Union in accordance with current technical regulations, as an authorized manufacturer, and also fulfills the requirements provided for by Federal Law No. 184-FZ "On Technical Regulation" for a person performing the functions of a foreign manufacturer on the territory of the Russian Federation.
The importer into the Russian Federation of products certified as serial production is LLC "BSH Household Appliances", 198515, St. Petersburg, Gorelovo, st. Karla Simensa, d. 1, lit. A, branch in Moscow, 119071, st. Malaya Kaluzhskaya, d. 15, tel. (495) 737-2777.
The organization indicated on the product in the product identification signs and carrying out the placement of products on the market of the European Union is Robert Bosch Hausgeräte GmbH, Carl-Wery-Str. 34, 81739 Munich, Germany (Robert Bosch Hausgeräte GmbH, Carl-Wery-Str. 34, 81739 München, Germany).
The original manufacturer (manufacturer) carrying out the production of products on its own behalf and responsible for their compliance with the requirements of the relevant technical regulations is BSH Hausgeräte GmbH, Carl-Wery-Str. 34, 81739 Munich, Germany (BSH Hausgeräte GmbH, Carl-Wery-Str. 34, 81739 München, Germany).
During transportation, loading, unloading, and storage of products, in addition to the instructions set forth in the operating instructions, the following requirements must be observed:
It is forbidden to subject the product to significant mechanical loads that could lead to damage to the product or violation of its packaging.
It is necessary to avoid getting moisture on the product packaging.
Before storing products that have been in use at negative temperatures, it is necessary to ensure that there is no water in the product.
The product is intended for use at temperatures above 0°C density.
Before starting operation of the product, if it has been under the influence of negative temperature for a long time, it must be kept at room temperature for several hours.
The rules for the sale of products are determined by retail enterprises in accordance with the requirements of current legislation.
Instructions for the disposal of products are contained in the operating instructions and can be clarified by municipal executive authorities.
Products manufactured during the validity period of the conformity certificate, this certificate is valid for its supply, sale and use (application) during the service life established in accordance with Article 18 of the Law of the Russian Federation "On Protection of Consumer Rights". The service life for products is indicated by the manufacturer in the paragraph "Information about the manufacturer, warranty and service maintenance".
The product can be identified by the product marking applied to the product, packaging and (or) contained in the operational documents. In accordance with the internal standard of the manufacturer, household appliances are identified according to the following scheme:
E-Nr. /
The material number is a unique digital designation of the product of no more than 10 characters, used for marking (identification or model) of household appliances of the Bosch brand. The material number (model) is indicated between the code word E-Nr and the slash /
The service index is a unique designation assigned to the product during the production process and used by the service department.
Operational documents are developed for a unified range of products of a wide assortment, therefore the manufacturer provides for the indication of the trade designation of the product in the operational documents in abbreviated form, as well as partially, in the conditions that this allows to determine the belonging of this operational document to a specific household appliance, its accessories and the operational document. Planned and ongoing verification of the conformity of the characteristics of household appliances with the provisions contained in the operational documents attached to it is carried out by analyzing the information presented in the operational documents.
The composition of the operational documents provided by the manufacturer for the product may include general information, instructions (manual) for operation, information about the conditions of warranty and service maintenance.
Marking of products is carried out by the manufacturer on the nameplate of the device, on the packaging label, directly on the packaging of the device, and can also be done in other ways that ensure accessible and visual presentation of information about the device at points of sale.

Products that have passed the conformity assessment procedure in accordance with the requirements of the technical regulations of the Customs Union or the technical regulations of the Eurasian Economic Union are marked with a single mark of product circulation on the market of the member states of the Customs Union (Eurasian Economic Union).
The product complies with the following technical regulations of the Customs Union:
TR CU 020/2011 Electromagnetic compatibility of technical equipment - TR CU 004/2011 Safety of low-voltage equipment - TR EAEU 037/2016 On restricting the use of hazardous substances in electrical engineering and radio electronics products from the date of its entry into force
Operational documents for the product are made in Russian. Operational documents in the state languages of the member states of the Eurasian Economic Union, different from Russian, if necessary, can be obtained free of charge from the manufacturer or the authorized organization of the corresponding member state of the Eurasian Economic Union.
Information about the product configuration is presented in the trade offers, can be requested by phone toll-free hotline (800) 200-2961, and is also available on the Internet on the manufacturer's website http://www.bosch-home.ru
| Toprboe
Obnoa
Hne | Anp6a-
UHOHb#
TIN | CepTNΦKAT COOTBETBTH | CTPAN-
M3GTOBNI-
TEB |
| Рertnctpaunon-
HbHOMER | ДаТа
Вьдчы | ДуСБУЕТ
До | | |
| SOKOBKIMANKI |
| MCP3000 CNP3 C-DE.AR46.B.73451 08.02.2016 | 07.02.2016 | 02.201 | CNOBENH | | | |
| MES25A0 CNJ03 C-DE.AR46.B.73451 08.02.2016 | 16.07.02.201 | 2021 | Ktani | | | |
| MES25C0 CNJ03 C-DE.AR46.B.73451 08.02.2016 | 16.07.02.201 | 2021 | Ktani | | | |
| MES25G0 CNJ03 C-DE.AR46.B.73451 08.02.2016 | 16.07.02.201 | 2021 | Ktani | | | |
| MES3500 CNJ03 C-DE.AR46.B.73451 08.02.2016 | 16.07.02.201 | 2021 | Ktani | | | |
| MES4000 CNC04 C-DE.AR46.B.73451 08.02.2016 | 07.02.2021 | 1 | Ktani | | | |
| MES4010 CNC05 C-DE.AR46.B.73451 08.02.2016 | 07.02.2021 | 21 | Ktani | | | |
| Pezhni |
| MAS4000W CNAS11ST1 C-DE.AR46.B.73634 19.02.2016 | 02.2016 18.02.2021 | CIOBENH | | | | |
| MAS4104W CNAS11EV1 C-DE.AR46.B.73634 19.02.2016 | 02.2016 18.02.2021 | CIOBENH | | | | |
| MAS4201N CNAS11ST1 C-DE.AR46.B.73634 19.02.2016 | 18.02.2021 | 2021 | Tyr | | | |
| MAS4601N CNAS11EV1 C-DE.AR46.B.73634 19.02.2016 | 18.02.2021 | 2021 | Tyr | | | |
| MAS6151M CNAS12 C-DE.AR46.B.73634 19.02.2016 | 18.02.2021 | CIOBENH | | | | |
| MAS6151R CNAS12 C-DE.AR46.B.73634 19.02.2016 | 18.02.2021 | 2021 | CIOBENH | | | |
| MAS6200N CNAS12 C-DE.AR46.B.73634 19.02.2016 | 18.02.2021 | 2021 | Tyr | | | |
| MAS9101N AS9ST C-DE.AR46.B.73634 19.02.2016 | 18.02.2021 | 2021 | Tyr | | | |
| MAS9454M AS9ST C-DE.AR46.B.73634 19.02.2016 | 18.02.2021 | 2021 | CIOBENH | | | |
| MAS9555M AS10EH CN-DE.AR46.B.73634 19.02.2016 | 18.02.2021 | 2021 | CIOBENH | | | |
| Мнксрь,блendрь,нзмельчтели |
| MFQ22100 CNHR30 C-DE.AR46.B.73649 17.08.2016 | 08.2021 | CIOBENH | | | | |
| MFQ2210D CNHR30 C-DE.AR46.B.73649 17.08.2016 | 08.2021 | CIOBENH | | | | |
| MFQ2210P CNHR30 C-DE.AR46.B.73649 17.08.2016 | 18.02.2021 | CIOBENH | | | | |
| MFQ2210Y CNHR30 C-DE.AR46.B.73649 17.08.2016 | 18.02.2021 | CIOBENH | | | | |
| MFQ24200 CNHR30 C-DE.AR46.B.73649 17.08.2016 | 18.02.2021 | CIOBENH | | | | |
| MFQ2420B CNHR30 C-DE.AR46.B.73649 17.08.2016 | 18.02.2021 | CIOBENH | | | | |
| MFQ3010 CNHR19 C-DE.AR46.B.73034 30.12.2015 | 29.12.2015 | 29.12.2020 | | | | |
| MFQ3020 CNHR19 C-DE.AR46.B.73034 30.12.2015 | 29.12.2015 | 29.12.2020 | | | | |
| MFQ3030 CNHR19 C-DE.AR46.B.73034 30.12.2015 | 29.12.2015 | 29.12.2020 | | | | |
| MFQ3520 CNHR17 C-DE.AR46.B.73034 30.12.2015 | 29.12.2015 | 29.12.2020 | | | | |
| MFQ3555 CNHR18 C-DE.AR46.B.73034 30.12.2015 | 29.12.2015 | 29.12.2020 | | | | |
| MFQ36300D CNHR27 C-DE.AR46.B.73034 30.12.2015 | 29.12.2015 | 29.12.2020 | | | | |
| MFQ36300I CNHR27 C-DE.AR46.B.73034 30.12.2015 | 29.12.2015 | 29.12.2020 | | | | |
| MFQ36300Y CNHR27 C-DE.AR46.B.73034 30.12.2015 | 29.12.2015 | 29.12.2020 | | | | |
| MFQ36300Z CNHR27 C-DE.AR46.B.73034 30.12.2015 | 29.12.2015 | 29.12.2020 | | | | |
| MFQ36300Y CNHR27 C-DE.AR46.B.73034 30.12.2015 | 29.9.12.2020 | CIOBENH | | | | |
| MFQ36300O CNHR27 C-DE.AR46.B.73034 30.12.2015 | 29.9.12.2020 | CIOBENH | | | | |
| MFQ36300Y CNHR27 C-DE.AR46.B.73034 30.12.2015 | 29.9.12.2020 | CIOBENH | | | | |
| MFQ36300Y CNHR27 C-DE.AR46.B.73034 30.12.2015 | 29.9.1.2020 | CIOBENH | | | | |
| MFQ36300Y CNHR27 C-DE.AR46.B.73034 30.12.2015 | 29.9.1.2020 | CIOBENH | | | | |
| MFQ36300Y CNHR27 C-DE.AR46,B.73034 30.12.2015 | 29.9.1.2020 | CIOBENH | | | | |
| MFQ36300Y CNHR27 C-DE.AR46.B.73034 30.12.2015 | 29.9.1.2020 | CIOBENH | | | | |
| MFQ36300Y CNHR27 C-DE.AR46.B.73034 30.12.2015 | 29.9.1.2020 | CIOBENH | | | | |
| MFQ36300Y CNHR27 C-DE.AR46.B.73034 30.12.2 | 29.9.1.2020 | CIOBENH | | | | |
| MFQ36300Y CNHR27 C-DE.AR46.B.73034 30.12.2 | 29.9.1.2020 | CIOBENH | | | | |
| MFQ36300Y CNHR27 C-DE.AR46 B.73034 30.12 | 29.9.1.2020 | CIOBENH | | | | |
| MFQ36300Y CNHR27 C-DE.AR46 B.73034 30.12 | 29.9.1.2020 | CIOBENH | | | | |
| MFQ36300Y CNHR27 C-DE.AR46 B 73034 30.12 | 29.9.1.2020 | CIOBENH | | | | |
| MFQ36300Y CNHR27 C-DE.AR46 B.73034 30.12 | 29.9.1.2020 | CIOBENH | | | | |
| MFQ36300Y CNHR30 C-DE.AR46.B.73034 30.12 | 29.9.1.2020 | CIOBENH | | | | |
| MFQ36300Y CNHR30 C-DE.AR46.B.73034 30.12 | 29.9.1.2020 | CIOBENH | | | | |
| MFQ36300Y CNMR1C NMR1C NMR1C NMR1C NMR1C NMR1C NMR1C NMR1C NMR1C NMR1C NMR1C NMR1C NMR1C NMR1C NMR1C NMR1C NMR1C NMR1C NMR1C NMR1C NMR1C NMR1C NMR1C NMR1C NMR1C NMR1C C-DE.AR46.B.73592 17.02.2016 | 29.016 18.02.2021 | 28.01.2021 | CIOBENH | | | |
| MFQ36300 CNMR1C NMR1C NMR1C NMR1C NMR1C NMR1C NMR1C NMR1C NMR1C NMR1C NMR1C NMR1C NMR1C NMR1C NMR1C NMR1C NMR1C NMR1C NMR1C NMR1C NMR1C NMR1C NMR1C NMR1C NMR1c NMR1C NMR1C NMR1C NMR1C NMR1C NMR1C NMR1C NMR1C NMR1C NMR1C NMR1C NMR1C NMR1C NMR1C NMR1C NMR1C NMR1C NMR1C NMR1C NMR1C NMR1C NMR1C NMR1C NMR1C NMR1cNMR1C NMR1C NMR1C NMR1C NMR1C NMR1C NMR1C NMR1C NMR1C NMR1C NMR1C NMR1C NMR1C NMR1C NMR1C NMR1C NMR1C NMR1C NMR1C NMR1C NMR1C NMR1C NMR1C NMR1C NMR1C nMR1C NMR1C NMR1C NMR1C NMR1C NMR1C NMR1C NMR1C NMR1C NMR1C NMR1C NMR1C NMR1C NMR1C NMR1C NMR1C NMR1C NMR1C NMR1C NMR1C NMR1C NMR1C NMR1C NMR1C NMR1C cNMR1C NMR1C NMR1C NMR1C NMR1C NMR1C NMR1C NMR1C NMR1C NMR1C NMR1C NMR1C NMR1C NMR1C NMR1C NMR1C NMR1C NMR1C NMR1C NMR1C NMR1C NMR1C NMR1C NMR1C NMR1c C-DE.AR46.B.73592 17.02.2016 | 28.01.2021 | CIOBENH | | | | |
| MFQ36300 CNMR1C NMR1C NMR1C NMR1C NMR1C NMR1C NMR1C NMR1C NMR1C NMR1C NMR1C NMR1C NMR1C NMR1C NMR1C NMR1C NMR1C NMR
CNMR1C NMR1C NMR1C NMR1C NMR1C NMR1C NMR1C NMR1C NMR1C NMR1C NMR1C NMR1C NMR1C NMR1C NMR1C NMR1C NMR1C NMR1C NMR1C NMR1C NMR1C NMR1C NMR1C NMR1C NMR1C
CNMR1C NMR1C NMR1C NMR1C NMR1C NMR1C NMR1C NMR1C NMR1C NMR1C NMR1C NMR1C NMR1C NMR1C NMR1C NMR1C NMR1C NMR1C NMR1C NMR1C NMR1C NMR1C NMR1C NMR1C NMR
CNMR1C NMR1C NMR1C NMR1C NMR1C NMR1C NMR1C NMMR1C NMR1C NMR1C NMR1C NMR1C NMR1C NMR1C NMR1C NMR1C NMR1C NMR1C NMR1C NMR1C NMR1C NMR1C NMR1C NMR1C NMR1C NMR1C NMR1C NMR1C NMR1C NMR1C NMR1C NMR1C NMMR1C NMR1C NMR1C NMR1C NMR1C NMR1C NMR1C NMR1C NMR1C NMR1C NMR1C NMR1C NMR1C NMR1C NMR1C NMR1C NMR1C NMR1c NMR1C NMR1C NMR1C NMR1C NMR1C NMR1C NMR1C NMMR1C NMR1C NMR1C NMR1C NMR1C NMR1C NMR1C NMR1C NMR1C NMR1C NMR1C NMR1C NMR1C NMR1C NMR1C NMR1C NMR1C NMR
CNMR1C NMR1C NMR1C NMR1C NMR1C NMR1C NMR1C NMR
CNMR1C NMR1C NMR1C NMR1C NMR1C NMR1C NMR1C NMR
CNMR1C NMR1C NMR1C NMR1C NMR
CNMR1C NMR1C NMR1C NMR
CNMR1C NMR1C NMR
CNMR1C NMR
CNMR1C NMR
CNMR1C NMR
CNMR1C NMR
CNMR1C NMR
CNMR1C NMR
CNMR1C NMR
CNMR1C NMR
CNMR1C NMR
CNMR1C NMR
CNMR1C NMR
CNMR1C NMR
CNMR1C NMR
CNMR1C NMR
CNMR
CNMR
CNMR
CNMR
CNMR
CNMR
CNMR
CNMR
CNMR
CNMR
CNMR
CNMR
CNMR
CNMR
CNMR
CNMR
CNMR
CNMR
CNMR
CNMR
CNMR
CNMR
CNMR
CNMR
CNMR
CNMR
CNMR
CNMR
CNMR
CNMR
CNMR
CNMR
CNMR
CN MR
CNMR
CNMR
CNMR
CNMR
CNMR
CNMR
CNMR
CNMR
CNMR
CNMR
CNMR
CNMR
CNMR
CNMR
CNMR
CNMR
CNMR
CNMR
CNMR
CNMR
CNMR
CNMR
CNMR
CNMR
CNMR
CNMR
CNMR
CNMR
CNMR
CNMR
CNMR
CNMR
CNMR | | | | | | |
| Toproboe
obsohaue-
Hnne | Anpoba-
zouhien
THN | Ceptnk#katacooTBeCTBn | CTPAN-
H3ROTOB-
TE |
| Ретистраць�-
нь Homeр | Дау
Быдч | Демосту
До |
| Mikcebp,белд;
псмьг:
ньсmьр:
Комбайы | MSM6B250 CNR11 C-DE | A46.B.73592 17.02.20 | 16.16.02.20 | 1 CnoBENIA | |
| MSM6B300 | CNHR12 | C-DE.A46.B.73592 | 17.02.2016 16 | 02.2021 CnoBENIA | |
| MSM6B500 | CNHR12 | C-DE.A46.B.73592 | 17.02.2016 16 | 02.2021 CnoBENIA | |
| MSM6B700 | CNHR12 | C-DE.A46.B.73592 | 17.02.2016 16 | 02.2021 CnoBENIA | |
| MSM87130 CNHR28 | C-DE.A46.B.73592 17.02.20 | 2016.16.02.20 | 021 CnoBENIA | | |
| MSM87140 CNR28 | C-DE.A46.B.73592 17.02.20 | 16.16.02.20 | 1 CnoBENIA | | |
| MSM87160 CNR28 | C-DE.A46.B.73592 17.02.20 | 16.16.02.20 | 1 CnoBENIA | | |
| MSM87165 CNHR28 | C-DE.A46.B.73592 17.02.20 | 16.16.02.20 | 1 CnoBENIA | | |
| MSM87180 CNHR28 | C-DE.A46.B.73592 17.02.20 | 16.16.02.20 | 021 CnoBENIA | | |
| MSM881X1 | CNHR29 | C-DE.A46.B.73592 | 17.02.2016 16 | 02.2021 CnoBENIA | |
| MSM881X2 | CNHR29 | C-DE.A46.B.73592 | 17.02.2016 16 | 02.2021 CnoBENIA | |
| KxhoonbIe KOMbAHIIb |
| MCM3100W | CNCM12 | C-DE.A46.B.73522 | 12.02.2016 | 11.02.2021 | CnoB |
| MCM3110W | CNCM12 | C-DE.A46.B.73522 | 12.02.2016 | 11.02.2021 | CnoB |
| MCM3200W | CNCM12 | C-DE.A46.B.73522 | 12.02.2016 | 11.02.2021 | CnoB |
| MCM3201B | CNCM12 | C-DE.A46.B.73522 | 12.02.2016 | 11.02.2021 | CnoB |
| MCM3401M | CNCM12 | C-DE.A46.B.73522 | 12.02.2016 | 11.02.2021 | CnoB |
| MCM3501M | CNCM12 | C-DE.A46.B.73522 | 12.02.2016 | 11.02.2021 | CnoB |
| MCM4000 | CNCM20 | C-DE.A46.B.73522 | 12.02.2016 | 11.02.2021 | CnoB |
| MCM4100 | CNCM20 | C-DE.A46.B.73522 | 12.02.2016 | 11.02.2021 | CnoB |
| MCM4250 | CNCM21 | C-DE.A46.B.73522 | 12.02.2016 | 11.02.2021 | CnoB |
| MCM62020 | CNCM30 | C-DE.A46.B.73522 | 12.02.2016 | 11.02.2021 | CnoB |
| MCM64051 | CNCM30 | C-DE.A46.B.73522 | 12.02.2016 | 11.02.2021 | CnoB |
| MCM64085 | CNCM30 | C-DE.A46.B.73522 | 12.02.2016 | 11.02.2021 | CnoB |
| MCM68840 | CNCM30 | C-DE.A46.B.73522 | 12.02.2016 | 11.02.2021 | CnoB |
| MCM68885 | CNCM30 | C-DE.A46.B.73522 | 12.02.2016 | 11.02.2021 | CnoB |
| MCM68885 | CNCM30 | C-DE.A46.B.73522 | 12.02.2016 | 11.02.2021 | Cno |
| MCM64406 | CNUM55T | C-DE.A46.B.73522 | 12.02.2016 | 11.02.2021 | CnoB |
| MCM64426 | CNUM55T | C-DE.A46.B.73522 | 12.02.2016 | 11.02.2021 | CnoB |
| MCM64657 | CNUM55T | C-DE.A46.B.73522 | 12.02.2016 | 11.02.2021 | CnoB |
| MUM54720 | CNUM55T | C-DE.A46.B.73522 | 12.02.2016 | 11.02.2021 | CnoB |
| MUM54920 | CNUM55T | C-DE.A46.B.73522 | 12.02.2016 | 11.02.2021 | CnoB |
| MUM54D00 | CNUM55T | C-DE.A46.B.73522 | 12.02.2016 | 11.02.2021 | CnoB |
| MUM54880 | CNUM55T | C-DE.A46.B.73522 | 12.02.2016 | 11.02.2021 | CnoB |
| MUM52131 | CNUM50 | C-DE.A46.B.73522 | 12.02.2016 | 11.02.2021 | CnoB |
| MUM54020 | CNUM51 | C-DE.A46.B.73522 | 12.02.2016 | 11.02.2021 | CnoB |
| MUM54240 | CNUM51 | C-DE.A46.B.73522 | 12.02.2016 | 11.02.2021 | CnoB |
| MUM54620 | CNUM51 | C-DE.A46.B.73522 | 12.02.2016 | 11.02.2021 | CnoB |
| MUM54720 | CNUM51 | C-DE.A46.B.73522 | 12.02.2016 | 11.02.2021 | CnoB |
| MUM54920 | CNUM51 | C-DE.A46.B.73522 | 12.02.2016 | 11.02.2021 | CnoB |
| MUM54D00 | CNUM51 | C-DE.A46.B.73522 | 12.02.2016 | 11.02.2021 | CnoB |
| MUM54G00 | CNUM51 | C-DE.A46.B.73522 | 12.02.2016 | 11.02.2021 | CnoB |
| MUM54100 | CNUM51 | C-DE.A46.B.73522 | 12.02.2016 | 11.02.2021 | CnoB |
| MUM54240 | CNUM51 | C-DE.A46.B.73522 | 12.02.2016 | 11.02.2021 | C noB |
| MUM54640 | CNUM51 | C-DE.A46.B.73522 | 12.02.2016 | 11.02.2021 | C noB |
| MUM54650 | CNUM51 | C-DE.A46.B.73522 | 12.02.2016 | 11.02.2021 | C noB |
| MUM54720 | CNUM51 | C-DE.A46.B.73522 | 12.02.2016 | 11.02.2021 | C noB |
| MUM54820 | CNUM51 | C-DE.A46.B.73522 | 12.02.2016 | 11.02.2021 | C noB |
| MUM54920 | CNUM51 | C-DE.A46.B.73522 | 12.02.2016 | 11.02.2021 | C noB |
| MUM54940 | CNUM51 | C-DE.A46.B.73522 | 12.02.2016 | 11.02.2021 | C noB |
| MUM54950 | CNUM51 | C-DE.A46.B.73522 | 12.02.2016 | 11.02.2021 | C noB |
| MUM54960 | CNUM51 | C-DE.A46.B.73522 | 12.02.2016 | 11.02.2021 | C noB |
| MUM54970 | CNUM51 | C-DE.A46.B.73522 | 12.02.2016 | 11.02.2021 | C noB |
| MUM54980 | CNUM51 | C-DE.A46.B.73522 | 12.02.2016 | 11.02.2021 | C noB |
| MUM54990 | CNUM51 | C-DE.A46.B.73522 | 12.02.2016 | 11.02.2021 | C noB |
| MUM55000 | CNUM51 | C-DE.A46.B.73522 | 12.02.2016 | 11.02.2021 | C noB |
| MUM55000 | CNUM51 | C-DE.A46.B.73522 | 12.02.2016 | 11.02.2021 | CnoB |
| MUM55000 | CNUM51 | C-DE.A46.B.73522 | 12.02.2016 | 11.02.2021 | C noB |
| MUM55000 | CNUM51 | C-DE.A46.B.73522 | 12.02.2016 | 11 02. 2021 | C noB |
| MUM55000 | CNUM51 | C-DE.A46.B.73522 | 12.02.2016 | 11 02. 2021 | C noB |
| MUM55000 | CNUM51 | C-DE.A46.B.73522 | 12.02 2016 | 11 02. 2021 | C noB |
| MUM55000 | CNUM51 | C-DE.A46.B.73522 | 12.02 2016 | 11 02. 2021 | C noB |
| MUM55000 | CNUM51 | C-DE.A46.B 73522 | 12.02 2016 | 11 02. 2021 | C noB |
| MUM55000 | CNUM51 | C-DE.A46.B.73522 | 12.02 2016 | 11 02. 2021 | C noB |
| MUM55000 | CNUF51B | C-DE.A46.B.73558 | 16.02.2016 | 15.02. 2021 | C noB |
| MUM55000 | KIM13 | C-DE.A46.B.73558 | 16.02.2016 | 15.02. 2021 | C noB |
| Mucopyk |
| MFW3520G | CNFW3A | C-DE.A46.B.72617 | 03. 12. 20 | 15 02. 12. 2020 | |
| MFW3520W | CNFW3A | C-DE.A46.B.72617 | 03. 12. 20 | 15 02. 12. 2020 | |
| MFW3540W | CNFW3A | C-DE.A46.B.72617 | 03. 12. 20 | 15 02. 12. 2020 | |
| MFW3630A | CNFW3B | C-DE.A46.B.72617 | 03. 12. 20 | 15 02. 12. 2020 | |
| MFW3630I | CNFW3B | C-DE.A46.B.72617 | 03. 12. 20 | 15 02. 12. 2020 | |
| MFW3640A | CNFW3B | C-DE.A46.B.72617 | 03. 12. 20 | 15 02. 12. 2020 | |
| MFW3640G | CNFW3B | C-DE.A46.B.72617 | 03. 12. 20 | 15 02. 12. 2020 | |
| MFW3650B | CNFW3B | C-DE.A46.B.72617 | 03. 12. 20 | 15 02. 12. 2020 | |
| MFW3650G | CNFW3B | C-DE.A46.B.72617 | 03. 12. 20 | 15 02. 12. 2020 | |
| MFW3650G | CNFW3B | C-DE.A46.B.72617 | 03. 12. 20 | 15 02. 12. 1998 | |

JL( S L)
Therefore, a + b = 1
Therefore, in right triangle ABD:
A
y1
Therefore, be = 15
J 1
i 1
A
Therefore, SΔ = SΔA1 + SΔA2 + SΔA3
Therefore, a + b = 1
Therefore, the arithmetic sequence is b1 + 2d.
J
olil 5c gaiy1 aegiial aeI bai
1
bawy S cIolsswY1 aG gio acLboll
cblll 4b1 jal baaia plabll
yololscclly
a0j1p aclwll
J 1
jz jiaiieai gao jiaeae
1
1
pabbl jj j
()
0/off 2
y
B
.
.
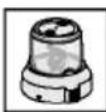
1
g
1.4
80
0
1. aXlal 1. aIgill bXll sJy jLil 12. aIwI bJc oJil
J 1 J 1 J 1 J 1 J 1 J 1 J 1 J 1 J 1 J 1 J 1 J 1 J 1 J 1 J 1 J 1 J 1 J 1 J 1 J 1 J 1 J 1 J 1 J 1 J 1
G
.1
.2
.3
1
1 ()
1 1
.00000000000000000000000000000000000000
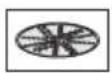
-
e1g 1
()
j 1
∴ ( x - 1) ( x + 3) = 0
(2)
(4)
1
J 1
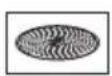
aagaii buaigia -
()
.
!
a
1
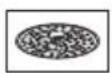
a
Aa
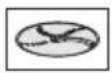
J 1
aalal aal alal
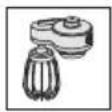
.7
.8
0
1
1
ar-11 2a
1
i 1
y1 1
a
y 8 y
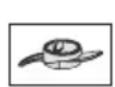
()
ylllgllllglgnnnne nnnn
y
(3)
B
p 1
15
!p
-
lalai aii iiaolai
- slc
Jlll
5 5aoollololoo
e 1
一
∴ a < b < 1
111 1
a 1
LgSall
8
jJ 0/off
ii 11 i 11i 11i 11i
J.
e 1
0/off 15
.
cLg|1
BjocnJusSlaalloljyI 10
jglal jc alal jieolll
41
J 1
Jaaal 1d Jala no Jaal 1d j 1s gl no
Bjoc 12
. 1e gllg jyj . jg jg a
Therefore, P is the midpoint of AQ. Because OQ is perpendicular to 1/2 PQ.
J 1
Jll 1
()
a a 1
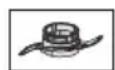
aiee 1 aegaae
1
1 2
aagaiall jllal piaiie iie
g 1000
a glll 1
L
gao 1
B
yge yll jll jll jll llaall pbi oal ydl c yll jll jlll g. jlll al! jlll Jaiu w f bix d jg. aodoll Jbc r gds g ygiyjlyi ayall abil jgi yjol jglal jglal ole! jay jglal g oclal ydl da
4
y j 1 1 1 1 1 1 1 1 1 1 1 1 1 1 1 1 1 1 1 1 1 1
J 1 J 1 J 1 J 1 J 1 J 1 J 1 J 1



a
i j 1j 1j 1j 1j
14 !
gall 1000
A 1
.0
ar-11 4
Jaeuiy Jalic g bai
!
Lalaiy 1 a gia acbll 1/le bge 1e g 1 Jg pldiu u auaa o 1d lla 1 1 y g
aiia jao g ao
jll 1iill g iill lglg jil





| DE Deutschland, GermanBA Bosnia i HerzegovinaDK Danmark, Denmark |
| BSH Hausgeräte Service GmbH Bosnia-Herzegovina BSH Hvidevarer A/S |
| Zentralwerkstatt für kleiner liche Schutzgräte Tel: 47 89 80 18 |
| Trautskirchner Strasse 6-Gradacčka 29b 2750 Ballerup |
| 90431 Nürnberg 71000 Sarajevo Tel: 44 89 80 18 |
| Online Auftragsstatus, Fil Tel: 033 21 35 13 Fax: 033 21 35 13 www.bosch-home.dk |
| unter: www. bosch-home.com mailto: bosch_siemens_sarajevo@ Eesti, Estonia |
| Reparatur service, Erssatz 19 y ago.com SIMSON OÜ |
| Zubehör, Produkt-Informationen: BE Belgique, Belgié, Bärigiüm |
| Tel.: 0911 70 440 040 BSH Home Appliances S.A. -1 N3 V3 Tallinn |
| mailto: cp-servicenceter @bsa Aveno® Laerbeek 74 |
| Wir sind an 365 Tagen rund um die Uhr Laar beeklaan 74 Fax: 0627 8730 |
| erreichbar. 1090 Bruxelles - Brussel mailto: servicenet @servicenet .www. simson. ee |
| AE United Arab Emirate Scl. 02 475 70 01 mailto: bru-repairs@bshg.co Renerki Kaubanduse ÜU |
| BSH Home Appliances FZE www. bosch-home.be Tammsaare tee 134B (Euronicsi kaupluses) |
| Round About 13, BG Bulgaria 12918 Tallinn |
| Plot Nr MO-0532A BSH Domakinski Uredi Bulgaria EOOD |
| Jebel Ali Free Zone - Dubal business center FPI, floor 5, Chemi vrah Blvd. 51B Fax: 0516 7171 |
| Tel.: 04 881 4401 107 Sofia mailto: klienditeenindus@renerk.ee www. renerk. ee |
| www. bosch-home. com/ ae Tel: 0700 208 17 Eliser OÜ |
| AL Republika e Shqiper fese Bsh#h#e te 24 www. bosch-home.bg 10621 Tallinn |
| Al bania e ELEKTRIO-SERVIS sh.p.k BH Bahra#f11 Khaledin@eliser.ee |
| Rr. Shkel qim Fusha, Selite Khalaiifat Est. mailto: hooldus@eliser.ee www.kodumasinate-remont.ee |
| Pali at " Matrix Konstruksi P.O. Box 5111 |
| Kati 0 dhe +1 Manama ES España, Spain |
| 1023 Tirane Tel: 01 7400 553 BSH Electrodomesticos España S.A. |
| Tel.: 4 2278 130, -131 mailto: service@khalaiifat.c Servicio Oficial del Fabricante |
| Fax: 4 2278 130 |
| mailto: info@elektro-servis BY Celerus, Benapycb OOO "ECX BbyTovieni TECHnika" |
| EXPERT SERVIS Tel: 495 737 2961 |
| Rruga e Kavajes, mailto:mok-kdhl@bshg.com Fax: 976 305 713 |
| Kulla B Nr 223/1 Kati I 1023 Tirane CH Schweiz, Suisse, mailto:CAU-Bosch@bshg.com |
| Tel.: 4 480 6061 Swizzera, Switzerland www. bosch-home.es |
| Tel.: 4 227 4941 BSH Hausgeräte AG FI Suomi, Finland |
| Fax: 4 227 0448 Bosch Hausgeräte Service BSH Kodinkoneet Cy ITälahdenkatu 18 A, PL 123 |
| Tel.: 0207 510 705 |
| AT Osterreich, Austria BSH Hausgeräte Gesellschaft Reparatur service, Ersatzt Eruh Informationen |
| Werkskundendienst für Hausgeräte Service Fax: 0848 840 041 |
| Quellenstrasse 2a mailto: ch-reparatur@bshg.c Tel: 0207 510 705 |
| Quellenstrasse 2a Service Fax: 0848 840 041 |
| Quellenstrasse 2a mailto: ch-reparatur@bshg.c |
| Quellenstrasse 2a Ersatztleile Fax: 0848 840 880 |
| Quellenstrasse 2a mailto: ch-ersatzteil@bshg. Erm France BSH Electroménager S.A.S. |
| www. bosch-home. com 50 rue Ardoin - CS 50037 |
| www. bosch-home. at 50 rue Ardoin - CS 50037 |
| Repairatur service, Erssatz 39, Arh. Makaariou III Str. 93406 SAINT-OUEN cedex Service interventions à domicile: |
| Produktinformationen 39, Arh. Makaariou III Str. 01 40 10 11 00 Service Consommateurs: |
| Tel.: 0810 550 511 2407 Egomi/Nikosia (Lefkosia) |
| Wird sind an 365 Tagen rund um die Uhr für Fax: 022 658 128 |
| Weiterline: bsh. service.cyprus@mailto: soa-bosch-conso@bshg.c Service Pièces Détachées et |
| AU Australia BSH Home Appliances Pty. Ltd. CZ Česká Republika, Czech Republic |
| Gate 1, 1555 Centre Road BSH domáci spotřébiče s.r.o. |
| Clayton, Victoria 3168 Firemni servis domácich spotřébiču www. bosch-home.f r |
| Tel.: 1300 369 744* Radlická 350/107c |
| Fax: 1300 306 818 158 00 Praha 5 |
| mail to: aftersales. au@bshg.com Tel: 0251 095 546 www. bosch-home. com. au www. bosch-home.com/cz |
GB Great Britain BSH Home Appliances Ltd. Grand Union House Old Wolverton Road Wolverton Milton Keynes MK12 5PT To arrange an engineer visit, to order spare parts and accessories or for product advice please visit www.bosch-home.co.uk or call Tel.: 0344 892 8979 Calls are charged at the basic rate, please check with your telephone service provider for exact charges
GR Greece, Ελλάς BSH Ikiakes Siskeves A.B.E. Central Branch Service 17 km E.O. Athinon-Lamias & Potamou 20 14564 Kifisia Τηλέφωνο: 210 4277701 Τηλέφωνο: 181 82 mail to: nkf-Customer Service www.bosch-home.gr
HK Hong Kong, BSH Home Appliances Limited Unit 1 & 2, 3rd Floor, North Block, Skyway House, 3 Sham Mong Road Tai Kok Tsui, Kowloon Hong Kong Tel.: 2565 6151 Fax: 2565 6681 mail to: bosch.hk.service@bs.com www.bosch-home.cn
HR Hrvatska, Croatia BSH kucanski uredaji d.o.o. Ulica grada Vukovara 269F 10000 Zagreb Tel.: 01 5520 888 Fax: 01 6403 603 mail to: inform macije.servis.com/ www.bosch-home.com/hr
IE Republic of Ireland
BSH Home Appliances Ltd.
M50 Business Park
Ballymount Road Upper
Walkinstown
Dublin 12
To arrange an engineer visit, to order spare parts and accessories or for product advice please call
Tel.: 01450 2655*
www.bosch-home.ie
* Calls are charged at the basic rate, please check with your telephone service provider for exact charges.
IL Israel
BSH Home Appliance Ltd.
1, Hamasger St.
North Industrial Park
Lod, 7129801
Tel.: 08 9777 222
Fax: 08 9777 245
mailto:csb-serv@csb-ltd.co.il
www.bosch-home.co.il
IN India, Bharat
BSH Household Appliances Mfg. Pvt. Ltd.
Arena House, Main Bldg, 2nd Floor,
Plot No. 103, Road No. 12,
MIDC, Andheri East
Mumbai 400 093
Toll Free 1800 266 1880*
www.bosch-home.com/in
* Mo-Sa: 8.00am to 8.00pm
(exclude public holidays)
IS Iceland
Smith & Norland hf.
@bshg.com
No atuni 4
105 Reykjavik
Tel.: 0520 3000
Fax: 0520 3011
www.smjorn.js
IT Italy
BSH Elettrodomestici S.p.A.
Via M. Nizzoli 1
20147 Milano (MI)
Numero verde 800 829 120
mailto:info.it@bosch-home.com
www.bosch-home.com/it
KZ Kazakhstan
IP Anackiy A.N.
PTN-Service
Kuyshi Dina str.23/1 N3
Astana
Tel.: 717 236 64 55
mailto: ptnservice@mail.r
Technodom Service
Utegen Batira Str.73
480096 Almaty
Tel.: 727 258 85 44
mailto: lsr@technodom.kz
www.technodom.kz
Kombitechnocentri
Zhambyl st.117
480096 Almaty
Tel.: 727 338 45 55
mailto: cts_pavel@bk.ru
www.cts.kz
TOO Evrika Service
Shimkent, Rskulova 22.
Shimkent 160018
Tel.: 727 252 44 63 75
mailto: evrika_kz@mail.ru
www.evrika.com
AV SERVICE
Abulhair hana Str. 51
Uralsk 090000
Tel.: 711 293 99 49
mailto:oastafiev@avservice.kz
www.avservice.kz
LB Lebanon
Teheni, Hana & Co.
Boulevard Dora 4043
Beyrouth
P.O. Box 90449
Jdeideh, 1202 2040
Tel.: 01 255 211
mailto:Info@teheni-Hana.com
LT Lithuania
Senuku prekybos centras UAB
Jonavos g. 62
44192 Kaunas
Tel.: 037 212 146
Fax: 037 212 165
www.senukai.lt
UAB "AG Service"
R. Kalantos g. 32
52494 Kaunas
Tel.: 070 055 655
Fax: 037 331 363
mailto: servisas@agservice.lt
www.agservice.lt
Baltic Continent Ltd.
Lukšio g. 23
09132 Vilnius
Tel.: 870 055 595
Fax: 052 741 722
mailto: info@balticcontinent.lt
www.balticcontinent.lt
UAB Emtoservis
Savanoriu pr. 1 (Centrinė būstinė)
03116 Vilnius
Tel.: 87 00 447 24
Fax: 05 27 373 68
mailto:svc@emtoservis.lt
www.emtoservis.lt
LU Luxembourg
BSH elektromenagers S.A.
13-15, ZI Breedeweues
L-259 Senningerberg
Tel.: 26 349 811
Fax: 26 349 315
Repair: lux-repair@bshg.com
Spare parts: lux-spare@bshg.com
www.bosch-home.com/lu
LV Latvia
SIA "General Serviss"
Bullu iela 70c
1067 Riga
Tel.: 067 42 52 32
mailto: info@serviscentrs.lv
www.serviscentrs.lv
BALTIJAS SERVISS
Brivibas gatve 201
1039 Riga
Tel.: 067 07 05 20; -36
Fax: 067 07 05 24
mailto: info@baltijasserviss.lv
www.baltijasserviss.lv
SIA Elektronika-Serviss
Tadaiku iela 4
1004 Riga
Tel.: 067 71 70 60
Fax: 067 60 12 35
mailto: serviss@elektronika.lv
MD Moldova S.R.L. "Rialto-Studio" str. Ucebnaya 98 2012 Kishinev Tel./Fax: 022 238 180 mailto: bosch-md@mail.ru
ME Montenegro, Elektronika komerc Ul. Slobode 17 84000 Bijelo Polje Tel./Fax: 050 432 575 Mobil: 069 324 812 mailto: ekobosch.servis@t-com.me
MK Macedonia, GORENEC Jane Sandanski 69 lok. 3 1000 Skopje Tel.: 022 454 600 Mobil: 070 697 463 mailto: gorenec@yahoo.com MT Malta Oxford House Ltd. Notabile Road Mriehel BKR 14 Tel.: 021 442 334 Fax: 021 488 656 www.oxfordhouse.com.mt
MV Maldives
Lintel Investments Ma. Maadheli, Majeedhee Magu Malé Tel.: 0331 0742 mailto: mohamed.zuhuree@lintel.com.mv
BSH Home Appliances Ltd. Unit F 2, 4 Orbit Drive Mairangi Bay Auckland 0632 Tel.: 0800 245 700 Fax: 0800 256 535 mailto: aftersales.nz@bshg.com www.bosch-home.co.nz Mo-Fr: 8.30 am to 5.00 pm (exclude public holidays)
mailto: service.romania@bshg.com www.bosch-home.ro
RU Russia, OOO BSH Bytovye Pribory Service ot proizvoditelya Malaya Kaluzhskaya, 15
119071 Moscow Tel.: 8 (800) 200 29 61 mailto: mok-kdhl@bshg.com www.bosch-home.com
SA Kingdom of Saudi Arabia Abdul Latif Jameel Electronics and Airconditioning Co. Ltd. BOSCH Service centre, Kilo 5 Old Makkah Road (Next to Toyota), Jamiah Dist. P.O. Box 7997 Jeddah 21472 Tel.: 800 127 9999 mailto: palakkaln@alj.com www.aljelectronics.com.sa
SE Sweden, BSH Home Appliances AB Landsvägen 32 169 29 Solna Tel.: 0771 19 70 00 local rate Tel.: 0771 11 22 77 local rate mailto: Bosch-Service-SE@bshg.com www.bosch-home.se
SG Singapore, BSH Home Appliances Pte. Ltd. Block 4012, Ang Mo Kio Avenue 10
01-01 Techplace 1
Singapore 569628 Tel.: 6751 5000* Fax: 6751 5005 mailto: bshsgp.service@bshg.com www.bosch-home.com.sg
- Mo-Fr: 8.30am to 7.00pm, Sa: 8.30am to 5.30pm (exclude public holidays)
Slovenia, BSH Hišni aparati d.o.o. Litostrojska 48 1000 Ljubljana Tel.: 015830700 Fax: 015830889 http://com mail to: inform macije.servi www.bosch-home.com/si
Carl - Wery- Straße 34
81739 Munchen, GERMANY

Thank you for buying a Bosch Home Appliance!
Register your new device on MyBosch now and profit directly from:
- Expert tips & tricks for your appliance
- Warranty extension options
- Discounts for accessories & spare-parts
- Digital manual and all appliance data at hand
- Easy access to Bosch Home Appliances Service
Free and easy registration - also on mobile phones:
www.bosch-home.com/welcome
BOSCH
HOME APPLIANCES
SERVICE
Looking for help?
You'll find it here.
Expert advice for your Bosch home appliances, need help with problems or a repair from Bosch experts.
Find out everything about the many ways Bosch can support you:
www.bosch-home.com/service
Contact data of all countries are listed in the attached service directory.
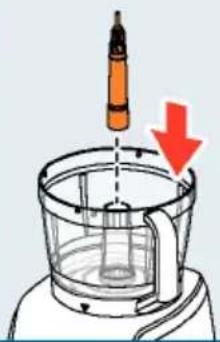
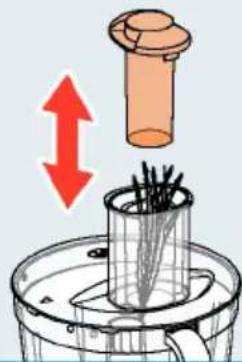
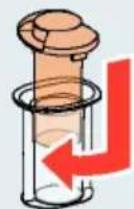
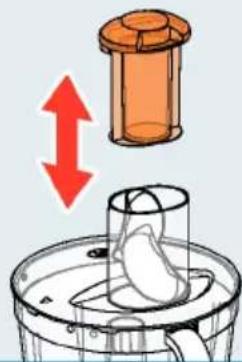
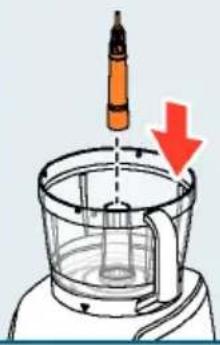
3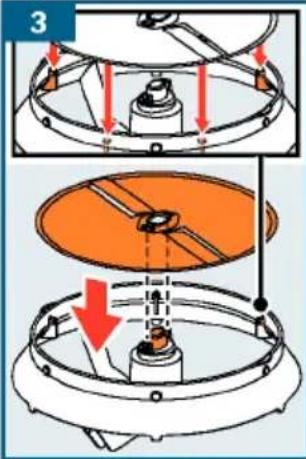
4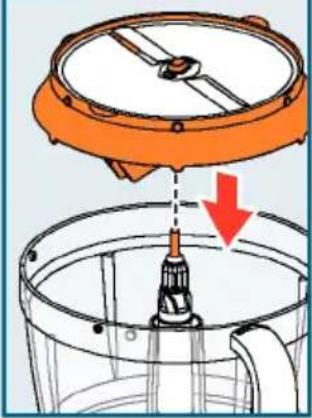
5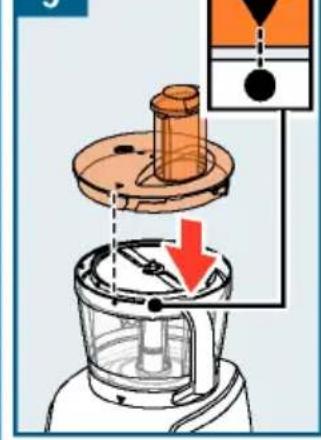
6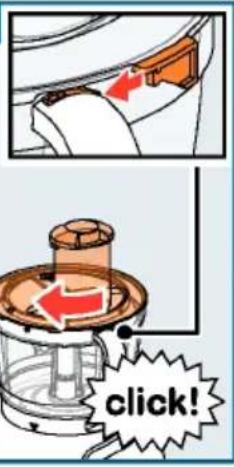
7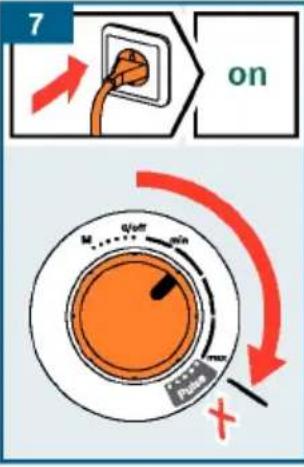
8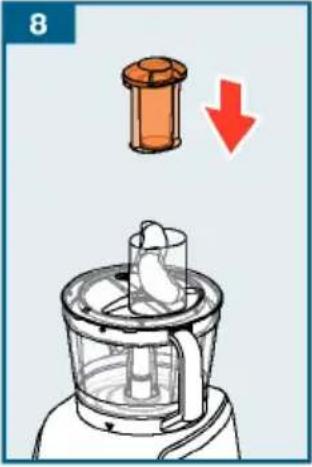
H 2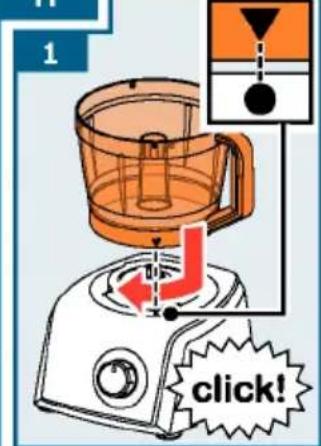
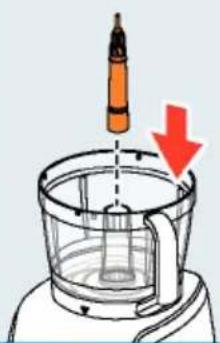
3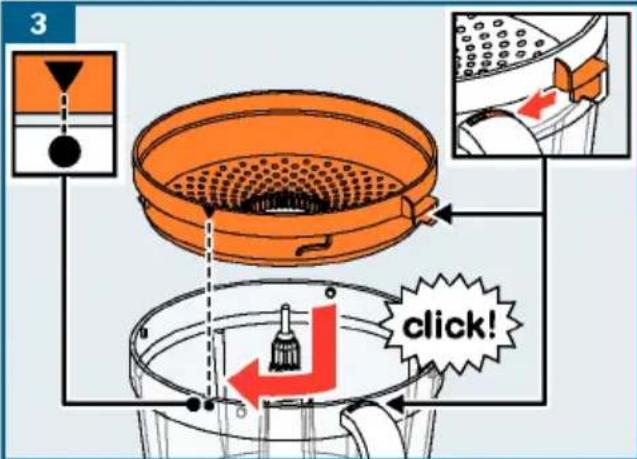
4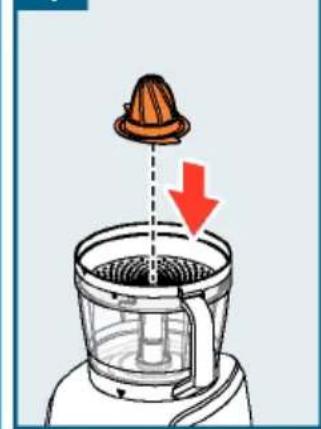
5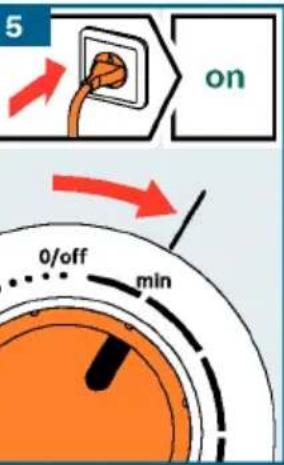
6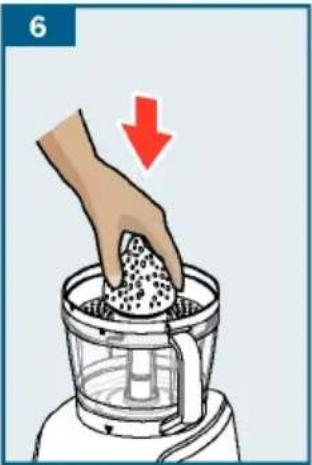
1 1 2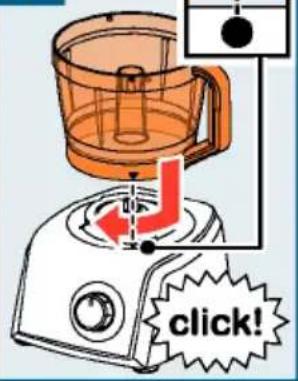
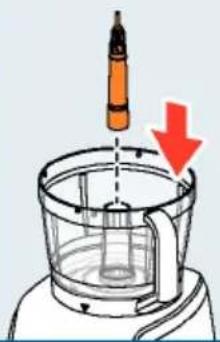
3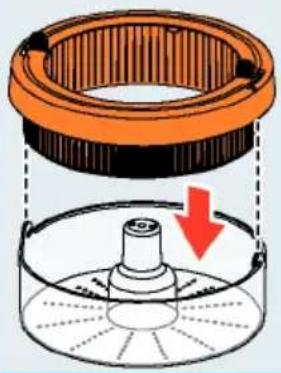
4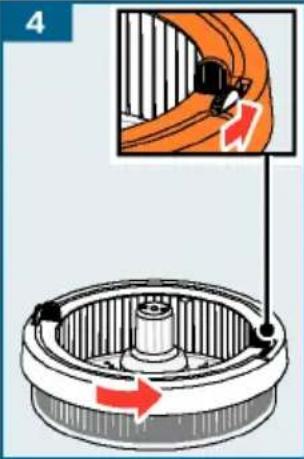
5 6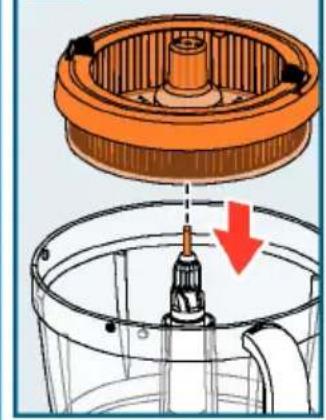
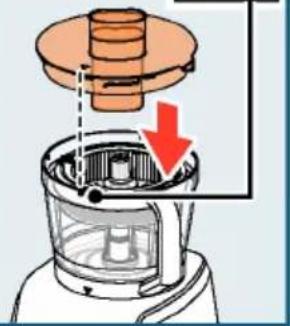
7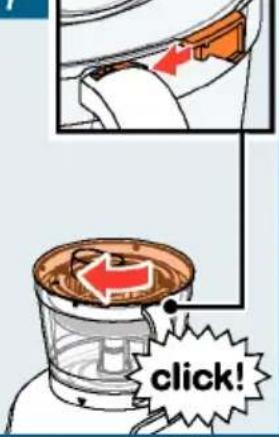
8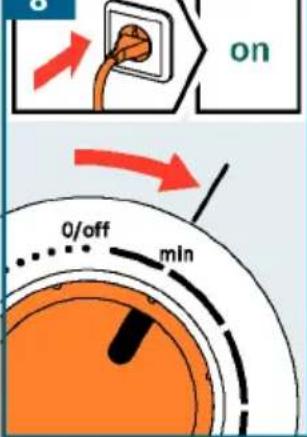
J 2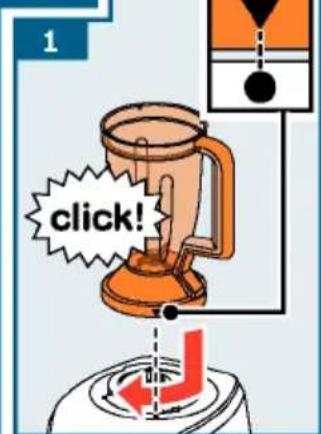
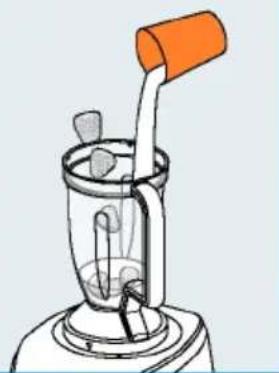
3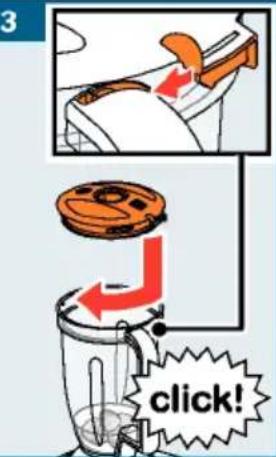
4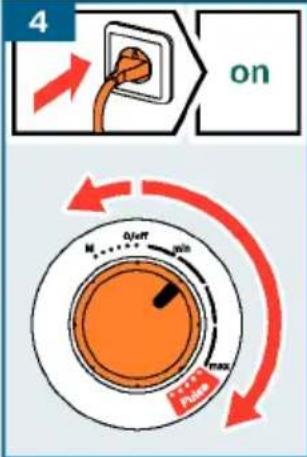
5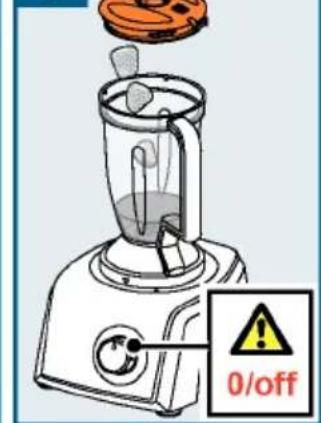
6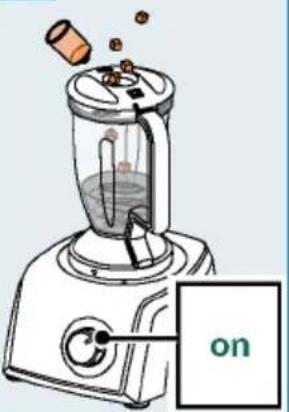
7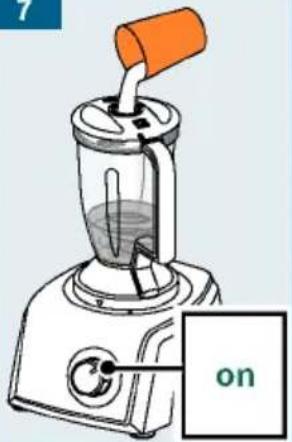
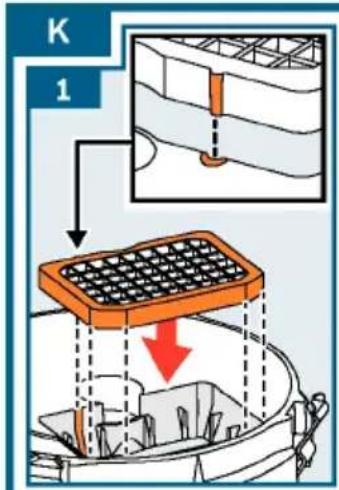
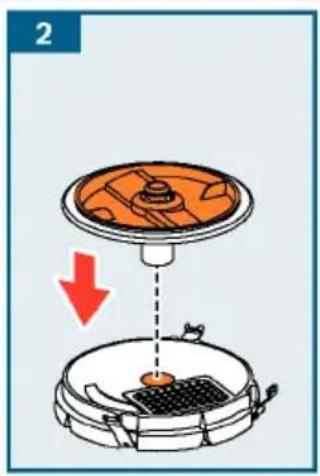
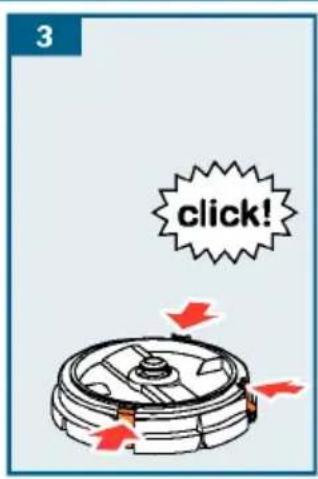
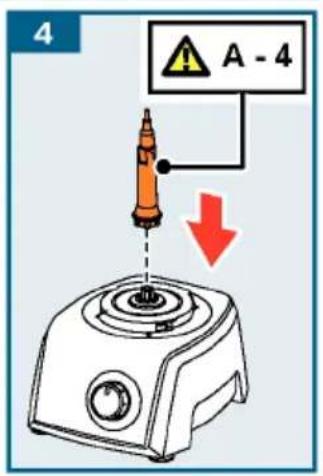
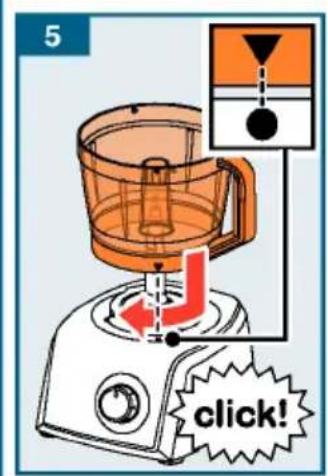
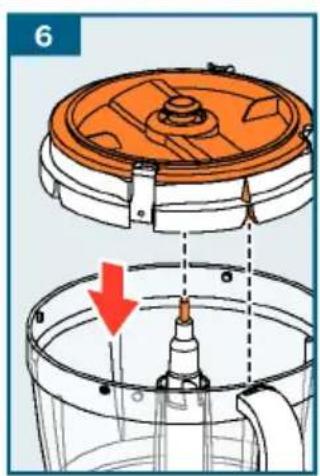
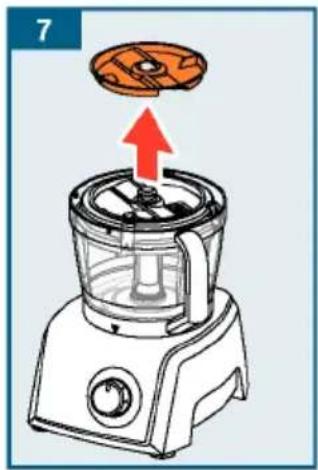
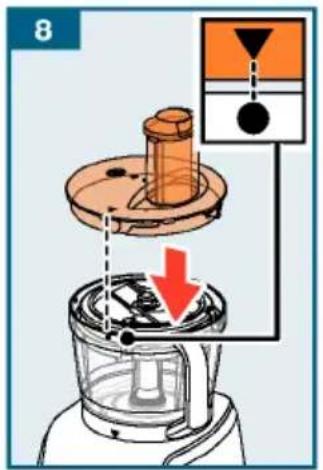
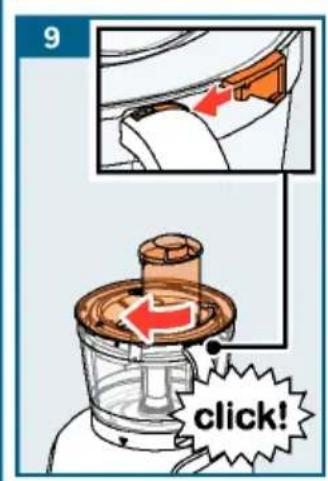
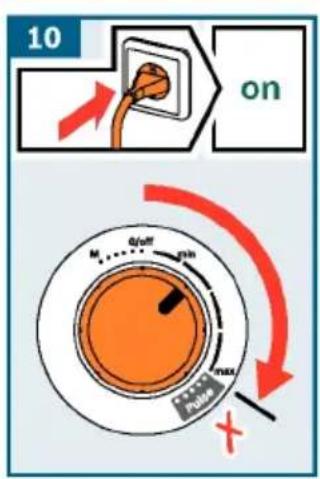
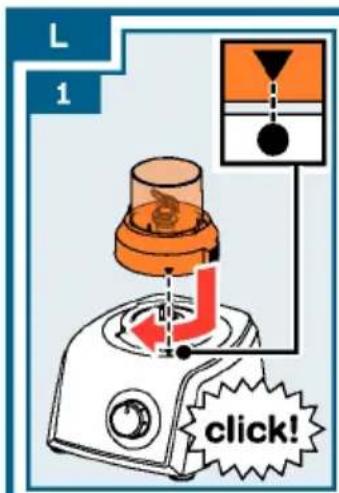
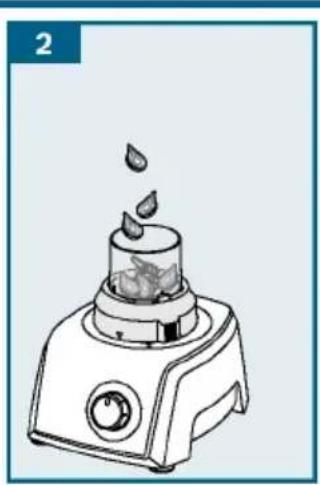
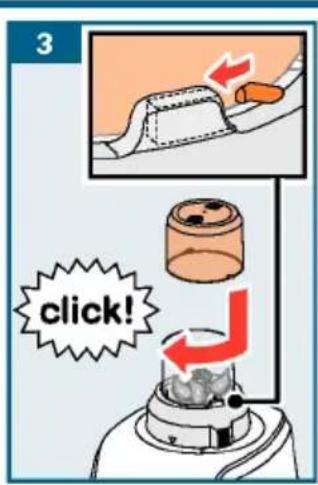
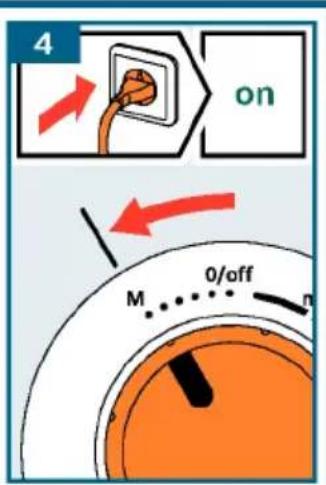
M 1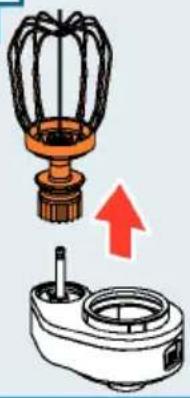
2 3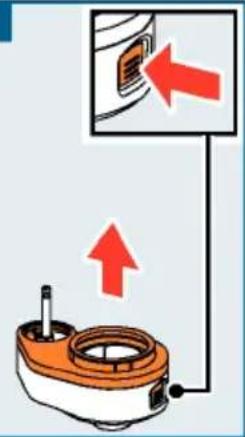

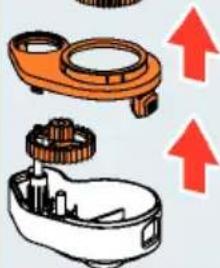
4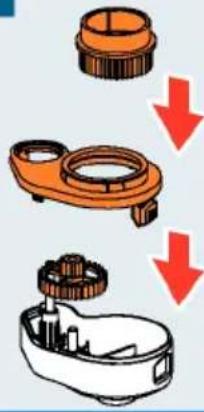
N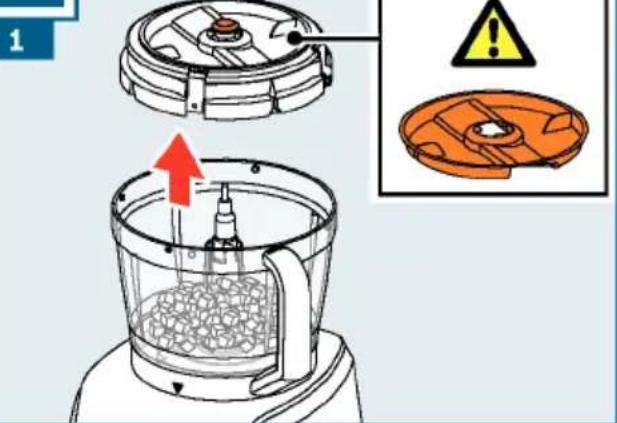
2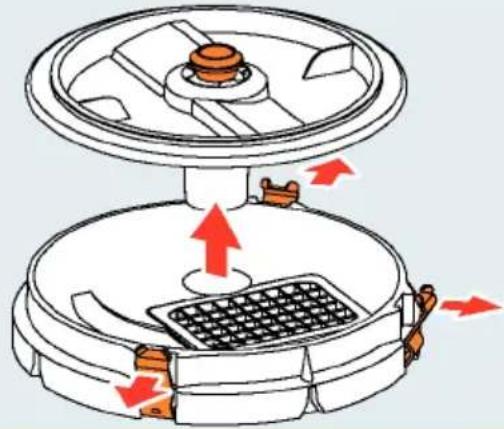
3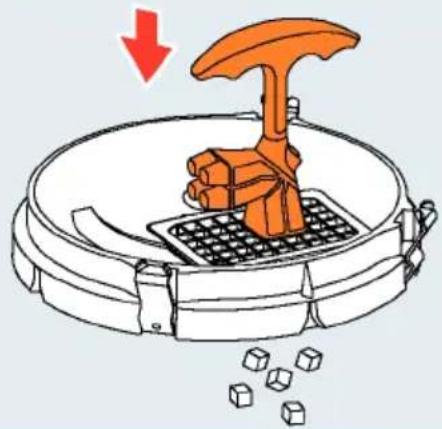
4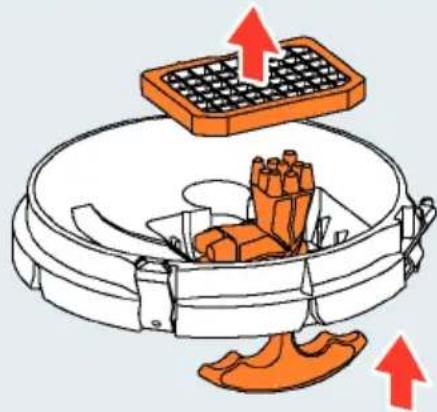


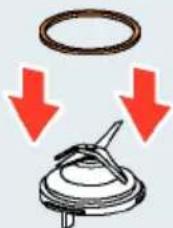
| P | MAX | | | | |
| 500 g | 3 x 2 | → | | M |
| 500 g | 1 min | → | | max |
| 750 g | 2 min | → | | |
| 500 g | 1 min | → | | |
| | → | | max 6 x |
| 500 g | 1 min | → | | min |
| 270 g | 1 min | → | | |
| 500 g | 2 min | → | | |
| 500 g | 1 min | → | | |
| | | → | | min 1 k |
| 500 g | 1 min | → | | min |
| 500 g | 1 min | → | | |
| 350 g | 30 s | → | | max |
| < 80°C | 1 min | → | | |
| 100 g | 15 s | → | | max |
| 100 g | 8 s | → | | |
| 10 g | 2 x | → | | M |
| 100 g | 2 x | → | | |
| 10 x | 1 x | → | | |
| 500 g | 3 min | → | | min |