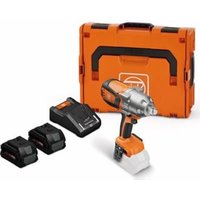
ASCT 18 M - Screwdriver Fein - Free user manual and instructions
Find the device manual for free ASCT 18 M Fein in PDF.
| Product type | Cordless screwdriver |
| Brand | Fein |
| Model | ASCT 18 M |
| Category | Screwdriver |
| Power supply | Li-ion battery (not included) |
| No-load speed (n₀) | Not specified |
| Torque (hard/soft screwdriving) | Not specified |
| Tool holder | Hexagon socket (inch) |
| Maximum screw diameter | Not specified |
| Weight (according to EPTA) | Not specified |
| Battery temperature range | 0 °C to 45 °C (32 °F to 113 °F) |
| Charge display | Green LED (1 to 4) for charge status, red LED for low or not ready battery |
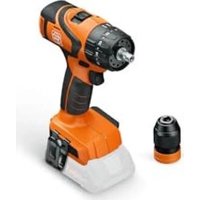
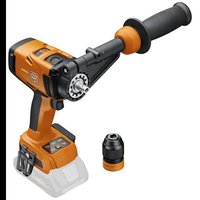
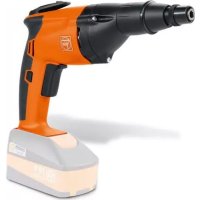
| Main functions | Screw tightening and loosening, depth stop (on model M), torque adjustment (on model UM) |
| Recommended use | Dry construction with quick-tension screws, sheltered from weather |
| Safety | Wear eye protection, do not touch rotating parts, remove battery before maintenance, use authorized accessories |
| Maintenance | Blow dry compressed air through ventilation slots if intensive use on metal |
| User-replaceable parts | Accessories, depth stop, battery, hook, magazine |
| Warranty | In accordance with legal regulations of the country of market placement |
| Recycling | Sort and dispose at a recycling center; only dispose of batteries when discharged or insulated with adhesive tape |
| Documents provided | User manual and general safety instructions |
Frequently Asked Questions - ASCT 18 M Fein
User questions about ASCT 18 M Fein
0 question about this device. Answer the ones you know or ask your own.
Ask a new question about this device
Download the instructions for your Screwdriver in PDF format for free! Find your manual ASCT 18 M - Fein and take your electronic device back in hand. On this page are published all the documents necessary for the use of your device. ASCT 18 M by Fein.
USER MANUAL ASCT 18 M Fein
OBJ DOKU-0000002096-003.1m Page 1 Wednesday, January 13, 2016 8:23 AM

▶ ASCT14 7 113 14
▶ASCT14M711314
▶ ASCT140 7 113 15
▶ASCT14UM 7 113 13
- ASCT18 7 113 16
▶ ASCT18M 7 113 16
▶ASCT180711317
▶ ASCT100M 7 113 17

CE
EN 60745-1:2009 + Cor.:2009 + A11:2010
EN 60745-2-11:2010
EN 55014-1:2006 + A1:2009 + A2:2011
EN 55014-2:1997 + Cor.:1997 + A1:2001 + A2:2008
EN 61000-4-2:2009
EN 50581:2012
2011/65/EU, 2006/42/EG,
2004/108/EG (→ 2016-04-19), 2014/30/EU (2016-04-20 →)
0714
Chunib
Hammersdorf
Quality Manager
Dr. Schreiber
Director of Advanced Technology
FEIN Service
C. & E. Fein GmbH
Hans-Fein-Straße 81
natural_image
3D rendering of two electric drill motors with visible internal components (no text or symbols)2
| ASCT14 | ASCT14M | ASCT14U | ASCT14UM | ASCT18 | ASCT18M | ASCT18U | ASCT18UM | ||
| 7 113 | 14 7 113 | 14 7 113 | 15 7 113 | 15 7 113 | 16 7 113 | 16 7 113 | 17 7 113 | ||
| V--- | 14,4 | 14,4 | 14,4 | 14,4 | 18 | 18 | 18 | 18 | |
| UV 14,4 | 14,4=14,4 | 14,4 | 18 18 18 | ||||||
| n_0 | /min | 0-4000 | 0-4000 | 0-4000 | 0-4000 | 0-4000 | 0-4000 | 0-4000 | 0-4000 |
| n_1 | /min | 0-2700 | 0-2700 | 0-2700 | 0-2700 | 0-2700 | 0-2700 | 0-2700 | 0-2700 |
| M... | Nm | 14/7 | 14/7 | 14/7 | 14/7 | 14/7 | 14/7 | 14/7 | 14/7 |
| kg 1,7 2,1 1,7 2,1 1,7 2,2 1,7 2,2 | |||||||||
| 1/4" | 1/4" | 1/4" | 1/4" | 1/4" | 1/4" | 1/4" | 1/4" | ||
| θ_mm | mm | 3-4,2 | 3-4,2 | 3-4,2 | 3-4,2 | 3-4,2 | 3-4,2 | 3-4,2 | 3-4,2 |
| L_pA | dB 71 71 71 74 74 74 74 | ||||||||
| K_pA | dB | 3 | 3 | 3 | 3 | 3 | 3 | 3 | 3 |
| L_wA | dB 82 82 82 85 85 85 85 | ||||||||
| K_wA | dB | 3 | 3 | 3 | 3 | 3 | 3 | 3 | 3 |
| L_pCpeak | dB | 86 | 86 | 86 | 86 | 87 | 87 | 87 | 87 |
| K_pCpeak | dB | 3 | 3 | 3 | 3 | 3 | 3 | 3 | 3 |
| a_h | m/s ^2 | 1,5 1,5 1,5 1,5 1,5 1,5 1,5 | |||||||
| K_a | m/s ^2 | 1,5 1,5 1,5 1,5 1,5 1,5 | 1,5 1,5 | ||||||

3
text_image
de 12 pt 30 tr 49 sl 67 et 88 th 106 en 15 el 33 hu 52 sr 70 lt 91 ja 110 fr 18 da 37 cs 55 hr 73 lv 94 hi 113 it 21 no 40 sk 58 ru 76 zh(CM) 97 ar 118 nl 24 sv 43 pl 61 uk 80 zh(CK) 100 es 27 fi 46 ro 64 bg 84 ko 103


The image is too blurry to recognize any text content.
text_image
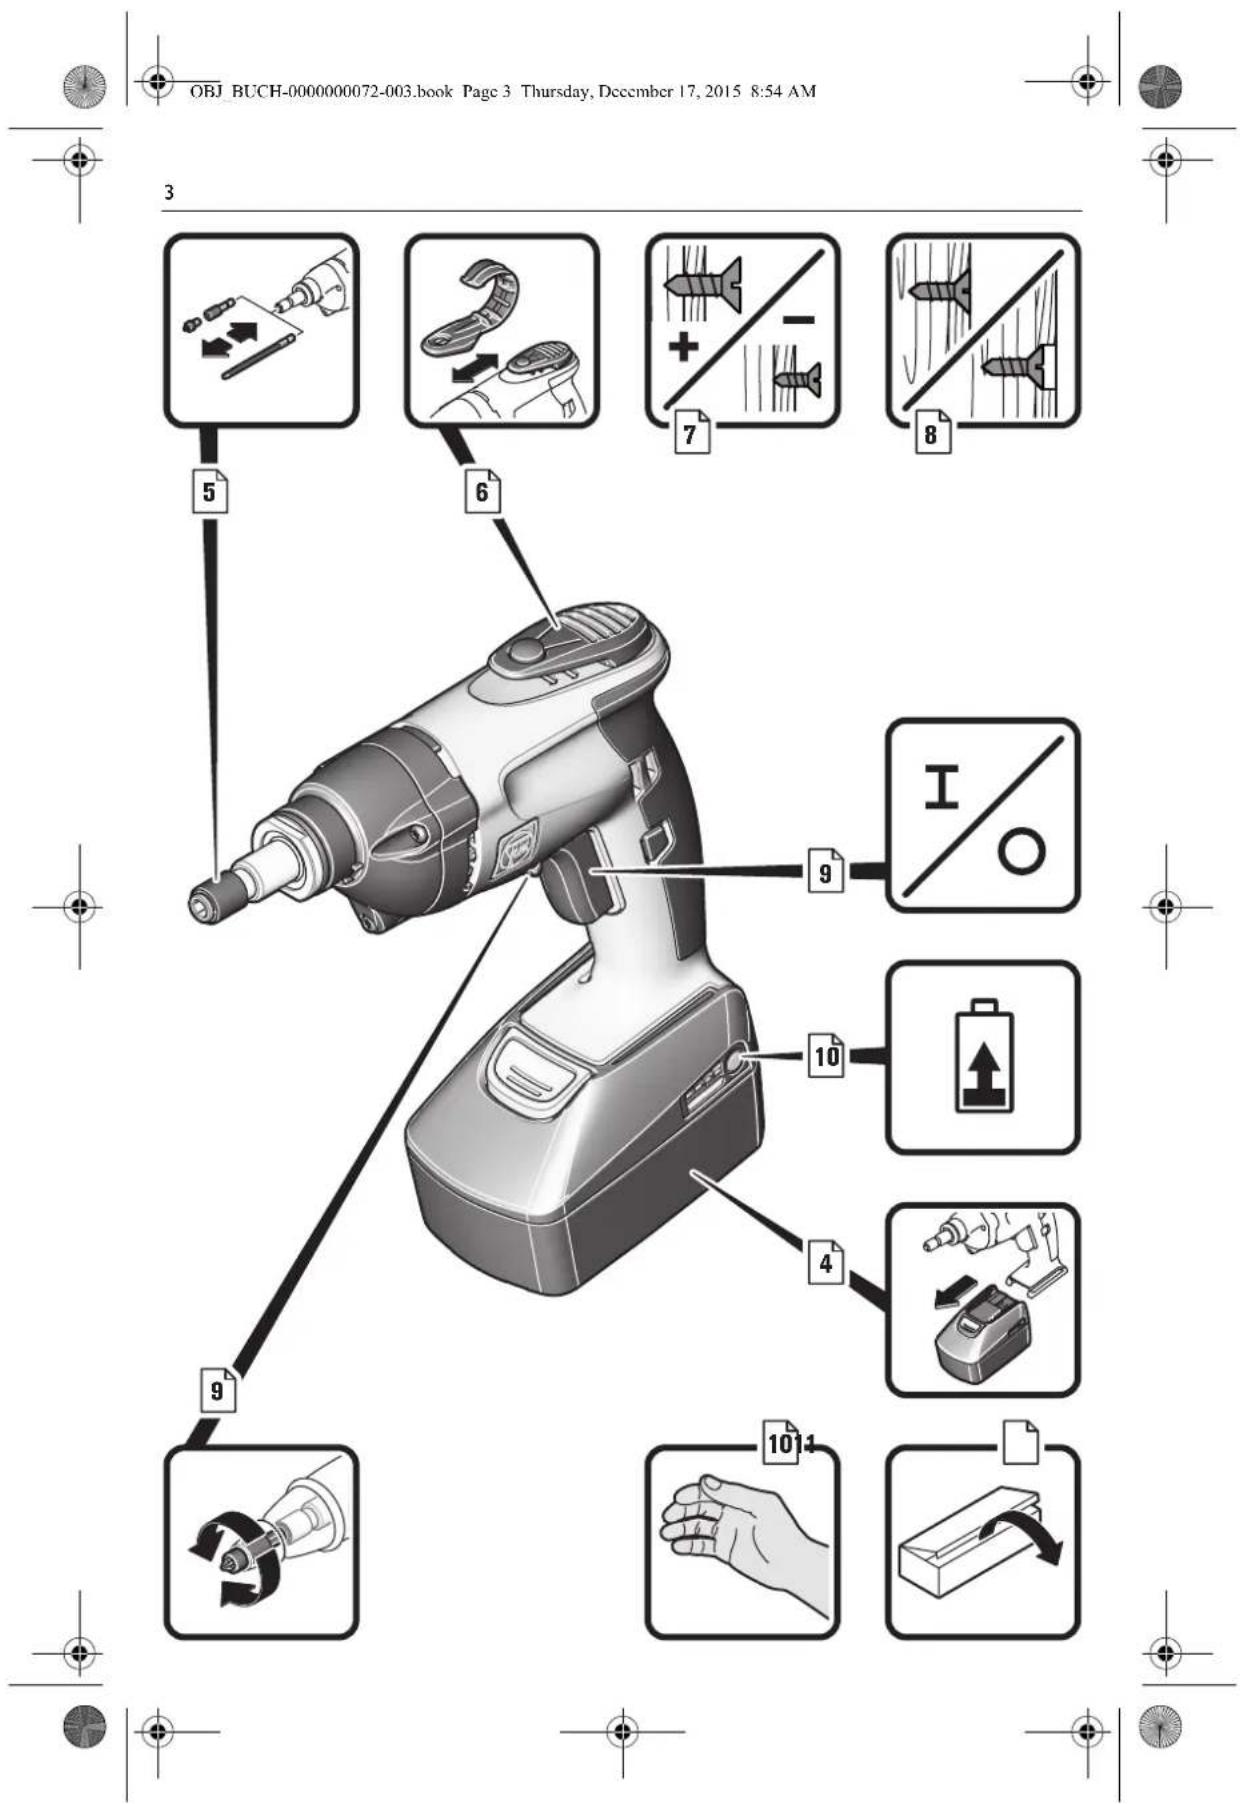
OBJ BUCH-000000072-003.book Page 3 Thursday, December 17, 2015 8:54 AM 3 5 6 7 8 9 I/O 10 4 10/14 9

OBJ BUCH-0000000072-003.book Page 4 Thursday, December 17, 2015 8:54 AM


4
text_image
Diagram illustrating the step-by-step installation of a power tool, showing disassembly and assembly steps.


OBJ BUCH-0000000072-003.book Page 5 Thursday, December 17, 2015 8:54 AM


5
text_image
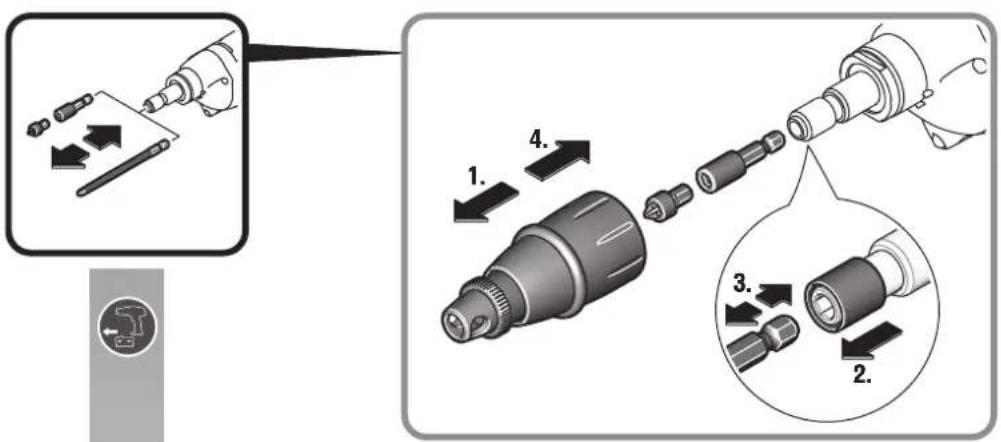
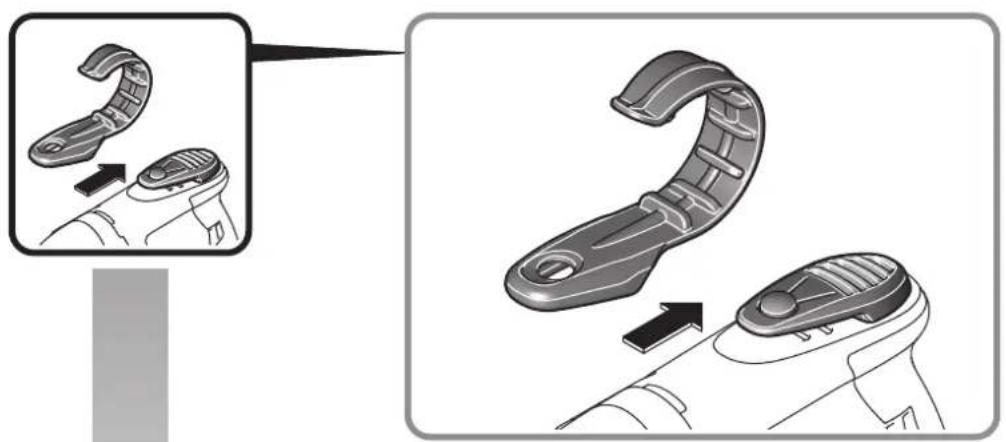
Diagram illustrating the step-by-step installation of a drill bit into a drill cap, with numbered instructions for each step.ASCT14M
ASCT14UM
ASCT18M
ASCT18UM
text_image
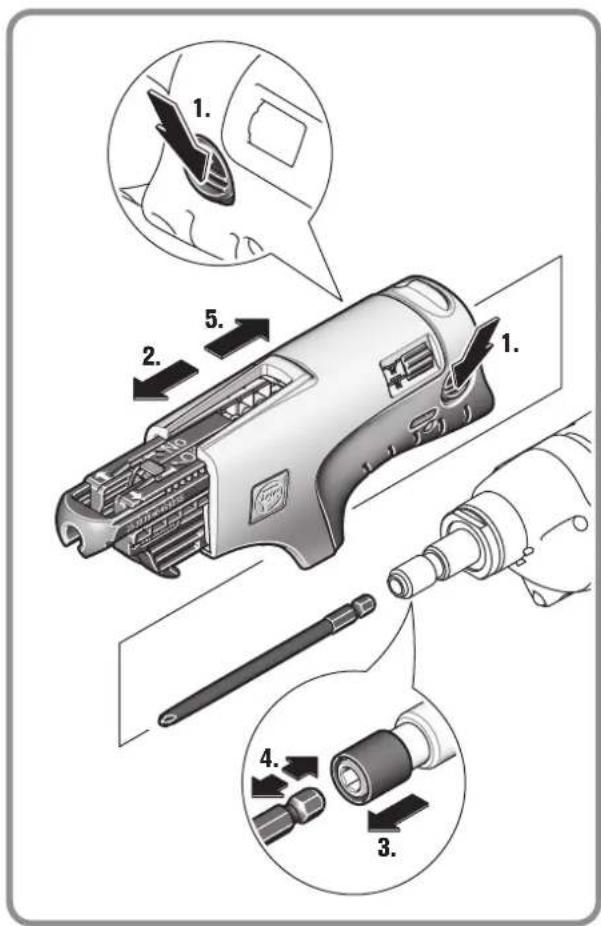
Diagram of a Ford electric drill bit with labeled parts including hand insertion, tool positioning, and disassembly steps.


OBJ BUCH-0000000072-003.book Page 6 Thursday, December 17, 2015 8:54 AM


6
natural_image
Illustration of a robotic device with a curved mechanical component being processed, showing two steps (no text or symbols present)
text_image
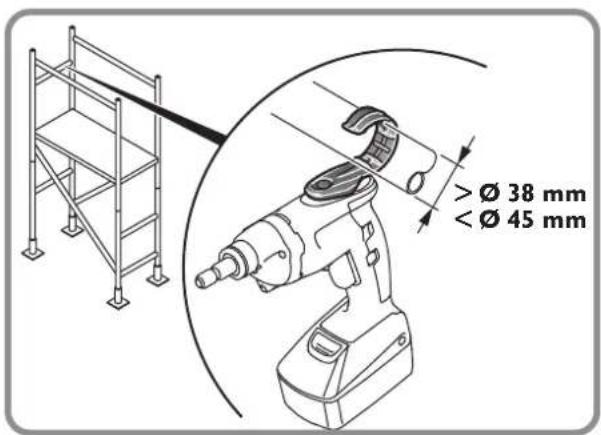
>Ø 38 mm < Ø 45 mm
text_image
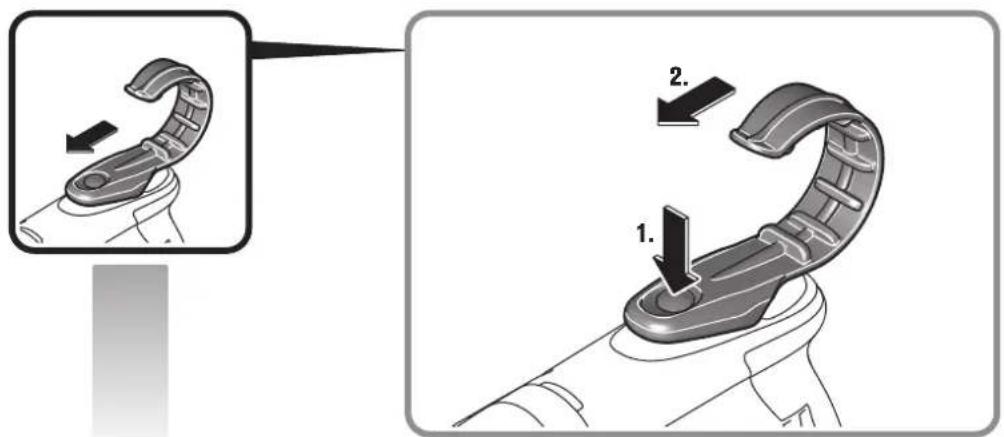
Diagram illustrating a mechanical device with labeled parts and directional arrows indicating motion or assembly.


8
text_image
1. 3. = 0 mm 2. 4. 5 6. 380 = 1 mm 7. 7.

text_image
Diagram illustrating car seatbelt adjustment mechanism with labeled arrows and rotation icons
text_image
I O 1. 2. I O 2. I 1. 3. O


OBJ_DOKU-0000002099-002.fm Page 10 Monday, January 18, 2016 2:19 PM


10
text_image
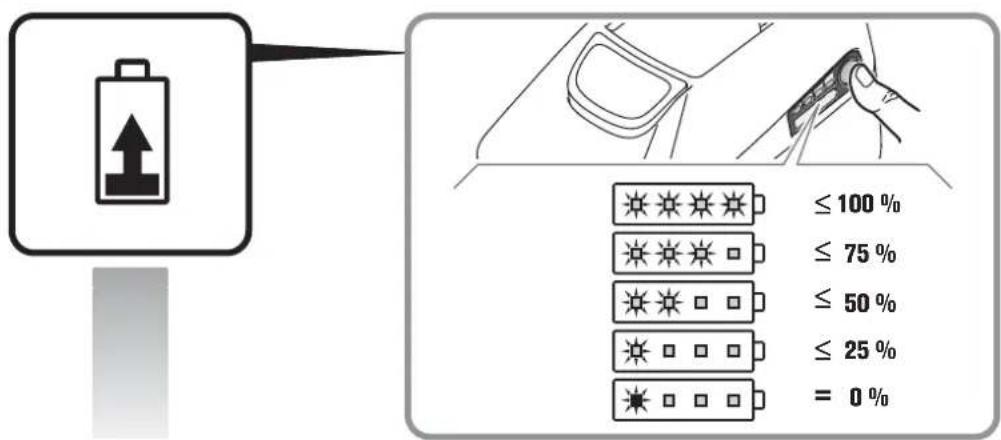
≤ 100 % ≤ 75 % ≤ 50 % ≤ 25 % = 0 %
text_image
Illustration showing a hand holding a power tool and its insertion into a device, with warning labels and an alert icon.


text_image
ASCT14U ASCT14UM ASCT18U ASCT18UM ASCT-14M ASCT-14UM ASCT-18M ASCT-18UM12
de
Original Instructions for Cordless Screwdriver.
Symbols, abbreviations and terms used.
| Symbol, character Explanation | |
| Do not touch the rotating parts of the power tool. | |
| Observe the instructions in the text or graphic opposite! | |
| Make sure to read the enclosed documents such as the Instruction Manual and the General Safety Instructions. | |
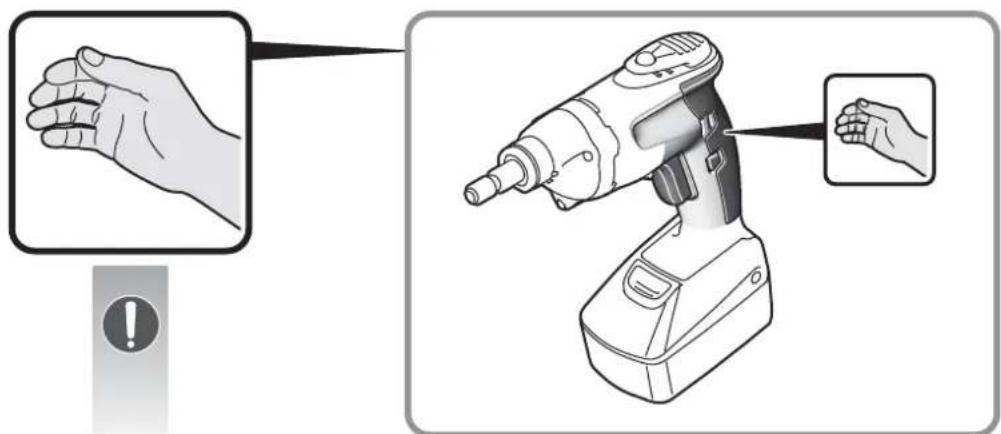
| Before commencing this working step, remove the battery from the power tool. Otherwise there may be danger of injury caused by unintentional starting of the power tool. | |
| Use eye protection during operation. | |
| Do not charge damaged batteries. | |
| Keep the battery away from fire. Protect the battery against heat, e. g. against continuous intense sunlight. | |
| Observe the information in the adjacent text! | |
| Gripping surface | |
| CE | Confirms the conformity of the power tool with the directives of the European Community. |
| WARNING | This sign indicates a possible dangerous situation that could cause severe or fatal injury. |
| Recycling symbol: designates recyclable materials | |
| Worn out power tools and other electrotechnical and electrical products should be sorted separately for environmental-friendly recycling. | |
| Battery type | |
| Low speed | |
| High speed | |
| Reduce torque | |
| Increase torque | |
| Character Unit of measurement, international | Unit of measurement, national | Explanation | |
| UV | --- V | --- D | C v |
| n_0 | /min, min ^-1 , rpm, r/min | rpm No-load speed | |
| n_1 | /min, min ^-1 , rpm, r/min | rpm Speed, full load | |
| M... Nm Nm Torque (hard/soft screwdriving application) | |||
| ○ | inch inch Hexagon socket tool holder | ||
| ∅mmø | mm mm Screw diameter | ||
| kg | kg | Weight according to EPTA-Procedure 01 | |
| L_pA | dB | dB | Sound pressure level |
| L_wA | dB | dB | Sound power level |
en
| Character Unit of measurement, international | Unit of measurement, national | Explanation |
| L_pCpeak dB dB Peak sound pressure level | ||
| K... | Uncertainty | |
| a m/s^2 | m/s^2 | Vibrational emission value according to EN 60745 (vector sum of three directions) |
| a_h m/s^2 | m/s^2 | Vibrational emission value (screwdriving) |
| m, s, kg, A, mm, V, W, Hz, N, °C, dB, min, m/s^2 | Basic and derived units of measurement from the international system of units SI. |
For your safety.
WARNING
Read all safety warnings and all instructions. Failure to follow the
warnings and instructions may result in electric shock, fire and/or serious injury.
Save all warnings and instructions for future reference.

Do not use this power tool before you have thoroughly read and completely understood this Instruction Manual and the enclosed "General
Safety Instructions" (document number 3 41 30 054 06 1). The documents mentioned should be kept for later use and enclosed with the power tool, should it be passed on or sold.
Please also observe the relevant national industrial safety regulations.
Intended use of the power tool:
hand-guided screwdriver for screwing in and unscrewing screws, especially for drywall screws, in weather-protected environments using the application tools and accessories recommended by FEIN.
Special safety instructions.
Hold power tool by insulated gripping surfaces, when performing an operation where the fastener may contact hidden wiring. Fasteners contacting a
"live" wire may make exposed metal parts of the power tool "live" and could give the operator an electric shock.
Beware of any concealed electric cables, gas or water conduits. Check the working area before commencing work, e.g. with a metal detector.
Secure the work piece firmly. A work piece that is gripped tightly in a clamping device or vice, is more secure than if held by hand.
Hold the power tool firmly. High reaction torque can briefly occur.
Do not machine any material containing asbestos. Asbestos is cancerogenic.
Do not rivet or screw any name-plates or signs onto the power tool. If the insulation is damaged, protection against an electric shock will be ineffective. Adhesive labels are recommended.
Do not use accessories which are not specifically designed and recommended by the power tool manufacturer. Safe operation is not ensured merely because an accessory fits your power tool.
Use and handling of the battery (battery pack).
To avoid hazardous situations such as burns, fire, explosion, skin injuries, and other injuries when handling the battery, observe the following instructions:
Batteries must not be disassembled, opened or reduced in size. Do not subject batteries to mechanical impact or shock. Hazardous vapours and fluid can escape in case of damage and improper use of the battery. The vapours can irritate the respiratory system. Liquid ejected from the battery may cause skin irritations or burns.
When battery fluid from a damaged battery has come into contact with objects close by, check the respective components, clean them or replace them as required.
Keep the battery away from heat and fire. Do not store the battery in direct sunlight.
Do not remove the battery from its original packaging until it is going to be used.
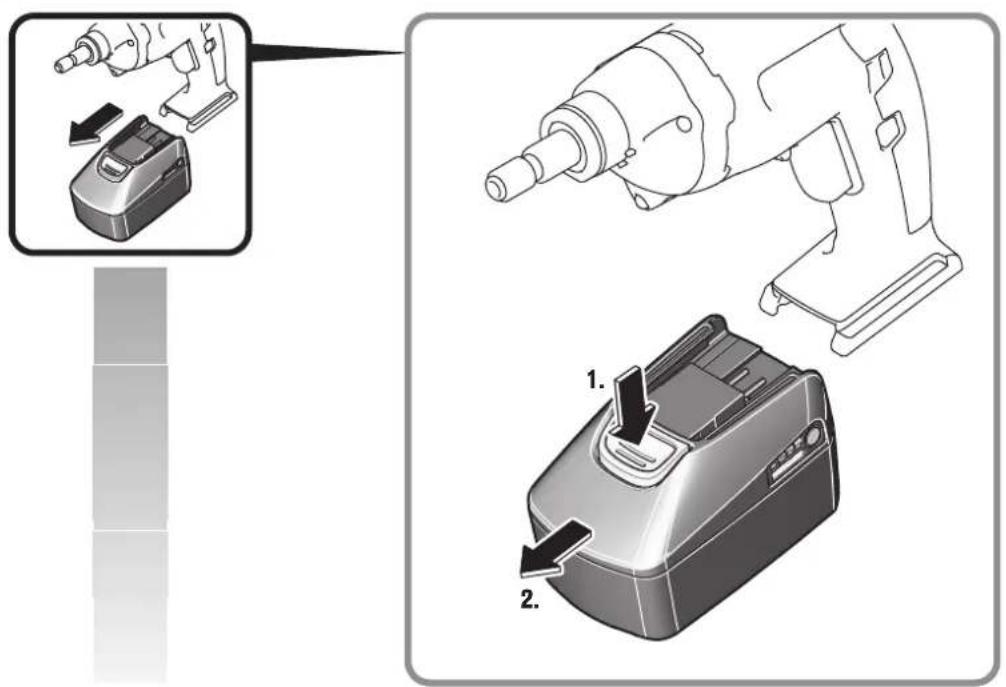
Before any work on the machine itself, remove the battery from the power tool. If the power tool accidentally starts, there is danger of injury.
Remove the battery only when the power tool is switched off.
Keep the battery away from children.
Keep the battery clean and protect it against moisture and water. Clean contaminated battery terminals and power tool connections with a dry, clean cloth.
Use only intact original FEIN batteries that are intended for your power tool. When working with and charging incorrect, damaged, repaired or reconditioned batteries, imitations or other brands, there is danger of fire and/or explosion.
Follow the safety warnings in the operating instructions of the battery charger.
Hand/arm vibrations
The vibration emission level given in this information sheet has been measured in accordance with a standardised test given in EN 60745 and may be used to compare one tool with another. It may be used for a preliminary assessment of exposure.
The declared vibration emission level represents the main applications of the tool. However, if the tool is used for different applications, with different accessories or poorly maintained, the vibration emission may differ. This may significantly increase the exposure level over the total working period.
An estimation of the level of exposure to vibration should also take into account the times when the tool is switched off or when it is running but not actually doing the job. This may significantly reduce the exposure level over the total working period.
Identify additional safety measures to protect the operator from the effects of vibration such as: maintain the tool and the accessories, keep the hands warm, organisation of work patterns.
Operating Instructions.
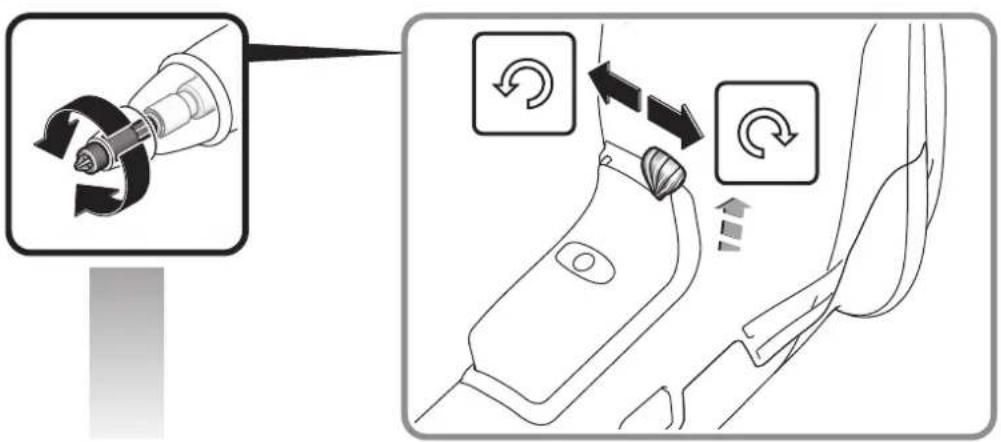
Adjust the rotation selector switch only when the machine is at a complete stop.
To avoid accidental starting, e. g., during transport, set the rotation selector switch to the centre position.
When overheated, the machine runs with short, low-power impulses. Allow the machine to cool down at no-load speed.
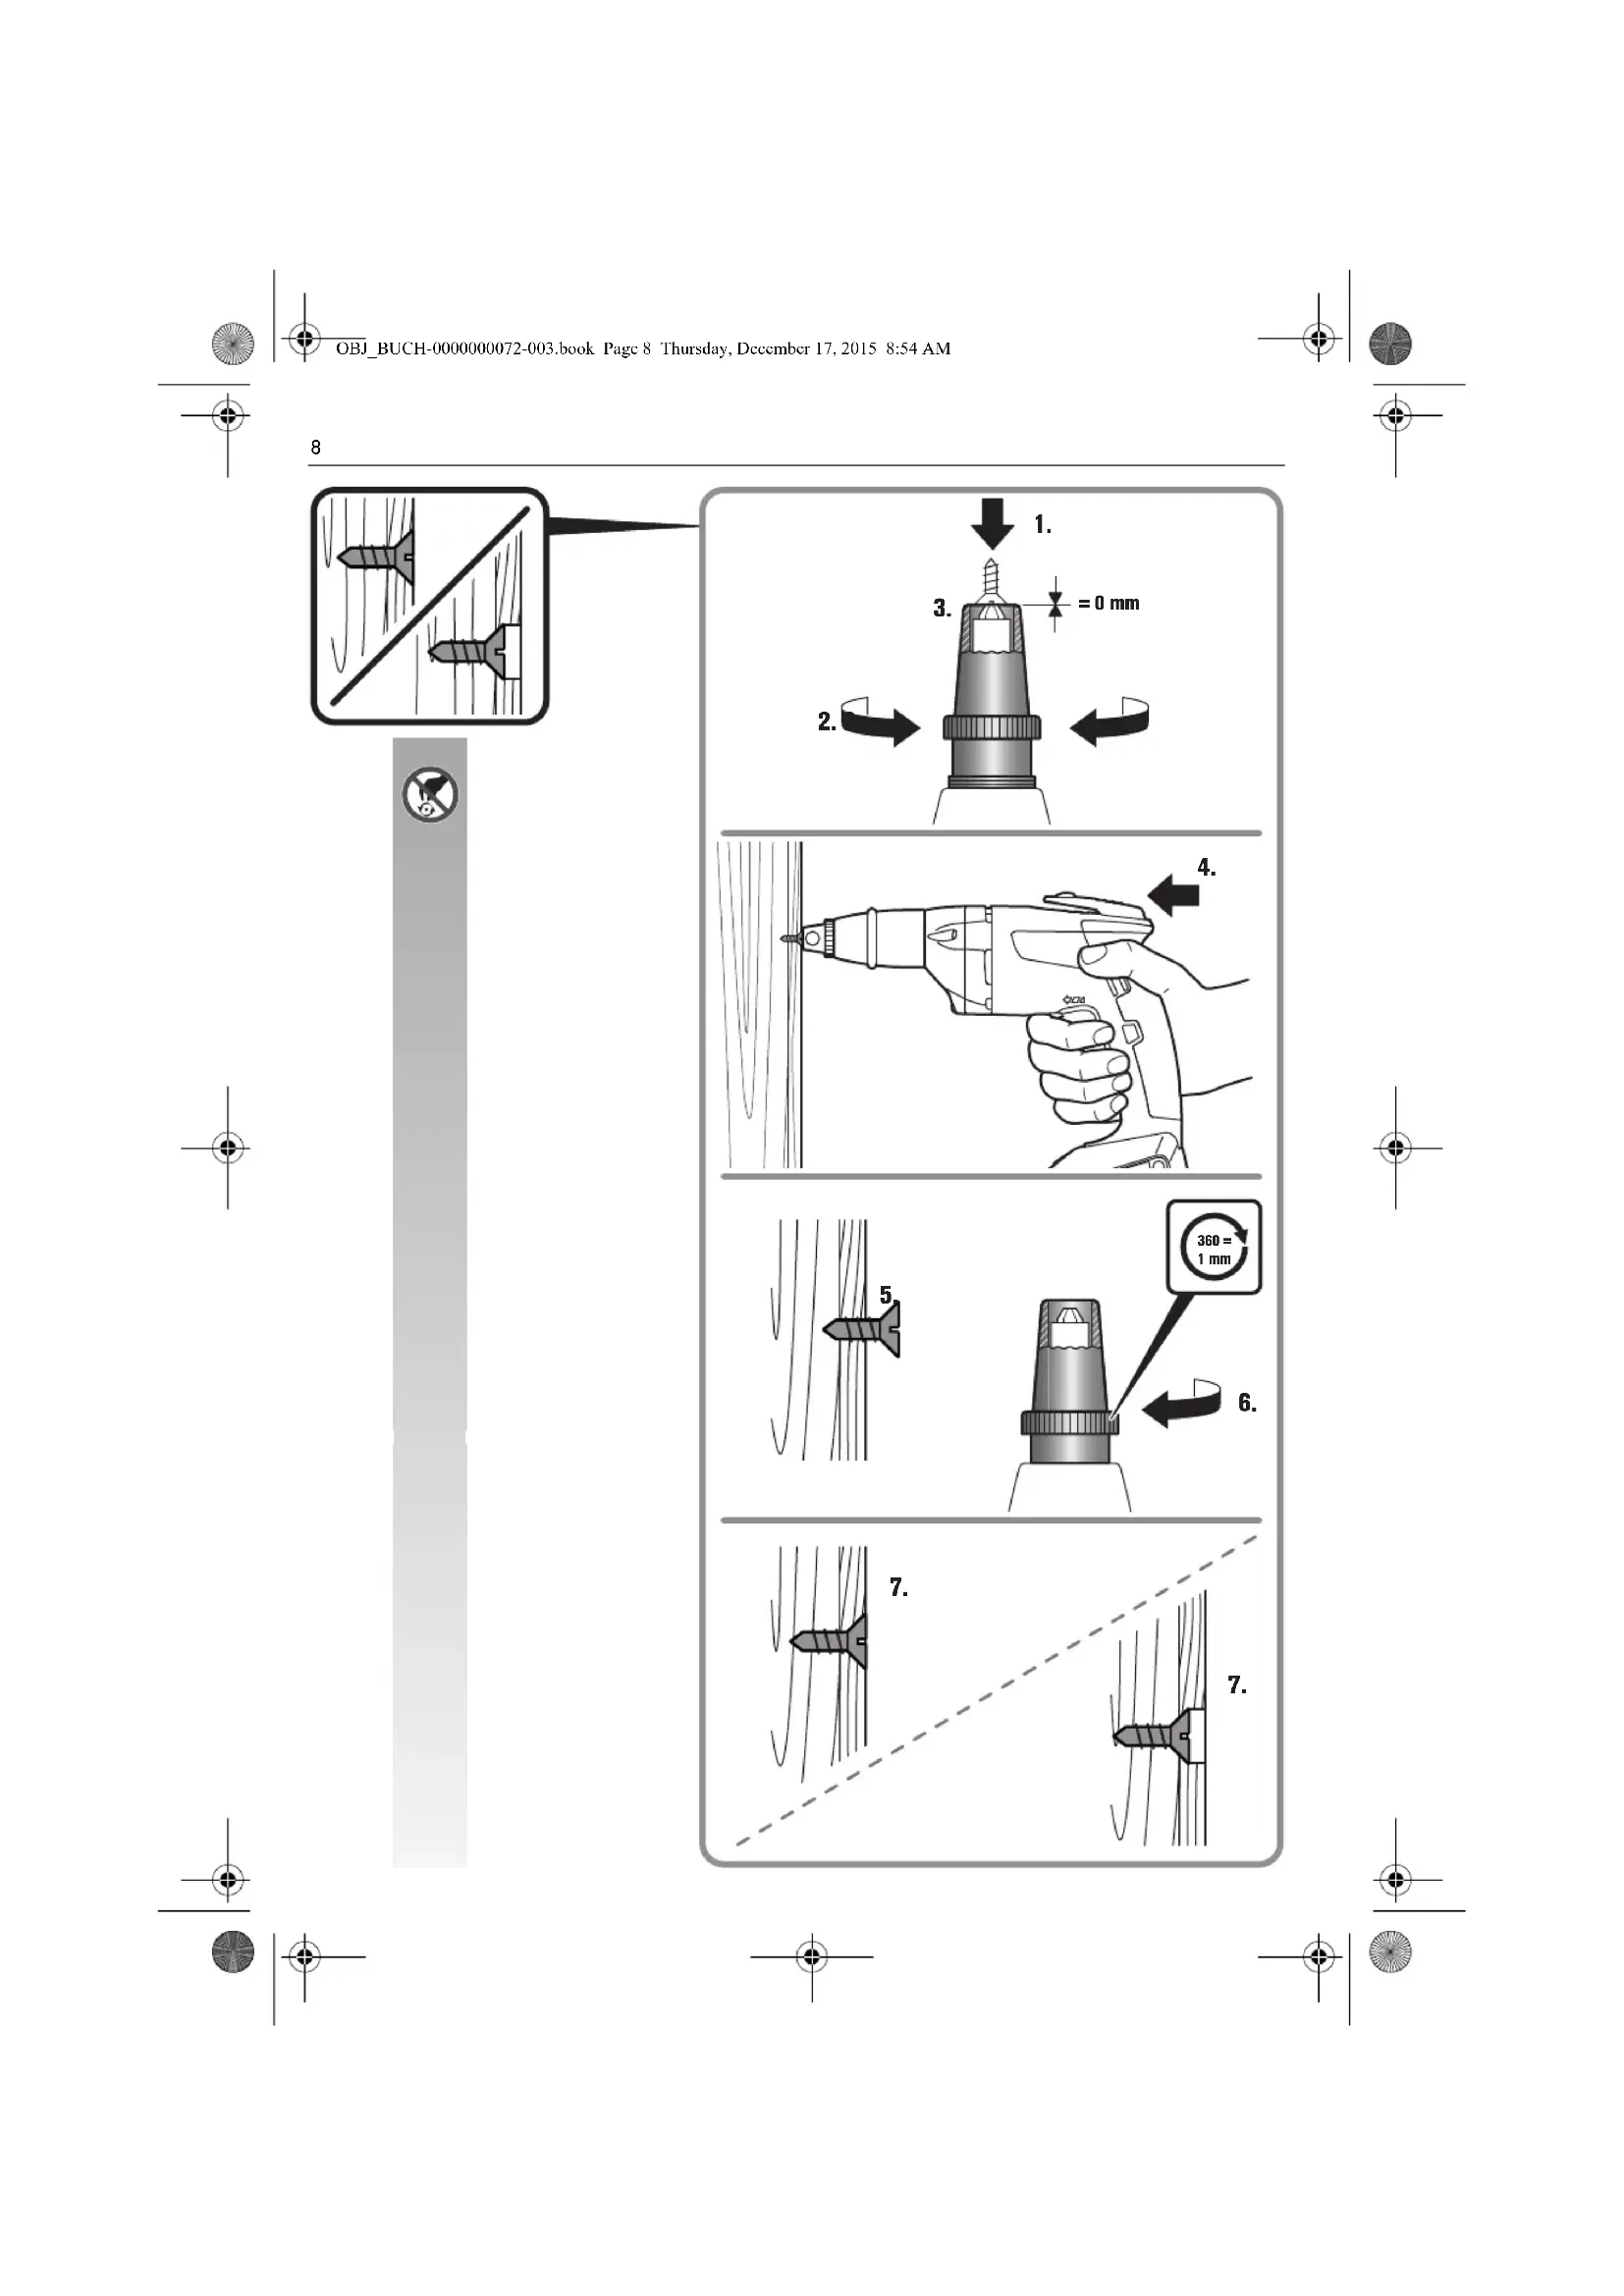
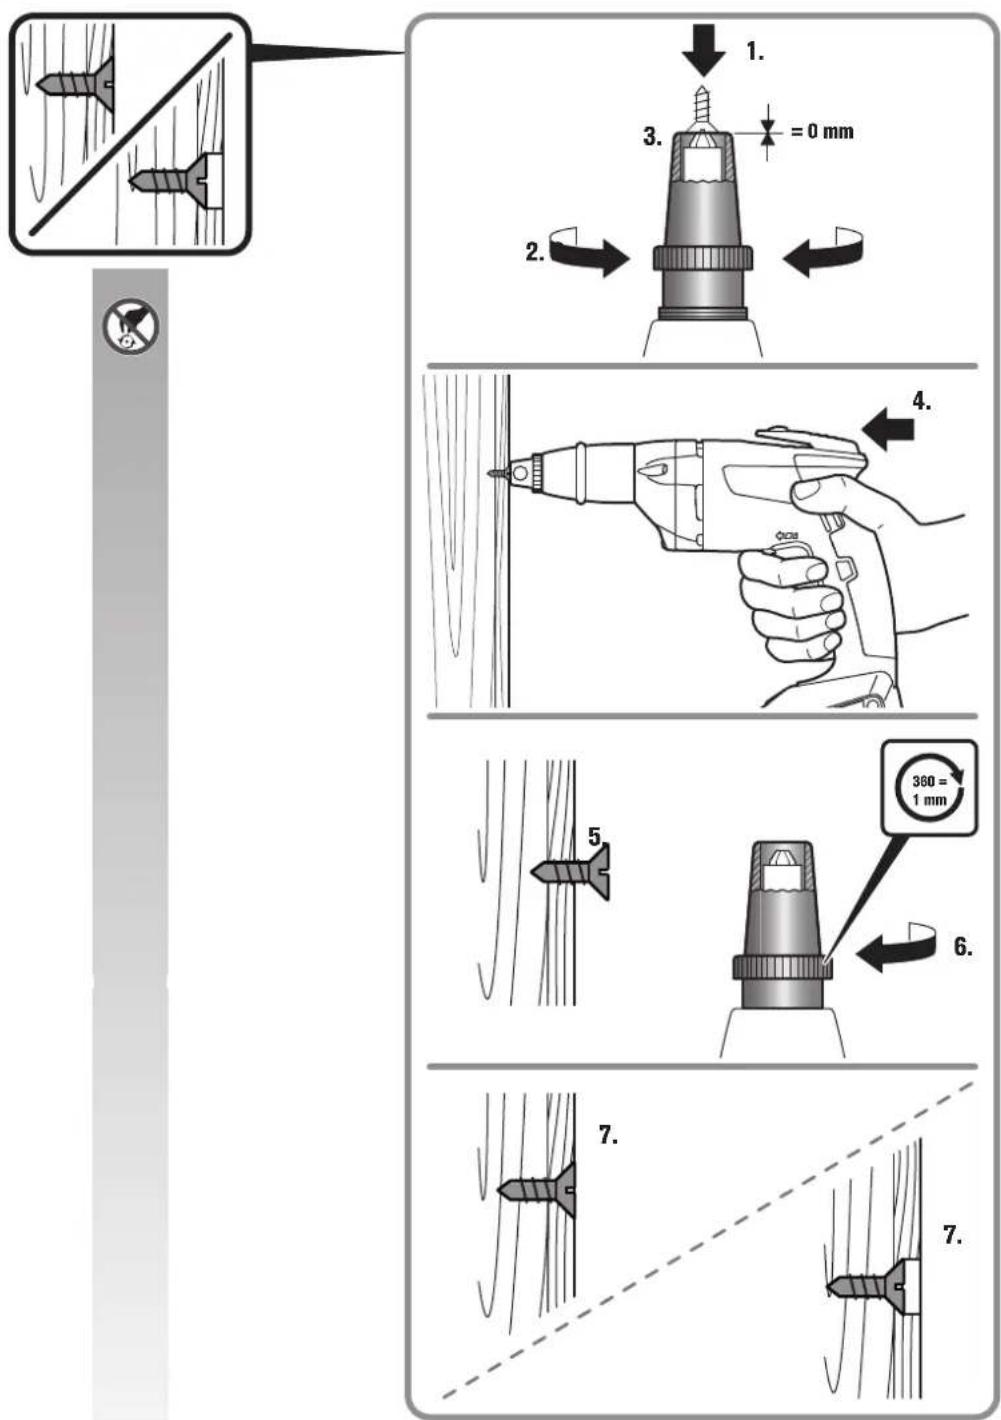
ASCT14/ASCT14M/ASCT18/ASCT18M: The screwdriving applications are to be carried out with mounted depth stop.
ASCT14M/ASCT14UM/ASCT18M/ASCT18UM: The collated cartridge may only be operated in "clockwise-rotation direction" position.
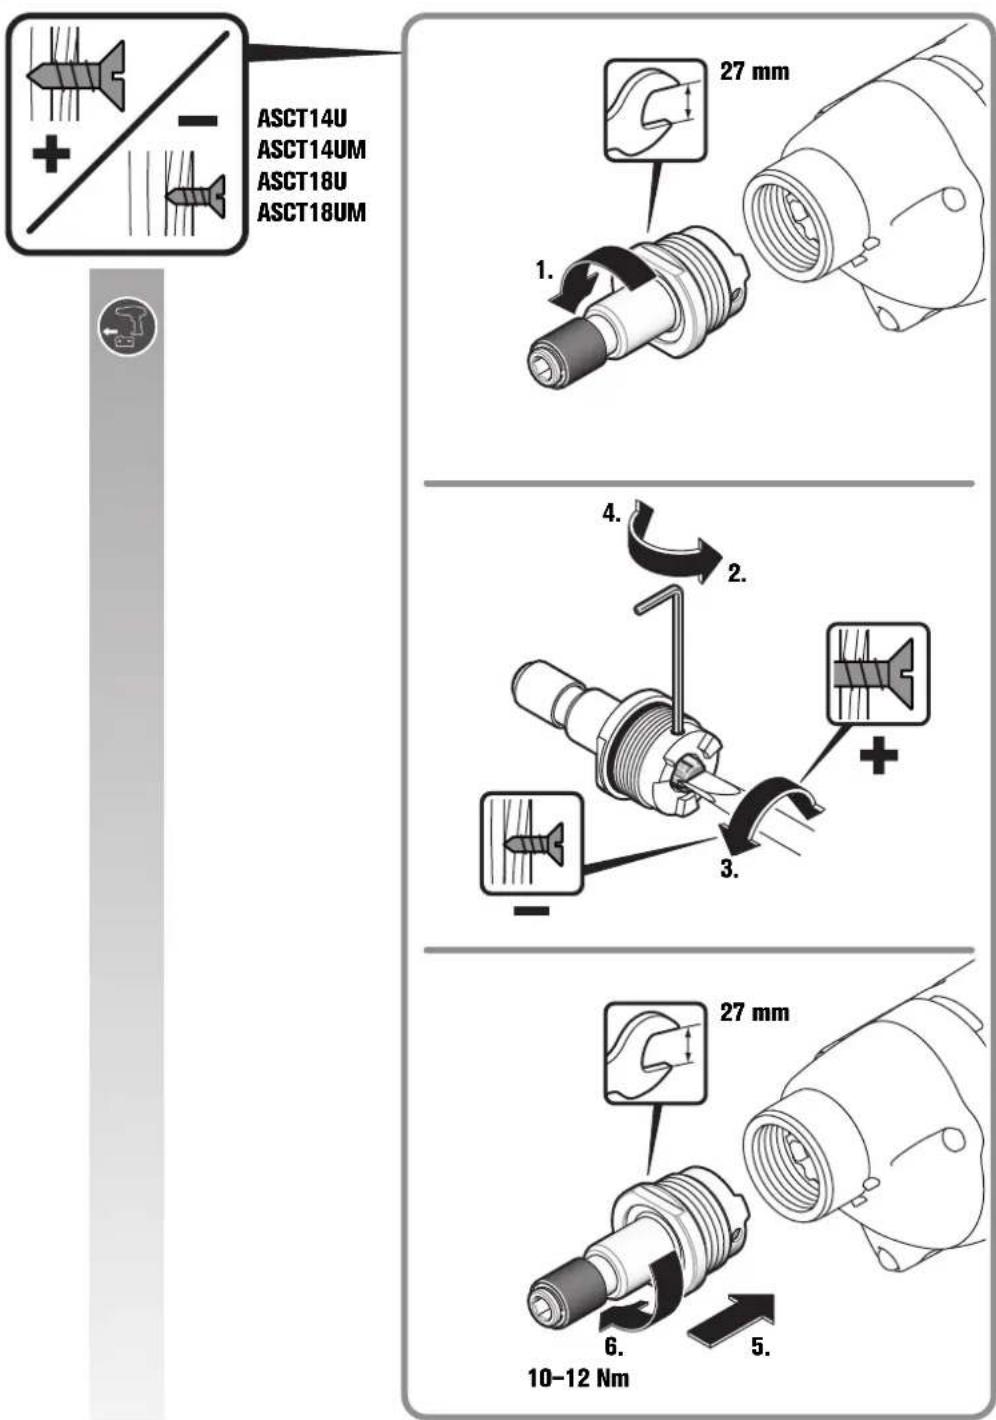
Setting the torque (ASCT14U/ASCT14UM/ASCT18U/ASCT18UM) (see page 7).
The factory setting is for the small to mid-size screw range.
The tightening torque also depends on the force with which the power tool is pressed against the screw.
Handling the battery.
Operate and charge the battery only within the battery operating-temperature range of 0^ C – 45^ C ( 32^ F – 113^ F). At the beginning of the charging procedure, the battery temperature must be within the battery operating-temperature range.
| LED indicator Meaning Activity | ||
| 1 – 4 green LED | Percentage of charge condition | Operation |
| Continuous red light | Battery is almost empty | Charge battery |
| Red flashing light | Battery is not ready for operation | Bring the battery into the battery operating-temperature range, then charge |
The real percentage of the battery charge condition is only indicated when the power tool motor is stopped. The electronics automatically switch off the motor prior to the battery being deep discharged.
Repair and customer service.


When working metal under extreme operating conditions, it is possible for conductive dust to settle in the interior of the power tool.
Blow out the interior of the power tool via the ventilation slots frequently with dry and oil-free compressed air. The current spare parts list for this power tool can be found in the Internet at www.fein.com.
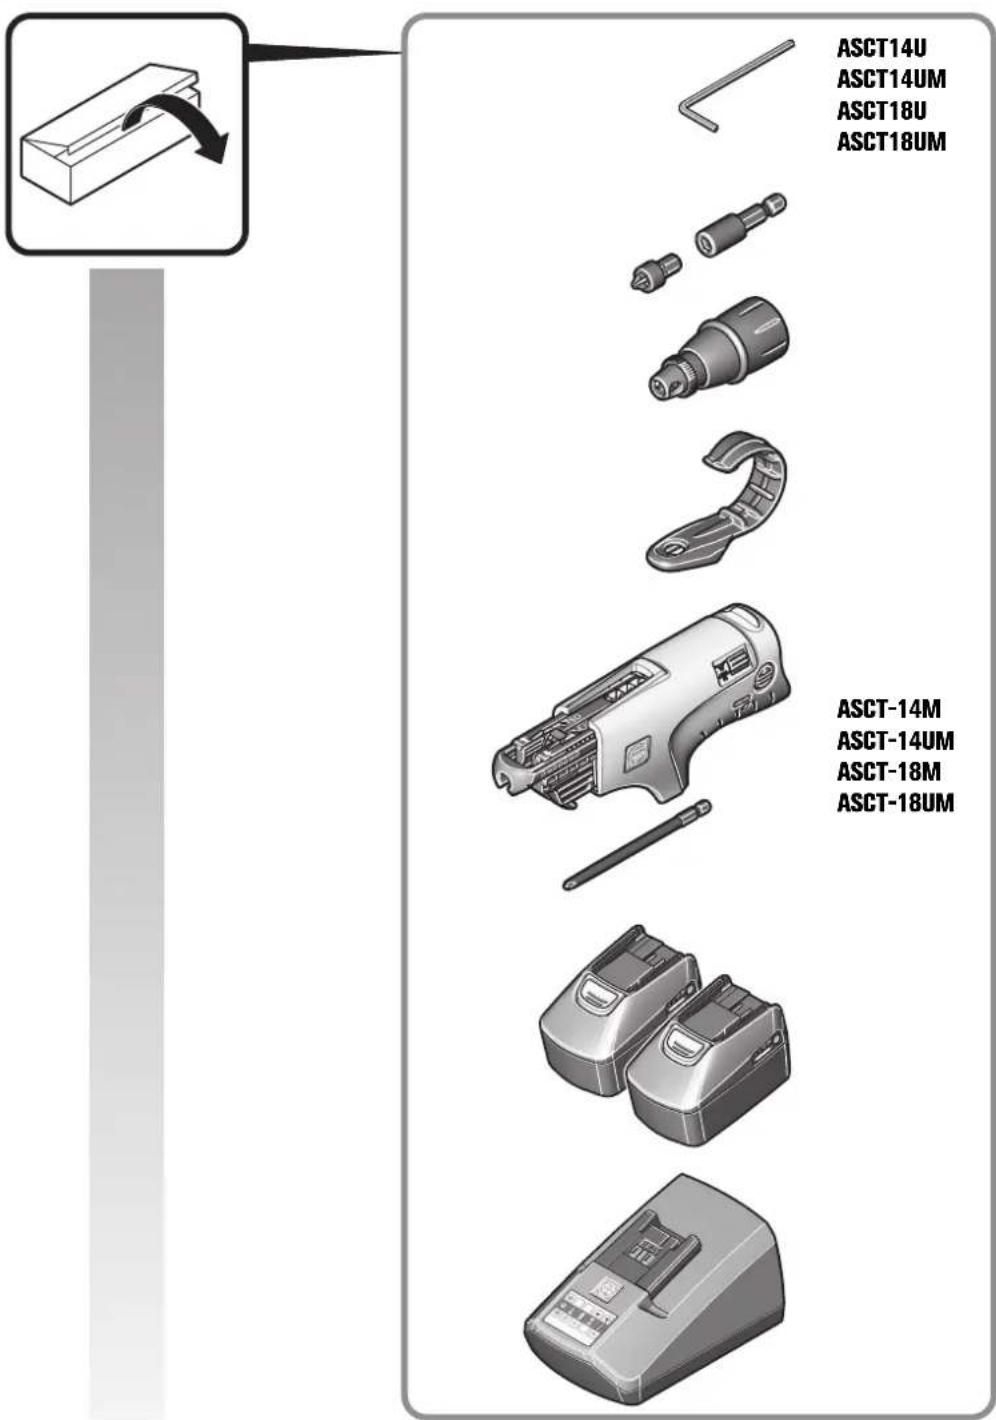
If required, you can change the following parts yourself: Application tools, depth stop, battery, belt clip, magazine
Warranty and liability.
The warranty for the product is valid in accordance with the legal regulations in the country where it is marketed. In addition, FEIN also provides a guarantee in accordance with the FEIN manufacturer's warranty declaration.
The delivery scope of your power tool may include only a part of the accessories described or shown in this Instruction Manual.
Declaration of conformity.
FEIN declares itself solely responsible for this product conforming with the relevant provisions given on the last page of this Instruction Manual.
Technical documents at: C. & E. Fein GmbH, C-DB_IA, D-73529 Schwäbisch Gmünd
Environmental protection, disposal.
Packaging, worn out power tools and accessories should be sorted for environmental-friendly recycling.
Dispose of batteries only when discharged.
For batteries that are not completely discharged, insulate the terminals with tape as a protective measure against short-circuiting.


Notice originale visseuse sans fil.