
Offset - Range hood BEST - Free user manual and instructions
Find the device manual for free Offset BEST in PDF.
| Product | Hood |
| Brand | Best |
| Model | Offset |
| Installation type | Extracting or recirculating |
| Extraction duct diameter | 150 mm |
| Number of motor speeds | 4 (including 4th intensive limited to 5 min) |
| Timer function | Automatic stop after 5 minutes |
| Automatic shut-off without command | After 10 hours |
| Acoustic signal | Beep with each key press |
| Lighting | Integrated LED |
| Grease filter alarm | 30 hours of operation |
| Charcoal filter alarm | 120 hours of operation |
| Grease filter | Dishwasher-safe or hand washable |
| Charcoal filter | Replacement approximately every 6 months |
| Exterior cleaning | Damp cloth, warm water and mild detergent |
| Interior cleaning | Cloth soaked in denatured ethyl alcohol |
| Installation | Must be carried out by a professional |
| Safety | Disconnect power before maintenance |
| Spare parts | Filters, lamps of the same type |
| Technical support | Contact after-sales service for lamps not listed |
Frequently Asked Questions - Offset BEST
User questions about Offset BEST
0 question about this device. Answer the ones you know or ask your own.
Ask a new question about this device
Download the instructions for your Range hood in PDF format for free! Find your manual Offset - BEST and take your electronic device back in hand. On this page are published all the documents necessary for the use of your device. Offset by BEST.
USER MANUAL Offset BEST
! The appliance must be installed by a qualified person in compliance with the instructions provided.

Wear gloves when carrying out installation and
maintenance operations.
If the supply cord is damaged, it must be replaced by the manufacturer, its service agent or similarly qualified persons in order to avoid a hazard.
Warning: Failure to install the screws or fixing device in accordance with these instructions may result in electrical hazards.
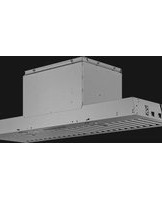
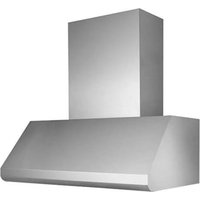
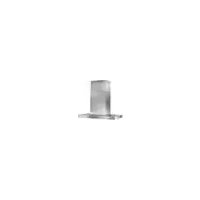
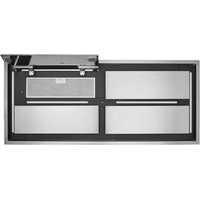
The hood can look different to that illustrated in the drawings in this booklet. The instructions for use, maintenance and installation, however, remain the same.
AIR VENT
(for ducting versions)
! Prepare the hole and the air vent duct (150 mm diameter).
! Use a duct of the minimum indispensable length.
! Use a duct with as few elbows as possible (maximum elbow angle: 90^ ).
! Avoid drastic changes in the duct cross-section.
! Use a duct with an as smooth as possible inside.
! The duct must be made of certified material.
! Do not connect the hood to smoke exhaust ducts for the products of combustion (boilers, fireplaces, stoves, etc).
1! For the air vents comply with the provisions laid down by the competent authorities. In addition, the air must not be evacuated through a hole in the wall unless specifically intended for this purpose.
! Fit air intakes in the room to prevent the hood from creating a negative pressure in the room (which must not exceed 0.04 mbar); if the hood is used at the same time as non-electrical equipment (gas-, oil- and charcoal-fired stoves, etc.) the exhaust gas may be sucked in by the heat source.
FILTERING OR DUCTING VERSION?
The hood may be in filtering or in ducting version. Decide from the outset which type is to be installed. For better efficiency, we recommend installing the hood in the ducting version (if possible).

Ducting version
The hood purifies the air and evacuates it to the outside through an exhaust duct (diameter 150mm

Version with an outside motor
In the version with an outside motor, a vacuum suction unit must be connected; this exhaust will operate separately, conveying the exhaust air through the unit. Only use vacuum units suggested in the original catalogue.

Filtering version
The hood purifies the air and recycles the clean air back into the room.
Only for hoods equipped with electronic control:
The 4th speed (intensive) is automatically lowered to 3rd speed after 5 minutes of operation to optimise energy consumption.
- If the hood is left on (lights and/or motor), after 10 hours in the absence of commands from the user, it will automatically switch to OFF condition with all services switched off.
- The Buzzer emits a "beep" each time that a command is set from the keyboard or remote control (optional).
- In the event of interruption of power during the hood, if you restore the hood in the OFF state, then the engine must be reactivate manually.
CONTROLS
Controls of Fig. 20
A) Turns the LIGHTS off.
B) Tums the LIGHTS on.
C) Decreases speed down to minimum speed. If pressed for 2^ the motor is turned off.
D) Activates the motor (calling the last speed used) and increases the speed until reaching maximum.
E) FILTER ALARM/TIMER RESET: when pressing the key during display of the filter alarm (motor off) its reset the hour counter. When pressing the key when the motor is running, the TIMER is activated and the hood will automatically be switched off after 5 minutes.
L1) The 4 green LEDs indicate the running speed.
L2) When the LED is red (motor off) it indicates the FILTER ALARM. When the LED is green (flashing) it indicates that the TIMER has been activated with the key E. FILTERALARM:
After 30h of operation, the LED L2 turns RED. It indicates that the grease filters need to be cleaned.
After 120h of operation, the LED L2 turns RED and flashes; It indicates that the grease filters need to be cleaned and the charcoal filters replaced.
After cleaning the grease filters (and/or replacing the charcoal filters), restart the hour counter (RESET) by pressing the key E during display of the filter alarm.
Controls of Fig. 21
Key A: light switch.
Key B: first speed motor ON/OFF switch.
Key C: second speed switch.
Key D: third speed switch.
Controls of Fig. 22
P1: It turns on an off the light.
P2: It starts the engine setting it to the first speed (the icon is highlighted). Other speed icons remain inactive.
P3: It starts the engine setting it to the second speed (the icon is highlighted). Other speed icons remain inactive.
P4: It starts the engine setting it to the third speed (the icon is highlighted). Other speed icons remain inactive.
P5: It starts the engine setting it to the fourth speed (the icon is blinking). Other speed icons remain inactive. The maximum speed is set to be maintained for maximum 5 minutes, after this time the speed will be automatically adjusted to the third speed.
P6: It starts the timer (the icon is highlighted). By running
the timer (5 minutes), the engine stops automatically after 5 minutes.
P7: FILTER ALARM. After 30 hours of operation the icon is highlighted to indicate that the filter should be cleaned.
After 120 hours of operation the icon is highlighted to indicate that the grease filter should be cleaned and the charcoal filters - replaced.
To RESET the alarm, press the icon while it is highlighted (or while it is blinking).
Controls of Fig. 23-24
Button TC1 (Lights): Switches main light ON/OFF When the main light is on, BL1 changes colour and becomes active. When the button is pressed for more than a second, it switches the courtesy lights (optional) on/off.
Button TC2 (Motor-V1): Motor ON/OFF - Activates the motor at 1st speed.
Button TC3 (Motor-V2)Activates the motor at 2nd speed.
Button TC4 (Motor-V3)Activates the motor at 3rd speed.
Button TC5 (Motor-V4) Activates the motor at 4th speedMaximum speed is timed at a maximum of 5 minutes, after which 3rd speed is set automatically. When the motor is active, the LED of the last selected button (TC2-TC5) active to signal which speed has been set.
Button TC6 (TIMER auto power off 5 min.) Activates the TIMER function at the speed that has already been selected if the motor is NOT active, it switches on the motor at the 1st speed and activates the TIMER function when the TIMER function is active, BL6 becomes active.
30h filter ALARM: after 30 hours of operation, an alarm switches on to signal the need for anti-grease filter cleaning. The filter alarm, when active, is displayed for 30 sec each time the motor is deactiva-ted:BL6 remains ON.During this period, it is possible to reset the alarm by pressing the TC6 button for longer than a second.
120h filter ALARM: after 120 hours of operation, an alarm switches on to signal the need for active carbon filter (optional) replacement. The filter alarm, when active, is displayed for 30 sec each time the motor is deactivated: BL6 lighting blinking. During this period, it is possible to reset the alarm by pressing the TC6 button for longer than a second.
Work Time Limit: if the hood is left on (lights and/or motor), after 10 hours in the absence of commands from the user, it will automatically switch to OFF condition with all services switched off.
Buzzer: the Buzzer emits a "beep" each time that a command is set from the keyboard or remote control (optional).
MAINTENANCE
! Before cleaning or maintenance cut the power.
Cleaning the hood
WHEN TO CLEAN IT: clean it at least every 2 months to prevent the risk of fire.
EXTERNAL CLEANING: use a cloth moistened in lukewarm water and neutral detergent (for painted hoods); use specific products for steel, copper or brass hoods. INTERNAL CLEANING: use a cloth (or brush) soaked in denatured ethyl alcohol.
WHAT NOT TO DO: do not use abrasive or corrosive products (e.g. metal sponges, brushes, too hard brushes,
very aggressive detergents, etc.)
Cleaning the grease filters
WHEN TO CLEAN IT: clean it at least every 2 months to prevent the risk of fire, in according to use.
HOW TO REMOVE THE FILTERS: push the catch near the handle towards the rear of the hood and pull the filter downwards
HOW TO CLEAN THE FILTERS: hand wash or in the dishwasher using a neutral detergent. If washing in the dishwasher, possible discoloration of the filters does not in any way compromise their functioning.
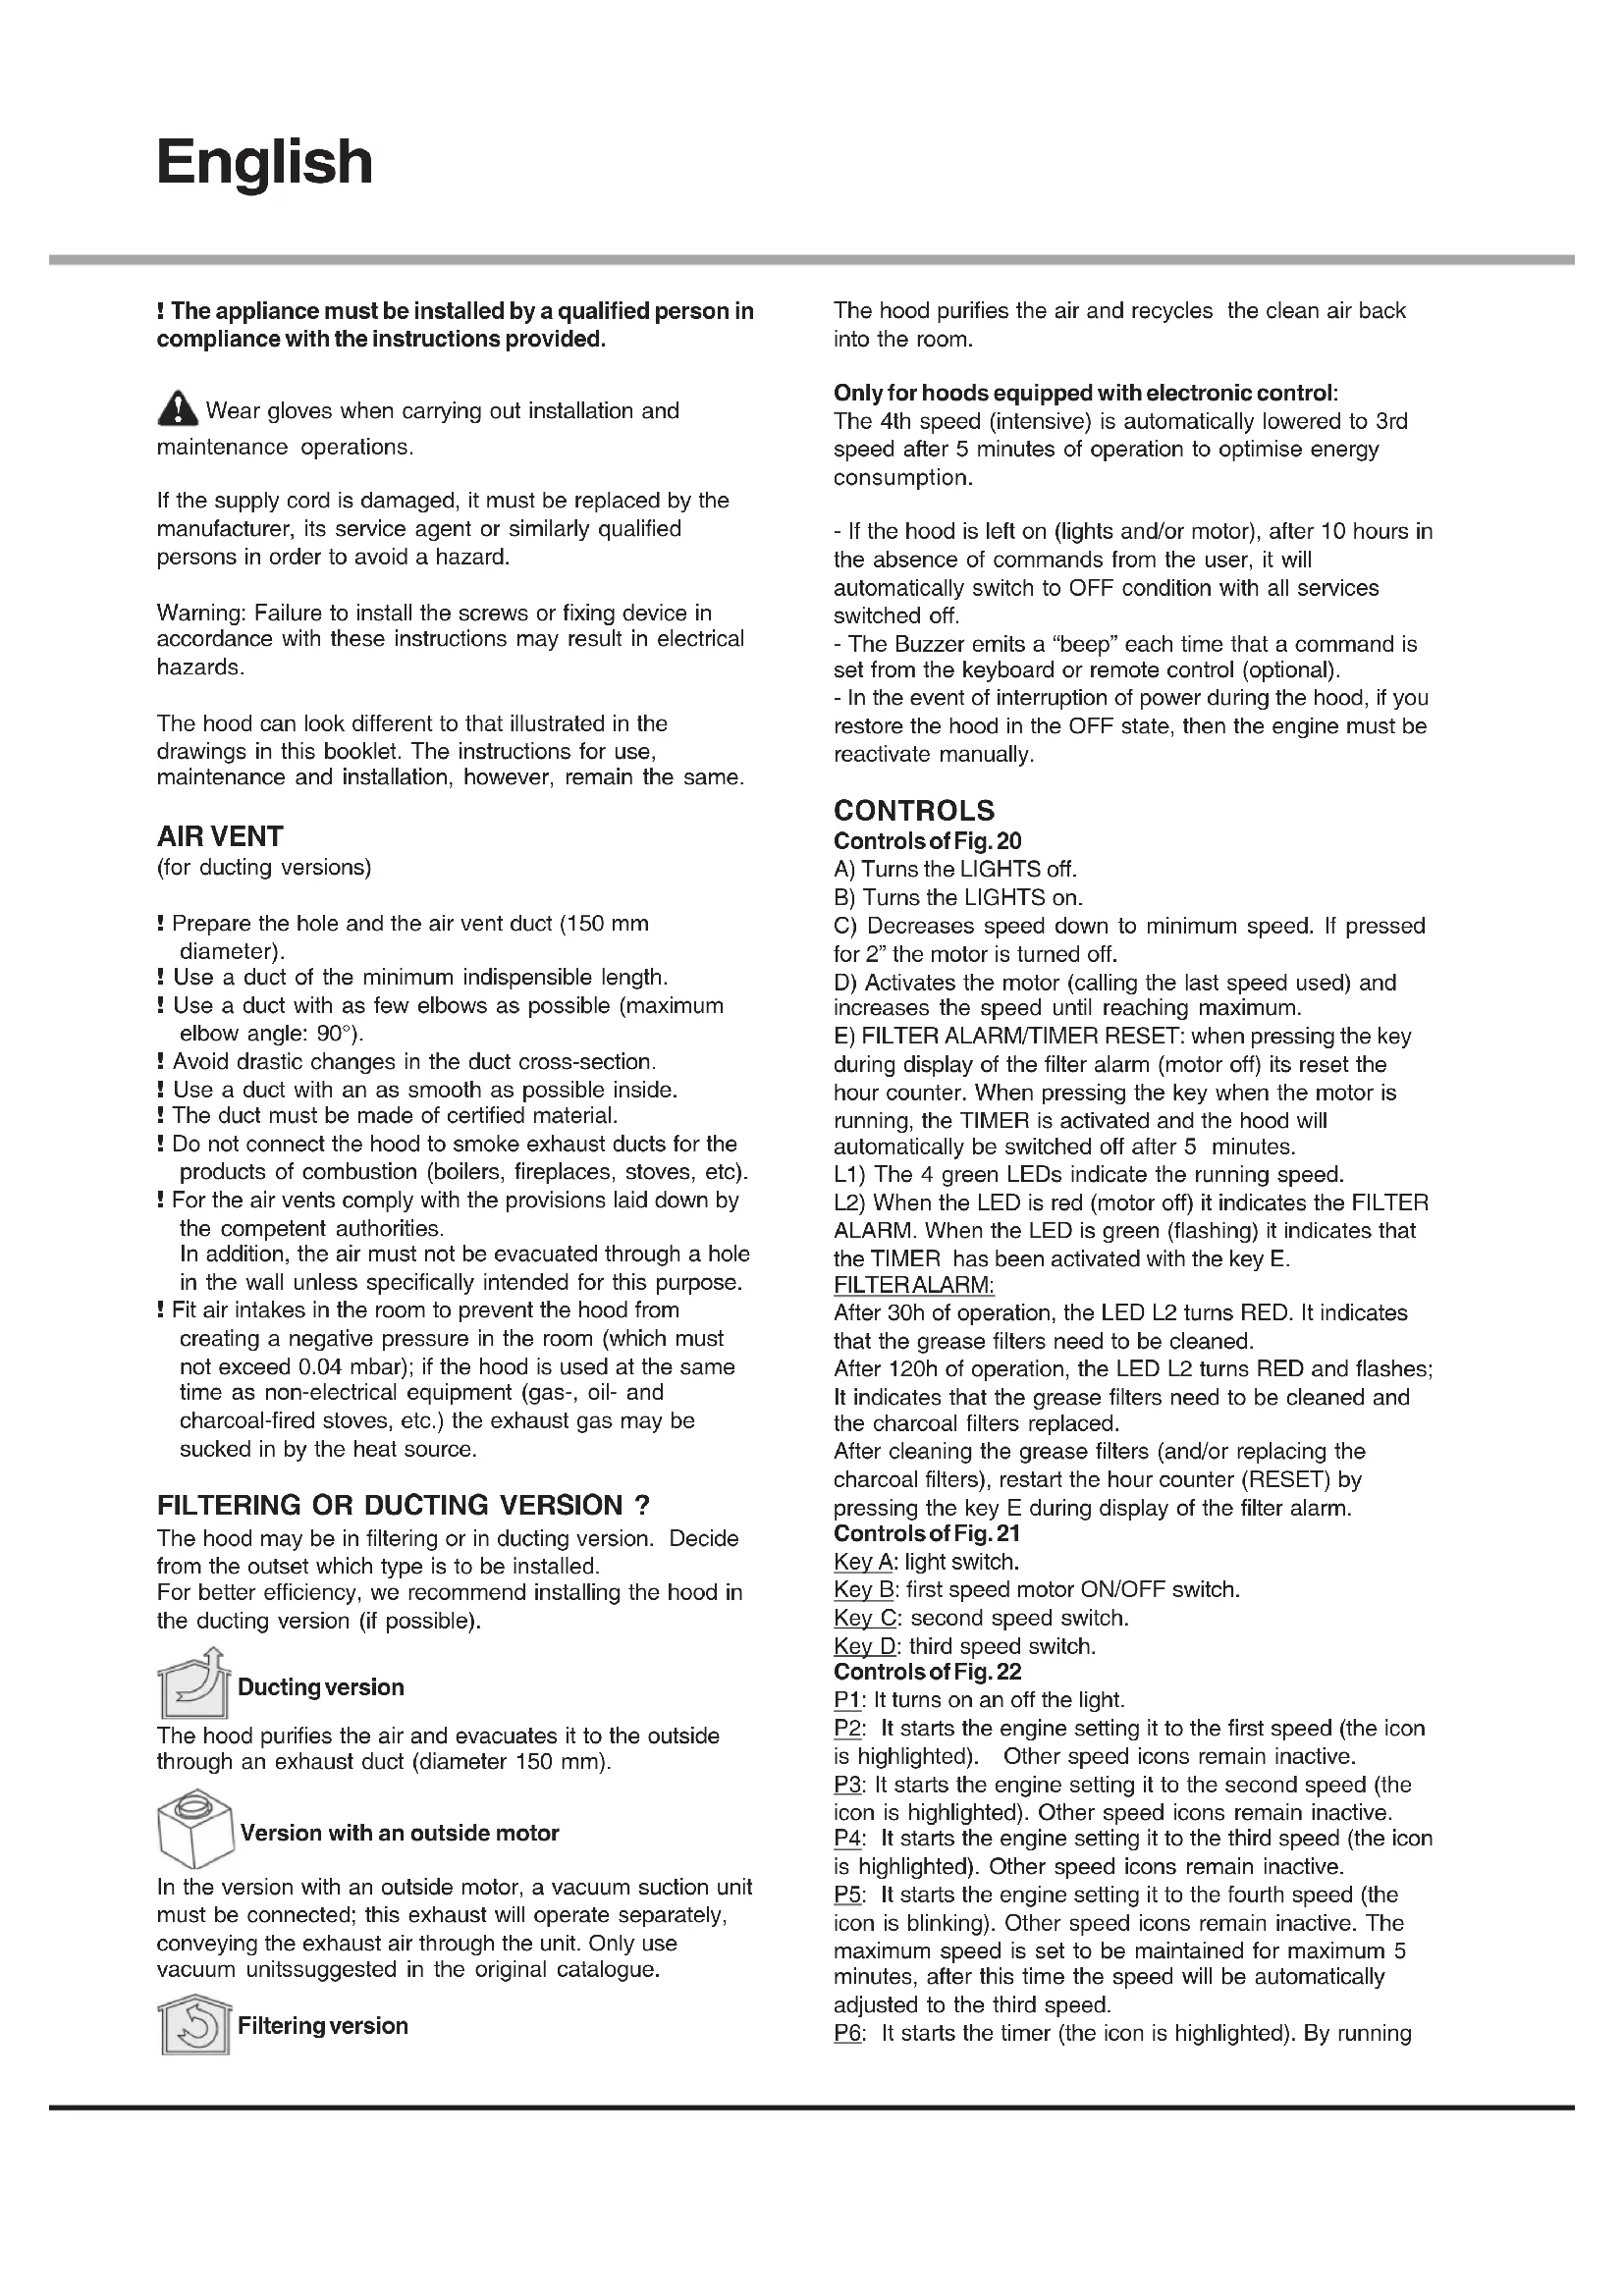
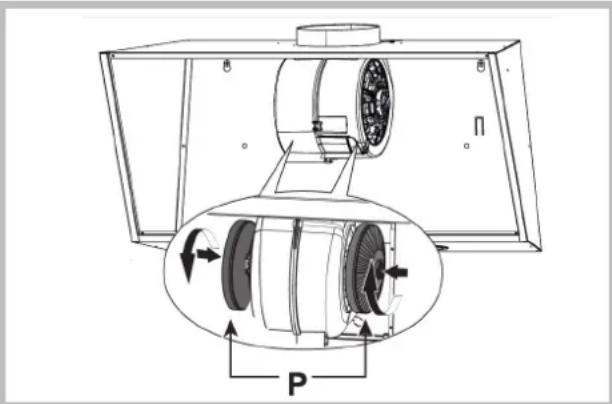
Replacing the charcoal filters (P)
(for filtering version only)
WHEN TO REPLACE IT: replace it at least every 6 months, in according to use.
HOW TO REMOVE IT: remove the charcoal filters with rotary motion.
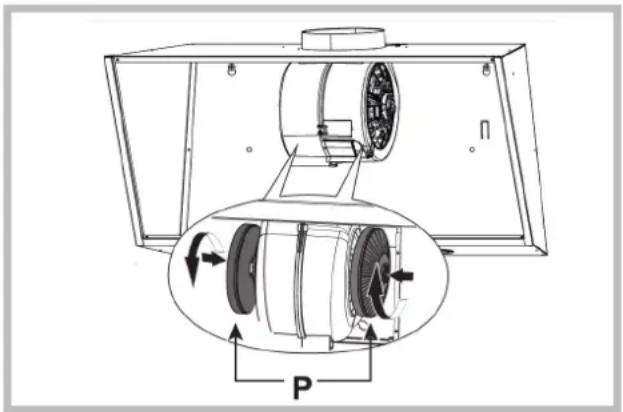
Lighting
Replace it with lamps of the same type; if a lamp is not listed in the table shown in the "Warning" worksheet, please contact the support center.


Components not provided with the product
MALFUNCTIONS
If something appears not to be working properly, do the following simple checks before calling Technical Service:
The hood is not working
Possible cause (1): Power cord not securely plugged in.
Correction: The hood was never electrically connected by the installer. Call the electrician/installer.
Possible cause (2): A speed has not been selected.
Correction: Select a speed in the control panel.
If the hood has turned off during normal functioning, check that the power has not been disconnected and that the omnipolar disconnection device has not tripped.
- The blower does not work but the lights do
Possible cause: The blower motor connector is not plugged.
Correction: Locate the blower motor connector and plug it. Check to see if the fan now works. If the problem persists, call Technical Service.
The hood is not operating effectively
Possible cause: Dirty filters/baffles.
Correction: Check to be sure the filter is clean.
For ducting hood and hood with an external motor
Possible cause (1). Ducting requirements inadequate. If your duct length exceeds the manufacturer's requirements, hood performance will suffer. Air-flow will also be reduced if the house duct work is too small or there are too many elbows in the system.
Comply with the official instructions provided by the competent authorities in merit when installing the disposal duct (example, the air collected must not be conveyed into a duct already used to central heatings systems, thermosiphons, etc.). The room contains air taps.
Contact your installer.
Possible cause (2): Obstruction in duct work.
Correction: make sure nothing is blocking the vent (bird nests or kinks in the duct work).
Possible cause (3): Damper blade may not be opening.
Correction: Make sure the tape is removed from the damper blades and that it swings open freely.
For filtering hood
Possible cause: the charcoal filter/s is saturated.
Correction: replace the charcoal filter/s.
The lamp does not work
Light spot (LED):
If a lamp is not listed in the table shown in the "Warning" worksheet, please contact Technical Service.
Incandescent lamps:
Possible cause: The lamp or socket may be defective or a wire could be disconnected.
Correction: place the lamp in another socket; if the lamp is not working, replace with lamp of the same type; if the lamp works, the original socket may be defective or a wire may be disconnected. Call Technical Service.
Halogen lamps:
Possible cause: The lamp or socket may be defective or a wire could be disconnected.
Correction: replace with lamp of the same type. If the problem persists, call Technical Service.
- Remote control not working (where present)
Possible cause (1): Link lost between the remote control and the hood.
Correction: Check to see if the hood works with the control on the hood.
Remove power from the hood at the circuit breaker then reapply power. Relink the remote control to the hood, following the instructions supplied with the remote control.
Possible cause (2): Remote battery dead.
Correction: Change the battery.
Vertical telescopic trolley is locked (where present)
If all LEDs flashing, the telescopic trolley is locked. Wait 30^ and press the Up/Down button to release the trolley.
If Up/down button flashing, the grease filter is not positioned correctly. Reposition properly.
If the trolley is locked, check that the cable connector is not disconnected. If the problem persists, call Technical Service.
Cause possible : Filtres / compartments sales
"Attention", contacter le service technique.
P1: Liga e desliga as LUZES
AFVOER OF RECIRCULATIE?
Oplossing: Controller of de filter schoon is.
IMoHTax npOn3BODNTCB C COOTBeTCTBnC HAcToHMMoHTax npOn3BOIDNTCB C COOTBeTCTBnC HAcToHMMHCTpyKzHMM npOpeccnoHaJIbHOHNCTpyKzHMM npOpeccnoHaJIbHO KBaJIHΦNtPOBaHHbIMCneHJNtCTAMN.KBaJIHΦNtPOBaHHbIMCneHJNtCTAMM.

IcnoB3oBaTb nepaTkN BO Bpem yCTaHOBKn I
TexobcIyKINBaHHa.
Ecnn Ka6eJIb NITaHnIOBpeKDeH, B cIeJnx npEynpeJnpExHeHn ONaCHOCTN, OH DOJIKeH 6bITb 3aMeHeH n3rOToBnTeJem HnIero CnyK6oTexHnuecko IOndepKKN, INN JInC0m C anaIorMHOKBAINcPknAunnei.
BHHMaHHe: HenpaBHbHa yCTaHOBka BnHTOB nJIN KpeEnKbIX DeTanei B COOTBeTBnC 3TMM HnCTpyKUHM, MOKeT pNBecTN K ONaCHOCTN NopaxEHn 3JIeKTPueckm TOKOM.
Kanot Moryt HmTeb pa3nHHyo 3CTeTNY, YEM TO, TTO NOKa3aHO Ha YepTeKax B 3ToI KNHRe, Ondako, HNCTpyKuIN NO 3KcPnyaTaUN, TEXHNueCKOMy 06cJyKnBaHInIO yctAHOBKe OCTaOTc TEMN JKe.
OTB0I BO3DyXAOTB0I BO3DyXA
(DnBcBaIbOxMoDeNe)
!PpeDyCMOTpeTb OTBepCTHe n Tpy6y dIa OTBOda BO3dyxa (dnaMeTp 150 MM).
!NcnoB3oBaTb Tpy6y MmHmAbHo BO3MOxHOn DnHbI.
!NcnoB30BaTtp6yC HAnMeHbIMM Bo3MOxHbIM YNCnOM N3r6OB(MakcMaJIbHbI yrOJ N3r6a:90°)
!36eRaTb pe3KxH 3MeHeHH dHaMeTpA ceHeHH Tpy6bl.
!IIO BO3MOXHOCTN CNOJIb3OBAbT Tpy6y C rnaKoBHyTpeHHe IOBePxHOCTbH.
! Tpy6a donkna 6bIb cdeJana n3 matepna, COOTBETCTBYUcero CTahapTAM.
!He noDcoeHnHbBITK Ty6am OTB0da dbima, 0bp3oBaHHoro B pe3yIbTaTe CkrraHn (BOHOHaRpeBaTeJI, KAMNbI, NeKu N T. d.)
!Pn OTBode BbITnBaemrBO3dyxa Heo6xOIMOCo5NHOaTb Tpe6OBaHn KOMTeHThBix OpraHO.BKpomeTORO,BO3dyx HE DoJnxEH BbIBODNTbcrYepe3 KaKoe-JINBOCTEHHOeOTBepCTne,ecnTOJIbKO OHOHeIpeDyCMOTpeHO dJaDaHHo Uen.
!ObopyoBaTb NOMeHHe BEHTNIAUHOHBIMN OTBepCTnMBO N36ekaHne CO3daHnBBIaKKoI OTPiAteNBHO DaBHeHn B NOMeHn (He DIOJXHO npBeBlaatb 0,04 6ap);ecn BBIaKk NaONJIb3yETcOdHOBPemEHNO C He3JeKTPOHHBMIM Pnp6opAMn (ra3OBtie,MacnHbIe,yroNbHbIe Neu n T.D.) BO3MOxHO 05paTHoe BCacbIBaHne ra3a,OTBeDeHHORO O NTcTOHnKa Tenna.
ФИЛТРУОДА ИП BCACБВAOUI?
BbTnKa MoKet 6bIb cHbIbTpYIOe HIN BCaCbIBaIOe TnTa. Heo6xOIMO C camoro Haana BbIbpaT TNB bTnKnn Dnry UcTAHOKn. INMakCMmaHbHOIN PPON3BOIMTeJIbHOCTn COBeTyEm YCTaHOBHTb BCaCbIAOuNN TIN BbITnKN (NO BO3MOXHOCTn).

BocLusoupsTin
BbTnKa OOnuAeT Bo3dyN BbIbpaCbIbaeT erO HApKy Yepe3 BbITKHyTO Tpy6y (DnaMeTp 150 MM).
Ppi pa6oTe BbITKke C nCTAHNOHHbIMBeHTNlTOpOM cNeyET NOcOe-DHHTB K np6bpy OTJeBHO CTORUYOBBITKHyO CTAHIO; Ppi 3TOM pIN6OpSyDet NcONJIb3OBaH B KaueCTBE nepeXODHOrO6noka DnB BbIbPoCa BO3Dyxa HApJy. DnToro NcONJIb3yIne TOnkO BbITKHBIECTAHU, PpeNDIOxKeHHbIe B

PhiLtpyoupH Tm
BbTJkKa OOnuaeT Bo3dyx N Bo3Bpaaet OOnueeHHbI B03dyx B NOMeueHne.
ToIbKO 10HTBENKCAEETPPEBHBM6000MYPQEPENHNA: B CEJAX ONTMM3aUNN NOTpe6NEHM 3HEprn Uepe3 5 MNHy T pa6Otbl 4- a CKOPoCTb (uHTehCNBHAA) ABTOMaTHUeCKN nepexoNT Ha 3-HO CKOPoCTb.
- Ecnn B TeueHne 10 yacOB He MeHreTc ynpaBHeHne BKJIIOUeHHo KYXOHHO BbITKKO (BKJIIOHeHO OCBeUeHne N/ INI NOCDBeTKA),TO BCE cyHKUIN ABTomATueCCKN OTKIIOHaOTcN BBITKKA nepExoDHT B COCTOHRNE OFF (BblIKI.).
- KaKdbi pa3, KOrda BbIaetcKOMaHd cKJIaBnAtpyblnnnylbTa nctahUHOHHoro ynpabNeHnra (OnuHOHaJbHbIiBapnaHT), cpa6aTbIBaet cyHKnro NOITBepXDeHnBBINOJIHeHnKOMaHdbI 3ByKObbIM CINHAJOM "0N".
- EcIn B pexime pa60tB bItTnKn Hactynnt Bhe3anHoe npekpaeseHne NoaduN B ceTb 3NeKTpo3Heprn, BblTkKa aBTOMaTHueckn BblKlIOuaeTCa, a KONka INDet B NOLOKeHne OFF (BblKJ.). CneDyET NOTOM NOBTOpHO BKNIOHTb DBIRatEnb BpyHyIO.
OPTAHbI YIPABJIeHnIa
OPTATAHHJXITPPBHTDHPBpWZD
A) BbIKHouHeHne OCBELEHNr.
B) BklnoueHne OCBELEHNr.
C)ymeHbWeHneCKOpocTnDBuratEnoMNHImaIbHoN. YdepKINBa KNONky HaxaToN 2",BbIKNoUaETcR DBruratEnb.
D) BkIIOucaET DnIRaTeNb (Ha nocJeHne HcNoJIb3OBAHHoCKOpOCTn) N yBeJIuHBaEt CKOpOCTb Do MAKcIMaJIbHOE) C5POC ABAPUNHO CnIHANA FNJIbTPbl /TAYMEP:
Haxnma KONky BO Bpem OTo6paKeHna ABapuHoro CnHaIa 1bTPOB (npn BkIOueHHOM DBrarTeNe), 0hnyetcOCTeYacOB pa6oJI. Haxnma KONky BO Bpem pa6oTI bNurateJI, BKIOuaeTcT AIMEP, n BtJkKa BIKIOUHTcABTomATHeckN Yepe3 5 MInyT.
L1) 4 3ENEHbIX cBeToaNoa o6o3HaHT TeKyuOCKOpocTb.
L2) Ecnn CBeToDnOg KpacHbI (npn BbIKNoeHHOM DBnraTeNe),TO OH 6o3Naaet ABAPINHbI CNHAI FNJIbTPOB. Korda CBeToDnOg 3eNeHbI (MnraE),TO OH 6o3Naaet, YTO 6bl BNIOueH TAnMEP npn NMOoun KHONK E.
ABAPINHbIN CnIHANIbTPOB:
Yepe3 30 yacob pa6oTbI CBetOJnoL2 cTaHOBNTcK PACHbIM, o6o3Haaya Heo6xOJMoCTb OuNCTKn KInpoylaBn-BaHouXΦnblTpOB.
Yepe3 120 yacob pa6oTbI cBeToNDoL2 cTaHOBHTcKPAChbIMn6ydtMnraTb,06o3Haay Heo6xOaHMOCTb
OuNTKn KInpoynabNBAIOUX XINbTpOB 3aMeHbI yOrNbHbIX NnBtPOB.
NoCne OuNTKn KInpoynabNBAIOUX XINbTpOB (n/nn 3aMeHbI yOrNbHbIX XINbTpOB), DnA BO3o6HOBNeHHa HauJa oTceta YacOB (CEPOC) HaxMnte KhoNky E Bo BpEmoTO6paKeHHa ABapnHoro CnHaJNa FInbTpOB.
OPRAHbI yNPABHEHn 210PAHbI yNPABHEHn 21 HNikatop 3aep3HeHn 4nhtpob Filter Alarm nocne Knonka A: BblKIOUATEB CBeta. 120 cacobpaotbl Knonka B: nepeKIOUATEb ON/OFF dBIRateJIHa 10ncle 120-ACOBORO UIKNA 3KcNlpyatauIN BkIOuaETcnackopctn I. HNDKATop 3aep3HeHn yrolbHO rKnIbtpa.KordaKnonka C: nepeKIOUATEb ckOPOCTII. HNDKATop 3aep3HeHn 4nhtpba BKIOueH, OH 6ydtKnonka D: nepeKIOUATEb ckOPOCTII. MRATb B TeeHne 30 cekynd kaxdbpa3 npn OPAHbI yNPABHEHn 220PAHbI yNPABHEHn 22BkIOUeHHn DBIRateJIb. BL6 hauHaeT MrrtaB. B 3TO P1): BkIOUaET N BblIOUaET CBET BPEM MoKHO c6pocntb CnHann3aunio nytem HaKaTHa P2): 3anyckaet DBIRATEb npn nepBOB CKOPOCTN (IKOHKA noDCBeHeHa). OctaIBHbIE NKOHKnCKOPOCTN BblIOUeHHbI. OrpaHmYeHne BpeMeHN pa6oTbI P3): 3anyckaet DBIRATEb npn BTOPOB CKOPOCTN (IKOHKA noDCBeHeHa). OctaIBHbIE NKOHKnCKOPOCTN BblIOUeHHbI. BKNIOUeHHo KxOHHO BblrKko (BkIOUeHO OCBeJeHne P4): 3anyckaet DBIRATEb npn TpeTbeiCKOPOCTN (IKOHKa noDCBeHeHa). OctaIBHbIE NKOHKnCKOPOCTN BblIOUeHHbI. OTKIOUaOTcN b BlrKkKa nepexoHTB coctoHne OFF P5): 3anyckaet DBIRATEb npn YETBEPTOn CKOPOCTN (BblKI). 3ByKOBOCnHaP MaKcMaJIbHaRCKOPOCTb yCTAHOBHeHa MaKcMaJIbHo 5 MNHyT. No nCTeEHnn 3TORO BpeMeHN aBTOMaTIueckn yctAHABJBAETc TpeTBCKOPOCTb.
P6):3anyck KlaBnua TIMER (NkoHka noCbeHea).Ipn BkLIOUeHNn cyHKunn Timer (5 MNHyT) DBNRatEnb ABTomATueCKn 3aepKnBaETcno 5 MNHyTax.
P7):CINHANFIIbTPOB.Iocne 30 cacOB pa6oem pexkme NKOKKa NODcBEuNBaetcN yka3bIBaET Ha HeoXOIMOCtB OCHCTKN IpOTINBOKIPPOBOROΦNJbTpA.
Iocne 120 yacob B pa6oem pexnme IKOHka nOcBeynBaetc H yka3bYBaET Ha Heo6XoDMOCt b OCHCTKn IpOTNBOxMPOBOrO fNtbpa N 3amehbl yrotlbhix fNtbpob.
C cIbIO AHHYINPOBAHnI CnHaJ, CJIeNyET HaxaTb NkOHky BO Bpem e e NOcBcETKn (NII BO Bpem MePuaHnI).
OPRAHbI UNPABLEHnI Phr.23-24OPRAHbI UNPABLEHnI Phr.23-24
KhONka TC1 (OcBeueHnE): BkIOUeHne / BbIKIOUeHne cpeDCTBa DnBbTJKeK n3 CTaJI, MeIN INN JATHyN.
rnaBHoro OCbeueHn ON / OFF. Korda rnaBHoe BHYTPEHHra YNCTKA: NcNoB3OBaTB TpRKy (INN
OCBeueHnE BkIOUeHO, BL1 MeHnert ZBET N BkIOUaEcTcR. KMCTOUY), CMOeHHyO B DeHaTyPnpOBaHHOM 3TNIOBOM
Pn Haxatm I ydepKbBAHN KlaBnSA BkIOUeHn/ cnIpte.
BbIKIOUeHn BcNOMaTeNbHO OcBeueHn ITO HEb3r DEATb: He NcNoB3OBaTB abpa3NBHe IIN Koppo3NHbI CpeDCTBa (HaNPIMep, MetaIIInueckne
KhONka TC2 (DbIrataJI - V1): ON/OFF DBrirateJIb - R6KN, CNIuKOM JeCtKHe UeTKn, Oeyb arpeCCNBHe MOIOUne CpeDCTBa, nT.D.).
TEXHNUECKOE OBCJNYKBAHNETEXHNUECKOE OBO
I Ipeed nCTKo INI npOBeHnEM TeXnueckoro 06cIyKBaHnO TKNIOHTb HaprKeHne.
U
KORDA IPOUN3BOUNITb YNCTKY: NCTNTb He peke, Yem pa3 B 2 Mecra, UTo6bI N36ExaTb PNCKA BO3ropaHn.
HAPYKHAR YNCTKA: INCINb3OBaTb TpRnKy, CMOeHHyIOB TENIIOB BOE CHeITpaJIbHbIM MOOcIM CpeCTBOM (DIIA 23.24 HENbIX BbTTXek); INCINb3OBaTb CNEUaJIbHbIE CpeCTBa DnI BbTTXek N3 CTaJIH, MEIN NIN JATyH.
BHYTPEHHRA YNCTKA: INCNoJIb3OBAbT TpRnKy (INN KNTOChy), CMOeHHyO B DeHaTyPiPoBaHHom 3TNIOBOM CnIpe.
HTO HJIb3A DENATb: He nCnONb3OBaTb abpa3HBbie IIN Koppo3HbIe cpeCTBa (HanpIMep, MetaIIINueckne ry6Kn, CInuKOM XeCTKNe UeTKN, OueHb arpeCCNBbIe MOIOUHe cpeCTBA, NT.D.).
4ACHTHERHNNNNTNEEHNNEHNNK
KOrIa IPOUN3BODNTb YNCTKY: OuHCTNTb BCBA3n CnCNoJIb3OBAHHem, no KpaHHeMpe, KaXdIe 2 Meca, TTo6ExaTb PnCKA Bo3HNKHOBEHnnoKapa.
KAK BbIHHTb FNilbTPbl: B MeCe pacnoJoxKeHn pyKn npToIKNHyTb CTOnOp No HAnpaBHeHn K3aHne Yactn BbITIKN NOTAHyTb FNilbTp BBepX.
KAK YNCTNTb ΦHbTPbl:MbIb HeITpaJIbHbIM MOIOUM CpeICTBOM BpyHnyIOIIN B NOcyDmOeHNO MAUNHe. B CJyuae IcnoIb3OBaHnI NOcyDmOeHNO MAUNHbI BO3MOxHO ObecuBeHNBaHne FNIbTPOB, KOtOpoe He BJNAET Ha IX cyHKUHOHaJIbHOCTb.
3ameHa yroELHoro dHtpa (P)
(TonbdofnnbtpyouoeBbTAAK)
KOrDAI PON3BOIDNTb 3AMEHY: 3aMeHeHbIO KpaHHei
Mepe, KaKbIe 6 MeCraueB 3aBVCNMOCTN OT NCIOJIb3OBAHn.
KAK BblHybΦnIbTp: C HMMTE yroIbHbIe φnIbTpbc NcNOJb3OBAHHeM NOKaYHbAHne.
IodcbetkaIodcbetka
3aMeHnTb Ha JAMNbI TORO Je Tnna; ecJn JAMNa He yka3ana B Ta6JIue JnCTa "IPIME4AHNE", o6paTntecb, noXaJyNCTa, B ceHTp nOdepKKn.
ABAPINHbIE CAPNTHBeyEN
EcnnTO-Toe npabotaertnpaBnHO,nepeBbI3OBOMTexMHcckoro 0cbnykBaHoe npcoHaA npocm BblIOHHTb IpOCTbIE KOHTpOblbIe DeHCTBIA,ONCAHbIe HIXe:
- BbItaKaHe pa6oTaetBbItaKa He pa6oTaet
Bo3MOxHnA npuHnA (1):PpOBoN nTAnHne NoDcoeHNHe NnnpOcOeHNHe HnnpaBnHo.
PeIeHHe: 3NeKTPnueckaN HCTaJIJIuIa NbIITJKK He 6bIJa COOTBcTcBeHHbIM Opa3OM NOcOeDiHeHa MOHTepoM. BbI3OBITE 3NeKTPkA/MOHTepa.
B03MooHna pnpHHa? (2) He BbI6paHa ckopocTb. PseueHeMe: BbI6epHTe cKOpCTb Ha naHeJIynpAs
Ecnn BblrKaO tKNIOHaETcB BO BPEM HOpMaIbHOH pa6oTbI,TO cNeJeYTe npOBepNtB, He OTCoeiOnHe Nn NITaHne H Be BKJIOUHNcN OMNHINRbHpy (MHORONIOHcHbI) p3a3eBNHmTeB.
BENTHINATBPHTNDIeTbpTHcNOOeHHe pa6oouHHe pa6o
Bo3moXnHa npuHa: Ka6eB nDburateJe BHTnIaTopa He noCoEHNHe. PeueHHe: OnpeDeneMe cteOnhaoxODeHne Ka6eB nDaunratae BHTnIaTopa HnoCoEHNHe ro. IpoBePbTe, pa6oTaet Nn BHTnIaTOp TenePB. EcnPi np6bEma He yctpaHena, Bb30Bnte TexHueckn 06cIpyKBAUoum nepcohan.
Buthnawkahepepoeetepeep
Bo3MOXHa npHnHa: 3aep3HeHbI pHnIbTpblneperoopdKn.
PeueHHe: PpOBepbTe, uCTbI Jn fNtBtp.
BcIyTaeM
Bo3MOxHn npuHn (1): CnCTema KaHaNoB He BbInOnHeHa COOTBeTCTBEHO Tpe6oBaHnM. EcnI DnHa KaHaNpReBbIaet Tpe6oBaHn PnO3BOJTeHn, BtIRKkA MoKcE He pa6oTaB ONTMaHbHO. EcnI CeeyHne KaHaC nINKOM MAnIO NnB CnCTeMe CNIKOM MHOrO n3rN6OB, To TaKKe 6yEdT 3AmDeHn NOTOK Bo3Dyxa.
Bo BpMaM OMTaXbO tBODnHOro KANHa CnEeYt pnpdepKNaBtC8
OOhmAlhBix NcHCTpykU, KOtpIbe npEOctBaNHeBcoOTBeTcByoUmm
OpAHAMn (Hapmep, Bblrnaem Bo3zH Me MOET 6bItb HapraJIeB
BA KaH, KOtpIb Yuke IcNOB3yETc B pAMKx IHCTaIIaUM
ZeHTpaJIbHorO oTOPiENHn, TepMOcHOHOB nT.d.). B nomeuHn
HAHOJrCE BENTNIUMOHHb TEbCPTH.
Cneyet o6patntbrc KMOHTepy.
Bo3MoXHa npuHa (2): KaHaJ 3aKpbT.
PeueHHe: npOBepntb, HnEro IIn He 6NoKpyet BeHTnIaIOHHbI KaHaI (rHe3da nTtU nn y3JI).
Bo3MOxHn npuHa (3): Dpoccehna 3acIOHa He OTKpbIbAeTcra.
PeHneHHe: Heo6xOJMoN pNoBepRb, 6IbIa nn yctpaheHa nENTHa n3 dOpccehNo3acNOHNcN BO6OHO nn OHA DnBaTcT.
B cnyuee BbITAAKc C dHnIbTPOM
Bo3MOxHnA npuHa: yroIbHbI pIbTp nonHOCTbIO npoNTaH.
PeueHHe:3aMeHHTb yroIbHbI pIbTp.
- Janna he pa60aer
PedonekTopb1(LED):
Ecnnn narnbl 3TOro Tnna He HaxoJrTaB C HnKEnpNBeDeHNoT TaBnIe Ha cTpaHnue c "PnpMeHaeHne", pOcMn ObaPTbC K TexHnYeCKOMy o6cnynBaOuSeMy npcoHany.
Namblc NamnoyKaMn:
Bo3MOXnHa npuHnA: NAMNoUkA Hn CBeTnBnK HeNcnpaBbI Jn6o oToCoeDnHnC nPoBOd nTuHn.
PeHHe: yCTAHOBHT lamnoQy B dpyroCBETnblbHK; ecn lamnoOka He paBoTaTe, 3aMeHNbEe pyroTakoroKe Tnla; ecn paBoTaTe, 3aHaHTb HeCNpBAHbNc CBETnblbHK Nt OTCoeDNHnC PNOBOD nTAnHnB. BbI3oBITE XEHNIeCKnO6cLNYBaOuMn nepcoHan.
TanoreHHbI naMbI:
Bo3MOXHnA npuHnA: lamnoUcKa nCBeTnBnK HeNCnPabHbI NIOO 0TOcoeHHnCnPobOD nHTaHn.
PeueHHe:3aMeHnTb lamNoOyKdypOry TaKOro Kx TIna. Ecnn npOBeMa He yctpaHeHa, BbI3OBte TexHnueckn 06cbnykBaHOoi nepcoHAn.
- PnybT dntaHnHO HOpabneHHe pa6oae (eepa66bI do6aBHe B KOMnNeKT)
Bo3MOXHnA pIuINHa (1): OTCyTCTBm CoEduHEHn MEXdy PnybTom H ByTTKIOI.
PeueHne: PnpoeBnTb, npabunbHo n pa6oTaOT KhONKn ynpaBHeHn, KOToPbIe YcTaHOBnEhBa Hb BbITJXKe.
BbIKIOHHTBNTAHNE BbITKHO C NMOIOJIHO ZIEKTPOUeCKTO RpeDOxPAHENTER; NOcIe Yero OYrB Iero IOIOCoEOHNHTB. CHOBA BbIOINHTB CoEOHNHE Mekdy NpblTOn M bITKHO, COJIOHO IA HCTP KyIOHO, PpINOJOEHHO K NpblTy.
BMOxMHaNpMnHua (2):OptapoTaTHHaNb 6aTapeiKa B npIbTe. PeSeHBe:3ameHHeTb 6atapeiKyo HOBoi.
- 5nokpoBaHHe BepTnKaIbHOro TeJeckOnuYeCKoro JOTka (ecm on 6bn doaaneB KOMNNeKT)
Ecnn CBe CBeTDoDbI (LED) MrraHOT, To TeneckOnneckn InotOK 3a5bokpOBaH. PnoOdaTb 30 cekyH n HaxKaTb KhoNky "Bepx" HIN3 , Tc6b1 pa36bKnKoPbAbt bNotOK.
EcnH KHONKA "Bepx/HM3" Miraet, To XnpoBoi FmNtP He yCTAHOBEN B COOTBTcTByIOUeM NOIOKeHH. Ero Heo6XoJHMo YCTAHOBITb HauJezaumm OBa3OM.
Ecni nnotok 3aboknpoBav, Huyko npobeprtb, He 6bln OTcoeJHHe npoBod nHTAHNA. Ecni npobJeMa H yeCTpAheA, Bby3OBITExHNeckn 06cnykmbauohm nepcohan.

KOMIOHEnTbI, He BXOJaUne B KOMnJIeKT
UDLUFTNING AF LUFTEN
HVORNAR SKAL DEN RENGORES: rengor mindst haveranden maned for at undga brandfare.
UDVENDIG RENGORING: anvend en fugit klud opredet i lunkent vand med et neutralr rengoringsmiddel (til lakere de emhaetter). Anvend specialprodukter til emhaetter i stal, kobber ell er messing.
INDVENDIG RENGORING: anvend en klud (eller en pensel) dyppet i hushholdningssprit.
HVORNAR SKAL DET RENGORES: rengor mindst haveranden maned for at undga brandfare, I relation til brug.
SADANTAGES FILTRENE UD:tryk
Kolla in tekniak service.
Halogenlampor:
(TiTcEKdooEic aToppopnpnoC)
Ipoetoiapote Tnv otn kai tov aywyo EKKevwnc tou aepa (diapertoc 150mm).
IXpnoiioTIOIeEvavaywyoTOU EALXIOTOAvaykaiou mKouc.
XPnaiotoineEvavayyoyeTovEaxiToDuVato apIe ywivw (eyiotynvviia Tc KaTtun90°
ATPOEUYETepaotikecaaayecdiatou tou aywyou.
IXpnoiIOToIOnTe Evav aywyo e To EoWTEPIKO kata To duvatov TIO Aio.
!To uAIKO tou aywyou TpEeI VA Eivai EYKEKPIevo Wc TPOCS TIOPOdiaypaes.
!Mn ouvdeete tov atoppoqnnpa o aywoouc EKKevwns TwV KAIVWv, TPOIOvTsw KaUOnC (AeBntEc, Tzakia, OepmuotpeC, kATI.).
Ia TnV EKKevwn Tou aepa TTPOC aTOnaKpuon va Tnpite TIC UTTOBcEIG Twv apoBDIWv apxuv. Akou, o TPOC EKKevwn aepac dev TpETeVA aTOnBaAaTeai iaoc KoIoAOTnTAC Tou Toixou kToC KAv autn n KoIoAOTnA TPOOpiEeai yia To OkOtto auto.
Eoiote to wpo me uttooexc aepa yia va un
ouyoe i aoppopnnpac ia apvntik niean oTo
Oatio (Tou dev npetie va eTepvaei ta 0,04 mbar).
paat, av o atoppopnnpac xpnoioutoine i
tautoxpova ie oukeuesn nektpikec (epmuotpec
aeiou, aoiou, avpaka, kTt.) mtpei va avappoqnouv
kaosaepia anr tyn nnyn thepountac.
ΦIATPAPIEMATOH ANOPPOHHE
O atoppoqntnpac mtpei va eivai tuTou aToppoqnonc n tuTou qIATpapiauatoC. AITOPaioTe E apxnc Tov TUTo EyKatataon. Ia kalutepn aTdooan, tpoteivoume Tnv Eykataotaon Tou aToppoqntnpa oE ekdoan aToppoqnonc (av eivai duvatov).

Kooan aonppoqnons
O atoppoqnnpac kaqapizei tov aepa kai tov atoabaalei TPOC TA Eeaw eovc aywoukKevwoon (iaetpou 150
mm).

EkoonmuεeogpiKivntnpa
TnV ekOoN eEgWepiKo KIVnTnpa, novada TpTeIva ouvdeTai eia mova aavapopnoan, n otioa 8a AEitoupyei OE ExwpiTo Xwpo, eXpnon Tc movadac Ws Baon Tou EApntmuatoc Tou aepa TpTeIe vaekewwtei. XpaoiopoIOIE MVO povadec Tou TpotaOnke oTO apxiko kataLoyo.

Ekoonpiaatpapipato
O atropopqnnpac kaapicitov aepa kai tov eTaveioayi kaapo oTo domegaatio.
Koupi C: Diakottns II taxutnac.
Koupi D: Aikottns III taxutnac
XEPIIETPHIA ik.22
Otau n AaTn eiv aavmuevn to BL1 aAaZeI to xpwa Tou kai Obrvei.
Otav to tatae kai to kpatnoete avae / oBnyeI to BonntikocwC (Kat'ETIAoyiv).
AaTNEe AaTnpe Tnpakwoews:
IⅡaivn aia: o aunnpac n n untooxn tou eivai elattwmuatikn n atoovde0ke to kawio tropofoocic.
Aun: bale ToV aatttnpa ae aaan utdoxh, av o aatttnpac dev Aieoupyei, avtkataotnote ToV eev ao Tou iou toun. Eav Aetoupyne, u TDOxh evai Eaattmuatikn h n attoovseBnke To Kaawio Tpoopooiai. KaaleTe NTV Teyviknt UTTpeia.
AaTTEc aOyovou:
Iiavn antia: o aunnpac n n untooxn tou eivai eattwataikn n atoovdeNkE to kawdo tropofoia.
Aun: avikataotate toe evav aoaunnpa tou iou toun. Av To npoBnaepve, kaleote nTv texviKn utnpesia.
To tnaexipiotnpio 8ev aeitoupyei (eav ouptepiaipheoi oto eT)
10avn 11: Dev utapxei ouvveon metagou tou mlexeiipntpiou kai kai tounoppopnptnpa
Aun: BeBaiWBeite eav ta koumtia eEyxou oTov aToppopnnpa AIToupyouv OoTa.
ATTEVEpyOTIOATE TO PEUa Tou aToppopnTnpa xpnIouTOIOVtac To diakottn, otu ouvexia va etivaauovdeote.
KAVETI auvseon avaeo aTO TnAeipiTnpio kAI OTV aToppopntpaek vou, aokouubovtac ts odnyie TnTAPEXovTai To nAeipiTnpio.
PiBavn aia (2): Pala natapia oTo nExepiopnpio.
Aua: Avikataotnote Tny pntapia ia kaivoupiia.
Aopaleia Tou kaeTou nkeokotikou biokou(av uunepiipheoi 0to e)
Eav oata LED avaboBnVou, 0 tnaekotikoc biokos exi atkaeitei. NpejEvete 30 deutepoAETTA KAI, OTN ouveia, TATNE TO TAVW n TPOc ta KATKoupti vla VekkeidwOeTe To biko. Av ta TAVW / KATW TAnkpo avaboBnei, To dItpo yia Ta IAMN SEv Eivai OTN OWtN Theu PuBuiote owota.
Eav o biakoc eivai kAeiDomegaoc, EeYcTe av to kaWio tropooosiaacev exi anouuvseiei.
Av to npoBAnua emuvei, kaleote Tnv texviKn utnpoeia.

Eapntmuata Tou dev npexovtai e to poiiov
Krmilni system Fig.23-24

- AIR VENT
- FILTERING OR DUCTING VERSION?
- Ducting version
- Version with an outside motor
- Filtering version
- Only for hoods equipped with electronic control:
- CONTROLS
- Controls of Fig. 20
- Controls of Fig. 21
- Controls of Fig. 22
- Controls of Fig. 23-24
- MAINTENANCE
- Cleaning the hood
- Cleaning the grease filters
- Replacing the charcoal filters (P)
- Lighting
- MALFUNCTIONS
- The hood is not working
- - The blower does not work but the lights do
- The hood is not operating effectively
- The lamp does not work
- Light spot (LED):
- Halogen lamps:
- Vertical telescopic trolley is locked (where present)
- AFVOER OF RECIRCULATIE?
- OTB0I BO3DyXAOTB0I BO3DyXA
- ФИЛТРУОДА ИП BCACБВAOUI?
- BocLusoupsTin
- PhiLtpyoupH Tm
- OPTAHbI YIPABJIeHnIa
- OPTATAHHJXITPPBHTDHPBpWZD
- ABAPINHbIN CnIHANIbTPOB:
- TEXHNUECKOE OBCJNYKBAHNETEXHNUECKOE OBO
- U
- 4ACHTHERHNNNNTNEEHNNEHNNK
- 3ameHa yroELHoro dHtpa (P)
- IodcbetkaIodcbetka
- ABAPINHbIE CAPNTHBeyEN
- - BbItaKaHe pa6oTaetBbItaKa He pa6oTaet
- BENTHINATBPHTNDIeTbpTHcNOOeHHe pa6oouHHe pa6o
- Buthnawkahepepoeetepeep
- - Janna he pa60aer
- PedonekTopb1(LED):
- Namblc NamnoyKaMn:
- TanoreHHbI naMbI:
- - PnybT dntaHnHO HOpabneHHe pa6oae (eepa66bI do6aBHe B KOMnNeKT)
- - 5nokpoBaHHe BepTnKaIbHOro TeJeckOnuYeCKoro JOTka (ecm on 6bn doaaneB KOMNNeKT)
- UDLUFTNING AF LUFTEN
- Halogenlampor:
- ΦIATPAPIEMATOH ANOPPOHHE
- Kooan aonppoqnons
- EkoonmuεeogpiKivntnpa
- Ekoonpiaatpapipato
- XEPIIETPHIA ik.22
- To tnaexipiotnpio 8ev aeitoupyei (eav ouptepiaipheoi oto eT)
- Aopaleia Tou kaeTou nkeokotikou biokou(av uunepiipheoi 0to e)
- Krmilni system Fig.23-24
Brand : BEST
Model : Offset
Category : Range hood