
MRK20 - Food Processor MPM - Free user manual and instructions
Find the device manual for free MRK20 MPM in PDF.
| Product type | Stand mixer |
| Brand | MPM |
| Model | MRK20 |
| Bowl capacity | 7.0 L |
| Bowl material | Stainless steel |
| Number of speeds | 6 speeds + Turbo function (P) |
| Motion | Planetary (rotation on axis and around the bowl) |
| Included accessories | Mixer with silicone finish, whisk for light mixtures, hook for heavy doughs, splash guard |
| Power cord length | 1.05 m |
| Intended use | Domestic only |
| Care and cleaning | Bowl and whisks hand washable; do not put whisks in dishwasher |
| Safety | Unplug before assembly/disassembly/cleaning; do not immerse body; supervise children |
| Maximum operating time | 5 minutes, then rest of 20 minutes minimum |
| Weight | Not specified in the manual |
Frequently Asked Questions - MRK20 MPM
User questions about MRK20 MPM
0 question about this device. Answer the ones you know or ask your own.
Ask a new question about this device
Download the instructions for your Food Processor in PDF format for free! Find your manual MRK20 - MPM and take your electronic device back in hand. On this page are published all the documents necessary for the use of your device. MRK20 by MPM.
USER MANUAL MRK20 MPM
EN We wish you satisfaction from using the product and invite you to check a wide range of other MPM/ appliances
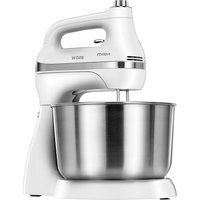
natural_image
Modern kitchen mixer with a bowl of liquid and a handle, no visible text or symbolsCZ NAVOD K OBSLUZE 3
INDIVIDUAALSETE MANUSTE KASUTAMINE
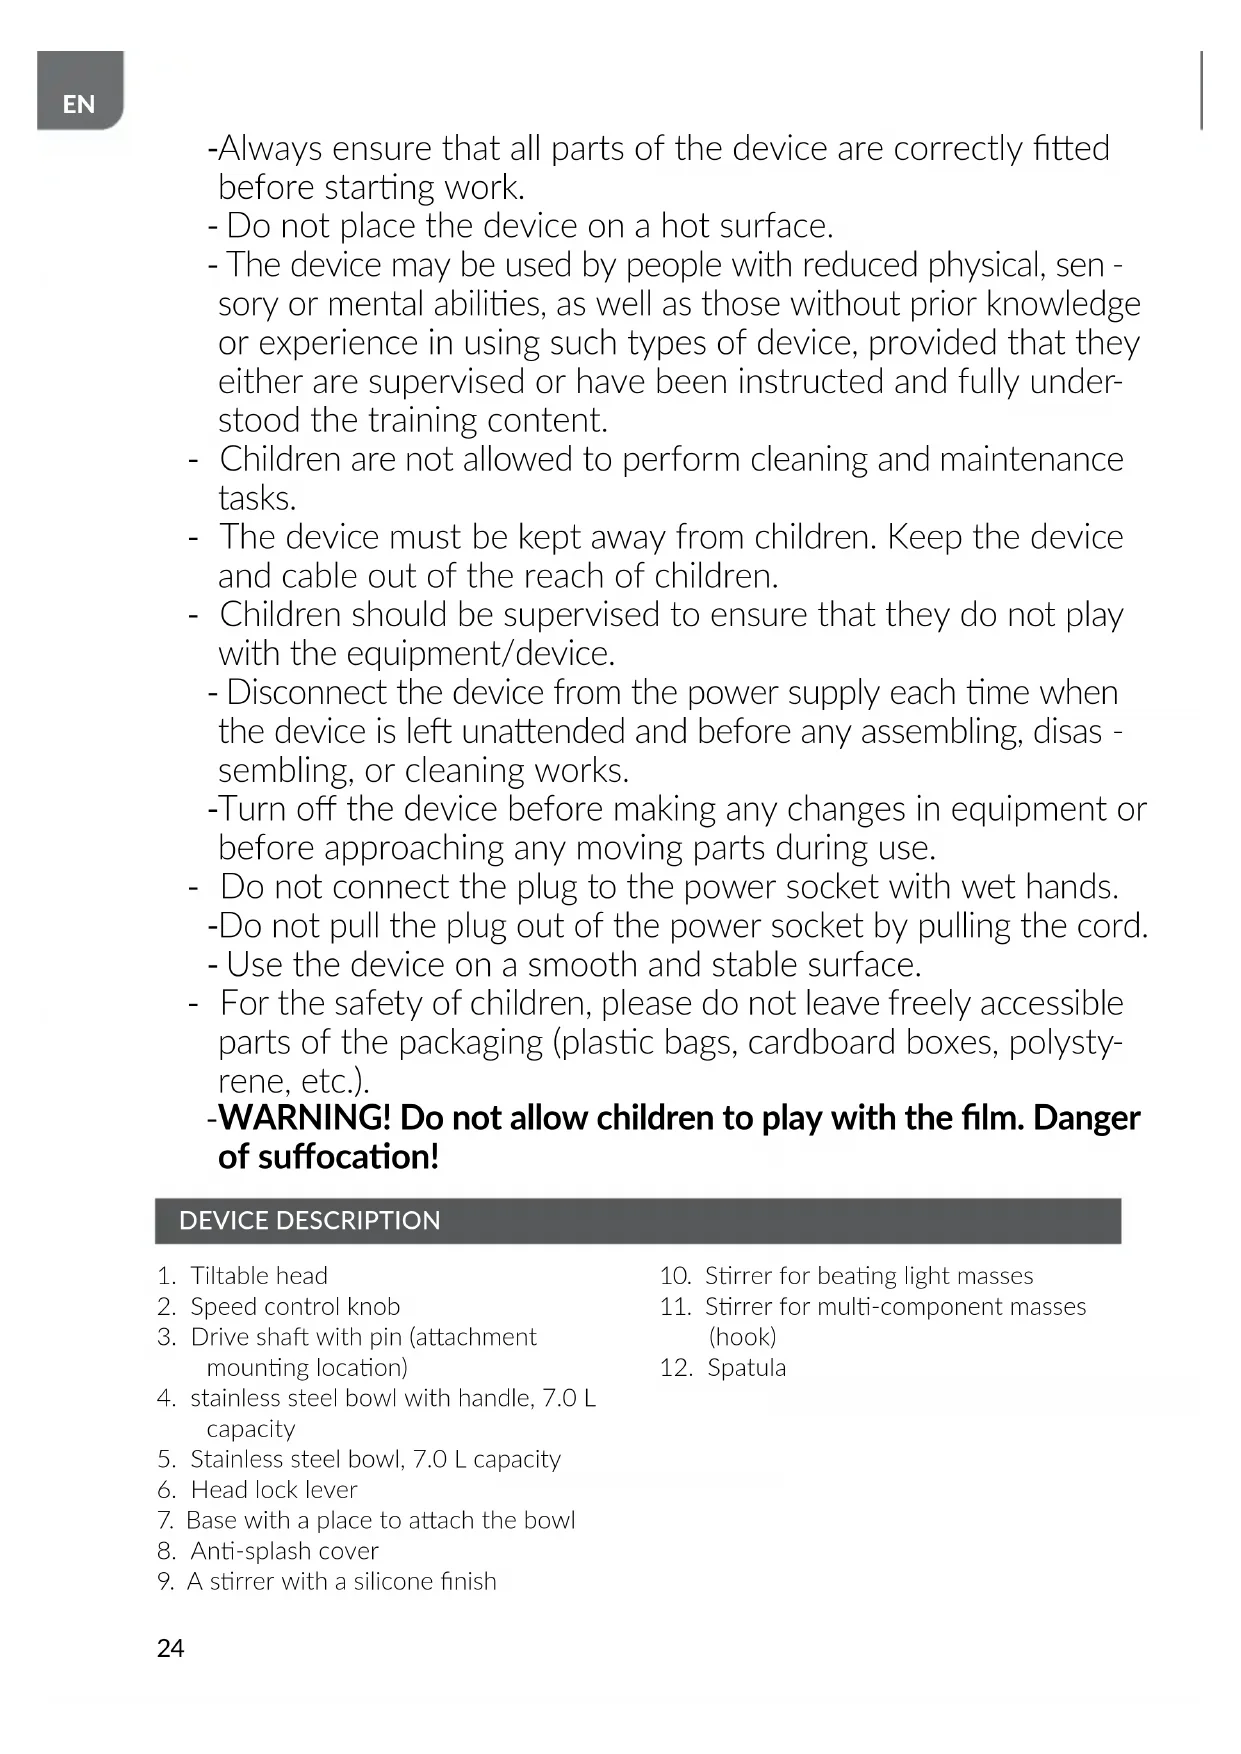
-Always ensure that all parts of the device are correctly fitted before starting work.
- Do not place the device on a hot surface.
- The device may be used by people with reduced physical, sensory or mental abilities, as well as those without prior knowledge or experience in using such types of device, provided that they either are supervised or have been instructed and fully understood the training content.
- Children are not allowed to perform cleaning and maintenance tasks.
- The device must be kept away from children. Keep the device and cable out of the reach of children.
- Children should be supervised to ensure that they do not play with the equipment/device.
- Disconnect the device from the power supply each time when the device is left unattended and before any assembling, disas - sembling, or cleaning works.
-Turn off the device before making any changes in equipment or before approaching any moving parts during use.
- Do not connect the plug to the power socket with wet hands.
-Do not pull the plug out of the power socket by pulling the cord.
- Use the device on a smooth and stable surface.
- For the safety of children, please do not leave freely accessible parts of the packaging (plastic bags, cardboard boxes, polystyrene, etc.).
-WARNING! Do not allow children to play with the film. Danger of suffocation!
DEVICE DESCRIPTION
-
Tiltable head
-
Speed control knob
-
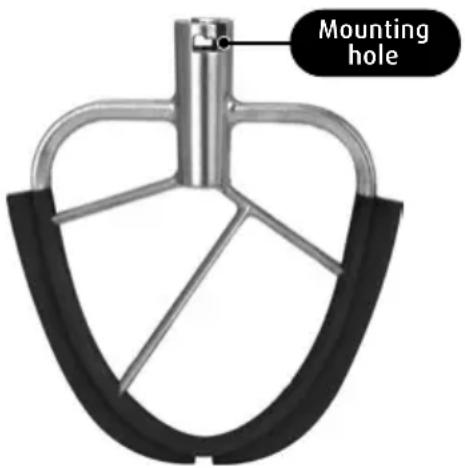
Drive shaft with pin (attachment mounting location)
-
stainless steel bowl with handle, 7.0 L capacity
-
Stainless steel bowl, 7.0 L capacity
-
Head lock lever
-
Base with a place to attach the bowl
-
Anti-splash cover
-
A stirrer with a silicone finish
-
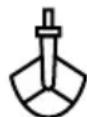
Stirrer for beating light masses
-
Stirrer for multi-component masses (hook)
-
Spatula
PREPARATION FOR WORK - GENERAL REMARKS
- Remove the device from the packaging, remove all foil bags, labels, polystyrene fillers and transport locks.
- Before using the device for the first time, thoroughly wash all accessories that might come into contact with food
- Remember to assemble/disassemble accessories (bowl, stirrer, etc.) only when the device is not connected to the power source.
- Before connecting the device to the power source, make sure that the speed control knob (2) is in the "0" position.
ASSEMBLY OF ACCESSORIES
STEP 1 - BOWL ASSEMBLY
- Release the tillable head (1) by pressing the head lock lever (6) to the right, then gently lift the tilting head until a click (the sound of the lock triggering) can be heard. After the lock is engaged, the arm of the head lock lever (6) will be directed downwards.
- Place the bowl (4;5) in the base (7), then turn it (4;5) clockwise so that the protrusions on the bowl engage with the latches on the base (7).
STEP 2 - MOUNTING THE ANTI-SPLASH COVER
- Slide the anti-slash cover (8) over the edge of the housing covering the drive shaft with the pin (3). Please note if the opening for adding ingredients is facing outwards so that the tillable head (1) does not hinder access to the opening.
STEP 3 - ATTACHING THE STIRRERS
- Push (until a resistance can be felt) one of the three dedicated stirrers (9, 10, 11) onto the drive shaft pin (3). Make sure that the spline on the pin fits into the mounting hole of the stirrer. Then turn the stirrer counterclockwise until the tab locks against the edge of the stirrer mounting hole.
WORKING WITH THE DEVICE
After attaching the stirrers (9, 10, 11), the device is ready for operation. Turn the head lock lever (6) clockwise and gently lower the tillable head (1) until a click can be heard (signalling the lock being triggered). Make sure the tilt head is properly locked; the head lock lever arm (6) will then point downwards. Then place the food in the bowl (4;5) through the hole in the anti-splash cover (8), connect the device to the power supply and set the desired speed with the speed control knob (2).
CAUTION! In the case of the TURBO (P) function, the speed control knob (2) must be held down. After releasing the knob (2), it automatically returns from the TURBO (P) position to the "0" position, which turns the device off.
CAUTION! Do not move the head lock lever (6) during the operation of the robot!
After work is finished, set the speed control knob (2) to the "0" position and disconnect the device from the power source.
REMOVING ACCESSORIES
The accessories can be dismantled after the tillable head (1) has been inseminated. The accessories are released from the latches when turned counterclockwise. Before turning, the stirrers (9, 10, 11) must first be released from the lock, i.e. pushed deeper onto the drive shaft pin until resistance is felt. After dismantling the mixers (9, 10, 11) is finished, the anti-splash cover (8) should be removed (9, 10, 11).
USING THE FOOD PROCESSOR
APPLICATION OF INDIVIDUAL ATTACHMENTS
| A stirrer with a silicone finish (9) | Mixing light and heavier masses, such as: dough, shortcrust pastry, minced meat and fish masses, butter and pudding creams, cheese masses, mashed potatoes as well as other vegetables, bases for cakes and loose cake ingredients. |
| Stirrer for beating light masses (10) | Whipping products that must be well aerated, such as: eggs, egg whites, sponge cake, whipped cream, meringues, creams, mayonnaise. |
| Stirrer for multi-component masses (hook) (11) | Kneading dough, especially yeast dough and kneading such as: bread, rolls, cakes, pancakes, pizza, choux pastry, pasta, breaded stripes. |
CAUTION! Do not leave knives, metal spoons, forks, etc. in the bowl while the appliance is operating.
CAUTION! The maximum operating time of the device is 5 minutes, while the minimum rest time between two mixing cycles is 20 minutes. When kneading yeast dough, it is recommended to set the regulator on low speed and increase the speed after a while.
PLANETARY MOVEMENT OF THE SNAP-INS
During the operation of the planetary mixer, the stirrer rotates in a complex motion: around its axis and at the same time around the circumference of the bowl. Thanks to this, during one full round, the stirrer works thoroughly inside the bowl, which shortens the working time and ensures greater efficiency of mixing. Therefore, the mixing time given in most recipes should be shortened.
The shape of the bowl and attachments has been designed in a way ensuring no need of constant scraping and pushing the ingredients from the walls of the bowl during the work of the robot. It is fully sufficient to clean the walls of the bowl once or twice during one mixing cycle. Disconnect the robot from the power supply before attempting such an action!
The robot may become warm during operation. Under heavy loads and after a long mixing cycle, the top of the robot head can become very warm. It's a fully normal occurrence.
CLEANING AND MAINTENANCE
- Make sure that the speed control knob (2) is in the "0" position.
- Disconnect the device from the power source.
- The tillable head (1) may become hot during prolonged use. Allow the device to cool down before working.
-
Clean the housing of the device with a damp cloth.
-
Clean the stirrers (9, 10, 11) and spatula under running water and with a detergent.
It is recommended to clean the accessories immediately after the operation is done. This ensures removal of any leftovers, preventing them from drying out, which makes washing more effective and easier as well as ensures the lesser chance of bacteria infestation.
CAUTION! The mixer for whipping light masses (10), the mixer with a silicone finish (9) and the hook (11) must not be washed in the dishwasher, as such an action creates a risk of damaging them.
OPERATION OF THE DEVICE AT INDIVIDUAL SPEED RANGE
The robot has speed regulation in the range of 1-6 and the TURBO function, used for short-term operation at maximum speed.
| Work speed | Work type Application | |
| 1 Pre-mixing | Slow pre-mixing, mixing all types of dough and dry ingredients. In this speed range, add flour and dry dough products as well as liquid ingredients until the mass is dry. Do not mix or knead yeast dough at this speed. | |
| 2 Slow mixing | For mixing at slow pace. This speed is ideal for kneading yeast, shortbread and pound cakes. Also to be used in the first phase of mashing potatoes and other vegetables as well as during adding liquid fat or flour to the dough. | |
| 3 Mixing, whipping | Used for kneading medium-heavy doughs, like shortbread dough. Speed range ideal for adding sugar and white to the meringues. This is the average speed of mixing masses, e.g. minced meat, pâtés and cakes. | |
| 4 Whipping | Medium-fast whipping, good for the initial phase of mayonnaise preparation, adding the ingredients of the custard cream. It is used to finish lighter masses that require aeration. | |
| 5 Fast whipping | Whipping creams and foam out of whites. | |
| 6 Very fast whipping | Whipping egg whites, whole eggs and whipped cream, used in the final phase of preparing mashed potatoes. | |
| P TURBO | Short-term mixing at maximum speed. | |
USING THE ROBOT FOR OWN RECIPES
This manual contains some general, practical advice on the specifics of working with the robot, which may be useful when preparing own recipes. However, to achieve a perfect effect and to develop the appropriate mixing procedure user's own observations and experience are necessary. Control the mixing process and stop exactly when the consistency required in the recipe is reached (e.g. "smooth and elastic dough"). To determine the appropriate mixing speed, see the following section: "Preparation for use".
CULINARY TIPS
- Refrigerated ingredients, such as butter or eggs, need to come to room temperature before being blended. Therefore, they should be removed from the refrigerator earlier.
- To avoid eggshells or bad eggs inside the mixture, it's best to pop them into a separate container before adding to the rest of ingredients.
- Excessive whipping may adversely affect the final product. Be sure to follow the mixing time specified in the recipe.
-
Changes in temperature, texture of food products (e.g. resulting from fluctuations in ambient temperature) may shorten/extend the process of mixing ingredients as well as affects the final result of mixing.
-
Always start mixing at low speeds and gradually increase the speed to the recipe's requirements.
RECIPES
A SIMPLE TWO-EGG PANCAKE
√ 2 cups of sifted flour
√ 1 and 1/4 cup of table sugar
√ 2 and ½ tablespoon of baking powder
√ 3/4 tablespoon of salt
√ 12 cup of soft confectionery fat
√ 3/4 cup of milk
√ 1 and 1/4 teaspoon of vanilla
√ 2 eggs

PREPARATION:
1) Put the flour, baking powder, sugar and salt into a large bowl. Add confectionery fat; pour milk and add vanilla.
2) Knead up to 5 minutes. on the lowest speed until the ingredients are completely mixed.
3) Then mix it at medium speed for 2 minutes.
4) Stop the robot, scrape off any leftover mixture from the sides and bottom of the bowl.
5) Add eggs, knead for another 1.5 minutes on highest speed.
MASHED POTATOES
√ 1kg of potatoes
√ 1/2 cup of hot milk
√ 2 teaspoons of butter
√ 1 tablespoon of salt
PREPARATION:
1) Peel and cook the potatoes in salted water, be careful not to make them too soft.
2) When they become floury, start kneading in the appropriate bowl or transfer the doughs to the robot. Then, knead the potatoes prepared in this way at medium speed for about 1 minute.
3) When finished, scrape any potatoes that have stuck to the sides of the bowl.
4) Mix hot milk, butter and salt together. Add potatoes and knead on highest speed for 1 min.
OATMEAL COOKIES
√ 2 cups of sifted flour
√ 1 tablespoon of baking soda
√ 1 tablespoon of salt
√ 1 and 12 tablespoon of cinnamon
√ 2 cups of instant oatmeal
√ 1 cup of confectionery fat or butter
√ 1/2 cup of table sugar
√ 3/4 cup of brown sugar
√ 2 whole eggs
√ 1-1/2 teaspoon of vanilla
√ 1/3 cup of milk
√ 1 cup of chocolate flakes
√ 3/4 cup of crushed nuts
√ 1 tablespoon of baking soda
√ 1 tablespoon of salt
√ 1 or 12 tablespoon of cinnamon

PREPARATION:
1) Mix the flour, baking soda, salt and cinnamon; then add the flakes and set aside.
2) Mix the butter, sugar, eggs and vanilla in the bowl of a robot.
3) Beat on highest speed for 2 minutes until creamy. When finished, scrape off any mixture that has stuck to the sides of the bowl.
4) Add the milk and half of the previously set aside flour as well as other ingredients, mix everything slowly, shifting the mix, then knead the mixture at the highest speed for 1 minute.
5) Add the other half of the mixture of flour and other ingredients and repeat the procedure. When finished, scrape off any mixture that has stuck to the sides of the bowl.
6) Add chocolate flakes and nuts, knead on highest speed for 1 min.
WHISKING EGG WHITES
√ 2 eggs

1) Put the egg whites into the bowls
2) Whip them at maximum speed
TECHNICAL DATA
Technical specifications are given on the product nameplate Length of mains cable: 1.05 m

This manual has been translated by a professional translator. In case of any doubts, please read its English version.
CAUTION! MPM agd S.A. reserves the right to technical changes!
Proper disposal of the product (waste electrical and electronic equipment)

Marking on the product indicates that after the service-life of the product expires, it should not be disposed with other type of municipal waste. Used equipment may have a negative impact on the environment and health of people due to potentially containing hazardous substances, mixtures and components. Mixing electric waste with other types of waste or disassembling those in an unprofessional manner may cause a release of substances that are hazardous to the environment and health. Used equipment should
be handed-over to a point for collection of electric waste. In order to obtain detailed information regarding the electric waste collection points, the user should contact the municipal point of electric waste collection or used equipment processing department.
INSTRUCCIONES DE USO
APPLICATION D'ACCESSOIRES INDIVIDUELS
BISCUITS AUX FLOCONS D'AVOINE
3. SOLIS – MAĞITATORU NOSTIPRINĂŠANA
BESCHRIJVING VAN HET APPARAAT
WERKEN MET HET APPARAAT

PROSTY PLACEK DWUJAJECZNY
- DEVICE DESCRIPTION
- PREPARATION FOR WORK - GENERAL REMARKS
- ASSEMBLY OF ACCESSORIES
- STEP 1 - BOWL ASSEMBLY
- STEP 2 - MOUNTING THE ANTI-SPLASH COVER
- STEP 3 - ATTACHING THE STIRRERS
- WORKING WITH THE DEVICE
- REMOVING ACCESSORIES
- USING THE FOOD PROCESSOR
- PLANETARY MOVEMENT OF THE SNAP-INS
- CLEANING AND MAINTENANCE
- OPERATION OF THE DEVICE AT INDIVIDUAL SPEED RANGE
- USING THE ROBOT FOR OWN RECIPES
- CULINARY TIPS
- RECIPES
- A SIMPLE TWO-EGG PANCAKE
- PREPARATION:
- MASHED POTATOES
- OATMEAL COOKIES
- WHISKING EGG WHITES
- TECHNICAL DATA
- Proper disposal of the product (waste electrical and electronic equipment)
- INSTRUCCIONES DE USO
- BISCUITS AUX FLOCONS D'AVOINE
- SOLIS – MAĞITATORU NOSTIPRINĂŠANA
- BESCHRIJVING VAN HET APPARAAT
- WERKEN MET HET APPARAAT
- PROSTY PLACEK DWUJAJECZNY
Brand : MPM
Model : MRK20
Category : Food Processor