
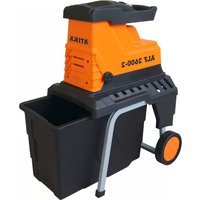
AMA 2500 - Mechanical chipper ATIKA - Free user manual and instructions
Find the device manual for free AMA 2500 ATIKA in PDF.
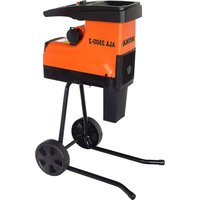
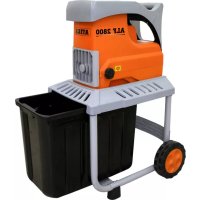
| Product Type | Mechanical shredder (garden shredder) |
| Brand | ATIKA |
| Model | AMA 2500 |
| Power supply | 230 V~, 50 Hz, single-phase |
| Motor power P1 (S6-40%) | 2500 W |
| Motor power P1 (S1) | 2000 W |
| Rated current | 11.3 A |
| No-load motor speed | 2800 min⁻¹ |
| Max branch diameter (fresh wood) | 40 mm |
| Weight | 18.5 kg |
| Sound pressure level LPA (K=3 dB) | 83 dB(A) |
| Measured sound power level LWA | 107 dB(A) |
| Guaranteed sound power level LWA | 108 dB(A) |
| Protection class | I |
| Protection type | IP X4 |
| Mains protection | 16 A delayed (except Switzerland 10 A, UK 13 A) |
| Operating mode | S1 (continuous), S6-40% (10 min cycle: 4 min load, 6 min idle) |
| Safety | Safety stop device with motor brake, motor protection circuit breaker, undervoltage release |
| Maintenance | Clean with damp cloth and soft brush; no high-pressure cleaner; lubricate metal parts with biodegradable oil |
| Spare parts (blades) | Ref. 382425, blade set |
| Warranty | Warranty statement included in the manual |
Frequently Asked Questions - AMA 2500 ATIKA
User questions about AMA 2500 ATIKA
0 question about this device. Answer the ones you know or ask your own.
Ask a new question about this device
Download the instructions for your Mechanical chipper in PDF format for free! Find your manual AMA 2500 - ATIKA and take your electronic device back in hand. On this page are published all the documents necessary for the use of your device. AMA 2500 by ATIKA.
USER MANUAL AMA 2500 ATIKA
Original instructions – Safety instructions – Spare parts
Broyeur de végétaux
natural_image
Person using a hammer to adjust or install a mechanical component, no visible text or symbolsnatural_image
Close-up of hands installing a recycling bin cover with a curved arrow indicating rotation (no text or symbols visible)
natural_image
Close-up of a mechanical component with a handle and lever mechanism (no visible text or symbols)natural_image
Close-up of hands installing or adjusting a mechanical component with a tool (no visible text or symbols)Linksgewinde
natural_image
Three black-and-white illustrations: eraser, pen, and textured object (no text or symbols)① Keep the operating instructions in a safe place for future use.
① Pass the operating instructions on to all persons who work with the machine.
You may not start to operate the machine until you have read these operating instructions, observed all the instructions given and installed the machine as described!
This machine must not be operated / used by children, persons with restricted physical, sensory or mental abilities or a lack of experience and/or know-how or by persons who are not familiar with the instructions.
⚠ The machine must not be operated by children or young people under 16 years of age.
Contents
| Assembly | 1 |
| Extent of delivery | 10 |
| Symbols on the machine / in the original instructions | 10 |
| Operating times | 10 |
| Proper use | 11 |
| Residual risks | 11 |
| Safety instructions | 11 |
| Commissioning | 12 |
| Working with the garden shredder | 13 |
| Changing the blades | 14 |
| Maintenance / Cleaning / Storage | 15 |
| Technical data | 15 |
| Operational faults | 16 |
| EC Declaration of Conformity | 16 |
| Guarantee | 16 |
| Spare parts | 145 |
Extent of delivery
After unpacking, check the contents of the box
▶ That it is complete
▶ Check for possible transport damage
Report any damage or missing items to your dealer, supplier or the manufacturer immediately. Complaints made at a later date will not be acknowledged.
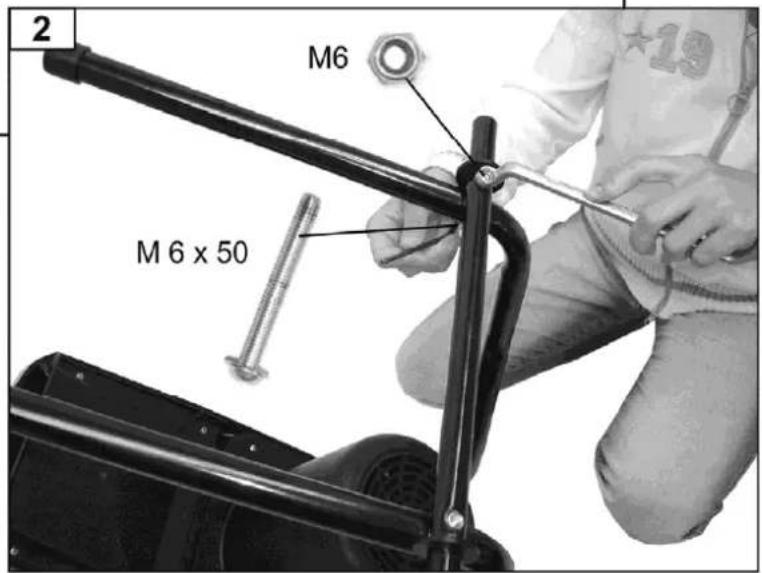
• 1 pre-assembled device unit
• 1 standing leg (left)
• 1 standing leg (right)
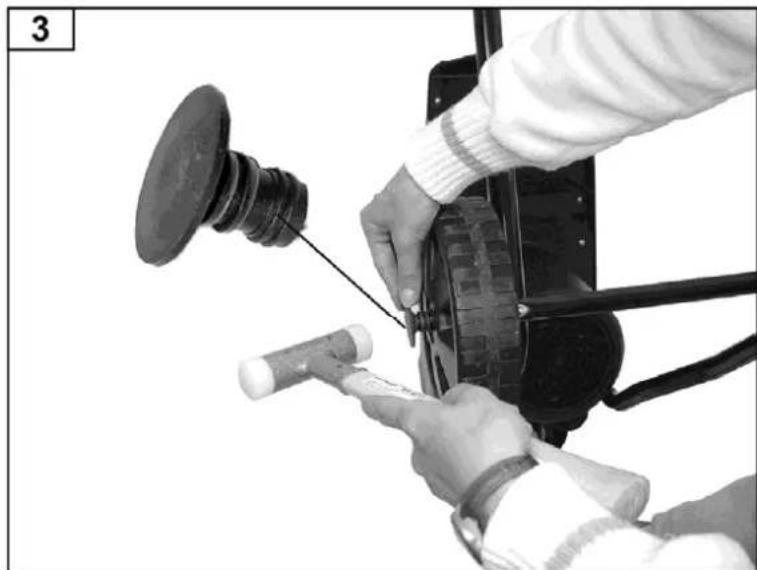
- 1 axle
- 1 screw bag
- 1 collection sack
• 1 original instructions
• 1 warranty declaration
- 2 wheels
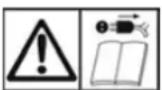
Symbols on the machine
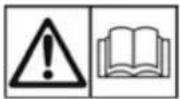 | Carefully read the operating manual and the safety instructions before starting the machine and observe the instructions when operating. | |
 | Switch off the motor and disconnect the mains plug before performing cleaning, maintenance or repair work. | |
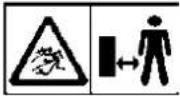 | Danger - objects may be thrown out at high speed when motor is running. Keep bystanders, pets and domestic animals out of the danger area. | |
 | Wait until all machine parts have come to a dead stop before touching them. | |
 | Danger - rotating blades. Keep hands and feet out of openings while machine is running. | |
 | Wear eye and ear protection. | |
 | Wear protective gloves. | |
 | Protect against humidity. | |
 | Do not use as footstep. | |
 | This product complies with European regulations specifically applicable to it. | |
| Electrical devices do not go into the domestic rubbish. Give devices, accessories and packaging to an ecofriendly recycling.According to the European Directive 2012/19/EU on electrical and electronic scrap, electrical devices that are no longer serviceable must be separately collected and brought to a facility for an environmentally compatible recycling. | ||
| Electrical devices do not go into the domestic rubbish. Give devices, accessories and packaging to an ecofriendly recycling.According to the European Directive 2012/19/EU on electrical and electronic scrap, electrical devices that are no longer serviceable must be separately collected and brought to a facility for an environmentally compatible recycling. |
Symbols Original instructions
Potential hazard or hazardous situation. Failure to observe this instruction may lead to injuries or cause damage to property.
Important information on proper handling. Failure to observe this instruction may lead to faults.
User information. This information helps you to use all the functions optimally.
Assembly, operation and servicing. Here you are explained exactly what to do.
Operating times
Please observe as well the regional regulations for noise protection.
Proper use
The proper use includes the shredding of
- all types of branches up to a max. diameter (depending on wood species and freshness)
- wilted, moist garden refuse that has already been stored for several days, alternating with branches
Shredding of glass, metal, plastic parts, plastic bags, stones, fabric cut-offs, roots with soil, waste without solid consistency (e.g. kitchen scraps) is explicitly excluded.
The garden shredders are suitable for private use in gardens and allotments.
As garden shredders for private gardens and allotments are considered such devices that are not applied in public facilities, parks, and sports facilities as well as in agriculture and forestry on a commercial basis.
The intended usage also includes compliance with the operating, servicing and repair conditions prescribed by the manufacturer and following the safety instructions included in the instructions.
Any other use is deemed not to be use as prescribed. The manufacturer is not liable for any type of damage resulting from this: the user bears the sole risk.
Unauthorised modifications on the garden shredder exclude a liability of the manufacturer for damages of any kind resulting from it.
Only persons who are familiarised with the device and informed about possible risks are allowed to prepare, operate and service this device. Repair works may only be carried out by us or by a customer service agent nominated by us.
Residual risks
Even if used properly, residual risks can exist even if the relevant safety regulations are complied with due to the design determined by the intended purpose.
Residual risks can be minimised if the “Safety information” and the “Intended usage” as well as the whole of the original instructions are observed.
Observing these instructions, and taking proper care, will reduce the risk of personal injury or damage to the equipment.
- Risk of injury to the fingers and hands, if your hand grasps through an opening and reaches the blade unit.
- Risk of injury to the fingers and hands, when carrying out assembly work and cleaning on the blade unit.
- Injury by the chopped material spinning away near the hopper.
- Risk from electricity when using improper electrical connections.
■ Touching live parts of opened electrical components. - Impairment of hearing when working on the machine for longer periods of time without ear protection.
In addition, in spite of all the precautionary measures taken, non-obvious residual risks can still exist.
Safety instructions
⚠️ Before commissioning this product, read and keep to the following advice. Also observe the preventive regulations of your professional association and the safety provisions applicable in the respective country, in order to protect yourself and others from possible injury.
i Pass the safety instructions on to all persons who work with the machine.
① Keep these safety instructions in a safe place.
i Machine including safety cut-out
The safety cut-out, including an automatic motor brake, which is attached to the shredder is used for the safety of the machine, preventing the motor being started when the machine is open and the rotating knives could be reached by the operator's hand.
⚠️ Repair works on the safety cut out must be carried out by the manufacturer or by companies appointed by the manufacturer respectively.
■ Make yourself familiar with the equipment before using it, by reading and understanding the original instructions.
- Do not use the machine for unsuitable purposes (see 'Normal intended use' and 'Working with the garden shredder').
- Provide a safe standing position and keep at any time the balance. Do not lean forward. When placing material into the shredder, always stand on the same level as the machine. When placing material into the shredder, always stand on the same level as the machine.
- Be observant. Attend to what you do. Start working with rationality. Do not use the device when you are tired or under the influence of drugs, alcohol or medicaments. One moment of carelessness when using the device can result in serious injuries.
- Wear protective goggles, gloves and noise protection while working with the machine.
■ Wear suitable work clothes:
- do not wear loose-fitting clothes or jewellery; they can catch in moving parts
- slip-proof shoes
– trousers to protect the legs
- no loose clothing or such with hanging bands or drawstrings
- Do not work with the device barfooted or only with thongs on your feet.
- Within his area of work the operator is responsible for third parties.
- Do not allow children to play with this machine.
- Keep children away form machine.
- Do not allow children to perform cleaning and maintenance tasks.
- Never operate the machine if other persons are in the immediate vicinity.
■ Never leave the device unattended. - Keep your workplace in an orderly condition! Untidiness can result in accidents.
- Choose a working position alongside the equipment or behind it. Never stand near the ejection opening.
■ Never reach into the filling or ejection opening. -
Keep your face and body away from the filling opening.
-
Do not overload the machine! You work better and safer in the given performance range.
- Only operate the machine with complete and correctly attached safety equipment and do not alter anything on the machine that could impair the safety.
- Never try to bypass the interlocking function of the safety device.
- Do not alter the motor controller setting, since the rotary speed controls the safe maximum operating speed, and protects the motor and all rotating parts against damage due to excess speed. Contact the customer service in case of problems.
■ Do not operate without the funnel.
- Do not modify the device or parts of the device respectively.
- Close machine properly before enabling motor.
- Do not hose down the device with water. (Origin of danger electric current).
■ Take into consideration environmental influences:
- Do not use the device in moist or wet ambience.
- Do not leave the machine standing in the rain.
- Do not work in bad weather conditions (e.g. rain, risk of lightning).
– Provide for good illumination.
- To prevent danger of injury to fingers during assembly or cleaning operations hold the cutting mechanism (see pic. "Changing the blades") and wear protecting gloves.
- Switch the machine off and remove the mains plug from the socket when
- Performing maintenance and cleaning work.
- Eliminating faults.
- Checking connecting lines, whether these are knotted or damaged.
- Transporting.
- Carrying out repair work.
- Changing the blades.
– Leaving unattended (even during short interruptions).
- If the machine's filling funnel or ejection slot is blocked switch off the motor and disconnect the mains plug before removing material from the filling funnel or ejection slot.
- Do not touch dangerous moving parts before the machine has been isolated from the electric supply and such moving parts have come to a dead stop.
- Check the machine for possible damage:
- Before further use of the machine the safety devices must be checked carefully for their proper and intended function.
- Check whether movable parts function perfectly and do not stick or whether parts are damaged. All parts must be correctly installed and fulfil all conditions to ensure perfect operation of the machine.
- Damaged safety devices and parts must be properly repaired or exchanged by a recognized, specialist workshop; insofar as nothing else is stated in the instructions for use.
— Damaged or illegible safety labels have to be replaced.
- Store unused equipment in a dry, locked place out of the reach of children.
Electrical safety
■ Design of the connection cable according to IEC 60 245 (H 07 RN-F) with a core cross-section of at least
- 1.5 mm ^2 for cable lengths up to 25 m
- 2.5 mm ^2 for cable lengths over 25 m
- Long and thin connection lines result in a potential drop. The motor does not reach any longer its maximal power; the function of the device is reduced.
- Plugs and coupler outlets on connection cables must be made of rubber, plasticised PVC or other thermoplastic material of same mechanical stability or be covered with this material.
■ The connector of the connection cable must be splash-proof.
- When running the connection line observe that it does not interfere, is not squeezed, bended and the plug connection does not get wet.
- Keep the extension cable away from dangerous moving parts to prevent damages to the cable, which can result in touching live parts.
■ Wind off completely the cable when using a cable drum.
- Do not use the cable for purposes for which it is not meant. Protect the cable against heat, oil and sharp edges. Do not use the cable to pull the plug from the socket.
- Regularly check the extension cables and replace them if they are damaged.
- Do not use any defective connection cables.
- When working outdoors, only use extension cables especially approved and appropriately labelled for outdoor use.
- Do not set up any provisional electrical connections.
■ Never bypass protective devices or deactivate them.
- Only hook up the machine by means of a fault-current circuit breaker (30 mA).
The electrical connection or repairs to electrical parts of the machine must be carried out by a certified electrician or one of our customer service points. Local regulations – especially regarding protective measures – must be observed.
⚠️ Damaged mains leads must be replaced by the manufacturer or one of their service workshops or a similar qualified person to prevent dangers.
⚠️ Repairs to other parts of the machine must be carried out by the manufacturer or one of his customer service points.
⚠️ Use only original spare. Accidents can arise for the user through the use of other spare parts. The manufacturer is not liable for any damage or injury resulting from such action.
Behaviour in an emergency situation
- Initiate all required first aid measures suited for the injury and seek qualified medical advice as quickly as possible.
- Protect the injured person against further injuries and immobilise the injured person.
Commissioning
- Check that the machine is completely and correctly assembled.
- To avoid toppling, place the shredder on a firm horizontal surface.
- Avoid working on moist surfaces. A moist surface affects the safe footing of the machine and increases the risk of accidents.
- Do not use this machine on a paved or gravel-covered area on which thrown out material can cause injury.
- Do not work directly near swimming pools or garden ponds.
- The machine should only be operated in the open. Always maintain a safe distance (at least 2 m) from walls or other fixed objects.
- Do not operate the machine in bad weather conditions.
■ Before each use, check
- the supply / extension cable for damages (cracks, cuts or the like) or ageing (brittleness).
Do not use defective supply or extension cables.
– there are no damage at the machine (see safety instructions).
- Make sure that the shredder tool is neither worn out nor damaged and that it is properly secured.
– that all screws, nuts and bolts as well as other fasteners are securely tightened
- that covers, deflectors and protective shields are on their correct position and in good working condition.
Mains connection
- Compare the voltage given on the machine model plate e.g. 230 V with the mains voltage and connect the machine to the relevant and properly earthed plug.
- Connect the machine via a circuit breaker switch (residual-current-operated circuit switch) 30 mA.
- Always use three-conductor extension cables with connected earthing conductor and sufficient cross section.
Mains fuse
| Suisse UK | |||
| 2300 W | 16 A time-lag | 10 A time-lag | 13 A time-lag |
| 2500 W | 16 A time-lag | 13 A time-lag | |
Electrical mains supply impedance
When conditions in the electrical mains supply are un-favourable, voltage reductions for short periods can occur during the process of turning on the equipment, which can adversely affect other equipment (e.g., the flickering of a lamp).
No breakdowns are to be expected if the maximum, electrical mains supply impedances given in the table are met.
| Power consumption P1 (W) | Electrical mains supply impedance Zmax (W) |
| 2300 | 0,24 |
| 2500 | 0,24 |
On / Off switch
Do not use any device where the switch can not be switched on and off. Damaged switches must be repaired or replaced immediately by the customer service.
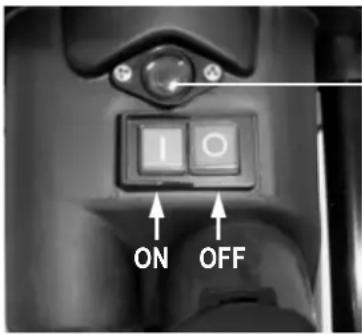
Reset button (motor protection)
Switch on
Press the green button ☐.
Switch off
Press the red button ☐.
√ Restart protection in case of power failure
In case of a power failure, the device switches off automatically (zero-voltage initiator). To restart, press the green button again.
Motor protection
The motor is equipped with a safety switch and switches off automatically when overloaded. After a cooling-down break (approx. 5 min), the motor may be restarted. Press the
- reset button (motor protection)
- green button ☐ to restart.
Use a tamper or hook to remove jammed objects from the hopper or ejection slot.
⚠️ Always wait until the shredder has come to a complete standstill before restarting it.
Working with the garden shredder
- Choose a working position alongside the equipment.
- Provide a safe standing position and keep at any time the balance. Do not lean forward. When placing material into the shredder, always stand on the same level as the machine. When placing material into the shredder, always stand on the same level as the machine.
- Always keep away from the ejection area when starting the machine.
- Longer material that is protruding from the device could spring back when it is drawn in by the blades! Observe safety distance!
■ Never reach into the filling or ejection opening. - Keep your face and body away from the filling opening.
- Never place hands, other parts of the body or clothing into the filler funnel, ejection channel or in the vicinity of other moving parts.
- Check that no chopped residues are in the filling hopper before switching on the equipment.
- Do not tilt or transport the machine (relocation) while the motor is running. - Make sure that the motor is free from waste material and other material accumulation to protect it against damage and to prevent fire.
- When filling, be careful that no pieces of metal, stones, bottles or other objects unintended for processing, enter the filling hopper.
- Power off the machine before attaching or removing the collecting bag. Power off the machine before attaching or removing the collecting bag.
- Immediately switch off the equipment and allow it to come to a stop, if foreign objects enter the filling hopper or if the equipment starts to make unusual noises or vibrates. Remove the mains plug and carry out the following checks:
— inspect for damage.
— replace or repair damaged parts.
— check the equipment and tighten loose parts.

You must not repair the equipment yourself if you are authorized to do so.

What can I shred?
Yes:
- organic household and garden waste e. g. hedge and tree cuttings, dead flowers and vegetable kitchen waste.
No:
- glass, metal, plastic, plastic bags, stones, cloth, roots with soil, food left-overs, fish or meat.

Special tips on shredding:
➢ Branches, twigs and wood should be broken down immediately after they have been cut.
— Material of this kinds gets very hard when it is dry, and the maximum allowed branch diameter to be processed has to be reduced.
Remove any side shoots from branches with a large number of twigs.
How to shred garden and kitchen waste with hight water content and a tendency to clog
— to prevent the machine from clogging, alternate waste with wood containing material.
Do not allow the shredded material to pile up too high in the area of the ejection opening. This can lead to shredded material blocking the ejection channel, and backing up to the filler opening.
Clean out the filler opening and ejection channel thoroughly if the machine becomes blocked. Before doing this, switch the motor off and disconnect the machine from the mains power supply.
Use a tamper or hook to remove jammed objects from the hopper or election slot.
Please do not exceed the maximum branch diameter specified (cutting fresh wood) for your appliance (∅ see "Technical data"). Depending on the wood's nature and freshness the maximum branch diameter the machine can process may be smaller.
The blades largely pull the material into the machine by themselves.
➢ Strong branches may cause overloading. This can be avoided by pulling them back from time to time.
If the machine is overloaded, a protective motor switch ensures that the machine turns itself off automatically.
— Turn the shredder on again after about 5 minutes.
- If you cannot turn on the machine after this waiting time refer to „Operational faults“.
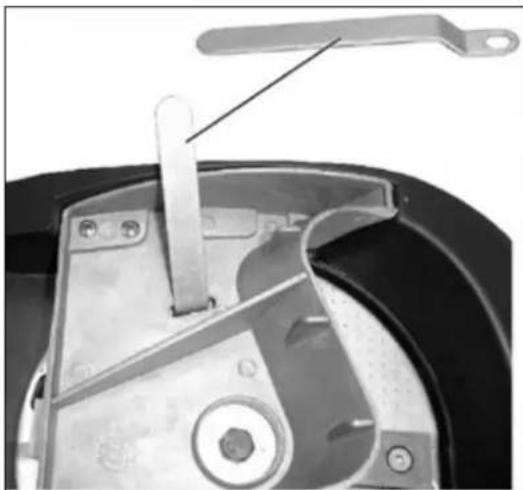
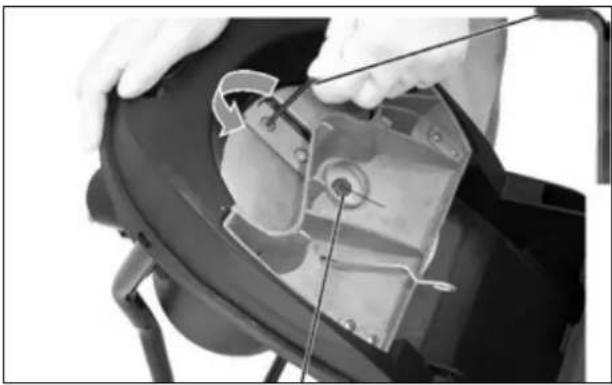
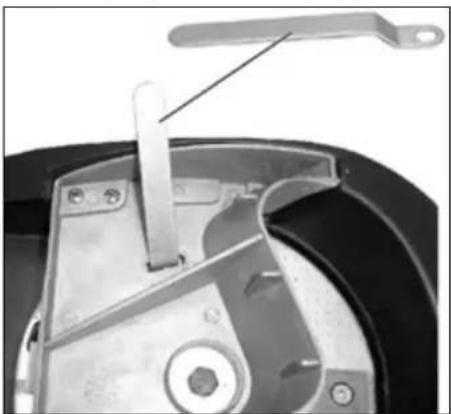
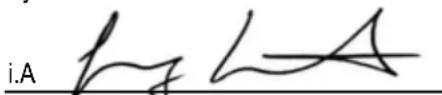
Changing the blades


Remove the mains plug before changing the blades.

Risk of injury to the fingers and hands when carrying out work on the blade unit. Wear protective gloves.

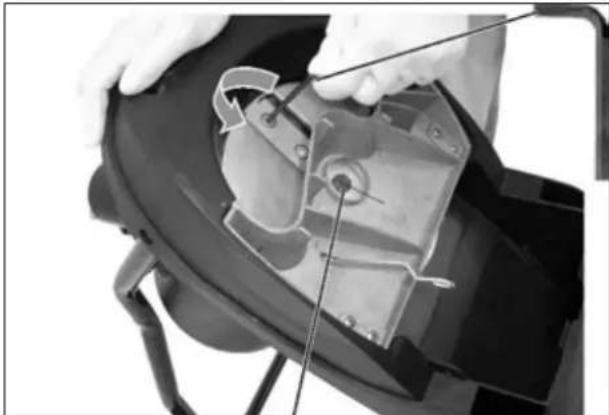
Open the machine.

natural_image
Close-up of hands installing a recycling bin cover with a curved arrow indicating rotation (no text or symbols)
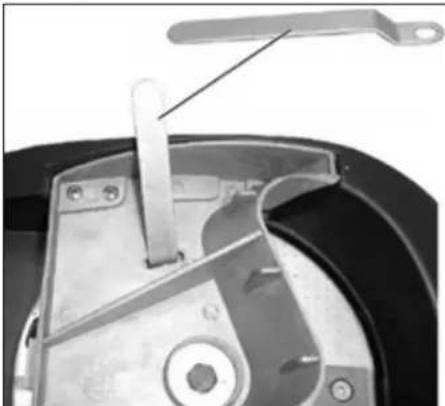
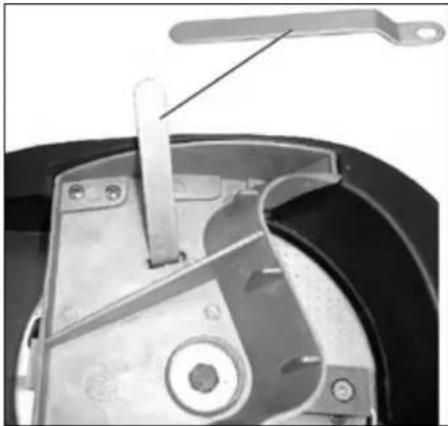
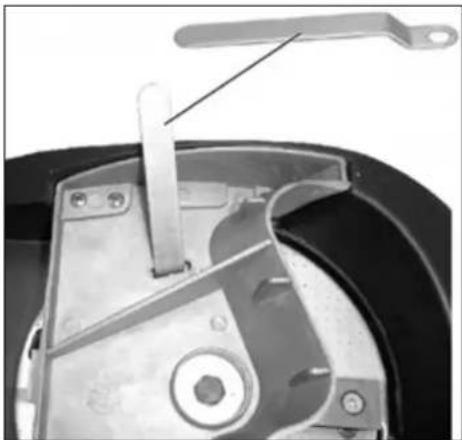
Fix the blade.
natural_image
Close-up of a mechanical switch component with a lever handle (no visible text or symbols)Reduced output
One edge of the knife has become blunt:

Turn knife so that you can use the other edge.
natural_image
Close-up of hands installing or adjusting a mechanical component with a tool (no visible text or symbols)Left-hand thread
Before installing, check the blades for damages (notches, cracks). Damaged blades must be replaced.
All knife edges have become blunt:
√ Replace with new set of knives (order-no. 382425).
① Always replace worn and damaged blades as a whole set to prevent any unbalance.
Maintenance / Cleaning / Storage
• Each time before starting maintenance work:
- Switch off the motor and pull out the mains plug.
- Allow the machine to cool down.
- Wear protective gloves to prevent injury.
When the machine is stopped for purpose of maintenance, storage or accessory replacement make sure that the energy source is isolated and the mains plug is disconnected. Make
sure that all movable parts are stationary and the key (if applicable) is removed. Allow the machine to cool down before maintenance, adjustment etc.
The cutters will not come to a standstill immediately after cut-off. Before starting any service work wait until all parts are stationary.
When performing maintenance operations on the cutting tool be aware that it can still move due to the start mechanism even if the motor does not run by the cover interlocking.
Be sure to have removed any tools from the machine after completion of service work.
- Generally garden shredders require little maintenance. To maintain their efficiency and a long life, observe the following:
- Keep vent slits clean and free from obstructions.
– Check the locking screws (tighten where necessary).
– Clean the device after shredding.
To clean your product only use a warm moist cloth and a soft brush.
Never use cleaning agents or solvents. Otherwise the device may be damaged irreversibly. Plastic parts may be corroded by chemicals.
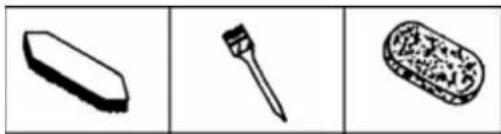
natural_image
Three black-and-white illustrations: eraser, nail, and porous block (no text or symbols)- Do not clean the machine with running water or high-pressure cleaners.
- After each operation treat bare metal parts with an environment-compatible biodegradable spray oil to protect them against corrosion.
Technical data
| Type/Model | AMA 2300 | AMA 2500 |
| Year of construction | see last page | |
| Motor | AC-Motor 230 V~, 50 Hz, 2800 rpm, including automatic motor brake | |
| Motor rating P1 S6 - 40 % | 2300 W | 2500 W |
| Motor rating P1 S1 | 2000 W | 2000 W |
| Current consumption I | 10,4 A | 11,3 A |
| ON/OFF-switch with | Motor protection switch, electrical safety cut-out, zero-voltage initiator | |
| Weight | 18,5 kg | |
| Sound pressure level at work LPA | 83 dB (A) / K = 3 dB (A) (measured to 2000/14/EC) | |
| Measured sound power level LWA | 107 dB (A) (measured to 2000/14/EC) | |
| Guaranteed sound power level LWA | 108 dB (A) (measured to 2000/14/EC) | |
| Max. branch diameter (only for freshly cut wood) | ∅ max. 40 mm | |
| Safety class | I | |
| Protection class | IP X4 | |
| Mains fuse | 16 A time-lag | 16 A time-lag |
| Suisse | 10 A time-lag | |
| UK | 13 A time-lag | 13 A time-lag |
| Operating mode: | S1Continuous operation | S 6 – 40 %Continuous intermittent operationFor 10 min.:4 min. continuous operation6 min. operation at no or low load |
Operational faults
Before each fault elimination:
- Switch off device.
- Wait for standstill of the garden shredder.
– Pull out mains plug.
| Fault Possible cause Removal | ||
| Motor does not start. | – No power supply.– Mains cable defective.– Upper part of the enclosure not properly closed (safety shut-off is activated). | – Check fuses.– Have these checked (electrician).– Close and bolt down upper part of the enclosure correctly, remove any dirt present. |
| Motor hums,but does not start. | – Cutters blocked.– Capacitor faulty. | – Switch machine off, disconnect mains plug, and clean interior of machine.– Have machine repaired by manufacturer or approved company. |
| Reduced cutting performance. | Knife edges became blunt. | Turn the knife or replace it with a new set of knives. |
| Device starts but blocks under slight load and cuts off via protective motor switch. | Extension cable too long, or cross-section too small. Socket too far from mains supply and cross-section of mains cable too small. | Extension cable at least 1.5 mm ^2 , maximum 25 m long. If a longer cable is used, minimum cross-section 2.5 mm ^2 . |
In case of further failures please contact our customer service.
EC Declaration of Conformity
No. (S-No.): 14181
according to EC directive: 2006/42/EC
We,
ATIKA GmbH
Josef-Drexler-Str. 8 – 89331 Burgau – Germany
herewith declare under our sole responsibility that the product
Gartenhäcksler (Garden Shredder) type AMA 2300 and AMA 2500
Serial number: 015000 - 040000
is conform with the above mentioned EC directives as well as with the provisions of the guidelines below:
2014/30/EU, 2011/65/EU and 2000/14/EC.
Following harmonized standards have been applied:
EN 60335-1:2012+A11; EN 50434:2014; EN 62233:2008; EN 55014-1:2006+A1+A2; EN 55014-2:1997+A1+A2;
EN 61000-3-2: 2014; EN 61000-3-11:2000
Conformity assessment procedure: 2000/14/EC - Appendix V.
Measured level of the acoustic output L_WA 107 dB (A).
Guaranteed level of the acoustic output L_WA 108 dB (A).
Keeping of technical documents at:
ATIKA GmbH – Technical department – Josef-Drexler-Str. 8 – 89331 Burgau – Germany
Burgau, 23.09.2016
i.A. G. Koppenstein, Engineering design management
Guarantee
Please observe the enclosed terms of guarantee.
natural_image
Close-up of hands installing or adjusting a recycling bin cover with a curved arrow indicating rotation (no text or symbols visible)
natural_image
Close-up of a mechanical device with a handle and lever mechanism (no visible text or symbols)natural_image
Close-up of hands installing or adjusting a mechanical component with a tool (no visible text or symbols)filetage à gauche
natural_image
Three black-and-white illustrations: a rectangular block, a pen, and a textured rectangular object (no text or symbols)natural_image
Close-up of a mechanical control panel with two buttons labeled 'I' and 'O' (no readable text or symbols beyond labels)natural_image
Close-up of hands installing a recycling bin cover with a curved arrow indicating rotation (no text or symbols visible)natural_image
Close-up of a mechanical switch handle assembly with metal components and a black housing (no visible text or symbols)natural_image
Close-up of hands installing or adjusting a mechanical component with a tool (no visible text or symbols)лява резба
natural_image
Three black-and-white illustrations: a rectangular block, a pen, and a textured oval (no text or symbols)natural_image
Close-up of hands installing a recycling bin cover with a curved arrow indicating rotation (no text or symbols visible)
natural_image
Close-up of a mechanical switch mechanism with a lever and housing (no visible text or symbols)natural_image
Close-up of hands installing or adjusting a mechanical component with a tool (no visible text or symbols)Levý závit
natural_image
Three black-and-white illustrations: a rectangular block, a pen, and a textured rectangular object (no text or symbols)natural_image
Close-up of hands installing a black recycling bin cover with a curved arrow indicating rotation (no text or symbols visible)
natural_image
Close-up of a mechanical switch mechanism with no visible text or symbolsnatural_image
Close-up of hands installing or adjusting a mechanical component with a tool (no visible text or symbols)venstregevind
natural_image
Three black-and-white illustrations: eraser, pen, and textured object (no text or symbols)natural_image
Close-up of hands installing a recycling bin cover with a curved arrow indicating rotation (no text or symbols visible)
Fije las cuchillas.
natural_image
Close-up of a mechanical device with a handle and internal components (no visible text or symbols)natural_image
Close-up of hands installing or adjusting a mechanical component with a tool (no visible text or symbols)natural_image
Three black-and-white illustrations: eraser, pencil, and textured object (no text or symbols)natural_image
Close-up of hands installing a black plastic bag with a curved arrow indicating rotation (no text or symbols visible)
natural_image
Close-up of a mechanical device with a handle and lever mechanism (no visible text or symbols)natural_image
Close-up of hands installing or adjusting a mechanical component with a tool (no visible text or symbols)vasen kierre
natural_image
Three black-and-white illustrations: a rectangular block, a brush, and a textured rectangular object (no text or symbols)natural_image
Close-up of hands installing a black plastic bag with a curved arrow indicating rotation (no text or symbols visible)A kések rögzítése.

natural_image
Close-up of a mechanical component with a handle and lever mechanism (no visible text or symbols)natural_image
Close-up of hands installing or adjusting a mechanical component with a tool (no visible text or symbols)balmenet
natural_image
Three black-and-white illustrations: a rectangular eraser, a pen, and a textured oval object (no text or symbols)natural_image
Close-up of hands installing or adjusting a black plastic container with a curved arrow indicating rotation (no text or symbols visible)
Fiksirajte mehanizam noževa.
natural_image
Close-up of a mechanical component with a handle and mounting holes (no visible text or symbols)Smanjeni učinak rezanja:
jedna oštrica noža je tupa

Okrenite nož i koristite još nekorištenu oštricu.
natural_image
Close-up of hands installing or adjusting a mechanical component with a tool (no visible text or symbols)Lijevi navoj
natural_image
Three isolated illustrations: a rectangular block, a pen tip, and a textured rectangular block (no text or symbols)natural_image
Close-up of hands installing or adjusting a black plastic bag with a curved arrow indicating rotation (no text or symbols visible)
natural_image
Close-up of a mechanical component with a handle and mounting bracket (no visible text or symbols)natural_image
Close-up of hands installing or adjusting a mechanical component with a tool (no visible text or symbols)natural_image
Three black-and-white illustrations: a rectangular block, a pen, and a textured oval (no text or symbols)Tilbakestillingsknapp (motorens beskyttelses-anordning)

Slå på apparatet
natural_image
Close-up of hands installing a black recycling bin cover with a curved arrow indicating rotation (no text or symbols visible)Feste knivverket.
natural_image
Close-up of a mechanical component with a handle and mounting holes (no visible text or symbols)Minsket skjäreeffekt:
En sløvt knivegg.
natural_image
Close-up of hands installing or adjusting a mechanical component with a tool (no visible text or symbols)Venstregjenger
i Før montering må man kontrollere om knivene er skadet (spor, sprekker). Skadete kniver må byttes ut.
natural_image
Three black-and-white illustrations: eraser, pen, and textured object (no text or symbols)natural_image
Close-up of hands installing a recycling bin cover with a curved arrow indicating rotation (no text or symbols visible)
natural_image
Close-up of a mechanical component with a handle and mounting bracket (no visible text or symbols)natural_image
Close-up of hands installing or adjusting a mechanical component with a tool (no visible text or symbols)linkse schroefdraad
natural_image
Three black-and-white illustrations: a rectangular block, a pen, and a textured oval (no text or symbols)natural_image
Close-up of hands installing a recycling bin cover with a circular arrow indicating rotation (no text or symbols)
natural_image
Close-up of a mechanical device with a handle and internal components (no visible text or symbols)natural_image
Close-up of hands installing or adjusting a mechanical component with a tool (no visible text or symbols)Gwint lewoskrętny
natural_image
Three black-and-white illustrations: a rectangular eraser, a pen, and a textured object (no text or symbols)natural_image
Close-up of a mechanical control panel with two buttons labeled 'I' and 'O', no visible text or symbols beyond the labels.natural_image
Close-up of hands installing or adjusting a black recycling bin cover with a curved arrow indicating rotation (no text or symbols visible)Fixati cuțitul.
natural_image
Close-up of a mechanical switch mechanism with lever and housing (no visible text or symbols)natural_image
Close-up of hands installing or adjusting a mechanical component with a tool (no visible text or symbols)filet pe stânga
natural_image
Three black-and-white illustrations: a rectangular eraser, a pen, and a textured oval object (no text or symbols)Conformity assessment procedure: 2000/14/UE – Appendix V
natural_image
Close-up of hands adjusting a black plastic container with a circular arrow indicating rotation (no text or symbols visible)
natural_image
Close-up of a mechanical switch mechanism with a lever handle (no text or symbols visible)natural_image
Close-up of hands installing or adjusting a mechanical component with a tool (no visible text or symbols)Левая резьба
natural_image
Three black-and-white illustrations: a rectangular block, a pen, and a textured oval (no text or symbols)89331 Burgau – Germany
Burgau, 23.09.2016
natural_image
Close-up of hands installing or adjusting a black plastic bag with a curved arrow indicating rotation (no text or symbols visible)
natural_image
Close-up of a mechanical switch mechanism inside a device housing (no visible text or symbols)Sämre skäreffekt: ②
En kniv är trubbig.

natural_image
Close-up of hands installing or adjusting a mechanical component with a tool (no visible text or symbols)Vänstergänga
natural_image
Three black-and-white illustrations: a rectangular block, a pen, and a textured oval (no text or symbols)natural_image
Close-up of hands installing or adjusting a recycling bin cover (no text or symbols visible)
natural_image
Close-up of a mechanical device with a handle and internal components (no visible text or symbols)natural_image
Close-up of hands installing or adjusting a mechanical component with a tool (no visible text or symbols)L'avý závit
natural_image
Three black-and-white illustrations: eraser, pen, and textured object (no text or symbols)natural_image
Close-up of hands installing a recycling bin cover with a curved arrow indicating rotation (no text or symbols visible)
Rezilo zaščitite z zagozdo.
natural_image
Close-up of a mechanical component with a handle and lever mechanism (no visible text or symbols)natural_image
Close-up of hands installing or adjusting a mechanical component with a tool (no visible text or symbols)levi navoj
natural_image
Three black-and-white illustrations: a rectangular block, a pen, and a textured rectangular object (no text or symbols)- Rezalnika ne čistite s tekočo vodo ali z visokotlačnim čistilnim aparatom.
Year of construction
F


- Broyeur de végétaux
- Extent of delivery
- Symbols Original instructions
- Operating times
- Proper use
- Residual risks
- Safety instructions
- Electrical safety
- Behaviour in an emergency situation
- Commissioning
- Do not use defective supply or extension cables.
- Mains connection
- Electrical mains supply impedance
- On / Off switch
- Switch on
- Switch off
- √ Restart protection in case of power failure
- Motor protection
- ⚠️ Always wait until the shredder has come to a complete standstill before restarting it.
- Working with the garden shredder
- What can I shred?
- Yes:
- No:
- Special tips on shredding:
- Changing the blades
- Reduced output
- All knife edges have become blunt:
- Maintenance / Cleaning / Storage
- Operational faults
- Before each fault elimination:
- EC Declaration of Conformity
- ATIKA GmbH
- Following harmonized standards have been applied:
- Keeping of technical documents at:
- Guarantee
- Smanjeni učinak rezanja:
- Slå på apparatet
- Minsket skjäreeffekt:
- Conformity assessment procedure: 2000/14/UE – Appendix V
- Sämre skäreffekt: ②
- En kniv är trubbig.
Brand : ATIKA
Model : AMA 2500
Category : Mechanical chipper