OMW 220 D - Microwave Oven OK - Free user manual and instructions
Find the device manual for free OMW 220 D OK in PDF.
| Product type | Microwave oven |
| Brand | OK |
| Model | OMW 220 D |
| Oven capacity | 20 L |
| Microwave power | 700 W (output) |
| Grill power | 900 W (consumed) |
| Supply voltage | 230-240 V ~, 50 Hz |
| Microwave frequency | 2450 MHz |
| External dimensions (H x W x D) | 262 x 452 x 335 mm |
| Cavity dimensions (H x W x D) | 198 x 315 x 297 mm |
| Net weight | Approx 11.3 kg |
| Available color | Available in several shades |
| Main functions | Microwave, grill, combination, auto defrost |
| Automatic programs | 9 menus (coffee/soup, rice, spaghetti, potatoes, reheating, fish, chicken, beef/mutton, minced meat) |
| Display type | LED screen |
| Supplied accessories | Glass turntable, roller ring, metal rack |
| Cleaning | Regular cleaning with soft cloth; glass turntable dishwasher safe |
| Child lock | Yes (long press on STOP/CANCEL) |
| Grounding | Plug with grounding contact, separate circuit recommended |
| Repairability | Contact qualified after-sales service; bulb replaceable by professional |
Frequently Asked Questions - OMW 220 D OK
User questions about OMW 220 D OK
0 question about this device. Answer the ones you know or ask your own.
Ask a new question about this device
Download the instructions for your Microwave Oven in PDF format for free! Find your manual OMW 220 D - OK and take your electronic device back in hand. On this page are published all the documents necessary for the use of your device. OMW 220 D by OK.
USER MANUAL OMW 220 D OK
natural_image
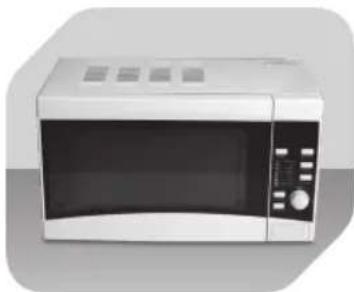
Front view of a microwave oven with control panel and digital display (no visible text or symbols on main body)De geBRaUcHsanWelsUng
el OδΗγίες ΧρΗςΗς
en UseR ManUal
es ManUal De InsTRUccIOnes
FR MODE D'eMplOI
natural_image
Exterior view of a modern microwave oven (no visible text or labels)1
natural_image
Illustration of a microwave oven with a crossed-out X mark on top (no text or symbols)3
natural_image
Close-up of a white electrical outlet plug with black socket and cable (no text or symbols visible)4
BeDlen- UnD anZelgeeInHeIT
MenÜ / Display
natural_image
Exterior view of a modern microwave oven (no visible text or labels)1
2
natural_image
Illustration of a microwave oven with a crossed-out X mark on top (no text or symbols)3
natural_image
Close-up of a black electrical plug inserted into a white socket (no text or symbols visible)4
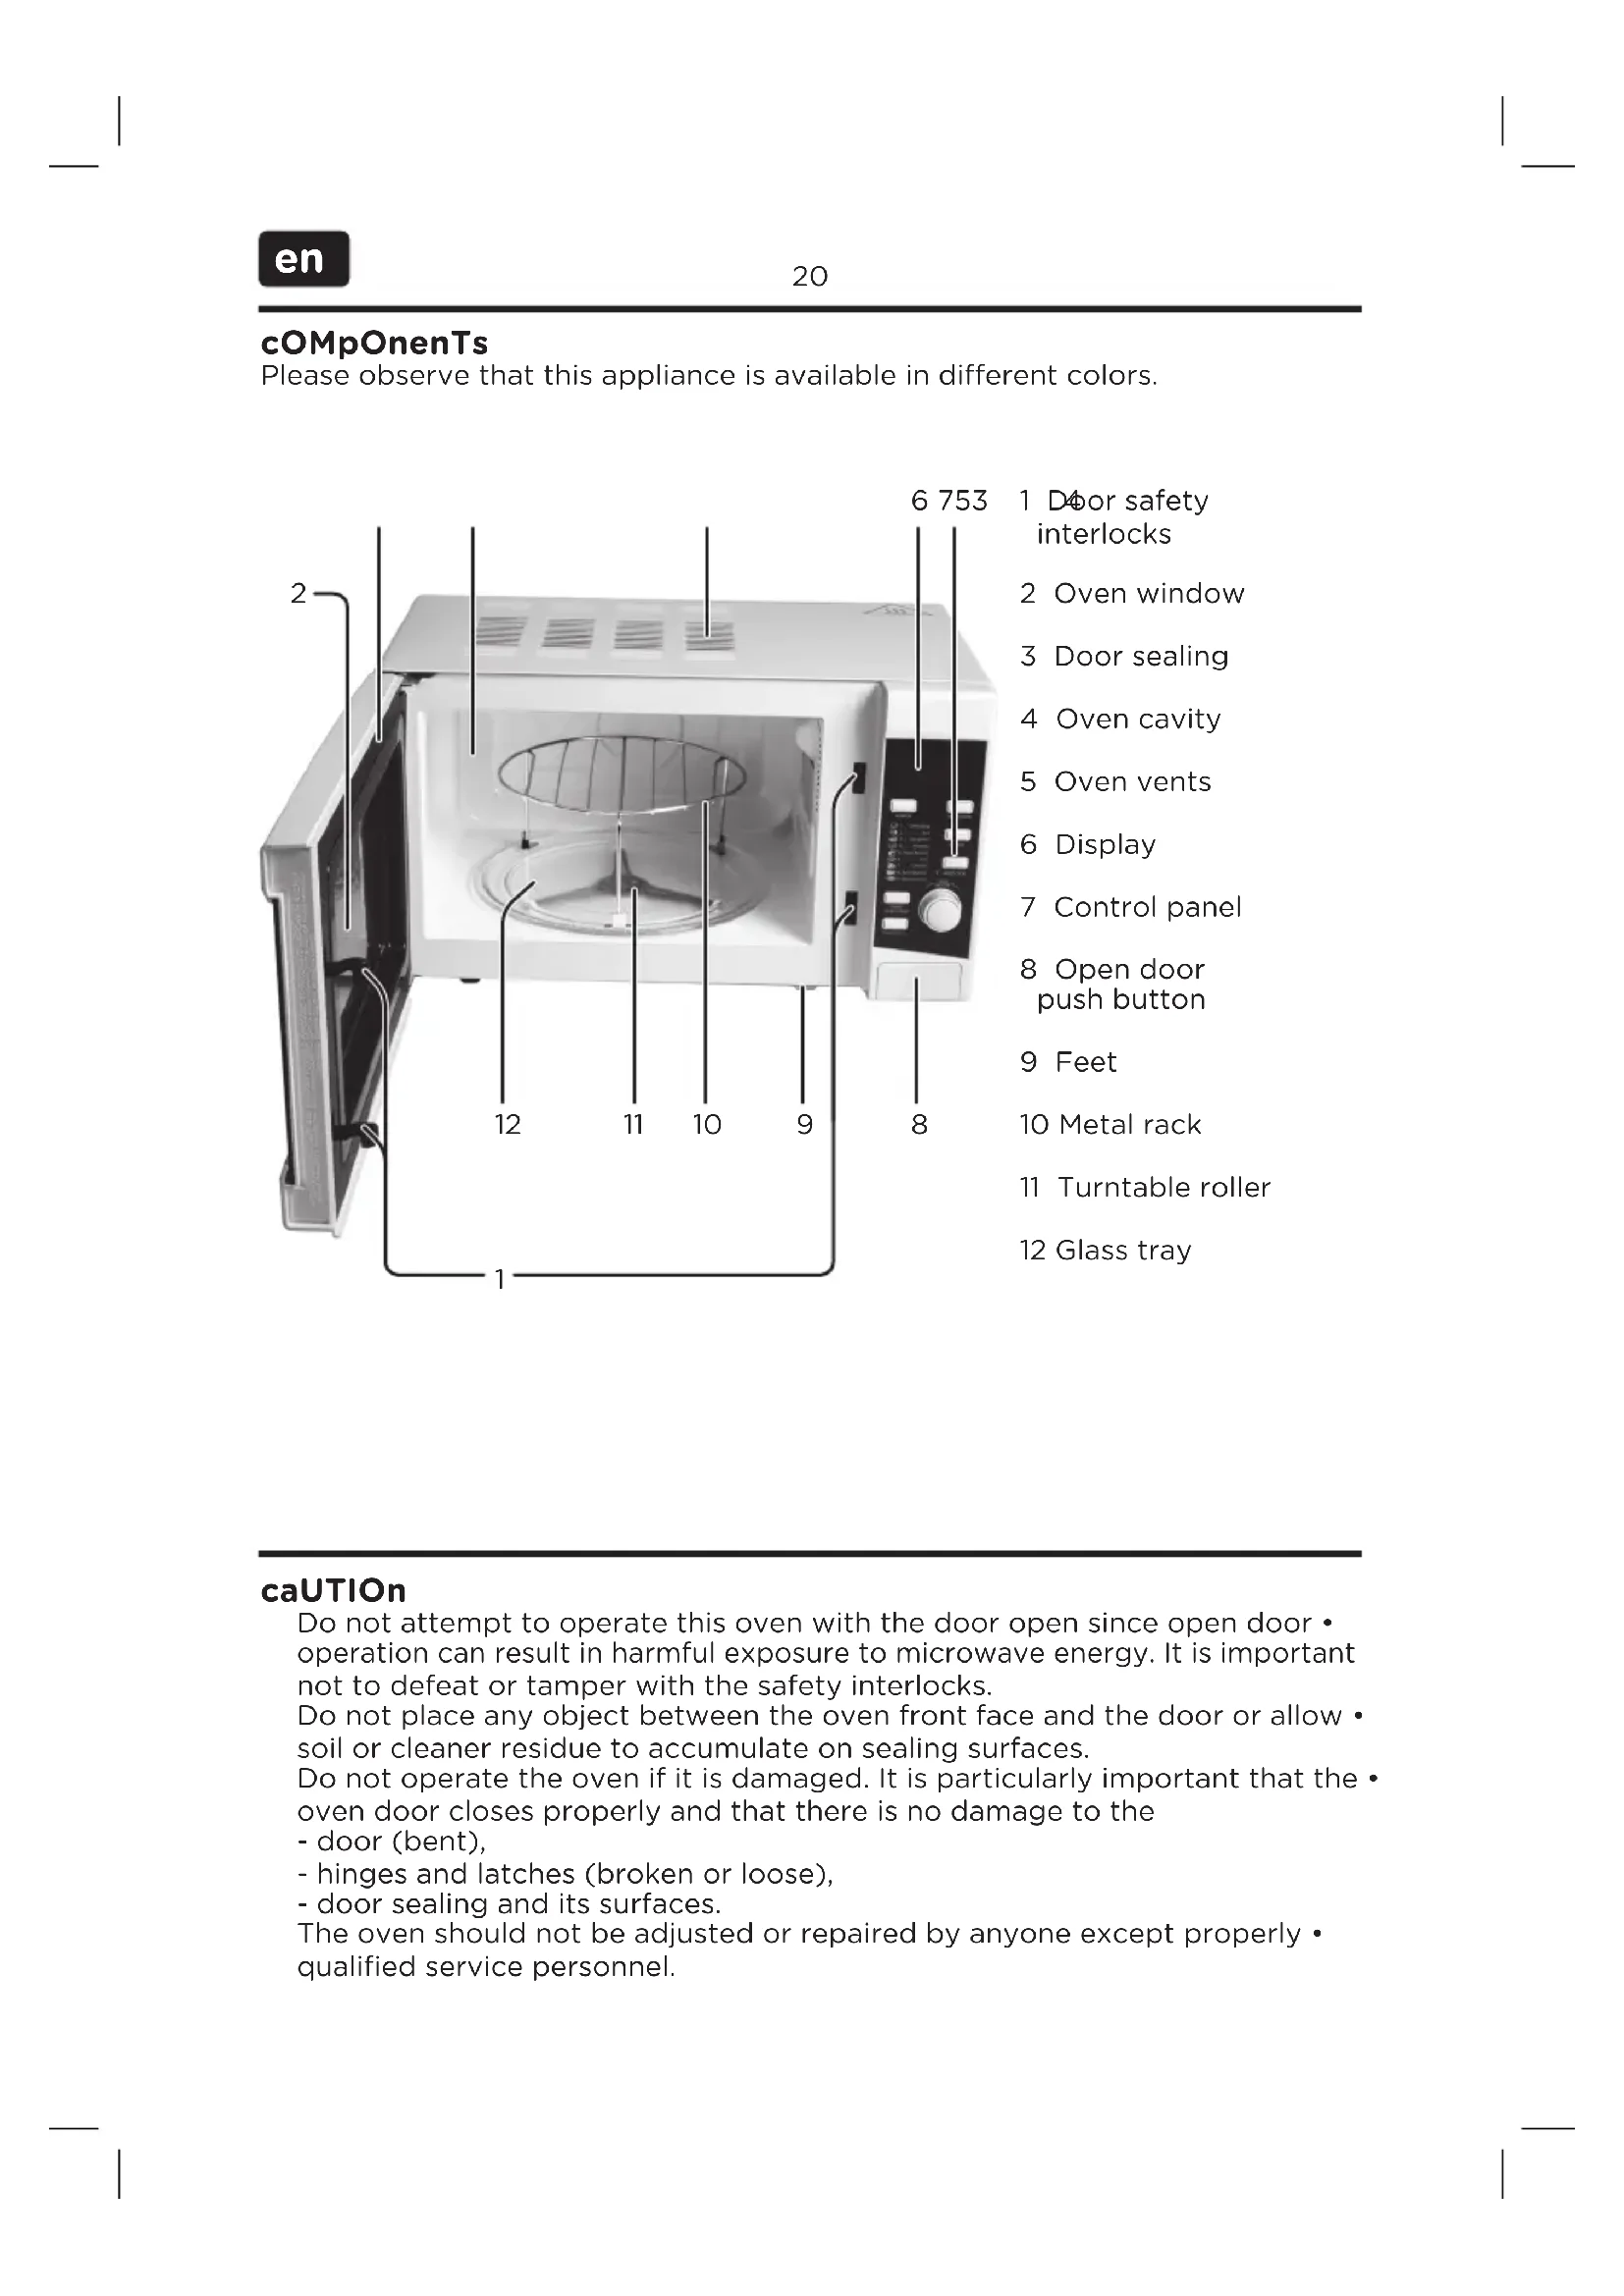
Please observe that this appliance is available in different colors.
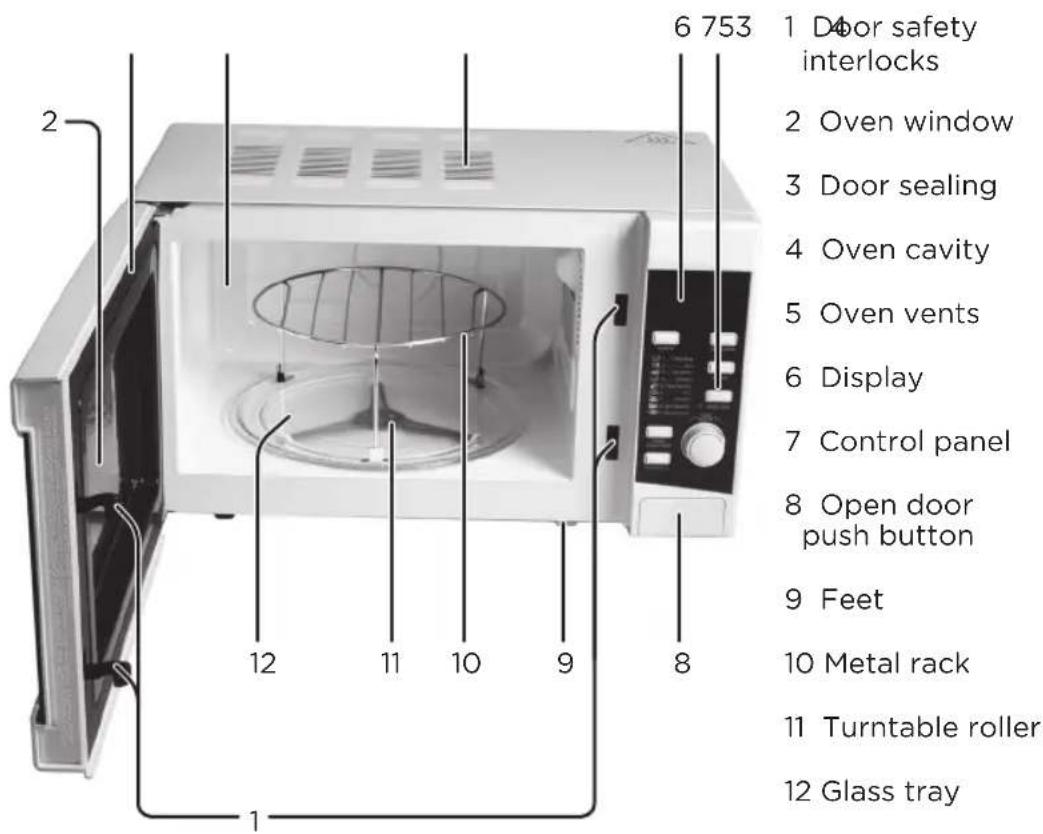
caUTION
Do not attempt to operate this oven with the door open since open door • operation can result in harmful exposure to microwave energy. It is important not to defeat or tamper with the safety interlocks.
Do not place any object between the oven front face and the door or allow soil or cleaner residue to accumulate on sealing surfaces.
Do not operate the oven if it is damaged. It is particularly important that the • oven door closes properly and that there is no damage to the
- door (bent),
- hinges and latches (broken or loose),
- door sealing and its surfaces.
The oven should not be adjusted or repaired by anyone except properly • qualified service personnel.
InsTallaTION
natural_image
Exterior view of a modern microwave oven (no visible text or labels)1
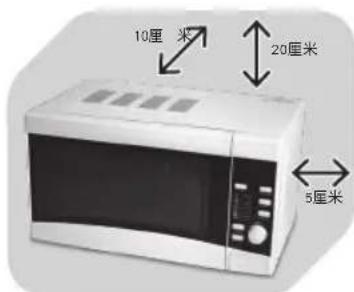
Place the microwave on a flat, stable surface.
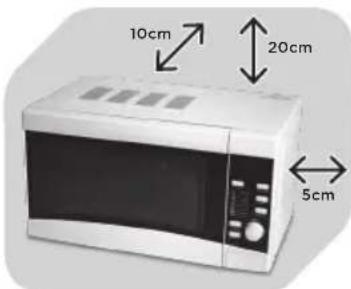
2
Leave space for sufficient airflow: 20 cm above the oven, 10 cm at the back and 5 cm on both sides.
natural_image
Illustration of a microwave oven with a crossed-out X mark on top (no text or symbols)3
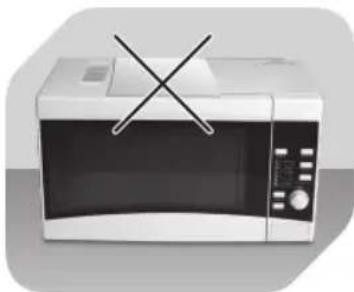
Do not cover or block any vents on the unit. Do not remove feet.
natural_image
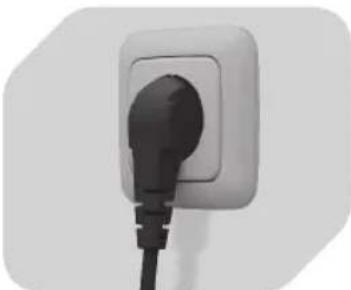
Close-up of a white electrical outlet plug with black socket and cable (no text or symbols visible)4
Before use, plug in the unit. Unplug when not using for a long time.
nOTe
Make sure that all packaging materials including tape are removed from the door, cavity, display, control panel and accessories.
Do not place the oven where heat, moisture or high humidity are generated, or near combustible materials.
Do not operate the oven without turntable roller on the shaft and glass tray or metal rack in proper positions.
Make sure that the supply cord is undamaged • and does not run under the oven or over any hot or sharp surface.
The mains plug must be readily accessible so that it can be easily disconnected in an emergency.
gROUnDIng InsTRUcTIOns
The supply cord of the oven is equipped with a plug with earth connection, which must be plugged into a properly installed and grounded wall outlet. It is recommended that a separate circuit serving only the oven be provided. High voltage is dangerous and may result in fire or other accidents, causing property damage or injuries.
Warning: Improper use of the grounding plug can result in a risk of electric • shock.
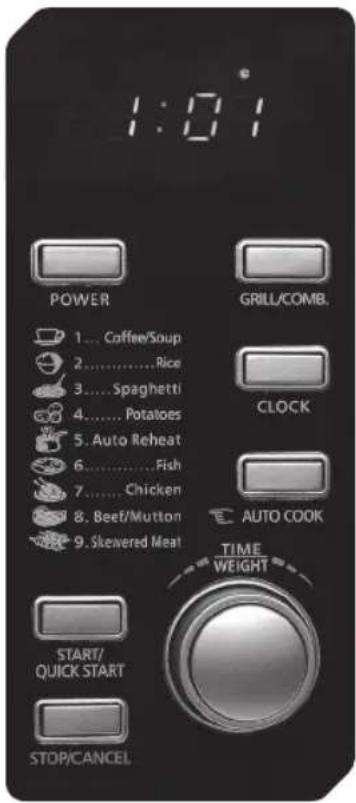
Display and cOnTROI panel
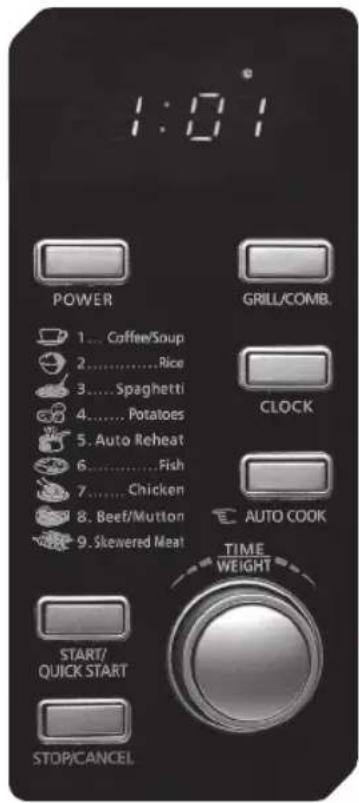
MenU acTION Display
Cooking time, power, indicators and clock time are displayed.
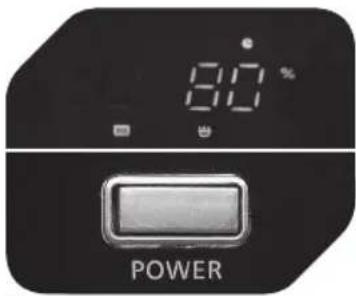
pOWeR
To set microwave cooking power level.
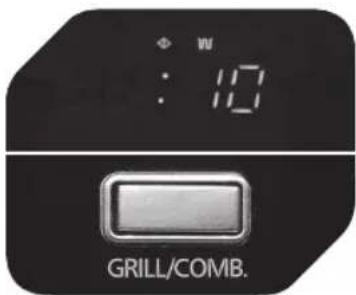
gRIII/cOMB.
To select grill mode or a grill and microwave combination program.
cIOck
To set clock time.
aUTO cOOK
To select a pre-set cooking program.
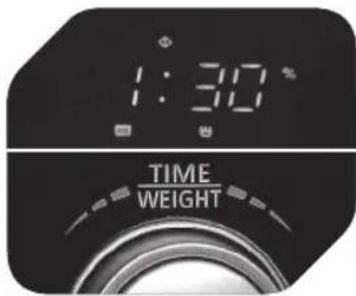
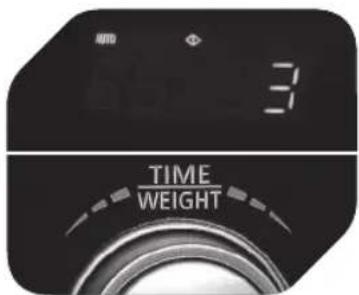
TIMe/WeIgHT
To set the cooking duration or to select the food weight or number of servings.
sTOp/cancel
To stop operation or to clear all previous settings (except for clock time).
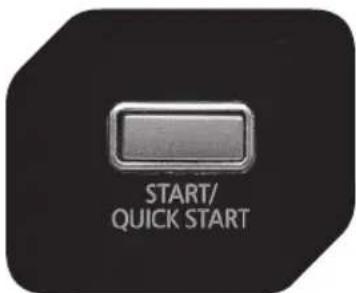
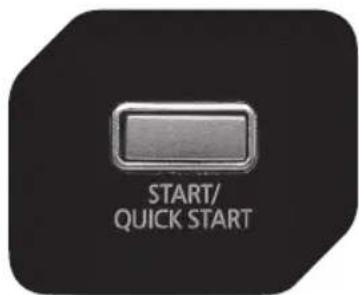
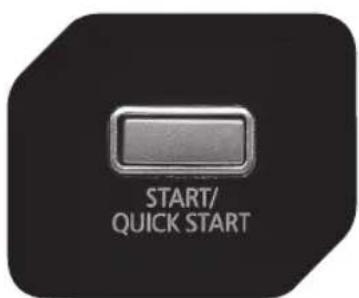
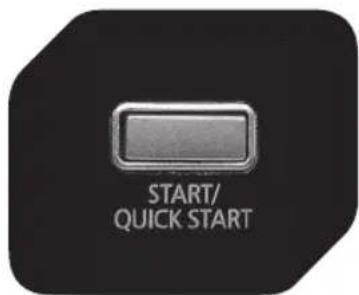
sTaRT/QUICK sTaRT
To start or to prolong a cooking program.
specIFIcaTIOns
Rated voltage: 230-240 V \~, 50 Hz / Rated power input: 1200 W (Micro), 900 W (Grill) / Rated power output: 700 W / Operation frequency: 2450 MHz / Outside dimensions: 262 mm (H) x 452 mm (W) x 335 mm (D) / Cavity dimensions: 198 mm (H) x 315 mm (W) x 297 mm (D) / Oven capacity: 20 L / Net weight: Approx. 11.3 kg
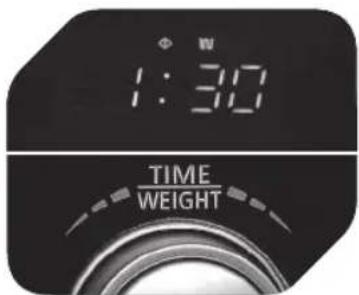
cIOck seTTIng
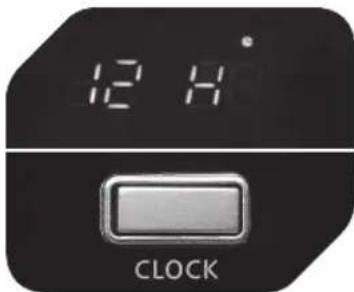
1
Press CLOCK once or twice to set 12 or 24 hour cycle respectively.
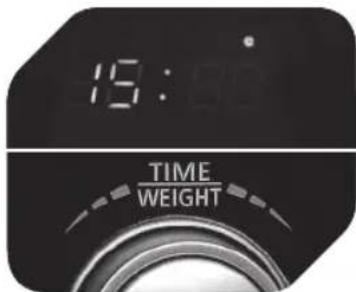
2
Turn TIME/WEIGHT to set the hour. Press CLOCK again, then turn TIME/WEIGHT to set the minutes.
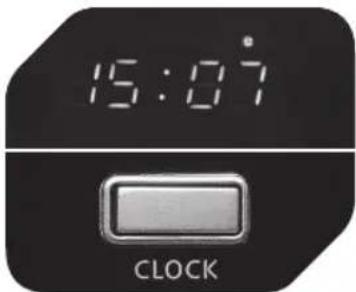
3
Press CLOCK to confirm the set time.
MIcROWave cOOKing
1
Press POWER repeatedly to select desired power level.
2
Turn TIME/WEIGHT to enter cooking duration.
3
Press START/QUICK START.
Press POWER level
1x 100 %
2× 80 %
3×60%
4× 40 %
5×20%
6×0%
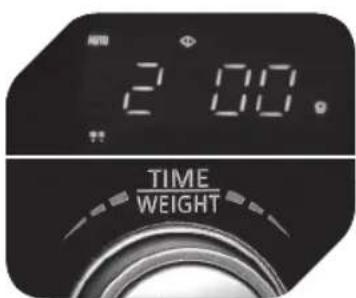
QUICK sTaRT
(Microwaving only) Press START/QUICK START repeatedly to set the cooking duration; the oven will start automatically using 100 % microwave power.
Cooking duration can be prolonged by 30 seconds by pressing START/QUICK START during cooking. After time has elapsed, beeps will sound and END is displayed.
GRILL/COMB.
Use this button to select grill cooking mode or to select a grill and microwave combination program.
123
Press GRILL/COMB. once for grill mode, twice or trice for combination program 1 or 2.
Turn TIME/WEIGHT to enter cooking duration.
Press START/QUICK START.
Combination 1: 30 % time for microwave cooking, 70 % time for grill cooking. Useful for fish, au gratin, etc.
Combination 2: 55 % time for microwave cooking, 45 % time for grill cooking. Useful for cooking pudding, omelettes, baked carrots and vegetables.
AUTOMATIC DEFROST FUNCTION
This microwave oven is suitable for defrosting food. Defrost duration and power level are automatically set according to the food weight entered.
1
Turn TIME/WEIGHT to select weight.
2
Press START/QUICK START.
MENU COOKING
This microwave oven features programs with pre-set power level and cooking duration. Food weight or number of servings must be entered accordingly.
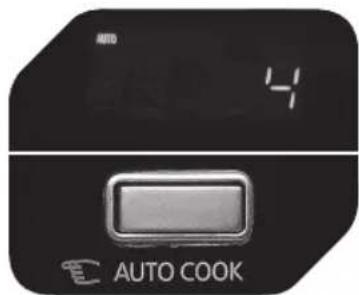
123
Press AUTO COOK repeatedly to select program.
Turn TIME/WEIGHT to enter the food weight or number of servings.
Press START/QUICK START.
Mode Food/Program (as on oven) Note
| 1 Coffee / Soup (200-250 ml per cup) | If cooking result is • not satisfactory, retry with different setting.7/8/9: Oven will • beep an pause half-way for user to turn over food. |
| 2 Rice (g) | |
| 3 Spaghetti (g) | |
| 4 Potatoes (230 g / each) | |
| 5 Automatic Reheat (g) | |
| 6 Fish (g) | |
| 7 Chicken (g) | |
| 8 Beef / Mutton (g) | |
| 9 Skewered Meat (g) |
CHILD LOCK
To set the CHILD LOCK: Press and hold STOP/CANCEL for 3 seconds.
Display shows LOCK.
To disable CHILD LOCK: Press and hold STOP/CANCEL for 3 seconds.
LOCK will disappear from the display.
cleanIng anD caRe
Cleaning the microwave oven is a significant part of the safe operation of the device and will prevent health hazards.
- The device must be cleaned periodically, food residue must be removed. If the device is not cleaned regularly, it can cause wear to the surface and severely reduce the service life. Furthermore, it could result in limited safety and functionality of the device.
If the door sealing no longer closes reliably due to accumulated food • residue, microwave radiation may leak and damage your health.
Clean the device after use to prevent mould, vermin, as well as leaking • microwave radiation.
Prior to each cleaning, switch off the microwave oven and disconnect the • mains plug.
Do not use steam cleaners to clean the device! The steam is pressurized and can condensate on the electrical components inside the device and cause short-circuits.
Do not use any abrasive cleaning agents or metal scrapers to clean the door • since they could scratch the surface and cause the glass to shatter.
Clean the casing with a slightly damp cloth. Please be sure that no water • enters the appliance.
Use a damp cloth to regularly and carefully clean the door sealing, cavity • and any adjacent components. Use a damp cloth to wipe off any food residue or splashes.
Make sure the display and control panel do not get wet. Clean by using a soft, damp cloth. Leave the door open when cleaning the control panel in order to prevent accidental operation.
If steam condensates or forms drops inside the microwave or on the casing, use a soft cloth to wipe it off. Condensation can occur if moist air meets a cold surface. At very high temperatures, oil and grease can also evaporate and deposit as a grease film after cooling off.
The glass tray can be removed for cleaning. Clean the tray in warm, soapy • water or in the dishwasher.
The turntable roller and the cavity bottom should be cleaned regularly to prevent excessive noise. Simply use a mild household cleaner to wipe the surface; allow it to dry. If the turntable roller is removed for cleaning, make sure to re-insert it properly before next use. Regularly clean the door, window and sealing with a damp cloth to remove dirt.
- Odours in the cavity can be neutralized by filling a microwave-suitable cup with water and lemon juice and boiling it in the microwave oven for 5 minutes. Wipe the cavity dry afterwards using a soft cloth.
- In the event that the light bulb inside the cavity must be replaced, please contact qualified service personnel.
InTenDeD Use
This appliance is intended for processing food. Only use according to these instructions. Improper use is dangerous and will void any warranty claim. Important safety instructions can be found in the separate document.
DispOsal
Do not dispose of this appliance as municipal waste. Return it to a designated collection point for the recycling of electrical and electronic equipment. Contact your retailer or local authorities for more information.
cOMpOnenTes
natural_image
Exterior view of a modern microwave oven (no visible text or labels)1
natural_image
Illustration of a microwave oven with a crossed-out X mark on top (no text or symbols)3
natural_image
Close-up of a white electrical outlet plug with black socket and cable (no text or symbols visible)4
natural_image
Exterior view of a modern microwave oven (no visible text or labels)1
natural_image
Illustration of a microwave oven with a crossed-out X mark on top (no text or symbols)3
natural_image
Close-up of a white electrical outlet plug with black cable (no text or symbols visible)4
natural_image
Exterior view of a modern microwave oven (no visible text or labels)1
natural_image
Illustration of a microwave oven with a crossed-out X mark on top (no text or symbols)3
natural_image
Close-up of a black electrical outlet plug with a black cable (no text or symbols visible)4
natural_image
Exterior view of a modern microwave oven (no visible text or symbols)1
natural_image
Illustration of a microwave oven with a crossed-out X mark on top (no text or symbols)3
natural_image
Close-up of a black electrical outlet plug with a black cable (no text or symbols visible)4
natural_image
Exterior view of a modern microwave oven (no visible text or labels)1
natural_image
Illustration of a microwave oven with a crossed-out X mark on top (no text or symbols)3
natural_image
Close-up of a black electrical outlet plug with a black cable (no text or symbols visible)4
Zaczepy drzwi1.
Okienko2.
Uszczelka drzwi3.
Komora4.
natural_image
Exterior view of a modern microwave oven (no visible text or labels)1
natural_image
Illustration of a microwave oven with a crossed-out X mark on top (no text or symbols)3
natural_image
Close-up of a black electrical outlet plug with a black cable (no text or symbols visible)4
natural_image
Exterior view of a modern microwave oven (no visible text or symbols)1
natural_image
Illustration of a microwave oven with a crossed-out X mark on top (no text or symbols)3
natural_image
Close-up of a white electrical outlet plug with black cable (no text or symbols visible)4
natural_image
Exterior view of a modern microwave oven (no visible text or labels)1
natural_image
Illustration of a microwave oven with a crossed-out X mark on top (no text or symbols)3
natural_image
Close-up of a black electrical plug inserted into a white socket (no text or symbols visible)4
natural_image
Exterior view of a modern microwave oven (no visible text or symbols)1
natural_image
Illustration of a microwave oven with a crossed-out X mark on top (no text or symbols)3
natural_image
Close-up of a black electrical outlet plug with a black cable (no text or symbols visible)4
| 1×100% |
| 2×80% |
| 3×60% |
| 4×40% |
| 5×20% |
| 6×0% |
snaBBsTaRT
natural_image
Exterior view of a modern microwave oven (no visible text or symbols)1
natural_image
Illustration of a microwave oven with a crossed-out X mark on top (no text or symbols)3
natural_image
Close-up of a white electrical outlet plug with black cable (no text or symbols visible)4
natural_image
Exterior view of a modern microwave oven (no visible text or symbols)1
把微波炉放在平坦、稳定的表面上。
natural_image
Illustration of a microwave oven with a crossed-out X mark on top (no text or symbols)3
natural_image
Close-up of a white electrical outlet plug with black socket and cable (no text or symbols visible)4