OMW 2223 DS CH - Microwave Oven OK - Free user manual and instructions
Find the device manual for free OMW 2223 DS CH OK in PDF.

| Product Type | Microwave oven with grill and combination mode |
| Brand | OK |
| Model | OMW 2223 DS CH |
| External dimensions (H x W x D) | 258 x 440 x 330 mm |
| Net weight | Approximately 11 kg |
| Rated voltage | 230 V ~ 50 Hz |
| Microwave output power | 700 W |
| Operating frequency | 2450 MHz |
| Oven capacity | 20 liters |
| Turntable diameter | 255 mm |
| Main functions | Microwave (10-100% power), Grill, Combination (C-1: 55% MW+45% Grill, C-2: 36% MW+64% Grill), Defrost by weight or time, Quick cook 30s, Auto menu (8 programs), Programmable clock, Multi-stage cooking |
| Installation type | Freestanding appliance (not built-in) |
| Safety | Child lock, door safety lock devices, automatic stop on opening |
| Interior lining materials | Stainless steel (not explicitly specified, but standard for this type) |
| Included accessories | Glass turntable, rotating support (cylinder), metal grill rack, instruction manual |
| Cleaning and maintenance | Clean after each use with a damp cloth; do not use steam cleaner or harsh detergents; glass tray dishwasher safe |
| Important safety instructions | Do not use if door or seals damaged; do not heat sealed containers; do not operate empty; use suitable utensils |
| Repairability | Repairs only by authorized technician; interior lamp replacement by qualified personnel |
| Disposal | Do not dispose of with household waste, take to a WEEE collection point |
Frequently Asked Questions - OMW 2223 DS CH OK
User questions about OMW 2223 DS CH OK
0 question about this device. Answer the ones you know or ask your own.
Ask a new question about this device
Download the instructions for your Microwave Oven in PDF format for free! Find your manual OMW 2223 DS CH - OK and take your electronic device back in hand. On this page are published all the documents necessary for the use of your device. OMW 2223 DS CH by OK.
USER MANUAL OMW 2223 DS CH OK
Thank you for your purchase of an ok. product. Please read this manual carefully and keep it for future reference.
IMPORTANT SAFETY INSTRUCTIONS . READ CAREFULLY AND KEEP FOR FUTURE REFERENCE.
-
Risk of burning! Do not touch the product's hot surfaces. Heat rises from the product during use. Caution! Hot surface!
-
This product can be used by children aged from 8 years and above and persons with reduced physical, sensory or mental capabilities or lack of experience and knowledge if they are being supervised or have been instructed concerning use of the product in a safe way and understand the hazards involved.
-
Children shall not play with the product.
-
Cleaning and user maintenance shall not be carried out by children unless they are older than 8 years and supervised.
-
Keep this product and its power cord out of reach of children under the age of 8 years.
-
Warning! If the door or door seals are damaged, the product must not be operated until it has been repaired by an authorised service agent.
-
Warning! It is hazardous for anyone other than a competent person to carry out any service or repair operation that involves the removal of a cover which gives protection against exposure to microwave energy.
-
Warning! Liquids and other foods must not be heated in sealed containers since they are liable to explode.
-
Only use utensils suitable for use in microwave ovens. Do not use containers or cutlery made from or containing metal, aluminium foil, lead crystal glassware, temperature-sensitive plastics, wood, metal clips or wire ties.
-
When heating food in plastic or paper containers, keep an eye on the oven due to the possibility of ignition.
-
If smoke is emitted switch off or unplug the product and keep the door closed in order to stifle any flames.
-
Microwave heating of beverages can result in delayed eruptive boiling, therefore care must be taken when handling the container.
- The contents of feeding bottles and baby food jars shall be stirred or shaken and the temperature checked before consumption, in order to avoid burns.
- Eggs in their shell and whole hard-boiled eggs should not be heated in microwave ovens since they may explode, even after microwave heating has ended.
- The oven has to be cleaned regularly and any food deposits must be removed.
- Failure to maintain the oven in a clean condition could lead to deterioration of the surface that could adversely affect the life of the appliance and possibly result in a hazardous situation.
- The microwave oven is only allowed to be used as a freestanding device. The device is not suitable for mounting in furniture such as cupboards and is therefore not allowed to be used in built-in furniture.
- If the supply cord is damaged, it must be replaced by the manufacturer, its service agent or similarly qualified persons in order to avoid a possible hazard.
- The microwave oven is intended for warming food and drinks. The drying of food or clothes and the warming of heating pads (incl. kernel filled pillows), slippers, sponges, damp cleaning cloths and similar can lead to injuries, inflammation or fire.
- The product is designed for the preparation of normal household quantities in the home, or in household-like, non-commercial environments. Household-like environments include staff kitchens in shops, offices, agricultural and other small businesses or for use by guests at bed-and-breakfast establishments, small hotels and similar residential facilities.
-
Warning! This product is not intended to be operated by means of an external timer or separate remote-control system.
-
Warning! Only allow children to use the oven without supervision when adequate instructions have been given so that the child is able to use the oven in a safe way and understands the hazards of improper use.
- Leave space for sufficient airflow: 20cm above the oven.
- Clean the product and all other accessories after each use.
-
Follow the instructions in the chapter Cleaning and care.
-
Read this manual thoroughly before first use. It contains important information for your safety as well as for the use and maintenance of the equipment.
- Keep this manual for future reference and pass it on with the product.
- Pay particular attention to the warnings on the product and in this manual.
- Use the product only for its intended purpose. Improper use may lead to hazards.
- In the event of improper use or wrong operation, we do not accept any liability for resulting damages.
- The use of accessories and components not expressly recommended by the manufacturer may result in injuries or damages and voids the warranty.
- Never leave the product unsupervised while it is switched on.
- Do not place any objects on top of the product.
- Never immerse electrical parts of the product in water or any other fluids during cleaning or operation. Never hold the product under running water.
- Do not under any circumstances attempt to repair the product yourself. For servicing and repairs, please consult an authorised service agent.
- The mains voltage must match the information on the rating label of the product.
- The power plug is used as the disconnect device. Please be sure that the power plug is in operable condition.
- Only unplugging from the power socket can separate the product completely from the mains.
- Avoid damages to the power cord that may be caused by kinks or contact with sharp corners.
- Keep this product including power cord and power plug away from all heat sources such as ovens, hot plates and other heat-producing products/objects.
- Only unplug from the power socket by the plug itself. Do not pull on the cord.
-
Unplug the product ...
-
when the product is not being used,
-in case of malfunctions, - before attaching / detaching accessories and
-
before cleaning the product.
-
If the power cord or the casing of the product are damaged or if the product has been dropped, the product may not be used before it is examined by an authorised service agent.
- Use this product in dry indoor areas only and never outdoors.
- Place the product on a flat, sturdy and slip-resistant surface.
- Protect this product from extreme heat and cold as well as from direct sunlight and dust.
- In order to reduce the risk of fire and electric shock, do not expose the product to fire (fireplace, grill, candles, cigarettes and so on) or water (water drops, water splashes, vases, tubs and so on).
- Warning! Do not use this product near water or heavy moisture; e.g. in a damp basement or beside a swimming pool or bathtub.
- This product is not intended for commercial use.
INTENDED USE
This appliance is designed for defrosting, reheating and cooking food. This appliance is only suitable for private household use and it is not designed for commercial purpose. Every other type of use can lead to damage to the appliance or injury.
The appliance is intended to be used in household and similar applications such as
- staff kitchen areas in shops, offices and other working environments,
farm houses, - by clients in hotels, motels and other residential type environments, and bed and breakfast type environments.
BEFORE FIRST TIME USE
- Remove all packaging materials.
- Check for completeness and transport damage. In case of damages or incomplete delivery please contact your dealer.
Clean the appliance Cleaning and care).
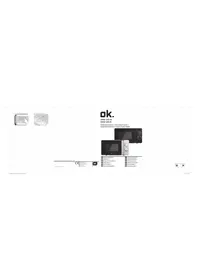
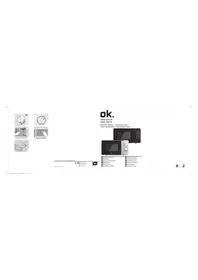
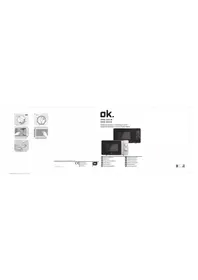
CONTROLS AND COMPONENTS
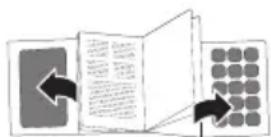
Fold out front and rear page for product illustrations.
A. Door sealing
B. Door safety interlocks
C.Oven cavity
D. Turntable roller / Shaft
E. Display
F. Control panel
G. Power cord with plug
H. Grill rack
I. Glass tray
J. Feet
K. Oven window
L. Door pull handle
DELIVERY CONTENT
1 x Microwave oven
1 x Glass tray incl. turntable roller
1 x Metal rack
1 x Instruction manual
Attention!
- Do not attempt to operate this oven with the door open since open door operation can result in harmful exposure to microwave energy. It is important not to defeat or tamper with the safety interlocks.
- Do not place any object between the oven front face and the door or allow soil or cleaner residue to accumulate on sealing surfaces.
- Do not operate the oven if it is damaged. It is particularly important that the oven door closes properly and that there is no damage to the
-door (bent),
-hinges and latches (broken or loose),
-door sealing and its surfaces.
- The microwave should not be adjusted or repaired by anyone except properly qualified service personnel.
- Warning: It is forbidden to run the appliance without any food inside. It is very dangerous.
BEFORE USE

Place the microwave on a flat, stable surface.

Leave space for sufficient airflow:
minimum installation height
85 cm
above the oven
30cm
at the back
0cm
on both sides
20 cm

Do not cover or block any openings on the appliance. Do not remove feet.

Do not operate the microwave without turntable roller on the shaft and glass tray in proper positions.
5 Connect the appliance to a suitable wall outlet. Unplug when not using for a long time.
Notes:
- Remove all packaging materials, including tape, from the door, cavity, switches, and accessories.
- Do not place the oven where heat, moisture or high humidity are generated, or near combustible materials.
- Make sure that the supply cord is undamaged and does not run under the oven or over any hot or sharp surface.
- The power plug must be readily accessible so that it can be easily disconnected in an emergency.
= Materials you can use in an microwave oven
× = Materials to be avoided in an microwave oven
The list below is a general guide to help you select suitable utensils:
| Cookware Microwave Grill Combi | |||
| Heat-resistant glass | ✓ | ✓ | ✓ |
| Non-heat-resistant glass | x | x | x |
| Heat-resistant ceramics | ✓ | ✓ | ✓ |
| Mirowave-safe plastic dishes | ✓ | x | x |
| Kitchen paper | ✓ | x | x |
| Metal tray | x | ✓ | x |
| Metal rack | x | ✓ | x |
| Aluminium foil and containers | x | x | x |
GROUNDING INSTRUCTIONS
- The supply cord of the oven is equipped with a plug with earth connection, which must be plugged into a properly installed and grounded wall outlet.
It is recommended that a separate circuit serving only the oven is used. - High voltage is dangerous and may result in fire or other accidents, causing property damage or injuries.
- Warning: Improper use of the grounding plug can result in a risk of electric shock.
Notes:
-
A short supply cord is provided to reduce the risks resulting from becoming entangled in or tripping over a longer cord.
If an extension cord is used: -
The electrical rating should be at least as great as the electrical rating of the appliance.
-
The extension cord must be a grounding-type 3-wire cord.
- The cord should be arranged so that it will not drape over counter tops or table tops, where it can be pulled on by children or tripped over unintentionally.
CONTROL PANEL
6 Display: Cooking time, power, and clock time are displayed.
Micro./Grill/Combi.: Set a microwave, grill or combination cooking program.
Weight/Time Defrost: Set defrost program by weight or time.
Clock/Pre-Set: Set clock or cooking delay program.

Stop/Clear: Pause/stop operation, and cancel settings or programs.
Start/+30Sec./Confirm: Start operation, increase cooking time at increment of 30 seconds, and confirm settings or programs.
Time-Weight-Auto Menu: Select time or weight settings, and select auto cooking program.
Notes:
- Start/+30Sec./Confirm must be pressed to continue cooking if the door is opened during cooking.
- Once the cooking program has been set and Start/+30Sec./Confirm is not pressed within 1 minute, the current time will be displayed. The previous setting will be cancelled.
The appliance will beep 5 times when cooking is finished.
CLOCK SETTING

When the appliance is plugged in, appears on the display and the appliance beeps once.

Press Clock/Pre-Set. Hour digit flashes.

Turn Time-Weight Auto Menu to right or left to set hour.
Press Clock/Pre-Set to confirm. Minute digits flash.
Turn Time-Weight Auto Menu to right or left to set the minutes.
Press Clock/Pre-Set to confirm.
Note: During clock setting, if Stop/Clear is pressed, or if there is no operation within 1 minute, the appliance will go back to the previous status automatically.
MICROWAVE COOKING

Press Micro./Grill/Combi. once. The default microwave power level appears on the display.
Press Micro./Grill/Combi. repeatedly, or turn Time-Weight-Auto Menu to select desired microwave power.
| Display Power level |
| P 100 100 % microwave power |
| P 80 80 % microwave power |
| P 50 50 % microwave power |
| P 30 30 % microwave power |
| P 10 10 % microwave power |

Press Start/+30Sec./Confirm to confirm.

Turn Time-Weight Auto Menu to right or left to adjust the cooking time.
Press Start/+30Sec./Confirm to start microwave cooking.
Note: The microwave can be opened any time during the cooking process. This might be necessary, for example, to turn or stir food, or to check the doneness of the food.
GRILL COOKING
Press Micro./Grill/Combi. once. Then press repeatedly until 6 appears on the display.
Or turn Time-Weight-Auto Menu to right or left to select desired grill power. Press Start/+30Sec./ Confirm to confirm.
Turn TimeWeight Auto Menu to right or left to set the cooking time. Press Start/+30Sec./ Confirm to start grill cooking.
Note: After half of the cooking time has passed, the appliance beeps 2 times, indicating it is time to turn food over. After turnover, press Start/+30Sec./Confirm to continue cooking.
COMBINATION COOKING
Press Micro./Grill/Combi. once. Then press repeatedly until C-1 or C-2 appears on the display.
| Display Power level | |
| C-1 | 55 % Microwave + 45 % Grill |
| C-2 | 36 % Microwave + 64 % Grill |
Press Start/+30Sec./Confirm to confirm.
Turn Time-Weight Auto Menu to right or left to adjust the cooking time.
Press Start/+30Sec./Confirm to start combination cooking.
SPEEDY COOKING
17 In waiting state, press Start/+30Sec./Confirm to cook for 30 seconds at 100% microwave power. Each press will increase time by 30 seconds.
In waiting state, turn TimeWeight·Auto Menu left to set cooking time directly.
Press Start/+30Sec./Confirm to start cooking at 100% microwave power.
Notes:
- During any mode of microwave, grill, combination cooking, and time defrost: Press Start/+30Sec./ Confirm to increase time by 30 seconds.
- In Auto Menu mode and weight defrost mode, cooking time cannot be increased by pressing Start/+30Sec./Confirm.
DEFROST BY WEIGHT
19 Press Weight/Time Defrost once.dEFl appears on the display.
20 Turn Time-Weight Auto Menu to right or left to select the food weight between 100 to 2000 g.
Press Start/+30Sec./Confirm to start defrosting.
DEFROST BY TIME
21 Press Weight/Time Defrost 2 times. dEF2 appears on the display.
Turn Time-Weight Auto Menu to right or left to select the cooking time.
Press Start/+30Sec./Confirm to start defrosting.
MULTI-STAGE COOKING
Notes:
- Up to 2 stages of cooking can be set. If one stage is defrosting, it should be set as first stage. After the former stage finishes, the appliance will beep once and starts the latter stage automatically.
- Auto Menu cannot be set as one of the stages.
For example, if you want to defrost food for 5 minutes, then cook with 80% microwave power for 7 minutes, follow steps 22 - 23.

Press Weight/Time Defrost 2 times. dEF2 appears on the display.

Turn Time-Weight Auto Menu to right or left to select the cooking time of 5 minutes.
Press Micro./Grill/Combi. once. Turn Time-Weight-Auto Menu to select 80% microwave power.
Press Start/+30Sec./Confirm to confirm.
Turn Time-Weight Auto Menu to right or left to select the cooking time of 7 minutes.
Press Start/+30Sec./Confirm to start multi-stage cooking.
PRE-SET FUNCTION
Notes:
- To use the pre-set function, the clock must be set first (Clock setting). To cancel the setting before pre-set time arrives, press Stop/Clear once in waiting state.
- Up to 2 stages of cooking can be set. Defrosting cannot be set in pre-set function.
Example: If you want to cook with 80% microwave power for 7 minutes at a certain pre-set time, follow steps 24 - 25.

Press Micro./Grill/Combi. once.
Turn Time-Weight Auto Menu to right or left to select 80% microwave power.

Press Start/+30Sec./Confirm to confirm.
Turn Time-Weight- Auto Menu to right or left to select the cooking time of 7 minutes.
Do not press Start/+30Sec./Confirm at this stage.
Press Clock/Pre-Set. Hour digit flashes.
Turn Time-Weight Auto Menu to right or left to set the hour (0 - 23).
Press Clock/Pre-Set to confirm. Minute digits flash.
Turn Time-Weight Auto Menu to right or left to set the minutes (0 - 59).
Press Start/+30Sec./Confirm to confirm.
When the pre-set time arrives, the appliance beeps 2 times. Then, it starts cooking automatically.
AUTO MENU
In waiting state, turn TimeWeight-Auto Menu right to choose the menu from Rto . R-B Press Start/+30Sec./Confirm to confirm.
| Menu Weight (g) | Display Power level | ||
| R-1REHEAT | 200 200 | 100 % 400 400 | |
| 600 600 | |||
| R-2VEGETABLE | 200 200 | 100 % 300 300 | |
| 400 400 | |||
| R-3FISH | 250 250 | 80 % 350 350 | |
| 450 450 | |||
| R-4MEAT | 250 250 | 100 % 350 350 | |
| 450 450 | |||
| R-5PASTA 100 (with water 800 g) 50 | 80 % | ||
| R-6POTATO | 200 200 | 100 % 400 400 | |
| 600 600 | |||
| R-7PIZZA 400 400 | 200 200 | 100 % | |
| R-8SOUP 400 400 | 200 200 | 80 % | |
Turn Time-Weight Auto Menu to right or left to select the food weight.
Press Start/+30Sec./Confirm to start cooking.
After cooking done, the appliance beeps 5 times.
CHILD LOCK FUNCTION
Enabling the child lock: In waiting state, press and hold Stop/Clear for 3 seconds.
The appliance gives out a long beep, indicating the child lock function is set.
28 Disabling the child lock: In locked state, press and hold Stop/Clear for 3 seconds.
The appliance gives out a long beep, indicating the child lock function is disabled.
EN
INqUIRING FUNCTION
29 Checking the current power: In any cooking state of microwave, grill and combination, press Micro./Grill/Combi. once. The current power appears on the display for 2 to 3 seconds.
30 Checking the current time: In any cooking state, press Clock/Pre-Set once. The current time appears on the display for 2 to 3 seconds.
31 Checking the pre-set time: Press Clock/Pre-Set once. The pre-set time flashes for 2 to 3 seconds. Then, the appliance resumes the clock display.
CLEANING AND CARE
Warning: Cleaning the microwave oven is a significant part of the safe operation of the device and will prevent health hazards.
32 Prior to each cleaning: Switch off the microwave oven and disconnect the power plug.
The device must be cleaned periodically, food residue must be removed. If the device is not cleaned regularly, it can cause wear to the surface and severely reduce the service life. Furthermore, it could result in limited safety and functionality of the device.
- If the door sealing no longer closes reliably due to accumulated food residue, microwave radiation may leak and damage your health.
Clean the device after use to prevent mould, vermin, as well as leaking microwave radiation. - Do not use steam cleaners to clean the device! The steam is pressurized and can condensate on the electrical components inside the device and cause short-circuits.
- Do not use any abrasive cleaning agents or metal scrapers to clean the door since they could scratch the surface and cause the glass to shatter.
- Clean the casing with a slightly damp cloth. Please be sure that no water enters the appliance.
- Use a damp cloth to regularly and carefully clean the door sealing, cavity and any adjacent components. Use a damp cloth to wipe off any food residue or splashes.
- The control panel and its controls must never get wet. Clean with a soft, damp cloth. Leave the door open when cleaning the control panel in order to prevent accidental operation.
- If steam condensates or forms drops inside the microwave or on the casing, use a soft cloth to wipe it off. Condensation can occur if moist air meets a cold surface. At very high temperatures, oil and grease can also evaporate and deposit as a grease film after cooling off.
- The glass tray can be removed for cleaning. Clean the tray in warm, soapy water or in the dishwasher.
- The turntable roller and the cavity bottom should be cleaned regularly to prevent excessive noise. Use a mild household cleaner to wipe the surface; allow it to dry. If the turntable roller is removed for cleaning, re-insert it before next use. Regularly clean the door, window and sealing with a damp cloth to remove dirt.
- Odours in the cavity can be neutralized by filling a microwave-suitable cup with water and lemon juice and boiling it in the microwave oven for 5 minutes. Wipe the cavity dry afterwards using a soft cloth.
- In the event that the light bulb inside the cavity must be replaced, please contact qualified service personnel.
TECHNICAL DATA
Rated voltage: 230V ,50Hz
Rated power input: 1050 W (Micro),
1000 W (Grill)
Rated power output: 700 W
Operation frequency: 2450 MHz
Outside dimensions: H: 258 mm
(approx.) W: 440 mm
D:330mm
Turntable diameter: .. 255mm
Oven capacity: 20 litres
Net weight: approx. 11 kg
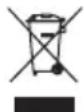
DISPOSAL
The crossed-out wheeled bin logo requires the separate collection of waste electric and electronic equipment (WEEE). Electric and electronic equipment may contain dangerous and hazardous substances. Do not dispose of this appliance as unsorted municipal waste. Return it to a designated collection point for the recycling of WEEE. By doing so, you will help to conserve resources and protect the environment. Contact your retailer or local authorities for more information.