
FSMH1321JMD - Steam cleaner BLACK & DECKER - Free user manual and instructions
Find the device manual for free FSMH1321JMD BLACK & DECKER in PDF.

| Product type | Steam mop and handheld cleaner |
| Brand | Black & Decker |
| Model | FSMH1321JMD |
| Power | 1300 W |
| Voltage | 230 V (AC) |
| Water tank capacity | 500 ml |
| Weight | 2.7 kg |
| Autoselect™ Technology | Automatic steam adjustment based on floor type (wood, tile, stone, etc.) |
| Main functions | Steam mop for hard floors + handheld steam cleaner with accessories for windows, grout, clothes, etc. |
| Included accessories | Floor cleaning head, microfiber pads, corner brush, squeegee, steam nozzle, SteaMitt™, etc. (varies by configuration) |
| Floor compatibility | Hardwood, laminate, linoleum, vinyl, tile, stone, marble |
| Heat-up time | Approximately 15 seconds |
| Continuous runtime | Up to 45 minutes (depending on use) |
| Pad cleaning | Machine washable (follow instructions on the pad) |
| Safety | Automatic shut-off in upright position, boiling steam (do not touch), joint detection for hose |
| Repairability | Spare parts available (pads, accessories); repair by Black & Decker authorized center |
| Warranty | Standard Black & Decker (refer to manual or website) |
Frequently Asked Questions - FSMH1321JMD BLACK & DECKER
User questions about FSMH1321JMD BLACK & DECKER
0 question about this device. Answer the ones you know or ask your own.
Ask a new question about this device
Download the instructions for your Steam cleaner in PDF format for free! Find your manual FSMH1321JMD - BLACK & DECKER and take your electronic device back in hand. On this page are published all the documents necessary for the use of your device. FSMH1321JMD by BLACK & DECKER.
USER MANUAL FSMH1321JMD BLACK & DECKER
Your BLACK+DECKER™ FSMH1321, FSMH13515M, FSMH13101SM, FSMH13151SM, FSMH1321J, FSMH1321JSM, FSMH1321JMD steam mop has been designed for sanitising and cleaning sealed hardwood, sealed laminate, linoleum, vinyl, ceramic tile, stone and marble floors. This appliance is intended for indoor household use only.
Safety Instructions
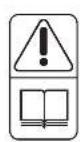
Warning! Read all Safety, Maintenance, Service' manual carefully before operating this appliance. Read all of this manual carefully before operating this appliance.
Labels on appliance
The following pictograms along with the date code are shown on the appliance.

CAUTION Hot Steam
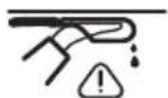
Water dripping when used upside down

Steam escapes from all sides
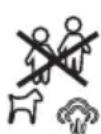

Do not leave unsupervised with young children

Hand wash only
Features
This appliance includes some or all of the following features.
-
On/off switch
-
Autoselect TM dial
-
Hand held steam unit handle
-
Filler cap
-
Hand held steam unit
-
Hand grip
-
Top cable tidy hook
-
Main handle
-
Bottom cable tidy hook
-
Hand held steam unit release button
-
Main body
-
Floor cleaning head
12a. Steam burst floor cleaning head
12b. Carpetglider (for use on carpets)
-
Floor cleaning pad
-
Floor cleaning pad release tab
-
Hanging Bracket
-
Steam hose
-
Steam nozzle
-
Angle brush accessory (for use on hard to remove stains)
-
Brush accessory (for use on tiles / grout)
-
Squeegee accessory (for use on shower screens / glass / mirrors / clothing / upholstery)
20a.Squeegeesock
- Large squeezegee accessory (for use on shower screens / glass / mirrors / clothing / upholstery)
21a. Large squeegee sock
- Steam burst brush unit
22a. Steam burst wire brush (for use on BBQ / ovens)
22b. Steam burst brush (for use on BBQ / ovens / oven hobs / taps / grout)
22c. Steam burst wide brush (for use on larger work surfaces)
- Delta head (for use on clothing / upholstery / larger work surfaces)
23a. Flat surface cleaning pad
23b. Garment steaming interface (for use on clothing / upholstery)
23c. Garment steaming brush (for use on clothing / upholstery)
23d. Garment steaming pad (for use on clothing / upholstery)
24. Fabric and garment steamer pad (for use on clothing / upholstery)
25. SteaMitt TM
26. SteaMitt TM hose
27. SteaMitt ™ cleaning pad
28. Adjustable nozzle
Configuration
| FSM1321 | FSM1351SM | FSM13101SM | FSM1351SM | FSM13151SM | FSM1321J | FSM1321JSM | FSM1321JMD | SETTING | |
| 12 | ✓ | ✓ | ✓ | ✓ | ✓ | ✓ | ✓ | ✓ | All |
| 12a | ✓ | ✓ | ✓ | ✓ | ✓ | ✓ | All | ||
| 12b | ✓ | ✓ | ✓ | ✓ | ✓ | All | |||
| 13 | ✓ | ✓ | ✓ | ✓ | ✓ | ✓ | ✓ | ✓ | All |
| 16 | ✓ | ✓ | ✓ | ✓ | ✓ | ✓ | ✓ | ✓ | All |
| 18 | ✓ | ✓ | ✓ | ✓ | ✓ | ✓ | ✓ | · | |
| 19 | ✓ | ✓ | ✓ | ✓ | ✓ | ✓ | ... | ||
| 20 | ✓ | ✓ | ✓ | ✓ | ✓ | ✓ | ✓ | ✓ | · |
| 20a | ✓ | ✓ | ✓ | ✓ | ✓ | ✓ | ✓ | ✓ | · |
| 21 | · | ||||||||
| 21a | · | ||||||||
| 22 | ✓ | ✓ | All | ||||||
| 22a | ✓ | ✓ | All | ||||||
| 22b | ✓ | ✓ | All | ||||||
| 22c | ✓ | ✓ | All | ||||||
| 23 | All | ||||||||
| 23a | All | ||||||||
| 23b | · | ||||||||
| 23c | · | ||||||||
| 23d | · | ||||||||
| 24 | · | ||||||||
| 25 | ✓ | ✓ | N/A | ||||||
| 28 | ✓ | ALL |
Assembly

Warning! Before attempting any of the following instructions, make sure that the appliance is switched off and unplugged and the appliance is cold and does not contain any water.
Attaching the handle (Fig. A)
Slide the bottom end of the handle (8) into the top end of the steam mop body (11) until it clicks into place.
ENGLISH
(Original instructions)
Attaching the hand held steam cleaner (Fig. B)
Holding the back of the steam mop body (11) push the hand held steam cleaner (5) firmly into the steam mop body (11) making sure it sits correctly over the interface (11a) and clicks securely into place.
Removing the hand held steam cleaner (Fig. B)
Push the release button (10) on the main body (11) and lift the hand held steam cleaner (5) off the interface (11a) and away from the main body (11).
Attaching a cleaning pad (Fig. C)
Replacement cleaning pads are available from your BLACK+DECKER dealer :- (cat no. FSMP20-XJ).
Place a cleaning pad (13) on the floor with the velcro 'loop' side facing up.
Lightly press the steam mop down onto the cleaning pad (13).
Note: This unit may be supplied with a standard floor cleaning head (12) or a steam burst cleaning head (12a). In either case use these instructions to fit a cleaning pad.
Caution! Never leave the steam mop in one spot on any surface for any period of time. Always place the steam mop with the handle (8) supported in the upright position when stationary and make sure the steam mop is turned off when not in use.
Removing a cleaning pad
Caution! Always wear suitable shoes when changing the cleaning pad on your steam mop.
Do not wear slippers or open toed footwear.
Return the handle (8) to the upright position and turn the steam mop 'OFF'.
Wait until the steam mop cools down (approximately 5 minutes).
Lift the steam mop away from the cleaning pad freeing it from the velcro fastening.
Caution! Never leave the steam mop in one spot on any surface for any period of time.
Always place the steam mop with the handle (8) supported in the upright position when stationary and make sure the steam mop is turned off when not in use.
Filling the water tank (Fig. Q)
Note! Fill the water tank with clean tap water (Do not use any additives or chemicals).
Note! In areas of hard water, the use of de-ionised water is recommended.
Open the filler cap (4) by flipping it up.
Fill the water tank with water (Do not use any additives or chemicals).
Warning! When filling, detach from main unit and maintain in a horizontal position.
Warning! Your water tank has a 0.5 litre capacity. Do not over fill the tank.
Close the filler cap (4).
Note! Ensure the filler cap is firmly secured.
Attaching the carpet glider (12b) (For use on carpets only)
Place the carpet glider (12b) on the floor.
Attach a cleaning pad to the floor cleaning head (12)
Lightly press the steam mop down onto the carpet glider (12b) until it clicks into place.
Caution! Never leave the steam mop in one spot on any surface for any period of time. Always place the steam mop with the handle (8) supported in the upright position when stationary and make sure the steam mop is turned off when not in use.
Removing the carpet glider
Caution! Always wear suitable shoes when changing the carpet glider on your steam mop. Do not wear slippers or open toed footwear.
Return the handle (8) to the upright position and turn the steam mop 'OFF'.
Wait until the steam mop cools down (approximately 5 minutes).
Place the front of your shoe onto the carpet glider removal tab and press down firmly.
Lift the steam mop up and off the carpet glider.
Caution! Never leave the steam mop in one spot on any surface for any period of time. Always place the steam mop with the handle (8) supported in the upright position when stationary and make sure the steam mop is turned off when not in use.
Attaching the hose and accessories to the hand held steam cleaner (Fig. G - O)
Warning! Inspect the seal between the connection point on the hand held steam cleaner (5) and the steam hose (16) before each use. If the seal malfunctions or is damaged, please contact your nearest authorised repair agent. Do not use the appliance.
Attaching the hose
Press the steam hose release button (16a) on the steam hose (16).
Connect the steam hose (16) to the hand held steam cleaner (5) and release the steam hose release button (16a) making sure it clicks into place.
Important! Ensure that the steam hose (16) is securely connected to the hand held steam cleaner (5). If steam escapes from the joint, the hose is incorrectly fitted. Switch off, allow the unit to cool then remove and refit the hose.
Attaching accessories (Fig H)
Align the lugs on the steam nozzle (17) with the recesses on the accessory.
Press the accessory onto the steam nozzle (17) and twist anti-clockwise until the accessory clicks into place.
Important! All accessories, apart from the SteaMittTM (25) which has its own hose and connector (26), must be attached to the steam hose (16) for use.
Removing the hose and accessories
Warning! The steam hose (16), Steam nozzle (17) and accessories become hot during use. Allow the unit and all accessories to cool before attempting to remove.
Removing an accessory
Twist the accessory clockwise then pull away from the hose (16).
Removing the hose
Press the steam hose release button (16a) on the steam hose (16) and pull away from the hand held steam unit.
SteaMittTM
Your BLACK+DECKERTM SteaMittfTM has been designed for sanitising and cleaning tiles, work tops, kitchen surfaces and bathroom surfaces. This appliance is intended for indoor household use only.
Attaching the SteaMitt™ hose to the hand held steam unit
Warning! Inspect the seal between the connection point on the hand held steam cleaner (5) and the SteaMitt™ hose (26) before each use. If the seal malfunctions or is damaged, please contact your nearest authorised repair agent. Do not use the appliance.
Press the SteaMittTM hose release button on the SteaMittTM hose (26).
Connect the SteaMittTM hose (26) to the hand held steam cleaner (5) and release the SteaMittTM hose release button making sure it clicks into place.
Important! Ensure that the SteaMittTM hose (26) is securely connected to the hand held steam cleaner (5).
If steam escapes from the joint, the hose is incorrectly fitted.
Switch off, allow the unit to cool then remove and refit the hose.
Fitting a cleaning pad to the SteaMittTM (Fig. L)
Fit the cleaning pad (27) to the SteaMittTM (25) by attaching the 'loop' velcro strips (27a) on the upper side of the cleaning pad, to the 'hook' velcro pads (25a) on the underside of the SteaMittTM (4). Press down firmly.
Warning! The SteaMitt™ should not be used without fitting a cleaning pad.
Note: The SteaMitt™ accommodates 3 types of cleaning pads of varying thickness. The thinnest can be used for cleaning 3D forms such as taps etc. The thicker versions can be used for larger flat areas.
Warning! Always use the SteaMitt™ as shown in figure M, with your hand inside the protective glove.
Warning! Never attempt to use the SteaMitt™ by
gripping it externally as shown in figure N. This will result in scalding.
Warning! Avoid using the SteaMitt in tight corners as shown in figure O.
Warning! Should a problem occur during use,
use the quick release tab to quickly remove the SteaMittTM from your hand as shown in figure P.
Warning! Do not use the SteaMitt™ on cold glass,
such as windows as damage may be caused by the sudden change in temperature.
Warning! Never point or direct the mitt at yourself or any other person.
Note: Variable steam dial is disconnected when the SteaMittTM is fitted and subsequently the flow of steam is limited.
Use
Important! This unit will kill 99.9% of bacteria and germs when used in accordance with the instructions in this manual and with the micro fibre pads fitted and a continuous run time of 90 seconds.
Switching on and off
To switch the appliance on, press the ON/Off switch (1). It takes approximately 15 seconds for the steam mop to heat up.
To switch the appliance off, press the ON/Off switch (1).
Note: always have your hand inside the SteaMittTM before you press the steam button.
Caution! Never leave the steam mop in one spot on any surface for any period of time.
Always place the steam mop with the handle (8) supported in the upright position when stationary and make sure the steam mop is turned off when not in use.
Caution! Always empty the steam mop after use.
Note! When first filled or after running dry, it can take up to 45 seconds for steam to be produced.
Autoselect™ Technology (Fig. R)
This steam mop is fitted with an AutoselectTM dial (2) which shows various cleaning applications. They are used to select the correct operating mode for your particular cleaning operation.
ENGLISH
(Original instructions)
Using AutoselectTM, choose from one of the following applications by turning the AutoselectTM dial (2) until the required setting is selected.
| Setting Mop Hand held | |
| Wood/Laminate High tempera | ure steam for windows |
| Stone/Marble | ● ● |
| Tiles/Vinyl Low temperature s | eam for heavy grime |
The steam mop will select the correct volume of steam required for your particular cleaning operation.
Note: Always check you are using the correct setting before using your steam mop.
Steam Burst (Fig. C1) (only available with units FSMH1310SM, FSMH13151SM)
The floor head (12a) is equipped with a steam burst pedal to aid in the removal of stubborn marks and stains.
During use, press the steam burst pedal to apply extra cleaning power.
To revert back to normal setting press the pedal again.
Hints for optimum use
General
Caution: Never use the steam mop without first attaching a cleaning pad.
Always vacuum or sweep the floor before using the steam mop.
- The easiest way to use the appliance is to tilt the handle to a 45^ angle and clean slowly, covering a small area at a time.
- Use water only with no additives or chemicals with your steam mop. To remove stubborn stains from vinyl or linoleum floors, you can pre-treat with a mild detergent and some water before using the steam mop.
Steam Cleaning with the mop
Fit hand held steam cleaner (5) to the steam mop body (11)
Place a cleaning pad (13) on the floor with the velcro 'loop' side facing up.
Lightly press the steam mop down onto the cleaning pad (13).
Connect the steam mop to the mains.
Press the ON/OFF button (1). It takes approximately 15 seconds for the steam mop to heat up.
Turn the AutoselectTM dial (2) until the required setting is reached. After a few seconds steam will start to come out of the steam head.
Note! When first filled or after running dry, it can take up to 45 seconds for steam to be produced.
- It takes a few seconds for steam to enter the cleaning pad. The steam mop will now glide easily over the surface to be sanitized/cleaned.
Push and pull the steam mop slowly across the surface to thoroughly steam clean each section.
When you have finished using the steam mop, return the handle (8) to the upright position, making sure that it is supported and turn it 'OFF'. Wait until the steam mop cools down (approximately five minutes).
Caution! It is important to monitor the water level in the water tank. To refill the water tank and continue to sanitize/ clean stand the mop upright making sure that the handle is supported and turn the steam mop 'OFF'. Unplug the unit from the electrical wall outlet, and refill the water tank.
Caution! Never leave the steam mop in one spot on any surface for any period of time. Always place the steam mop with the handle (8) supported in the upright position when stationary and make sure the steam mop is turned off when not in use.
Carpet refreshing
Place a cleaning pad (13) on the floor with the 'loop' side facing up.
lightly press the steam mop down onto the cleaning pad.
Place the carpet glider (12b) on the floor.
Lightly press the steam mop down onto the carpet glider until it clicks into place.
Connect the steam mop to the mains.
Press the ON/OFF button (1). It takes approximately 15 seconds for the steam mop to heat up.
Turn the AutoselectTM dial (2) to the Wood/Laminate setting.
Push and pull the steam mop slowly across the carpet to thoroughly refresh each section.
When you have finished using the steam mop, return the handle (8) to the upright position and turn the unit OFF. Wait until the steam mop cools down (approximately five minutes).
After use
Turn the AutoselectTM dial (2) to the OFF position.
Wait until the steam mop cools down.
Unplug the steam mop from the electrical wall outlet.
Empty the water tank.
remove the cleaning pad (13) and wash it ready for next use (take care to follow the wash care instructions printed on the cleaning pad).
Wrap the supply cable around the cable tidy hooks (7 and 9).
- There is a hanging bracket (15) built into the hand grip (6) which allows your steam mop to be hung from a suitable hook on the wall. Always ensure that your wall hook is capable of supporting the weight of the steam mop safely.
Hand held steam cleaning
Warning! Unit will not produce steam unless it is connected to the main body (11) or the steam hose (16) is fitted.
Warning! Only use in a horizontal position.
Attach the required accessory.
Connect the hand held steam cleaner to the mains.
Press the ON/OFF button (1). It takes approximately 15 seconds for the steam mop to heat up.
Turn the AutoselectTM dial (2) until the required setting is reached. After a few seconds steam will start to come out of the steam head.
Note! When first filled or after running dry, it can take up to 45 seconds for steam to be produced.
When you have finished using the hand held steam cleaner turn the AutoselectTM dial (2) to the OFF position. Turn the unit OFF by pressing the ON/OFF button (1) and disconnect from the mains supply. Wait until the unit cools down before storing (approximately five minutes).
Accessories
The performance of your appliance depends on the accessory used. BLACK+DECKER accessories are engineered to high quality standards and designed to enhance the performance of your appliance. By using these accessories you will get the very best from your equipment.
Technical Data
| FSMH1321 | ||
| Voltage V | ac | 230 |
| Power W 1300 | ||
| Tank Capacity | ml 500 | |
| Weight kg 2.7 | ||
| FSMH1351SM | ||
| Voltage V | ac | 230 |
| Power W 1300 | ||
| Tank Capacity | ml 500 | |
| Weight kg 2.7 | ||
| FSMH13101SM | ||
| Voltage V | ac | 230 |
| Power W 1300 | ||
| Tank Capacity | ml 500 | |
| FSMH1321 | ||
| Voltage V | ac | 230 |
| Power W 1300 | ||
| Tank Capacity | ml 500 | |
| Weight kg 2.7 | ||
| FSMH1351SM | ||
| Voltage V | ac | 230 |
| Power W 1300 | ||
| Tank Capacity | ml 500 | |
| Weight kg 2.7 | ||
| FSMH13101SM | ||
| Weight kg 2.8 | ||
| FSMH13151SM | ||
| Voltage V | ac | 230 |
| Power W 1300 | ||
| Tank Capacity | ml 500 | |
| Weight kg 2.8 | ||
| FSMH1321J | ||
| Voltage V | ac | 230 |
| Power W 1300 | ||
| Tank Capacity | ml 500 | |
| Weight kg 2.7 | ||
| FSMH1321JSM | ||
| Voltage V | ac | 230 |
| Power W 1300 | ||
| Tank Capacity | ml 500 | |
| Weight kg 2.8 | ||
| FSMH1321JMD | ||
| Voltage V | ac | 230 |
| Power W 1300 | ||
| Tank Capacity | ml 500 | |
| Weight kg 2.8 | ||
Troubleshooting
If your appliance seems not to operate properly, follow the instructions below. If this does not solve the problem, please contact your local BLACK+DECKER repair agent.
| Problem Step Possible | solution | |
| The steam mop is not turning on | 1. Check | the unit is plugged in at the wall socket. |
| 2. Check | the unit is switched on using the ON/OFF switch (1) | |
| 3. Check | the fuse in the plug. | |
| Problem Step Possible solution | ||
| The steam mop is not producing steam | 4. The s team mop will only produce steam if the hand held steam cleaner (5) is correctly docked into the main body (11) or the steam hose is fitted or the AutoselectTM is turned to ON | |
| 5. Check that the water tank is full. Note: When first filled or after running dry it can take up to 45 seconds for steam to be produced. | ||
| 6. Check steps 1, then 2, then 3 | ||
| The steam mop stops producing steam during use | 7. Check steps 4, then 5, then 3 | |
| The steam mop is producing too much steam during use | 8. Turn the Automouse \( ^{\text{TM}} \) dial (2) anti-clockwise to reduce the amount of steam being produced | |
| The steam mop is producing too little steam during use | 9. Turn the Automouse \( ^{\text{TM}} \) dial (2) clockwise to increase the amount of steam being produced | |
| No steam is being produced from the hand held steam cleaner | 10. Check that the Automouse \( ^{\text{TM}} \) dial (2) is at the ON position | |
| 11. Check steps 5, then 1, then 2, then 3 | ||
| The hand held steam cleaner is producing too little steam during use | 12. Turn the Automouse \( ^{\text{TM}} \) dial (2) clockwise to increase the amount of steam being produced | |
| 13. Check step 5 | ||
| The hand held steam cleaner is producing too much steam during use | 14. Turn the Automouse \( ^{\text{TM}} \) dial (2) anti-clockwise to reduce the amount of steam being produced | |
| The accessories keep falling off the unit | 15. Refer to the assembly chapter for correct fitting instructions of all parts and accessories | |
| Steam is escaping from unexpected areas of the unit | 16. Refer to the assembly chapter for correct fitting instructions of all parts and accessories | |
| Where can I get further information/ accessories | 17. www.blackanddecker.co.uk/steammop www.blackanddecker.ie/steammop | |
DEUTSCH
| F SM H 1 3 2 1 | F SM H 1 3 5 1 SM | F SH 1 3 1 0 1 SM | F SM H 1 3 1 5 1 SM | F SM H 1 3 1 5 1 SM | F SM H 1 3 2 1 J | F SM H 1 3 2 1 J SM | F SM H 1 3 2 1 J M D | SET T I N G S | |
| 12 | ✓ | ✓ | ✓ | ✓ | ✓ | ✓ | Tutto | ||
| 12a | ✓ | ✓ | ✓ | ✓ | Tutto | ||||
| 12b | ✓ | ✓ | ✓ | Tutto | |||||
| 13 | ✓ | ✓ | ✓ | ✓ | ✓ | ✓ | Tutto | ||
| 16 | ✓ | ✓ | ✓ | ✓ | ✓ | ✓ | Tutto | ||
| 18 | ✓ | ✓ | ✓ | ✓ | ✓ | - | |||
| 19 | ✓ | ✓ | ✓ | ✓ | ✓ | ... | |||
| 20 | ✓ | ✓ | ✓ | ✓ | ✓ | ✓ | - | ||
| 20a | ✓ | ✓ | ✓ | ✓ | ✓ | ✓ | - | ||
| 21 | - | ||||||||
| 21a | - | ||||||||
| 22 | ✓ | ✓ | Tutto | ||||||
| 22a | ✓ | ✓ | Tutto | ||||||
| 22b | ✓ | ✓ | Tutto | ||||||
| 22c | ✓ | ✓ | Tutto | ||||||
| 23 | Tutto | ||||||||
| 23a | Tutto | ||||||||
| 23b | - | ||||||||
| 23c | - | ||||||||
| 23d | - | ||||||||
| 24 | - | ||||||||
| 25 | ✓ | ✓ | N/D | ||||||
| 28 | ✓ | TUTTO |
Assemblaggio

| FSM1321 | FSM1351SM | FSH13101SM | FSM13151SM | FSM131J | FSM1321JSM | FSM1321JM | FSM1321JMDS | SETTINGS | |
| 12 | ✓ | ✓ | ✓ | ✓ | ✓ | ✓ | ✓ | ✓ | Todo |
| 12a | ✓ | ✓ | ✓ | ✓ | ✓ | ✓ | Todo | ||
| 12b | ✓ | ✓ | ✓ | ✓ | ✓ | Todo | |||
| 13 | ✓ | ✓ | ✓ | ✓ | ✓ | ✓ | ✓ | ✓ | Todo |
| 15 | ✓ | ✓ | ✓ | ✓ | ✓ | ✓ | ✓ | ✓ | Todo |
| 18 | ✓ | ✓ | ✓ | ✓ | ✓ | ✓ | ✓ | · | |
| 19 | ✓ | ✓ | ✓ | ✓ | ✓ | ✓ | ✓ | ... | |
| 20 | ✓ | ✓ | ✓ | ✓ | ✓ | ✓ | ✓ | ✓ | · |
| 20a | ✓ | ✓ | ✓ | ✓ | ✓ | ✓ | ✓ | ✓ | · |
| 21 | · | ||||||||
| 21a | · | ||||||||
| 22 | ✓ | ✓ | Todo | ||||||
| 22a | ✓ | ✓ | Todo | ||||||
| 22b | ✓ | ✓ | Todo | ||||||
| 22c | ✓ | ✓ | Todo | ||||||
| 23 | Todo | ||||||||
| 23a | Todo | ||||||||
| 23b | · | ||||||||
| 23c | · | ||||||||
| 23d | · | ||||||||
| 24 | · | ||||||||
| 25 | ✓ | ✓ | N/A | ||||||
| 28 | ✓ | TODO |
Ensamblaje

| FSMH1321 | FSMH1351SM | FSH13101SM | FSMH13151SM | FSMH1321J | FSMH1321JSM | FSMH1321JM | SETTINGS | ||
| 12 | ✓ | ✓ | ✓ | ✓ | ✓ | ✓ | ✓ | Tudo | |
| 12a | ✓ | ✓ | ✓ | ✓ | ✓ | Tudo | |||
| 12b | ✓ | ✓ | ✓ | ✓ | Tudo | ||||
| 13 | ✓ | ✓ | ✓ | ✓ | ✓ | ✓ | ✓ | Tudo | |
| 18 | ✓ | ✓ | ✓ | ✓ | ✓ | ✓ | ✓ | Tudo | |
| 18 | ✓ | ✓ | ✓ | ✓ | ✓ | ✓ | · | ||
| 19 | ✓ | ✓ | ✓ | ✓ | ✓ | ✓ | ... | ||
| 20 | ✓ | ✓ | ✓ | ✓ | ✓ | ✓ | ✓ | · | |
| 23a | ✓ | ✓ | ✓ | ✓ | ✓ | ✓ | ✓ | · | |
| 21 | · | ||||||||
| 21a | · | ||||||||
| 22 | ✓ | ✓ | Tudo | ||||||
| 22a | ✓ | ✓ | Tudo | ||||||
| 22b | ✓ | ✓ | Tudo | ||||||
| 22c | ✓ | ✓ | Tudo | ||||||
| 23 | Tudo | ||||||||
| 23a | Tudo | ||||||||
| 23b | • | ||||||||
| 23c | • | ||||||||
| 23d | • | ||||||||
| 24 | • | ||||||||
| 25 | ✓ | ✓ | N/A | ||||||
| 26 | ✓ | TUDO |
Montagem

| FsmH1321 | FsmH1351sm | FsmH13101sm | FsmH13151sm | FsmH1321J | FsmH1321Jsm | FsmH1321Jmd | SETTGs | |
| 12 | ✓ | ✓ | ✓ | ✓ | ✓ | All | ||
| 12a | ✓ | ✓ | ✓ | ✓ | All | |||
| 12b | ✓ | ✓ | ✓ | All | ||||
| 13 | ✓ | ✓ | ✓ | ✓ | ✓ | All | ||
| 16 | ✓ | ✓ | ✓ | ✓ | ✓ | All | ||
| 18 | ✓ | ✓ | ✓ | ✓ | ✓ | · | ||
| 19 | ✓ | ✓ | ✓ | ✓ | ✓ | ... | ||
| 20 | ✓ | ✓ | ✓ | ✓ | ✓ | · | ||
| 20a | ✓ | ✓ | ✓ | ✓ | ✓ | · | ||
| 21 | · | |||||||
| 21a | · | |||||||
| 22 | ✓ | ✓ | All | |||||
| 22a | ✓ | ✓ | All | |||||
| 22b | ✓ | ✓ | All | |||||
| 22c | ✓ | ✓ | All | |||||
| 23 | All | |||||||
| 23a | All | |||||||
| 23b | · | |||||||
| 23c | · | |||||||
| 23d | · | |||||||
| 24 | · | |||||||
| 25 | ✓ | ✓ | ej till. | |||||
| 28 | ✓ | All |
Montering

12b. Teppeglider (for bruk pa tepper)
23a. Rengjoringpute, flate flater
23b. Tsydampingsadapter
(for bruk pā klær/møbler)
23d. Tøydampingspute
| FSMH1321 | FSMH1351SM | FSH13101SM | FSMH13151SM | FSMH1321J | FSMH1321JSM | FSMH1321JMD | SETTINGS | ||
| 12 | ✓ | ✓ | ✓ | ✓ | ✓ | ✓ | ✓ | \( ^\circ \lambda a \) | |
| 12a | ✓ | ✓ | ✓ | ✓ | ✓ | ✓ | \( ^\circ \lambda a \) | ||
| 12b | ✓ | ✓ | ✓ | ✓ | ✓ | \( ^\circ \lambda a \) | |||
| 13 | ✓ | ✓ | ✓ | ✓ | ✓ | ✓ | ✓ | ✓ | \( ^\circ \lambda a \) |
| 16 | ✓ | ✓ | ✓ | ✓ | ✓ | ✓ | ✓ | ✓ | \( ^\circ \lambda a \) |
| 18 | ✓ | ✓ | ✓ | ✓ | ✓ | ✓ | ✓ | ● | |
| 19 | ✓ | ✓ | ✓ | ✓ | ✓ | ✓ | ● ● ● | ||
| 20 | ✓ | ✓ | ✓ | ✓ | ✓ | ✓ | ✓ | ✓ | ● |
| 20a | ✓ | ✓ | ✓ | ✓ | ✓ | ✓ | ✓ | ✓ | ● |
| 21 | ● | ||||||||
| 21a | ● | ||||||||
| 22 | ✓ | ✓ | \( ^\circ \lambda a \) | ||||||
| 22a | ✓ | ✓ | \( ^\circ \lambda a \) | ||||||
| 22b | ✓ | ✓ | \( ^\circ \lambda a \) | ||||||
| 22c | ✓ | ✓ | \( ^\circ \lambda a \) | ||||||
| 23 | \( ^\circ \lambda a \) | ||||||||
| 23a | \( ^\circ \lambda a \) | ||||||||
| 23b | ● | ||||||||
| 23c | ● | ||||||||
| 23d | ● | ||||||||
| 24 | ● | ||||||||
| 25 | ✓ | ✓ | X/E | ||||||
| 28 | ✓ | O/AA |
Uvapuoloyon

Pnoeiooan! PIV ETIyEipnAeTE OTIOaONTote aTO TIC PAPAKATOWOByIEC, BcBaiWBeITE OIT N OUKEUN Eivai ATVEpyOTIOINJEV, EXI ATOOUVbEei ATO TIV Ptia, Eivai Kpua KAI DEV TEPIEXI KABoLOU Vepo.
ToTOnBcTeTnO TnS λαβN (Eik. A)
Eioayete To kawakpo TnC aBns (8) OTo avw akpo Tou oWuatoC TNS nAekpikc sOouTacatou (11) expi va Koumuwoei otn theon tou.
SUVsOToUaTOKaBApIOTnXeIpOs(EIK.B)
Kpatuvtac to Tiowepoc Tou watoC Tn ngkptiknc kountac atou (11) OtpwTeTov atuokaatpiotn xiepoc (5) otaepa meo a 0to ouma (11) ngs nekptiknc okouttac atou kai beaiwtheta ot Ebpazetai owotanavto tngiauvcog (11a) kai aopalizc ot n theon tou jexpaktnpiotiko hko klik.
Apaieoan Tou atmuokaagpiTn xeiipoc (Eik.B)
Platntate To KoumuTi aTTEaEuaepwOnc (10) oTo kupiwoc wma (11) KAI ovuWOTe To KaBapiotko atou xieipoc (5) ato Tn diaovvdeon (11a) atroakpuvovtac to atto kupiwoc wma (11).
TOnoTeTnTo UeapntmaToC kaBapiaou (EiK.C)
AvtaAakTikcEapntmuataKaBapiooudiatBevtai atoTa eMtopiKa onueia TlwnanC npoiovtwv BLACK+DECKER- (ap10. kart. FSMP20-XJ).
ToTtoTe nOte Eva Eaptnua Kaepiaou (13) OTO dattdo Me Tnv Paupa tic BnAies Velcro Otpauev npoc ta ravw.
Iieote eAapaa Tnv nEeKpiKn oKaouTt aTuou Tavw sto EApiaou (13).
Enjeiwn: Autn n movaba mtopei va egotlnte ie pia kavovikn kepaan Kaapioou dattewv (12) n me ia kepaan kaepaiou je pittn atou (12a).Ka otic duo TEPITNTWEIC xnpoiotoinote autc Tc odnyie c ia va toTtOetne Eva ecaptma kaopaiou.
Npoox! Mny aqvete TOTe TnV naekpiK nokouta atou oTo iIO anueo e OTIOAOHTOTE ETIAPVEIA VIA OTIOOHTOTE XPOVIKO diaotma. NAVTOE TOIOBETeTE TNY naekpiK noOUta atou me Tn laBn (8) UTOOTNIPOEvn OE opBia Theon otav eivai oe taoan kai Bebaiwte Ot n naekpiK noOUta atou eivai atvepytoioueyn otav de xnoiIOIOIEtai.
ApaieoEvocEapntmuocKaBapiaou
Pooox! Na oopate navtoe katalanaa tannoutia otav aalacte to ecaptnua kaabapioou otny nektpikn okouta atou.
Mn opate navirophiace n utofojua tnaou apinyouv ta daxuaka akauTTt.
EtnavaepetnlaBn8)Oe op0ia 6eon kai aTVEpyoioiote Tnv nAekptikn OkoUta atpuou.
Iepiiveveteva kpuooei n aeKtpikn okuotaaou (Teipitou 5 aetra).
Avaonkwote tny nlektipik okoouta atou kai atouakpuve te nvt to Eaptnma kaepiou euegepwovtac nvt ao tn ouvdeon me to velcro.
PpOoxn! Mny apVETe TOTy NkEPTPIK nOoUTa atou OTo IDIO nneio oE OTIOIANTOTE ETIAVEY IVA OTIOIDNTOTE XPOVIKO dAOTma.
IavtoTTOBteite Tny nKtpiKn Oou taou u E Tn AaBn (8) UTOOtnpIoEvn 0e opia eon otav evai o stao kai baiwteote n KtpiKn Koou taou evai aTeevpyoToinuev otav de xpoioToieirai.
Tou doxeiou vepou (Eik. Q)


- Safety Instructions
- Labels on appliance
- CAUTION Hot Steam
- Do not leave unsupervised with young children
- Hand wash only
- Features
- Configuration
- Assembly
- Attaching the handle (Fig. A)
- ENGLISH
- (Original instructions)
- Attaching the hand held steam cleaner (Fig. B)
- Removing the hand held steam cleaner (Fig. B)
- Attaching a cleaning pad (Fig. C)
- Removing a cleaning pad
- Filling the water tank (Fig. Q)
- Attaching the carpet glider (12b) (For use on carpets only)
- Removing the carpet glider
- Attaching the hose and accessories to the hand held steam cleaner (Fig. G - O)
- Attaching the hose
- Attaching accessories (Fig H)
- Removing the hose and accessories
- Removing an accessory
- Removing the hose
- SteaMittTM
- Attaching the SteaMitt™ hose to the hand held steam unit
- Fitting a cleaning pad to the SteaMittTM (Fig. L)
- Use
- Switching on and off
- Autoselect™ Technology (Fig. R)
- Steam Burst (Fig. C1) (only available with units FSMH1310SM, FSMH13151SM)
- Hints for optimum use
- General
- Steam Cleaning with the mop
- Carpet refreshing
- After use
- Hand held steam cleaning
- Accessories
- Troubleshooting
- DEUTSCH
- Assemblaggio
- Ensamblaje
- Montagem
- Montering
- Uvapuoloyon
- ToTOnBcTeTnO TnS λαβN (Eik. A)
- SUVsOToUaTOKaBApIOTnXeIpOs(EIK.B)
- Apaieoan Tou atmuokaagpiTn xeiipoc (Eik.B)
- TOnoTeTnTo UeapntmaToC kaBapiaou (EiK.C)
- ApaieoEvocEapntmuocKaBapiaou
- Tou doxeiou vepou (Eik. Q)
Brand : BLACK & DECKER
Model : FSMH1321JMD
Category : Steam cleaner