S 96.130 T - Lawn mower Wolf Garten - Free user manual and instructions
Find the device manual for free S 96.130 T Wolf Garten in PDF.


Frequently Asked Questions - S 96.130 T Wolf Garten
User questions about S 96.130 T Wolf Garten
0 question about this device. Answer the ones you know or ask your own.
Ask a new question about this device
Download the instructions for your Lawn mower in PDF format for free! Find your manual S 96.130 T - Wolf Garten and take your electronic device back in hand. On this page are published all the documents necessary for the use of your device. S 96.130 T by Wolf Garten.
USER MANUAL S 96.130 T Wolf Garten
(Original operating instructions)
François
Assembling the appliance 6
Operation and Display elements 7
Operating safety 9
Tips on lawn care 11
Transporting the appliance 12
Cleaning/Servicing 12
Shutting down the machine 13
Warranty 14
Information about the engine . . 14
Troubleshooting 14
Information on the identification plate
This information is very important for subsequent identification, ordering spare parts for the appliance and for the customer service desk. You will find the identification plate under the driver's seat. Enter all the details on your appliance's rating plate in the following fields.
You will find this and further information about the appliance in the separate CE-declaration of conformity which is a component part of these operating instructions.
The model number identification
The fifth digit of the model number specifies the Series, e.g.:
Model number: 13BT793G678 = 700 Series.
Illustrations

Fold out the illustrated pages at the start of the operating manual. Various models are described in these operating instructions.
The illustrations may differ in detail from the machine which you have purchased.
For your safety
Using the appliance correctly
This unit is designed to be used
- as a lawn tractor for mowing lawns of domestic and leisure gardens,
with accessories which are expressly permitted for use with this lawn tractor,
- according to the descriptions and safety instructions provided in these operating instructions.
Any other use is not as intended. Improper use is not covered by the warranty and the manufacturer will reject any liability. The user is liable for all damage to third parties and their property.
The manufacturer accepts no responsibility for damages resulting from unauthorised alterations to the unit that have been carried out by the owner or operator.
This mower is not licensed for use on public roads or for transporting people.
General safety notes
Carefully read these operating instructions through before first using the appliance and proceed accordingly.
Tell other users about the correct use of the vehicle.
Only operate the appliance in the technical condition stipulated and supplied by the manufacturer.
Carefully keep these operating instructions in a safe place and have them to hand.
With a change of ownership, pass the operating instructions on with the appliance.
Spare parts and accessories must satisfy the requirements specified by the manufacturer.
Therefore use original spare parts and original accessories only or spare parts and accessories authorised by the manufacturer.
Only allow repair work to be carried out from a specialist garage.
Before working with the appliance
If you are tired or ill, do not use the unit.
Persons allowed to use the appliance must not be under the influence of intoxicating substances (e.g. alcohol, drugs or medicine).
Persons under 16 years of age may not operate the appliance. Local regulations may fix the minimum age.
This appliance is not intended for use by persons (including children) with reduced physical, sensory or mental capabilities, or lack of experience and knowledge, unless they have been given supervision or instruction concerning use of the appliance by a person responsible for their safety.
Children should be supervised to ensure that they do not play with the appliance.
Before commencing work with the appliance, familiarise yourself with all of the equipment and control elements as well as with their function.
Store fuel in appropriate containers only, and never in the vicinity of heat sources (e.g. ovens or hot-water cylinders).
Replace the exhaust, fuel tank or fuel cap immediately if they become damaged.
Attach trailers and accessory equipment in accordance with the guidelines. Driving performance, especially steering, braking capability, and overall stability are affected by attachments, towed items, ballast weights and the weight of a grass catcher when full.
While working with the unit
When working with or on the unit, wear appropriate work clothes (e.g. safety boots, long trousers, tight-fitting clothing, goggles and hearing protection).
Only operate the appliance in a technically flawless state.
Never change the engine settings preset at the factory.
Never refuel the unit while the engine is running or hot. Only fill the tank in the open air.
Avoid naked flames, the formation of sparks and do not smoke.
Ensure that no persons, especially children, or animals are in the area of operation.
Check the area in which you intend to use the unit and remove all objects that could be hit and propelled by the unit. You can thus avoid injuries and damage to the unit.
Never mow on slopes that are steeper than 20% . Working on slopes is dangerous; the risk of rollover and sliding is increased.
When working on slopes, always drive off and halt the unit gently and gradually. The transmission should always be engaged when driving down a slope - never coast - and drive at a low speed. Never drive across the face of a slope, always up and down the slope.
Only use the unit in daylight or with a sufficient level of artificial lighting.
The unit is not authorised for the transport of people. Never allow passengers on the unit.
Before any work on the appliance
Protect yourself from injury. Before doing any work to this appliance:
- turn the engine off,
- remove the ignition key,
- lock the parking brake.
- wait until all moving parts have come to rest and the engine has fully cooled.
- pull off the cap of the spark plug, so that the engine cannot inadvertently start.
After working with the appliance Only leave the appliance once you have turned off the engine, actuated the parking brake and have removed the ignition key.
Safety features
Safety features serve to protect you and must always be functional.
You may not make any alterations to the safety features or circumvent their proper functioning.
Safety features are:
Grass flap/grass catcher
The deflector (Fig. 4)/grass catcher protects you from injury that can be inflicted by the cutters or solid objects flung out by the appliance.
The unit should never be operated with the deflector/grass catcher detached.
Safety lock system
The safety interlock system will not allow the engine to start unless
- the driver is sitting on the seat,
the brake pedal has been depressed or the parking brake is in the park position,
-
the direction lever or the accelerator pedal is at "N",
-
the cutter deck is switched off, i.e.: PTO switch or PTO lever set to "0/Off" (PTO = Power-Take-Off).
The safety interlock system switches the engine off as soon as the operator leaves his seat without actuating the parking brake or switching off the cutter deck.
The safety interlock system prevents rear discharge units from mowing without attached deflector/ grass catcher (automatic disconnection of engine or cutter deck). If units have no OCR function or the OCR function is deactivated, the safety interlock system prevents the unit from reversing while the cutter deck is switched on (automatic disconnection of engine or cutter deck).
Before reversing appliances with PTO, therefore, switch OFF the cutters at the PTO switch or PTO lever.
Symbols on the appliance
Various symbols are stuck to the appliance in the form of adhesive labels. The following provides an explanation of the symbols.

Warning!
Please read the operating instructions before putting lawnmower into operation!
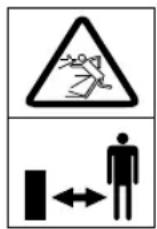
Keep third parties away from the danger area!
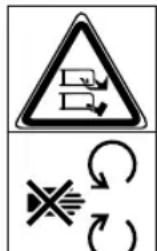
Risk of injury from rotating blades and other rotating parts. Keep hands and feet out of the openings when the machine is running.

Risk of injury from rotating blades and other rotating parts.

Risk of injury from propelled grass or solid objects that are propelled.
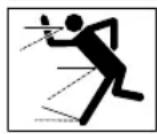

Working on steep slopes increases danger.
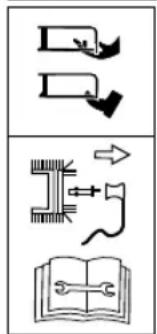
Always remove the spark plug connector before working on the cutters! Keep fingers and feet well away from the cutters! Always switch off the appliance and remove the spark plug connector before adjusting, cleaning or checking it.
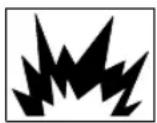
Attention! Risk of explosion.
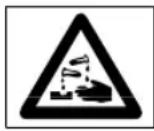
Battery acid/risk of chemical burns.
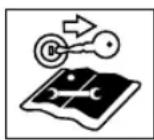
Withdraw the key from the ignition before all work on the unit and observe the instructions in this document.
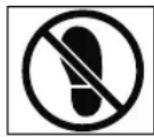
When getting on and off, never step on the cutter deck.

Beware of hot surface!
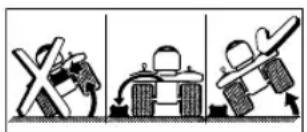
Remove the battery before tilting the unit.
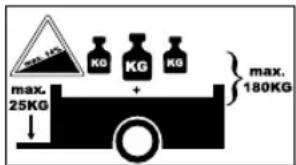
If operating with an attached trailer, do not exceed the following maximum values:
Max. gradient 14%
Max. support load on the
trailer coupling 25 kg
Max. trailer load
(trailer and load) 180kg
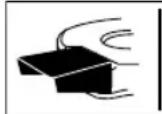

The unit must not be operated without the attached discharge flap or the mulch locking part.
Keep these symbols visible on the appliance.
Symbols used in these instructions
The following symbols are used in these instructions:
Danger
Your attention is drawn to dangers in connection with the action described and through which there is a danger to persons.
Warning
Your attention is drawn to dangers in connection with the action described which could involve material damage.
i Note
Points out important information and tips concerning application.
Details concerning position
Where a position on, or in relation to, the unit is described (e.g. left, right), this is always from the perspective of the driver, sitting on the driver seat and facing forward.
Note concerning the disposal of packaging
Any waste packaging or waste appliances etc. which accumulate should be disposed of according to the local regulations.
Assembling the appliance
Installing the seat
Seat without adjusting lever:
Fig. 1
Seat with adjusting lever:
Fig. 2
Installing the steering wheel
Fig. 3
Connect steering wheel (1) to steering shaft.
Put on washers (3) and secure steering wheel with bolt (4).
i Note
Put on washer (3) with curved side face up.
Insert cover cap (5, depending on model).
Installing the deflector
(Appliances with side ejector)
Fig. 4a
- Remove all screws, washers, and nuts on the deflector.
- Insert the deflector (1), and secure it with the screws, washers, and nuts.
- Secure the cutter rollers (2) with the available screws, washers, and nuts.
Fig. 4b
The deflector and cutter rollers are now installed.
- Press the deflector back slightly, and remove the securing plate. The deflector closes automatically.
Attaching the grass catcher (depending on model)
See the separate operating instructions for the grass catcher.
Commissioning the battery
Fig. 5
Danger
Risk of poisoning and injury from battery acid.
Wear protective goggles and gloves. Prevent battery acid from coming into contact with skin.
Should battery acid splash into your face or eyes, wash immediately with cold water and consult a doctor.
Should you inadvertently swallow battery acid, drink plenty of water and consult a doctor immediately. Keep batteries out of the reach of children.
Never tilt the battery; the battery acid may run out.
Bring the remaining, unused battery acid to your dealer or to a waste disposal company.
Warning
Risk of fire, explosion and corrosion caused by battery acid and battery acid gases Immediately clean parts of the appliance upon which battery acid has been sprayed. Battery has a corrosive effect.
Do not smoke and keep burning and hot objects away.
Store batteries in rooms which are well ventilated and dry. There is a risk of a possible short circuit when working with the battery.
Do not place any tools or metal objects on the battery.

Warning
Observe the order in which the battery is mounted when connecting/disconnecting the terminals.
Fitting (Fig. 5a):
- First connect the red cable (+/positive pole) and then the black cable (-/negative pole). Removal:
- First disconnect the black cable (-/negative pole) and then the red cable (+/positive pole).

Note
The battery is situated under the passenger seat.
If a "maintenance-free/sealed" battery (type 1) is supplied (Battery without filler plugs) The battery is filled with battery acid and is sealed at the factory. However, even a "maintenance-free" battery requires maintenance if it is to have a longer service life.
- Keep the battery clean.
- Avoid tipping the battery. Electrolyte fluid leaks from a 'sealed' battery, if it is tipped.
Before using the battery for the first time, charge it using a battery charger (max. charging current 12 Volt/6 Ampere) for 1 to 2 hours. After charging the battery, first pull out the battery charger plug, then disconnect the battery (see also operating instructions for the battery charger).
If an empty battery (type 2) is supplied
(Battery with filler plugs)
- Remove the filler plugs of the battery cells (Fig. 5b).
- Fill each cell slowly with battery acid up to 1cm below the filling opening.
- Let the lead in the battery absorb the battery acid for thirty minutes.
- Check the level of the battery acid, add more if necessary.
Before using the battery for the first time, charge it using a battery charger (max. charging current 12 Volt/6 Ampere) for 2 to 6 hours. After charging the battery, first pull out the battery charger plug, then disconnect the battery (see also operating instructions for the battery charger). - Re-insert the filler plugs of the battery cells.
Install the battery in the appliance. - Remove the strip seal from the battery vent. Connect the venting hose so that the free end points downwards in the appliance. The hose must always allow free passage (Fig. 5c)!
- First connect the red cable (+), and then the black cable (-).
Thereafter, use only distilled water to top up the battery (check every 2 months). - Keep the battery clean.
Operation and Display elements

Warning. Damage to the vance.
The control and indicator functions will be described to begin with. Do not perform any functions at this stage!
Ignition lock (depending on model)
Fig. 6a
Start: Turn the key to the right until the engine is running, then release. The key rests at
Stopping: Turn the key to the left, to stop.

Note
If the ignition lock features a light position, the light is switched on when the ignition key is moved back to this position when the engine has started.
Ignition lock with OCR function (depending on model)
Fig. 6b
This ignition lock features an OCR function (=) user-controlled mowing in reverse gear).
Start: Turn the key to the right until the engine is running, then release. The key at normal) allows mowing in the drive direction.
OCR position: Turn key to left of normal position to reverse mowing position and press the switch (1).
The indicator light (2) comes on and indicates to the user that the unit can now mow in reverse and forward gear.
Stopping: Turn the key to the left, to

Note
Do not use the OCR function unless absolutely necessary, otherwise work with the key in the normal position. The OCR function switches off automatically as soon as the key is turned to the normal position or the engine is switched off (stop position or disconnection of the engine by the safety interlock system).
Choke (depending on model)
Fig. 7
To start a cold engine, pull the choke (Fig. 7a), or move the accelerator lever to Fig. 7b).
Throttle
Fig. 8
The engine speed can be adjusted continuously. Fast engine speed = . Slow engine speed =
Clutch/brake pedal (only for models with Transmatic drive)
Fig. 9
Engage = Depress pedal halfway.
Brake = Depress pedal all the way.
i Note
Is also used to activate/deactivate the parking brake.
Brake pedal
Fig. 9
Brake = Depress pedal.
i Note
Is also used to activate/deactivate the parking brake.
Direction of travel pedal (only for models with Transmatic drive)
Fig. 10
The direction lever must be used only when the tractor is stationary. To do this, depress the clutch/ brake pedal all the way and keep depressed.
Forwards = lever to “F/
Idle = lever to "N"
Reverse = lever to "R/
Lever for setting the cutting height
Fig. 11
Largest cutting height - cutters top = lever to "5 (H)".
Smallest cutting height - cutters bottom = lever to "1 (L).
PTO lever
Fig. 12
The PTO lever actuates a mechanism to switch ON and OFF the cutters.
Switch off cutter deck 0/1 pull lever all the way backwards Switch on cutter deck I/ slowly press lever all the way forwards
Parking brake for units with hydrostatic drive/automatic drive
Fig. 13
Actuating parking brake:
Fully depress brake pedal and move lever to position "I".
Release parking brake:
Fully depress brake pedal and move lever to position "0".
Lever for speed settings/ parking brake for units with Transmatic drive
Fig. 14
Low speed = lever to "1".
High speed = lever to "6" or "7" (optional).
Increase speed = adjust drive positions without depressing the clutch/brake pedal.
Reduce speed = adjust drive positions by depressing the clutch/ brake pedal (depress halfway).
Actuating parking brake:
Fully depress clutch/brake pedal, push lever for speed setting to
Release parking brake:
Fully depress clutch/brake pedal, push lever to a speed setting.
Drive lever for units with hydrostatic drive (depending on model)
Fig. 15
Using the drive lever, set the speed stepplessly and change the driving direction.
Forwards:
Fast forward driving = lever to
F/
Maximum mowing speed = lever to
CUTTING SPEED / 11111
Stopping:
To stop driving and change direction = lever to "N".
Reverse:
Reverse driving = lever to "R/
i Note
-
The further the lever is pressed towards "R" or "F", the faster the unit moves.
-
When the brake pedal is actuated and released again, the drive lever moves towards the "N" position and reduces the operating speed.
Accelerator for units with hydrostatic drive (depending on model)/automatic drive
Fig. 16
The drive pedal is used to adjust the speed continuously and to change direction:
Forwards = push forwards the drive pedal (in direction the further forward, the faster.
Stop (for stationary vehicle and changing direction) = release the drive pedal (N).
Reverse = push back the drive pedal (counter to direction the further back, the faster.
i Note
When the parking brake is switched on, the accelerator cannot be actuated.
Gear release lever for units with automatic drive
Fig. 17a
The lever is situated on the left side of the unit between the footboard and rear wheel.
For moving the appliance when the engine is switched off:
Press lever inwards, then pull outwards and swivel to the rear. The lever is engaged in front of the holder.
Driving:
- Push the lever to the left and press in.
Transmission release for machines with a hydrostatic drive
Units with drive lever
Fig. 17b
The lever is situated on the rear panel of the machine.
For moving the appliance when the engine is switched off:
Pull out lever and press to the right.
Driving:
- Push the lever to the left and press in.
Units with accelerator
Fig. 17c
The lever is situated on the left side of the unit between the footboard and rear wheel.
For moving the appliance when the engine is switched off:
Pull out lever and press to the right.
Driving:
- Push the lever to the left and press in.
Display cluster (depending on model)
Fig. 18
According to the model, the combination indicator can consist of the following elements.
Oil pressure (1): The indicator light is lit while the engine is running, immediately switch off engine and check oil level. Where necessary, visit a garage.
Clutch (2): Indicator lamp lights up if the clutch/brake pedal is not depressed or the parking brake is not locked when the engine starts.
Cutter deck (3): Indicator lamp lights up if the cutter deck is not switched off when the engine starts.
Battery charge indicator (4): If the indicator light lights up when the engine is running, this means that the battery is not sufficiently charged. Where necessary, visit a garage.
Operating hours counter (5): Indicates the completed operating hours when the ignition is switched on.
Ampere meter (6):
This shows the charging current from the generator to the battery. Slow engine speed = pointer in the middle.
Fast engine speed = pointer is on the right (+)
i Optional functions:
- When the ignition is switched on, the battery voltage indicator is indicated for a short period and then the operating hours are indicated.
The operating hours are always counted except for when the ignition key is in the "Stop" position or when it is removed.
Each time 50 operating hours have elapsed (according to the model), the oil change indicator "CHG/OIL" appears in the display for five minutes. This message appears after the next two hours of operation. See the engine manual for oil change intervals.
Light (depending on model)
Fig. 21
Switch on headlights = switch to "ON".
Some models do not feature the light switch.
The headlights are lit as long as the engine is running or the ignition key is set to the position (depending on model).
Seat with adjusting lever (according to the model)
Fig. 19
Pull the lever, and adjust the seat.
Operating safety
Follow the notes in the engine manual as well!
Danger
Risk of injury No person, especially children, and/or animals should be allowed to stand close to the mower while it is in use. They could be injured by stones or similar objects that might be thrown out. Children must not operate the appliance.
Be particularly careful when mowing in reverse gear (units with OCR switch). Ensure that all persons are outside the working area of the unit.
Never empty the grass catcher while the engine is still running. While emptying the grass catcher, you yourself or some other person could be injured if the contents of the catcher are ejected at high speed.
When mowing on steep slopes, there is a risk of the mower tipping over and you could be injured as a result. Do not drive across the face of a slope, but only straight up and down. The unit may only be driven on slopes up to max. 20% . Never turn on a slope.
When mowing wet grass, there is a greater risk of the unit sliding as a result of reduced wheel grip.
Mow only when the grass is dry. Excessive speed can increase the risk of an accident.
Maintain a safe distance at all times from particularly steep slopes, trees, bushes and hedges.
Pay particular attention when you are travelling in reverse while mowing at the same time.
Check the area in which you intend to use the unit and remove all objects that might be hit and propelled by the unit.
If the cutting tool hits a foreign object (e.g. stone) or if the machine starts vibrating violently: stop the engine immediately. Before using the unit, have it checked for damage by a specialist company. In the case of mowers with rotary blades, never stand in front of grass ejection holes.
Never place your hands, feet, or other parts of the body near rotating parts.
Switch OFF the engine, remove the ignition key, and disconnect the spark plug terminal before you clear the ejector of blockages and other hindrances.
Do not use the unit in adverse weather conditions, e.g. if there is a probability of rain or a storm.
Risk of suffocation from carbon monoxide
Only allow the combustion engine to run in the open air.
Risk of explosion and fire Fuel and petrol vapours are volatile and fuel is highly flammable.
Before starting the engine, fill with fuel. If the engine is still hot or running, keep the fuel tank closed. Only fill with fuel when the engine is turned off and has cooled down. Avoid naked flames, the formation of sparks and do not smoke.
Only fill the tank in the open air. Do not start the engine if fuel has been filled up and has overflowed. Wipe the affected areas clean and wait until the fuel has vaporised.
To avoid the risk of fire, keep the following parts free from grass of oil leaks: engine, exhaust, battery, fuel tank.
Danger
Risk of injury through the appliance being faulty
Only operate the appliance in a flawless state.
Carry out a visual check each time before using the appliance. Check in particular the safety features, cutting tools and mountings, operation elements, and threaded joints for damage and secreteness.
Replace damaged parts before operating.
i Operating times
Observe the national and local regulations concerning the hours when the appliance can be used (where necessary, enquire at your appropriate local authority).
Refuelling and checking the oil level
i Note
The engine is already filled with oil at the factory - please check and where necessary, top it up.
Fill up with lead-free petrol (Fig. 20).
- Fill the fuel tank to a maximum of 2cm below the lower edge of the filler neck.
Turn the fuel tank stopper tight.
- Check the oil level (Fig. 20). The oil level must be between the "Full/Max." and the "Add/Min." markings (see also the engine handbook).
Check the tyre pressure
i Note
For manufacturing reasons, the tyre pressure can be higher than necessary.
Check the tyre pressure. Correct where necessary (see section "Servicing"). - front: 0.8 bar - rear: 0.7 bar
Set the driver seat
- Adjust the seat to the desired position.
Depending on model:
Loosen screws, adjust seat and retighten screws (Fig. 1) or
Pull seat adjusting lever, adjust seat and release seat adjusting lever again (Fig. 19).
Starting the engine
Sit in the driver seat.
- Switch off cutter deck: Switch off PTO (Fig. 12) and lift up cutter deck.
Depress the brake pedal or clutch/brake pedal all the way and hold (Fig. 9) or engage the parking brake (Figs. 13/14).
- Move direction of travel lever/ drive lever (Fig. 10/15) to "N".
i Note
Units with accelerator are in the "N"-position unless the accelerator is depressed (Fig. 16).
Set the throttle lever (Fig. 8) to
To cold-start the engine, pull the choke or move the accelerator lever to Fig.7).
Turn the ignition key (Fig. 6) to until the engine is running (attempt to start the engine for max. 5 seconds, wait 10 seconds before attempting to start the engine again). When the engine is running, set the ignition key to
Slowly push back the choke (Fig. 7).
- Return the accelerator lever (Fig. 8) until the engine runs smoothly.
Stopping the engine
- Move the throttle (Fig. 8) to the middle position.
Let the engine run for approx. 20 seconds.
Turn the ignition key (Fig. 6) to
Remove the ignition key. - Engage the locking brake before leaving the appliance.
Driving
Danger
Abrupt takeoff, stopping suddenly, and driving at excessive speeds raise the risk of accidents and can cause damage to the unit.
Never set/adjust the driver's seat while the unit is moving.
i Note
Be especially cautious when reversing. Never change direction without first stopping the appliance.
Driving with the hydrostatic drive
Start the engine as stated.
- Release the parking brake.
- Slowly actuate drive lever or accelerator (depending on model) until the required speed is reached.
Driving with the Transmatic drive
Start the engine as stated.
- Release parking brake: Fully depress and hold down clutch/ brake pedal.
- Move the driving direction lever to the appropriate position.
- Select speed setting with lever.
Slowly release the clutch/brake pedal, the unit moves.
Driving with automatic drive
Start the engine as stated.
- Release the parking brake.
- Slowly engage the drive pedal until you have reached the speed you want.
Stopping the appliance
- Move drive lever to "N" position or release accelerator (units with hydrostatic drive/automatic drive).
- Step on the brake pedal or clutch/brake pedal until the unit stops.
Mowing
In normal mowing mode Operation, ignition lock): Before reversing the machine, switch off and raise the cutter deck.
In reverse mowing mode (see Operation, ignition lock): Exercise extreme caution w/ reverse mowing and do not activate unless absolutely necessary.
- Do not change direction when the appliance is coasting or driving.
Units with hydrostatic drive
Start the engine as stated.
To ensure adequate power output, move the throttle to
- Release the parking brake.
- Switch on the cutter deck.
Lower the cutters.
Using the drive lever or accelerator (depending on model) select forward direction of travel and speed (actuate slowly). The appliance starts moving.
Units with Transmatic drive
Start the engine as stated.
To ensure adequate power output, move the throttle to
- Release parking brake: Fully depress and hold down clutch/ brake pedal.
- Move the direction-of-travel lever to "F" (forwards).
- Select speed setting with lever.
- Switch on the cutter deck:
- Switch on PTO.
Lower the cutters.
Slowly release the clutch/brake pedal, the unit moves.
Units with automatic drive
Start the engine as stated.
To ensure adequate power output, move the throttle to
- Release the parking brake.
- Switch on the cutter deck.
Lower the cutters.
- Select forward drive and speed with the accelerator pedal (depress slowly). The appliance starts moving.
General information
When adjusting the cutting height and driving speed, ensure that the machine is not overloaded. Depending on the length, type, and dampness of the grass it may become necessary to adjust the cutting height and appliance speed for the optimum grass catcher performance.
If blockages occur, reduce the driving speed and increase the cutting height.
Switching off the machine
- Stopping the appliance.
- Switch off the cutter deck.
- Move the throttle to the middle position.
Raise the cutters to the top.
Set the ignition key to after twenty seconds.
Remove the ignition key. - Engage the locking brake before leaving the appliance.
Pushing appliances with hydrostatic drive
Push the appliance only when the engine is switched OFF.
- Release the parking brake.
- Release transmission (Fig. 17b or 17c depending on model):
Pull out lever and press to right. Return the gear lock lever before restarting the engine.
Pushing units with automatic drive
Push the appliance only when the engine is switched OFF.
- Release the parking brake.
- Release transmission (Fig. 17a): Press lever inwards, then pull outwards and swivel to the rear. The lever is engaged in front of the holder.
Return the gear lock lever before restarting the engine.
Mulching
Various appliances can also mulch when fitted with the corresponding accessories. Ask your specialised dealer for details.
Emptying the grass catcher (depending on model)
See the separate operating instructions for the grass catcher.
Tips on lawn care
Mowing
Lawnns consist of various grass types. Frequent mowing promotes the growth of grass, resulting in strong roots and a firm sward. If you seldom cut the grass, you will enhance the development of high-growing types of grass and other weeds, such as clover, daisies ...). The normal height of a lawn is approx. 4 - 5cm Only 13 of the overall height of the grass should be mown; i.e. at 7 - 8cm cut at normal height. Try not to cut the grass shorter than 4cm otherwise the lawn will suffer during dry periods.
If the grass has grown particularly high (for example, during a holiday period), cut it back to its normal height in several stages.
Mulching (using the accessories)
The grass is cut into small pieces (approx. 1cm ) and left to lie on the lawn. The lawn therefore retains a lot of nutrients.
For the best possible result the grass must always be kept short, see also section "Mowing".
Observe the following when mulching:
- Do not mow wet grass.
- Never mow more than max. 2 cm of the total grass length.
- Drive slowly.
- Use the max engine speed.
- Clean the cutters regularly.
Transporting the appliance
If changing location, drive the lawn tractor short distances only. otherwise transport it by vehicle.
Note: The mower is not approved for public thoroughfares in accordance with StVO.
Short distances
Danger
Solid objects may be hit/propelled by the rotating cutting mechanism causing damage.
Always switch off the cutting mechanism before moving the mower.
Long distances

Warning
Transport damages
The mode of transport used (e.g. transport vehicle, loading ramp) must be used in accordance with guidelines (refer to the respective operating instructions). When transporting, secure the mower against slipping.
Environmental hazard from leaking fuel
The appliance must not be tilted when it is transported.
Have the transporting vehicle ready.
- Lay the loading ramp to the transporting vehicle.
- Manually push the unit at idling speed into the loading area (for units with hydrostatic drive or automatic drive release the gear).
Lock the parking brake.
- Secure the machine to prevent it from moving.
Cleaning/Servicing
Danger
Risk of injury through the engine being unintentionally started.
Protect yourself from injury. Before doing any work to this appliance:
- turn the engine off,
- remove the ignition key,
- lock the parking brake.
- wait until all moving parts have come to rest and the engine has fully cooled.
- remove the spark plug connector on the engine in order to prevent the engine from accidentally being started.
Cleaning
Warning
Do not use a high-pressure cleaner for cleaning the vehicle.
Cleaning the machine
If possible, clean the machine directly after mowing.
- Park the unit on a solid, even surface.
- Move the direction-of-travel lever to position "F" or "R" (not available on all models).
Lock the parking brake.
i Note
There is a particularly high risk of rust and other corrosion when the appliance is used in the winter.
Clean the appliance thoroughly after every use.
Cleaning the cutting mechanism
Danger
Injury hazard due to sharp cutting blade
Wear protective gloves. If the unit has more than one cutting mechanism, moving one cutting mechanism may cause the other cutting mechanisms to move as well. Take special care when cleaning cutting mechanisms.
Warning
Damage to engine
Do not tilt the unit to more than 30^ .
Fuel may run into the combustion chamber causing engine damage.
Raise the cutting mechanism fully.
Clean the area surrounding the blade using a scrubbing brush or cloth.
Cutters with cleaning nozzle (optional)
Fig. 23
Place the appliance on an even surface free of debris, stones, etc., and engage the locking brake.
1.Use a commercially available quick-release coupling to attach a water hose. Turn on water.
2.Start the engine.
3. Lower the cutter deck and switch on for several minutes.
4. Switch off the cutter deck and engine.
5.Detach the water hose.
Repeat steps 1 to 5 for the second cleaning nozzle (if provided).
At the end of cleaning (steps 1 to 5):
Raise the cutters to the top.
Start the engine and switch on the cutter deck for several minutes in order to dry the cutter deck.
Cleaning the grass catcher
i Note
See the separate operating instructions for the grass catcher.
- Remove and empty the grass catcher.
The grass catcher can be cleaned with a powerful water jet from a garden hose. - Allow the grass catcher to dry off completely before using it again.
Servicing the vehicle
Observe the servicing guidelines in the engine manual. At the end of the grass-cutting season, have the appliance checked and serviced in a specialist workshop.

Warning
Threat to the environment through engine oil
Pass on any waste oil which comes about through an oil change to a collection point or a waste disposal company.
Threat to the environment through batteries
Used batteries do not belong to domestic rubbish. Pass on used batteries to a dealer or a waste disposal company. Dismantle the battery before the vehicle is scrapped.
Using jump leads

Danger
Never bridge a defective or frozen battery with jump leads. Ensure that the units and the jump lead clips do not touch each other and that the ignitions are switched off.
- Connect the red jump lead to the positive terminal (+) of the flat battery and the donor battery.
- Connect the black jump lead first to the negative terminal (-) of the donor battery. Connect the other clip to the frame of the engine block of the tractor with the flat battery (as far away from the battery as possible).

Note
If the donor battery is installed in a vehicle, this vehicle must not be started during the jump starting process.
- Start the tractor with the flat battery and actuate the parking brake.
- Disconnect the jump leads in reverse sequence.
Tyre pressure

Warning
Never exceed the maximum permitted tyre pressure (see side of tyre). When pumping up the tyres, do not stand in front or above them. The recommended tyre operating pressure is:
front: 0.8 bar
rear: 0.7 bar
Over-inflating reduces the longevity of the tyres. Tyre pressure should be checked before every journey.
After 2-5 operating hours
- First engine oil change. See engine manual for subsequent intervals. Use the oil channel or (optional) quick oil drain (Fig. 22).
Every 2 months
- For battery type 2 only - Fill battery cells with distilled water up to 1cm beneath the filling aperture.
Using a multi-purpose grease, lubricate the front wheel bearings or front axle (depending on model) via the grease nipples.
Every 50 operating hours
- Grass residue and other soiling on the drive gears must be removed at a specialised garage.
If necessary
Charging the battery
When the appliance is not used for longer periods, we recommend removing the battery from the appliance and charging this before and every two months during storage and before the appliance is again put into operation.
i Note
Note the information in the operating instructions for your battery charger.
Replace the fuse
- Replace defect fuses only with the equivalent rating.
Once a season
Apply multipurpose grease to the teeth on the steering gear.
Lubricate the steering linkage with a few drops of light oil.
Lubricate all moving parts and bearing surfaces with a few drops of oil (control levers, cutting height adjustment).
Clean the spark plug and check the gap between the electrodes or replace the plug. See engine handbook.
- The rear axles must be lubricated with a special-purpose (water-repellent) grease at a specialised garage.
Have the cutting blade sharpened or replaced in a specialist workshop.
Shutting down the machine

Warning
Damage to mower materials Store the mower with engine cooled down only in clean, dry areas. Always protect the mower against rust if it is to be left for comparatively long periods, e.g. over the winter.
At the end of the grass-cutting season or if the mower is not going to be used for longer than one month:
Clean the mower and the grass catcher.
- Protect all metal parts against rust by wiping them using an oiled cloth or spray with spray oil.
- Recharge the battery using a battery charger.
Before winterising the appliance, remove the battery. The battery must then be charged and kept in a dry, cool place (protected against frost), and recharged every 4 to 6 weeks and before the next use.
- Drain fuel (outdoors only) and shut down the engine as described in the engine manual.
Inflate the tyres in accordance with the specifications on their walls. Tyres without specifications on their walls must be pressurised to 0.9 bar.
- Park the mower in a clean, dry room.
Warranty
In each country, the guarantee conditions apply which are given out by our company and/or the importer.
We are happy to repair damage to your appliance free of charge within the scope of the guarantee in as far as the damage is believed to be caused by a material or a manufacturing fault. In making a claim against the guarantee, refer to place where the vehicle was sold or the nearest branch office.
Information about the engine
The engine manufacturer is liable for all problems related to the engine regarding performance, measuring performance, technical data, guarantee and service. You will information in the separately enclosed owner's/ operator's manual provided by the manufacturer.
Troubleshooting
Danger
Risk of injury through the engine being unintentionally started.
Protect yourself from injury. Before all work on this unit:
- turn the engine off,
- remove the ignition key,
- Actuate the parking brake,
- wait until all moving parts have come to rest and the engine has fully cooled.
- pull off the cap of the spark plug, so that the engine cannot inadvertently start.
Faults when operating your appliance often have simple causes which you should know about and which you can partly deal with yourself. In case of doubt, your specialist garage will be happy to help you further.
| Problem Possible cause(s) | Remedy | |
| Starter does not react. | Safety interlock system has actuated. | To start the engine, first sit down on the driver's seat. Press down fully the brake pedal or engage the locking brake.Switch off the cutters when your appliance features a PTO switch or PTO lever.Fit a grass catcher attachment or deflector to machines with a rear discharge. |
| Battery not connected properly. Connect the red cable to the positive (+) terminal on the battery and the black cable to the negative (-) terminal on the battery. | ||
| Starter does not react. | Empty or weak battery. | Check the liquid level in the battery. If required, top up with distilled water up to 1 cm below the filler neck. Then charge the battery. |
| Fuse has tripped. Exchange fuse. If the fuse trips repeatedly, find the cause (usually short-circuit). | ||
| Loose earth (ground) lead between engine and frame. | Connect the earth (ground) lead. | |
| Starter runs, but engine does not start. | Choke and throttle at wrong position. | Actuate the choke.Move throttle to |
| Carburettor not receiving any fuel, fuel tank empty. | Top up with fuel. | |
| Defective or dirty spark plug. Check spark plug; see engine manual. | ||
| No ignition spark. Have ignition check ed in repair shop. | ||
| Engine emits smoke. Too much oil in engine. Switch OFF appliance immediately. Check engine oil level. | ||
| Defective engine. Switch OFF appliance immediately. Get the engine checked in a specialist garage. | ||
| Excessive vibration. Damage | blade drive shaft or defective cutting blade. | Switch OFF appliance immediately. Have defective parts replaced in a specialist workshop. |
| Cutting mechanism does not discharge grass or cuts unevenly. | Engine speed too low. Increase throttle. | |
| Travelling speed too high. Set to a lower travelling speed. | ||
| Cutting blade is blunt. Arrange for service agent to sharpen or replace blade. | ||
| Engine is running, cutter deck is not mowing. | V-belt torn. Have the V-belt replaced in a repair shop. | |
Sommaire
Pourvoiresecurite. 16
Montage 18
Manover-ochindikerings- organ 83
Handhavande 85
Kombinationsindikator (alt after model)
Billede 18
Lys (alt after model)
Billede 21
Benyt计划生育 is a good idea.
Regular o assento do conductor
- Colocar o assento na posicao pretendida.
Consoante a versao:
Desligar o tractor certa-relva
TnV won Tou nXavnpatoc 0nTo Tov KInnpa: