USER MANUAL MEK 1108 Lavor
Translation of the original instructions
- This appliance's performance and userfriendliness make it suitable for NOT PROFESSIONAL use.
- The appliance can be used for washing surfaces outdoors, whenever pressurised water is required to remove dirt.
- With special optional accessories, it used for foaming and sandingblasting, and for washing with a rotary brush for application to the gun.
> THECNICAL DATA
(see technical data plate)
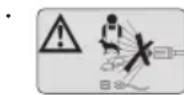
SYMBOLS

WARNING: It is important to be careful of the following items.

IMPORTANT

LOCKED

OPEN

IF PRESENT

Doubleinsulated (IF PRESENT): supplementary insulation is applied to the basic insulation to protect against electric shock in the event of failure of the basic insulation.

warning do not touch

warning symbol : do not inhale
SAFETY PRECAUTIONS
>WARNINGS
- 01WARNING: This appliance is for outdoor use only.
- 02WARNING: Always disconnect the electricity and water supplies on completion
of every job.
-03WARNING: Do not use the machine if a supply cord or important parts of the machine are damaged, e.g. safety devices, high pressure hoses, trigger gun.
- 04WARNING: This appliance has been designed for use with the detergent provided or the detergent specified by the manufacturer, such as a neutral shampoo based on biodegradable anionic surface active detergents. The use of other detergents or chemicals may put the appliance's safety at risk.
- 05a WARNING: Do not use the machine within range of persons unless they wear protective clothing.
05b - Do not allow other people or animals within a range of 5m when operating the machine.
05c - Always wear suitable protective clothing in order to protect yourself against ricocheting parts.
05d - Do not touch the plug and the appliance with wet hands or when barefoot.
05e - Wear safety goggles and non-slip rubber footwear.
-06WARNING: Do not direct the nozzle toward mechanical parts containing lubricant grease, as the grease will dissolve and spread over the surrounding ground. Vehicle tyres/tyre valves may only be cleaned from a minimum distance of 30~cm otherwise the vehicle tyre/tyre valve could be damaged by the high-pressure jet. The first indication of this is a discoloration of the tyre. Damaged vehicle tyres/tyre valves can be deadly dangerous.
07WARNING: High pressure jets can be dangerous if subject is to misuse. The jet must not be persons, animal, live electrical or the machine itself.
directed at persons,animal, live electrical equipment or the machine itself.
- 08WARNING: High pressure hoses, fittings and couplings are important for the safety of the machine. Use only hoses, fittings and couplings recommended by the manufacturer. (it is extremely important to protect these components against damage by avoiding their improper use and protecting them against bending, knocks and scratches).
- 09WARNING: Appliances not equipped with
A.S.S. – Automatic Stop System: must not be left in operation for more than 2 minutes with the gun released. The recycled water heats up considerably, seriously damaging the pump.
A.S.S. AUTOMATIC STOP SYSTEM 10WARNING: Appliancesequipped
with A.S.S - Automatic Stop System: these appliances should not be left in standby for more than 5 minutes.
- 11WARNING: Switch the appliance off completely (master switch on (0)OFF) whenever it is left unattended.
- 12WARNING: Every machine is tested in its operating conditions, so it is normal for a few drops of water to be left inside it.
13WARNING: Take care not damage the electric cable. If the supply cord is damaged, it must be replaced by the manufacturer, its service agent or similarly qualified persons in order to avoid a hazard
14WARNING: Appliance with fluid under pressure. Keep a firm hold on the gun and be prepared to take the kickback pressure. Only use the high pressure nozzle provided with the appliance.
16WARNING: This appliance is not intended for use by persons (including children) with reduced physical, sensory or mental capabilities, or lack of experience and knowledge, unless they have been given supervision or instruction concerning use of the appliance by a person responsible for their safety.
17WARNING: Children should be supervised to ensure that they do not play with the appliance.
18WARNING: Never start the high-pressure cleaner without first completely unwinding the high-pressure hose.
- 19WARNING: When winding and unwinding the pipe take care not to cause the high-pressure cleaner to overturn.
20WARNING: Before unwinding or winding the hose, switch the machine off and release the pressure in the hose itself (switching off).
21WARNING: Risk of explosion - Do not spray flammable liquids.
-22WARNING: To ensure machine safety, use only original spare parts from the manufacturer or approved by the
manufacturer.
23WARNING: Do not direct the jet against yourself or others in order to clean clothes or foot-wear.
24WARNING: High pressure cleaners shall not be used by children or untrained personnel.
-WARNING: Water that has flown through backflow preventers is considered to be non-potable.
- XX WARNING: the machine shall be disconnected from its power source, by removing the plug from the socket-outlet, during cleaning or maintenance and when replacing spare parts
- XJ WARNING: If an extension cord is used, the plug and socket must be of watertight construction.
- XY WARNING: Inadequate extension cords can be dangerous.
-WARNING: It is absolutely forbidden to use the machine in potentially explosive environments or areas.
WARNING:
- NEVER EVER TOUCH THE MACHINE WITH WET HANDS OR BARE FEET.
- NEVER PULL THE POWER SUPPLY CABLE OR MACHINE IN ORDER TO DISCONNECT THE PLUG FROM THE SOCKET.
- IF DURING FUNCTIONING THE POWER SUPPLY RUNS OUT, FOR SAFETY REASONS, TURN THE MACHINE OFF.
> SAFETY DEVICE
- WARNING: the gun is fitted with a safety catch. Whenever use of the machine is interrupted it is important to operate the safety catch to prevent accidental activation of the jet.
- Safety features: gun equipped with safety locking device, appliance equipped with (Class I) overload cutout, pump equipped with by-pass valve or shutdown device.
- The safety button on the gun is not there to lock the lever during operation, but to prevent its accidental operation.
-WARNING: The appliance is equipped with a motor protection device: in case of device intervention, wait some minutes or, in alternative, disconnect and re-connect the product to the electric system. In case this problem repeats again or if the product
EN
does not start again, take the product to the nearest After Sales Service Point
>STABILITY
- WARNING: The machine must be always kept on horizontal bases, in a safe and stable way.
> WATER SUPPLY
Water supply collection
Water supply from the water main
- Connect a supply hose (not included) to the water inlet of the unit and to the water supply.
- Open the water supply.

WARNING: (symbol) machine not suitable connection to the potable water mains.
The cleaner can only be connected to the water mains if the water mains is separated by a backflow preventer. Make sure that the hose is at least 0.13mm - 1 / 2 inch and that it is reinforced.
- WARNING: Water that has flown through backflow preventers is considered to be nonpatable.
IMPORTANT: Only clean or filtered water should be used for intake. The delivery of the water intake tap should be equal to the double of the maximum pump range.
- Minimum delivery rate: 30 l/min.
Maximum intake water temperature: 40^
Max inlet water pressure: 1Mpa
Place the cleaner as close to the water supply system as possible.
Water supply from an open container
- Unscrew the coupling part for the water inlet.
- Screw the suction hose with filter (not included) onto the water connection of the unit.
- Hang the filter in the container.
- Vent the unit before operation.
- Unscrew the high-pressure line at the high-pressure outlet of the unit.
- Switch on the unit and let it run until water free of bubbles emerges at the high-pressure outlet.
- Switch off the unit and screw on the high
pressure hose again.
Failure to comply with the above conditions causes serious mechanical damage to the pump and the loss of warranty cover.
> ELECTRICITY SUPPLY
- The appliance's electrical connection must comply with the IEC 60364-1 standard.
IMPORTANT: Before connecting the appliance, make sure that the nameplate data are the same as those of the electrical mains and that the socket is protected by a differential security breaker with tripping sensitivity below 0.03A - 30ms
- If the appliance's plug is not compatible with the socket, have the socket replaced with another of suitable type by professionally qualified staff.
- Never use the appliance in ambient temperatures below 0^ if it is equipped with a PVC (H VV-F) cable.
- XY WARNING: Inadequate extension cords can be dangerous.
- XJ WARNING: If an extension cord is used, the plug and socket must be of watertight construction.
Information for supply may also be obtained from the plug manufacturer.
| 230-240V | 400-415V |
| 3G 2,5 mm2 | 4G 2,5 mm2 |
| max 20 m | max 30 m |
USAGE
> UNPACKING
(see fig. D)
Take out the upper and the lower hooks, which fix the cardboard box to the pallet, take the cardboard box off, put two wheels of the machine on ground and take the pallet off.
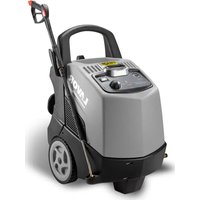
> DESCRIPTION OF THE MACHINE
(see fig. ABC)
① Electropump switch
② Burner switch
③ Regulator burner
Detergent switch (mod.DP)
⑤ Nozzle
(6) Lance
⑦ Gun
⑧ High pressure hose
High pressure water outlet
Detergent tank
Diesel tank
⑫ Electric cable
⑬ Water inlet + filter
14 Rubber hose fitting
15 Pressure gauge
A.S.S. AUTOMATIC STOP SYSTEM
(if fitted)
IMPORTANT: This water cleaner is equipped with the A.S.S. (Automatic Stop System), which stops the machine during the bypass phase.
To start the water cleaner, it is therefore necessary to set the switch on position "ON"; after that press the pistol trigger: the Automatic Stop System will start the machine and will stop it automatically when the trigger is released. It is advisable to put on the safety of the pistol trigger whenever the machine is stopped, in order to avoid unintentional starting.
- Any automatic start of the machine pressing the gun trigger is attributable to air bubbles in the water or other similar phenomena which do not imply the existence of any defects in the machine.
- Do not leave the appliance unattended during the standby for more than 5 minutes. Contrarily, for the safety of the appliance it is necessary to re-turn the switch into the OFF position.
- Please check that the coupling of pressure hose with the appliance and the gun supplied as standard equipments made correctly, that is to say without any water leak.
If the appliance is equipped with a pressure regulator:
when the pressure is set to minimum the A.S.S.
may not trigger. Therefore, do not allow the appliance to function in by-pass for more than 1 minute.
- do not act on the gun lever too frequently (this may cause a malfunction).
> INSTALLATION AND START-UP
(fig. C)
FILLING UP WITH FUEL
Fill the tank with the fuel indicated on the technical data plate (Diesel)
Avoid that the tank is empty when the machine is running in order not to damage the fuel pump.
WARNING: Incorrect fuel shall not used as they as provide hazard.
FILLING UP WITH DETERGENT
(fig. C)
the detergent tank with the suggested products, suitable for the kind of washing to be carried out.
WARNING: Make use only of liquid detergent, do not absolutely use acid or too much alkaline products. We suggest you to make use of our products, which have been studied for the use with washer machines.
> INSTALLATION
(fig.BE)
- Check that the master switch is turned to "OFF" and that the water filter is fitted into the pump's inlet pipe.
- Screw the snap connection into place by hand, without the aid of tools.
- Connect the water supply hose to connection. The hose must have an inside diameter of at least 13mm (1/2^ )
- Connect the high pressure hose to the pump's outlet pipe. Press the high pressure hose coupling fully down and then screw into place by hand without the aid of tools.
- Connect the high pressure hose to the gun.
the Turgh the water tap fully on. The water temperature absolutely must be below 40^ .
IMPORTANT: The washer machine has to operate with clean water in order to avoid any damages to the washer machine itself.
- Release the gun safety catch and keep t trigger pressed, allowing the water to flow until
EN
all the air has been expelled.
- Fit the lance into the gun.
- Fit the nozzle into the lanxce.
- Connect the plug to the power socket.
>1ST START-UP
When starting up for the first time or after a long period out of use, connect the intake line only for a few minutes so that any dirt is vented from the delivery outlet
> START-UP
(fig. F)
- Whenever using the high-pressure cleaner, urged to hold the gun in the correct position, with one hand on the grip and the other on the spray rod.
TO WASH WITH COLD WATER
(fig. A) To start the machine, press the gun trigger and at the same time turn the master switch ① to "ON"
TO WASH WITH HOT WATER
(fig. A)
To wash with hot water, press the switch ② and turn the thermostat ③ to the desired temperature setting.
WARNING: In case of operation indoors, adequate ventilation and gas venting must be assured.
> DETERGENT SUCTION
at low pressure (if included)
(see fig. G)
The adjusting head allows you to select water jet at low and high pressure. The pressure selection is carried out by rotating the adjusting head. To increase the pressure, rotate the adjusting head clockwise, to reduce the pressure, rotate it anti-clockwise. The detergent suction is automatic when the adjusting head of the lance is rotated for low pressure operation (anti-clockwise).
> DETERGENT SUCTION
at hght pressure (if included)
(see fig. A)
Operate the button, press the gun: the detergent is mixed with high pressure water.
- CAUTION: Make use only of liquid detergent, do not absolutely use acid or too much alkaline products.
We suggest you to make use of our products, which have been studied for the use with washer machines.
CARE AND MAINTENANCE
(vedi fig. H)
IMPORTANT: Before doing any work on the cleaner, discharge the pressure and disconnect the electricity and water supplies.
users...are
WARNING: Do not spray the appliance with water and do not use detergents or aggressive solvents. Machine could be damaged.
- Clean the exterior part of the machine with a dry cloth.
>STORAGE
- Move the machine only by grasping the carrying handle
- Store the appliance and the accessories in a dry room.
- Store the appliance and the entire accessories in a frost-safe room.
Check the oil level periodically. The oil must be changed for the first time after 50 working hours, with subsequent changes every 500 hours. SAE 20/30, 15W-40, 20W-40 oil is recommended.
CHECKING THE WATER INTAKE FILTER
Inspect and clean the water intake filter on the intake union periodically. This is important to prevent fouling which may impair operation of the pump.
CLEANING THE FUEL FILTER
Check the fuel filter periodically and replace if it has deteriorated or is excessively dirty.
DESCALING
The descending procedure must be carried out periodically with specific products. The interval depends on the hardness of the water. Pour one litre of product for every 15 litres of water into a drum containing at least 30 litres of
water. Disconnect the gun from the high pressure line and place its free end in the drum, in order to form a closed circuit, and draw the solution into the machine for at least 10 minutes. The delivery end of the line should discharge into a canvas or mesh bag so that the scale removed is not returned to the circuit. Then restore the normal connection and rinse with plenty of cold water. This operation should be carried out by our after-sales service, since the descaling product may cause wear of components. Comply with the regulations in force when disposing of the descaling agent.
BOILER CLEANING
WARNING:For all maintenance of the boiler, of the high pressure pump and of the machine, it is necessary to address to qualified personnel or to an authorized assistance center.
The boiler cleaning must be periodically executed every 180÷ 200 hours of working proceeding as follows:
- Carefully remove the nozzle holder flange and the electrodes holder (boiler head).
- Clean with compressed air the nozzle filter and check the electrodes position.
- Remove the boiler cap, clean the deflector.
- Manually take away the interior cap.
- Unscrewing the locking nuts and take the boiler coil out.
- Clean the coil by an iron brush.
- Suck the residuums from the boiler.
- Replace every parts doing the operations in the inverse way.
WARNING: The general checking and combustion regulation must be periodically executed by specialized personnel as prescribed by the law.
ELECTRIC DIAGRAM
See illustrations, page 7-8.
WATER DIAGRAM
See illustrations, page 7-8.
TROUBLESHOOTING
Before doing any work on the machine, disconnect the electricity and water supplies and discharge the pressure. Proceed systematically to identify Faults following the chart below; if you are still unable to eliminate the problem, call in the Authorized After-Sales Service.
| Fault When the main switch is turned on the machine does not start |
| Cause | Plug not properly connected.
Connection panel fuses are burnt out. |
| Repair | Carefully check the plug and the electric cable.
Check them and replace them. |
| Fault The motor hums but does not start |
| Cause | A phase is missing (in three phase models).
Lows voltage.
High pressure pump is blocked. |
| Repair | Contact an authorised service centre.
Contact an authorised service centre.
Contact an authorised service centre. |
| Fault The motor stops suddenly or after a while |
| Cause | The motor-protecting switch is on beCause of insufficient mains voltage. |
| Repair | Check the value of the mains voltage.
Contact an authorised service centre. |
| Fault When the lance is turned on pressure values decrease and increase |
| Cause | The nozzle is either clogged or deformed.
Either boiler coil or lance are clogged with limestone. |
| Repair | Either clean it or replace it.
Descaling. |
| Fault To much vibrations at the delivery |
| Cause | The pressure tank is run down.
The valve are worn out or dirty. |
| Repair | Check the pressure in the tank.
Check and/or replace. |
| Fault | The pump does not reach the fixed pressures |
| Cause | The pump sucks air.
The valves are worn out.
The setting valve area is worn out.
The nozzle is unsuitable or worn out.
The seals are worn out. |
| Repair | Check the suction pipes.
Check and/or replace.
Contact an authorised service centre.
Contact an authorised service centre. |
| Fault Irregular pressure fluctuations |
EN
| Cause | ·The suction and/or delivery valves are worn out.
·Presence of foreign matters in the valves, which generate bad functioning.
·Air suction.
·The seals are worn out. |
| Re-pair | ·Check and/or replace.
·Check and clean the replace.
·Check the suction pipe.
·Check and/or replace the seals. |
| Fault Pressure leakage |
| Cause | ·The nozzle is worn out.
·The suction and/or delivery valves are broken or down.
·Presence of foreign matters in the valves, which generate the valves bad functioning.
·The setting valve area is worn out.
·The seals are worn out. |
| Repair | ·Replace the nozzle.
·Check and/or replace the valves.
·Check and clean the valves.
·Check and/or replace the setting valve area
·Replace the seals. |
| Fault Noisiness |
| Cause | ·Air suction.
·The suction and/or delivery valve springs are broken or down.
·Foreign matters in the suction and delivery valves.
·The bearings are worn out.
·Extreme liquid temperature. |
| Repair | ·Check the suction pipes.
·Replace the valve springs.
·Check and clean the suction and delivery valves.
·Replace the bearings.
·Reduce the liquid temperature. |
| Fault | Water is in the oil |
| Cause | ·The O-ring casing is worn out.
·High moisture in the air.
·The seals are completely worn out. |
| Repair | ·Check and/or replace the O-ring.
·Replace the oil with double frequency in respect of the one suggested.
·Replace the seals. |
| Fault | Filtrations of water from the drains between casing and head |
| Cause | ·The seals are worn out.
·The piston is worn out.
·The O-ring of the piston cap is worn out. |
| Repair | • Replace the seals.
• Replace the piston.
• Replace the seal. |
| Fault | Filtrations of oil from the drains be-tween head and casing |
| Cause | • O-ring seals of casing are worn out. |
| Repair | • Replace the seals. |
| Fault | Turning on the burner switch the boiler does not start |
| Cause | • No fuel.
• Fuel filter is clogged.
• Fuel pump is either blocked or burnt out.
• Damaged thermostat.
• Ignition spark insufficient or totally lacking.
• The space among the electrodes is not correct.
• Burn out fuse. |
| Repair | • Check the level in the tank and check whether the rigid suction pipe is clean.
• Replace the line filter.
• Replace it.
• Replace it.
• Contact an authorised service centre.
• Check the positioning.
• Replace it. |
| Fault | Water is not hot enough |
| Cause | • Poor boiler performance.
• Boiler coil clogged with limestone. |
| Re-pair | • Clean burner nozzle filter.
• Clean fuel filter.
• Check diesel pump pressure.
• Descaling. |
| Fault | Too much smoke from the chimney |
| Cause | • Combustion is not correct.
• Impurities or water in the fuel. |
| Re-pair | • Clean fuel filter.
• Clean the boiler.
• Empty the tank and clean it carefully.
• Clean fuel filter as well. |
| Fault | Insufficient detergent suction |
| Cause | • No detergent in the tank.
• Incrusted injector.
• Either coil or tube or lance are clogged. |
| Re-pair | • Fill the detergent tank.
• Clean it.
• Either cleaning or descaling. |
> REPAIRS - SPARE PARTS
For any problems not mentioned in this manual, or if the machine breaks down, you are urged to contact an Authorized After-Sales Service for the relative repair or for any replacement of components with original spare parts. Use exclusively original replacement parts.
> WARRANTY CONDITIONS
All our machines are subjected to strict tests and are covered against manufacturing defects in accordance with applicable regulations (minimum 12 months). The warranty is effective from the date of purchase. If your high pressure washer or accessories are handed in for repair, a copy of the receipt must be enclosed.
Guarantee repairs are being made on the following conditions: - That defects are attributable to flaws or defects in materials or workmanship. - That the directions of this instruction manual have been thoroughly observed. - That repair has not been carried out or attempted by other than authorized service staff. - That only original accessories have been applied. - That the product has not been exposed to abuse such as knocks, bumps or frost. - That only water without any impurities has been used. - That the high pressure washer has not been used for rental nor used commercially in any other way.
The following are not included in the warranty: Parts subject to normal wear. - The high-pressure tube and optional accessories. - Accidental damage, caused by transport, neglect or inadequate treatment, incorrect or improper use and installation failing to comply with the indications in the instruction manual. - The warranty shall not cover any cleaning operations to which the operative components may be subjected. Repairs under this guarantee include replacement of defective parts, exclusive of packing and postage/carriage. The warranty shall not cover replacement of the machine or extension of the guarantee resulting from a breakdown. The manufacturer declines all responsibility for damage to persons or property caused by bad installation or incorrect use of the machine.
WARNING! Failures, such as clogged nozzles, valves and mechanism blocked due to limestones, damaged pressure cleaner accessories (like kinked high pressure hose) and/or appliances normally working without any defects ARE NOT COVERED BY THE WARRANTY.
> DISPOSAL
electrical and electronic equipment and the national laws of the EU Member States that have implemented this Directive) prohibits you from disposing of this product or its electrical / electronic accessories as municipal solid waste and obliges you to make use of the appropriate waste collection facilities.
The product can be disposed of by returning it to the distributor when a new product is purchased. The new product must be equivalent to that being disposed of.
Disposing of the product in the environment can cause great harm to the environment itself and human health.
The symbol in the figure indicates the urban waste containers and it is strictly prohibited to dispose of the equipment in these containers. Non-compliance with the regulations stipulated in the Directive 2002/96/EC and the decrees implemented in the various EU Member States is administratively punishable.
INDICATIONS GÉNÉRALES
SECURITÉ
> UTILISATION PRÉVUES
> CONDITIONS DE GARANTIE
>TEXHnueCKNE DAHHbIE
(CM. 3TnKeTka TexHnueckne daHHbIe)
> CUMBOJbl

BHIMAHHE! CmboJbI, He BdbixaTb
БЕЗПАСНСТБ
OБцИЕ ПРЕДУПЕЖDEHNU
BHUMAHVE!ДЯ obecneueHЯ 6e3oNaChOCTu 6yDbTe BHIMaTeNbHbl.
01 BHIMAHHE: Annapat pa3pewaetc HcnoIb3OBA TbToIbKO Ha OTKpbITOM BO3dyxe.
02 BHIMAHNE:ПО OKOHuaHn JIO6Oro Bnda pa6oT Bcerda OTKlnuOaTb 3JIeKTPoNtHaHne INpepeKpbIbTaT IOdaUy BObl.
03 BHUMAHNE: He nCnoB3OBA Tb annapat npn noBpeKdHnn CnIOBOro Ka6eN nn BaxKbIX dIra pa60TbI annapata Detalei, HApnpMep, npedoxpaHNTbHbIX yCTPOICTB, IHaHra BbICOKOrO daBHeHn NICTOJeTaPacNbJIHTeRn T.D.
04 BHIMAHNE: DaHbI aHnapaT pa3pa6oTaHДЯ nCNoJIb3OBaHnC uNCTaUIMn CpeDCTBaMn, peKOMeHdyEmbIMn H NOCTaBnE mbIMn n3rTOBNTeJEM (HeITpaJIbHbI YNCTaUIMn WaMnyHb Ha OCHOBe 6NOLOrueCKn pa3IOXIMbIX aHNOHHbIX NOBepxHOCTHOAKTNBBHX BeIeCTB). IprimeHene Dpyrnx YNCTaUINx CpeDCTB INI XmNUeCKNX BeIeCTB MoKeT CHN3ntb HaNEXHOCTb aNnapata.
05a - BHUMAHNE: He Испобь3OBaТь
annapat, ecn рядом НхODЯТСЯ Люн 6e3
cneocdejbl.
05b - Bo BpeMpa6oTbl MaunHbI He cKaaTe haoXeHnJIIOJe NIN KINBOTbIX B paDnyce 5 M.
05c - Bcerda OeBaIte NODxOJaUyBAM no pa3Mepy 3aunTHyIO OJExNy DnA n36exHaHn BO3MOXHO rPikoWeta
05d - He npikacaiTecb K yctpoiCTBy Mokpbimnyekamn Hpepa6oTaIte 6e3 06yBn 05e - NcnoJIb3yIte 3aunTHbIe OcKN n npOTNBOCKOJIb3aUyIO 06yBb
06BHIMAHHE: BbIXOJyUIO H3HaCaJKNCTpyH He CJIeDyET HaIpaBnTb HA MexaHnueCKNe y3JIbIC KOHCnCTeHTHOcMa3KOi, T.K. B IpOTNBHOM Cnyae npOn3oJedT paccenBaHne cMa3Kn NO OKpyXaIooemy yAcTKy. ⅢINHbI N BO3dUWNbIE KlaNaHbI WIn DOLXHbI PpOMblBaTbCra C paCCToHnR He MeHee 30 cm, B IpOTNBHom Cnyae NOd DeNCTBnEM CTpyN BObl BbICOKOr OaBJeHnMoKet npOn3oITn IN NOBpeXJDeHne. IepBbIM npn3HaKOM TaKOrO NobpeXJdeHn RBAJIeTcBbUBeTaHne WInHbI. NOBpeXJdeHHbI WInHbI N BO3dyWHbI KlaNaHbI WIn ONaCHbI DnA Xn3HN.
07BHNMAHNE: BbICOKoHaOpHbIe Ctpyn BOdbl MOryT npedctabnTb co6oJ ONaCHOCTb, ecnn nCNoJIb3OBaTb nx HeHaJIeKaUIM o6pa3OM. Ctpyo HeIb3a HaIpaBnTb HaJIIOJe, XNIBOTbIX, BKJIIOueHHbIe 3NeKTpOpi6Opbl IIN HeNOCpeDCTBeHHO Ha
RU
annapat.
08BHUMAHNE:UHaHn BbICOKOr DaBHeHn, KOMNKeKTyIOuIe DeTaN N COeINHeHn IMeOT 6OJIbWoE 3HaueHne dJa 6e3OnaCHOCTn annapata. NcNoJb3yIte TOnbKO UHaHn, KOMNKeKTyIOuIe DeTaN N COeINHeHn, peKOMeHNyEmble N3rTOBNTeJIem (OueHb BaXHO, YTObbl 3TN DeTaN OCTaBaJInCb HeNOBpeXdEHHbIMN, NO3TOMY CNeJyET N36eratb HeHaJIeXaJero nPpIMeHn H npEdoxpaHraTb IN OT CrIbOB, yDapOB n CCAHN).
09BHMAHHE:AnnapaTbI 6e3A.S.S.-cntEmbl ABTomatnueckoro OCTaHOBa He DOJXHbI pa6oTaTB 6Olee 2 MNHyT c pa36IOKnpOBaHHbIM NCTOJeTOM.TempepaTypa BObl,OTBOIDMOB B CINPKyIaUNOHbI KOHTyp,3HaunTeNbHO NOBbIaETcN MOKeT cepBe3HO NOBpeDNTb HaocC.
A.S.S.Automatic 10BHMAHNE: STOP SYSTEM Annapath C ASS
-CTeMOI aBTOMaTnueCKOro OCTaHOBa He CneDyeT OCTaBnABy B peXnme OxNJaHn (stand-by) 60nee 5 MNHyT.
11BHIMAHHE: AnnapaT Heo6xOJIMO NOJIHOCTbIO BblKJIIOUaTb KaJdbI pa3 (rIaNBbIy BBIKJIIOuATeJIb B noLoXeHne «OFF»), KOrda octaETc86e npICMOtpa.
12BHUMAHHE:KaJdaMaHaHaNoBepraeTcA OKOHaTeIbHOMy IPOUN3BOIDCTBeHHOMY KOHTPOJIIO B yCNOBnX ee NcNOb3OBaHn, NO3OMy O6bIHO B Hei OCTaETcR HeCKoJIbKO KaJIeNb BObl.
13BHUMAHNE: CnTe 3a Tem, YTO6bI He 6bl NOBpeKdEh CnIOBOI Ka6enb. NOBpeXdEHbI COeINHITeNBHbI npoBOD cNeDyET HEmdJIeHNO 3aMeHNTb, DIA 3TOrO O6paTntbCk CneuAInCTyJAEKTPNKy ABTOPN3OBaHHORO cepBcHOrO npednpnTna.
14BHIMAHHE: B MaunHe HaxoJTCa KNDKOCTN NOI DaBneHem. Pn BKNIOUeHN NICTOJeta-pacnbIInTeJI erO cNeyET depXaTb KpeNko, YTO6bl KOMNEHCINPOBaTb peAKTINBHyIO cnly. IcnoJIb3OBaTb TOnbKO fOpcyHky BbICOKO rDaBJeHn, NOCTABJIeMMyIO BmecTe C MaunHOi.
16BHUMAHNE: He donyckaetcnaIOJIb3OBAHne n3dEJIaNe dTebMn IINuAMn COrpaHnueHHbIMN fN3NueCKnIMn, CeHCOPHBIMN yMCTBeHHbIMN BO3MOXHOCTaMn, a TaKKeIInaMn, He IMeUImn COOTBETCTByIOeToONbTa N HaBbIKOB, Do Tex NOp, NOKa IMN He 6yJeT npOIdeHo COOTBeTCTByIOoee ObyeHN3 n
NHCTpyKTaK.
17BHIMAHHE: He DonyckaetcNcNoJIb3OBAHne n3dJIeNJaTebMn IJrIg DaJKe NOI npICMOTpOM B3pocJIbIX.
18BHIMAHHE: Hn B Koem Cnyuae He BKJIouaIte aannapat dIy MoIKN IOD daBLeHneM Do TORO, KaK pa3BepHyT 7IaNr BBICOKORo DaBHeHn.
19BHUMAHNE: AkkypaTHO CBepHnTe n y6epnte 7naHr TaK, TTo6bI He nepeBepHyTb annapat dIy MOIKn POn daBneHnEM.
20BHIMAHHE: KOrda shaHr pa3BopauuBaetc nIIN CBopauuBaetc aInpaT dOJxHe 6bITb BbIKIOUeH N B HEm He DOJXH6bITb OCTaTOUHO daBJIeHnA (CnyueHo).
21BHIMAHHE: Pnck B3pbIbA. He pacnbIJIaTb TropouNX KNDKOCTeN.
22BHUMAHHE:ДЯ obecneueHn63oNaHOCHTMaUHHe,INPONb3yIe TOJbKO OpUNHaJIbHbIe 3aIuaCTn OT pOn3BODInTeJIy IIn yTBePKDeHHORO pOn3BODInTeJIa
23BHIMAHHE: He HappaBnTb CTpyu Ha ce6y nI npDpynx IIOeN C 0cJIbIO OUNCKN 06yBNnOJExKDbI.
24BHIMAHNE: HeDonyckaTbKNoIb3OBaHIO annapatom deteNn Heo6yehhbn nepcoHaI.
BAMAHNE:Boda, KOTOPa npoxoNT yepe3 npOTnBOtOK,CHTaeTcH He NITbeBOH.
- XX BHIMAHHE: Пелед БылонHeHem KaKxIbno pa6ot no TexHnueckomy 06cnyXnBaHnIO UIN ONUCTKe OTKIIouHTe annapaT OT 3JIeKTpUeCKOJ CETN.
XY BHUMAHNE: HenoXoJaIe ydInHnTeN MoYr npEcdTaBJIb onaCHOCTb.
XJ BHUMAHNE:Пи ИСпОЛьЗOBAHИУДИНHTeJIbHOrO Ka6eIЯ StTeKep Ipo3eTKa ДОЛЖHbI 6bITb BOJOHENpOHnuaeMbIMN;
BHIMAHHE: A6conIOTHO 3aIpeuaeTcra noJIb-3OBaHne MaunHOB NOMEueHNx INI 3OHax, KlaaccnHnucPOBaHHbIX KaK nOTehuNbHO B3pblBOONaChble.
BHUMAHNE:
- HNKOДA HE ДOTPAГИBAITEСь ДО ANI-PAPATA MOKPbIMPyKAMN IJI N BOCblM N HOrAMN.
- HNKOKIДA HE TЯHNTE 3A UHYP ΕЛЕKTPOПИТАНИ, YTOБbl BbIHHTb UTENCEJIb-HYIO BUNIKY N3 PO3ETK.
- ECJN BO BPEM PA6OTbI NODAyA 3JEKTPONITAHNA BHE3ANHO IPEKPATINACb, BbIKIOUHTE YCTPOICTBOC LJIbIO BE3OPIACHOCTN.
> PNEOxPAHNTeBhIEYCTPOICTBA:
BHUMAHHE: NCTOtePacnbHnteB cha6-KeH npedoxpaHnTeBHO 6IOKn pOBko.Bo n36exKaHne CnyaHoro OTKpbTna ee cJeDyET BKNIOuATb npN KAKDOM nepepbBe B pa6ote annapata.
- PpeoxpaHnteNbHbIe yctpoiCTBa: nuctoletpacblntelb c ppeoxpaHnteBHO6nKPOBko, DBrataTeB C 3aunToN OT 3JeKtpuecko neperp3Kn (Kn.1), Hacoc c nepenyckhblm KlaHOM NIN OCTaHOBOM.
- Khonka 6e3oNaChOCTn Ha nCTOnTe CnyKHT He JIA 6JIOKINPOBKn PbUaRa BO BpeM pa60Tb, a JIy IpeDOrTbpAaHcHn CnyuHoro OTKpbITn NCTOneta.
BHUMAHHE: Annapat ochaeh yctpoiCTBOM 3aunTb DBnraTeJ: npn BCTyIeHn B DeiCTBne yctpoiCTBa, BblJaTb HeCKoJIbKO MmHT nn, KaK aIbTePHaTnBa, OTKIOUHTb n CHOba NOkIOuHTb annapat K 3JeKtpueckOcETn. Pp nOBtOPHom BO3HKnHOBeHn Ip06JIembl, nn npn HeBKnIOUeHnn, o6paTNTbcR B 6nXaIshn cepBnchbI ueHTp.
>UCIOBIAIJIABOECNEUHNA YCTOUYBOCTN
BHIMAHNE: UcToUHBOCTb npu6opa rapaHTnpoBaHa TOnbKO B TOM Cnyae,ecn OH yCTaHOBHeH Ha POBHOI NOBepXHOCTN.
>ПОДАЧАВОДbl
IopKnHueHne K nCTOuHnky IoJaun BOdbi

BHUMAHNE: Annapat donyckaetca He
MOxHNOIqKlIOuATb HeNOCpeDCTBeHHO K O6eMy BOOpnpOBOy NITbeBOrO BOOCha6KeHn.
IINDOOCHNTeHb MOXHO NOKJIouaTb He CpeCTBeHHo K O6uemy BOOpPOBOy NITbeB OBOOCh6xHeHn TOlbKO npu ycIOU TTO B Tpy6OpBOOE NOaun BObl yCTaHOBNE HO YCTPOJCTBO 3auntbI OT o6paTHORO NOTOKA C ONOPOXHeHnEM, COOTBeTCTByIOUee DeNCTBYUIM HopMaTnBaM. Y6eINTEcb B TOM, YTO WIIaHr ycInHe, a ero dHaMeTp COCTaBIAe MeHee 13 MM.
BHIMAHHE:Boda, KOtopa npoxoNT uepe3 npOTnBOTOK,CHTaeTcH He NITbeBOI
BAXHO: NcnoB3ynte ToIbKO fNbTpoBaHHyIO nnu CYTO BDOy. Pa36OpHbI KpaH BObldoJKeH oEcecneuBaTB nOdaU, OBeM KOtOpO BDBOE npeBbIaet MaKcMaJIbHyIO pON3BOIDTeNbHOCTb HaOCA.
- MInHMaJIbHaI npOn3BOJnteJIbHOcTb: 30 n/ MNH.
- MakcmaJIbHaЯ TempepaTypa BOdbl Ha BXO-De: 40^
- MaKcMaJIbHOe IaBHeHne BOIb Ha BXOJe: 1Mpa
IINpOoUcNTeNb CneNyET pa3MeuaTb KaK MoXHO 6nJKe K BOOCha6nTeNbHcHcTn.
Heco6nOeHne Bblweyka3aHHbIX ycNoBn npuBOiNT K cepbe3HOMy MexaHnueCKOMy NOBpeKdEHNIO HAcOca, a TaKke K notepe rapaHTn.
Iopaa BObl OT BOOnpOBOHcTn
- PóndcoeHNHrTe rN6kIn wlnaHr noJaun BObl (He BXoIIT B KOMnIeKr TNOCTaBKn) K WtUepey dIy BObl Ha annapaTe N K nCTOuHnky noJaun BObl.
- OTkpoIe KpaH.
Iopaa BObln3 OTKpbIToro 6aka
- OTBnHTnte WtTyep nIy noJaun BoDbI.
- PnBHTte BCacbIbAioyU Tpy6ky C nIbTpom (He BXoNT B KOMNKeT NOCTaBKn) K WtYucepPy dJa BOdbHa aannapate.
Iorpy3nte qnibtpB6ak.
- Pered Naayam OKcnpnyatauyn ydaInTe BO3dyx n3 annapata.
-OTBnHTnte r6Kn IJNaHr BbICOKO rDaBHeHna, NOBBeHeHHbIK WtUepey BbICOKO daBHeHna Hap annapate.
-BkIIOUHTe annapaT IOJXdITecb MOMeHTa, KOr- da n3 BbIXOda BbICOKO rDaBJeHnHaCHET BbIXO- dntb BOda 6e3 np3bIPbKOB.
- BbIKIIOUHTe annapaT IN BHOBb npINBnHTITE rN6Km IJNaHr BbICOKO DaBJIeHn.
>CNCTEMA3JEKTPONITAHNIA
-Подклioчене annapapaТ к ЗлЕКТрocetTNdoJxHcOOTBETCTBOBaTb CTaHApTy IEC 364.
BAXHO: Ppexde qem NOKIOUHTb annapaT K cetn y6eINTecb B TOM, YTO daHHbIe Ha 0npmeHOn Ta6NueKe COOTBETCTBYOT xapaKTepNCkam 3neKtpnueCKoC eTn H po3eTKa 3aunuHe aBTOMaTnueCKm npedoxpaHNTbHbIM BBIKIOuAteJeM, Ra6aTBiBaIOUM pRn IPOABLeHN TOKa yTeKn, C noporOBOu ChvBCTBHTeNbHocTbIO HNXe O,03A -30MC.
- Ecni ceTeBaBnIka aannapaTa He noDxOuNT K po3eTKe, 3aMeHInTe po3eTKy Ha NOxDxOJaUyIO, dIpy 3TOrO o6paTntecb K cneuaJIncTy.
- He nCnoB3OBaTb annapaT npn TempeType Hnke 0^ ,ecn OH OChauH en IJaanrrom n3 PBX (H VV-F). 87
RU
XYBHUMAHNE: HenoXoJaIe yJInHntJI MOryT npeCTaBnTb ONaCHOCTb.
XJ BHIMAHNE: Pn nCNoJIb3OBAHn ydInHnteIbHOro Ka6eJa WTeKeP u po DOnKHBi 6bITb BOHOHeNpOHNuCaEmbIMu, a Ka6eB JOnJKeH NMeTb pa3Mepbl, npNBeDeHHbI B CneDyUoSeI Ta6Nue.
230-240V 400-415V
3G 2,5 mm2 4G 2,5 mm2
max 20 m max 30 m
ynpabJIeHne
> PACNAKOBKA
(pnc. D)
YdaNTb BepxHne HxKHe KpOuKn, npKpeJIIOUne KapTOH K naIeTaM. BbyHyTb KapToHHyO pe ONyCTnTb Dba KOleCa MaunHbHa 3emJIO N BbyHyTb naJIety.
>BA3OBAR KOMПЛЕKTALUNA
(pnc.ABc)
① BbIKIIOUaTeINb 3JIeKtpoHaOca
② BbIKIOUaTeIb IopeJIKN
③ PeryIaTopoM rOpEnKu
④ BbIKIOuATEIb MOIOUero (mod.DP)
⑤ Topelka
⑥ Tpy6Ka onpbicknBaTeJRA
⑦ TnctOnet
山naHr BbICOKOraBnHeH
BbIXoD BOID IOBICOKIM DaBJHeHEm
10 Mojoero
Diesel
12 CoeHNHTbHbIK Ka6eIb CBNKOJ
BxOaBoDb+HnIbTp
14 NaTPy6ok depkaTeIaHaHra
15 MaHOMeTp
A.S.S. AUTOMATIC STOP SYSTEM
(ecnnectb)
CINCTEMA ABTOMATUNCHEKOTO OCTAHOBA
BAXH0: DaHHbI OUHCTHTeJIb BBICOKDaBHeHnO6OpyIDoBaH CnCTeMoA.S.S.
(Automatic Stop System - cnctema aBTOMaTnueckoro OCTaHOBa), KOTopa
OCTaHaBnBaet MaunHy Bo BpeMg a3bl
po3eepenycka.ДЯ 3anycka MaunHbI yCTaHOBtE
a BbIKIOuATel B NOLOXKeHne ("ON" 3aTeM
He HaxMtTe Ha CnyCKOBo KpOcOK NICTOJETA:
CNTema A.S.S. 3aNcyTIT MaunHy n
ABTomaTHueCKn OCTaHOBt ee npn OTnyckAHn
KpOcKa. IOnrOMy ZeNEcoO6pa3Ho npn
KaXDoN OCTaHOBKe MaunHbI CTaBtB NICTOJET
Ha IpeOxpanTeIb, paCNOLOXKeHHbI Ha
CnyCKOBOM KpOcKe, BO N36ExKaHne CnyaHORO
BKIOUeHnMaunHbI.
- Camonpon3BOJbHoe BKNIOUeHne MaunHbI 6e3 HaxkaTnHa NnCTOJeT MoKTe Ipn3OuTN, HanpImep, n3-3a Ny3blpBkoB Bo3dyxa B BOJe.
- ПиoctaHOBKe MaunHbI 6OJIe Yem Ha 5 MNHyT He cIeJyET OCTaBnAyt b annapat 6e3 npICMoTpa. B npOTNBOM Clyuae dIЯ 3aUHTbI annapata Heo6XoIMO yCTaHOBnTb BbIKIIOUaTeNb B WSeIOJIOXeHne "OFF"
-Проверьт e npaBnIbHOCt b coeINHeHnHaNoPHoro 7laHra c annapaTOM nnpeducMOTpeHHbIM B KaueCTBe o6OpydoBaHnI INCTOJIeTOM.
EcnMaunHa Cha6KeHa peryIaTopom daBHeHra:
C daBHeHnEM, OTpeRyIInpOBaHHbIM Ha MINHMaJIbHyIO BeINuYHy, ABTomAtNueckaI NOcIeOBATeJIbHOCTb BKIOUeHnA (A.S.S.) MOKeT He BMeUaTbcr. CneIOBaTeJbHo, N36eRaTb pa6oTbI MaunHbIB nepenycke 60nee 1 MNHyTbl.
- I36eraTb BKNIOUeHn pbIyara NICTOJeTa C NOBbIWeHHo YAcTOTOH (MORYT Bbl3BaTb OCTaHOBBI IN NOBpeXJDeHnA).
>YCTAHOBKA U3ANYCK
3AIPABKA (m3enb) (pnc. C)
HaonHnB 6ak ropouHM yka3aHHbIM Ha Ta6NIyKe TexNueckx daHHbIX (M3enb).
136eraTb onyctOweHn 6aka BO BpeM pa60TBI BO
136exKaHne NOBpeKJehn dI3eHbHO HAcoca.
BHUMAHNE: Ncnonb3OBAHne HecooTBeTCTByIOUeRO TROPOUcero MOKeT PnPBecTu KOnaCHOCTu.
3AIPABKA (Moouzero) (pnc. C)
HaonHb 6aok mooero cpeCTBa peKOMeHnyEmbIMn npOyKTAMN, NOxOJaUMN K Bbl6paHHOMy TnPy MoKn.
BHIMAHHE: NcnoJb3OBA Tb NCKHouHTeJbHo XnKne MOUuIe CpeCTBa, OdHO3HaUHO 36eRaTb KncIoTHbIX IIN OueH UeIOuHbIX IpOdyKTOB. PekomeHnyem Nolb3OBA TbCB NaHIMn npOdyKTAMN, pa3pa6oTaHHbIMN cneuaJIbHO DnA NCNoJb3OBAHnM MInHMoEK.
>YCTAHOBKA (pnc. B E)
- Проверпг, чтобь OCHOВОН BBIKЮчATEнь
нхODиСя В полжени "OFF", a BOДЯнOH ФильТр
6ын установлин На BNYCKHО nATpy6OK.
- YctaHOBnte coeINHeHne IJIaHaHra NODaH BOdbI BpyHyIO, 6e3 NOMOUI INHCTpymeHTOB.
* POncoeHnHTe IaHaTIOaHbOdbIKCoeHNHeHIO. BHyTpEHnn DnaMeTp IaHaRa DoJIKeH 6bITb He MeHee 13 MM (1 / 2^ )
* IopcoeHnHTe WJahr BbICOKO r daBHeHnK BblnyckHomy nATpy6ky. Hadabnte Ha coeHNHeHne WJahra BbICOKO DaBHeHn yOpap 3aTeM npIKpyTnte ero BpyHyIO, 6e3 nOMouu INHCTpymeHTOB.
* PoiCoeHnHe WnHaB BBICOKOraBHeNk BOJAHOMy NCTOJeTy.
* POnHocTbIO OTKpoIe KpaH noJaHy BODbl. TemnepaTypa NODaBaEMoBODbl DOJXHa 6bITb MeHee 40^
BAXHO:ДЯ pa6OТы MOИКи ДОЛЖн ИСПОЛБ3OBaTbСЯNTая BODa BO ИЗБexKaHne ee NOВpeXKeHnI.
- OToNyctnte 6NoKnPaTOp KypKa BOJHOrO
NtCTOnTe N HaxMnTe Ha KypOK, Do BbIXoJa
BO3dUxHa n3 WlaHra.
- YCTaHOBInTe KOnBe Ha NICTOJET
- BctaBbTe BnIky B pO3eTky.
> BBOI B 3KCIpyATAUIO.IPEBbI 3ANYCK
Iocne IInTeBHOOCTaHOBKn NIN npn nepBOM 3anycke, Heo6xOdIMo NOcOeHNHTb BCacbBaIOyU Tpy6y Ha HeCKoJIbKO MNHyT DnA BblNycka BO3MOXHbIe HOpOdHbIe TeJa N BO n36exKaHne 3acopeHnФopCyHKn PnCTOJIeta.
>3ANYCK (pnc. F)
BkHouHTb MaunHy, Hax Kab Ha BbIKHouTeIb N DaTb eN nopaboTaB B TeueHne HeCKoJIbKINx MNHyT IJyUdaJeHn3aRpy3HeHn IN BO3NyUHbIX Ny3bIpeN 13 rIuPaBnueeCKO CNTEmbl,
3aTeM OCTaHOBtB MaIINHy,
noDcoeHNHtBtp6Ky BbICOKO rDaBHeHnK nCTOnTeY uCTaHOBHTfoPCyHk.
YIOCTOBEPUBCBATOM,TO6bIperyIaTOpMOUoeroCpe
CTBa 6bI3aKpbIT.
Pn MaunHe, BkUoyeHHo 3aHOBO, npOBepuTb, YTO6bl CTpy 6bIpaBHomepHOB, B npOTNBOM Cnyae npoCHNTb fOpcyHKy OT BO3MOXhblx 3arpa3HeHNI, NOOJDaTb HECKOJIbKO CekyHd, NOKa He 6yDet DOCTURHyTO pa6Ouee DaBLeHne, NocJe Yero OTKpbITb N 3aKpbITb NICTOJET DBA INN TPN p3a.
>ДЯMbITbXOJODHOBOdbI NOBepHyTb
(pnc.A)
olje SAE 20/30, 15W-40, 20W-40.
PREVERJANE VODNEGA FILTRA
LwA 89dB(A) K(uncertainty) 2dB (A)
LwA 91dB(A)
- Livello pressione acustica
Acoustic pressure
- Niveau de pression acoustique
Schalldruckpegel
- Nivel de ruido
Geluidsdrukniveau
- Nível da pressão acústica
Livello di potenza sonora misurato
EN Acoustic power measured
Niveau du puissance sonore mesure
DE Abgemestes Schalleistungsiveau
65 Nivel de potencia acustica mesurado
NL Geluidsdrukniveau LwA gemeten
Nivel de potencia acústica mensurada
Livello di potenza sonora garantito
EN Acoustic power granted
FR Niveau du puissance sonore garanti
DE Garantiertes Schalleistungsnaiveu
Nivel de potencia acústica garantido
NL Geluidsdrukniveau LwA geqarandeerd
Nivel de potencia acustica garantida
I fascicolo tecnico si trova presso
EN Technical booklet at
FR Dossier thecnique aprres de:
DE Das technische Aktenbündel befindet sich bei
El manual técnico se encontrar en:
TEchnisch dossier bij:
Proceso Tecnico em:
Lavorwash S.p.A
via J.F.Kennedy, 12
46020 Pegognaga
(MN)-Italy
Direttore generale
General manager
FR Directeur général
DE Generaldirektor
Director general
ALgeen directeur
Director geral
Giancarlo Lanfredi

Pegognaga 03/01/2013