
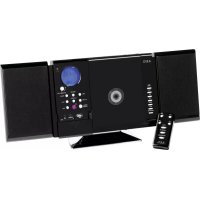
MC 4464 - Hi-fi system AEG - Free user manual and instructions
Find the device manual for free MC 4464 AEG in PDF.

| Product type | Hi-Fi system |
| Brand | AEG |
| Model | MC 4464 |
| Net weight | Approx. 0.99 kg |
| Power supply | Mains adapter: input AC 100-240 V~50/60 Hz, output DC 6 V, 1 A |
| Backup batteries | 2 x AAA 1.5 V batteries (not included) |
| FM frequency band | 87.5 – 108 MHz |
| Main functions | FM radio, CD/MP3 player, AUX input, alarm, playback programming |
| Disk compatibility | CD, CD-RW, CD-R, MP3 |
| Connectivity | Headphone jack 3.5 mm, AUX input 3.5 mm, dipole antenna |
| Alarm | Dual alarm with wake-up by radio, CD or buzzer |
| Wall mounting | Possible (mounting hardware not included) |
| Laser safety | Class 1 laser, do not open the housing |
| Moisture protection | Do not expose to rain or moisture |
| Maintenance | Wipe with a slightly damp cloth, without additives |
| Repairability | Have repairs done by a qualified technician; do not open the housing |
| Supplied accessories | Stand, mains adapter, wire antenna |
| Display type | LED display |
| Backup battery life | Retains settings in case of power outage |
Frequently Asked Questions - MC 4464 AEG
User questions about MC 4464 AEG
0 question about this device. Answer the ones you know or ask your own.
Ask a new question about this device
Download the instructions for your Hi-fi system in PDF format for free! Find your manual MC 4464 - AEG and take your electronic device back in hand. On this page are published all the documents necessary for the use of your device. MC 4464 by AEG.
USER MANUAL MC 4464 AEG
Élimination. Page 20
Espanol
Contenidos
Overview of the Components..
Instruction Manual.. Page 31
Technical Data.. Page 35
Disposal.. Page 35
Język polski
Spis tresci
Overview of the Components
Voeding: DC6V,1A,0-(-
Alimentation: DC6V,1A,0-(-+
Consummation: 8 W (maximum)
Reserve de piles: 2x1,5V,AAA,R03
Radio:
Alternatively, you can use the dispositivo in the past.
ATENCIón:
Thank you for choosing our product. We hope you will enjoy using the appliance.
Before using this device, carefully read this user manual and keep it together with the Warranty Certificate, cashier receipt and if possible, the original package inclusive its interior packing. If you hand on the device to any third person, include the user manual as well.
Safety Instructions
Caution!


Not suitable for children under 3. Small parts may break off and be swallowed.
- To avoid the risk of fire or electric shock, you should not expose the device to rain or humidity. Do not use the device near water (e.g. bathroom, swimming pool, humid cellars).
- Do not use the unit in extremely hot, cold, dusty, or damp places.
The unit is designed solely for private use and its intended purpose. This unit is not designed for commercial use. - Make sure that the power cable is not bent, pinched, or comes into contact with heat sources.
- Make sure that the power cable is not a tripping hazard.
- The power supply unit is only suitable for use in dry rooms.
- Never touch the power supply unit or the cable with wet hands.
- Only connect the power supply unit to a properly installed wall outlet. Ensure that the listed voltage matches the voltage of the wall outlet. Also ensure that the output current, voltage and the polarity of the power supply unit match the information on the connected device.
Always install batteries in the correct direction. - Avoid covering the device's vent openings.
- Never cover the vent holes with objects, such as magazines, tablecloths, curtains etc.
- This appliance shall not be exposed to dripping or splashing water and that no object filled with liquids such as vases shall be placed on apparatus.
- Open sources of fire, such as e.g. burning candles may not be placed onto the unit.
- Never open the device's case. Improper repairs can cause severe danger to the user. If the device or particularly the power cord is damaged, don't use the device any further and have it repaired by a qualified specialist. Check the power cord regularly for damage.
- If you do not use the device for a long period of time, pull the power supply unit from the wall socket and/or remove the batteries.
These symbols may be found on the device and shall indicate the following:

The lightning symbol warns the user of dangerously high voltages inside the case.

The exclamation mark symbol points to important instruction or maintenance remarks in the accompanying guidelines.

Devices bearing this symbol work with a "class 1 laser" for tracing the CD. The built-in safety switches should prevent the user being exposed to dangerous laser light, which is invisible to the human eye, when the CD compartment is opened.
These safety switches must not be bypassed or altered; otherwise there is a risk of being exposed to the laser beam.

Caution: This product features a class 1 laser.
Children and disabled persons
- For the safety of your children, keep any packing parts (plastic bags, cartilage, Styrofoam etc.) out of their reach.
CAUTION: Don't let small children play with foils for danger of suffocation!
- This device is not intended for use by persons (including children) with reduced physical, sensory or mental capabilities, or lack of experience and/or knowledge unless they have been given supervision or instructions concerning the use of the device by a person responsible for their safety.
Supervise children to ensure they do not play with the device.
Overview of the Components
1 Tab for opening CD compartment
2 CD tray
3 button (next title)
4 button (stop)
5 button (playback/ pause)
6 STANDBY button (on/ operational readiness)
7 FUNCTION button (Select source)
8 ALARM SET button (Alarm time)
9 Stand
10 Display
11 VOL+/VOL- buttons (volume)
12 M+/M- buttons (10 music titles forward or backward / preset station location)
13 PROG/TIME SET button (memory/time)
14 button (previous title)
32 English
15 headphone jack
16 AUX jack
Back
Dipole antenna
Battery compartment (power reserve)
Suspension eyes for wall mounting
Power adapter socket (DC 6V-(-))
First Use of the Device/Introduction
- Select a proper place for the device. A dry, level and slip proof surface is suitable.
Make sure the device is vented sufficiently! - Remove the protective film from the device, if present.
Mounting the stand
If you do not want to mount the device to the wall, place the device onto the supplied stand.
Wall mounting (Mounting material not included)
You can also mount the device to the wall.
CAUTION:
Make sure beforehand whether there are cables in the wall which could be damaged!
NOTE: Check the reach of the cable!
To mount the device, make sure that an easily accessible plug outlet is available within reach of the power cable.
The distance between the mountings for wall mounting is 120mm
- Drill two holes horizontally at that distance.
- Fit dowels and screws into the holes.
- Hang the device onto the screws. Check that it is secure.
Power supply
- Make sure the grid voltage corresponds to the figures on the rating plate.
- Plug the power supply unit into a properly installed protective contact socket.
- Connect the device with the power supply unit by plugging the jack of the power supply unit into the "DC 6 V - - jack. The DC socket is located near the fixture for installing the stand (see figure 2 on page 3).
CAUTION:
This device should only be used with the mains supply unit (included). Do not use it for other devices.
Only use a 6 V power supply unit (A) A different supply unit may damage the device.
NOTE:
- Disconnect from mains power supply during longer periods of non-use.
If you have not inserted any backup batteries, the storage of the time and the radio station will be lost as soon as the power supply has been interrupted.
Inserting the backup battery
(Batteries not included)
If there should be a power outage or if the mains plug were to be disconnected from the electrical outlet, then the settings will be maintained with inserted backup batteries.
- Open the battery compartment on the back.
- Insert 2 batteries of the type AAA/R03 1.5 V into the battery compartment. Ensure the correct polarity (see battery compartment).
- Close the battery compartment again.
CAUTION:
- Do not expose the batteries to high temperatures or direct sunlight. Never throw batteries into the fire. There is a danger of explosion!
- Batteries may leak and lose battery acid. If the device is out of use for long periods, remove the battery.
Non-rechargeable batteries may not be charged. - Chargeable batteries may only be charged under adult supervision.
Chargeable batteries must be removed from the toy before they are charged. - Different battery types or new and used batteries must not be used together.
- Batteries must be inserted with the correct polarity.
- Spent batteries must be removed from the toy.
- Batteries are not to be disposed of together with domestic wastes. Dispose of the used batteries at the relevant collection bin or at your dealer's.
The terminals may not be short-circuited.
Setting the time
- Switch the device to standby with the STANDBY button.
- Keep the PROG/TIME SET button (13) pressed for about 2 seconds. The time starts flashing in the display.
- Use the button (14) to adjust the hours and the button (3) to adjust the minutes.
- Press the PROG/TIME SET button again to store the time.
NOTE:
If you do not press any button within 4 seconds, all settings will be saved automatically.
General Operation
Switch device on/off
With the STANDBY button (6), you can switch the unit between standby and operating mode.
NOTE: In CD mode
After about 10 minutes without signal, or if the signal is too weak, the device will automatically switch to standby.
Volume
By pressing the VOL+VOL- buttons (11) you can adjust the desired volume.
FUNCTION (7)
Press the FUNCTION button until the desired operating mode is shown on the display.
Radio mode
- Fully uncoil the wire antenna.
- Searching radio stations:
Briefly press the buttons (3/14), until you have found the radio station which you are looking for. If you keep one of the buttons pressed down, the device will search to the previous, respectively next radio station.
Preset station:
- Search for the desired radio station with the buttons (11).
- To store the radio stations, press the PROG/TIME SET button (13). The notification "P 01" will blink in the display.
- Select the desired preset location with the M+/M buttons (12).
-
Press the PROG/TIME SET button to store the station.
-
If the reception is too weak and there is interference on the received station, try to improve the reception by altering the position and uncoiling or coiling the antenna. The message "C" is shown on the display for stereo reception.
Select the preset radio station
The preset radio stations can be selected by repeatedly pressing the M + / M - button (12).
Playing CDs/MP3
- Select the CD mode with the FUNCTION button (7). The following will appear in the display "---".
- Open the CD compartment (2) using the tab (1) to flip the cover of the CD compartment open to the front.
- Place a CD with the label on top onto the spindle so that the CD clicks in mechanically.
-
Close the CD compartment.
-
The CD will play from the first title.
- In order to remove a CD, press the button (4), open the CD compartment and lift the CD out carefully.
Always keep the CD deck closed.
NOTE:
If a disc is inserted the wrong way around, respectively if no disc is inserted, then the message "---" will blink and "..." appears on the display.
- Playback of CDs produced by the user cannot be guaranteed due to the large variety of software and CD media available.
Description of the control buttons
II (5)
You can briefly interrupt and resume playback using this button. The fade-in in the display will blink. Pressing again continues playback.
//(8/14)
With you can jump to the next or previous track etc.
- If the button is kept pressed down, the machine starts to search through the tracks. (The sound is muted.)
The button can be used as follows:
Press once = This starts the current track again from the beginning.
Press twice = This jumps back to the previous track.
Press three times = This plays the song before etc. If the button is kept pressed down, the machine starts to search through the tracks. (The sound is muted.)
(4)
The playback is stopped.
PROG/TIME SET (13)
During the playback of an audio CD:
Press once = the current track is repeated continuously. The notification "C" will appear in the display.
Press twice = the whole CD is played continuously.
The notification "ALL" will appear in the display.
Press three times = The notification "RAND" will appear in the display. All the titles will be played back successively in a random sequence.
Press four times = all functions are cancelled. The normal play mode is resumed.
34 English
During playback of MP3 music:
Press once = the current track is repeated continuously. The notification " will appear in the display.
Press twice = the selected folder is repeated continuously (FOLDER appears in the display).
Press three times = all music titles are repeated continuously. The notification "ALL" will appear in the display.
Press four times = The notification "RAND" will appear in the display. All the titles will be played back successively in a random sequence.
Press five times = all the functions are deactivated. Playback is continued normally.
M+/M-(12)
- During the music playback, press one of the buttons to skip 10 titles forward or back (if more than 10 titles are on the storage medium).
- In radio mode for connecting to the preset radio stations.
Programmed Play
This can be used to program any desired sequence of tracks.
- Press the button (4).
- Press the PROG/TIME SET button (13). "P01" (Storage space) and the notification "PROGRAM" will appear in the display. Use the buttons (3/14) to select the desired track and then press the PROG/TIME SET button again. The display changes to memory slot P02.
- Select the next track with the M buttons and press the PROG/TIME SET button again. Repeat the procedure until all the desired tracks are selected.
- Press the button (5). The playback starts. The notification "PROGRAM" will appear additionally in the display.
The device stops automatically after all programmed titles have been played. The notification PROGRAM will switch off and the programmed sequence will be deleted from the memory.
Deleting the programming
Press the button. The programmed sequence will be deleted from the memory.
Playing back Music in MP3 Format
With this device it is possible to play back pieces of music in MP3 format. The device also supports all standard CD types: CD, CD-RW, CD-R.
This machine of is able to play MP3 CDs. Up to 200 tracks can be compressed and stored on these CDs. Your machine
detects an MP3 CD automatically (the total number of tracks and MP3s appears in the display). If you would like to play one of these CDs, proceed as described under "Playing CDs/MP3". Tracks can be programmed as described under "Playing Back Programmed Tracks".
Please note:
There are a number of different recording and compression methods, as well as quality differences between CDs and self-recorded CDs.
Furthermore, the music industry does not adhere to fixed standards (copy protection).
For these reasons it is possible that in rare cases there are problems with the playback of CDs and MP3 CDs. This is not a malfunction of the device.
AUX socket
To connect analogue replay devices. Via this socket you can also hear the sound of other playback devices such as MP3 players, CD players etc. through the loudspeakers.
- Please connect the external device with a 3.5mm stereo jack plug to the AUX socket.
- Repeatedly press the FUNCTION button (7), until "AUX" is shown in the display.
- You will hear the sound playback from the external device through the loudspeakers. You may adjust the volume with VOL+VOL- (11). The CD buttons are not functional.
- For the remaining procedure please see the operating instructions of the external sound source.
NOTE:
Adjust the volume of the external device to a comfortable level.
Alarm function
Setting the alarm time
- Switch the device to standby with the STANDBY button.
-
Use the ALARM SET button (8) to select the alarm time to be adjusted:
-
Press once = The " 空 " symbol starts flashing in the display. The first alarm time is activated and can be adjusted.
- Press twice = The " symbol starts flashing in the display. The second alarm time is activated and can be adjusted.
- Press three times = The " and " ^n symbols light up. Both alarm times are activated and can be adjusted one after another.
-
Press four times = The " and " symbols disappear. The alarm times are deactivated.
-
Press the ALARM SET button for about 2 seconds. The time starts flashing in the display.
-
Use the button (14) to adjust the hours and the button (3) to adjust the minutes.
- Use the FUNCTION button (7) to select radio (FM), CD or buzzer as wake-up mode.
- Press the ALARM SET button again to store the alarm time.
When the pre-set alarm time has been reached, the device turns on activating the selected wake-up mode. The volume increases gradually.
NOTE:
If no CD has been inserted, the device will activate the buzzer instead.
Switching off the alarm signal
Press the STANDBY button (6) to switch off the alarm signal until the following day.
NOTE:
The alarm function will turn off automatically after approx. 60 minutes.
Deactivating the alarm function
Press the ALARM SET button (8) repeatedly until the " 空 " and "icons disappear from the display.
Cleaning and Maintenance
CAUTION:
Do not immerse the device in water.
Always remove the mains plug before cleaning the machine.
- Any marks on the surface can be wiped off with a slightly damp cloth without any additives.
Troubleshooting
| Symptoms Co | Urine Solution | |
| CD can not be played back. | CD is not inserted or inserted incorrectly. | Ensure that the disc is inserted with the label facing upwards. |
| CD jumps dur-ing playback. | Check the disc for fingerprints, dirt or scratches. | Check the disc for fingerprints, dirt or scratches. |
| Device cannot be operated. | Device crashes and "hangs". | Disconnect the power supply for 5 sec. Then switch the device on again. |
Technical Data
Model: MC 4464 CD/MP3
Power supply: DC6V, 1A, Θ-C-Φ
Power consumption: 8 W (maximum)
Battery power reserve: 2x 1.5 V, AAA, R03
Radio component:
Frequency range: FM 87.5 ~ 108 MHz
Net weight: approx. 0.99 kg
Power supply unit
Protection class:
Input: AC 100-240 V~50/60 Hz
Output: DC6V,1A
The right to make technical and design modifications in the course of continuous product development remains reserved.
This device has been tested according to all relevant current CE guidelines, such as electromagnetic compatibility and low voltage directives, and has been constructed in accordance with the latest safety regulations.
Disposal
Meaning of the "Wheelie Bin" Symbol
Take care of our environment, do not dispose of electrical applications via the household waste.
Dispose of obsolete or defective electrical appliances via municipal collection points.
Please help to avoid potential environmental and health impacts through improper waste disposal.
You contribute to recycling and other forms of utilization of old electric and electronic appliances.
Your municipality provides you with information about collecting points.
36 Jezyk polski
Instrukcja obslugi
CTC Clatronic Sp. z o.o
Tapadapter aljat (DC 6V- -
KpIaH He 6yE BnKOpCTOByBaTnCJIOBm npMIXOK yacy, BiEeHaHTe 6Lok XNBHeHHB iD po3eKn Ta/ a6o BnIMt batapeKe.
Ha npictpoi moxytb 6ytn po3miuehi cunboi, kni nonepedkaotb npo Take:

CIMBOI 6JIuCKaBKn nOpeJxKae npo He63neky BncoKoi Hanpyr NcepeDnHi KopnyCy.

CIMBOL 3NaKy OKIky N03Haae BaxJIbI iHCTpyKuI abo npaun uOTo TexHiNoro 6CNYROByBaHHB NocIHky, AKN IOnJaTaBCa Do npCTPOU.

PnIaIaN 3UIM CUMBOLOM IpaIIOHTb 3Ja3ePOM KJIacy 1IIN4 3uTYBaHH3 KOMNaKTHO DnCKy.BMOHTOBaHI 6IOKyBaIbHi BIMNKaHi MAOTb OXopoHATN KOpICTyBaHaB iJ He6e3-NeHOrO Ja3ePHORo CBITLA, KOTpi JIOcBKe OKHe 6aHTb, KOJI BIDKpNTa UyXnIAkA dIa KOMNaKTTHIX DnCKIB.
LJI nepemikai 6e3neKn He cnla p03bupatn a6o 3MiHIOBAtn; iHaKwie icHy e pu3nk ypaXeHHaIaepHm npomeHem.

Ybara! Lcien npnilad npauoe 3 naeporm klancy 1.
DITI oO6n 3 Oo6JINBIM nTpe6aM
3 MeTOIO YHINKHeHH He6e3NeKN DIA BALIMX DItei 36epiraTe 6yDbKaN nakyBaJIbHn MaTePiaJ (nIaCTNKoBI Kopo6Kn, nepeRoPoJKn, nIHOnJaCT ToUcO) No3a MExaMn iX DoCAxHOCTi.
YBARA!
He Do3B0JIeMaJIeHbKIM DIITAMrpaTnCA 3 FOJIbFOIO, OCKINbKICHyE6e3NeKa 3aDyWeHH!
LepnctpiHne np3HaenDnBnKOpNCTaHHO Oco6AMn (BKNIOUoAOn DITE) 3OBmExeHMn FizHMMn YPO3yMOBIMN 3ID6HOCTMn, aBO 36paKOM DOCBiDy Ta/ aBO 3HaHb, AKN0 3a HMMn HE BeDeTbCn HAJIaN YIM He 6yIIN HADAHBI BIDNOBIDHI BKA3IBKN CTOCBOH BNKOpNCTAHNr PnictpoO OcOboIO, Aka Hece BiNObJaIbHiCtB 3a IxHIO 6e3NeKy.
CTeXTe,106diTnHe6abunncb npucTpoEM.
Orlae enemehtib ynpablinna
1 RaHOK dIa BIkPbAHHa BiCiKy CD
2 JIOTOK IIN KOMTAKT-DIACKB
3 KhoNka HaCTyHnKa Komno3uJia
4 Khonka cTOni
5 KhoNka HbTbopeHH/nay3a)
YkpaIHcbka
6 KhoNka STANDBY (BMK./TOTOBHicb do pOboTIN)
7 KhoNka FUNCTION (Bn6ip dzpepa)
8 KhoNka ALARM SET (aac 6yDnIbHnKa)
9Пдстаьka
10 Ekpan
11 Khonkn VOL+NOL-(rhyHicTb)
12 KhoIkn M+/M- (10 kOMNo3nui ynepe, qH naHaad/nonepeHHe HanaTuBaHHcTaHii)
13 Khonka PROG/TIME SET (nam'rtb/aca)
14 Khonka (nonepednKOMno3u)
15 Po3'EM dIa HabyIiHKiB
16 PO3'EM AUX
3a#h#i 6ik
IynoIbHa aHTeHa
Bjdiinok dian6bataeioK (pe3epBHe XINBENH)
OTbip nI KpInnHn DO CTiH
BctaHOBHeHH Ha nIDCTaBky
KIO Bn He XOHeTe KpInTu npNlaD O CTIN, BCTaHOBITb IHO HnIcTaBky, kA DoJaCTbCRA.
HactiHHM MOHTaK (MaTepiAIN DnA KpInIeHHN He dOdaIOTBcR)
ПистрийТаож мохна BCtaHOBJIIOВаMu Na CTiHy.
YBAGA:
PonepeHbno nepeKoHaTeca, uoB CTiHi Hema Ka6eJIIB, Aki MoKyTB 6yTN N0uKOJKeHI!
PIMITKA: nepeBipTe Meksi DocxKhocti Ka6eJa!
Nepu HIX BCTAHOBIOBAtn npicTpi, nepeKoHaTeCnBa HAABHOCTI JERKO IOCTyHoi po3eKn B Mekax DoCAxHOCTi Ka6eJXAIBNeHHA.
BiDCTaHbMIXKOTBOPAMNДIHACTIHHO MOHTAXY CTAHOBTb 120 MM.
1.Посвердить ДВа Гориэтабнх OTБОп Ha 3a3HaeHiBjCTaHI.
2. BCTABTe JIO6eJI Ta TBInTHB OTBOpN.
3. NobicbTe npnlaHa rBnHTn. IpebeipTe HaHnHictb KpinnHeHHa.
KMBJIeHHA
YneBHITcra, 10 Hanpyra Mepexi BiINOBiJae 3HaehHHa Ha TabnHJI 3TexHiHMn DaHIMN.
ПлдкючьбLOKЖИВLEHЯДОpo3ETKNI3axuueHIM KOHTaKToM,RKA BCTAHOBNeHaHJIeKHMMYHOM.
ПлкючьпрладдблoksжнвенгьставTeшКерблoksжнвенгьуpos'mE"DC6V-(.F.ГИЗДО NOCTIHorO CTpyMуpo3aUOBaHO npRdI3KPIIIHENHAMДЯ MOHTaxy CTiKNI(INB.pnC.2Ha cTopHJ3).
YBAGA:
- PpuaI cnIi BnKOpNCTOByBaTn pa3om i3 6IOkOM KINBneHnB biMepexKi (Dpaetbca). He 3actocobyTe Ioro do IHux npuaiaB.
BukopncToByte Tlkb6 B 6Iok XnBHeHHa ().C- BukopncTaHHnIHoro 6Ioka XnBHeHHa MoKe noKoDITn npnla.
PIMMITKA:
Bid'EnHyTe pncTpii Bi MepeXxJHbHeHHaKUo He KOpNCTyETeCA HMM DOBnI IpOMIXOK Yacy.
KuH He BCTaBnT 6atapeuk nIpe3epBHOrO JINBENHH, dani hcy Ta paioctAHui 6ydyTb BtpaHei y pa3i BiKJIOUeHH HBI Mepeksi XNBHeHH.
BctaHOBHeHb6aTapeHOK
(6aTapeiKHe IdoiaoTbca)
Ypasi npinHHeHHn odaChi eekTpoeHeprii a6o BiKIOueHHBID MepeXi KINBHeHH HalaaTyBaHH 6ydyb36epexHi,AKUO BCTaBHeHi 6atapeKn pe3epBHOrO XNBHeHH.
-
Bɪkpnɪte Bɪdɪjʊk Ṭŋ 6aTapeɪək 33aʌh pɪnʌaɪ.
-
BCTaBTe 2 6TaapeKn Tnny AAA/R03 1,5 B y BiDjInok. DTpMMyTecn npabNlBHOI nOlaRHoCTi (INB. MaJ. y BiDjNKy).
-
3akpiIte BIDINOK dJa 6aTaepeIK.
YBAGA:
3a6bopohaeTbcn iDabatn 6aTaepKIN BVCOKIM TempepaTypam abo npramm COHARHM Ipomehr. 3a6bopohaeTbcn Kndatn 6aTaepKIN B OROhb. Ichye He6e3nekaBn6yxy!
- BaTapeKn MoKyTb npOtikaTn, BHaCNIIDOK YOrO 3 HIX BHTiKaTIme eIeKtPolIT. AkIo KOpNCTyBaHnI npIC TpoE m npINHHaETbCa Ha TpINBaanI NepIOd, BmMaIte 6BaTapeKky.
- BaTapeiKn, He npu3HaueH i Dna 3apAdkn, 3apAdkaTn He MoXkHa.
3apJdxKaTn akymyIaTopu MoXHa TiIbKn IiHarJIaDM dopocnix.
Akymnyatopn nepe3apkoC1D BnMaTn 3 irpauKN.
He BNKOpNCtOByIte BOJHOuac 6aTaapeKn pi3HIX TUNIB aO CTapi 6aTaapeKn pa3OM i3 HOBIMN.
BctabnTbatapeKc cnid i3 doTPMaHHaHaneXhoi nonpHoCTi.
BukopncTaHbatapeiKn cnD BnMaTN 3 irpaKn.
YBARA:
- BaTapeKn HE MOXHa BKNUdAtn B 3BmuaHne DOMaUHe CMTT. IPOcIMNO NOBepHyTN BaTapeKy B Mara3IN, De Bn II npu6aJIn, a6o BiDAtn Ha cneuaJIbHi NpHKT 3bOpY.
Kopotke 3aMnKaHHa KOHTaKTIB He DOnyckaTebca.
HanaWtYBaHHa cacy
- IpepeBeiItb npuIaIy peXIM OchkyBaHHra 3a DOnOMoHO KhoNkN STANDBY.
- YtpmyTe HaTnchyToIO KhoNky PROG/TIME SET (13) npoTROM 2 cekyHd. Ha dncJIeI noHHe 6ImMaTn noka3-HNK yacy.
3.BctaHOBtB 3HaehHHrOIMH 3aDOnOMOrIO KhoNk (14), a 3HaehHHxBUNIH - 3a DOnOMOrIO KhoNk(3). - Hatncitb KhoNky PROG/TIME SET ue pa3, 06 3epeTn 3HaHeHHaCv.
NPMIMITKA:
Ku npotrom 4 ckyH He HATNCKaTN XOJH KONKN, Bci HanaTByaHH6yde 36pexeHO ABOMaTHUHO.
3araJIbHa iHΦopMaζιρo po 06Oу npIcTpoI
YBIMKHEHHBIMKHEHHH npuctpo
3a donomoroi KhoiKSTANDBY (6) moxha nepemikatmix peximom oikyBaHHi pobou mpeximom.
PIMITKA: Y pexmMax BiTbopeHHa KOMnakT-Dncky
PpIaIabTOMaTHNOpeeIbeBpeKIMOcIKyBaHHNicIa BIDcyTHoCTiCnHaNyaboYpa3iDykeCna6KOroCnHaNy npOTAROM10XbINIH.
IyHicTb
Iotpi6Hy rhyHicTb MOxHa HanaUyBaTN 3a DOnOMorIO KhoNOKVOL+/VOL-(11).
FUNCTION (7)
HaTnckaTe KhoNkY FUNCTION nokn ha dinCnnei He 3'ABtbcra Notpi6hmi peKm pObToN.
Pekimpaio
1.Повсichtуpo3kpyritnbnpoJd anTeHHI
2. Nouypkapioctanui:
KopoTko HATnCHITb KHOHcy /B/1),doNOKHe 6yde 3HaJIDHO NOPTi6HOI cTAHJI. JkUO yTPmYBaTHaTnCHyTOIOHNY3LHXKHOK, npuaad 6yde WyKaTu NonepeDHO aBO HAcTyHpyaioCTaHJIO BiNObiHO.
3aamrTOBByBaHHcTaHui:
-
Bn6epiB nOtpi6Hy paiaoctaHui 3a donomorok KhoNOK/1(11).
-
Lio6 36epeTn dahi paiaocTaHui, HataiChItb KhoIky PROG/TIME SET (13). Ha ekpaHI bye MuroTiHa-nuc "P01".
- Bn6epitb notpi6Hy komipky nam'raTi 3a donomoroio KhoNOK M+/M-(12).
-
Hatncitb KhoNky PROG/TIME SET 36epertn daHi paioctanii.
-
阿卡图纳尼加托斯拉夫,iYyOteBcU Wymu,Cnpo6yTe NOKpaunTIN pinnMaHHa CnHany, 3MHNbUN NOJXeHHa a60 3MOTabWUn YN po3MOTabWUn aHTeHy.Пд.Yac npinMaHHa CTepeo CnHany HaДncJIeI BiDoppaKaetbCR NOBIOMLeHHa "ST.
Bn6ip BcTaHOBJeHOi paioctaHui
BctaHOBJIehi padioCTaHJI MOXHa Bn6paTn HaTNCHeHHAM KhoNkM+/M-(12).
My3nHa iHcyTpIe He MaE eHHNX CTaHdaptTb (3axNCT BiKONIOBAHH).
3Lnx nictab BOKpemix BUNaikax MOkytb BNHKHTn npo6IeMn 3 nporpaBaHHm KOMnKT DnckIB CDs i MP3. Lc He e Heonlikom npnaIady.
Po3'em AUX
IINIKIOHHe H aHaIOROBx 3ByKOiITBOPIOBaIbHIN npI IaIIB. Ypee3 ue rH3IO Bu MoKTe CnYxATN Upee3 dInHAMIKI 3Byk iHUNX 3ByKOiITBOPIOBaIbHIN npIIaIIB TINY npOrpaBAHIB MP3, nporpabaHIB KOMNAKT DnCKIB CD Ta iHUNX.
1.Плкючь 3ыкововприлд за домоггюстебониногшт ekра35mmdo rhizdaAUX.
2. HatckaTe KhONky FUNCTION (7), donokn Ha dinnei He 3'BBNTbca iHdkuaia "AUX".
3. 3Byk i3 3OBHlUHbO rnpCTPO BIDTBOPBOBATMmETbC Hpe3 rYHOMOBuI. rYHicb MoXHa HanaU TyBaTn 3a DONOMORIO KHONK VOL+VOL- (11). KhONKn Ha nporpaBahi KOMNAKTINCKIB He pauIOKtB.
4. Nopalbui iHctpykui Bn mokeTe oTmuMaTu 3 iHctpykuoi6cyroBvBaHHaI npnaia, kai Bu nkiKIOaTe.
PIMMITKA:
IocTabe peryIaTOp ryHooCTi nikJIOueHOro npuaNy HapibHeB, Ioo e pniemHMm DnA cyxhaHH.
Функцябудньнka
HaJauTuBaHHaCy 6yDnIbHnka
- IpebeDITb npnla y pexkIM OchkyBaHHa 3a DOnOMoTOKHOHKN STANDBY.
- Bn6epitb 3a DonomoroH KhONK ALARM SET (8) cac 6vunlBuHa, AKn CnB BCTAHOBTu
1xHaTNCyBaHHa=HaDcNJIeI NOHc6bIMaTH3Ha-OK"AKTNByETbcnepue HanaHTyBaHHaCcy 6vMnhHnKa,JeKMOXHaBCTAHOBNTU.
2xHaTNCyBaHHa=HaDcNJIIOHHe6nMaTu3Ha-OK"AKTNByETbCpYreHanaHTyBaHHaCy 6vIMNbHnKa,JaE MoXHa BCTaHOBtU.
3xHaTNCyBaHHa=HaDnCJIeIi 3acBITbCA 3HaHKn Ta" .AKTNByHTbCa ObUBA HaAutaYBaHHa HAcV6vNlBHKa. RkMOXHA BCTAHOBNTn NOePROBO
4xHaTNCyBaHHa3HnKaTa"SHHKHYb. HanaHTyBaHHaacy6vNtBnKAdeAKTMBVOTcb
- HataHcHtB KHONky ALARM SET i TpmaIte ii np6n3HO 2 cekvHnHa dnCnnie noyHe bIMMaTHn poka3Hk Yacv
4.BctaHOBtB3aueHHraDmH3aDOnOMrOIO KhoNk(14)a3aueHHXbunH-3aDOnOMrOIOKhoNk - 3a donomoro khoonkFN uON (7) Bn6epiB pexm 3BykoBO rHany 6yDnIbHnka: paio (FM), CD n 3BIOHK
- Hatncitb KhoNky ALARM SET ue pa3, 0o6 36epeTn yac bVdHbHaKa.
KoHn HactaHe BCTaHOBHeHn Yac 6yDnIbHnKa, npHaJyBMKHeTcra Ta Noaactb Bn6paHn CnHnBnBnHnKa.
NPMIMITKA:
Aku He BCTabHeo CD, pncptiHaTOMictb yBIMKHe 3BIOK.
BumkaHnCunHany 6yDnIbHnKa
LIOB BIMKHyTN CINHAN 6yDnIbHNka DO HAcTyNHO DHAHTCHITb KHONKY STANDBY (6).
TIPMIMTKA:
DyHKcij6dynHbHnKa aBTOMaTHHO BmKHeTbcr npu6n3-HO uepe3 60 xBnIH.
DeaktnBauiyHKu6yHnBnka
HaTnckaTe KhoNky ALARM SET (8), nOKn 3 nncnne He 3HnKHyTb 3HaQKn "Ta"
OuHHe iTexHcHyOBaHH
YBAGA:
He 3aHpyIOIte npICTpI y BDOy.
- Ppeed OunueHHAM npnaLy BnTARHITb BNky 3 pOeTKN eNEKTOUHOI MepeXi.
Пламн ha nobepxhi npunaMy moKHa BndaJIInI 3nerka BOJORIO TKaHHIO,6e3doATKOBIM MIOHIX 3acO6IB
YcyHeHH HeCnPaBHOcTei
XNBJIeHHRA.8BT(MaKcIMyM)Pe3epBHe XNBJIeHHRA BID 6aTapeiok:2x1,5B,AAA,R03
Pao:
ДларанчсгТ FM 87,5~108 Mц
Bara HETTO: npn6J.0,99K
BnokXMBneHH
CnoxnbHn noTyXhOCTi: II Bxid: 100-240B3miHHoro cTpyM,50/60Iu Buxid: 6B noctiHoro cTpyM,1A
52 YkpaIHcbka
IpaBoHaTexHiH3MiHN Ta 3MiHN y dN3aHi 36epiraetbCn npoDBK npoecy po3pO6Kn npOdykTy.
Ley npiaad 6yilo nepebipeho 3riHNO Bcix BiNIOBHNx, AKTy- aIbHnx DnpeKTINB CE, Hapniklaad 1oO eJeKTPomarHITHO cyMICHOCTa Hn3bKOBOJTHOI DnpeKTINB,Ta 36yDObaHO 3 a HOBITIM NIOLOXEHNRm TexHIKs 6e3neKn.
PykoBoDCTBO no 3KcnIyatau
Cnacn6o 3a Bb6op HaJero npOyKta. Haeemc, OH Bam noHpabITcR.
Ipeed Hauanom 3Kcnnyataunn npnbopa BHmMaTeNbH npouHTaTe npnaaraemyIO uHCTpykUIO NO 3Kcnnyataunn COxpaHNTe ee B HadeXHom MecTe, BMeCTe C rapaHTnHBIM TaHOOM, KACCOBbIM YekOM N, NO BO3MOXHOCTN, KAPTOH HOKOPO6KO C yNAKOBOHHbIM MaTePnaJOM. EcIn daete KOmyu6oNoNoJIb3OBAbCra PnpOpOM, Oba3aTeNbHO daTBe BpNDaHy DaHHyIO UHCTpykUIO NO 3Kcnnyataunn.
HCTpykUno TExnke 6e3OnaCHOCTu
BHIMAHNE!

3aIpeaaeTcNcIOb3ObaTbTeTAMMnaIiE 3-x let.MenKne DetanIMoYrOTBaJNTbca, INMOXHO pOrIOTnTb.
-ДлгуctpaheHnpyckaBo3rOpaHnIyIyapA3JIeKTPuYeCKM TOKOM HeNoDBePraIte YcTPOUCTBO B03DeIcTBIOdoXJNIBlaRn.He npIMeHnTe yCtpoIcTBOB6IINBODII(HaIPmEep,BBaHHO KOMHaTe,6acceHMeKpOMnoDbAlne).
He npmeHnTe yctpoNCTBO B 3KCTpeMaJIbHO rOpaHIX, XoIOhBIX, 3aIbIeHHbIX INJ BLaXHbIX MecTAX.
-Пользугпесь пибором только устным образим И по Наразени.
-Пибор не педаназдуня КOMМерчЕСКОГ ИСПОЛБ3OBAHЯ.
- Y6eNTecb, YTO KaBEn NITaHnHE NepeRHyT, He NO-BpeXdEN HIN He KOHTaKtNpyET C UCTOHnKaMn TEIJa.
- Y6eIITecb,HTO Ka6eJIb NITAHNAHAdEHXNPODKJIOUeH.
BIOK NCTOCHNKA NITAHNA INEHA3HaueH IINCNOb30BaHnTOJbKO B CYHXN NOMEueHHx.
He npikacaiTecb BnaXhblm pykam K 6noky nCTOHNka nHTAHNI NNI KaBeIO.
I OdkHouaTe 6nOK nCTOHHa NITAHN TOJbKO K npabInbHO YcTaHOBHeHHo HAcTeHHo 3NeKtpuecko po3eTKe. Y6eINTEcb, YTO HOMHnBbHOe HapRjXeHne COBnadaet C hApRjXeHMe HAcTeHHo po3eTKu. TaXke npOBepbTe, YTO BixOHDOn TK, HApRjXeHne I NOJIpHOCTb 6nOKa NCTOHHa NITAHN COOTBeTCTBye T INΦOpMaUN Ha OdkHIOUaEMOM K Hemy YCTPOICTBE.
- Pnp yctahOBke 6atapeek co6IIOdaIte nOJIaPnOCTb.
He donyckaite nepekpbTne BEHTINLAIOHHbIX OTBepCTNI yCTPOCTBA.
He nepekpbiaTe BeHTUNLAIOHbIe OTBepCTN NOCTOPOHNIMnpeMeTaMn,HaNPImep Ra3eToiCKaTepTbIO,
He npcykaTe BO3eINCTBna HA ycTpoCTBO npoiNTO INIpaCbIJIeMOBBobl,HE CTaBBTe HA ycTpoCTBO COCybl C BOIOHapnpMep Ba3bl.
VCTOCHNIOTKpBITOROOrH,HAPIMepropAueCbeHn HeDOLJHKbI pacnoJaTaTcRaHaYCTPOINCTBE.
He OTKpbBaIte Kopnyc yctpOcnCTBa. HenpaBnHbI peMOHT MOKeT npVBecTn K cepBe3HOJ ONaCHOCTn NOlb3OBaTeJIIO. PnIOBpeKdEHHN yCTpOcTBA NIN erO shHypa 3NEkTpONITAHN (B YacTHOCn) npeKpaTIe NCNOlb3OBaHne yCTpOcTBA N IpeJaTe erO dIra peMOHTa KBaIINFUPOBaHOMy CNEuaAInCTy. PeryIaRPho npoBepaTE Ha NOBpeKdEHHN UHyp 3NEkTpONITAHN.
- Ecnn yctpoCTBO He npIMeHReTcA JInTeJIbHoe BpeMa, n3BNEKNTe 6IOK NCTOCHNk AITAHN I3 HAcTeHHoI 3NEKTPuYeCKoP03ETKn WnINn N3BNEKNTe 6aTaapeKn.
JaHHbIe CIMBOJIbI MOrYT 6bITb YKa3aHbI Ha yCTpOINCTBa JnA O603HaHeHnCNeDyUcEro:
CIMBOL MOHIN INPeynpexJaET NOIb30BaTeJIa 6 ONaCHOM BlicOKOM HapRaxeHHBHyTPN KOpNyCa.

CIMBOL BOCKINUaTeNbHOrO 3HaKa OTMeueAET BaxHbIe INCTpyKcIM NIM 3aMeHaHnO TExHnYeCKOM O6CJyKuBaHm B pyKOBOcTBax n3 KOMIIKeTA NOCTABK.

YCTpoIcTBa,OTMeueHHbIe DaHHbIM CmMBOJOM,pabotAOtC"la3epomKJIacca1"ДЯ CHTbIBAHINnDICKOB CD.BCTpoEHhB3aunHbI nepeKJIIOUATEIb npedOTBpaauet npi OTKpbTmNOTCEKaCDJeICTBHeHaNoIb3oBaTeJIOnACHORO LA3epHOIyua,KOTOpbI HEBINIM YeIOBueeCKIMrJa3OM.
HnBHe npEdoxpaHnteHbHe BbIKIOuateHn HEnb36IkoPObaT bNIN3MeHATb;B pOTUBHom Cnyae CyUecTByET ONaCHOCTb BO3dEChTBnJa3epHOrO Lyua.

BHHMaHHe: npOdyKT nMeet Ia3ep Klacca 1.
Ettnnna HxkdaioumeecB npncmOTpe
- IV3 coo6paXeHn 6e0NaChOCTn dIaIeTe HcOctaBnIte IexaTb yNakOBky (IIaCTNKOBbie MeUKN, KapTOH, NeHONlact n T.D.) 6e3 npICMOTpa.
BHIMAHHE:
He no3B0JnTe deTAM nIpaTb c nOJIIN3TNIEHOBOI nJIeHKO. OnachocTb ydyuBa!
3TOT npi6op He npedha3auehen IINI NOJIb3OBAHnI INaM (BKNIOUyA DeTe) C OPAHmEHHbIMN fN3NUeCKMN, CEHCOPHBIMN NIN YMCCTBEHHbIMN CNOOC6HOCTAMN INI INI LAMN, He IMeHOUIMM ONIta NIN HEO6XoIMMbIX 3HAHNI. NCKIOUChHeNE COCTABJAO TcUYAN, KOrDa OHN HAXODTcN IOI pncmOTpom IINu, OTBETCTBEHHORO 3a INx 6e3ONaCHOCTb, INI KOrJa OT 3TORO IINu NOJYHeHbI YKa3AHNIO NO IINJb3OBAHnIO npi6OpOM.
Heo6xoJIMO pncmAtpmbTa 3aTebMn, yTo6b y6eDHTbcraTOM, yTO OHN He nIpaOT c np6opom.
54 Pycckn
O63op detalei npnbopa
1 RaHOK dIa OTkpBITnOTceKa CD
2 JIOTOK KOMNAKT-DNCKA
3 KhoPiKa (CneDyUOuaa KOMnO3uN)
4 Khonka (ocTaHOBka)
5 Khonka II (Bocnpoun3BeJeHne / nay3a)
6 Khonka STANDBY (BKN./ROTOBHOCTb K paOte)
7 KhoNka FUNCTION (Bb6op nCTOuHnka)
8 KhoIka ALARM SET (BpemcunHaj6yDnblNk)
9 POnctabka
10 Dusrnnei
11 KhoKuVOL+/VOL-(rpoMkoCTb)
12 KhoNKn M+/M- (npokpytka 10 My3bikajhBix KOMnO3nIu Bnepe,IIN Ha3aI/HaxoKdHne npedBapntelHo HAcTpoEHHO CTAHU)
13 KhoNka PROG/TIME SET (namrtb/BpeMa)
14 Khonka (npebdyuaa komno3nna)
15Pa3bEmIaHayuHnKOB
16 Pa3bem Bxoda AUX
3aHnHa naHeIb
DByxNIOJIoCHa aHTeHHa
OTeCkIy6bTaapeeK (pe3epBHOe nITaHne)
YUkoDINI NOBEEUBAHNA HA CTEHY
YcTaHOBka pe3epBbIx 6aTapeek
(6aTapeKnB KOMPJIeKT He BXOJrT)
PnOTKIIOUeHIM 3NEKTpOINTaHn IIN PnI HeoXoIMOCtN BbIepHyTB WHPu IN3 PO3ETKN, TOrJa HAcTPOIK N6yDyT CoXpaHATbCRA 3a CHT pe3epBHOrO nITaHn 6aTaapeek.
- OtkpoIte OTCek dIa 6aTaapeek.
- BCTaBbTe 2 6aTapeiKn Tnna AAA/R03 1,5 B B OTCek. IpoBepBe npabNtBHOCTb NOIAPHOCTn (CMOTpNTe OTCek 6aTaapeek).
- Choba 3aKpOte OTCek dIaTapeeK.
BHIMAHHE:
He noDBeprAte 6aTapeKn BO3JeCTBnIO BbICOKnx TempeaTp nI npAmbix COHneHbIX Lyuei. HkOrJa He 6pocaiTe 6aTapeKn B OROh. Onachocb B3pbBa!
- IV3 6aTapeek MoKet BbITEKaTb KcNcIToA. EcIn yCtpoICTBO He NcIOJIb3yETCa DnITeJIbHoe BpEMr, BbITaCKINBaIte 6aTapeiKn.
BHIMAHHE:
-ПосълбьебатугнHeJIb3aЗрkaTb.
- AkkyyIaTOpb MoKHO 3apKaITb ToJIbKO IIOI IIpHCMOTPOM CTAPUIX.
AkkmyJITropbI Heo6xOIMBOBtACKBaTbHnpyuHKn, npexJeYcTaHaBaNBaTbNXHa3apRky.
3anpeaertcHcnoJIb3ObaTb OHOBpeMeHHo 6aTaapeiKN pa3JNUHOrO Tnla, a TaKKe HOBbie N I NCNoJIb3OBAHNbIe 6aTaapeKn.
BaTapeKHeo6xOdmo yTaHaBnBaTb,coHdoaI NOJAPHOCTb.
NIOJb3OBAHHBe 6aIapeHKn HEO6XoIMMo BbITACKnBaTb N3 IpyuKn.
BatapeKHe CJeDyET BbIbpaCbIaTb BMeCTe CpyMN 6blTOBbIMN OTXoJaMn.CdaBaHTe NCIOJIb3OBAHHbIE6atapeKINBCOOTBeTCTBYIOUne PnykTbI pInema ININCCBOEMY npOdaBly.
He npynckaTe 3ambkaHnKJIeMM.
YcTaHOBKa BpeMeHH
- BkIIOHTe yCTpoIcTBO B pexIM OXnIaHnC nOMOJIbIO KHOII STANDBY.
2.YeepKbAitr KHOIIky PROG/TIME SET (13) B TeueHne 2ceHyN.HaIcnPlee HauHET MIRAtbBpemr. - KhoNkoI (14) HacTpoIte HaCbl, a KhoNkoI (3) MHyTbl.
4.Ди coхpaHeHn BpemeHn CHOBa HaxMITE KHOIky PROG/TIME SET.
ПРIMEЧАнг:
Ecn KHOKN He HaxmMaiOTc 4 ckyHbI, BCE npaMeTpbl NaCTPOKNI 6ydyT COxpaHeBb ABTOMATUeCKN.
06üne npabnla 3kcnnyatau
BkIIOueHHe/BbIKIOueHHe yctpoictBa
KhoNka STANDBY (6) nepekIyuaet yctpoIcTBo MeJy XdyUIM npaOuM pexNMOM.
PIMMEYAHNR: BpeKmMax CD (komnakT-dnck)
PnO TcYCTBm CnHnA Hn CnHkOM CnAbom CnHaJe TeueHHe 10 MmHT yCtpoiCTBO aBtOMaTneCKn nepeJTe B pexIM OxNdaHnR.
YpOBeHb rPOMKoCTn
Haxatne KhoNOK VOL+VOL-(11) no3BOJReT yCTaHOBnTB Hyxhbl yPoBeHb rPOMKoCTn.
FUNCTION (7)
HaximMaTe KhoNky FUNCTION do oTo6paKeHnHa dncnnlee HxHoro pexIMpa6oTbI.
Pekim padnOpneMnHa
1.Полноctью pa3BepHITe npOBoHDHyO aHTeHHY.
Ecn yepkmbaht KhoNky hkaToI, np6bOp hauHET noNCK NO 3aNNcM. (3ByK 6yDet OTKnIOueH.)
KhONKaHcNoJb3yETcTak:
OndhokpatoHoe Haxatne = CHOba 3anyckaet c hauaTekyuIyIO 3nncb.
Двоиhoeнжкати =перхднэздкпрдьушeyn 3aПСИ.
Haxatne Tpr pa3a = BocnpoN3BeJeHne npdeBdyucei 3aIncn nT.D. Ecnj Xe KHOJka ydepXkBaetcna Haxato, pni6op HauHaET nonck no 3aIncam. (3Byk 6ydt otKloueh.)
(4)
Bocnpon3BedeHnne octaHaBnBaETCA.
PROG/TIME SET (13)
BoBpemaBOCpON3BeDHeH3ByKOBbIX KOMT-DICKOB:
OdHOKpaTHoe HaKaTne = HnpepbIBHO BOCpON3BOJNTcTekya 3aIncb. Ha nCJIpee noBNTcPipeDynpexJeHne
Двовhoeнжатne = HepepbBHO BOCPON3BOJNTCBeCbDcKCD.HaDCNJIeepoRBITcnpdynpexKdEHNIE"ALL".
HaXMMTe Tpu pata Ha nCnIe neAHTc npEynpeK- DeHHe "RAND".Bce KOMnO3nUIM 6yDyT BOCnpOIN3BOIDITbcra BxaOTNCHOM npAJaKe.
HaxmTe yeTbipe pa3a = BCE cyHKUIN OTMeHnOTc.Bo3-OBHOBnRETCOObiHuHbIpeKIMBOCpON3BeDeHnR.
Bo BpemB OBCPON3BeDHeNMy3bIKN B fOpMaTe MP3:
OdHOKpaTHoe HaxaTne = HenpepbIBHO BOCpON3BOIDTCRA Tekyua 3anncb. Ha nncnnee noBNTc npdeynpejxdeHne
Дьоиhoeнхатne =Быбранняпanka He nppepbIBHO NOBTOPЯETcra (Ha nCnnee noka3aHo FOLDER).
Haxatne Tpu p3a = BCE Ha3BaHnMy3bIKn Hnpe- pbIBHO NOBTOPAOTc. Ha DnCJIee NOBHTc npdynpexKeHne
ALL
Haxmte yeIpe paa = Ha dinCnlee noBvTc npedynpexk
JeHHe "RAND".Bce KOMIO3N UyDyT BOCnpon3BOJNTbCR B XaOTNUHOMnopAKe.
Haxmte nTb pa3
= BCE cyHKuIN OTKIOUeHbI. BocnpoN3BeDeneHne npOJOnJaETcH HOpMaJIbHO.
M+/M- (12)
Bo BpemBocnpoun3BeDeneMy3bIKnHaKmTeOHy n3 KhoNOK nepexoHa Ha 10 kOMNo3uBpeEiHnHa3ad (ecnHa HcTOHnke XpaHeHn HaxoNTc8 BoJe e 10 kOMno3u).
BpeXnme BOCPON3BeEHHaPdIOIINIPOKJIIOHEnHKNpeDbapntelbHO HAcTpoEHHOpaIOCTaHUN.
PporpammpoBaHHoe BocnpOn3BeJeHne
Moxho nporpammpoBaTb HIO6yHxHyIO nOcneIOBaTeIb-HOCTb 3aNcEi.
- HaxmTe KJIabnUy (4).
- HaxmTe KJIaBnUy PROG/TIME SET (13). "P01" (MecTo dIa coxpaHnI) n yBeDomJIeHne „PROGRAM" no- BbATcRa Ha ekpAe. IcnoJb3yIte KhoNkII 1/14) dIra BbIbopa HuyKHOI 3aIncI, 3aTEM CHOBA HaxmTe KHOIky PROG/TIME SET. Ha IincJIee N3MeHITcMaCTo B NaMHTnHa P02.
- BbIbepTe cIeIyIouIy 3aIncb KlaBnIe HHOBA HaxMITE KlaBnIpy PROG/TIME SET. NOBTOPIte 3Ty npOeIpy DO BbIbOpA BCex Heo6xOIMbIX 3aIncceI.
- HaxMMTe KJIaBnIy HaHcHETc BocpOn3BeJeHne. JonoJHrTeIbHo Ha IInCnIee NoBHTc CoO6JeHne "PROGRAM".
YcTpoIcTBO OCTaHaBnBaETcABOTMaTHUeCKN NOCE BOCpOn3BeDEHn BCEx 3aPpOrpaMMnPoBaHHbIX 3aRJIOBKBOB.
IpeynpexKeHne PROGRAM OTKnOHTcR, n 3aPpOrpaMMnPoBaHHaNOJIeOBATeHbHOCTb 6yET yJaHeHa N3 pAMrTn.
YdaJIeHne nporpaMMnpOBaHn
HaxMMTe KhoNkY. 3aIporpamMnpoBaHHa NocJeDObaTeNbHOCTb 6yET ydaJIeHa n3 naMTN.
Bocnpo3BeHne My3bIKN B φopMaTe MP3
JaHHoe yCTPOIcTBO o6eCNHBAET BOCPON3BeHeHMe My3bKnBΦopMaTe MP3.YCTPOIcTBo TaKKe NOIepKNaBcT BceCTaHdapThIbe TINbl DnCKOB CD:CD,CD-RW,CD-R.
JaHHbI npH6Op MOxET BOCnPOIN3BOOInT bNCKn MP3 CD.
D0 200 3aINCeM OMyT 6bITb CxAtbl N COXpaHEhbl Ha TaKnx
DnCKax CD.YCTPOINCTBO ABTOMaTHueCKn ONpeJeINT MP3
CD (Ha DnCnIeE 6yTeT BBBeDEHO 6Bee UcNo 3aINCe I
DnCKOB MP3).O BOCnPOIN3BeDEHN OdHOrO n3 3TINx DnCKOB
CD cm.B pa3DeJe "BOcnpON3BeDEHeNe IMCKOB CD/MP3".
3aHcMoKHO pporpammmpoBaTb, kak paccMOrTeHO B rIabe "PporpammmpoBaHne BOCnpoINBedeHnA."
PoxaJynta yuTte:
CyueCTByOT HeckoBko pa3HbIX MeToOB 3aIncn CxKaTn, a TaKke OTInHn B KaYeCTBe O6bHbIX DnCKOB CD n DnCKOB CD, 3aIncaHHbIX CaMOCTOReJIbHO.
Bonee toro, My3bikalbHaH INDyCTPnH He npndepKNaBaetc eINhbx cTaNapTOB (3aunTa OT KOnnpobAHna).
No 3TtM npuHnAM B KpaIHe peKnx CnyaRb BO3MOXhBi np6LemblpnpBOCpOIN3BeDEnm DnCKOB CD mP3 CD.
3To He ABJIETcH npn3HaKOM HnnpaBnIbHOJ pa6OtBJ yCTpoCTBa.
THe3doAUX
Ihe3do npEHa3NaHeO IaI NOkJIouHeHn IpyrNx aydmo yctpoCTB.Ype3 HrO MoXHO BocPOn3BOuNTb 3ByK Ype3 rpoMkoROBOpTeHn OT dpYrNx nCToHnKOB, TaKnx KaK MP3- nleepb, CD-nleepb nT. d.
- PIOKJIIOHTe BHeUHHe yCTpoIcTBO, IMEIOUe pa3bEM 3,5 MM, Ypeezr He3do AUX.
- HaximMaTe MHorokpaTHo KhoNky FUNCTION (7) noka Ha DnCnJIee He NoRbITcR CmB0J "AUX"
- Byet cIbIuHO BOCpON3BeJeHHe 3ByKa OT BHeUHero yCTpoIcTBaYepe3 DnHAMKn.MoXHo peYIpOBAtbyPOBHe IpOMKOCTn C NOMOUsBOVOL+VOL- (11).KhONKn CD He DeIeCTBYOT.
- OctaIbHyIO INHΦOpMaIIO CM. B INHCTpyKUHX NO pa6Ote C BHEUHMN UCTOHNKAMN.
TIPVIMEYAHNA:
OtperyIpyTe rpOMKocTb BHeUHero nCTOHnka do KOMΦOPTHOro ypOBH.
Функлma 6удильнka
Hactpoika BpeMeHi 6yduNbHuKa
- IpeeknOHTe ycTpoIcTBO B peKIM OxNJaHr C nOMO- hIO KhoIKN STANDBY.
2.ИспolyзутЕ кноку ALARM SET (8)ДЯ Bыбopa Врemeи 6удьнда Кцью Habtroй:
OHHOKpaTHoe HaxkTne=Ha DCnnee HaHcET MURaTb CmBOJ "".AKnBpUyETcR BpEmr NepBOrO 6yDnJIb-HNkaI eRO MOXHO HAcTPOITb.
- IBOHHe HaKaTne=Ha DCNJIe HaHHT MMRaTB CMMBOJ .AKTNBUPyETcBpEMBTOPOO6yDnIbHNkaI EROMOXHO HACTPONTb.
Haxatne Tpu p3a= 3aropatc cmmboJIb "N"AKTNBnpoBaHb BpemeHa 6oONx 6yDnIbHNKOB INMOXHOIN HACTPOITb OINH 3aDPYIM.
HaxMMteyTbepe paa=cmMBoIb"n"npo- naIyt.BpemeHa6yINbHKnOBDeaKTbNPOBaHbI.
- HaximMaTe KhoNky ALARM SET B TeeyHne 2 cekyHnBpeMa HaHTeMraTb Ha dncnnee.
- NcnoJIb3yIte KhoNkY (14)ДЯ HAcTpOKn YacOB IN KhoNkY B) -ДЯ HAcTpOKn MmHT.
- IcnoIb3yIte KhoIky FUNCTION (7)IaBb6opa paIIO FM, CD uIu 3ymMepa B pexIme npObyKeHna.
6.ДлсoxpaehnBpeMeHbNc6yDnIbHnka ChOBa HaxMITE KhoNKy ALARM SET.
PnHaCTynIeHm paHee yCTaHOJIeHHOro BpeMeH 6yDINb HNka YCTPOICTBO BKIOHaeTc CaKTHBaUeN Bbl6paHHOro peKIMApO6yXKeHn. TpOMKOCt bYBeHInHBAeTc NoCleDoBATEJIbHO.
IPYIMEYAHN:
Ecnn CD He BCTabJIeH, BmecTo Hero yCTpoIcTBO AKTNBnpy-ET 3yMMep.
OTKIOUeHnepeXIMa6yDnblbNka
Длг OTКLOUЕнna CnHana 6уДиьнka Do CneIyIOJIeRo nHaHakmITE KhoNky STANDBY (6).
IPYIMEYAHN:
Функлдуньнka BbIKIOHTbcra aBTOMaTHueCKn ПпМерночepes60MHyT.
OTKIOUeHHe FyHKmpeKmAs6yJnBnKa
IocneIOBaTeJIbHO HaxnMaIte KhoNky ALARM SET (8), noka c dncnien He npOaNyt 3aHKn " "
Ynctka n TexHnueckoe o6cIyKnBaHne
BHIMAHHE:
He norpykaTe yctpOciSTBO B BOy.
- PpeoOnctKo np6opa Bcerda n3BneKaIte BNky 3JekTPoNTaHn.
IIO6bIe OTMeTKN Ha NOBepxHOCTM MOXHO CTepeTb CnErKa BnaJHOH TKAHbIO 6e3 KaKux-JIN6O JIO6aBOK.
DnarHocTnKa
BnOK nCTOuHnKa nTaHnA
Klacc 3aunTbI:
BxqD: AC (nepem. Tok) 100-240 B~ 50/60 T
BbixoD: DC (noct. tok) 6 B, 1 A
CoxpaHEno npaBO Ha TexHMHeCKne IN KOHCTpyKIOHOHBie N3MeHenB pAMkax PpOdoJIkaIOUeICr pa3pa6OToN IpoDyK-Ta.
JaHHoe yCTPOIcTBO COOTBeTCTBYET BcEM TEKUIM INPeKTNiBAM CE, TAKIM KAK 3JIeKTPOMaHHTHAn CoBMecTUMOCtBu HN3KOE HAPRKeHHe; OHO PpON3BeDeHO B COOTBeTCTBmC HOBeHJIMM INpaBUNAM TeXHKn 6e3OnaCHOCTn.
GARANTIEKARTE
warranty card · garantiekaart · carte de garantie · schedadi garanzia · tarjeta de garantia · cartao de garantia · garantikort karta gwarancyjna · zaru.cnI list · kartica jamsta · carte de garantie · fapauuHnHa Kapta · zaruynI list · garancijski list · garanciajegy · rapaHTINHmOpMnyp · fapaHTNnHb TANOH
MC 4464 CD/MP3
24 Monate Garantie gemäß Garantieerklärung - 24 months warranty according to warranty declaration - 24 maanden garantie volgens garantieerklärung - 24 mois de garantie selon la déclaration de garantie - 24 messi di garanzia seconde la dichiarazione di garanzia - 24 meses de garantie de acordo con la déclaration de garantia - 24 meses de garantia, de accordo com a déclaration de garantia - 24 maverdis garanti i herenhold til garantibeteingsene - 24 misiace gwarancji na podstawie oswiadzenia garanczyjego - 24 mesiču podrholáni Žárcze - 24 mjesěcho jamstvo u sklady s Jamstvenom déclaracionj - 24 luni garantie conform déclaratié de garantie - 24 meczua rapamuk B cpoTbTeBnC rapaHNOHHATA dekpAraa - 24-mseschá záruka podla vlaséna Žárbó - 24-mesecna garancija, skladno Žarancjsko Izvao - 24 hónap garancia a garancialfetelekben leirtak szerit - rapamn ha 24 muciji bINOHO 3BAI npa raptan - 24 meczua cormaCHO 3BAIENHBM RAPHTHBMIPRAVJAM - 24 srad
Kaufdatum, Handlerstempel, Unterschied - date of purchase, dealer stamg, signature - aankoogdum, dealertempel, handelsbekring - date d'achat, tampien du concessionaire, signature - data de acquisto, timbre del revindatore, firma - fecha de compra, seile del distributor, firma - data de compra, carismo del distributor, assinatura - kajpuzado, forhanderstimpel, signature - data zakup, piecjez srozawydy, podistip - datum zakupopeni, zadrike prodkote, podistip - datum kupovice, big trognica, potpa - data de achizyce, piampafturaturum, semenituri - Daria na loxemnaya. Nevat na Tlnojpana, datisht - datum nikopka, pradihita - datum nikopka, big trognica, podistip - vasiakir datma, kereskii-bihigjepni: akini - para napirokanne, nevata napirokanne, matri - para napirokanee. Uvnu npnapnai, Tnnprovo - pgiu. qiu. qiu. qiu. qiu. qiu. qiu. qiu. qiu. qiu. qiu. qiu. qiu. qiu. qiu. qiu. qiu. qiu. qiu. qiu. qiu. qiu. qiu. qiu. qiu. qiu. qiu. qiu. qiu. qiu. qiu. qiu. qiu. qiu. qiu

www.etrv.de

- Espanol
- Contenidos
- Język polski
- Spis tresci
- ATENCIón:
- Safety Instructions
- Caution!
- Children and disabled persons
- Overview of the Components
- English
- Back
- First Use of the Device/Introduction
- Mounting the stand
- Wall mounting (Mounting material not included)
- CAUTION:
- NOTE: Check the reach of the cable!
- Power supply
- NOTE:
- Inserting the backup battery
- Setting the time
- General Operation
- Switch device on/off
- NOTE: In CD mode
- Volume
- FUNCTION (7)
- Radio mode
- Preset station:
- Select the preset radio station
- Playing CDs/MP3
- Description of the control buttons
- II (5)
- //(8/14)
- (4)
- PROG/TIME SET (13)
- English
- M+/M-(12)
- Programmed Play
- Deleting the programming
- Playing back Music in MP3 Format
- Please note:
- AUX socket
- Alarm function
- Setting the alarm time
- Switching off the alarm signal
- Deactivating the alarm function
- Cleaning and Maintenance
- Technical Data
- Power supply unit
- Disposal
- Meaning of the "Wheelie Bin" Symbol
- Jezyk polski
- Instrukcja obslugi
- DITI oO6n 3 Oo6JINBIM nTpe6aM
- YBARA!
- Orlae enemehtib ynpablinna
- YkpaIHcbka
- 3a#h#i 6ik
- BctaHOBHeHH Ha nIDCTaBky
- HactiHHM MOHTaK (MaTepiAIN DnA KpInIeHHN He dOdaIOTBcR)
- YBAGA:
- PIMITKA: nepeBipTe Meksi DocxKhocti Ka6eJa!
- KMBJIeHHA
- PIMMITKA:
- BctaHOBHeHb6aTapeHOK
- YBARA:
- HanaWtYBaHHa cacy
- NPMIMITKA:
- 3araJIbHa iHΦopMaζιρo po 06Oу npIcTpoI
- YBIMKHEHHBIMKHEHHH npuctpo
- PIMITKA: Y pexmMax BiTbopeHHa KOMnakT-Dncky
- IyHicTb
- Pekimpaio
- Nouypkapioctanui:
- 3aamrTOBByBaHHcTaHui:
- Bn6ip BcTaHOBJeHOi paioctaHui
- Po3'em AUX
- Функцябудньнka
- HaJauTuBaHHaCy 6yDnIbHnka
- BumkaHnCunHany 6yDnIbHnKa
- TIPMIMTKA:
- DeaktnBauiyHKu6yHnBnka
- OuHHe iTexHcHyOBaHH
- BnokXMBneHH
- YkpaIHcbka
- PykoBoDCTBO no 3KcnIyatau
- HCTpykUno TExnke 6e3OnaCHOCTu
- BHIMAHNE!
- Ettnnna HxkdaioumeecB npncmOTpe
- BHIMAHHE:
- Pycckn
- O63op detalei npnbopa
- 3aHnHa naHeIb
- YcTaHOBka pe3epBbIx 6aTapeek
- YcTaHOBKa BpeMeHH
- ПРIMEЧАнг:
- 06üne npabnla 3kcnnyatau
- BkIIOueHHe/BbIKIOueHHe yctpoictBa
- PIMMEYAHNR: BpeKmMax CD (komnakT-dnck)
- YpOBeHb rPOMKoCTn
- Pekim padnOpneMnHa
- M+/M- (12)
- PporpammpoBaHHoe BocnpOn3BeJeHne
- YdaJIeHne nporpaMMnpOBaHn
- Bocnpo3BeHne My3bIKN B φopMaTe MP3
- PoxaJynta yuTte:
- THe3doAUX
- TIPVIMEYAHNA:
- Функлma 6удильнka
- Hactpoika BpeMeHi 6yduNbHuKa
- IPYIMEYAHN:
- OTKIOUeHnepeXIMa6yDnblbNka
- OTKIOUeHHe FyHKmpeKmAs6yJnBnKa
- Ynctka n TexHnueckoe o6cIyKnBaHne
- DnarHocTnKa
- BnOK nCTOuHnKa nTaHnA
- GARANTIEKARTE
- MC 4464 CD/MP3
Brand : AEG
Model : MC 4464
Category : Hi-fi system