SR 4364 BT - Radio AEG - Free user manual and instructions
Find the device manual for free SR 4364 BT AEG in PDF.
| Product type | Stereo radio with CD/MP3 player, Bluetooth, USB, AUX |
| Brand | AEG |
| Model | SR 4364 BT |
| Mains power supply | 100-240 V~, 50/60 Hz |
| Battery power supply | 8 UM1/R20 batteries (1.5 V) |
| Power consumption | 30 W |
| Net weight | Approx. 3.5 kg |
| Protection class | II |
| Radio frequency range | FM 87.5 – 108.0 MHz |
| Bluetooth version | V3.0 |
| Bluetooth range | Approx. 15 meters |
| Bluetooth protocols | A2DP/AVRCP |
| Playback functions | CD, MP3, USB, Bluetooth, AUX, FM radio |
| Preset equalizer | FLAT, CLASSIC, ROCK, POP, JAZZ, DBBS |
| CD/MP3 playback modes | Repeat, random, intro, programming |
| Display | LCD screen with ID3 metadata |
| Remote control | Yes, with CR2025 battery |
| Headphone jack | Yes, 3.5 mm jack |
| AUX input | Yes, 3.5 mm jack |
| USB port | Yes, for playing MP3 files |
| Antenna | Telescopic antenna |
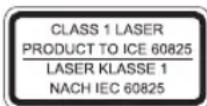
| Laser safety | Class 1 |
| Cleaning | Slightly damp cloth, no additives |
| Repairability | Do not open, repair by professional only |
| Supplied accessories | Power cable, remote control, manual |
Frequently Asked Questions - SR 4364 BT AEG
User questions about SR 4364 BT AEG
0 question about this device. Answer the ones you know or ask your own.
Ask a new question about this device
Download the instructions for your Radio in PDF format for free! Find your manual SR 4364 BT - AEG and take your electronic device back in hand. On this page are published all the documents necessary for the use of your device. SR 4364 BT by AEG.
USER MANUAL SR 4364 BT AEG
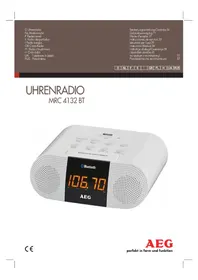
D Stereo Radio Soundbox CD/MP3/BT
NL Stereo Radio Sound box CD/MP3/BT
natural_image
Red and black AEG portable radio with three large speaker reels and a digital clock (no visible text or symbols on device body)CE
AEG
Overview of the Components......Page 3
Instruction Manual......Page 45
Technical Data......Page 51
Disposal Page 51
Język polski
Spis treści
text_image
Technical diagram of a vehicle front panel with numbered components and an internal layout of labeled switches and modules.4 Deutsch
Bedienungsanleitung
Alcance:....aprox. 15 metros
Thank you for choosing our product. We hope you enjoy using the device.
Symbols in these Instructions for Use
Important information for your safety is specially marked. It is essential to comply with these instructions in order to avoid accidents and prevent damage to the machine:

WARNING:
This warns you of dangers to your health and indicates possible injury risks.

CAUTION:
This refers to possible hazards to the machine or other objects.

IOTE:
This highlights tips and information.
General Safety Instructions
Read the operating instructions carefully before putting the appliance into operation and keep the instructions including the warranty, the receipt and, if possible, the box with the internal packing. If you give this device to other people, please also pass on the operating instructions.
- To avoid the risk of fire or an electric shock, you should not expose the device to rain or moisture. Consequently, do not use the device in the immediate vicinity of water - for example near a bath tub, a swimming pool or in a damp cellar.
- Do not use the device in extremely hot, cold, dusty or damp places.
- Only use the device for private use and the intended purpose. This device is not intended for commercial use.
- Ensure that the power cord is not kinked, trapped or brought into contact with heat sources.
- Ensure that the power cord does not present a tripping hazard.
- Never touch the power plug or the cable with wet hands.
- Only connect the device at a properly installed plug socket. Pay attention that the specified voltage corresponds to the voltage of the plug socket.
- The power cord must always be easily accessible.
• Always insert the batteries correctly. - Do not cover up any ventilation openings with objects such as newspapers, tablecloths, curtains, etc.
- This appliance shall not be exposed to dripping or splashing water and that no object filled with liquids such as vases shall be placed on apparatus.
- Exposed ignition sources such as burning candles may not be placed onto the device.
English
- Never open the housing of the device. Incorrect repairs can constitute a considerable risk for the user. Should the device become damaged, in particular the mains supply cable, do not operate the device any longer, but rather have it repaired by an expert. Check the mains supply cable regularly for damage.
- For safety reasons a broken or damaged mains lead may only be replaced by an equivalent lead from the manufacturer, our customer service department or a similar qualified person.
- If the device is not used for a longer period, remove the plug connector from the plug socket or take out the batteries.
These symbols may be found on the machine and are intended to indicate the following:
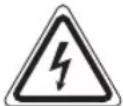
The lightning symbol should advise the user of parts in the inside of the device which carry dangerously high voltage levels.

The symbol with an exclamation mark should advise the user of important operation or maintenance instructions in the accompanying documentation.
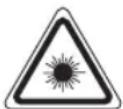
Devices bearing this symbol work with a "class 1 laser" for tracing the CD. The built-in safety switches should prevent the user being exposed to dangerous laser light, which is invisible to the human eye, when the CD compartment is opened.
These safety switches must not be bypassed or altered; otherwise there is a risk of being exposed to the laser beam.
Children and Frail Individuals
- In order to ensure your children's safety, please keep all packaging (plastic bags, boxes, polystyrene etc.) out of their reach.

WARNING!
Do not allow small children to play with the foil. There is a danger of suffocation!
- This device is not intended to be used by individuals (including children) who have restricted physical, sensory or mental abilities and/or insufficient knowledge and/or experience, unless they are supervised by an individual who is responsible for their safety or have received instructions on how to use the device.
- Children should be supervised at all times in order to ensure that they do not play with the device.
Special safety information
This device works with a class 1 laser.
46 English
WARNING:
Avoid damage to your hearing with volume that is too high.
CAUTION:
Do not touch the loudspeaker membranes (13) with your hands or with objects. The membranes can get damaged that way.
Overview of the Components
1 Telescopic antenna
2 FOLD./10+ button
3 button (increase volume)
4 CD compartment
5 PUSH TO OPEN button (open CD tray)
6 RUN-button
7 EQ button (equalizer)
8 /M+ / button
9 AUX IN input
10 headphone connection
11 MTUN+ button
12 ■M- / ID3 button (Stop / Select preset location / ID3 tag meta data on/off)
13 Loudspeaker membranes
14 PAIR/STANDBY – Standby indicator lamp /Bluetooth Pairing
15 IR-Infrared sensor for remote control
16 Display
17 MEM/P-MODE button
18 button (reduce volume)
19 USB port
20 ◎FUNC.button
Reverse (not shown)
AC Mains connection
Underside (not shown)
Battery compartment
Remote control
1 STANDBY/O button (operational readiness)
2 EQ button (equalizer)
3 FM ST/MO button (stereo/mono)
4 DNR button (select album)
5 VOL buttons (volume)
6 TUN+/▶ button (radio station search upward/ next track)
7 PAIR button (disconnect current Bluetooth connection)
8 button (stop)
9 MEM/P-MODE button (storing/playback mode)
10 button ( playback/ pause)
11 TUN-/▲ button (radio station search downward/ previous track)
12 MEM./10 Buttons ( respectively 10 select tracks/ stored radio stations)
13 ID3 button (ID3 tag Meta data on/off)
14 FUNC. button (function mode)
15 MUTE button (mute)
Start-up of the device/introduction
- Select a suitable location for the device, such as a dry, flat, non-slip surface on which it is easy to operate the machine.
- Ensure that the device is sufficiently ventilated!
- Remove the protective film from the display if it is still present.
Power Supply
- Ensure that the voltage is the same as that indicated on the model identification plate.
- Connect the power cable supplied (see battery compartment if necessary) to a properly installed safety power socket and the mains connector AC on the back of the machine.
i NOTE:
If the device is not used for a longer period of time, the mains plug must be pulled from the socket.
Inserting the Batteries (not supplied)
- Open the battery compartment lid on the rear.
- Insert 8 batteries of type UM1/R20 1.5 V. Please ensure that the polarity is correct (see the floor of the battery compartment)!
- Then close the battery lid.
i NOTE:
When a mains cable is connected the batteries are automatically switched off.
CAUTION:
- Batteries may leak and lose battery acid. If the device is not used for a longer period of time, remove the batteries.
- Different battery types or new and used batteries must not be used together.
- Batteries are not to be disposed of together with domestic wastes. Dispose of the used batteries at the relevant collection bin or at your dealer's.
WARNING:
The batteries shall not be exposed to excessive heat such as sunshine, fire or the like. Danger of explosion!
Remote control
i NOTE:
The lithium cell in the battery compartment of the remote control was secured with foil for transport. This extends the battery life. Remove this foil before initial use to operate the remote control.
For wireless operation from a distance of up to 5 meters. During operation, please ensure a clear line of view between the remote control and the sensor (IR) on the device. If this range should diminish, the battery must be replaced. Replace the battery as follows:
- Open the battery compartment.
- Replace the cell with a battery of the same type (CR 2025). Please observe the correct polarity.
- Close the battery compartment.

WARNING:
- Do not expose the batteries to intense heat such as sunlight, fire or similar. There is a risk of explosion!
- Keep batteries away from children! They are not a toy.
- Do not open batteries with force.
- Avoid contact with metallic objects (rings, nails, screws, etc.). There is a risk of short circuit!
- Batteries may heat up considerably through a short circuit or may even ignite. It could result in burns.
- The battery terminals should be covered with adhesive tape during transport for your safety.
- Batteries can leak out and can lose battery acid. If the device is not used for a longer period of time, remove the battery from the remote control.
- If a battery does leak out, do not rub the liquid into your eyes or the mucous membranes. In case of contact, wash your hands, rinse your eyes with clear water, and if the symptoms persist, consult a doctor.

CAUTION:
- Batteries can leak out and can lose battery acid. If the device is not used for a longer period of time, remove the battery from the remote control.
- Batteries do not belong in the household waste. Please dispose of spent batteries at authorized collection points or at the dealer.
Transport Safety Device, CD Compartment
- Open the CD tray (4) by pressing the PUSH TO OPEN button (5).
- Before operating the machine for the first time, remove the transport safety device from the CD player if it is still in place.
General operation

NOTE:
- You will find some buttons both on the device and the remote control. Identical buttons have the same function.
- The operation of the device is described by the buttons on the device.
Turning device on/ off
- Press the ⏻/FUNC button (20) to turn the device on.
- In order to switch off the unit, keep the √FUNC button pressed for approx. 2 seconds. The control lamp PAIR/STANDBY lights up red.

NOTE:
After about 15 minute without a signal, the device will automatically switch to standby.
Volume
You can adjust the desired volume with the 📄/buttons (3/18).
#/FUNC (20)
Press the ⬆/FUNC button until the desired operating mode is shown in the display.
EQ (7)
Press the EQ button repeatedly to select one of the preset equalizer sound modes. You may choose from the following: (FLAT, CLASSIC, ROCK, POP, JAZZ, DBBS).
Headphone jack (10)
For headphone operation, use headphones with a 3.5 mm jack plug that you plug into the headphone jack of the device. The loudspeakers will be shut off.
MUTE (15 on the remote control)
You can quickly shut off the sound using the MUTE button. The notification "MUTE" will blink in the display. Press the button again to turn the sound back on.
Listening to the Radio
- Select the radio mode with the AFUNC button (20). The display will show "FM".
- Fully extend the telescopic antenna. Adjust its direction for better reception.
- You have two possibilities to look for and store radio stations.
• Automatic station scan:
Important! Any previously stored radio stations will be overwritten.
Keep the ▶II / M+ / 📋button (8) pressed for approx. 2 seconds. The device is searching the complete FM frequency band for radio stations. The stations found are stored ascending by frequency.
• Searching for radio stations manually:
Tune the required station with the ▶/TUN+ or the ▶/TUN- button. If you keep one of the buttons pressed, the unit will search for the next or previous radio station.
English
Storing stations:
- Search for the required radio station with the TUN+ or the K-TUN- button.
- In order to store the radio station, press the MEM/P-MODE button (17). The notification "P 01" will blink in the display and "MEM" is shown.
- Use the ▶M+ / ③ /■/ M- / ID3 buttons (8/12) to select the desired memory location.
- Press the MEM/P-MODE button. The radio station will be stored.
i NOTE:
"STEREO" will appear in the display once the station is received with stereo sound. If there is interference on the received station, we recommend that you switch to MONO. Press the FM ST/MO button (3 on the remote control) to switch between MONO and STEREO.
Selecting stored radio stations
Press the ▶ II / M+ / 📋 button (8) or the ■M-/ID3 button (12) repeatedly to scroll through the preset radio stations.
Playing CDs/MP3
- Select the CD mode with the AFUNC button (20). The following will appear in the display "CD".
- Open the CD tray (4) by pressing the PUSH TO OPEN button (5).
- Insert an audio CD with the printed side facing upwards on to the central cone so that the CD clicks into place and then close the lid of the CD compartment.
- The CD will play from the first title. The elapsed playing time and the current track will be shown in the display. If available, the ID3 tag Meta data will additionally alternately be shown as a continuous band with CDs in the MP3 format.
- In order to remove a CD, please press the ■M-/ID3 button (12), open the CD compartment and lift the CD out carefully.
Always keep the CD deck closed.
i NOTE:
- If a disc is inserted the wrong way around, respectively if no disc is inserted, then the message "READING" will blink and "NO DISC" appears on the display.
- Playback of CDs produced by the user cannot be guaranteed due to the large variety of software and CD media available.
- When the CD remains inserted: The unit remembers the current play position even if you switch off the unit or switch to another mode. To play the CD again from the start, press the ■M-/ID3 button and then the ▶■ M+/□button.
Playing back music via Bluetooth
Bluetooth involves a technology for wireless radio connection of devices over a short distance. Devices with Bluetooth standard are transmitting between 2.402 and 2.480 GHz in the ISM band (Industrial, Scientific and Medical). Interference can be caused for example by WLAN-networks, DAB radios, cordless phones, or microwave ovens which work on the same frequency band.
This device offers you the possibility to use a Bluetooth-enabled device. The functional radius is limited to approx. 15 metres depending on the surroundings and the unit used.
If your playing device supports the A2DP profile (Advanced Audio Distribution Profile) and has a music-player function, then you can also wirelessly transfer music to the device. The A2DP profile involves a multi-vendor Bluetooth profile. By streaming, stereo-audio signals are wirelessly transferred between the playing device (source) and the receiving device. To be able to remotely control the source, the playback device must support the AVRCP profile (Audio Video Remote Control Profile).
Due to the different device manufacturers, models, and software versions, a full functionality cannot be guaranteed.
Logging on devices (Pairing)
Before you listen to music via the unit, you must pair the devices.
- Ensure, that the Bluetooth function is activated in your player (e.g. mobile phone). For this, refer to the operation manual of your player.
- Select the BLUETOOTH mode using the ⏻/FUNC button (20). The control light PAIR/STANDBY will blink blue. This signalizes that the device is in pairing mode.
- Choose the Bluetooth menu in your player and register the device in your player. For this, refer to the operation manual of your player. The device "AEG SR 4364 BT" will show in your player as a selection.
i NOTE:
- Only one playback device can be connected with the device at one time. If the device is already connected with another playback device, the device will not appear in the BT selection menu.
-
To disconnect an existing Bluetooth connection, keep the ▶/M+/button (8) pressed down. The PAIR/STANDBY control lamp flashes blue.
-
Now enter the password "0000" in your player, depending on the device manufacturers, model, and software version.
If pairing was done successfully, the PAIR/STANDBY control lamp lights up blue. For the further procedure, please refer to the user manual of the playback unit. If possible, adjust the volume of the external unit to a comfortable level.
NOTE:
- Depending on the device manufacturer, you need to perform the registration (PAIRING) again to connect the devices.
- In case of problems with the registration of a replay device, deactivate the WiFi-/ and mobile data function in your playback device.
- The Bluetooth compatibility cannot be ensured for devices (e.g. mobile phones) getting released in the future.
- To ensure an optimal connection, make sure that the battery of your player is completely charged.
- Some of the mobile phone brands have an energy-saving mode. Deactivate the energy-saving mode as it can otherwise result in problems during the data transfer through Bluetooth.
- To be able to transfer audio data, Bluetooth needs to stay activated in your player. Observe the operation manual of your player.
- If a mobile phone on which you are playing music receives a call, the music will be interrupted. However, the sound is not played back by the device. After you have ended the call, the devices are connected to each other again and playback continues.
Playing music via USB (19)
This device has been developed in line with the latest technical advances in the USB field. The wide range of different USB storage devices of all types which are currently on the market, unfortunately do not allow us to guarantee full compatibility with all USB storage devices. For this reason, in rare cases there may be problems in playing back files from USB storage devices. This is not a malfunction of the device.
- Press the ⏻/FUNC button (20) repeatedly until "USB" is shown on the display.
- Connect a USB storage device directly into the port. Playback will automatically start after a few seconds.
For operation, please refer to the section "Description of the control buttons".
NOTE:
- Always directly connect a USB storage medium to the USB port to prevent any malfunctions.
- The USB port is not designed for charging external devices.

CAUTION:
Switch the device to a different operating mode before you remove the USB storage device.
Description of the control buttons
NOTE:
Not all the functions may be supported depending on the playback device.
▶ II/M+/⑧(8)
During music playback:
You can briefly interrupt and resume playback using this button. The notification on the display flashes. Pressing again continues playback.
▶/TUN+ / ⚠TUN- (11/6)
During music playback:
With ▶TUN+ you can jump to the next or previous track etc.
- If the button is kept pressed down, the machine starts to search through the tracks.
The ◀/TUN- button can be used as follows:
Press once = This starts the current track again from the beginning.
Press twice = This jumps back to the previous track.
Press three times = This plays the song before etc. If the button is kept pressed down, the machine starts to search through the tracks.
■ /M-/ID3 (12)
During music playback:
• The playback is stopped.
- Keep the button pressed briefly during MP3 play to switch the ID3 tag metadata on or off.
MEM/P-MODE (17)
- In stop mode for programming any order of tracks (see the section on "Programmed Play").
During the playback of an audio CD:
Press once = the current track is repeated continuously. The symbol "C" appears on the display.
Press twice = the whole CD is played continuously. The symbol "⊂ ALL" appears on the display.
Press three times = All the music tracks are played back in random order. The notification "RAN" appears on the display.
Press four times = each track is played for 10 seconds respectively. The message "INTRO" appears in the display.
Press five times = all functions are cancelled. The normal play mode is resumed.
50 English
During playback of MP3 music:
Press once = the current track is repeated continuously. The symbol "C" appears on the display.
Press twice = the selected folder is repeated continuously (⊂DIR appears in the display).
Press three times = all music titles are repeated continuously (The symbol "⊂ALL" appears on the display.).
Press four times = all the music tracks are played back in random order. The notification "RAN" appears on the display.
Press five times = each track is played for 10 seconds respectively. The message "INTRO" appears in the display.
Press six times = all the functions are deactivated. Playback is continued normally.
FOLD./10+ (2)
(For music in MP3 format)
- Press this button to skip 10 tracks. Provided that there are more than 10 titles available.
- Keep this button pressed during playback of an MP3 file. The next folder is selected (e.g. F02). The device starts playing the files in the selected folder.
Programmed Play
This can be used to program any desired sequence of tracks. (Only in CD-/USB mode)
- Press the ■/M-/ID3 button (12).
- Press the MEM/P-MODE button (17). "P01" (Storage space) and the notification "PROG" will appear in the display. Use the TUN+ / /TUN- buttons (11/6) to select the desired track and then press the MEM/P-MODE button again. The display changes to memory slot P02.
NOTE: For CDs in MP3 format
- First select the folder with the FOLD/10+ button (2) (e.g. F01). Then select the track which you want to program (e.g. T05).
-
When switching to another folder, "T01" appears for the first track in the current folder.
-
Select the next track with the ▶/TUN+/KNTUN- buttons and press the MEM/P-MODE button again. Repeat the procedure until all the desired tracks are selected.
i NOTE:
Once the storage capacity of the tracks to be programmed has been reached "PROGFULL" flashes in the display.
-
Press the ▶ IV/ M+/@button (8). The playback starts. The notification "PROG" will appear additionally in the display.
-
Press once the 📂M-/ID3 button to stop the playback while retaining the program.
- To play the programme back again, press the ▶M+/button.
The device stops automatically after all programmed titles have been played. The listed sequence remains in the memory until you switch to a different operating mode.
Delete program
To delete the program, press the ■/M-/ID3 button twice. The notification "PROG" will disappear.
Playing back Music in MP3 Format
With this device it is possible to play back pieces of music in MP3 format. The device also supports all standard CD types: CD, CD-RW, CD-R.
This machine of is able to play MP3 CDs. Up to 200 tracks can be compressed and stored on these CDs. Your machine detects an MP3 CD automatically (the total number of tracks and MP3s appears in the display). If you would like to play one of these CDs, proceed as described under "Playing CDs/MP3". Tracks can be programmed as described under "Playing Back Programmed Tracks".
Please note:
There are a number of different recording and compression methods, as well as quality differences between CDs and self-recorded CDs.
Furthermore, the music industry does not adhere to fixed standards (copy protection).
For these reasons it is possible that in rare cases there are problems with the playback of CDs and MP3 CDs. This is not a malfunction of the device.
AUX IN socket
To connect analogue replay devices. Via this socket you can also hear the sound of other playback devices such as MP3 players, CD players etc. through the loudspeakers.
- Please connect the external device with a 3.5 mm stereo jack plug to the AUX-IN socket.
- Press the ⏻/FUNC button (20) repeatedly until "AUX" is shown on the display.
- You will hear the sound playback from the external device through the loudspeakers. Use the 🎨/buttons to adjust the volume. The CD buttons are not functional.
- For the remaining procedure please see the operating instructions of the external sound source.
i NOTE:
Adjust the volume of the external device to a comfortable level.
Cleaning and Maintenance

WARNING:
Do not immerse the device in water.
- Always remove the mains plug before cleaning the machine.
- Any marks on the surface can be wiped off with a slightly damp cloth without any additives.
Troubleshooting
| Symptoms Course Solution | ||
| CD can not be played back. | CD is not inserted or inserted incorrectly. | Ensure that the disc is inserted with the label facing upwards. |
| Batteries too weak. | insert new batteries or operate the device with the mains lead. | |
| CD jumps during playback. | Check the disc for fingerprints, dirt or scratches. | Check the disc for fingerprints, dirt or scratches. |
| Device cannot be operated. | Device crashes and "hangs". | Disconnect the power supply for 5 sec. Then switch the device on again. |
| No audio signal during bluetooth connection. | The device is not registered with the audio source. | Ensure that there is a connection. Register the device with the audio source again, if necessary. |
| Volume too low. Increase the volume on the device. | ||
| Device can not be connected. | Registration does not work. | Check to see if the audio source supports the A2DP protocol. |
| Audio source is shut off. | Turn on the audio source. | |
| Bluetooth is shut off on the audio source. | Turn on the Bluetooth function on the audio source. | |
| Bluetooth version is not supported. | Use a different play-back device. | |
Technical Data
| Model: | SR 4364 BT |
| Power supply: | 100-240 V~, 50/60 Hz |
| Battery operation: | 8 x 1.5 V, Type UM1/R 20 |
| Power consumption: | 30 W |
| Protection class: | II |
| Net weight: | approx. 3.5 kg |
| Radio section: | |
| Frequency ranges: | FM 87.5 ~ 108.0 MHz |
Bluetooth
| Bluetooth support: | V3.0 |
| Range: | approx. 15 metres |
| Transmission frequency: | 2.402-2.480 GHz |
| Protocols: | A2DP/AVRCP |
The right to make technical and design modifications in the course of continuous product development remains reserved.
This device has been tested according to all relevant current CE guidelines, such as electromagnetic compatibility and low voltage directives, and has been constructed in accordance with the latest safety regulations.
Disposal
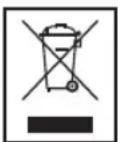
Meaning of the "Dustbin" Symbol
Protect our environment: do not dispose of electrical equipment in the domestic waste.
Please return any electrical equipment that you will no longer use to the collection points provided for their disposal.
This helps avoid the potential effects of incorrect disposal on the environment and human health.
This will contribute to the recycling and other forms of reutilisation of electrical and electronic equipment.
Information concerning where the equipment can be disposed of can be obtained from your local authority.
52 Język polski
Instrukcja obsługi
CTC Clatronic Sp. z o.o