HW221E - Electric heater HONEYWELL - Free user manual and instructions
Find the device manual for free HW221E HONEYWELL in PDF.

| Product type | Electric radiant panel |
| Brand | Honeywell |
| Model | HW221E |
| Power supply | Single-phase, mains voltage (see rating plate) |
| Mounting | Floor standing on feet or wall mounting with hooks |
| Thermostat | Adjustable, with anti-freeze function (triggers at approx. +6°C) |
| Operation | Radiant heating, power indicator light |
| Safety | Automatic shut-off in case of overheating; frost protection; safety distance 90 cm |
| Power cord | Detachable, unwind completely before use |
| Use | Indoor use, do not use outdoors or in vehicles |
| Maintenance | Clean at least once a month with a damp cloth; do not use abrasive or chemical products |
| Storage | In its original box, in a cool and dry place |
| Warranty | Do not open or repair yourself; contact an authorized service center |
| Repairability | Spare parts available through the manufacturer; repair by authorized workshop |
Frequently Asked Questions - HW221E HONEYWELL
User questions about HW221E HONEYWELL
0 question about this device. Answer the ones you know or ask your own.
Ask a new question about this device
Download the instructions for your Electric heater in PDF format for free! Find your manual HW221E - HONEYWELL and take your electronic device back in hand. On this page are published all the documents necessary for the use of your device. HW221E by HONEYWELL.
USER MANUAL HW221E HONEYWELL
natural_image
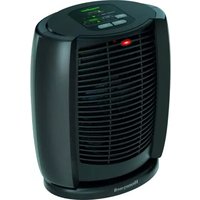
Two transparent electrical heating units labeled HW-220E, HW-220F, and HW-221E, shown side by side (no additional text or symbols on the devices themselves)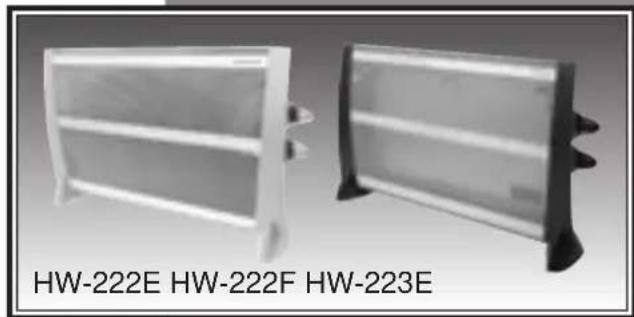
natural_image
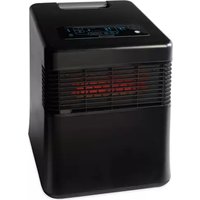
Two white rectangular electronic devices labeled HW-222E, HW-222F, and HW-223E (no additional text or symbols visible)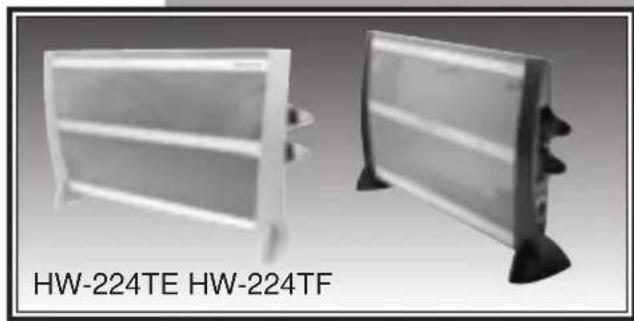
natural_image
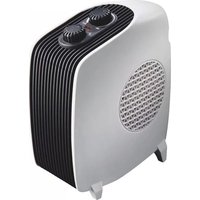
Two white rectangular electronic devices labeled HW-224TE HW-224TF, shown from different angles (no additional text or symbols visible)| CONTENTS |
| INHALTSVERZEICHNIS |
| SOMMAIRE |
| INHOUDSOPGAVE |
| INDICE |
| INDICE |
| INDICE |
| INNEHÅLLSFÖRTECKNING |
| INNHOLTSFORTEGNELSE |
| INDHOLDSFORTEGNELSE |
| SISÄLLYSLUETTELO |
| SPIS TREŚCI |
| FIHRIST |
| TARTALOMJEGYZÉK |
| OBSAH |
| SADRŽAJ |
| VSEBINA |
| СОДЕРЖАНИЕ |
| ПЕРИЕХОМENA |
| فهرس احتويات |
| ENGLISH | GB | 5 |
| DEUTSCH | DE | 8 |
| FRANÇAIS | FR | 11 |
| NEDERLANDS | NL | 14 |
| ESPAÑOL | ES | 17 |
| PORTUGUÊS | PT | 20 |
| ITALIANO | IT | 23 |
| SVENSKA | SE | 26 |
| NORSK | NO | 29 |
| DANSK | DK | 32 |
| SUOMI | FI | 35 |
| POLSKI | PL | 38 |
| TÜRKÇE | TR | 42 |
| ČESKY | CZ | 45 |
| MAGYAR | HU | 48 |
| HRVATSKI | HR | 51 |
| SLOVENSKO | SI | 54 |
| PYCCKIIЙ | RU | 57 |
| ΕΛΛΗΝΙΚΑ | GR | 61 |
| عربي | SA | 65 |
Fig. 1
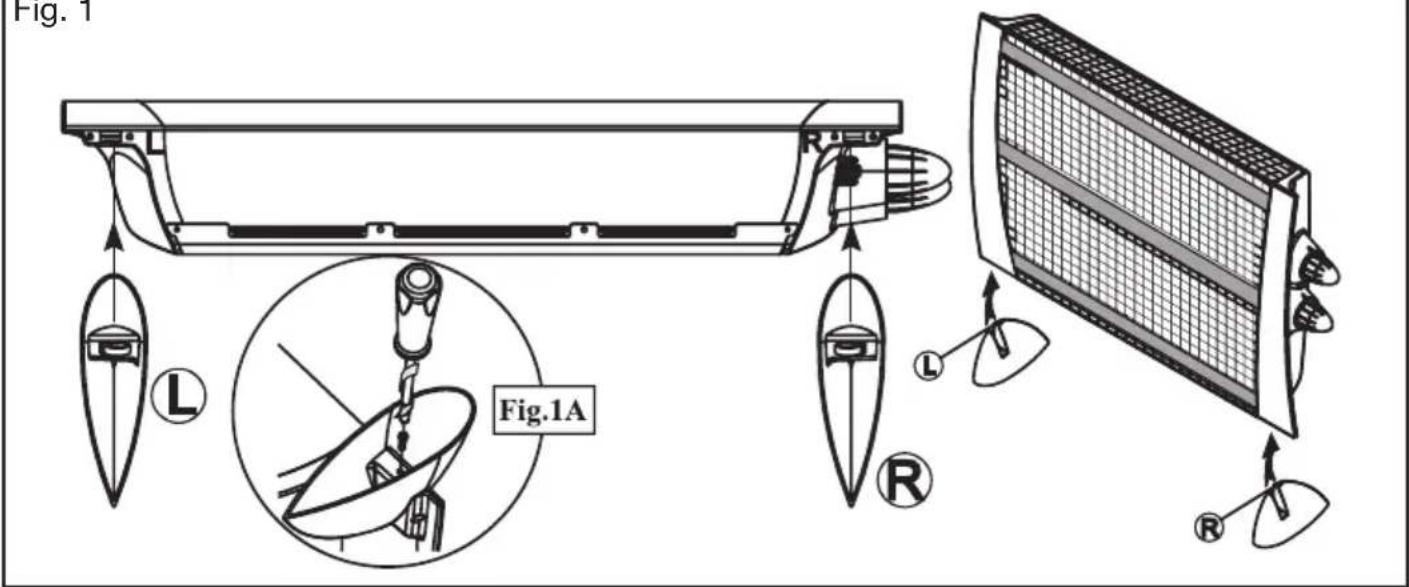
Fig. 2 Fig. 3
natural_image
Technical line drawing of a mechanical component with two circular features and a gear-like structure (no text or symbols)Fig. 4

natural_image
Diagram of insect wing anatomy showing three views of a circular structure with internal patterns (no text or labels)Fig. 5 Fig. 7
natural_image
Diagram showing three types of biological structures: a grid-patterned panel, a circular arrangement with internal patterns, and a circular pattern with dots (no text or labels)Fig. 6
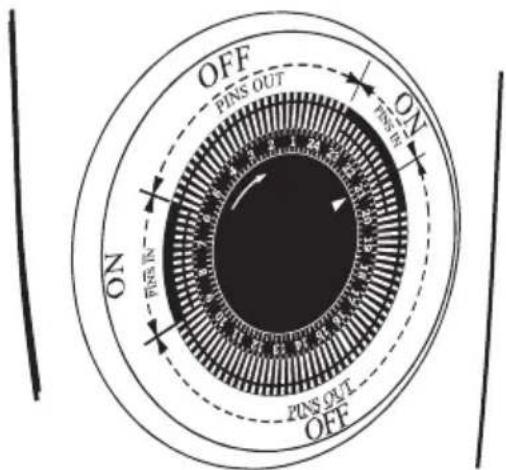

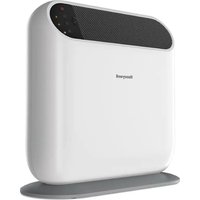
Fig. 8
natural_image
Technical line drawing of a mechanical assembly with no visible text or symbolsENGLISH
IMPORTANT SAFETY INFORMATION
Read through all the instructions before starting to use the panel heater. Keep these user instructions in a safe place for future reference.
- Only use the panel heater in a location that is inaccessible to children.
- Do not use the panel heater outdoors.
- Place the panel heater on a firm, even surface. Make sure it the heater standing securely so that it cannot tip over or fall off. Only use the panel heater when it is in an upright position and only with mounted feet.
- For wall mounting the panel heater must only be mounted on heat-proof surfaces, and never on a wooden, synthetic or other inflammable surface.
The feet must not be attached to the panel heater when wall mounting. Please observe the safety distances as illustrated in Fig. 7. - Unwind the power cable completely. An incompletely unwound power cable can lead to overheating and cause a fire.
- Do not use an extension power cable, a variable speed controller or a timer. This can cause overheating, fire and an electric shock.
- The panel heater must only be connected to a single-phase power socket with the current as stated on the type plate.
- Always disconnect the power plug from the socket when the panel heater is not in use, or when it is handled, moved or cleaned. Allow the panel heater to cool. Do not pull at the cable to disconnect the plug.
- Do not use the panel heater anywhere near easily inflammable gases or materials such as solvents, varnishes, glues etc.
- Do not install the panel heater immediately below a power socket.
- Do not use the panel heater in any kind of vehicle (e.g. builders' cabin, lift, elevator, caravan, automobile, cabin) or in any similar enclosed space
- Warning: The panel heater gets hot during use. Keep burnable materials such as cushions, bedding, furniture, paper, curtains and clothing at least 90 cm away from the panel heater.
- Keep the panel heater clean. Make sure that the front grid is open before the heater is put into operation. Do not allow any objects to get
into the heater. Do not cover up the panel heater (marked by the symbol on the panel heater). This can cause overheating, fire and electric shock.
- Do not immerse the panel heater in water or any other liquids and do not pour water or any other liquids over or into the heater.
- Clean the panel heater regularly. Please follow the cleaning instructions.
- If the power cable of the panel heater is damaged it must be repaired in a workshop approved by the manufacturer, as special tools are needed.
- Do not operate the panel heater if it is damaged or shows any signs of damage, or if it is not working properly. Disconnect the power plug from the socket.
ASSEMBLY
- This panel heater may be used with feet on the floor or attached directly to the wall.
- For floor use, attach the feet to the lower part of the panel heater by snapping each foot into the matching holes (fig.1).
- As shown in fig. 1A, please tighten the feet at the bottom of the appliance using the screws provided.
- Place the panel heater on a firm, level, open surface at least 90 cm away from any other object. DO NOT use on an unstable surface such as bedding or deep carpeting.
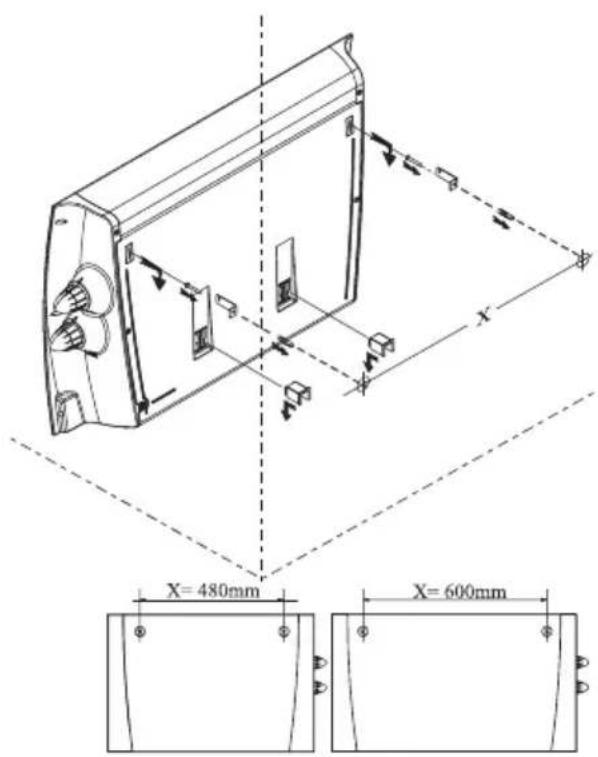
- For wall mounting, secure the wall attachment clips into the wall with the screws provided (fig.7).
- Attach the wall spacers on the back of the panel heater to keep the minimum distance to the wall. Attach the panel heater to the mounting clips, using the mounting holes on the back of the panel heater (fig.2).
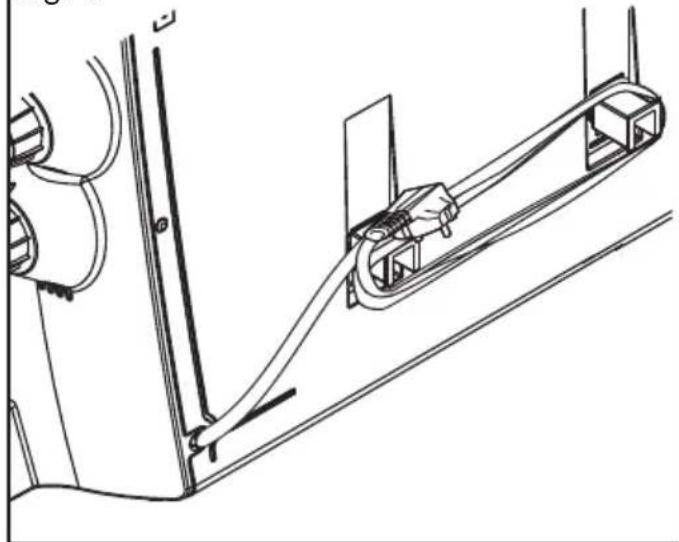
POWER CABLE WINDING
- Mount the wall spacer at the bottom of the rear side of the heater.
- Wind the power cable around the wall spacer (Fig. 8).
- When you wish to use the panel heater, you must completely unwind the power cable. An incompletely unwound power cable can lead to overheating and cause a fire.
ENGLISH
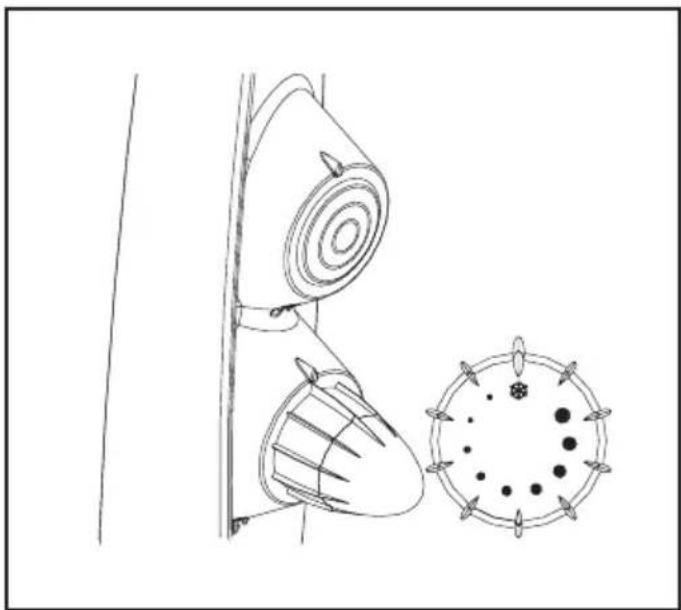
OPERATING INSTRUCTIONS A) MODELS HW-220E, HW-220F AND HW-221E
- Turn the thermostat anti-clockwise to its lowest setting (*).
- Plug in the panel heater.
- Turn the thermostat clockwise to the highest temperature setting for rapid warming (fig.3).
- When the room reaches a comfortable temperature, turn the thermostat anti-clockwise until the panel heater switches off. At this setting the thermostat will automatically switch the panel heater on (the pilot light comes on) and off (the pilot light goes off) to maintain the selected temperature.
- To turn the panel heater off, turn the thermostat anti-clockwise to the lowest setting (*) and unplug it.
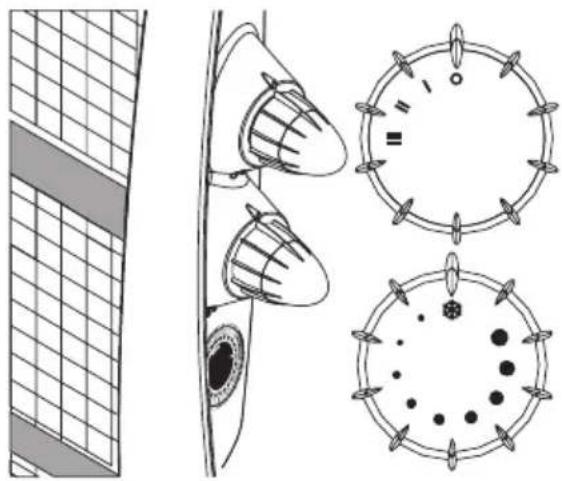
B) MODELS HW-222E, HW-222F AND HW-223E
- Turn the switch to (0).
- Plug in the panel heater.
- Turn the switch to the desired power, (I-Low, II-Medium, III-High) (fig.4).
- Turn the thermostat clockwise to its highest setting for a rapid warming.
- When the room reaches a comfortable temperature, turn the thermostat anti-clockwise until the panel heater switches off. At this setting, the thermostat will automatically turn the panel heater on (the pilot light illuminates) and off (the pilot light goes out) to maintain the selected temperature.
- To turn the panel heater off, turn the switch to the (0) position and unplug the panel heater.
TIMER OPERATION
C) MODEL HW-224TE, HW-224TF ONLY
- Follow the operating instructions under B) and see Fig. 5 and 6.
- In order to operate the panel heater without using the timer, place all timer pins in the "ON" position (all pins close to the centre).
To set the timer:
- Put all "timer pins" close to the centre of the timer.
- Turn the dial clock until it corresponds to the actual time of day.
• Each pin corresponds to a period of 20 minutes. -
To program the time desired to maintain the heater off, place the number of pins desired away from the centre of the timer.
-
To program the time desired to maintain the heater on, place the number of pins desired close to the centre.
• Over a period of 24 hours, you can set any number of switching periods by pulling out pins. For example see Fig. 6: - Actual time: 9 p.m.
- Switches on at 9 p.m. and remains on for 2 hours.
- Remains off from 11 p.m. to 6 a.m.
- Switches on at 6 a.m. and remains on for 3 hours.
- Switches off at 9 a.m.
- Switches on at 9 p.m.
- Until changed, the program will repeat every 24 hours.
- To turn panel the heater off, turn the switch to the (0) position and unplug it.
FROST PROTECTION
The panel heater is equipped with an anti-frost function. Plug in the panel heater. Turn the switch to I, II or III. Turn the thermostat anti-clockwise to its lowest setting (*). As soon as the room temperature is below + 6°C the panel heater will automatically switch on.
AUTOMATIC SAFETY CUT-OUT
This panel heater is equipped with an automatic safety cut-out. If the panel heater stops unexpectedly, the safety cut-out may have operated. Once the safety cut has operated, the heater will not restart until the panel heater has been turned off and cooled down. In this situation, you are recommended to turn the switch to the (0) position and unplug the panel heater. Allow the panel heater to cool. Plug the panel heater into a socket and follow the “Operating Instructions”.
IF THE PANEL HEATER FAILS
TO OPERATE
- Check for and remove any obstructions.
- Check if the panel heater is in the right position and if it is plugged in. Check if the power socket is working (e.g. plug in a different working electrical device).
- Make sure that the thermostat is not set too low.
- With the switch set to one of the power settings (I, II or III) turn the thermostat clockwise until the heater restarts.
ENGLISH
- If the panel heater still does not wok consult the warranty for further instructions.
CLEANING
We recommend cleaning the panel heater at least once a month.
- Switch off the heater, unplug it and allow to cool.
- Use a damp cloth to clean ONLY the external surfaces of the panel heater.
- Do not use any abrasive or caustic cleaning agents.
- Never immerse the panel heater in water! DANGER TO LIFE!
STORAGE
- Clean your panel heater following the CLEANING instructions.
- Pack the panel heater in its original carton and store it in a cool, dry place.
CONDITION OF PURCHASE
As condition of purchase the purchaser assumes responsibility for the correct use and care of this KAZ product according to these user instructions. The purchaser must himself or herself decide when and for how long this KAZ product is in use.
WARNING: IF PROBLEMS ARISE WITH THIS KAZ PRODUCT, PLEASE OBSERVE THE INSTRUCTIONS IN THE GUARANTEE CONDITIONS. DO NOT ATTEMPT TO OPEN OR REPAIR THIS KAZ PRODUCT YOURSELF, AS THIS COULD LEAD TO TERMINATION OF THE GUARANTEE AND CAUSE DAMAGE TO PERSONS AND PROPERTY.
Technical modifications reserved
DEUTSCH
A) MODELLI HW-220E, HW-220F E HW-221E
A) MODELLERNA HW-220E, HW-220F OCH HW-221E
A) MALLIT HW-220E, HW-220F JA HW-221E
A) Modely HW-220E, HW-220F, HW-221E
B) Modely HW-222E, HW-222F, HW-223E
B) Model HW -222E, HW-222F in HW-223E
__ ي Winning about the purpose of doing it: 23.00 مساء، حتى
الساعة 6.00 صباحا.