
Silence Force Cyclonic RO8055 - Vacuum Cleaner ROWENTA - Free user manual and instructions
Find the device manual for free Silence Force Cyclonic RO8055 ROWENTA in PDF.
| Product type | Vacuum cleaner |
| Brand | Rowenta |
| Model | Silence Force Cyclonic RO8055 |
| Category | Canister vacuum |
| Filtration system | Washable HEPA filter (mechanical or automatic model depending on version) |
| Suction type | Cyclonic bagless |
| Dustbin capacity | Approximately 2 L |
| Power supply | Mains, 220-240 V ~ 50-60 Hz |
| Cord length | Approximately 8 m |
| Noise level | Silent (Silence Force technology) |
| Included accessories | Hose with ergonomic handle, metal telescopic tube, Delta Silence Force nozzle, telescopic crevice tool, upholstery tool, parquet tool, turbo brush (depending on model) |
| Power control | On the handle (positions MIN, Medium, MAX) |
| Cord rewinder | Automatic cord rewind pedal |
| Parking positions | Vertical and horizontal |
| Filter maintenance | Mechanical cleaning (manual model) or automatic cleaning (auto model) of the HEPA filter; dustbin and separator washable with water |
| Filter cleaning frequency | After each use (simple cleaning); manual washing every 3 months |
| Safety | Motor overheat protection; automatic shut-off in case of blockage |
| Recommended use | Hard floors, carpets, rugs, upholstery |
| Warranty | 2 years (parts and labor) |
| Spare parts available | HEPA filter ref. RS-RT 3078 (mechanical) or RS-RT 3079 (auto), accessories at authorized centers |
| Weight | Approximately 5 kg |
Frequently Asked Questions - Silence Force Cyclonic RO8055 ROWENTA
User questions about Silence Force Cyclonic RO8055 ROWENTA
0 question about this device. Answer the ones you know or ask your own.
Ask a new question about this device
Download the instructions for your Vacuum Cleaner in PDF format for free! Find your manual Silence Force Cyclonic RO8055 - ROWENTA and take your electronic device back in hand. On this page are published all the documents necessary for the use of your device. Silence Force Cyclonic RO8055 by ROWENTA.
USER MANUAL Silence Force Cyclonic RO8055 ROWENTA
natural_image
Illustration of a hand connecting a cable to a car engine component (no text or symbols visible)fig. 1 fig. 2
text_image
CLIC!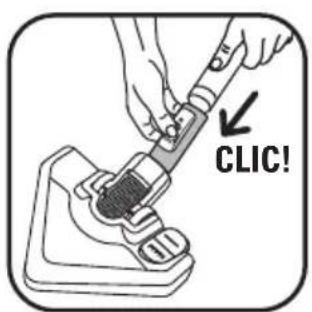
text_image
CLIC!fig. 6
natural_image
Illustration of a hand pressing down on a device component (no text or symbols visible)fig. 3
text_image
CLIC!fig. 4

text_image
CLIC!fig. 5
text_image
Diagram showing a hand inserting a plug into a vacuum cleaner device with labeled parts 1 and 2fig. 10
text_image
① PUSH ②fig. 7
natural_image
Illustration of a person using a handheld vacuum cleaner with a directional arrow indicating motion (no text or symbols)fig. 8

natural_image
Illustration of hands adjusting a mechanical device (no text or symbols visible)fig. 9
natural_image
Line drawing of a person holding a camera with a handle, no text or symbols presentfig. 14
text_image
MAX MINfig. 11
text_image
Diagram showing a hand inserting a plug into a vacuum cleaner with labeled parts and arrows indicating process steps.fig. 12
natural_image
Illustration of a camera with a hand adjusting the lens and adjusting a screwdriver (no text or symbols)fig. 13
text_image
OPENfig. 18
natural_image
Diagram showing a hand holding a device with a crossed-out X symbol, next to a simplified illustration of a device with circular components (no text or symbols present)fig. 15 fig. 16
natural_image
Two identical line drawings of a vintage camera with no text or symbols广力云智慧零售收银系统
natural_image
Technical line drawing of a mechanical assembly with no visible text or symbolsfig. 17
text_image
OPENfig. 18
natural_image
Illustration of a hand holding a coffee maker with a lid, next to a small robot (no text or symbols)fig. 19
text_image
MECHANIC x 6fig. 20
text_image
CLIC AUTOMATICfig. 21
natural_image
Illustration of a hand placing a component into a device with an upward arrow (no text or symbols)fig. 22
text_image
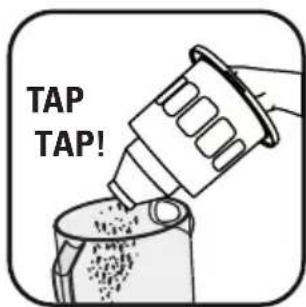
TAP TAP!fig. 23
natural_image
Illustration of a hand pouring granular material into a container (no text or symbols)fig. 24
natural_image
Illustration of hands holding a mechanical device with a tool, no text or symbols presentfig. 25
natural_image
Illustration of a hand pressing down on a mechanical component with arrows indicating motion (no text or symbols)fig. 26
text_image
Diagram showing a hand holding a container with two labeled steps (1 and 2) indicating a process or procedure.fig. 27
text_image
x 2fig. 28
natural_image
Illustration of a hand holding a circular mechanical component with a tool, no text or symbols presentfig. 29
natural_image
Illustration of hands holding a waste bin with an upward arrow indicating motion (no text or symbols)fig. 30

text_image
TAP TAP!fig. 31
text_image
Diagram showing a hand operating a device with a 24-hour temperature indicator, alongside an inset image of the device's thermal conductivity.fig. 32
natural_image
Illustration of hands holding a mechanical component with arrows indicating motion (no text or symbols)fig. 33
natural_image
Illustration of a hand holding a mechanical component with a circular dial and central hub (no text or symbols)fig. 34
natural_image
Illustration of a hairdryer with a magnified inset showing its use in sunlight (no text or symbols)fig. 35
natural_image
Illustration of a spray gun with a magnified inset showing its heat source (no text or symbols)fig. 36
natural_image
Two-step illustration showing hands holding a container and a bag, both in a split view (no text or symbols)fig. 37
CONSEILS DE SÉCURITÉ
For your safety, this appliance conforms to the applicable standards and regulations (Low Voltage, Electromagnetic Compatibility, Environmental, etc. Directives).
1 • Conditions of use
Your vacuum cleaner is an electrical appliance: it must only be used under normal operating conditions.
The appliance should be used and stored out of the reach of children. Never leave the appliance unattended when it is switched on.
Always keep nozzles and tube ends well away from eyes and ears.
Do not vacuum wet surfaces, any water or any kind of liquids, hot substances, ultra-fine substances (plaster, cement, ash, etc.) large sharp debris (glass), dangerous products (solvents, stripping compounds, etc.), chemical products (acids, cleaners, etc.), inflammable or explosive products (petrol- or alcohol-based).
Do not immerse the appliance in water, splash water on the appliance or store it outdoors.
DESCRIPTION
1 Vacuum cleaner cover
2 Dust container
3 Separator
4 Filter release button
5 Hepa filter * :
5a – HEPA filter for mechanical model (Ref: RS-RT3078)
5b – HEPA filter for automatic model (Ref: RS-RT3079)
6 Knob for cleaning the HEPA filter (mechanical model)
7 Cover "OPEN" button
8 Dust container housing
9 Suction inlet
10 Air outlet
11 ON/OFF button
12 Power cord rewind button
13 Carrying power nozzle
14 Parking positions
15 Dust container full level
Accessories
16 Flexible hose with power nozzle ERGO COMFORT SILENCE
Do not use the appliance if it has been dropped and shows signs of damage or functions abnormally. In this case, do not open the appliance, but send it to the nearest Approved Service Centre or contact Rowenta Customer Service (see contact particulars on last page).
2 • Electrical power supply
Make sure that the operating voltage of your vacuum cleaner is the same as your supply voltage. Unplug the appliance by removing the plug from the power outlet: immediately after use, before changing accessories, before maintenance, cleaning or changing the dustbag.
Do not use the appliance: if the supply cord is damaged. The winder and cord assembly of your vacuum cleaner must be replaced by an Approved Service Centre because special tools are required for carrying out any repair in order to prevent any danger.
3 • Repairs
Repairs should only be carried out by specialists using original replacement parts. Repairing an appliance oneself can be dangerous for the user and cancels the warranty.
16a – Ergonomic power nozzle ERGO COMFORT SILENCE
16b – Built-in brush (EASY BRUSH)
16c – Power control switch (POWER CONTROL)
16d – End of flexible hose (with push button)
16e - Flexible hose attachment (with tab)
17 Telescopic crevice tool*
18 Upholstery nozzle*
19 Parquet nozzle*
20 Metal telescopic tube ERGO COMFORT SILENCE
20a – power nozzle/tube lock system (LOCK SYSTEM)
20b – tube adjustment button (TELESCOPIC SYSTEM)
21 Delta Silence Force Nozzle
21a – Tube/nozzle lock system Delta Silence Force (LOCK SYSTEM)
21b – 2 position button: retracted brush rugs and carpets / advanced brush for parquets and smooth floors
22 Turbo-brush*
23 Mini turbo-brush*
BEFORE USING FOR THE FIRST TIME
1 • Remove packaging
Unpack your appliance, keep your guarantee form and read the instructions carefully before using your appliance for the first time.
2 • Hints and precautions
Each time before use, unwind the power cord completely. Do not jam it and do not allow it to rub against sharp edges.
If you are using an electrical extension, check that it is in perfect condition and that it is suited to the power of your vacuum cleaner. Do not unplug the appliance by pulling on the power cord. Do not move the vacuum cleaner by pulling on the power cord, the appliance must be moved using its carrying power nozzle. Do not use the power cord or the flexible hose to lift or carry the appliance.
Switch off and unplug your vacuum cleaner each time after use. Always switch off and unplug your vacuum cleaner before servicing or cleaning it.
This appliance is not designed to be used by people (including children) with a physical, sensory or mental impairment, or people without knowledge or experience, unless they are supervised or given prior instructions concerning the use of the appliance by someone responsible for their safety.
Children must be supervised to ensure that they do not play with the appliance.
Your vacuum cleaner is fitted with a safety device which prevents the motor from overheating. In certain cases (when used on chairs, sofas, etc.) the safety device may be tripped and the appliance may make an unusual noise that is not serious.
Only use original Rowenta accessories and filters.
Check that the filter and the separator are correctly positioned.
Do not operate your vacuum cleaner without its filter system (3 and 5) or if the cover is not closed.
Do not fit the filter in the appliance until it is completely dry. If you have any difficulties in finding accessories or filters for this vacuum cleaner, contact the Rowenta customer service (see last page for details).
USING THE APPLIANCE
1 • Assembling the elements of the appliance
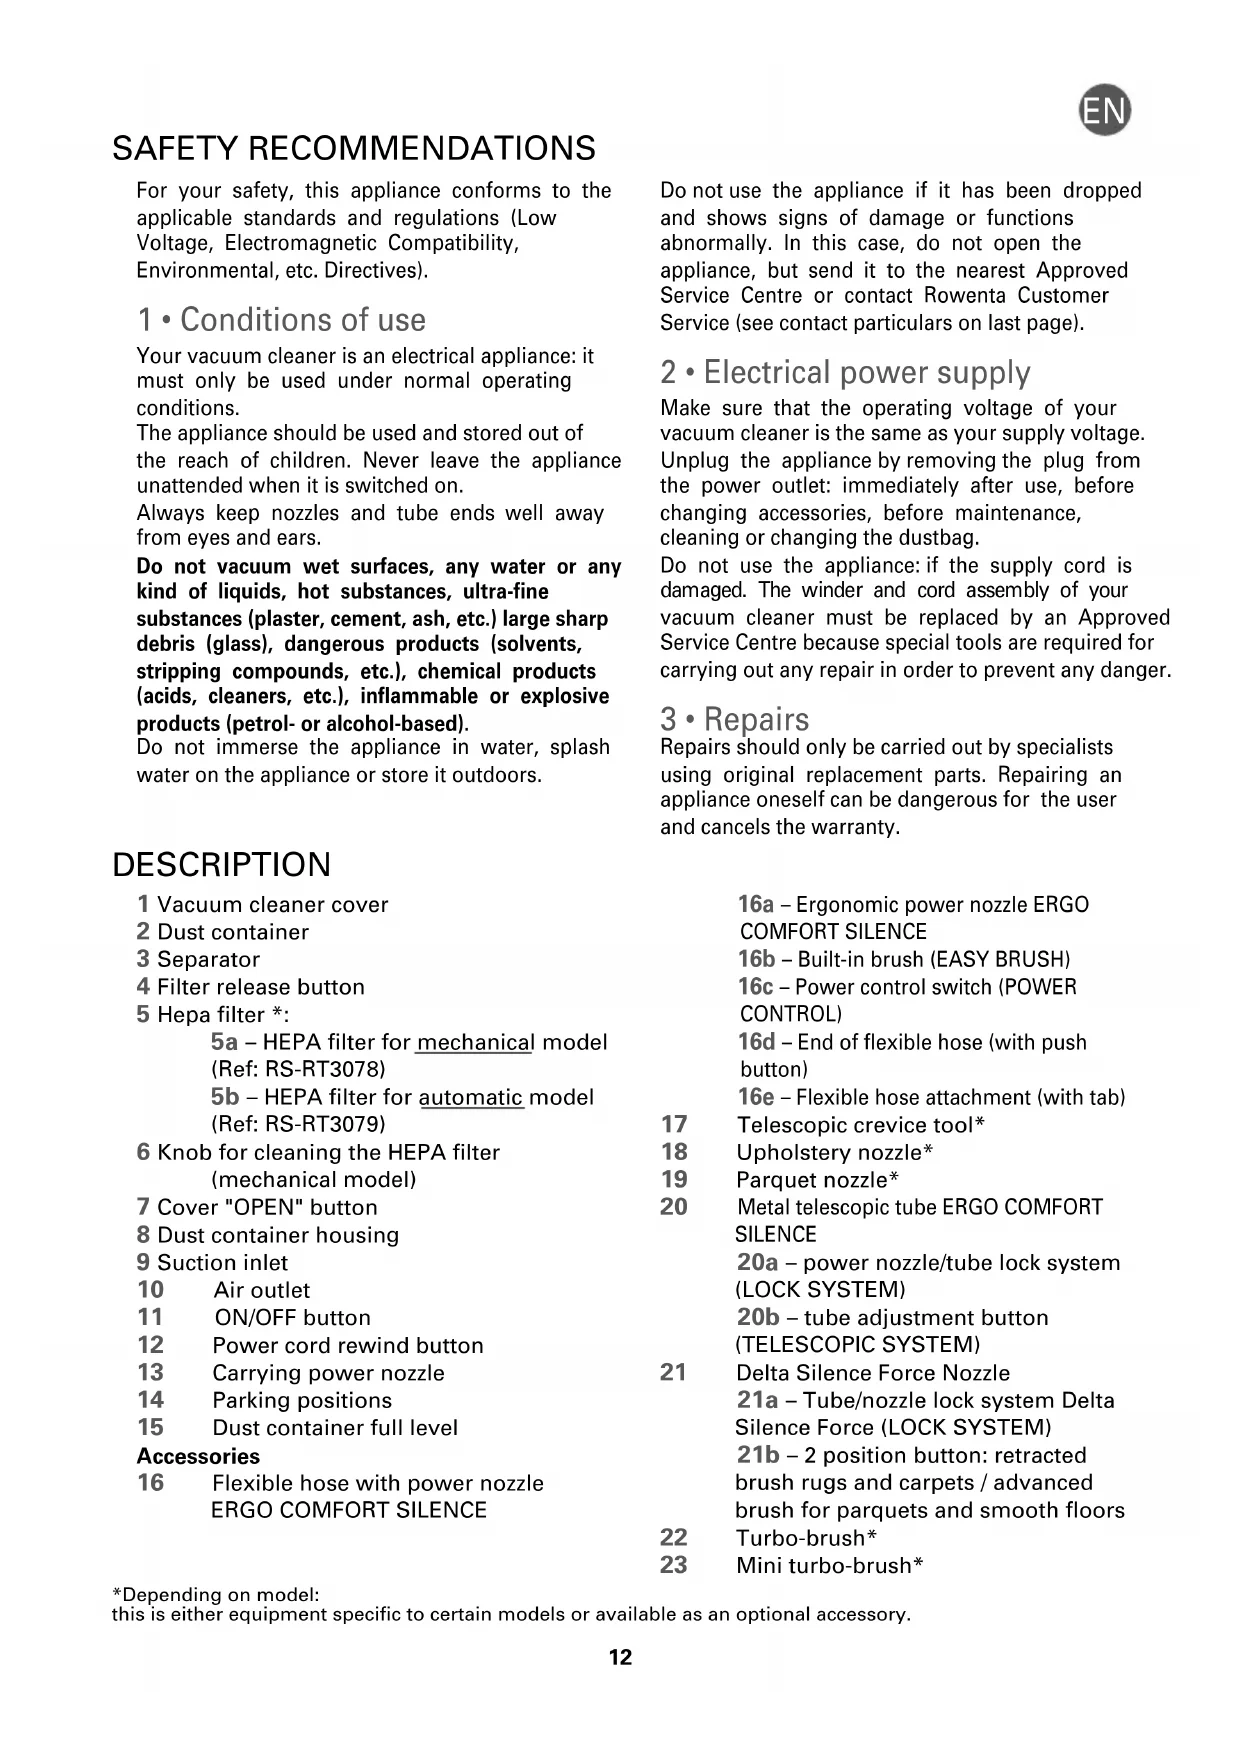
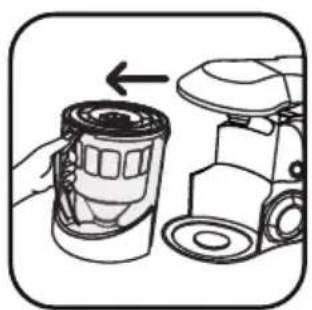
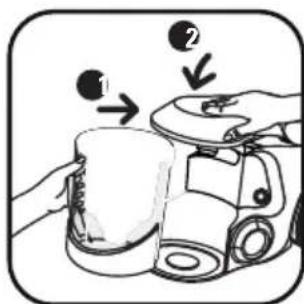
Clip the end of the flexible hose (16d) into the suction inlet (9) (fig.1 & 2) and attach it (16e) to the front of the appliance (fig.3 & 4).
To remove the flexible hose, unclip the end using the button and pull it towards you, unclip the clip by pressing the tab and pull it towards you.
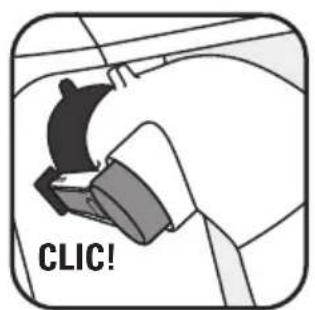
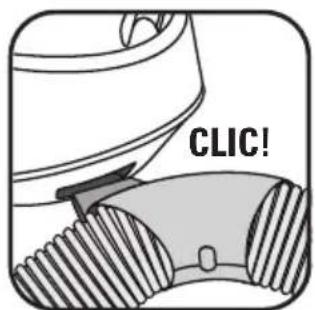
- Fit the metal telescopic tube to the end of the power nozzle, pushing it until you hear a locking 'click' (fig.5) (to release it, press on the tube's lock button and remove it).
- Fit the Delta Silence Force nozzle to the end of the metal telescopic tube, pushing it until you hear a locking 'click' (fig.6) (to release it, press the nozzle's lock button and remove it).
- Adjust the metal telescopic tube to the required length using the telescopic system (TELESCOPIC SYSTEM) (fig.7)
- Fit the required accessory to the end of the metal telescopic tube or the power nozzle:
- For rugs and carpets: use the Delta Silence Force nozzle in the retracted brush position or the Turbobrush* (to remove fibres and animal hairs).
- For parquets and smooth floors: use the Delta Silence Force nozzle in the advanced brush position or, for a better result, use the parquet nozzle*.
- For getting into corners and places that are hard to reach: use the telescopic crevice tool*.
- For furniture and fragile surfaces: use the brush which is built into the nozzle (EASY BRUSH) or the upholstery nozzle*.
IMPORTANT Always switch off your vacuum cleaner before changing the accessories.
USING YOUR VACUUM CLEANER COMFORTABLY ERGO COMFORT SILENCE Range
Comfortable to use, the ERGO COMFORT SILENCE range has been designed to make using your vacuum cleaner an easier and more comfortable experience.
So as to avoid bending your back and to keep a straight posture, make sure you:
-
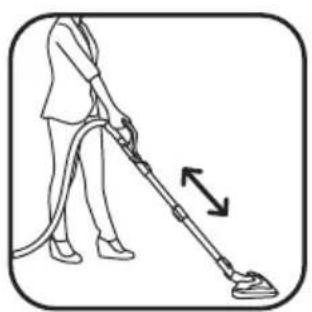
Adjust the ERGO COMFORT SILENCE metal telescopic tube to a length that you're comfortable with (fig.8).
-
Place your second hand in front of the ERGO COMFORT SILENCE power nozzle handle (fig.9).
2 • Plugging in the power cord and using the vacuum cleaner
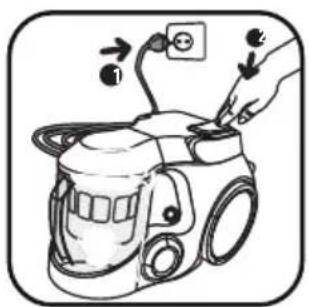
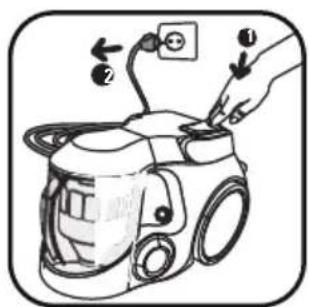
Unwind the power cord completely, plug in your vacuum cleaner and press the ON/OFF button (fig.10).
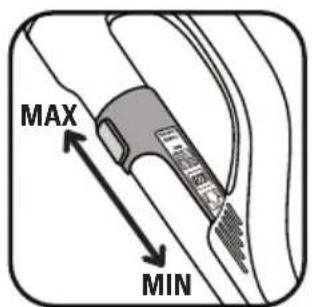
- Adjust the vacuuming power using the power switch on the power nozzle (fig.11):
- Position (MIN) for vacuuming delicate fabrics (net curtains, textiles).
- Position (Medium) for every day vacuuming of all types of floors, that are only slightly dirty.
- Position (MAX) for vacuuming hard floors and rugs and carpets that are really dirty.
IMPORTANT Do not operate your vacuum cleaner without the filtration system fitted (3 and 5
IMPORTANT Do not use the vacuum cleaner once the maximum level is reached | the dust container.
3 • Storage and transport of the appliance
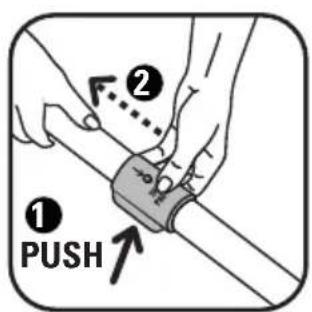
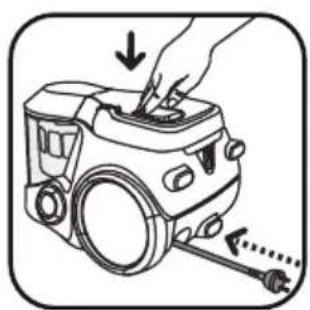
After use, switch off your vacuum cleaner by pressing the ON/OFF button and unplug it (fig.12). Rewind the power cord by pressing the power cord rewind button (fig.13).
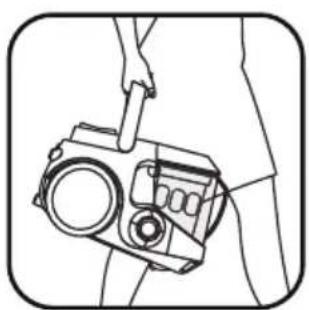
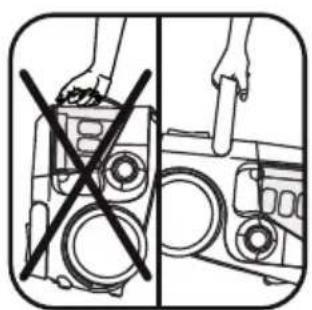
Use the carrying power nozzle to carry your vacuum cleaner easily (fig.14).
IMPORTANT Do not use the power nozzle of the dust container to carry the appliance (fig.15).
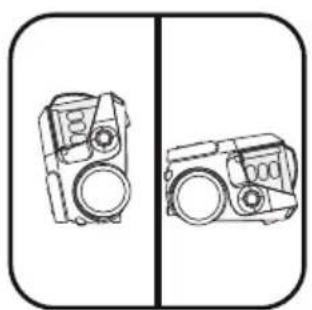
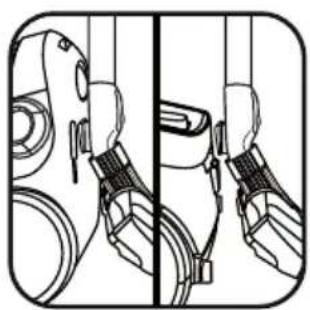
When storing your vacuum cleaner, you can park it either vertically or horizontally (fig.16). Place the tube in the storage slot underneath or at the back of the appliance, in the parking position (fig.17).
CLEANING AND MAINTENANCE
The air we breathe contains particles that may be allergens: mite larvae and droppings, mould, pollen, smoke and animal residues (hair, skin, saliva, urine). The smallest particles penetrate deep into the respiratory system where they can cause inflammation and cause lung impairment.
HEPA filters (High Efficiency Particulate Air) are used to filter out the smallest particles.
With the HEPA filter, the air released back into the room is healthier than the air that is vacuumed.
IMPORTANT Always switch off and unplug your vacuum cleaner before cleaning or servicing.
1 • If you have the mechanical model*: mechanical cleaning of the HEPA filter and emptying of the dust container
Each time after use, we recommend that you clean the HEPA filter to maintain optimum suction power.
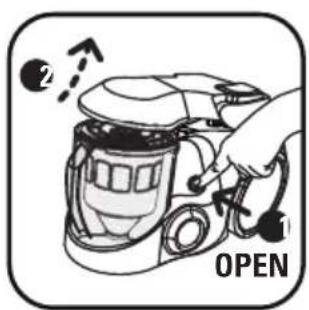
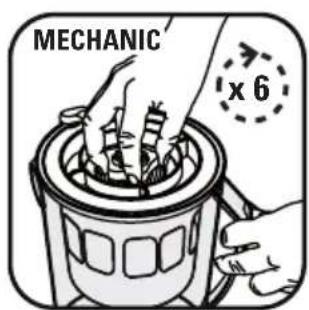
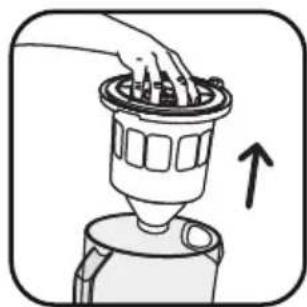
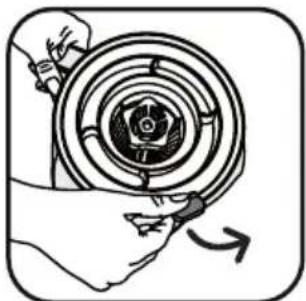
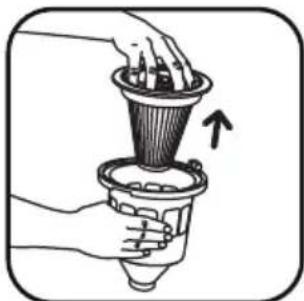
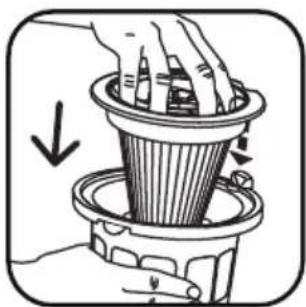
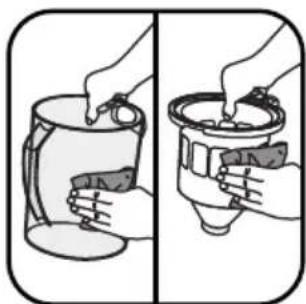
The HEPA filter is cleaned using the cleaning knob (6). After use, switch off your vacuum cleaner, unplug it and open the cover by pressing the "OPEN" button (fig.18), remove the bowl (fig.19), actuate the HEPA filter cleaning knob by turning it in a clockwise direction (fig.20), then remove the filter assembly (3 and 5) (fig.22), tapping it gently against the side of the bowl to remove any excess dust (fig.23) then empty the dust container (fig.24). Clean the separator the cover using a cloth if it is dirty (fig.25). Put the filter assembly (3 and 5) back inside the dust container (fig.26). Then fit the dust container back into its housing and close the vacuum cleaner cover (fig.27).
IMPORTANT Each time after use, we recommend that you turn the HEPA filter cleaning knob 6 times completely, so that your vacuum cleaner maintains full suction power.
2 • If you have the automatic model*: automatic cleaning of the HEPA filter and emptying of the dust container
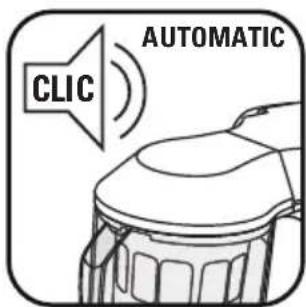
Cleaning is performed automatically and requires no action from you. It is carried out when required when your vacuum cleaner is switched on or off. NOTE: Your vacuum cleaner makes a clicking noise during the cleaning operation, this is completely normal (fig.21).
We recommend that you empty the dust container each time after use and/or after cleaning the filter. Proceed as follows:
- Unplug your vacuum cleaner and open the cover by pressing the "OPEN" button (fig.18) and remove the bowl (fig.19).
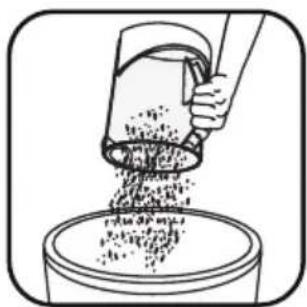
- Remove the filter assembly composed of the separator and the filter (3 and 5) (fig.22) tapping it gently against the side of the bowl to remove any excess dust (fig.23) then empty the dust container (fig.24).
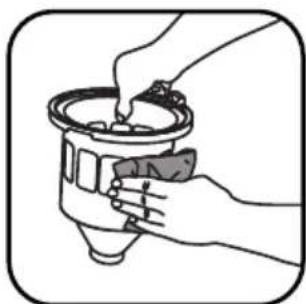
- Clean the separator cover using a cloth is if it is dirty (fig.25).
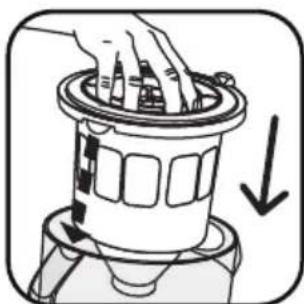
- Refit the filter assembly (3 and 5) inside the dust container (fig.26). Then refit the dust container into its housing and close the cover of the vacuum cleaner (fig.27).
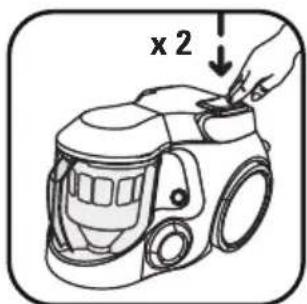
REMARK if you notice that the suction power of your appliance drops, you can force the automatic cleaning of the HEPA filter. In this case, switch off your appliance and press the ON/OFF button twice consecutively (fig.28).
IMPORTANT Empty the dust container afterwards.
3 • Servicing the HEPA filter
IMPORTANT The suction power may still remain unsatisfactory after the mechanical or automatic cleaning of the HEPA filter (see Cleaning and maintenance paragraph). In this case it must be cleaned manually.
In this case, open the vacuum cleaner cover (fig.18), remove the dust container and release the HEPA filter (fig.29).
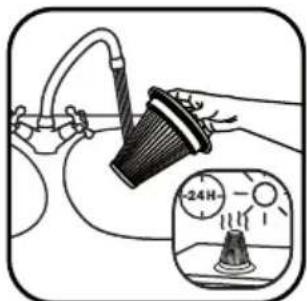
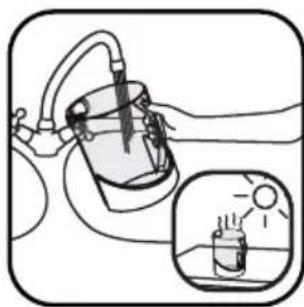
Remove the HEPA filter (5) from the separator (3) (fig.30) and tap the filter above a dustbin (fig.31) then clean the outside wall of the filter under the cold water tap (fig.32).
WARNING Do not place the inside wall of the HEPA filter under water.
Do not touch or rub the folds of the HEPA filter. Leave the HEPA filter to dry for 24H before refitting it in the appliance.
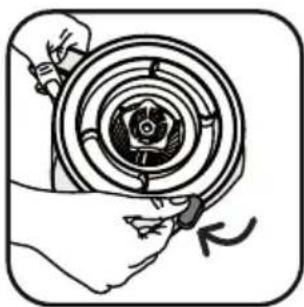
Refit the HEPA filter in the separator (fig.33). Lock it in position (fig.34). Refit the dust container into its housing in the vacuum cleaner and close the cover of the appliance (fig.27).
IMPORTANT If your HEPA filter is damaged, you may purchase another from your dealer or from an Approved Service Centre (see attached list).
4 • Cleaning your vacuum cleaner Wipe the body of the appliance and the accessories with a soft cloth. Wash the dust container and the separator with clean water (fig.35-36) then dry them with a soft cloth (fig.37).
IMPORTANT Do not use aggressive or abrasive detergent products. The transparency of the dust container and/or the separator cover may alter in time but this does not change the performances of the appliance.
TROUBLESHOOTING
IMPORTANT As soon as you notice that your vacuum cleaner is not operating as well, before carrying out any checks, switch it off using the ON/OFF button and unplug the power cord.
If your vacuum cleaner will not start
- The appliance is not powered. Check that the appliance is plugged in correctly.
If your vacuum cleaner has no suction power
- An accessory, the tube, the flexible hose or the pipe between the suction inlet (9) and the separator are blocked, unblock them.
- The separator cover is blocked: remove the filter and clean it.
- The HEPA filter is dirty: clean it (see Cleaning and Maintenance paragraph). If the HEPA filter is damaged, change it.
- The cover is not closed correctly: close it.
If your vacuum cleaner has less suction power, is noisy or makes a whistling noise
- An accessory, the tube, the flexible hose or the pipe between the suction inlet (9) and the separator are blocked, unblock them.
- The dust container is full: empty it and wash it.
- The dust container is not correctly fitted. Fit it correctly (fig.27).
-
The filter system (3 and 5) is saturated: see the Cleaning and Maintenance paragraph. If the HEPA filter is damaged, change it.
-
The separator cover (3) is blocked: remove the filter and clean it.
- The power control switch (16c) is open: close the power nozzle power switch.
- There is an air leak. Check that the dust container is locked. Check that the end of the flexible hose (16d) is fitted correctly. Check that the filter system is fitted (3 and 5).
If the separator fills up
- Dust accumulates in the bottom of the separator. Check that the pipe between the bottom of the separator and the dust container is not blocked. Remove the filter assembly (3 and 5) and tap it gently against the side of the bowl to remove any excess dust(fig.23).
- The inlet of the dust container is blocked. Remove the dust container and empty it. Clean the opening of the dust container (9).
If it is difficult to move the nozzle
- Open the power nozzle power switch (16c).
If the power cord does not rewind completely
- The power cord is slowed down when rewinding: pull the power cord out again and press the power cord rewind button.
If a problem persists, take your vacuum cleaner to your local Rowenta Approved Service Centre. Check the attached list of Rowenta Approved Service Centres or contact the Rowenta customer service.
WARRANTY
- This product has been designed for domestic use only. Any professional use, inappropriate use or failure to comply with the instructions, the manufacturer accepts no responsibility and the guarantee will not apply.
- Read the instructions for use carefully before using your appliance for the first time: any use which does not conform to these instructions will absolve Rowenta from any liability.
WHERE CAN YOU BUY THE ACCESSORIES
| ACCESSORIES* VACUUMING | FITTING AN ACCESSORY | PURCHASE LOCATIONS | |
Furniture brush | To clean furniture. | Fit the brush to the end of the power nozzle. | Rowenta Approved Service Centres (see the attached address list). |
Upholstery nozzle | To clean furniture. | Attach the furniture nozzle to the end of the grip or tube. | |
Telescopic crevice tool | To get into corners and places that are hard to reach. | Fit the telescopic crevice tool to the end of the power nozzle. | |
Parquet nozzle | For fragile floors. | Attach the parquet nozzle to the end of the tube. | |
Mini turbobrush | To clean furniture fabrics thoroughly. | Attach the miniature turbobrush to the end of the tube. | |
Turbobrush | To remove threads and animal fur embedded in rugs and carpets. | Attach the turbobrush to the end of the tube. | |
ENVIRONMENT
- In accordance with current regulations, before disposing of an appliance no longer needed, the appliance must be rendered inoperative (by unplugging it and cutting off the electricity supply cord).
• Environment: Directive 2002/95/EC.
Environment protection first!
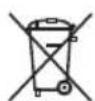
①Your appliance contains valuable materials which can be recovered or recycled.
Leave it at a local civic waste collection point.
SICHERHEITSHINWEISE
WAAR KUNT U DE ACCESSOIRES KOPEN
DÔLEŽITÉ UPOZORNENIE Pred