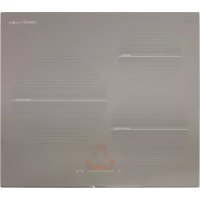
ISB 603 SD - Cooker CATA - Free user manual and instructions
Find the device manual for free ISB 603 SD CATA in PDF.



| Product type | Induction hob |
| Brand | CATA |
| Model | ISB 603 SD |
| Number of cooking zones | 4 |
| Control type | Touch controls (sensitive) |
| Power levels | 9 levels (1-9) + Booster function (P) |
| Booster function | Yes, higher power for max. 5 minutes. |
| Timer | Independent per zone, up to 99 minutes |
| Residual heat indicator | Displays "H" on hot zones (>60°C) |
| Child safety | Key lock |
| Automatic shutdown | After 20 seconds of inactivity; duration limited by power level |
| Pan detection | Yes (induction), shuts off if removed |
| Acoustic signal | Buzzer for keys and errors |
| Power supply | 230 V single-phase, power cable with earth |
| Surface material | Glass-ceramic |
| Maintenance and cleaning | Use a scraper, mild cleaner, avoid abrasive sponges |
| Standards and certifications | Directive 2006/95/EC (low voltage) and 2004/108/EC (electromagnetic compatibility) |
| Repairability | Spare parts available through approved service |
Frequently Asked Questions - ISB 603 SD CATA
User questions about ISB 603 SD CATA
0 question about this device. Answer the ones you know or ask your own.
Ask a new question about this device
Download the instructions for your Cooker in PDF format for free! Find your manual ISB 603 SD - CATA and take your electronic device back in hand. On this page are published all the documents necessary for the use of your device. ISB 603 SD by CATA.
USER MANUAL ISB 603 SD CATA
Operating and maintenance instructions for hobs
IT
HctpyKnna No 3KcnIpyaTaHH H Texo6IcyKHBaHHIO IJIHT
PL
THIS APPLIANCE IS CONCEIVED FOR DOMESTIC USE ONLY. THE MANUFACTURER SHALL NOT IN ANY WAY BE HELD RESPONSIBLE FOR WHATEVER INJURIES OR DAMAGES ARE CAUSED BY INCORRECT INSTALLATION OR BY UNSUITABLE, WRONG OR ABSURD USE.
The manufacturer declares that this product meets all the essential requirements for low voltage electrical material set out in European directive 2006/95/EEC of 12 December 2006 and for electromagnetic compatibility as required by European directive 2004/108/ EEC of 15 December 2004.
PRECAUTIONS
- When the hob is in use keep all magnetizable objects away (credit cards, floppy disks, calculators and so on).
- Do not use any aluminium foil or place any foodstuffs wrapped in aluminium foil directly on the hob - do not place any metal objects such as knives, forks, spoons and lids on the hob surface as they will heat up.
- When cooking in a non-stick pan without seasoning, do not exceed 1-2 minutes' pre-heating time.
- When cooking food that may easily stick, start at a low power output level and then slowly increase while regularly stirring.
- After cooking is finished, switch off using the control provided (turn down to "0"), and do not rely on the pan sensor.
- If the surface of the hob is damaged, immediately disconnect the appliance from the mains to prevent the possibility of electric shock.
-
Never use a steam cleaner to clean the hob.
-
The appliance and accessible parts may be hot during operation.
Take care to avoid touching the heating elements. - Children less than 8 years of age should be kept at a safe distance unless continuously supervised.
- This appliance may be used by children aged 8 or over and by persons with reduced physical, sensory or mental capabilities or lack of experience and knowledge, if they are supervised and have received suitable instructions on safe use of the appliance and understand the dangers involved. Children must not play with the appliance. User maintenance and cleaning should not be carried out by children except under constant supervision.
- Cooking with grease or oil may be dangerous and cause a fire if left unattended. NEVER try to extinguish a fire with water. Rather, disconnect the appliance and then cover the flames with a cover or sheet, for example.
- Fire hazard: do not store elements on cooking surfaces.
- Only counter top protectors designed for use with the cooking appliance and listed in the manufacturer's instructions should be used as suitable protection for the counter top incorporated in the appliance. Use of unsuitable protectors may cause accidents.
- WARNING: Accessible parts will become hot when in use. To avoid burns and scalds children should be kept away.
Insert in the fixed wiring a mean for disconnection from the supply mains having a contact separation in all poles that provide full disconnection under overvoltage category III conditions, in accordance with the wiring rules. The plug or omnipolar switch must be easily reached on the installed equipment.
This appliance is not intended to be used via an external timer or a remote control system.
The manufacturers decline any responsibility in the event of non-compliance with what is described above and the accident prevention norms not being respected and followed.
To avoid all risk, if the power cable becomes damaged, it must only be replaced by the manufacturer, by an authorised service centre, or by a qualified electrician.
OPERATING PRINCIPLE (Fig. 1)
It exploits the electromagnetic properties of most cooking vessels.
The coil (inductor) which produces the electromagnetic field is operated and controlled by the electronic circuit.
The heat is transmitted to food by the cooking vessel itself.
The cooking process takes place as described below.
- loss of heat is minimum (high efficiency)
- the system stops automatically when the vessel is removed or even just lifted from the hob
- the electronic circuit guarantees maximum flexibility and fine adjustments.
(Fig.1)
1 Vessel
2 Induced current
3 Magnetic field
4 Inductor
5 Electronic circuit
6 Power supply
User's Instructions (Fig. 2)
1 ON/OFF
2 Minus -
3 Plus +
4 Cooking zone
5 Setting level display
6 Zone selection lights
Installation
All operations relative to installation (electric connection) should be carried out by skilled personnel in conformity with the rules in force.
As for the specific instructions see part pertaining to installer.
Switching the Touch Control ON/OFF "Z"
After mains voltage is applied the control initializes for approx. 1 second before it is ready for operation.
After a reset all displays and LEDs glow for approx. 1 second. When this time is over all displays and LEDs extinguish and the control is in the stand-by mode.
Press the ON/OFF (1) button to switch the touch control on. The cooking zone displays show a static "0".
If a cooking zone is in the "hot" status, the display shows a static "H" instead of "0". The bottom right dot is blinking in 1 second intervals on all cooking zone displays to indicate that no cooking zone is selected at the moment.
After switching-ON the electronic control remains activated for 20 seconds. If no cooking zone or timer selection follows within this period of time, the electronic control automatically switches back into the stand-by-mode. The control can only be switched-ON if it identifies the ON/OFF key alone being operated. Should it recognize key activation other than that, the control remains in the standby- mode.
If the child safety feature is active when switching on, all cooking zones show "L", (LOCKED). If the cooking zones are in a "hot" status, the display shows "L" and "H" in alternation.
When the Touch Control is ON it can be switched- OFF at any
time by operating the ON/OFF key. This is also valid if the control has been locked (activated child safety feature).
The ON/OFF key has always priority in the switch-OFF function.
Automatic switch-OFF
When the control is ON it automatically sw itches-OFF after 20 seconds if no cooking zone or select key has been operated within this period of time. If case of a cooking zone selection, the automatic switch- OFF time is composed of 10 seconds deselection time for a cooking zone at setting"0 and 10 seconds switch-OFF time.
Switching a cooking zone ON and OFF
First place the pan in the chosen cooking zone. If the pan is not present the system cannot be switched on the correspondent zone.

If the touch control is switched on, the cooking zone can be selected by pressing the button (4) of the corresponding zone.
The display (5) of the zone selected lights up, while the remaining displays are dimmed. If the cooking zone is "hot", "H" and "0" are alternately displayed.
Press the PLUS (3) or MINUS (2) button to select a setting and the zone will begin to heat up.
Once the cooking zone has been selected, the setting can be selected by keeping the PLUS (3) button pressed down. The setting begins at level 1 and increases by 1 level every 0.4 seconds. When setting "9" is reached, the setting will not be changed further.
If the setting level has been selected using the MINUS (2) button, the start level is "9" (maximum level). Keep the button pressed down to lower the active level by 1 every 0.4 seconds. When setting "0" is reached, there will be no further setting changed.
The setting can only be changed by pressing the MINUS (2) or PLUS (3) button again.
Switching a cooking zone off
Select the zone to be switched off using the corresponding button (4). The display (5) of the zone selected lights up, while the remaining displays are dimmed. Press the Cooking zone (4) and MINUS (2) buttons at the same time and the setting level of the zone is changed to 0. Alternatively, the MINUS button (2) can be used to reduce the setting level to 0.
If a cooking zone is "hot", "H" and "0" will be alternately displayed.
Switching-OFF all cooking zones
Immediate switching-OFF of all cooking zones can be achieved anytime by means of the ON/OFF key. In the standby-mode an "H" appears on all cooking zones which are "hot". All other cooking zone displays are not illuminated.
Wattage settings
The output of the cooking zones can be set in 9 steps which are indicated by the figures "1" thru "9" by means of LED sevensegment-displays.
In the cooking zone located on the front left, when selecting the power level 9 and after 30 minutes operating, the power will decrease slightly for safety reasons. In case more power is required, select the boost level ("P")
Boost function
After selection of a respective cooking zone, the boost function can be activated by selecting the power level 9 and then pressing PLUS (3) button. By means of this function certain cooking zones are enabled to receive power over the nominal (the number of boostable cooking zone depends on the power available on a partial modules which is to be lees than total hob power). If the desired cooking zone has the capacity to activate the booster, the display shows a "P" symbol. In case the available power is not enough the cooking stage display flashes for 3 seconds on the cooking zone which needs to be reduced and which requires automatic adjustment.
The boosting time is limited to 5 min to protect cooking utensils. After the booster is switched off automatically, the cooking zone continues operation on power level "9". The booster can be reactivated after some minutes.
In case that the pan is removed from the cooking zone during boosting, the boosting function remains active and boosting time continues.
The power management is based on the principle that the last entry is requested by the induction as top priority. That means that previous actions and settings also made for the other cooking zones are reversed automatically, if necessary.
- If induction identifies the necessity of reducing power at a cooking zone, the selected cooking stage flashes on that cooking zone providing a correction period of 3 sec before the power is reduced automatically to a minimum cooking stage.
- If the setting is adjusted within the correction period, the power management checks the settings again. Should a new setting lead to further power reduction, the correction period starts again.
- If no automatic correction needs being made to the cooking zone setting, the flashing stops immediately and the original value remains as a steady display indication. Should the situation change again on the power reduced cooking zone, no automatic power increase is effected.
Residual heat indicator
It is meant to indicate to the user that the glass ceramic has a dangerous touch temperature in the circumference of a cooking zone. The temperature will be determined following a mathematical model and the remaining residual heat will be indicated by means of "H" on the corresponding 7-segment display.
Heating-up and cooling down will be calculated dependent on:
-
the selected setting (,0^ to 9^)
-
the ON/OFF time.
After switching-OFF the cooking zone the respective display shows "H" until the assigned cooking zone temperature is mathematically in a uncritical level. (≤ 60^)
Automatic power OFF function (operating time limitation)
Dependent on the selected setting, every cooking zone will be switched-OFF after a defined maximum operation time if no operation of the assigned cooking zone follows within this time period. Every change of the cooking zone condition (by means of the PLUS-, MINUS- key) puts back the maximum operation time of this cooking zone to the initial value of the operating time limitation.
Protection against unintended switching-ON
- If the electronic control realizes a continuous operation of keys for approx. 10 seconds, it switches OFF automatically. The control sends out an audible failure signal for 10 seconds, so that the user can remove the object which has been mistakenly placed onto the operation surface. The displays show the failure code "E R 0 3". If the failure carries on for more than 10 seconds, only the code "E R 0 3" will be displayed as long as the failure will be recognized by the electronic control. If the cooking zone is in the "hot" status, "H" will appear on the display in alteration with the failure notice.
- If no cooking zone will be activated within 20 seconds after switching-ON by means of the Power-key, the control switches back from the ON-condition into the stand-by-mode.
- When the control is switched- ON the ON/OFF-key has priority over all other keys, so that the control can be switched-OFF anytime, even in case of multiple or continuous operation of keys.
In the stand-by mode a continuous operation will not be signalized. However, before the electronic control can be switched-ON again, it has to recognize that all keys are not operated.
Key lock (child safety feature)
Child safety feature:
Key lock:
After switching-ON the control the child safety feature can be activated. To achieve this it is necessary to simultaneously operate the front right cooking zone- select-key and the MINUS-key and then press the front right cooking-zone-select key again. There will be an "L", meaning LOCKED (child safety feature against unintended switching-ON). If a cooking zone is in the "hot" condition, "L" and "H" will be displayed in alternation. This course of operation has to take place within a period of 10 seconds, no other key than described above may be operated. Otherwise the input will be interrupted because of incompleteness, the cook top will not be locked then.
The electronic control remains in a locked condition until it gets unlocked, even if the control has been switched-OFF and -ON in the meantime. Also a reset of the control (after a voltage drop) does not cancel the key lock.
Unlocking for cooking purposes: :
To unlock and operate the control it is required to operate the front right cooking-zone select-key and the MINUS-key simultaneously. "L" (LOCKED) in the display extinguishes and all cooking zones show "0" with a blinking dot. Should a cooking zone be "hot", "H" is displayed instead of the static "0". After switching- OFF the control, the child safety feature is active again.
Cancelling the key lock:
After switching-ON the control the child safety feature can be deactivated. Here it is necessary to simultaneously operate the front right cooking-zone-select key and the MINUS-key and then operate the MINUS-key alone. If all steps have been carried out in the right order within 10 seconds the key lock gets cancelled and the control is OFF. Otherwise the input will be considered incomplete, the control remains locked and switches-OFF after 20 seconds.
After a renewed switching-ON by means of the ON/OFF key all displays show 0^ , the display dots are blinking and the control is ready for cooking. If a cooking zone is in "hot" mode, "0" and "H" will be alternately displayed.
Audible signal (buzzer)
While the control is in operation the following activities will be signaled by means of a buzzer:
normal key activation with a short sound signal.
- continuous operation of keys over a longer period of time (_10 seconds) with a longer, intermittent sound signal.
Timer function (optional)
The timer function is realized in two versions:
- Stand-alone timer 1..99 min: sound signal when the time is over (= minute minder). This function is only available when the cooktop is not in operation, i.e. when there is no cooking.
- Cooking zone timer 1..99 min: sound signal when the time is over, four cooking zones can be programmed independently.
Timer as minute minder (stand-alone):
If the control is ON and no cooking zone selected, the standalone-timer can be used by simultaneously operating the MINUS (2) and PLUS (3) keys.
- Adjustment range (0-99min), it can be set in 1-minute steps with any key, starting at 1 up to 99 (end stop) with the minuskey starting at 99 down to 0 (end stop)
- Continuous activation of the plusor minus-key results in a dynamic increase of the adjustment speed up to maximum value without sound signal.
- when the plus- or minus key is released in the meantime, the adjustment speed starts again from a (low) initial value.
- adjustment can be made with a continuously activated plus- or minus-key or by tip-operation (with sound signal). After the timer is set the time runs down according to the adjustment. When the time is over there is a sound signal and the timer display blinks.
The sound signal will be stopped
automatically after 2 minutes and/or
by operating any key.
Then the blinking of the timer display stops and the display extinguishes.
Switching-OFF/changing the timer
The timer can be changed or switched-off anytime by simultaneously operating MINUS (2) and PLUS (3) keys. (with sound signal). The timer will be switched off by counting down to "0" with the minus-key.
For 6 seconds the timer display remains at "0" before it will be switched-off.
- If the control will be switched-ON by means of the Power-key, the stand-alone timer will be switched-off also.
Timer programming on cooking zones
When the control is switched- ON an independent timer can be programmed for every cooking zone.
- By selecting a cooking zone with the cooking-zone-selectkey (4), then selecting the setting and, finally, operating MINUS (2) and PLUS (3) keys simultaneously, the timer can be programmed as a switch-off function for a cooking zone.
- During timer programming, the pilot light (6) of the selected cooking zone blinks.
- When the timer has run down, there is a sound signal and the timer display shows "00" statically, the assigned cooking zone timer LED blinks. The programmed cooking zone will be cut off and H^ will be displayed if the coking zone is hot, otherwise a stroke will show in the cooking zone display.
The sound signal and the blinking of the timer LED will be stopped
automatically after 2 minutes
by operating any key.
The timer display extinguishes.
- The basic behaviour follows the description of the "minute minder" (stand-alone-timer).
Cooking vessels (Fig. 3)
- a magnet-attracting vessel may be a suitable vessel for induction cooking
- prefer vessels which are especially declared to be suitable for induction cooking
- flat- and thickbottomed vessels
- a vessel with the same diameter as zones ensures the maximum exploitation of power
- a smaller vessel reduces power exploitation, but does not cause any energy loss. We would anyhow not recommend the use of vessels with diameters smaller than 10cm .
- stainless-steel vessels with multi-layer or ferritic stainless-steel bottoms when specifically suited for induction cooking
- cast-iron preferably enamel-bottomed vessels to avoid scratching the pyroceram surface
- we do not recommend the use of any glass, ceramic, earthenware, alluminium, copper or non-magnetic (austenitic) stainlesssteel vessels.
Maintenance (Fig. 4)
By means of a scraper immediately remove any alluminium foil bits, food spills, grease splashes, sugar marks and other high sugarcontent food from the surface in order to avoid damaging the hob.
Subsequently clean the surface with some towel and appropriate product, rinse with water and dry by means of a clean cloth. Under no circumstance should sponges or abrasive cloths be used; also avoid using aggressive chemical detergents such as oven sprays and spot removers.
Installer's Instructions
Installation
These Instructions are for the qualified technician, as a guide to installation, adjustment and maintenance, according to the laws and standards in force. These operations must always be carried out when the appliance has been disconnected from the electric system.
Positioning (Fig. 5)
The fixture is especially designed for fitting into a work-top as shown in the corresponding figure.
Place the supplied sealing agent along the hob perimeter.
Do not install the hob over an oven; in case you do, make sure of the following:
- the oven is equipped with an appropriate cooling system
- there is no warm-air leakage from the oven towards the hob
- suitable air-inlets are provided as shown in the figure.
(Fig. 5)
1 Front view
2 Front side
3 Oven or cupboard zone
4 Air input
Electrical connection (Fig. 6)
Prior to carrying out the electrical connection, please ensure that:
- the plant characteristics are such as to follow what is indicated on the matrix plate placed at the bottom of the working area;
- that the plant is fitted with an efficient earth connection, following the standards and law provisions in force.
The earth connection is compulsory in terms of the law. Should there be no cable and/or plug on the equipment, use a suitable absorption material for the working temperature as well, as indicated on the matrix plate. Under no circumstances must the cable reach a temperature above 50^ of the ambient temperature.
IT
QUESTO PRODOTTO E STATO CONCEPITO PER UN IMPIEGO DI TIPO DOMESTICO. IL COSTRUTTORE DECLINA OGNI RESPONSABILITA NEL CASO DI EVENTUALI DANNI A COSE O PERSONE DERIVANTI DA UNA NON CORRETTA INSTALLAZIONE O DA USO IMPROPRIO, ERRONEO OD ASSURDO.
VOORZORGSGMAATREGELEN
Sakerhetsmekanism for barn:
Blockering av touchkontrollerna:
NOMOUI COOTBETCTBYUeKlaBUN (ymeHbweHne do "0"), n He DoBepaTe DeTeKTOpy KaCtpoJIb.
- Pp npa3nme NOBepxHocT NNTbl, CneNyET HeMeIeHHO OTKIOUHTb annapaT OT CETN NITAHNA BO n36exKaHne 3JIeKTPuueCKoro Woka. - 3anpeaaetc HcnoJb3OBaTB napOBbie annapatbl DnryouchTK NOBepxHocT NNTbl.
- Pn6op n ero qactn Moryt HargpeBaTbCra BO BpeMa pa60tbl.
CobnOaTe octopoxHOCTb, yTObI He KacatbC HArpeBaTeNbHbIX 3JemeHTOB.
-Дети Mладие 8 net He DoJnxHbI npn6nKaTbcR K npn60py 6e3 NOCTOARHHOro nPNCMOtpa B3pocblix.
-Данньи np6op pa3pe7aetcЯ nCNoB3OBaTb DeTAM CTapwe 8 neT, a TAKKe IINuam C ORpaHnueHHbIMN OIN3UneCKMn, CEHCOPHbIMN INI YMCTBeHHbIMN BO3MOXHOCTaMn INI OTCYTCTBnEM ONbITA N 3HaHm TOlbKO B TOM cInyae, eCIn OHN HaxOJaTc NOd KOHTPOJem INI eCIn OHN pOoJIIN COOTBETCTByUOUsNI INHCTpyKTaK B OTHOWeHm 6e3Onachoro nCNoB3OBaHnA np6opa INOHMaIOT CBraHHbIe C 3TIm OnaCHOctn. He DOnyckaIte, qTO6bl DeTI nrgpAn C np6Opom. DeTI 6e3 npncMoTpa He DOJxHbI BblONHrTb OUnCTky IN TexHnueCKoe o6cnykBaHnE np6oba.
Onacho OTXOAnTb OT np60pa BO BpeM npiroTOBHeHn NmC nCNoJIb3OBaHneM Xnpa nn MaCla, Notomy yTO cyueCTByeT BepoTHOCTb BO3HNKHOBeHn NoXapa. HNKOrDA He nbIaTeCb NOTyUHTb OROh BOIOB. B Takom clyuae CneJyET OKNIOUHTb np6Op OT NcToCHnKa PNTAHn, a 3aTeM HaKpbITb PIIaM, HanpIMep, KpbIshKO nn NOKpbIBaIOM.
-Опасноctb BO3нИКHOBEHЯ NOЖар: He octaBnIte npedMeTbI Ha BapOuHbIX NOBepxHOCTX.
IcnoJb3ynte TOnbKO TaKne CpeDCTBa 3aunTbI CToneuHnUbl, KOtOpbl pa3pa60TaHbI npOn3BOoNTeMe npu6opa dJa npnroTOBHeHn IIN yKa3aHbI npOn3BOoNTeMe B INHCTpyKxnx Np npImeHnIO,In6OpeDCTBa3aunTbICTOJeHnUbl, KOtOpbl BXoJrB KOMnEKT NOCTABKn npu6opa. IcnoJb3OBaHne HeNoDxOauxxCpeDCTB 3aunTbIMoXET npuBeCTN K BO3HNKHOBEHnIO HeCuaCTHBIX CnyuaEB.
BbIOnHnTe noDKIIOUeHne K cTaunHOapHoN npOBoJKe C yueTOM TOrO, YTO OTKIOUeHne OT nHTaIOUeI CEIN DOJIxHO OCUUeCTBJIaTBcA C 3a3OpAMM MeXdy BCEMN KOHTaKTAmN, oBeCneuBaIOUmN pONHbI pa3pbIB ceNn npnpeHaPRAJKeHN,BCOTBeTCTBUNCTpe6OBaHnAMN kateropnn I I npABnAMn npOKnaDkn. Po3etKa NII MHorOIOJIIOChbI nepeKIOUaTeNb DoJXHbI 6bITb Ipocbl I DoCTyINHbl DnI NOKIOUeHnY UCTAHOBJeHHoro aannapaTa.
Даньи npi6op He npedHa3NaueH ДЯ NCNoIb3OBAHnC BHeUHM TaIMepOM NIN CNTeMoI DnCTaHcNOHHOro ynpaBLeHn.
KoHCTpykTopCHIMMaetCce6Bc0OTBeTCTBeHHOCTbB TOM Cnyae,ecnBCE BblweyKa3aHHble Tpe6OBaHn I O6bIHyIe HopMbI PpeIOctOpOXHOCTn He 6byT co6JIIOJeHbI.
B cnyae nopekdehna whypa numanu, 6pamumecbkΦa6pukaHmydne203amehbI, uUo6pamumecb bynoHMOueHHbu uehmp mexHuueckou nomouu, uUx oe 6pamumecb K mexHuueckomy cneuauncmy IIO6O zuehmpa c nodo6hmu noHMOuymu, dny npedombaeHua BO3HukHObeHua IIO6O zu buda pucOB.
PpHnHnnblpa6oTbI(Pnc.1)
PnHcHbIpaObIocHOBaHbHa3JIeKTpOMaHHTHBIX CBOCTBAX KAcTPOJIb, CKOBOpOIOK INHOH NOCyDbI DnA PnroTOBHeHINu.
HnykuohnKaTuWka ynpabIeTc3NeKtpoHHo CXeMoJ dno c03daHnCnblHorO MaHHTHO rNoJ.
Tepno nepedaetc npodykram nHTaHn oT cMoNocybl.
Bapka npoaykTob n npiroToBneHne pnsocyueCTbIaETcnaeDyoUIM 6pa30m:
-MMHMaJIbHaJIaNcIpeCnA(BbIOxNbBIXOJ)
- CHTne KAcTpOJn C 30Hb BApKn (mnn npocTo ee noDHaTne BBepx) ABTomatueckn bIokpyeT cIcTeMy.
- 3NEKtpOHnHa CNTeMa OBycnaBnBaet MaKcMmaJbHyO T6KOCTb IN TOHKoCTpeYnnpOBKn.
(Pnc.1)
1 Kacrtpion
2 INHnyuympoBaHHbI TOK
3 MaTHHtHOe nOJe
4 INykTOp
5 3neKtpoHHa cxema
6 3eKtpueeckoe noDkIuoyehne
Hnctpykunnn nn nonb3oBaTea (Pnc.2)
1 BkIIOUeHnE N BbIKIOUeHne
2y6aBntb"-"
3ПибавNTb"+
430ha npiroTOBHeHH
5 OTo6paXeHne yPoBnHaCTpoiKn
6 NHdNkaTOpb BbIbOpa30HbI
MOHTAK
Bce onepaunnoMOHTaxky(3neKtpueeckne NOkHouehn)doJXhbl npON3BONDTCOJIbKO KBaINHcUNPOBaHHbIM nepcoHaON M B COOTBeCTBnC cyuectByIOUmm HOpMaTHBaMn.
B Pa3dene "MOnTakHnKa" npuBeHeBb BCE noOpno6HoCT MoTaKa.
BklioucheHne N BbIKluoyeHne Touch Control
Pocne noKIOUeHn K cTeN nITaHn, yKe uepe3 ceKyHny Touch Control 6yDenAOKBnPOBaH.
Iocne c6poca BceX dncnneeB, DIObI LEDs 6dyT mRatb np6m3nteHBO TeueHne OOnH CEkyHdbI. Iocne ETOrO BCE dncnnen u DIObI LEDs norachyT, n Touch Control nepeJET B coCToHHe oXuaHna.
HaKMTe KHOKNy BKNIOueHn/ByIKIOueHn (1) nBkIOueHn ceHCOPHOrO ynpabIeHn.
Ha dncnneB 30hax BapKn Bby yBuDnte "O" BCnyae «RopeHnra» OndHn 30h BapKn (BbICOKA TemNepaTpa), Ha dncnnee NOBNTc CmBON "H" BMeTOo"TOUka, paCNOJKeHHa H npABoH NHXHe YacTH BCex DncnneB B 30hax BapKn, 6yJeT qAcTo MNrTaB TteYeHne OndHcKHyDbI, nla HAnOMnHaHn, yTO Noka eSe He BbIbPaHa HOn Onda 30Ha BapKn.
Tocne BknoeHn, Touch Control 6ytdet AKtmbpoBn B TeeyHe 20 ckyHn. B Tom Cnyae,ecn BbI He BbIbpaII Hn 3OHy BapKn,Hn TaIMep,Touch Control ABTomATmueckne BepHcTBpeKUM OxMuaHn.
Touch Control BKNIOUaETcB pa60Ty HaxKaTHeM BCErO NnMb OndHou KnaBnHINITAHN.
B cnyae ecn Bb Haxaann OndHobpeMeHHo KnaBnuy nITAHn INpyrne KnaBnHN, He 6ydt npOn3BeDeHO HnKaKOrO DeCTBn, n Touch Control octaHETc B pexmme OxndaHn. Ecn B MOMENT BKIOUeHn AKTNBnPOBaHO npncnoc6bHeHne 6e3onacHoT nIg DetE, Ha DnCInJeX BO BCex 30hAx BapKn BBCBetntc "L" (locked/3a6nOKnpoBaHO). B cnyae "ropeHnA
B30Hax BapK,Ha dncnIex BbCBetTcnooepeHNO 6yKbbl "L" n"H"(hot/ ropn).Touch Control moxho B no6oM omeHT bIKIOuHTb KnaBnwei nTuHn.3To moXHO cEJaTb DaXe B tex CnyaX, KOrDa ynpabNeHne 3a6nokpObaHo NocpeCTBOM npCnOc6NeHn 6e3OnaCHO Tn DnTei. KnabNtuaNTaHn BcERda NMeET npOpNTET DnBkIOUeHn.
ABTomatueckoe BbIKIOUeyHe
Pocne BkIOUeHn, Touch Control BbIKIOuAeTc ABOTMATueckn uepe3 20 cekyH npOCTCBn DeICTBn. Pocne BbI6opa 30hB BapKn, Bpemr abTOMATueckoro BbIKIOUeHn NOp4a3dEJIeTc HApnpOdb1B 10 cekyHn, no nCTeUeHn nepBbIX 10 cekyHb BbIKIOUaTe Tc 30Ha BapKn, a no nCTeUeHn cnedyUoixn 10 cekyHd Touch Control BbIKIOuAeTc.
BkIIOUeHHe/BbIKIOUeHHe 30Hb BapKn.
Noctabbte KactpnoH a COOTBcTbYbOyO 30Hy BapKn. Ecn KactpnoH He CTont Ha MeTe, CnCTema He aKTHBNpyet COOTBeTcTByOyO 30Hy, a Ha DnCnnee NOABTCa CneDyOuM CNMBON:

PnB BKIOUHOM CENCOPHOM UnpaBHeHH MoXHO BbI6paTb IIO6yO
BapOHyIO 30HY HaxKaTHEM KHOKNBbI6pa COOTBeCTByIOe 30HbI (5).
DInCNIIe BbI6paHNO 30HbI (6) 3 aropaETc cNbHee, a OCTaNbHe eINCNIIe RaCHyt.
Ecn 30Ha HarpeBaetc, To nooUepEno OTobpaKaHOTc cMMBOJI bH N N O.
HaxMma KHOKN «PIIOC» (3) u MmHCy (2), MoXHO Bbl6paTb
Heo6xOaMbMy yPoBeH MOuHOctN, u 30Ha HaCyET HarpeBaTcB.
BbI6pab BApOHy 30Hy, MoXHO HAcTpONbYpoBeH MOUHCTN, HaxMma KHOKNy
«PIIOC» (3); NaHna C yPoBn1 YBeJIuHHe He aOni War 6yDet npOnxCOJNTb KaKdble 04c. yPoBeH 9 JABLIEcMaKCMaJIbHbIM yPOBHE MOnHOCTN.
Pn HacTpOKe yPoBn MaUHOctN pRn NOMOUs KHOKN «MmHCy (2)
NepBoHaauNbHbI yPoBeH 6yDet PabeH 9 (MaKCMaJIbHbIM yPoBeH). Ecnu
UdepXMBaTB 3Ty KHOKN HaXaToH, yPoBeH MOUHOctN 6yDet CHNXaTbCA HAOnn KaKdble 04 cekyHNbI. YPoBeH 0 ABJIeTC MaHMMaJIbHBIM yPOBHE
MOUHCTN. DnperpyINpOBaHn yPoBn MOUHCTN Heo6xOaMIO CHOBA
HaxKaTb KHOKN «PIIOC» (2) nnn «MHYC» (3).
Bbiklouhene cepooh30hbl
BbIePHTe 30Hy, KOtopyH Heo6xOJIMo OTKIOUHTb, PnN NOMOu COOTBeCTByIOUeH KONKn (5). DcNnei Bbl6paHHo30hbi (6) 3aropntc CnIbHe, a octaIbHbe IucnIe norachyt. PnO ndHOpeMeHHom HaxaTIN KONOK «PIIOC» (3) u «MHNYC» (2) ypOBeH MoUHOCTN Bbl6paHHo30hBi YctahABInBaetcHa «0». B KaueCTbe anbTePhaNBbl MoXHO NcNoB30BaTb KONKy «MHNYC» (2), yTO6bl CHN3NTb ypOBeH MoUHOCTN Do «0».
BbIKIOUeyue 8cex 30H 8apku
Hn HaxaHn Ha KnaBmUy NtTaHn Bbl MoKeTe HemeJeHHO BbIKIOuHTb BCE 30Hb. B pexime OxuaHn BbcBETcra 6o3HaueHne "H" B oTHoueHn BCex 30H, KOtopbIe «rOpaT». Bce octaJIbHbIe DnCIIeN 6dyT BbIKIOUeHbI.
UpoBeHb MOUHcTn
IINMOUHOCTMB0HEBAPKNIPeYCMOTpeHb9yPOBHe,KoTOpBeO6O3HaueHbI έΦpAMNOT"1"do"9"HaDcπIeAXCEMIeMENTbIXdIOOBLED.
PnBbIbOpE yOBHMAoHOCn 9,B30He npnroTOBHeHMA, KOtopa HaxOHTc CnepeDn CNeBa, MoOHOCTb HEMHOro CHNXKaETc NoCte 30 MmHyT paBoTI dN OeBCNeUHMe 6eONaHcOHTn. Pn HeoBXoDMocTn YBeINuHEnM MOHOCn BbIEpTe ycInntelb yOBHMAoHOCn ("P").
Функua Booster (BycTeP)
Nocne Bb6opa COOTBeCTBHyOuSei 30HbI pInrTOBHeHn MoXHo BKNIOHTb FyHKUIO YCKOpENH, Bb6paB yPoBeHb MOUHOCT N 3aTeM HxAB KHOJky " + " (3).Pn NOMoOn DaHHoFyHKUIN OTJeNbHbIe 30Hb BApKn MOrYT NOLyHTb MOUHOCTb, INpeBbIaIOUyIO HOMHaJIbHyIO (KONueCTBO 3OH
cOHOBPeMeHHbIM NcNoJIb3oBaHnEM BOOSTER 3aBNCHT OT MOUHOCTH, NcNoJIb3yEmoB Pa3JIuHbIX 30Hax, INx CymMaHaJ MoUHOCtB He DOJIxHa JIpeBbIaTb MaKcMmaJIbHyIO MoUHOCtB IIITb).IIpN HAIuMn BO3MOXHOCTH aKtINBaCmI CyHKcIm BOOSTER B OnpeJeHeHoi 30He, Na IcNPiee NoRBNTCB o6O3NaueHe "P". B cIyae HeIOCTaTOHoi MOUHOCTH, INdIKaTOP MOUHOCTH TOI 30HbI, rIe Tpe6ByeTcABTomTuYeCKoe CHIXKeHne MOUHOCTH, 6ydet MIRaTb 3cekyHdbI.
BpemakTbAUm BOOSTER orpaHueHo 5 MNHyama nIy o6ecneHnna 630NaChocTN KxOHNbIX npHaJnEeKHOCTe. IocNe aBTOMaTuyeCKoI De3aKTbAUm BOOSTER, 30Ha 6yDet npOOnjKaTb pa6oTaTb Ha yPoBHe MoUHcToN «9». MoKHO cHObA BKJIIOuHTb BOOSTER B pa6O TY no NCTeEHn HECKOBKO MNHYT.
ECINB nepnoBD BKIOueHn BOOSTER Bby Ib y6peTe KAcTPhIO 30hbl BapKn, FyHKUBAOOSTER He 6yJeT OKKIOueHa n ero UKN npdoJNKTc.
UnpablenHe MOHocTbO OCHOBaHO HA TOM, YTO npOpTeTHo CHTaETcnoCnEHNKoHOFpyaUNpeyINpOBKn yPOBH MoHOCTN B 30Hax BApKN.3To 03HaayET, YTO MOXHO ABtOMaTneCKCNH3NTb yPobHN MOHOCTN, npEBapntEnbHO 3aDaHHBe B OCTaJIbHbIX 30Hax BApKN.
- Ecnn Hnykun OnpeJeT Heo6xOuMocb ChmKeHn MOUHO BODH 30H BapKn, HndKAtop 30hbl, Tpe Tpe6yeTcR CHN3NTb MOUHOCTb, 6yTe MIRaTb 3 cekyn, 3TO nepnoD KoppeKTnpOBKn neped perncpauee N3MeHeHH npaMeTpA.
- Ecn npedeokohahnem nepnoa KoppeKtupOBKn BHocatcN3MeHeHnB NapameTpbl Bb6paHHo 30hbl,ynpaBLeHne MOUHOCbIO CHOba aHaJIIN3puyET ee pacnpedeneHne. Ecn B 3TOM cIyueyxe He Tpe6yeTcCHJKeHne MOUHcTNI, MrrA Hne ppeKauaetcA, a COOTBETCTByuOuIN HnDnKATOp NOKaXeT YPOBeH 3daHHo MOUHcTNI.
- Ecnn noIb3OBeTbn CHOba NImMeHn pacnPpeJeHne MoUHcTN, He npOn3oJET aBTOMaTNUeCKOrO yBEnuHHeNy yPOBnMaOuHcTn BTEX30Hax, rDe OHa 6bla aBTOMaTNUeCKn CHNXeHa.
HdkaTop octatoHoro tenla
Oh yka3bIbaet nOJIb3OBAteJIHO Ha To, YTO CTKeJIO HAXoIJTCn Pn ONaCHOH TemnepaType B Cnyuae KOHTaKTA C 3OHOH NaI 3OHOB BApKn. 3HaueHne TemnepaTypbl ONpeJenrTeCn PO MaTeMaTmUeCKoM MoJeN, N B CNYuae HAIUMN OCTaTOUHOrTo TEnla, HA COOTBeTCTByUoEe CMN CeMeHTHom DIncPiee NoBtCra 0603HaueHne «H».
HarpeBaHne n oxnaJdeHne paccuHTbIBaHOcHa OCHOBe cJeDyIOx3haueHn:
BbI6paHbIyUpoBeHMoUHocTn(MeXNy"0"u"9")
-ПернорВрemeиakTиBaUIM.
Iocne toro, KaK BbY bIKIOHm 3OHy BApKn, Ha COOTBeCTByIOeM DcNIIee BBcBETnC O60HaueHHe "H", NOKa TEMnepaTpy B 3OHe He ONyCTnC HnKe 3HaueHn KpUInueCKOrO yPobHr (≤ 60^) B COOTBeCTBnn C MaTeMaTHueCKo MoDenblO.
Функца abTomatueckoro BbIKIOUeHn (orpaHueHne nepnoDa BpeMeHH pa60tbl)
B cnyae oTcYCTBn Opeaun, n ecnn Bbl He perynnpyete ypobehb MoUHOCTN, KaJdA u3 30H BApKn 6ydt BblKIOueHa no NCTeueHm npEdBapntbHO 3aDaHnHO MaKcMaIbHOro nepNoDA BpemHe. KaJdA onepaun B 30He BapKn (nocpeDCTBOM KnaBn BOJIbWE m MEHbWE) Bo3BaPaauet K ToUKe oTceta TpeBapntbHO 3aDaHnOe 3hauHne MaKcMaIbHOro nepNoDA BpemEHn pabotbl.
3aunTa B clyae Henpon3BolbHoro BKIOueHn
B Cnyae, eCNI 3NEKtpoHHb KOHTpObl ONpeDnIT fAKT HENpepbHOra Haxatna Ha KlaBnUy B TeueHne np6n3nteBHO 10 cekHyd, npOn3oJET ABToMaTHueckoe BbIKIOUeHme. IpO3ByuT aKyCTMueCKn CnHAn OwN6Kn B TeueHne 10 cekHyd, YTObbl ONOBcTeB nOlb3oBaTea N oOw6Ke, ObHApXeHHo CEHCOPAM No pnuHne npCyTcBn PnpEMeTa Ha KlaBnIe. Ha DnCnIee NOBtca KoD OwN6Kn "ER0" IN OH He MChE3He, Noka 3NEKtpoHHb KOHTpObl He 3apeMCTpPpyet OwN6Ky. ECSN 3OHa BAPK (TropT), Ha DmCnIee 6yDet NOBnTbCa 0603NaueHHe "H" noOuepeHDo C 6o03NaueHEm OwN6Kn.
B Cnyuae ecn B TeueHne 20 cekyHn nocBe BkIoueHna Touch Control He 6ydt aKTHBupoBaHa HN OHa N3 30H BapKn, KOHTpOb BepHet PnITy B COCTOHHe OKUNDaHn.
PnBkIIOeHOM Touch Control,KnabuHa ON/OFF IMeET npnopTe OTHOCHTbHO OCTaJIbHbIX KnabU.3To DaET BO3MOXHOCTb BbIKIOHTb NNITy BIO60Momet,JaKe Bcnyae OJHOBpeMeHHORO HaxaTn Ha HECKOBKO KnaBUNIMIN NITeBHO HO HaxaTn HA HNX.
BpeKIMe OxkuaHn NoCToHHoe HaxKaTne Ha KlaBmHn He OKaKeT HmKaKOrO Bo3DcEiCTBn. B NIO6om Cnyae, DnT TORo, YTO6bI CHOBa BKHOHTb 3NEKTPoHHbl KOHTpOB, KOHTpOB Chayana OnpeJenrE, HaxTa nn KaKaar-HMOyDb n3 KlaBmH.
BloKpOBKa KlaBn (npncno6neHne nla 6e3oNaChOtei)
Ppncnoc06neHmIg 6e3oNaChOCTn DeTei:
BloKupoBka KnaBuu:
ДлгaktnBaunnpncnocobneHnIg63onacnoctnTeetnocne BkHouenHn Touch Control tpe6yertca HaxKaTb OndOBpeMeHHa KnaBnUy Bb6opa npabOn HnxKHe 30HbI nHa KnaBnUy MEHbUe, noCte yero ChOba HaxKaTb Ha KnaBnUy Bb6opa npabOn HnxKHe 30HbI. IoBnTc8 o6O3NaueHne "L", o3NauaOooee LOCKED -3AKPbIto (npncnocobneHne dIn 63onacnoctn Detet, npedOTbpaaaOooee Hnpon3BoNbHOe BkHoueHne). B clyuae ecnn 30Ha BapKn «Ropnt», noouepeDho 6byt noka3aHbI o6O3NaueHn "L" n"H".
DAnHnOepaunI DOnJHnBa 6bIt npOn3BedeHa B TeueHe 10 nocNeyUoxnx CekyHn, H HeJIb3a HaxmAtb Hn Ha OHy I3 KlaBnU, NOMMBOBIIe yKa3aHHbIX. B npOtNBHom Cnyae, nocJeDoBateBHOCTb 6yET npeKpauneHa IIITNa TE 3a6NOKpyetc.
3NeKtpoHHbI KOHTpOB 6yET 3a6NOKpOBaH Do MOMeHTa erop a36NOKpOBaHn NOB3OBATeMe, XOTn HA pTaeHm NTOrO BpeMeHnero MoXHO BbIKIOHTb IN CHOBA BKIOHTb. N daXe c6poc Touch Control (nocne OTKIOUeHn PNTAHn) He HApuNT 6NOKpOBky KnaBn.
He peKoMeHnyem yCTaHaBnBaTb nIITy Ha dYxOBKe, IIN, B Clyuae TaKoro pOda yCTaHOBKN, y6eIITecb B TOM, UTO:
-Духоваоборудаянф ekтнвонстемохлaxденя,
- TROPYU B03DyX N3 DxyOBKn He MoKET nonAcTb NO KaHaNy B 06NaCTb INdyKUnOHn NaHEn,
- npdeymOTpeTb BO3dUHbIe KaHaJIb I COOTBeTCTBIM CyKa3aHHbIM Ha PnCyHKe.
(Pnc.5)
1 BmI cnepei
2переднахастb
3ДуховкmaишkaΦ
4Подача Вздуха
3eKtpueeckne npoknoueHnna (Pnc.6)
IpeepnoKIOUeHnEM K cTei nHTaHnY, y6eIMTeB TOM, yTO:
XapaKTePNCTKN yCTaHOBKn COBnaJaIO T C xapaKTePNCTKKaMn, nPBBeHeHHbIMn Ha yCTaHOBOUHOI INaCTHHe, HAXOJaEeCnHa DHe NaHEIN DnBaPKN;
-Дя yctaHOBKN npeycmOTpeHO DoCTaTOH OMOHoe 3a3eMneHMe, B COOTBETCBN C HopMaTnBaMIM Tpe6oBaHnA Mm DeICTBYUOeTo 3aKOHdaTeJIbCTBa. 3a3eMJeHne npeycmOTpeHO B yCTaHOJIeHHbIX HopMaTnBAx.
B Tom cnyuae, ecn nla annapata He npedycmTope Hny i -nnn po3eTka kKIOUeyHna, Heo6xOdmo NcNoIb30BaTb MaTePnA1, pNiroDhni dna 3HaueHm 3JeKtpnueckoro ToKa, pNBeDeHHbIX Ha yCTaHOBOOHn PnactHe C xapaKTePncTKaMn, n daHn o paOoyem TempepaTypb. 3aIpeaaetcN cNoIb30BaTb Hny B cnyuae ero neperpebaHn npi npebbluHm 50^ TempePaTypb OkpykaioSei cpebl.
PL
PRODUKT TEN ZAPROJEKTOWANY ZOSTAL DO UZYTKU W GOSPODARSTWIE DOMOWYM. PRODUCENT NIE PONOSI ZADNEJ ODPOWIEDZIALNOSCJI ZAWENTUALNE SZKODY RZECZOWE I OSOBOWE POWSTALE WSKUTEK JEGO NIEPRAWIDŁOWEJ INSTALACJI ORAZ NIEWLASIWEGO, BLEDNEGOLUB NIEUZASADNIONEGO UZYTKOWANIA.

- PRECAUTIONS
- OPERATING PRINCIPLE (Fig. 1)
- User's Instructions (Fig. 2)
- Installation
- Switching the Touch Control ON/OFF "Z"
- Automatic switch-OFF
- Switching a cooking zone ON and OFF
- Switching a cooking zone off
- Switching-OFF all cooking zones
- Wattage settings
- Boost function
- Residual heat indicator
- Automatic power OFF function (operating time limitation)
- Protection against unintended switching-ON
- Key lock (child safety feature)
- Child safety feature:
- Key lock:
- Unlocking for cooking purposes: :
- Cancelling the key lock:
- Audible signal (buzzer)
- Timer function (optional)
- Timer as minute minder (stand-alone):
- The sound signal will be stopped
- Switching-OFF/changing the timer
- Timer programming on cooking zones
- Cooking vessels (Fig. 3)
- Maintenance (Fig. 4)
- Installer's Instructions
- Positioning (Fig. 5)
- IT
- VOORZORGSGMAATREGELEN
- Blockering av touchkontrollerna:
- PpHnHnnblpa6oTbI(Pnc.1)
- Hnctpykunnn nn nonb3oBaTea (Pnc.2)
- MOHTAK
- BklioucheHne N BbIKluoyeHne Touch Control
- ABTomatueckoe BbIKIOUeyHe
- BkIIOUeHHe/BbIKIOUeHHe 30Hb BapKn.
- Bbiklouhene cepooh30hbl
- BbIKIOUeyue 8cex 30H 8apku
- UpoBeHb MOUHcTn
- Функua Booster (BycTeP)
- HdkaTop octatoHoro tenla
- Функца abTomatueckoro BbIKIOUeHn (orpaHueHne nepnoDa BpeMeHH pa60tbl)
- 3aunTa B clyae Henpon3BolbHoro BKIOueHn
- BloKpOBKa KlaBn (npncno6neHne nla 6e3oNaChOtei)
- BloKupoBka KnaBuu:
- 3eKtpueeckne npoknoueHnna (Pnc.6)
- PL
- PRODUKT TEN ZAPROJEKTOWANY ZOSTAL DO UZYTKU W GOSPODARSTWIE DOMOWYM. PRODUCENT NIE PONOSI ZADNEJ ODPOWIEDZIALNOSCJI ZAWENTUALNE SZKODY RZECZOWE I OSOBOWE POWSTALE WSKUTEK JEGO NIEPRAWIDŁOWEJ INSTALACJI ORAZ NIEWLASIWEGO, BLEDNEGOLUB NIEUZASADNIONEGO UZYTKOWANIA.
Brand : CATA
Model : ISB 603 SD
Category : Cooker