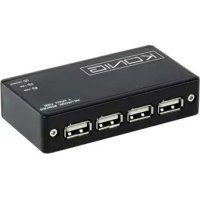
CMPUSBNETBOX4 - Printer KONIG - Free user manual and instructions
Find the device manual for free CMPUSBNETBOX4 KONIG in PDF.


| Product Type | 4-Port USB Network Server |
| Brand | Konig |
| Model | CMPUSBNETBOX4 |
| Main Functions | USB printer sharing over Ethernet network, compatible with Windows and Mac OS |
| Power Supply | Included AC adapter |
| Connectivity | 4 USB 2.0 ports, 1 RJ45 Ethernet port |
| Supported Operating Systems | Windows XP/Vista/7/8/10, Mac OS X |
| Installation | Via the network printer wizard provided on CD-ROM |
| Maintenance | Clean with a dry cloth only |
| Safety | Do not open the device, unplug in case of issues |
| Package Contents | Server, AC adapter, CD-ROM with manuals and drivers |
| Warranty | No warranty in case of modification or incorrect use |
| Repairability | Opening only by a qualified technician |
| Environmental Information | Do not dispose of with household waste (WEEE symbol) |
Frequently Asked Questions - CMPUSBNETBOX4 KONIG
User questions about CMPUSBNETBOX4 KONIG
0 question about this device. Answer the ones you know or ask your own.
Ask a new question about this device
Download the instructions for your Printer in PDF format for free! Find your manual CMPUSBNETBOX4 - KONIG and take your electronic device back in hand. On this page are published all the documents necessary for the use of your device. CMPUSBNETBOX4 by KONIG.
USER MANUAL CMPUSBNETBOX4 KONIG
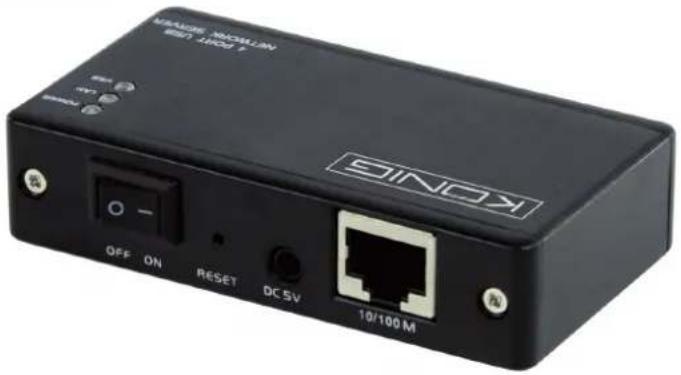
MANUAL (p. 2)
4port USB network server
MODE D'EMPLOI (p. 32)
MANUAL DE USO (p. 77)
EST provides a straightforward and easy-to-use utility that helps you set up USB printers connected to EST's LPR printer server as network printers through the Network Printer Wizard. This utility reduces the dozens of steps required in setting up a network printer via Windows® built-in printer setup program to a few point-and-clicks with the mouse. Users no longer need to deal with the confusing IP setting, queue name entering and port configuration.
Network Printer Wizard Installation
To start the installation, please double click on the installer:

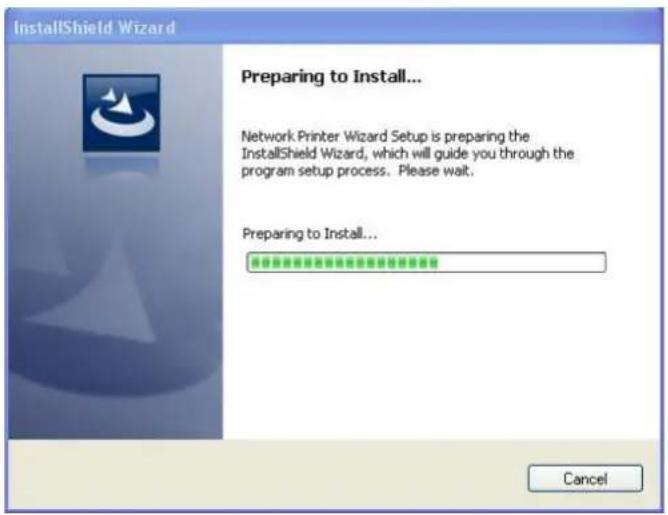
Wait for the installer to run:
Select the installation language and click OK:

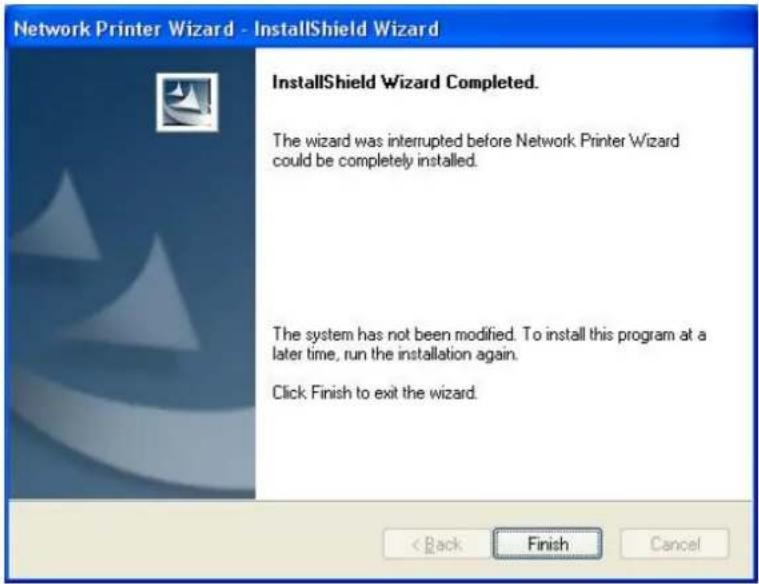
Click on Finish to exit the installer once the installation is completed:
The installer creates a shortcut on the Desktop for you:
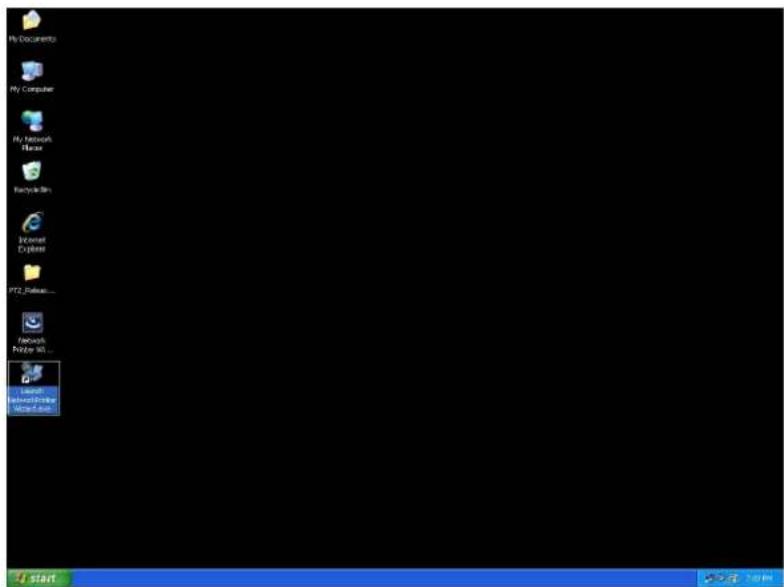
Printer Set up
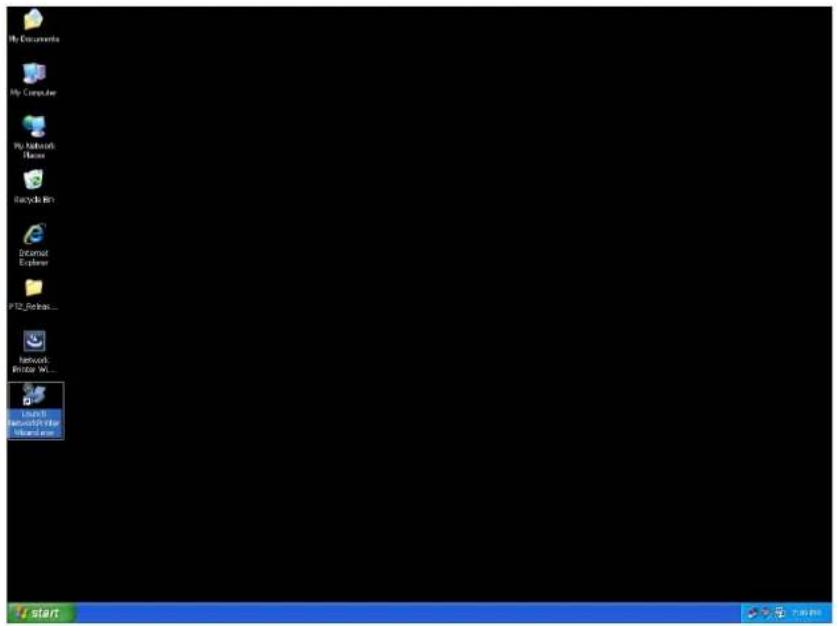
- Now we can start setting up your printer. Please click the Launch NetworkPrinterWizard icon created on the desktop.
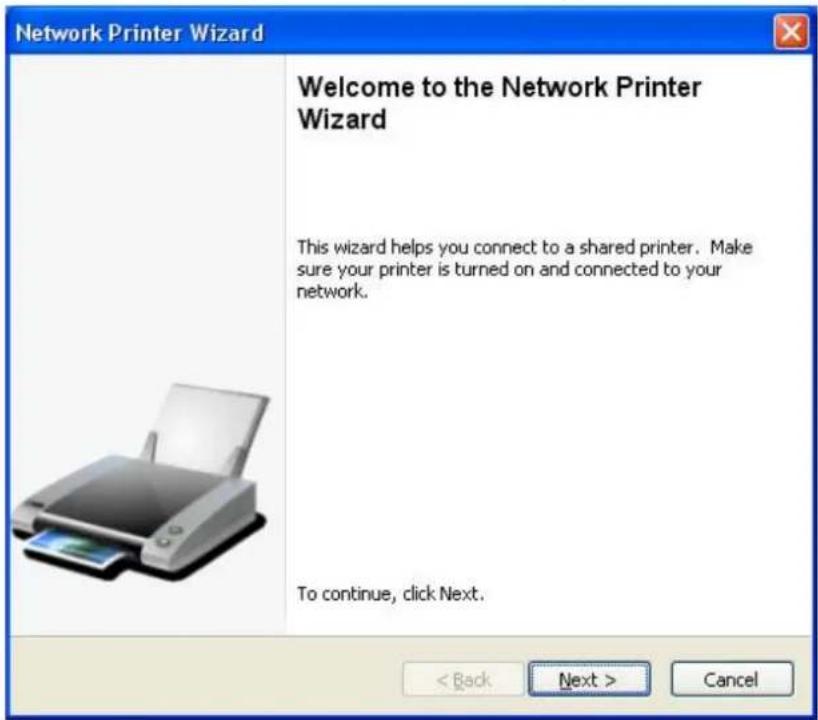
- Please click Next to continue when you see this welcome dialog box.
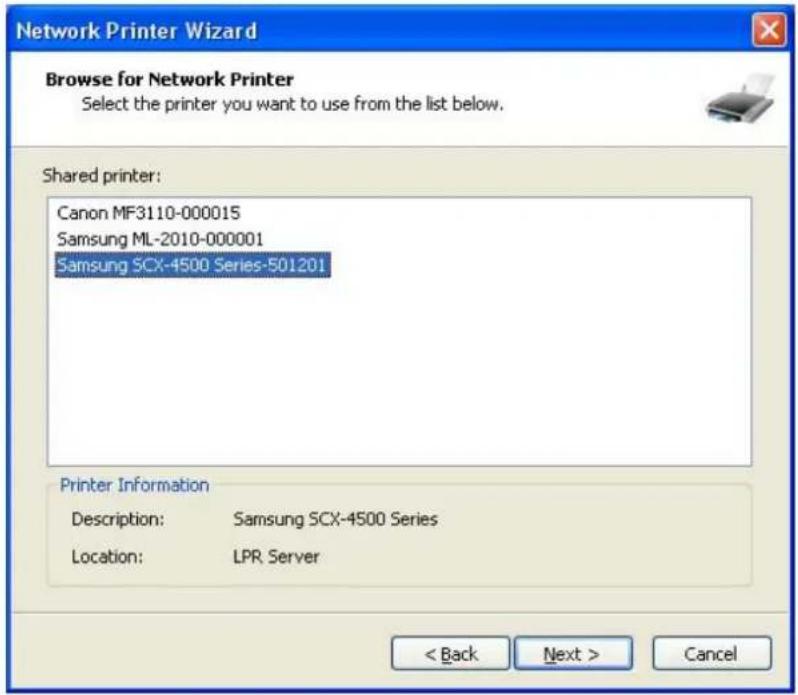
- Please select the printer you would like to setup from this list and then click Next. The number of printers you see on this list depends on the number of printers that are connected to your network. If you only have one printer on the network, you will see only one printer on this list.
If you don't see any printers, please make sure your printers and EST LPR Printer Server are correctly powered on and connected to the network.
- On the next dialog box, please select the driver from the list, if it is there, click the Next button and go to step 7. Otherwise, read on.
If you can't find the target printer's driver on the list, please insert the disk containing the printer's driver, click on the Have Disk... button then go to step 5.

• You must browse to the folder that contains the driver for your printer and click OPEN to use it:
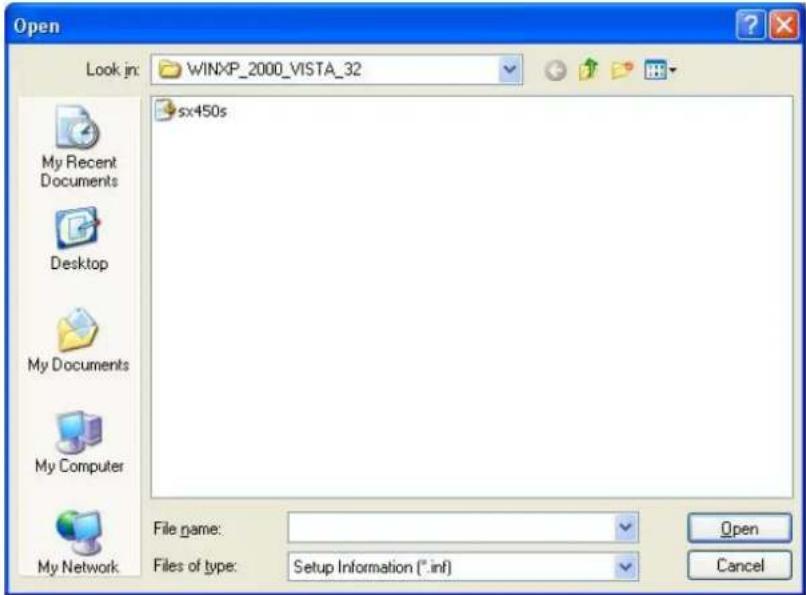
- Then, select the driver from the list again and click the Next button. If you did not select the correct driver, this is the chance for you to verify. Please click Have Disk again to re-select.
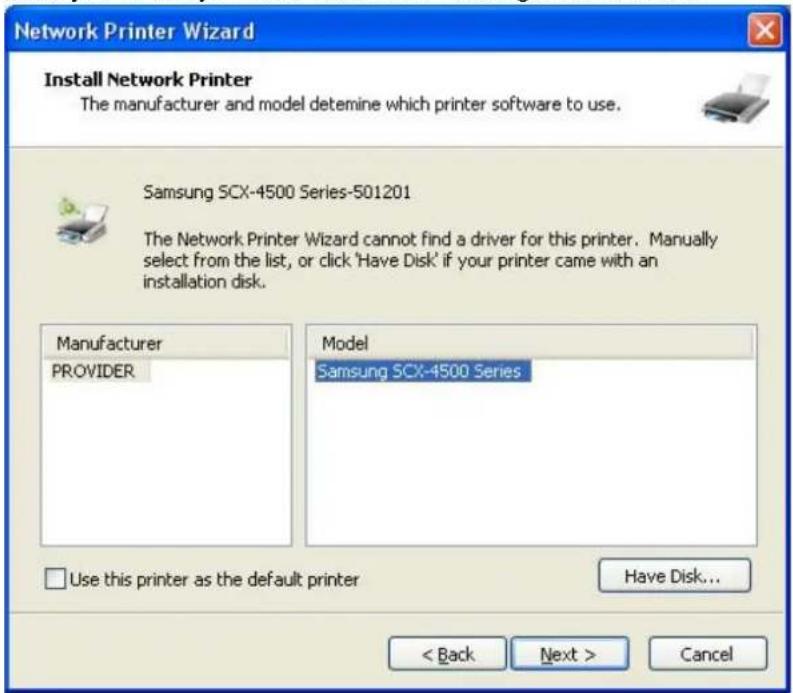
- Once you have selected the correct driver from the list, please click the Finish button. The wizard might take a minute to setup the network printer for you.
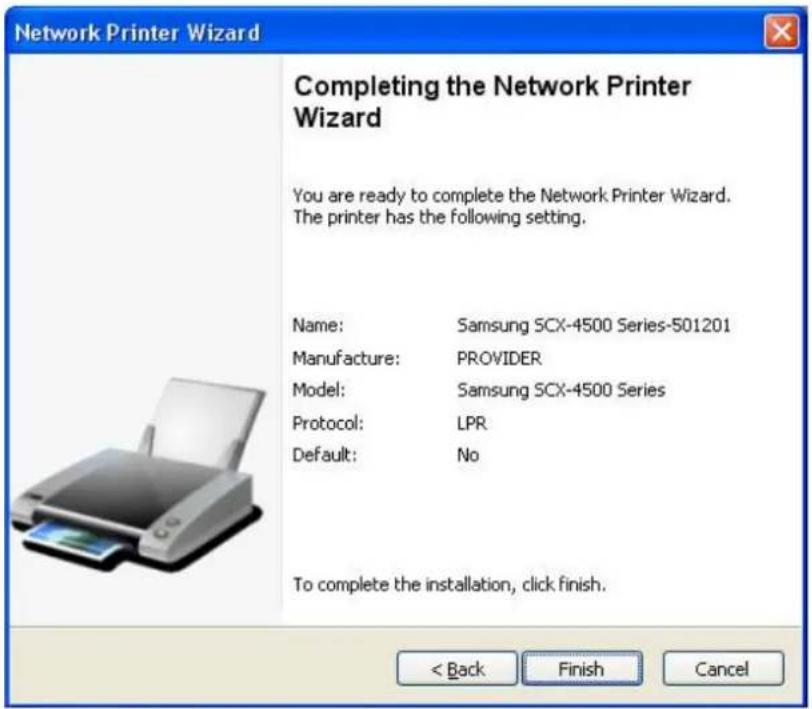
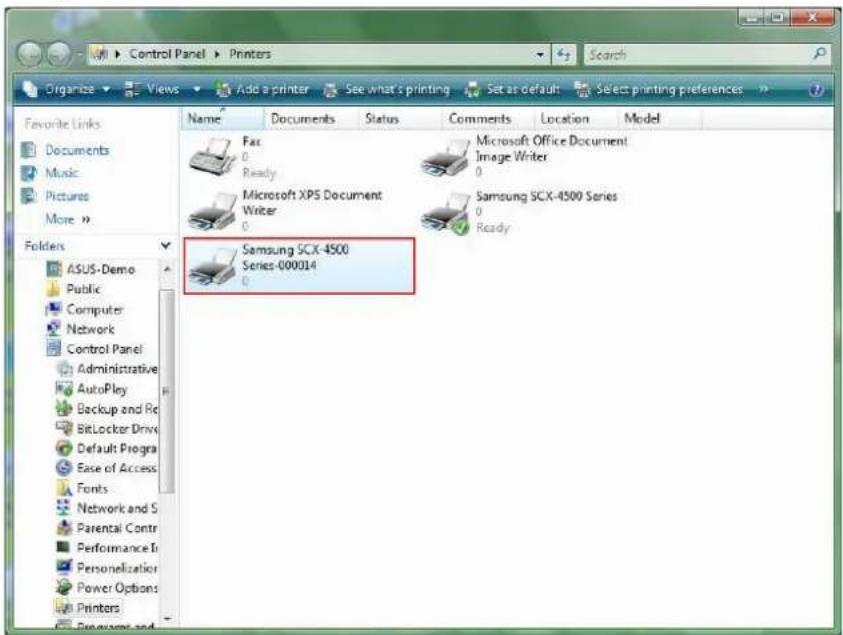
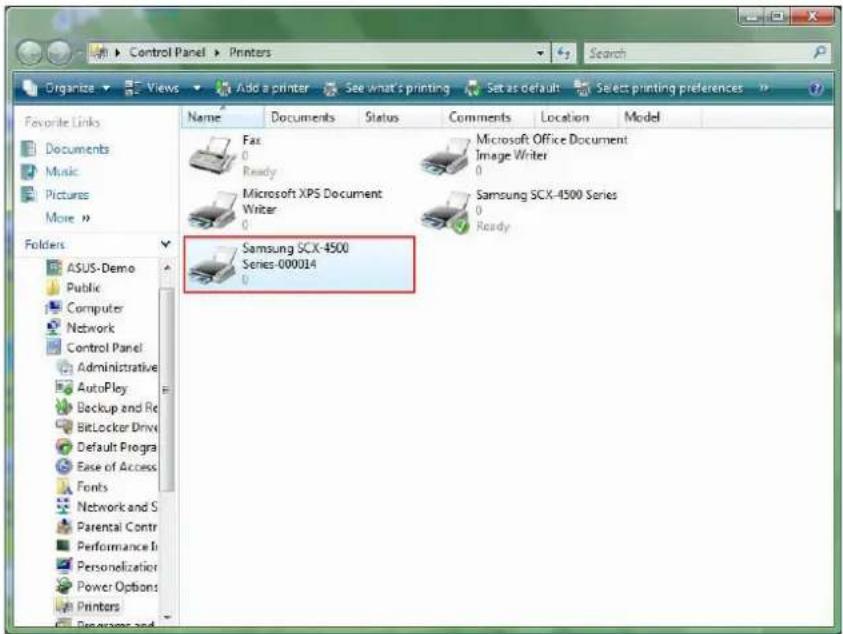
• After the printer has been setup correctly, you can see it under Control Panel > Printers:

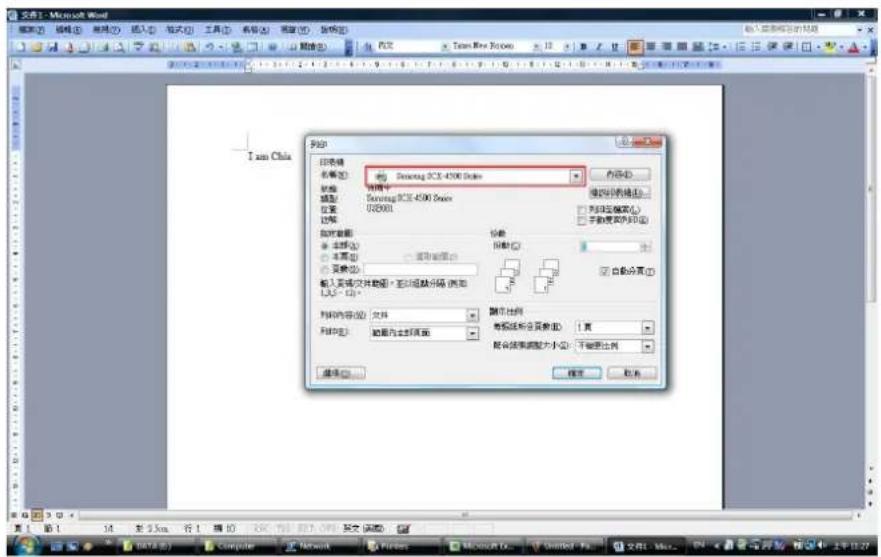
• Now you can print any document using the printer you just setup:
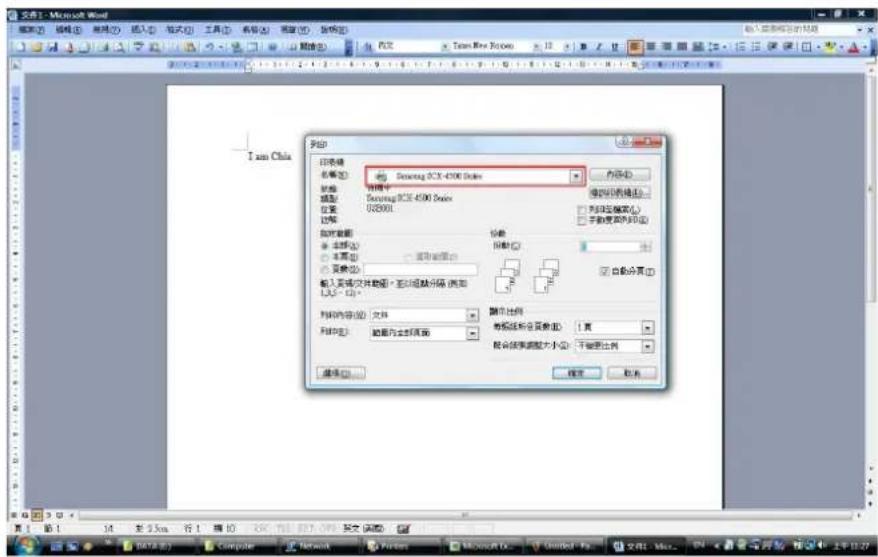
If you have more than one printer set up, please make sure you have selected the correct printer to print.
NOTE:
Remember, this setup is a one-time procedure. You do not have to run this process every time you want to print. However, of course, if you remove the Network Printer Wizard program, your printer setup will no longer work.
Remove the Printer Setting
To remove the printer setup, please go to the Control Panel > Printers dialog box and remove the printer entry.
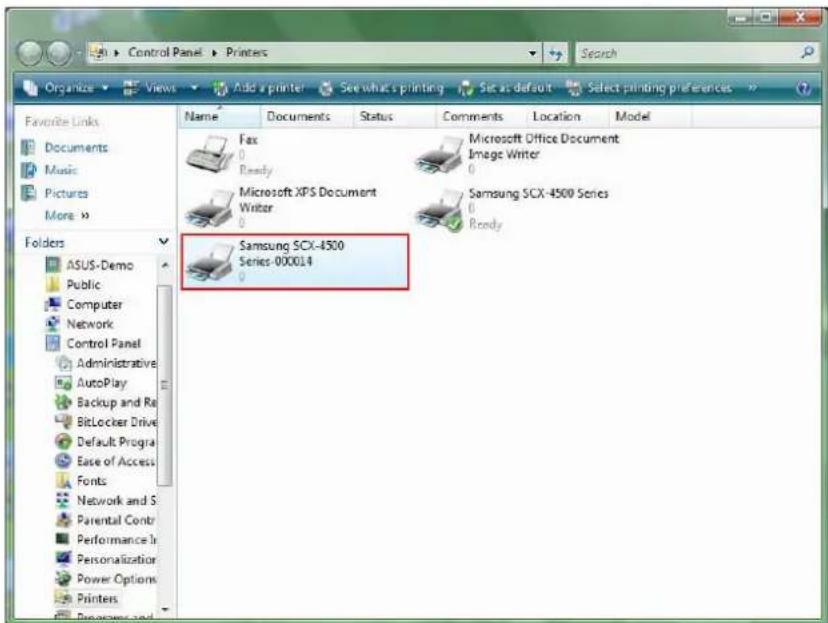
Simply Delete this icon by pressing the Del key on your keyboard. Then, it will be removed from the list of usable printers when you print a document.
Remove the Program
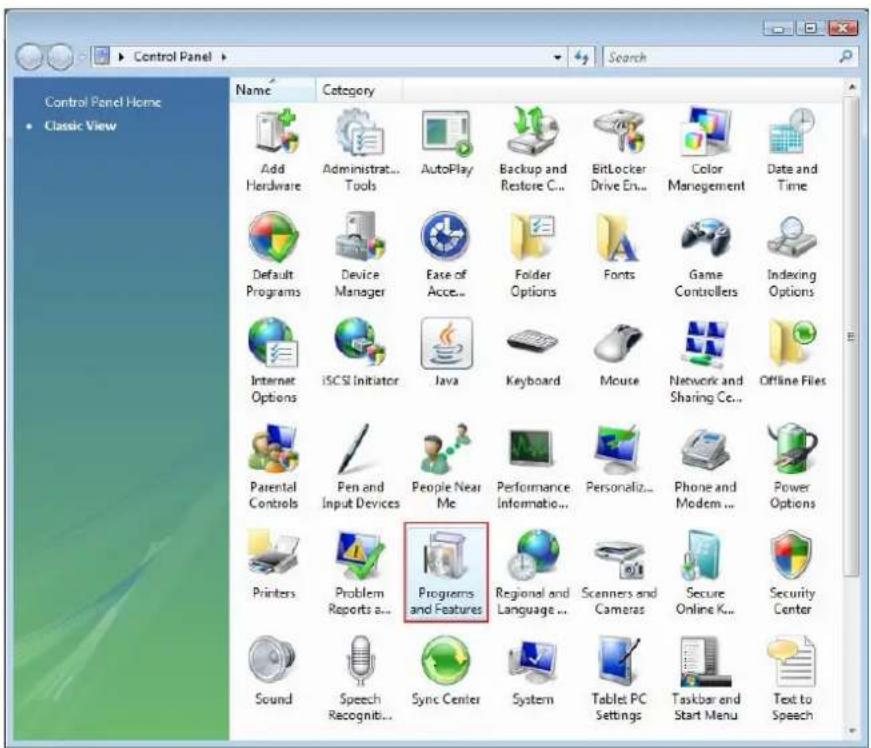
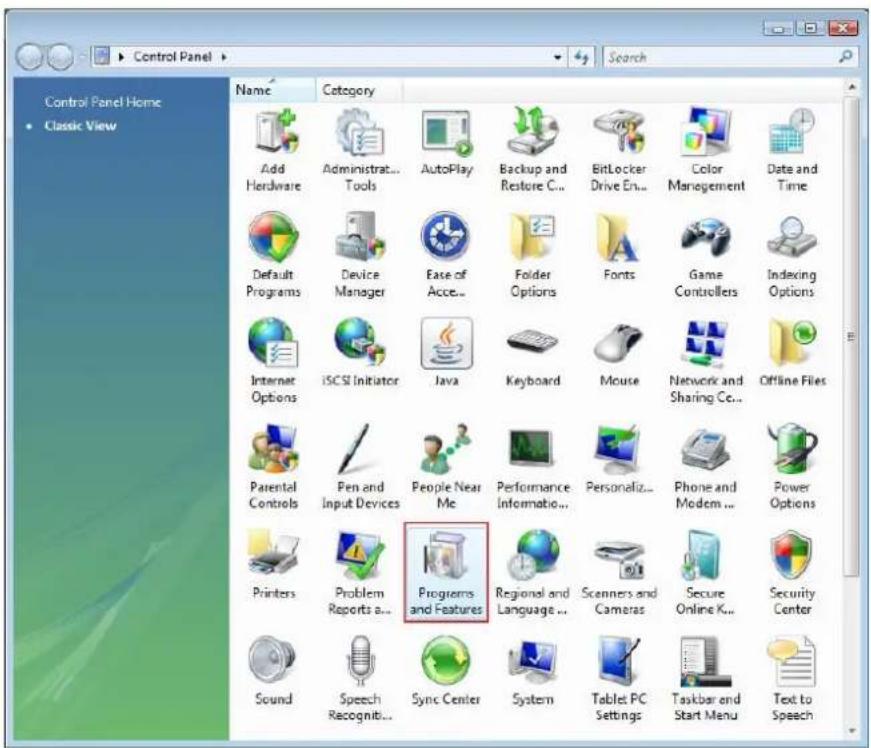
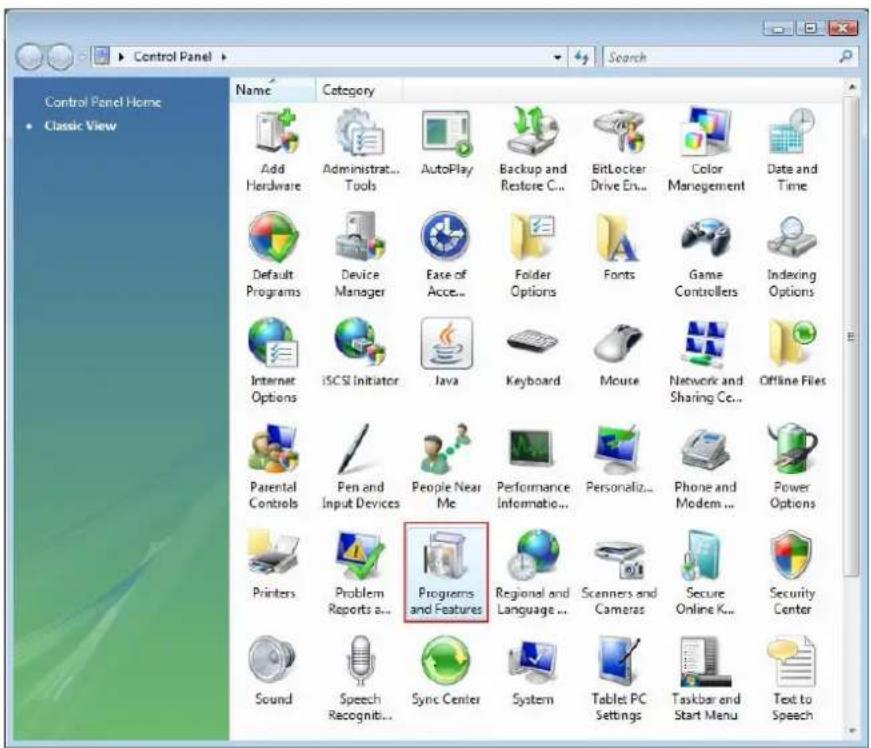
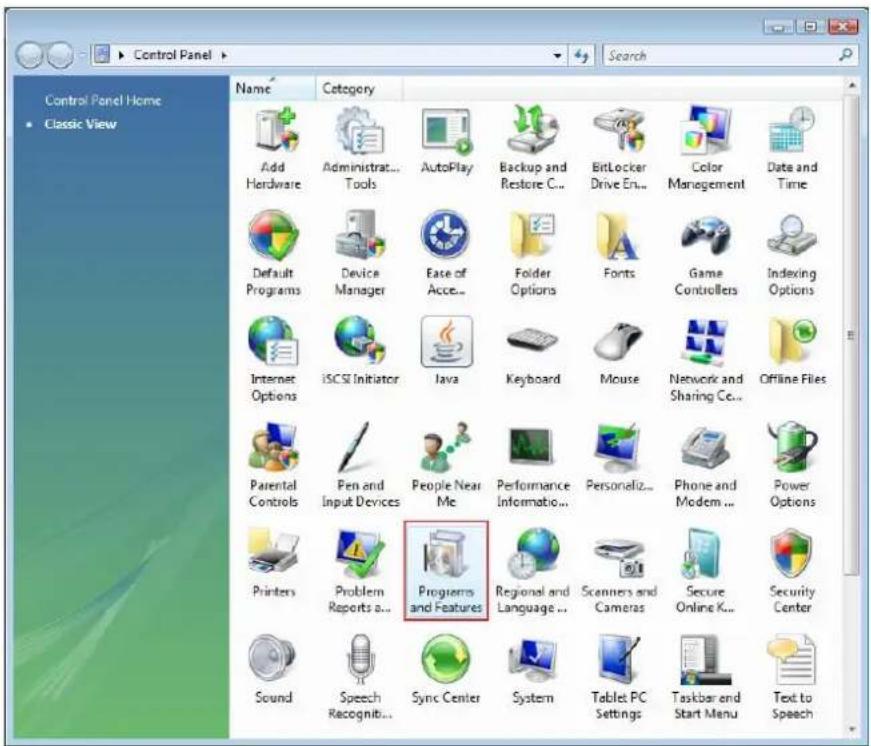
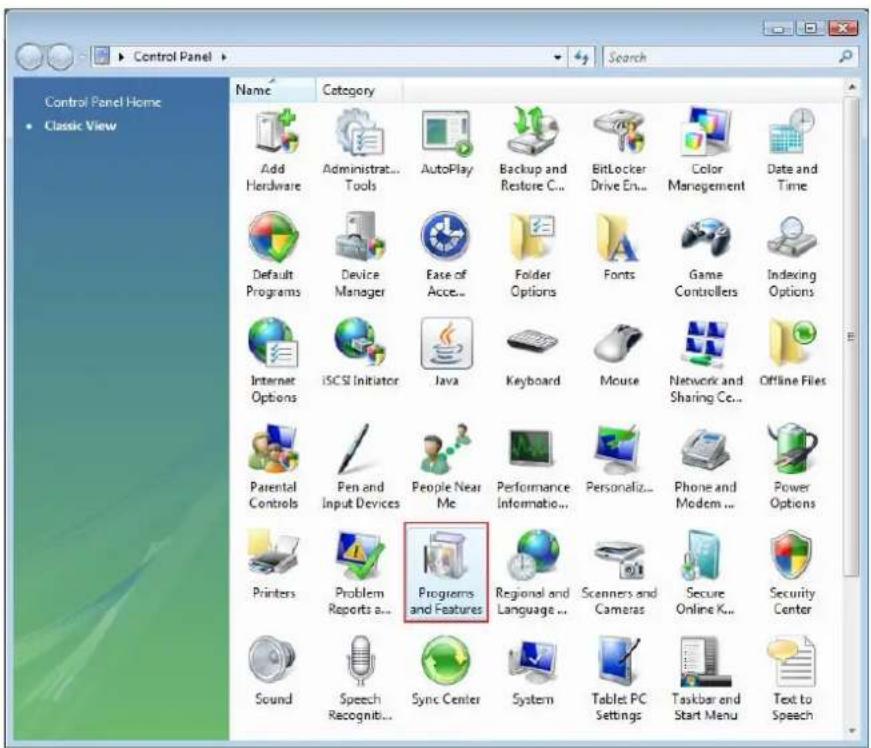
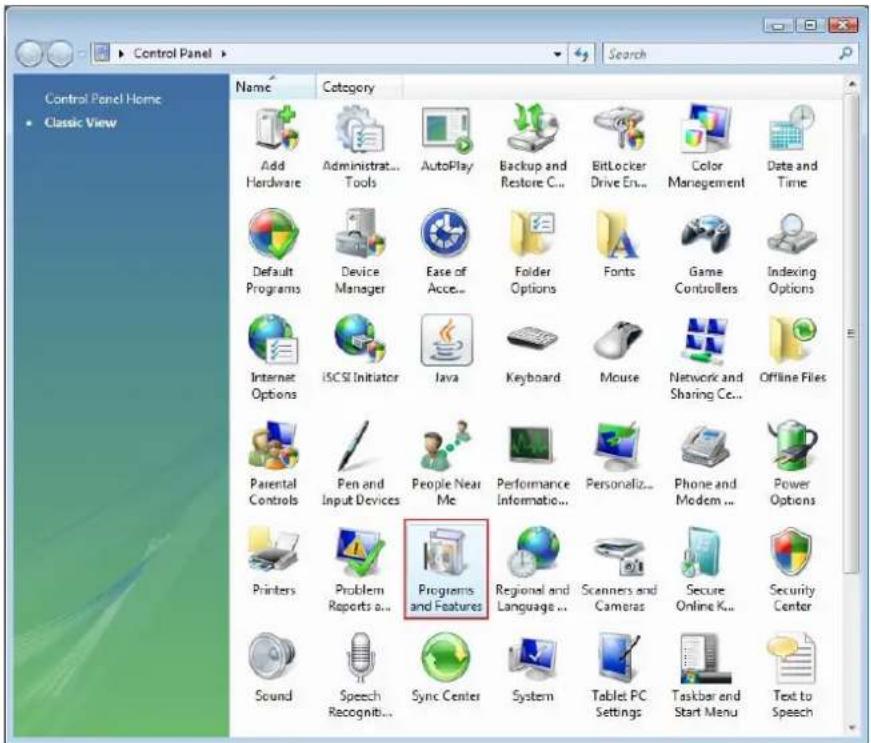
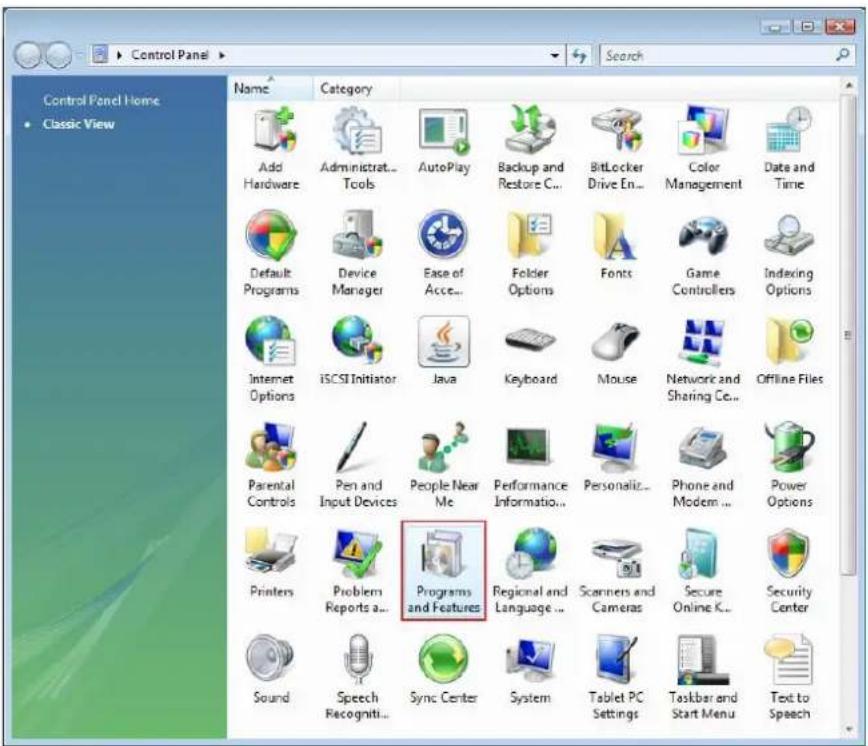
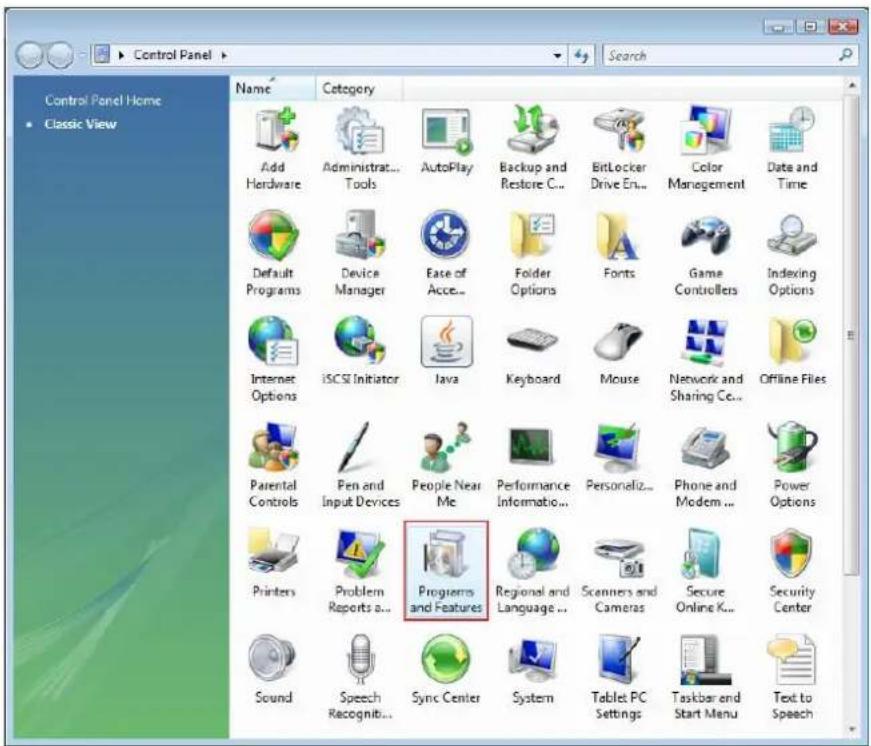
• To remove the Network Printer Wizard program, please go to the Control Panel > Add or Remove Programs (Programs and Features on Windows® VISTA)
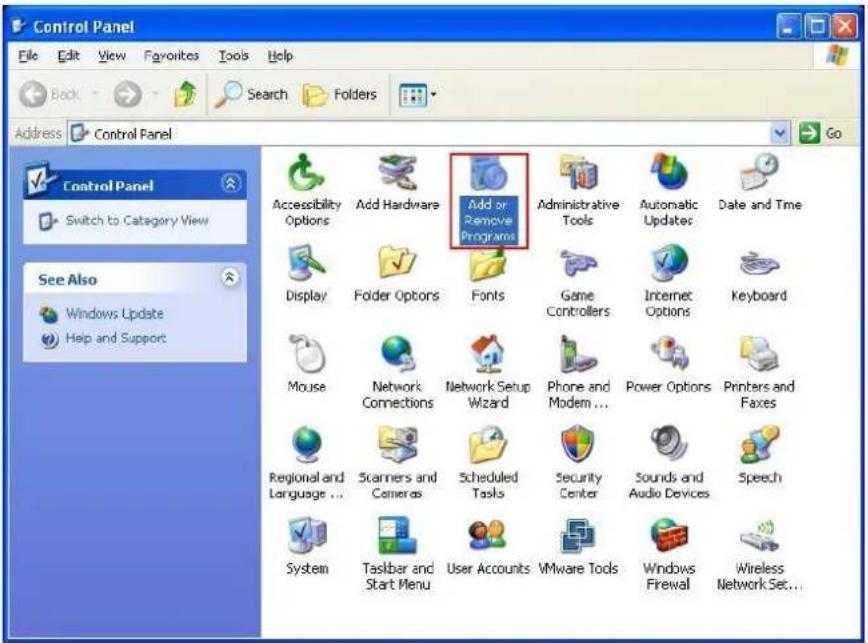
Windows® XP
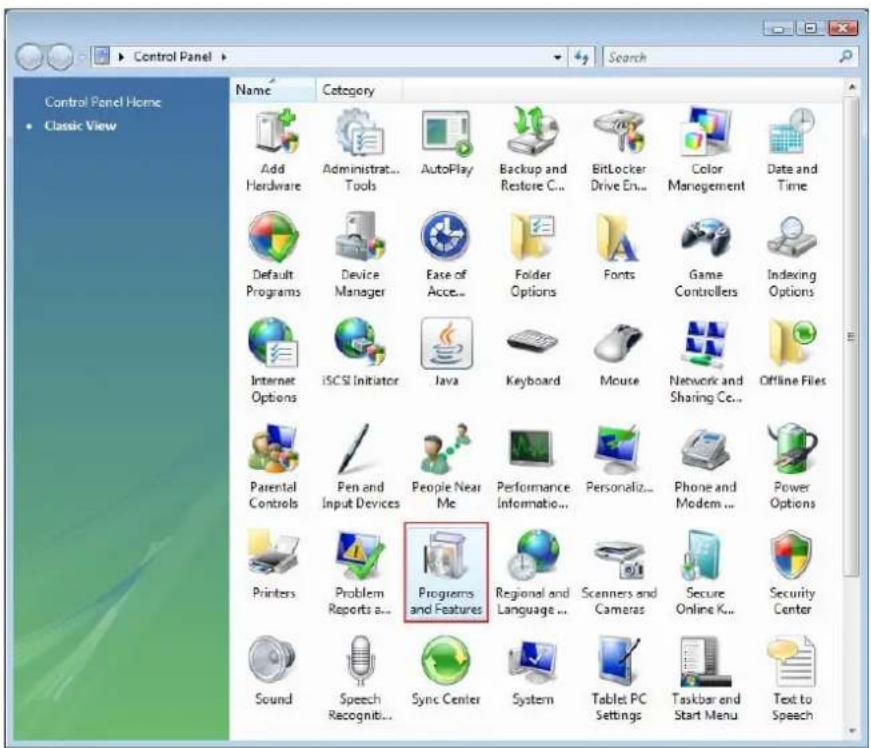
Windows® VISTA
- Then select it to remove the program

• Then follow the instructions of the installer to complete the removal process:
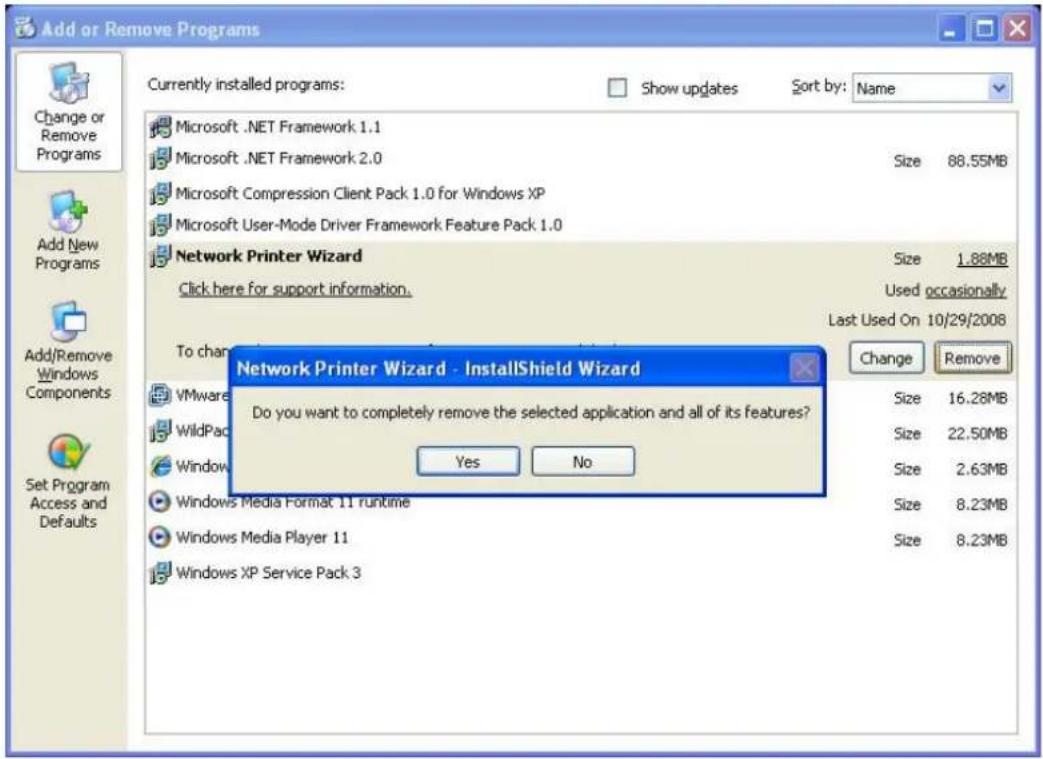
PLEASE NOTE:
Once you remove this program, you will no longer be able to print using the printers you setup with Network Printer Wizard.
Printer Setup on Mac OS X™
- MAC OS ® by Apple Inc. comes with a built-in utility very similar to the Network Printer Wizard. To start, please go to "System Preferences" on the Dock menu:
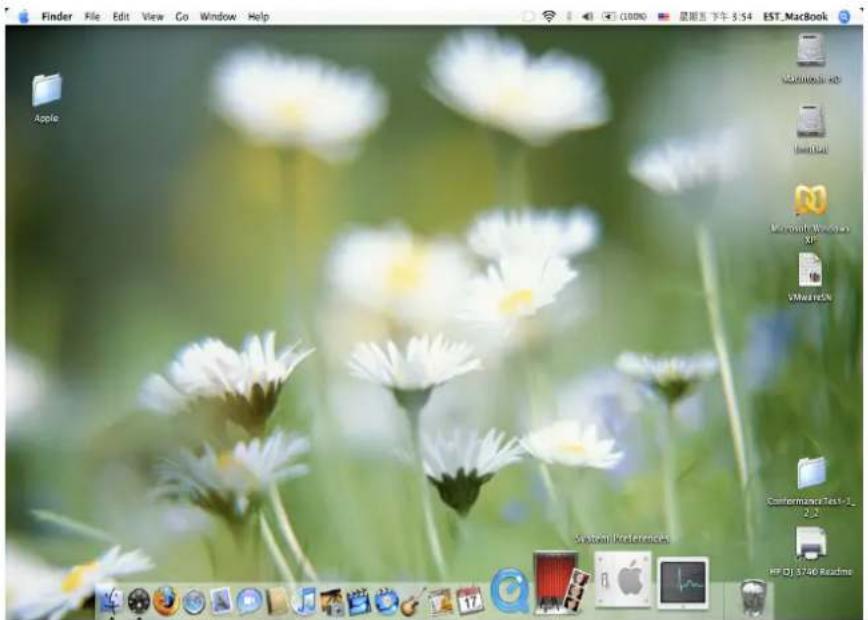
• Once you have the "System Preferences" window up, please locate the "Print & Fax" item:

Double click on "Print & Fax" to start selecting the printer for installation.
- This window shows you the printers that have been installed on your Mac. To install a new printer, please click on the "+" button to select printers.

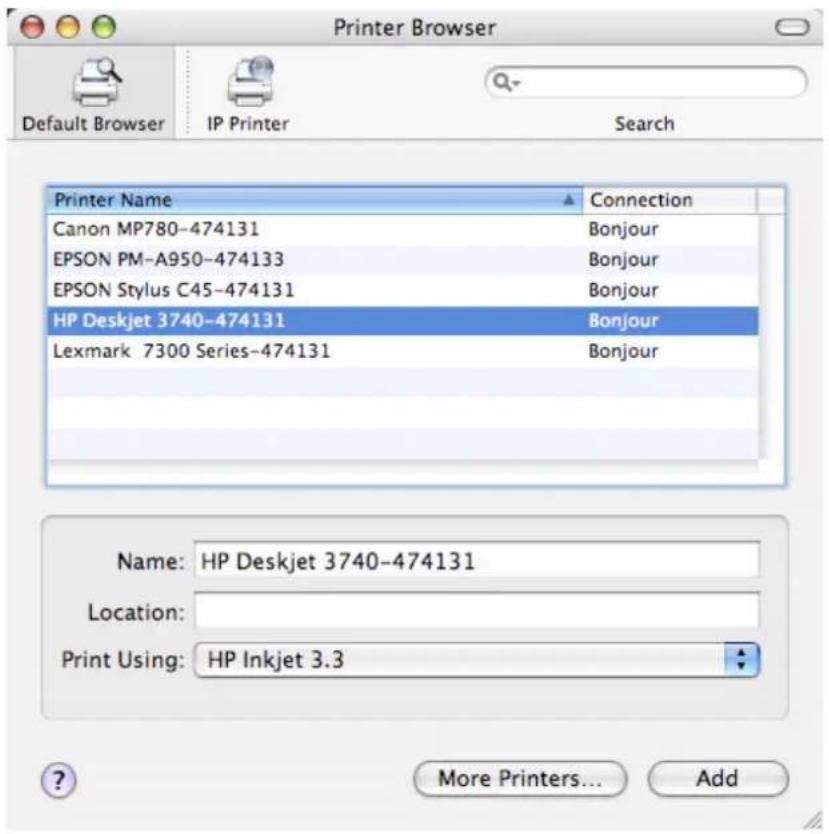
- Select the printer you would like to setup from the list. The number of printers you see on this list depends on the number of printers that are connected to your network. If you only have one printer on the network, you will see only one printer on this list.
If you don't see any printers, please make sure your printers and EST LPR Printer Server are correctly powered on and connected to the network.
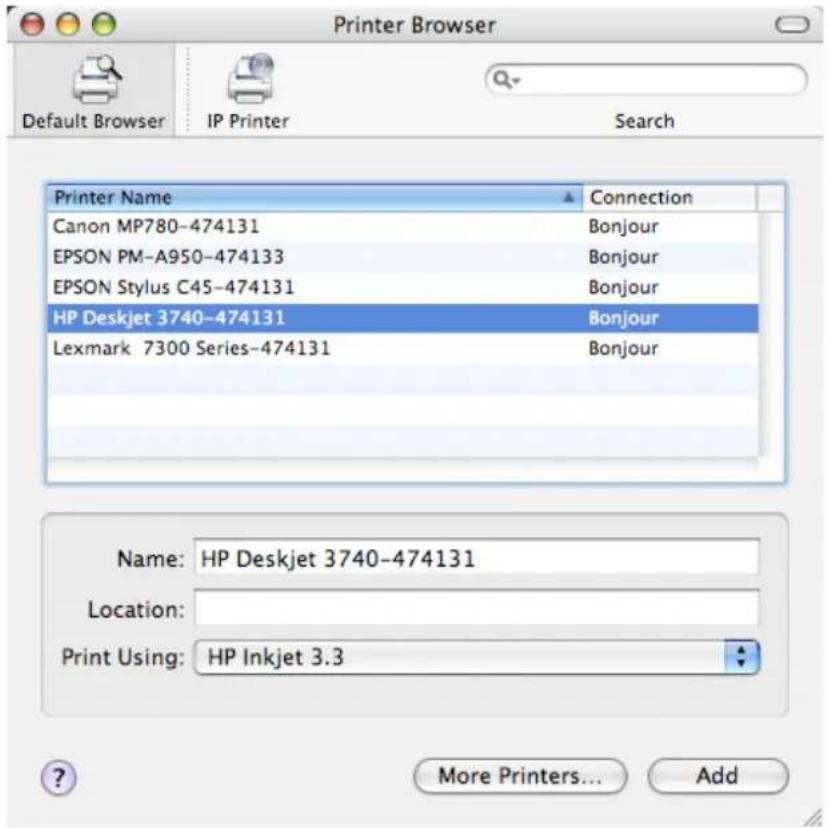
- As you select the printer to install, Bonjour will select the correct printer driver for you and is shown at the "Print Using:" field:
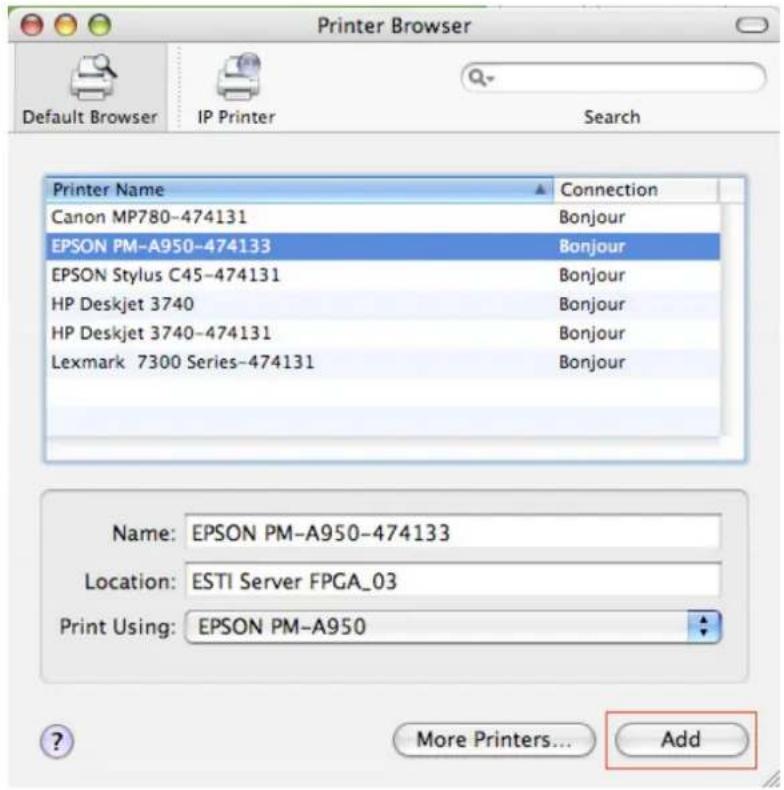
Once you have highlighted the printer to install, click on the Add button to install it.
• Once the installation is done, you should be able to see this on your "Print & Fax" window:
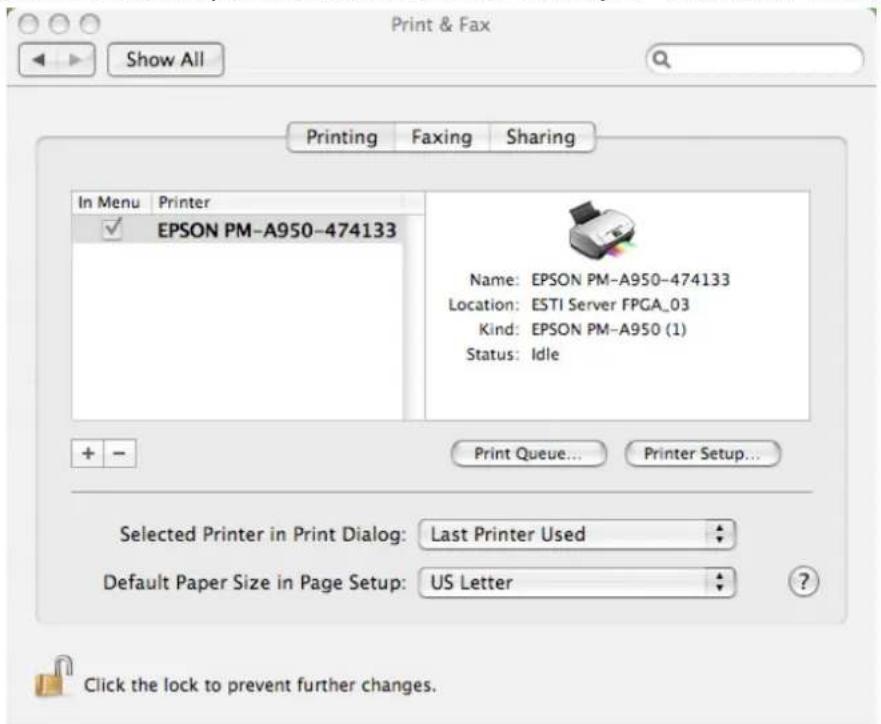
You will see that the A950 printer appears on the available printer list. You can now use this printer for printing your documents or pictures.
NOTE: Remember, this setup is a one-time procedure. You do not have to run this process every time you want to print.
- When printing your document, simply select the printer you just setup on the available printer list:

Removing the Printer Setting
- To remove a printer setting, please go to your Printer and FAX again:

Select it from the available printer list on the left and then click on the "-" button to remove it.
- Once removed, the printer will disappear from the list.
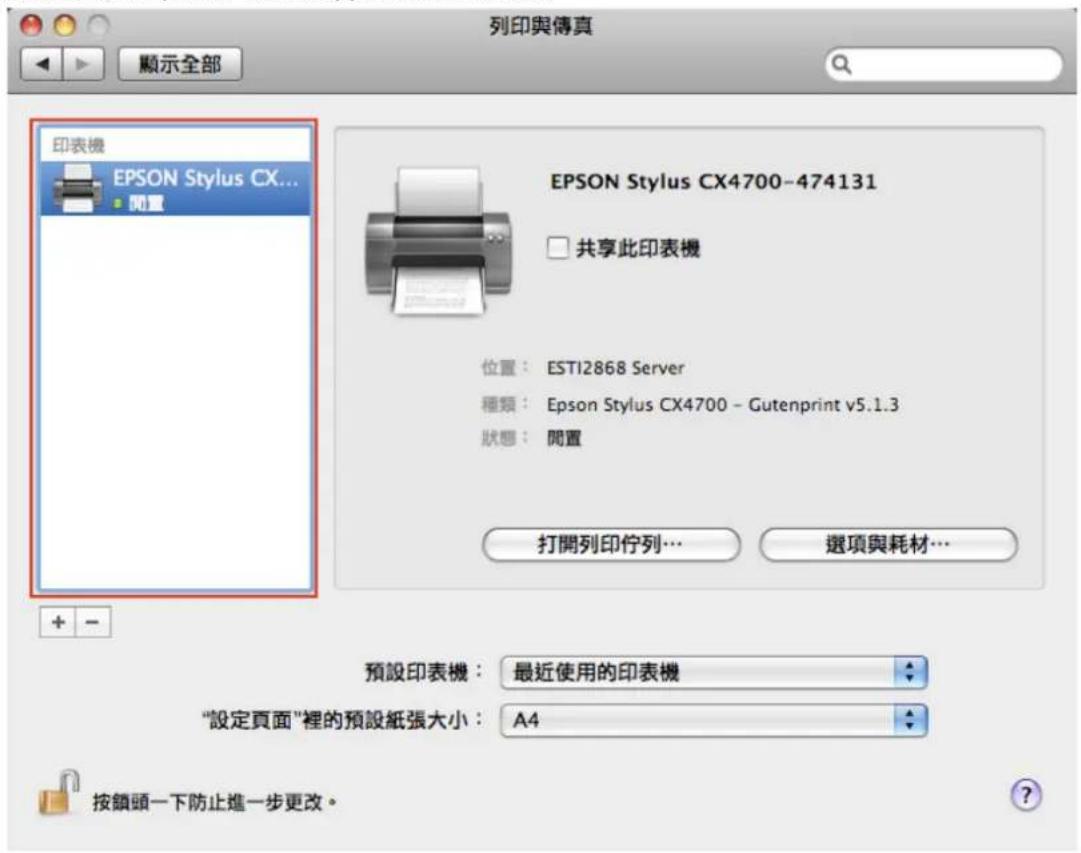
- And when you print a document, you will not be able to select it anymore.

Package contents:
• 4-Port USB network server.
- Power adapter.
- CD-rom with manual and driver.
Safety precautions:


To reduce risk of electric shock, this product should ONLY be opened by an authorized technician when service is required. Disconnect the product from mains and other equipment if a problem should occur. Do not expose the product to water or moisture.
Maintenance:
Clean only with a dry cloth. Do not use cleaning solvents or abrasives.
Warranty:
No guarantee or liability can be accepted for any changes and modifications of the product or damage caused due to incorrect use of this product.
General:
Designs and specifications are subject to change without notice.
All logos brands and product names are trademarks or registered trademarks of their respective holders and are hereby recognized as such.
Keep this manual and packaging for future reference.
Attention:

This product is marked with this symbol. It means that used electrical and electronic products should not be mixed with general household waste. There is a separate collections system for these products.
DEUTSCH
Druckereinrichtung
Windows XP
Windows VISTA
BITTE BEACHTEN SIE:
Lieferumfang:
Windows XP
Windows VISTA
VEUILLEZ NOTER :
Désinstaller l'imprimante
Windows ® XP

Windows® VISTA
LET OP:
Windows XP

Windows VISTA
NOTA BENE:
Windows XP
Windows VISTA
POR FAVOR, TENGA EN CUENTA:
Windows XP
Windows VISTA
FELHÍVJUK FIGYELMÉT A KÖVETKEZÖKRE:
A csomag tartalma:
Tulostimen asennus
Windows XP

Windows VISTA
HUOMAA:
Paketin sisältö:
Windows XP
Windows VISTA
OBSERVERA:
Paketets innehåll:
Nastavení tiskárny
Windows XP

Windows VISTA
UVĚDOMTE SI PROSÍM:
Odstranění tiskárny
Obsah balení:
Instalarea imprimantei
Windows XP
Windows VISTA
VĂ RUGĂM SĂ RETINETI:
Ştergerea imprimantei instalate
Pachetul contine
Windows XP
Windows VISTA
ΠΑΡΑΚΑΛΩ ΣΗΜΕΙΩΣΤΕ:
Printer opsætning
- Efter at printeren er opsat korrekt, kan du se den under Control Panel[Kontrolpanel] > Printers[Printere]:
Windows XP
Windows VISTA
BEMÆRK VENLIGST:
Slet printerindstilling
Pakkens indhold:
Skriveroppsett
- Velg skriveren du ønsker å sette opp fra denne listen og klikk Neste. Antallet skriver du finner på denne listen er antallet skrivere som er koblet til nettverket ditt. Har du bare én skriver, finner du bare én skriver på denne listen.
- Etter skriveren er satt opp korrekt, finner du den under Kontrollpanel > Skrivere:
• Du kan nå skrive ut et du vil med skriveren du nettopp installerte:
Windows XP

Windows VISTA
LEGG MERKE TIL:
- Velg skriveren du ønsker fra listen. Antallet skriver du finner på denne listen er antallet skrivere som er koblet til nettverket ditt. Har du bare én skriver, finner du bare én skriver på denne listen. Hvis du ikke finner noe skrivere der bør du forsikre deg om at skriverne og EST LPR Printer Server er slått på og har oppkobling mot nettverket.
Pakkens innhold:

- NETWORK PRINTER WIZARD INSTALLATION
- PRINTER SET UP
- NOTE
- REMOVE THE PRINTER SETTING
- REMOVE THE PROGRAM
- PLEASE NOTE
- PRINTER SETUP ON MAC OS X™
- REMOVING THE PRINTER SETTING
- PACKAGE CONTENTS
- SAFETY PRECAUTIONS
- MAINTENANCE
- WARRANTY
- GENERAL
- ATTENTION
- DEUTSCH
- DRUCKEREINRICHTUNG
- BITTE BEACHTEN SIE
- LIEFERUMFANG
- VEUILLEZ NOTER
- DÉSINSTALLER L'IMPRIMANTE
- LET OP
- NOTA BENE
- POR FAVOR, TENGA EN CUENTA
- FELHÍVJUK FIGYELMÉT A KÖVETKEZÖKRE
- A CSOMAG TARTALMA
- TULOSTIMEN ASENNUS
- HUOMAA
- PAKETIN SISÄLTÖ
- OBSERVERA
- PAKETETS INNEHÅLL
- NASTAVENÍ TISKÁRNY
- UVĚDOMTE SI PROSÍM
- ODSTRANĚNÍ TISKÁRNY
- OBSAH BALENÍ
- INSTALAREA IMPRIMANTEI
- VĂ RUGĂM SĂ RETINETI
- ŞTERGEREA IMPRIMANTEI INSTALATE
- PACHETUL CONTINE
- ΠΑΡΑΚΑΛΩ ΣΗΜΕΙΩΣΤΕ
- PRINTER OPSÆTNING
- BEMÆRK VENLIGST
- SLET PRINTERINDSTILLING
- PAKKENS INDHOLD
- SKRIVEROPPSETT
- LEGG MERKE TIL
- PAKKENS INNHOLD
Brand : KONIG
Model : CMPUSBNETBOX4
Category : Printer