
ES8103 - Razor PANASONIC - Free user manual and instructions
Find the device manual for free ES8103 PANASONIC in PDF.


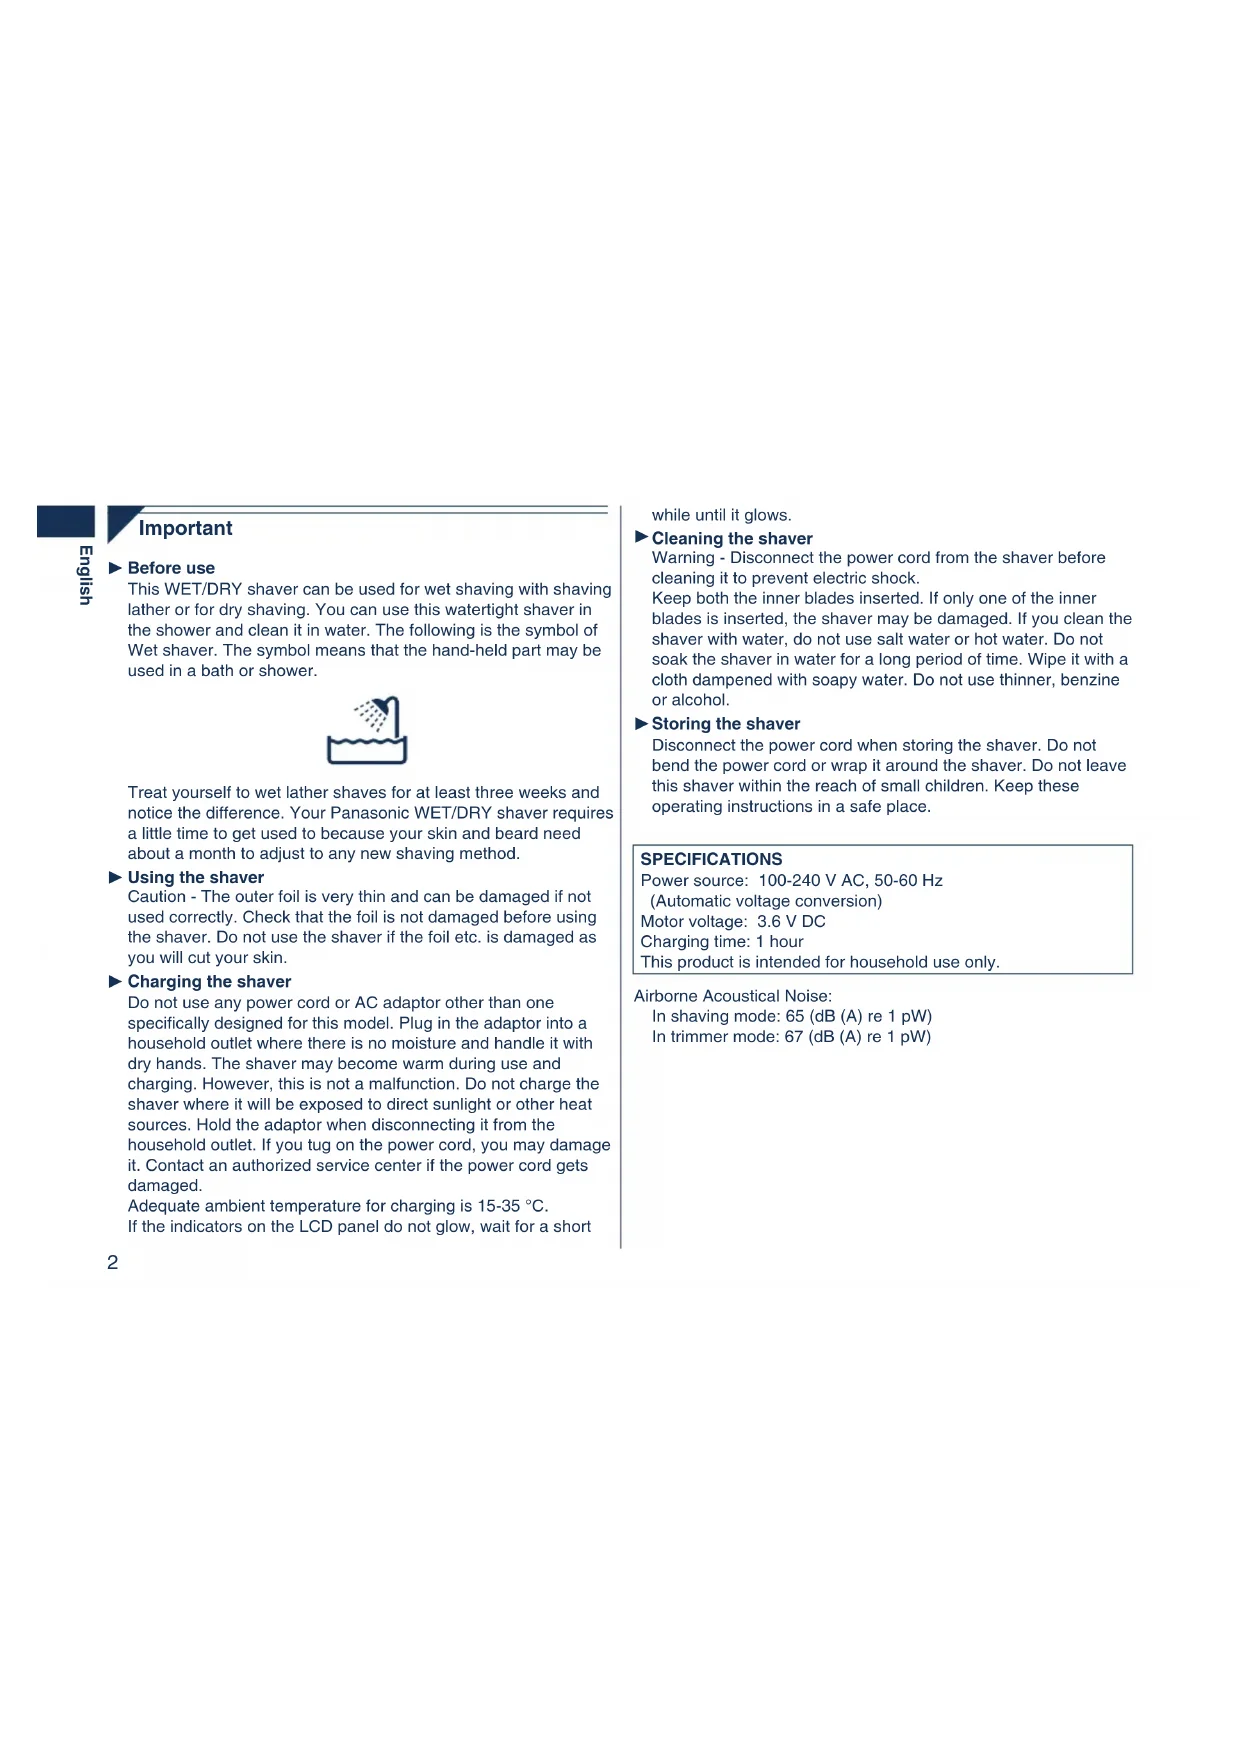


| Brand | Panasonic |
| Model | ES8103 |
| Product type | Wet/dry electric shaver |
| Power supply | AC adapter 100-240 V, 50-60 Hz (automatic conversion) |
| Motor voltage | 3.6 V DC |
| Battery type | Rechargeable lithium-ion |
| Charging time | 1 hour |
| Runtime | Approx. 42 minutes (14 shaves of 3 minutes) |
| Charge indicator | LCD panel (0% to 100% in 10% increments) |
| Usage | Dry and wet shaving (waterproof, usable in the shower) |
| Functions | Pivot action selector (SOFT/LOCK), built-in trimmer, turbo cleaning mode |
| Maintenance | Cleaning with soapy water, cleaning brush, lubrication with provided oil |
| Foil replacement | Every year |
| Inner blade replacement | Every two years |
| Noise level (shaver) | 65 dB (A) |
| Noise level (trimmer) | 67 dB (A) |
| Charging temperature | 15 °C to 35 °C |
| Safety | Fine foil, do not use if damaged; unplug before cleaning |
| Included accessories | Adapter (RE7-40), cleaning brush, oil |
| Use | Household use only |
Frequently Asked Questions - ES8103 PANASONIC
User questions about ES8103 PANASONIC
0 question about this device. Answer the ones you know or ask your own.
Ask a new question about this device
Download the instructions for your Razor in PDF format for free! Find your manual ES8103 - PANASONIC and take your electronic device back in hand. On this page are published all the documents necessary for the use of your device. ES8103 by PANASONIC.
USER MANUAL ES8103 PANASONIC
Operating Instructions Rechargeable Shaver Model No. ES8103
English 2 Portuguese 38 Magyar 73 Deutsch 8 Norsk 43 Romana 78 Francais 13 Svenska 48 Pycckn 83 Italiano 18 Suomi 53 Türkce 88 Nederlands 23 Polski 58 YkpaHcbka 93 Espanol 28 Cesky 63 Dansk 33 Slovensky 68
Before operating this unit, please read these instructions completely.
Important
Before use
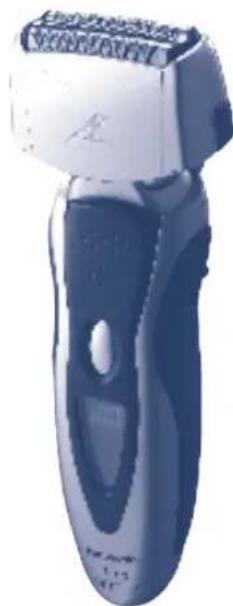
This WET/DRY shaver can be used for wet shaving with shaving lather or for dry shaving. You can use this watertight shaver in the shower and clean it in water. The following is the symbol of Wet shaver. The symbol means that the hand-held part may be used in a bath or shower.

Treat yourself to wet lather shaves for at least three weeks and notice the difference. Your Panasonic WET/DRY shaver requires a little time to get used to because your skin and beard need about a month to adjust to any new shaving method.
Using the shaver
Caution - The outer foil is very thin and can be damaged if not used correctly. Check that the foil is not damaged before using the shaver. Do not use the shaver if the foil etc. is damaged as you will cut your skin.
Charging the shaver
Do not use any power cord or AC adaptor other than one specifically designed for this model. Plug in the adaptor into a household outlet where there is no moisture and handle it with dry hands. The shaver may become warm during use and charging. However, this is not a malfunction. Do not charge the shaver where it will be exposed to direct sunlight or other heat sources. Hold the adaptor when disconnecting it from the household outlet. If you tug on the power cord, you may damage it. Contact an authorized service center if the power cord gets damaged.
Adequate ambient temperature for charging is 15 - 35°C. If the indicators on the LCD panel do not glow, wait for a short
while until it glows.
▸ Cleaning the shaver
Warning - Disconnect the power cord from the shaver before cleaning it to prevent electric shock.
Keep both inner blades inserted. If only one inner blade is inserted, the shaver may be damaged. If you clean the shaver with water, do not use salt water or hot water. Do not soak the shaver in water for a long period of time. Wipe it with a cloth dampened with soapy water. Do not use thinner, benzine, or alcohol.
Storing the shaver
Disconnect the power cord when storing the shaver. Do not bend the power cord or wrap it around the shaver. Do not leave this shaver within the reach of small children. Keep these operating instructions in a safe place.
SPECIFICATIONS
Power source: 100-240 V AC, 50-60 Hz
(Automatic voltage conversion)
Motor voltage: 3.6 V DC
Charging time: 1 hour
This product is intended for household use only.
Airborne Acoustical Noise:
In shaving mode: 65 (dB (A) re 1 pW)
In trimmer mode: 67 (dB (A) re 1 pW)
Parts identification
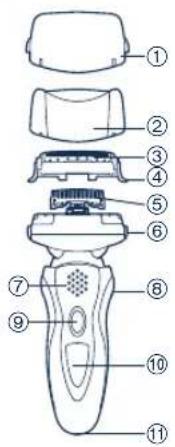
1 Protective cap, 2 Foil frame, 3 System outer foil, 4 System outer foil release buttons, 5 Inner blades, 6 Foil frame release buttons, 7 Finger rest, 8 Pivot action selector, OFF/ON switch
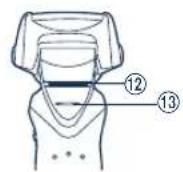
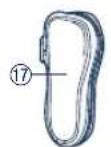
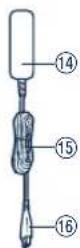
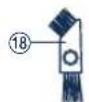
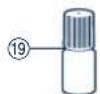
10 LCD panel, 11 Appliance socket, 12 Trimmer, 13 Trimmer handle, Adaptor (RE7-40), 15 Power cord, 16 Appliance plug, Soft case, 18 Cleaning brush, 19 Oil
Charge
Charging
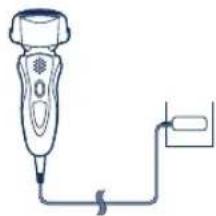
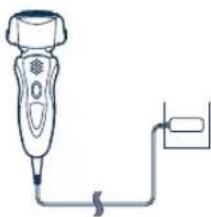
1 Insert the appliance plug into the shaver. 2 Plug the adaptor into a household outlet.
The indicators on the LCD panel glow and charging starts. - Charging is completed when the indicators on the LCD panel blink. (Max. 1 hour later)
About the LCD panel
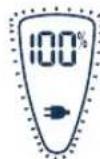
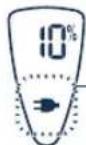
The LCD panel shows the remaining battery capacity from 0% to 100%, in 10% increments.
While charging
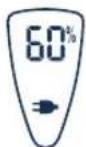
The indicators glow.
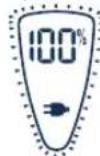
After charging is completed
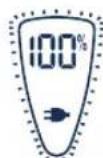
The indicators blink once every second.
10 minutes after charging is completed
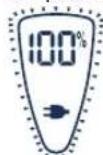
The indicators blink once every 2 seconds.
When the battery capacity is low
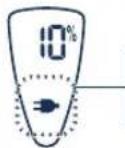
You can shave 1 to 2 times after 10% appears. (This will differ depending on usage.)
10% appears and links.
- A full charge will supply enough power for approximately 14 shaves of 3 minutes each.
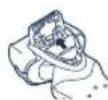
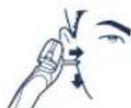
Using the trimmer
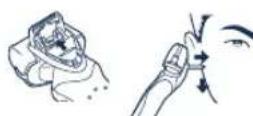
Slide the trimmer handle up. Place it at a right angle to your skin and move downwards to trim your sideburns.
Using the shaver
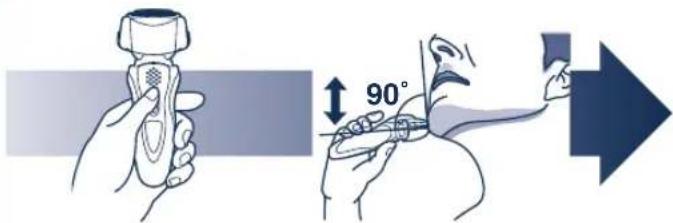
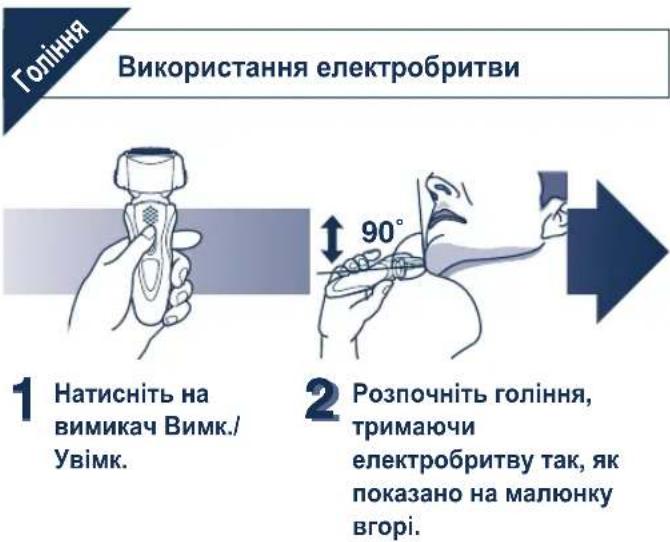
1. Press the OFF/ON switch.
2. Hold the shaver as illustrated above and shave.
- Start out shaving by applying gentle pressure to your face. Stretch your skin with your free hand and move the shaver back and forth in the direction of your beard. You may gently increase the amount of pressure as your skin becomes accustomed to this shaver. Applying excessive pressure does not provide a closer shave.
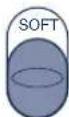
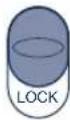
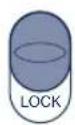
Pivot action selector
Use to select "SOFT" (soft) or "LOCK" (lock).
You can change the pivot action whether the shaver is turned on or off.
Cleaning
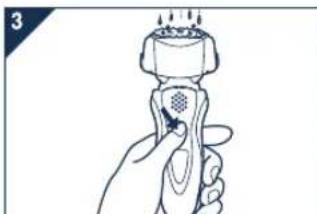
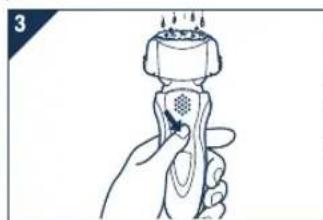
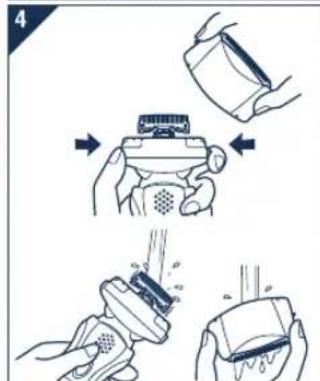
We recommend that you clean your shaver with the self-cleaning recharger or the "sonic vibration turbo-cleaning mode" when the faucet symbol appears on the LCD panel.
- Disconnect the power cord from the shaver.
- Apply some hand soap and some water to the outer foil.
- Press the OFF/ON switch for more than 2 seconds to activate the turbo mode for "sonic" vibration cleaning.
- (m) appears on the LCD panel. After about 20 seconds, it will be automatically turned off, or you can turn it off by pressing the OFF/ON switch.
- Remove the system outer foil and press the OFF/ON switch for more than 2 seconds to activate the turbo mode for "sonic" vibration cleaning and clean it with running water.
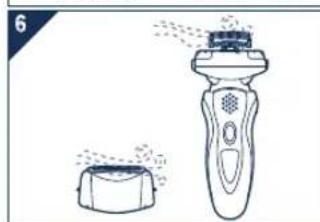
- Wipe off any drops of water with a dry cloth.
- Remove the system outer foil and the foil frame to allow them to dry completely.
Caution for turbo mode
- Shaving in turbo mode may damage your skin. Turn the shaver off and then on again to cancel turbo mode.
- Do not place your fingers on the OFF/ON switch while using the shaver. This may cause the shaver to turn off or enter turbo mode. Place your fingers on the finger rest while using the shaver.
Lubrication
To maintain shaving comfort for a long time, it is recommended that the oil provided with the shaver is used.
- Switch off the shaver.
- Apply one drop of oil to each of the outer foils.
- Raise the trimmer and apply a drop of oil.
- Switch the shaver on, and run it for approximately five seconds.
- Switch off the shaver, and wipe off any excess oil from the outer foils with a soft cloth.

Replacing the system outer foil and the inner blades: system outer foil once every year, inner blade once every two years.
Replacing the system outer foil
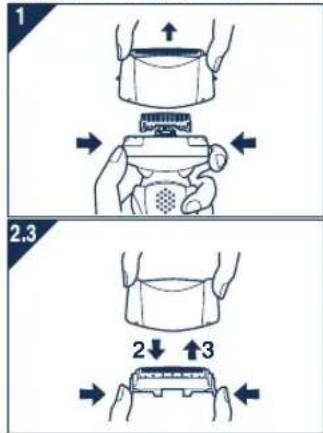
- Press the foil frame release buttons and lift the system outer foil upwards as illustrated.
- Press the system outer foil release buttons and pull down the system outer foil as illustrated.
- Insert the system outer foil until it clicks. Always attach the system outer foil in the proper direction. Always insert the system outer foil into the foil frame when attaching to the shaver.
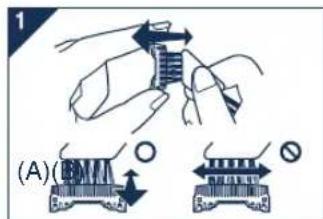
Cleaning with the brush
- Press the foil frame release buttons and lift the system outer foil upwards as illustrated.
- Remove the inner blades one at a time as illustrated.
- Do not touch the edges (metal parts) of the inner blades to prevent injury to your hand.
- Insert the inner blades one at a time until they click as illustrated.
- Clean the inner blades using the short brush by moving it in direction (A).
Clean the system outer foil, the shaver body and the trimmer using the long brush.
- Do not move the short brush in direction (B) as it will damage the inner blades and affect their sharpness.
- Do not use the short brush to clean the outer foils.
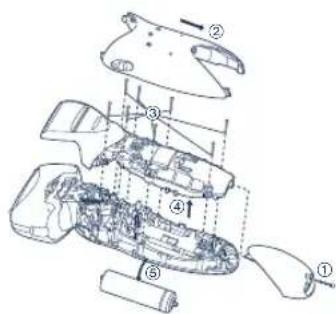
Removing the built-in rechargeable battery
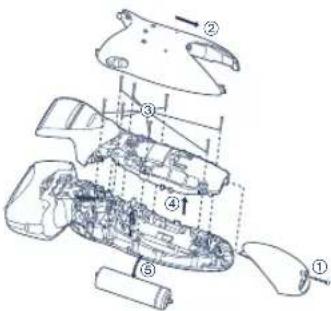
Remove the built-in rechargeable battery before disposing of the shaver. Please make sure that the battery is disposed of at an officially designated location if there is one. Do not dismantle or replace the battery so that you can use the shaver again. This could cause fire or an electric shock. Replace it at an authorized service center.
- Disconnect the power cord from the shaver when removing the battery.
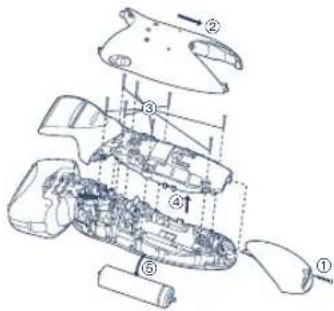
- Perform steps ① to ⑤ and lift the battery, and then remove it.
For environmental protection and recycling of materials
This shaver contains a Lithium-ion battery. Please make sure that the battery is disposed of at an officially assigned location, if there is one in your country.
Please read "Information on Disposal for Users of Waste Electrical & Electronic Equipment" on page 98.
Important
under shaving: 65 (dB (A) re 1 pW)
under trimming: 67 (dB (A) re 1 pW)
① Protective cap ② Foil frame ③ System outer foil ④ Release buttons for system outer foil ⑤ Inner blades ⑥ Release buttons for foil frame ⑦ Finger support ⑧ Rotation selector ⑨ OFF/ON switch

Charging
During shaving: 65 (dB (A) re 1 pW)
During trimming: 67 (dB (A) re 1 pW)

In trimmer position: 67 (dB (A) re 1 pW)
Do not touch the blades (metal parts) inside the shaver to avoid cutting your hands.
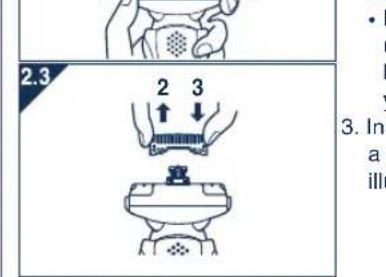
3. Insert the inner blades into the cutter as shown in the figure.
Cleaning with a brush
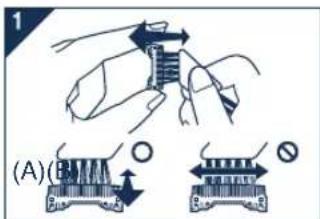
1. Clean the inner blades by moving the short brush in the indicated direction (A). Clean the foil, the shaver body, and the trimmer using the long brush.
Do not use the short brush in direction (B), as this may damage the inner blades and reduce their sharpness. Do not use the short brush to clean the foil.
Removing the built-in battery
Before disposing of the shaver, remove the battery from it. Please ensure that battery disposal is carried out at an official collection point. Do not disassemble or replace the battery yourself for the final use of the shaver. This may cause fire or electric shock. Replace the battery at an authorized service center.
Disconnect the shaver from the power supply before removing the battery. Follow steps ① to ⑤ to remove the battery.
Environmental protection and waste disposal recommendations
The shaver uses nickel-metal hydride batteries. Please ensure that battery disposal is carried out at an official collection point in your country.
The manufacturer has established a service life of 7 years from the date of manufacture, in accordance with paragraph 2 of Article 5 of the Russian Federation Law "On Protection of Consumer Rights", provided that the product is used in accordance with this instruction manual and applicable technical standards.

ME10
Made in China
This appliance is intended for household use only.
Radio frequency electric toothbrush (Guangzhou) Co., Ltd.
"Information on disposal for users of electrical and electronic equipment not included in the European Union" see p. 104.
Important
▶ Before use
Charge the device at a temperature between 15 and 35°C. If the indicator light does not turn on, wait a few seconds until it lights up.
Electric toothbrush
Warning - To avoid electric shock, unplug the charger from the outlet before cleaning the electric toothbrush. The brush heads must be installed. If only one brush head is installed, the electric toothbrush may be damaged. Do not use the electric toothbrush with salt or hot water. Do not immerse the electric toothbrush in water for a long time. Wipe it with a damp cloth. Do not use gasoline, benzene, or alcohol.
Storing the electric toothbrush
Before storing the electric toothbrush, unplug it from the outlet. Do not pull the cord and do not wrap it around the electric toothbrush. Store the electric toothbrush in a dry place. Keep this instruction manual in a safe place.
Technical specifications
Power supply: 100-240 V~, 50-60 Hz
(Automatic voltage adjustment)
This product is intended for household use only.
Acoustic noise:
In idle mode: 65 dB(A) relative to 1 pW
In operating mode: 67 dB(A) relative to 1 pW
Electric shaver construction (see page 3)
① Protective cap 10 Charging socket ② Frame comb ① Shaver lift ③ Outer cutter system ⑫ Timer ④ Release buttons for outer cutter system ⑬ Timer reset ⑤ Inner blade 14 Lamp (RE7-40) 6 Frame comb lock button 15 Power cord 7 Base for shaver 16 Cord winder ⑧ Shaver head lock 17 Storage bag ⑨ On/Off switch 18 Cleaning brush 19 Oil

Charging
1 Connect the power cord to the shaver.
2 Plug the adapter into the socket.
- The indicators on the charging socket light up to show the charging status. Charging is complete when the indicators on the charging socket light up continuously. (Max. charging time 1 hour)
About the charging socket
The charging socket displays the battery charge level from 0% to 100% in 10% increments.

P1n3aBepHnH 3apJKeHH
INnKaTOpn 6nMaOTb Odn pa3 0OcEkyHn.
Yepe3 10 XbunmH nicnna 3abepeHHH 3aDxJKeHH
IHnkaTOpN 6bnmaIbT bviuOcekyHn.
BIMoKTe BIKOHATN1-2rOIHHK,KOIN6JIIMae iHnKaTOp3apyD 10% (20 (Y3aJEnXHOCTiBD BIKOPNCtAHH.)
BiodopaKTaTbCa "10%" Ta 6nMaac
POBHe 3apJKeHHaKMyIaTopa 3a6e3neUcpoBoTy eNEKtpo6pntBnHa npN6mHo 14 ceaHciB roJIHHa TpNBaIICTO DO 3 XBNIH.
BukopncTaHH TpHMepa
Ipeemictb nepemukau TpImepa Bropy. Po3auyte TpImep eJektpo6pntBn iD npabNbHm KyTOM do uKipn oBnuey, uO6 niDiPiaTn 6aKn.
- Po3noohHtB rOiHHra, 3JIeKa npTnCKaIOUH eNEKtpo6pntBy do oBNIuY. HataRHTb uKipy oBNIuY BInbHOIO pyKOIO Ta nepeMluyte eNEKtpo6pntBy Ha3aI Ta Bnepey HaNPrmi 3apocTy. KOnu uKipA oBNIuY 3BnKHe Do daHOI eNEKtpo6pntBN, BN MoKeTe 3JERka 36InbWNTn HAITCK Ha He. PnPKaDaHHaHdINuKOBOrTo Tccky He 3a6e3NeUe YnCTIwOrO rOIHHra.
PepemnkauchapHipa
Cnykntb dne nepeknoueHHa waphipa B nooxKeHHa "SOFT"(pyxomn) a6o "LOCK" (3aqiKcobAHn).Bn moKeTe 3MIHOBaNT CTah wapHpa, konn enektpo6pntBa BmKHeHa a6o yBIMKHeHa.

PekomeHdyMo NOuCTHTn eNEKtpo6pntBy 3a DOnomorO cAmooCHORO 3apdHorO npctro 40 3a DOnomorO BipocuueHHra "sonic"KOnHa PK- naHeni BiO6paNTbc iOKKa
- Electric shaver for wet and dry use.
- Apply shaving gel to the skin and apply a thin layer. 3. Press and hold the on/off switch for more than 2 seconds to activate the turbo mode for thick hair "sonic".
It is selected on the RK panel. After about 20 seconds, it will turn off automatically or you can turn it off by pressing the on/off switch. 4. Turn on the system of external tanks and press and hold the on/off switch for more than 2 seconds to activate the turbo mode for thick hair "sonic", and then the conversation will continue. 5. Wipe the device thoroughly with a dry cloth. 6. Turn on the system of external tanks and the tank frame so that they can dry out.
Using the turbo mode
Fuel turbo mode can lead to damage to your device. To save the turbo mode, turn off and turn on the electric shaver again. Do not put the electric shaver on the charging base during use. You can turn off the electric shaver or turn on the turbo mode. The electric shaver is designed to be placed on the stand for charging.
Cleaning
For comfortable shaving for a long time, it is recommended to clean the electric shaver regularly.
- Turn off the electric shaver.
- Apply one drop of oil to each external tank. 3. Turn on the trimmer and apply one drop of oil to it.
- Turn on the electric shaver and let it run for about 5 seconds. 5. Turn off the electric shaver, then with a cotton swab wipe the external tanks with oil.
Cleaning the system of external tanks and internal blades
System of external tanks once a year
Internal blades once a year
Cleaning the system of external tanks
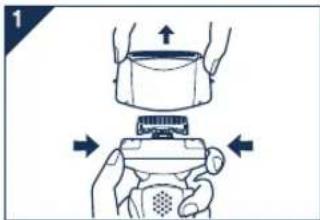
- Press the button and remove the top part as shown in the picture.
2.3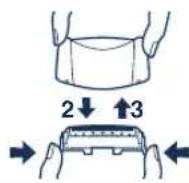
- Press the button and remove the battery as shown in the figure. 3. Insert the battery system according to the sound of the click. Installing the battery system in the correct direction.
Insert the battery into the frame of the battery under the cover to the electric toothbrush.
Remove the inner brush
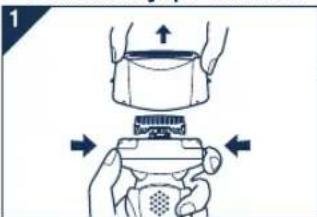
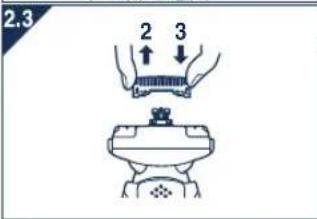
- Press the button and remove the brush as shown in the figure.
- Remove the inner brush as shown in the figure.
To remove the brush, do not touch the edges (metal parts) of the inner brush.
3. Insert the inner brush according to the sound of the click as shown in the figure.
Cleaning with the brush
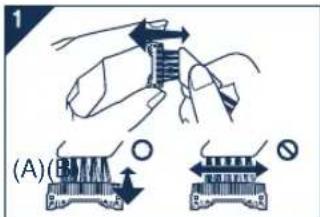
- Clean the inner brush with a short brush, moving it in direction (A). Clean the battery system, the electric toothbrush body, and the trimmer with a long brush.
Do not move the short brush in direction (B), as this may damage the inner brush and change its sharpness. Do not use the short brush for cleaning the brush.
Removing the built-in battery
Remove the built-in battery before disposing of the electric toothbrush. Be careful, dispose of the battery in a specially designated place, as it is hazardous. It is forbidden to disassemble or recharge the battery or use it with the electric toothbrush. This can lead to fire or electric shock. Charge the battery only in an authorized service center.
Before removing the battery, turn off the electric toothbrush and unplug it. Follow steps ① to ⑤, remove the battery, and then dispose of it.
Information on environmental protection and recycling of materials
Danger of explosion if battery is incorrectly replaced. Please be careful and dispose of the battery in specially designated places, as they are delivered in your country.
The manufacturer sets the service life (durability) of this product at 7 years from the date of manufacture, provided that the product is used in strict accordance with this instruction manual and the technical standards applicable to this product.
The date of manufacture is indicated on the product.
Panasonic Electric Works Wanbao (Guangzhou) Co., Ltd.
Wanbao Base Shiguang Road, Panyu District, Guangdong, 511495 CHINA
Panasonic Electric Works Wanbao (Guangzhou) Co., Ltd.
Banhao Bei 3, Panyu District, Yanbu, Guangdong, 511495, China
Panasonic Information Center telephone number:
+38(044) 490-38-98
Read the section "Information for disposal in countries not belonging to the European Union" on page 105.
English
Information on Disposal for Users of Waste Electrical & Electronic Equipment (private households)

This symbol on the products and/or accompanying documents means that used electrical and electronic products should not be mixed with general household waste. For proper treatment, recovery and recycling, please take
these products to designated collection points, where they will be accepted on a free of charge basis.
Alternatively, in some countries you may be able to return your products to your local retailer upon the purchase of an equivalent new product.
Disposing of this product correctly will help to save valuable resources and prevent any potential negative effects on human health and the environment which could otherwise arise from inappropriate waste handling. Please contact your local authority for further details of your nearest designated collection point.
Penalties may be applicable for incorrect disposal of this waste, in accordance with national legislation.
For business users in the European Union
If you wish to discard electrical and electronic equipment, please contact your dealer or supplier for further information. Information on Disposal in other
Countries outside the European Union This symbol is only valid in the European Union.
If you wish to discard this product, please contact your local authorities or dealer and ask for the correct method of disposal.
German
This symbol of the crossed-out wheeled bin applies only to the European Union. If you intend to dispose of this product, please contact your local authorities or dealer for information on how to properly dispose of such waste.
Type.
Turkish
Wanbao Base Shiguang Road, Panyu District, Guangzhou, Guangdong, 511495 CHINA
No.1 EN,GE,FR,IT,DU,SP,DA,PT,NW,SW,FI,PL,CZ,SK,HU,RO,RU,TK,UA (Europe)
Printed in China


- IMPORTANT
- BEFORE USE
- USING THE SHAVER
- CHARGING THE SHAVER
- ▸ CLEANING THE SHAVER
- STORING THE SHAVER
- SPECIFICATIONS
- PARTS IDENTIFICATION
- CHARGE
- CHARGING
- ABOUT THE LCD PANEL
- USING THE TRIMMER
- PIVOT ACTION SELECTOR
- CLEANING
- CAUTION FOR TURBO MODE
- LUBRICATION
- REPLACING THE SYSTEM OUTER FOIL AND THE INNER BLADES: SYSTEM OUTER FOIL ONCE EVERY YEAR, INNER BLADE ONCE EVERY TWO YEARS
- REPLACING THE SYSTEM OUTER FOIL
- CLEANING WITH THE BRUSH
- REMOVING THE BUILT-IN RECHARGEABLE BATTERY
- FOR ENVIRONMENTAL PROTECTION AND RECYCLING OF MATERIALS
- CLEANING WITH A BRUSH
- REMOVING THE BUILT-IN BATTERY
- ENVIRONMENTAL PROTECTION AND WASTE DISPOSAL RECOMMENDATIONS
- ME
- ELECTRIC TOOTHBRUSH
- STORING THE ELECTRIC TOOTHBRUSH
- TECHNICAL SPECIFICATIONS
- ELECTRIC SHAVER CONSTRUCTION (SEE PAGE 3)
- ABOUT THE CHARGING SOCKET
- PEPEMNKAUCHAPHIPA
- USING THE TURBO MODE
- CLEANING THE SYSTEM OF EXTERNAL TANKS AND INTERNAL BLADES
- CLEANING THE SYSTEM OF EXTERNAL TANKS
- REMOVE THE INNER BRUSH
- INFORMATION ON ENVIRONMENTAL PROTECTION AND RECYCLING OF MATERIALS
- PANASONIC ELECTRIC WORKS WANBAO (GUANGZHOU) CO., LTD
- ENGLISH
- INFORMATION ON DISPOSAL FOR USERS OF WASTE ELECTRICAL & ELECTRONIC EQUIPMENT (PRIVATE HOUSEHOLDS)
- FOR BUSINESS USERS IN THE EUROPEAN UNION
- GERMAN
- TURKISH
Brand : PANASONIC
Model : ES8103
Category : Razor