Video Shooter - Mp3 player INTENSO - Free user manual and instructions
Find the device manual for free Video Shooter INTENSO in PDF.
| Product type | MP3 player with multimedia functions (audio, video, photo, radio, voice recorder, camera) |
| Brand | Intenso |
| Model | Video Shooter |
| Power supply | Rechargeable lithium-polymer battery via USB port |
| Battery life | Up to 8 hours |
| Screen | 2.4-inch color LCD |
| Supported audio formats | MP3, WMA |
| Supported video formats | MPEG-1, MPEG-4, FLV, M-JPEG |
| Supported photo formats | JPEG, BMP |
| Main functions | Audio/video player, FM radio, voice recorder, digital camera, webcam, folder navigation |
| Memory expansion | micro SD card (not included) |
| Connectivity | Mini USB 2.0 port |
| Earphones | Stereo, 5 mW + 5 mW |
| Operating temperature | 0 °C to 45 °C |
| Operating humidity | < 80 % RH |
| Storage humidity | < 90 % RH |
| Safety | Do not expose to moisture, do not disassemble, avoid high volume to protect hearing |
| Maintenance and cleaning | Clean with a dry, soft cloth, do not use chemicals |
| Package contents | Player, stereo earphones, USB cable, user manual, warranty certificate |
| Spare parts and repairability | Not user-serviceable, warranty void if opened |
| General information | Manufactured by Intenso, Germany |
Frequently Asked Questions - Video Shooter INTENSO
User questions about Video Shooter INTENSO
0 question about this device. Answer the ones you know or ask your own.
Ask a new question about this device
Download the instructions for your Mp3 player in PDF format for free! Find your manual Video Shooter - INTENSO and take your electronic device back in hand. On this page are published all the documents necessary for the use of your device. Video Shooter by INTENSO.
USER MANUAL Video Shooter INTENSO
MP3, WMA, FLAC, APE, ACC, OGG, Wave
Foto Format
JPEG, BMP
Bit Rate
MP3: 8-320kbps;
WMA:5-320kbps
SNR
80dB
USB Port
USB2.0
1. Table of contents
- Table of contents 1
- Instructions 2
- Functions 2
- Package content 2
- Before use. 3
- First steps 6
- Main Menu 6
- Playing music 7
- Picture 9
- Video 11
- Integrate Digital Camera 12
- Using the device as PC camera 15
- FM Radio 15
- Record 17
- View Folders 18
- Editing the Player's Settings 18
- Troubleshooting 20
- Technical data 21
- Please observe what follows 22
2. Instructions
- Avoid a strong collision of the device.
- Do not use the device in extremely cold, hot, humid or dusty places. Do not expose it to direct insolation.
- Carry out frequent data backups to avoid a possible data loss.
- Avoid the use in strong magnetic fields.
- Protect the device from humidity. If humidity penetrates the device, please switch it off immediately and clean and dry the device.
- Please do not use chemical solutions to clean the device. In this case please use a dry cloth.
- We are not responsible for damages or data loss in case of a failure malfunction caused by a faulty operation, the reparation of the device by one's own hand or the battery change.
- Please do not decompose the device into smaller parts and do not try to repair it by yourself, because in this case the guarantee expires.
- If you use earphones or headsets on full blast you could cause a durable damage to your hearing.
3. Functions
- MP3 & WMA Player
Video Player - Camera: to take pictures and record videos
Possible to connect PCs and Webcams - JPEG / BMP picture viewer
- Directory navigation
- Rechargeable Li-polymer battery
- User-specific settings
- Removable medium
4. Package content
Please check the package content for completeness
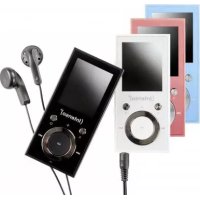
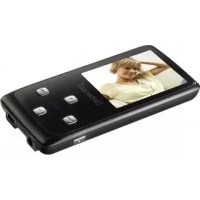
- Intenso Video Player
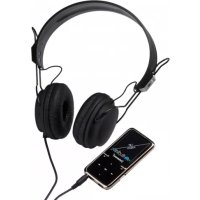
- Stereo headset
USB cable - Instruction manual + guarantee certificate
5. Before use
Connect with the PC
With the operating systems Windows 98/SE please install a driver before you connect the player with the PC. (The download is available on the following website: www.intenso.de). For the operating systems WIN 2000/XP/ME/Vista/Windows 7 the installation of the driver is not needed.
Please go ahead as follows:
(1) Connect the player with the USB connection of the PC.
(2) The window "Intenso" will open. Now you can save the data from your hard disk on the removable medium.
Safe removal from the PC
For Windows 2000/XP/ME/Vista/Windows 7:
Click with the right mouse button down right in the task bar on the symbol "Remove hardware securely". In the displayed context menu please select the point "Remove USB mass storage device driver" with the left mouse button. Please make sure that the data transmission has been completed.
Now you can remove the device.
For Windows 98/SE:
Select the device in the "device manager" with the left mouse button. Now click on the menu point "Remove". Make sure also here that the data transmission has been completed.
Now the device can by disconnected from the computer.
Charging batteries
The Player's battery is automatically charged if the player is connected to the computer. Please ensure the computer is switched on.
- Within 3 hours approx. 80% of the battery is charged. After 5 hours the Player is completely charged. If you use the Player while it is being charged, it's charging time will increase.
Below you find the Player's different charging states.

Full

2/3 full

1/2 full

Battery weak

Empty
Please Note:
- When charging the local room temperature should be between 0^ and 35^ .
- Please charge the Player before you use it for the first time or after you have not used it for longer time.
- Please charge the Player if the display shows "Battery weak".
Please mind that the battery's lifetime may reduce if you discharge or overcharge it. - The battery may completely discharge if the device has not been used for more than 3 months. Due to this reason, please charge the Player completely at least every 3 months.
If you will not use your device for longer times, please store it at a room temperature of 23 ± 5^ C and air humidity of 65 ± 20% to maintain the battery's quality.
Operating controls
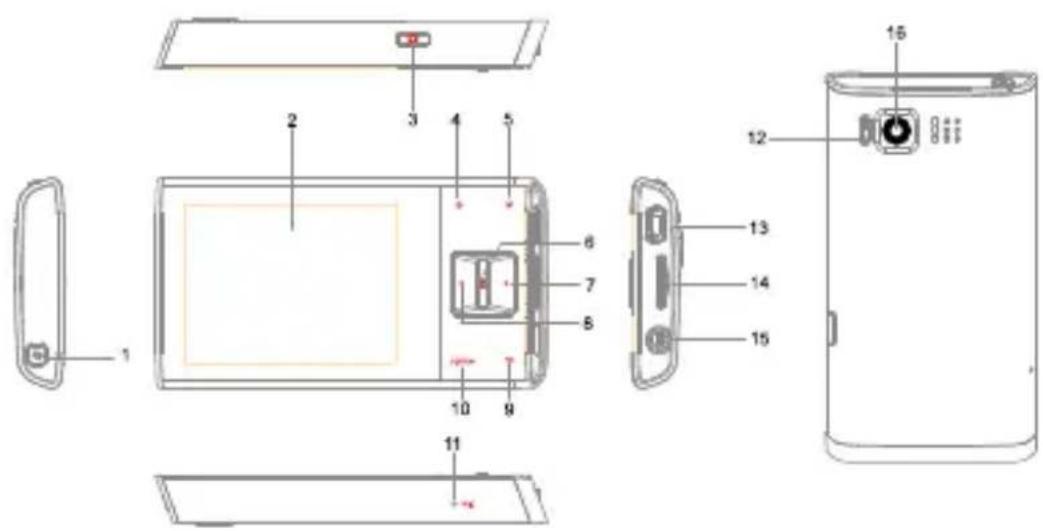
| 1. | Power On/Off |
| 2. | Display |
| 3. | Take picture / record videos |
| 4. | Up button, turn up volume |
| 5. | Down button, turn down volume |
| 6. | Play/Pause/Continue, Confirm - button |
| 7. | Right / forward button: press and hold = fast forward |
| 8. | Right / forward button: press and hold = fast forward |
| 9. | Exit; recorded files are stored |
| 10. | Opens the relevant settings menu |
| 11. | Microphone |
| 12. | Reset |
| 13. | Mini USB Port |
| 14. | Micro SD Card slot |
| 15. | Headphone input |
| 16. | Camera lens |
6. First steps
Switching the player on / and off
Please ensure your battery is properly charged and the headphones are correctly plugged in.
- To start the Player please press and hold the [ ] button.
- To switch off the Player please press and hold the [ ] button.
Volume settings
To turn up the volume, please press the [ ] button.
To turn down the volume, please press the [ ] button.
Resetting the Player
In case the Player does not respond to your input anymore, please use a thin needle or pin and press it into the Reset hole to reinitialise your Player.
7. Main Menu
Upon switching on the Players the main menu appears. If you are in a submenu, you reach the main menu by pressing the [ ] button.
- Using the [O], [O], [or [] button you can select the desired menu item.
- Please press the [ ] button to start the desired menu.
| Symbol | Name | Description | Symbol | Name | Description |
| Music | Play songs. | Record | Voice recording | ||
| Picture | View pictures. | FM Radio | Listen to FM Radio | ||
| Video | Play videos. | Directory navigation | View directories and files | ||
| Camera | Take picture / record videos | Settings | Personal settings |
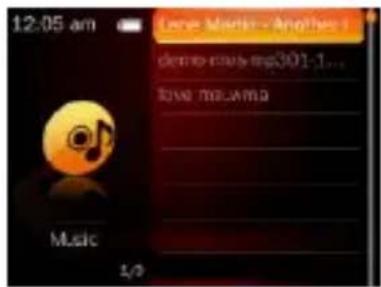
8. Playing music
Please ensure your battery is properly charged and the headphones are correctly plugged in.
- In the main menu you can select your desired Music using the [+], [-], [<] or [>] button.
- Using the [ ] button you can select your desired Playlist (All songs, Artist, Album or Genre); press confirm.
-
Using the [ ] or [ ] button you can select the desired song; press [ ] to confirm. Now you see the Music Playback Menu on the display. Here you have the following options:
-
Pause/Continue Playback: Using the [▶] button you can stop the music, by repeatedly pressing this button you can continue playing the music.
- New song: Press the [ ] or [ ] button to play the previous or next song.
- Fast search: Press and hold the [ ] button for fast rewind. Press and hold the [ ] button for fast forward.
Volume settings: Press the [or [ button to turn down or up the volume. -
Exit: Press and hold the [ ] button to return to the main menu.
-
Add to My playlist:
-
While you are playing music you can start the Settings Menu by pressing the [Option] button.
Using the [or button you can select the "Add to Playlist" feature; press [to confirm. The relevant song added to "My Playlist". -
Add bookmark
While playing music please press the [Option] button to start the Settings Menu.
Using the [or [] button you can select the "Add bookmark" feature, to confirm press the [] button. The current position of the current song is added to the list "My bookmark list".
Selecting a song from the "My playlist" list
a) Press and hold the [ ] button to return to the music menu.
b) Press the [ ] or [ ] button to select "My Playlist" and confirm your selection using the [ ] button.
c) Press the [ ] or [ ] button to select a particular song and press the [ ] button to play this song.
Music settings
While you are playing music you can start the Settings Menu by pressing the [Option] button.
| Menu item | Settings | Description |
| Repeat AB | Repeat a particular part of a song. | |
| Playback mode | Chronological order | Songs are played one after the other. |
| Repeat individually | The song is played as infinite loop. | |
| Repeat all | All songs are played as infinite loop. | |
| Random | Songs are played in random mode. | |
| Random + Repeat | Songs are repeated and played in random mode | |
| Intro | Only the first few seconds of a song are played | |
| Select EQ | Normal | No sound effects. |
| Rock | Sound effect Rock. | |
| Pop | Sound effect Pop. | |
| Classic | Sound effect Classic. | |
| Soft | Sound effect Soft. | |
| Jazz | Sound effect Jazz. | |
| User EQ | Sound effect User EQ. | |
| Playback speed | -4, 3,-2,-1,0,1,2,3,4 | Set playback speed. |
| Display settings | Album, Lyrics, Equalizer | Select display mode. |
| Evaluate | Evaluate the current song. | |
| Add bookmark | Bookmark song. | |
| Add to playlist | Playlist 1 - 5 | Add current song to playlist. |
| Delete | Delete current song. | |
| Music settings | Number of repetitions | Select number of repetitions. |
| Interval of repetitions | Select interval of repetitions. | |
| Search speed | Select search speed. | |
| Fade in/out | Activate / deactivate fade in / out. | |
| EQ settings | Adjsut EQ settings. | |
| Information | Display of song details. | |
Edit Equalizer Settings:
- In the music menu please select Setup EQ
- Press the [ ] or [ ] button to select "User EQ"
- Please press the [Option] button to select your desired menu items.
- Press the [ ] button to select the values desired.
- To confirm please press the [ ] button.
Display song text with playback (Lyrics)
This Player can display the lyrics (song texts) of songs while they are being played. It is only possible to display song texts in LRC format.
To add song texts proceed as follows. Example: You want to display the song text of the MP3 file "love music. Mp3":
- Download the relevant lyrics file ("Lrc") from the Internet.
- Rename this file into "love music.Irc". The name of this lyrics file must correspond to the name of the MP3 file.
- Copy both files into the same directory of the Player.
- In the Music Settings Menu please select "Lyrics".
- Now, the song text (Lyrics) is displayed while the song is being played.
9. Picture
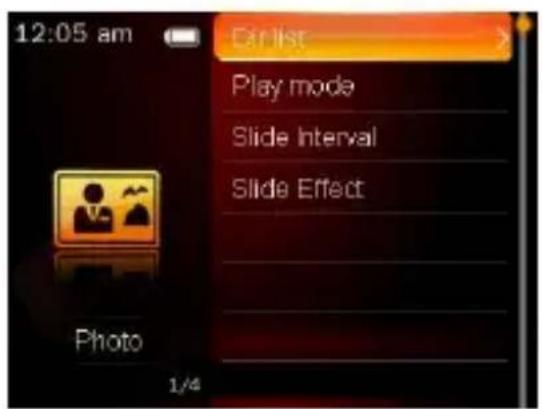
- In the main menu you can select the menu item Picture using the [O], [O], [or [] button
- Using the [or] button you can select the "Content" feature: press [▶] to confirm.
-
To select a picture please press the [+], [−], [←] or [→] button; to confirm press [▶]. Now the picture is shown as full screen.
-
Miss out pictures: Press the [ ] or [ ] button to leap to the previous or next picture.
- Fast search: Press and hold the [ ] button to search in the fast rewind mode; press and hold the [ ] button to search in fast forward mode.
- Slide show: Press the [▶] button to Start / Stop / Continue the slide show.
- Rotate picture: Press the [Option] button and select "Rotate".
- Zoom in / out: Press the [Option] button and select "Zoom in".
- Select as background: Press the [Option] button and select "as background".
- Exit: Press and hold the [ ] button to return to the main menu.
Picture settings
- Press and hold the [ ] button to return to the picture menu.
-
Press the [ ] or [ ] button to select "Playback", "Display duration" or "Transition effect". To confirm please press the [ ] button.
-
Playback: Select the playback mode from: "List" or "Thumbnails".
- Display duration Adjust the display duration of pictures to be shown in a slide show.
- Transition effect: Adjust the transition effect for the transition from one picture to the other.
While you are viewing a picture you can start the Settings Menu by pressing the [Option] button.
| Menu item | Selection | Description |
| Rotate | 90, 180, 270 | Rotate the picture. |
| Zoom in | Zoom in / out: | Zoom in / out picture. |
| Playback: | Full screen, original size, scale | Adjust the display mode. |
| Display duration | 1 – 10 seconds | Adjust the display duration. |
| Transition effect: | Normal, flying in, chess board, cutting, deleting,alousie, scrolling, pushing, crossfading, wave, cube, rotating, lines, random | Select the transition effect. |
| As background | Main menu, list menu, music menu, FM - menu, recording menu, all menus | Place your desired picture as background into the selected menu. |
| Standard background | Main menu, list menu, music menu, FM - menu, recording menu, all menus | Place your standard picture as background into the selected menu. |
| As start screen | Select the desired picture as start screen. |
| As “shut down” picture | Select the desired picture as “Shut down” screen. |
| Delete | Delete |
| Information | Display picture data |
10. Video

Please ensure your battery is properly charged and the headphones are correctly plugged in.
- Press the [O], [O], [or] button to select the Video feature in the main menu.
- Using the [ ] or [ ] button you can select the "Content" feature; press [ ] to confirm.
-
Using the [ ] or [ ] button you can select a video; press [ ] to confirm. Now, you see the playback menu. Here, please pick one of the following options:
-
Pause/Continue: Press the [▶] button to Stop the video being played.
Repeatedly press the button to continue playback.
Volume settings: Press the [ ] or [ ] button to adjust the volume.
- Miss out videos: Press the [ ] or [ ] button to play the previous or next video.
- Fast search: Press and hold the [ ] button to search in the fast rewind mode.
Press and hold the [ ] button to search in the fast forward mode.
- Exit: Press and hold the [ ] button to return to the main menu.
- Add bookmark
While you are playing a video you can start the Settings Menu by pressing the [Option] button.
Using the [<] or [>] button you can select the "Add bookmark" feature; press [▶] to confirm. The current position of the video being played is stored in your bookmark list.
Playback of the video last viewed at last position
- Press the [ ] button to return to the video menu.
- Using the [<] or [>] button you can select the "Currently being played" feature; press [ ] to start playback from the last position.
Video settings
While you are watching a video you can start the Settings Menu by pressing the [Option] button.
| Menu | Menu item | Description |
| Playback: | Chronological order | Videos are played one after the other. |
| Repeat individually | The video is played as infinite loop. | |
| Repeat all | All videos are played as infinite loop. | |
| Random | Videos are played in random mode. | |
| Search speed | x2, x4, x8, x16, x32 | Select search speed. |
| Add bookmark | Bookmark song. | |
| Display mode: | Full screen, original, scaled | Select the display mode. |
| Continue | On, Off | Activate and/or deactivate the Continue feature. |
| Delete | Delete. | |
| Information | Display picture data | |
11. Integrate Digital Camera
Taking pictures

Upon switching on the Players the main menu appears.
- Using the [>, [], [or [] button you can select the menu item Camera.
- Press the [ ] or [ ] button to select the "Take a picture" feature. To confirm please press the [ ] button. Now you see the Standby menu.
- To take a picture please press the [ ] button.
- Please change into the Picture mode to view the pictures taken.
Please note:
- Press the [ ] button to start the "Take a picture" mode (possible in all menus).
- The pictures taken are stored in the picture folder as JPG files.
Picture mode settings
While you are taking pictures you can start the Settings Menu by pressing the [Option] button.
| Menu item | Settings | Description |
| Preview | Thamburger of the picture taken. | |
| White balance | Automatic, indoors, outdoors | Colour balancing to environmental conditions. |
| Brightness | 1,2,3,4,5 | Adjusting the brightness. |
| Exposure mode | Automatic, indoors, outdoors | Select your preferred exposure. |
| Special effect | Off, black & white, sepia, negative | Add a special effect |
| Memory location | Internal memory, external memory | Select the memory location desired. |
| Resolution | 2048 x 1536, 1600 x 1200, 1280 x 960, 1024 x 768, 640 x 480, 320 x 240 | Please select a resolution. |
| Automatic release | Off, 5 sec., 10 sec., 15 sec., 20 sec. | Please select the interval the picture is automatically taken. |
| Release sound | Off, sound 1, sound 2, sound 3 | Select the desired sound. |
| Picture information | Off, date, date & time | Select your preferred type of representation. |
| Display settings | Full screen, original, scaled | Adjustment of display settings. |
| Facial recognition | On, Off | Activate the facial recognition for very clear and pin sharp facial pictures. |
| Settings | Settings menu | |
Selecting pictures from a playback list
- Press and hold the [ ] button to return to the main menu and select the menu item Picture.
- Using the [<] or [>] button you can select the "Content" feature; press [▶] to confirm.
- Using the [ ] or [ ] button you can select the picture desired, to view the picture press the [ ] button.
Recording videos

Upon switching on the Player the main menu is displayed.
- Using the [or button you can select the menu item Camera.
- Press the [<] or [>] button to select "Video recording" and, thereafter, press [▶]. Now the video recording menu is opened. Video recording is in Standby mode.
- Please press the [ ] button to start recording the video.
- Please repeatedly press the [ ] button to pause recording the video.
- Press the [ ] button to store the recorded video.
- Change to Video Mode to view the stored recordings.
Please note:
- The stored file is stored in the video directory as AVI file.
- Video recording is automatically paused if the internal memory is full or the internal battery is empty. The recording date is automatically stored.
Video recording settings
While recording a video you can choose from the following options.
| Menu item | Options | Description |
| Preview | Thumbnail of the videos recorded. | |
| White balance | Automatic, indoors, outdoors | Colour balancing to environmental conditions. |
| Brightness | -3, -2, -1, 0, 1, 2, 3 | Adjusting the brightness. |
| Exposure | Automatic, indoors, outdoors | Select the appropriate type of exposure |
| Special effect | Off, black & white, sepia, negative | Add a special effect |
| Memory location | Internal memory, external memory | Select the memory location desired. |
| Resolution | 640 x 480, 320 x 240 | Selection of the desired resolution. |
| Quality of recording | High, medium, low, automatic adjustment | Adjustment of recording quality. |
| Volume of recording | Off, 1, 2, 3, 4, 5 | Setting the desired volume. |
| Display settings | Full screen, original, scaled | Adjustment of display settings |
| Settings | Settings menu | |
Selecting a video from the playback list.
- Press and hold the [ ] button to return to the main menu. Here, select the entry Video.
- Press the [ ] or [ ] button to select the "Content" or "Bookmark list" feature. To confirm please press the [ ] button.
- Using the [ ] or [ ] button you can select the desired video; press [ ] to start the video.
12. Using the device as PC camera
The camera lens on the Player's rear panel can be used as webcam.
- Connect the mini USB cable with the mini USB port of the Player and put the other end into a free USB slot of the computer.
- Press the [<] or [>] button to select "Charge and Play". Now, the main menu is displayed on the Player.
- Please select the Camera.
- Press the [<] or [>] button to select "PC Camera". To confirm please press the [▶] button.
- Now you can use the Camera as PC Camera.
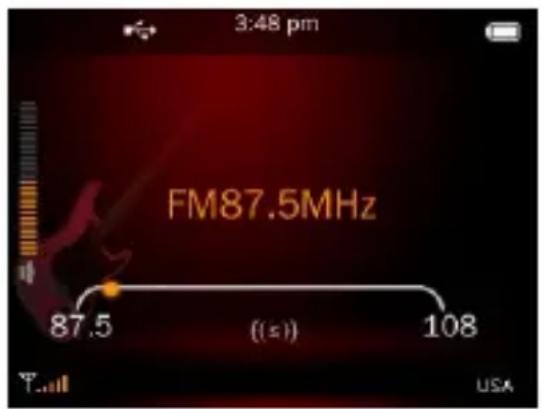
13. FM Radio
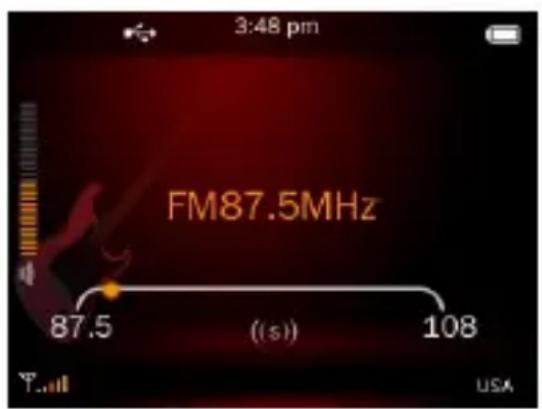
Please Note: Please always connect your headphones with the Player, since they are used as antenna.
- Press the [O], [O], [or] button to select FM Radio in the main menu.
- In radio mode press the [Option] button and select "Automatic Search".
-
While you are listening to the radio you can:
-
Press the [ ] or [ ] button to leap to the previous or next stored radio station.
- Press and hold the [ ] or [ ] button to search the next radio station available.
- Press the [ ] button to turn up / down the volume.
- Please press the [Option] button to start Settings Menu FM Radio.
FM Radio recording
- While listening to the radio please press the [Option] button and select "FM Recording". Now the FM Radio is automatically recorded.
- Press the [P] button and, then, select "OK" to copy the recorded file into the Recording Directory.
FM Radio Settings
While listening to the FM Radio you can start the FM Settings Menu by pressing the [Option] button.
| Menu item | Options | Description |
| FM Recording | Start FM Recording. | |
| Quality | Low, Medium, High | Adjust quality of recording. |
| Volume of recording | 1, 2, 3, 4, 5,6,7 | Adjust volume of recording. |
| Store station | Store the current station in the list of stations. | |
| Automatic search | Search automatically for available radio stations. | |
| List of stations | Check or select a station from the list of stations. | |
| FM Sensitivity | Low, Medium, High | Adjust FM Sensitivity. |
| User list of stations | Check or select a station from the user list of stations. | |
| FM Region | USA, Japan, Europe | Selection of FM Region. |
| Mute / Play | Mute or Unmute | |
14. Record

In the main menu please select Recording; to confirm press [ ]
- Please press the [ ] button to start recording.
- Please repeatedly press the [ ] button to pause or continue recording the station.
- Press the [ ] button and, then, select "OK" to store the recorded file into the Recording Directory.
Please note:
The recorded files are stored in the Player's main directory as WAV or MP3 file.
- Video recording is automatically stopped as soon as there is no free memory capacity on the Player available or the battery is empty. The recording date is automatically stored.
Recording settings
In the Recording Menu (while in Stand-by Mode) you can change into the Recording Settings Menu using the [Option] button.
| Menu item | Options | Description |
| Quality of recording | Low, Medium, High | Adjust quality of recording. |
| Volume of recording | 1, 2, 3, 4, 5 | Adjust volume of recording. |
15. View Folders
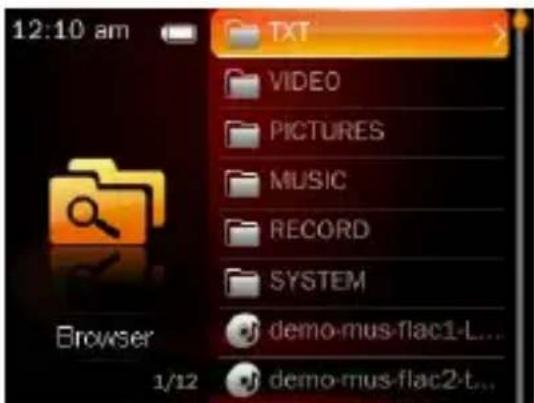
In the main menu please Folder Overview and confirm your selection using the [▶] button. Now you can see all directories and files stored on the Player. Please press the [▶] or [▶] button to navigate between individual files and folders.
- To open a directory tick it and press the [ ] button. To return to the higher directory please press the [ ] button.
To return to the main menu please repeatedly press the [ ] button.
16. Editing the Player's Settings
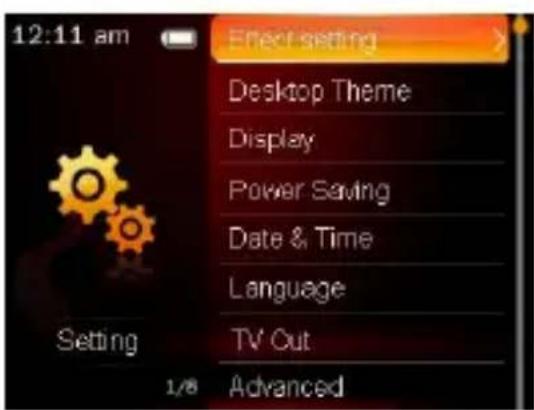
In the System Settings Menu you can edit your personal settings and set the Player as desired.
- Using the [⊗], [⊗], [▷] or [▷] button you can select the Setting menu item (in main menu).
- Using the [<] or [>] button you can select the element desired; confirm it using the [▶] button.
- To open the sub-menu or to confirm an option please press the [ ] or [ ] button; to confirm press [ ]
- Press and hold the [ ] button to leave this menu and to return to the main menu.
Settings menu
| Settings | Description | |
| Menu Effect | Select an effect for the menu transitions. | |
| Main Menu Display | Menu list / grid | Please select the menu type |
| Display Settings | Backlight time | Please select how long the display light is switched on. Options: Off, 5 sec., 10 sec., 20 sec., 30 sec., 1 minute, 5 minutes. |
| Brightness | Please set the brightness of the display. Options: 1, 2, 3, 4, 5. | |
| Energy saver mode | Auto Off | Please select the time the Player is to switch off if it is not being used. Options: Off, 10 sec., 30 sec., 1 minute, 3 minutes, 5 minutes, 10 minutes. |
| Sleep Timer | Please select the time the Player is to switch off (even if it is being used). Options: Off, 10 minutes, 30 minutes, 1 hour, 2 hours, 3 hours, 4 hours, 5 hours. | |
| Date & Time | Date and time settings | |
| Language | Set the desired language. | |
| Advanced | Player information | System details of Player |
| Format internal memory | Select formatting the internal memory. After formatting all data are deleted from the device. | |
| Format external memory | Select formatting the external memory. After formatting all data are deleted from the device. | |
| Set user name | Here, please enter the desired user name. | |
| System test | Select to delete all DRM HDS. | |
| Factory settings | Reset to factory settings | |
Setting Date and Time
- Using the [O], [O], [or] button you can select the menu item Settings.
- Using the [<] or [>] button you can select the "Date & Time" feature, to confirm press the [ ] button.
- Please press the [Option] button to select a settings item (hour/minute or year/month/day); then press the [ ] or [ ] button to set the date and time values.
- To confirm please press the [ ] button; or press [ ] to leave the menu.
17. Troubleshooting
Problem - possible causes - problem solving
There is nothing on the display.
(1) The battery is empty. Charge the battery.
(2) The keys are locked. Unlock the key lock as described in the paragraph "6. Operation".
- The device does not react, if you press the play key.
(1) The keys are locked. Unlock the key lock as described in the paragraph ,6. Operation".
There is no sound during the play back.
(1) The volume is too low. Raise the volume in the volume menu.
(2) The audio file is damaged Please transfer the files again
There is no connection with the PC.
(1) The driver was not installed correctly Install the driver again.
(2) Please carry out an update of the main board (In this context, observe the instructions of the main board producer)
- The displayed time value always changes.
(1) The bit rate of the MP3 files changes during the play back. Please use a unified bit rate for the compression.
The PC displays an error message during the connection with the device
(1) The player was disconnected from the PC during the data transmission. Please do not disconnect the device during the data transmission in any case.
- The device memory indicated does not correspond to the real memory.
(1) A part of the memory is used for software, formatting and display characteristics.
- The MP3 files are not reproduced properly.
(1) The MP3 files were compressed in a wrong format, for example in MPEG 1 or 2.
Delete the file formats if they are not supported.
Video data cannot be reproduced.
(1) The format is not supported.
(2) The video file is damaged. Transfer your video file again.
- The photos are not displayed.
(1) The file format is not supported.
Please convert the photo into JPG or BMP format.
18. Technical data
Battery type
Rechargeable li-polymer battery
Battery duration
\~8 hours
LCD
Display of 2,4" inch
Headset
5mW+5mW
Video format
MPEG 1, MPEG 4, FLV, M-JPEG
Audio formats
MP3, WMA, FLAC, APE, ACC, OGG, Wave
Photo format
JPEG, BMP
Bit rate
MP3: 8-320kbps;
WMA:5-320kbps
SNR
80dB
USB port
USB 2.0
Operational between
0 Celsius +45 Celsius
Operational at a relative air moisture of
< 80%
Fit for storage at a relative air moisture of
< 90%
19. Please observe what follows
(1) Plug & Play is possible only with Windows 2000/XP/Vista/Windows 7. With 98/SE please install the driver.
(2) Please unlock the key lock in order to work with the device.
(3) Please charge the battery if it is indicated on the display.
(4) Please disconnect the device from the PC only as indicated in order to avoid an eventual data loss.
(5) If the file to be recorded is too big, the charge of the file takes longer.
(6) Support software per Windows 2000, Windows XP, Windows Vista, Windows 7.
(INTENSO)
49377 Vechta
Germany
www.intenso.de


MP3, WMA, FLAC, APE, ACC, OGG, Wave
Formato fotografie
JPEG, BMP
Quota bit
MP3: 8-320kbps;
WMA:5-320kbps
SNR
80dB
USB Port
USB 2.0
MP3, WMA, FLAC, APE, ACC, OGG, Wave
Format image
JPEG, BMP
Fréquence de bit
MP3: 8-320kbps;
WMA:5-320kbps
SNR
80dB
Porte USB
USB 2.0
Eligen unaResolution.
MP3, WMA, FLAC, APE, ACC, OGG, Wave
Como de foto
JPEG, BMP
Tasa de bits
MP3: 8-320kbps;
WMA:5-320kbps
SNR
80dB
Puerto USB
USB 2.0
Operable entre
0 Celsius +45 Celsius
MP3, WMA, FLAC, APE, ACC, OGG, Wave
Formato de imagens
JPEG, BMP
Débito binário
MP3: 8-320kbps;
WMA:5-320kbps
SNR
80dB
Porta USB
USB 2.0
Operacional entre
0 Celsius +45 Celsius
PpOBeBte noJHOTy coOpKIMoro naKeTa
- Bndeonneep HHTeHco
- CTepeo-HayuHnKn
- Ka6eIb USB
- IHctpyKzna no o6cnyxnbAHIO + rapaHTnHbI JnCT
5. Перауnotpeбленим
CoeHNHTb c NK
Ecn y Bac pa6oay cnctema Windows 98/SE, ycTaHOBnTe dpaibep, npexJe Yem coeHNITb pIeep c PIK. (Ero Bbl cmoKeTe ckaaTb co ctpaHnCBy www.intenso.de). B onepaOnHHbIX cncTemax WIN 2000/XP/ME/Vista/Windows 7 HeT Heo6xoDmoctnu yCTaHaBnBaTb dpaibep.
CdaaTe cneyuoune warn:
(1) CoeHnHTe nIeep c pa3bemOM USB Ha PIK.
(2) OTKpbIbAeTcra OKHO "INHTehCO". Tepeb MoXHo 3aNtcaTb daHHbIe n3 JecTkoro DaNcKa Ha nepeHocHoi HOCHTeNb daHHbIX.
HaedxHoe oTcoeDnHeHne ot PK
- HaxmTe Ha KhoNky [O], [O], [A] nn KhoNky [B], YTO6bI BbIbpaTb Heo6xOaMbI nyHKT MeHIO.
- Haxmnte Ha KhoNky [I], YTO6bI BbI3BaTb Heo6xOaHMOe MeHIO.
BbI6op neCn n3 cnNcKa "MoI cnNcOK BocIpOn3BeJeHna"
a) HaXMMTe Ha KHOJky [P], YTO6bI BepHyTbcr K MeHIO My3bika.
b) HaxmTe Ha KhoNky [ ] nIe [] TTo6bI Bb6paTb "MoCnCOK BocnpOn3BeDeHna" n noTBePdnte BaW Bb6Op KhoNkoI
c) BbI6paTte onpeJeHHyIO neCHIO c NOMOUsbKHOKN[ ] nIN [ ], yTO6bB BbI6paTb onpeJeHHyIO neCHIO n HaxMNTe Ha KHOKNy [ ] , YTO6bl BocnpOn3BeCTn neCHIO.
Hactpoynkmy3bIKN
Bo Bpemr Bocnpn3BeDeHnry My3bIKN MOxHO Bbl3BaTb MeHIO HAcTpoKn C NOMOuI KhoNk [Onu].
Bo Bpem y oToIpaOpOBaHn moXHO BbI3BaTb MeHIO HaCTPOiKN, HaxaB Ha KhoNky [Onu].
BbI6op BnDeo n3 cnNcKa BocnpOn3BeDeHn.
- Haxmnte n depknte KhoNky [P], yTObI BOITN B rnaBHOe MeHIO. Bbl6epnTe Tam nyHKr Bndeo .
- HaxmTe Ha KhONky [Hnn [H], YTO6bI Bbl6paTb "CoepXaHne" nn "Cnncok 3aknaDOK". HaxmTe Ha KhONky [H]YTO6bI NOITBepdntb.
- BbIbePte Heo6xOaHMOe BNJeO C NOMOu bIO KHONK [ ] nIN [ ] n HaxMnTe Ha KHOkky []HTObbl 3anyCTNTb BNJeO.
12. Историческая并将 the first two of the three types of the three types of the three types of the three types of the three types of the three types of the three types of the three types of the three types of the three types of the three types of the three types of the three types of the three types of the three types of the three types of the three types of the three types of the three types of the three types of the three types of the three types of the three types of the three types of the three types of the three type
JIIN3a KaMepbHa o6paTHoN cTOpOHe PnEepa MoKeT 6bITb NcNoJb30BaHa KaK B36KaMepa.
- CoeHInTe MHN-Ka6JIb USB c MHN-nOpTOM USB nIeepa n BCTaBbTe pyroJ KOHeU Ka6eJI B CBO6oDHOe rHe3do USB Ha KOMNbIoTepe.
- Haxmte Ha KhoNky [ ] nnn [ ], yTo6bl noTBePdntb "3apAaNTb N BocnpOn3BecTn". Tenepb rnaBHOe MeHIO NOBnEeTcra Ha nnepe.
- BbI6epnte Kamepy.
- HaxmTe Ha KhoNky [I] nIe [R], YTObI BbIbpaTb "Kamepa PIK". HaxmTe Ha KhoNky [HTo6bl NOITBepdntb.
- Tenepb Bbl moKeTe nCnoB3OBaTb KaMepy KaK KaMepy PIK.
13. Pañno FM
Baxho: Bcerda coeHnIe HauHHKc c nIeepom, TaK KaK HayHHKn BblIOJIHrIoT cyHKUHO aHTehHbI.
- Haxmte Ha KhoNky [O], [O], [I]n [I], YTO6bI BbIbpaTb rIaBHOe MeHIO FM paNo.
- HaxmTe B pexime Paio Ha KhoKy [Onu, n BbIepeTe "ABTomatueckn nonck".
3.BoBpem npocnyuBaHnpaNo MoXHo:
HaKmTe Ha KhoNky [4] nIe [4], YTo6bl nepeTn K npdeBlyu eHnn cJeDyUoSei 3aIncAHHO paDIOCTaHcH.
HaxmTe n depxnte KhoNky [nI, TTo6bHaTn cJeDyOuYo paIOCTaHcHIO.
HaXMMTe Ha KONky [HJN [G], YTO6bI HAcTpOntb rPOMKoCTb.
HaXMMTe Ha KHOKNy [Onu#, YTO6bI Bbl3BaTb MeHIO HAcTpoKn paAno FM.
3aannscb paanfo FM
- HaxmTe BO BpeM npocnyuBaanpaNo Ha KOnky [Onu] N Bbl6epnte "3anscb FM". 3anncb paNo FM haunHaetc aBtOMaTnueckn.
- Haxmnte Ha KhoNky [P] nnotom Ha "OK", qTo6bl cKoNipObaTb 3aIncHbI paJI B nnKy 3aIncn.
HactpoynpaNo FM
Bo Bpemn npocnyuBaanpaNo FM c nOmoU KHOKn [Onu] Bbl nonaTe B MeHIO HacTpoek PaNo FM.
- IcnoIb3yIe KhoIKN [O], [O], [n]n [B], yTo6bl BblpaTb nyHKT MeHIO HaCTpoiKn.
- Haxmte Ha KhoNky [>, nnn [], yTo6bI BbIbpaTb "DaTa n BpeM" n HaxmTe Ha KhoNky [], HTo6bI NOITBepdntb BblOp.
- Haxmte Ha KhoNky [Onu], yTo6bI Bb6paTb BpeM HaCTpoKn (ac/MnHyTa nJIi
roJ/Mecra/DeHb) n HaxMnte Iocne 3Toro Ha KhoNky [4]nn [4], YTO6bl Bbl6paTb BEINuHbI BpeMeHn N daTbI.
- HaxmTe Ha KhoNky [I] dIy IoTBePxDeHn yIi Ha KhoNky [P], YTObI BblTN n3 MeHIO.
17. YcTpaHHe HEnoJaIOK
Ipo6Iema - Bo3MOxHbIe npuHHbI - PeSeHne npo6Iembl
Ha nncJIee HeT HnKaKnx NOKa3aHn.
(1) AKKyMnyTOp ceI.
3apAInTe aKKymyIaTOp.
(2) KhoNKn 6JIOKInpoBaHbI.
CHIMTE c KHOJOK 6JIOKINPOBky, KaK ONHcAHO B NyHKTe «6. O6cJIyXkBaHne»
- Пибор He pearpyeT, korda haxnmaeTcK HONka Bocnpon3BeDeHnra.
(1) KhoNKn 6JIOKInpoBaHbI.
CHIMTE c KHOJOK 6JIOKINPOBky, KaK ONHcAHO B NyHKTe «6. O6cJyKbAHne»
B Bpemra Bocnpon3BeDeHn OTCyTCTByeT 3Byk.
(1) HactpoKa rpoMkoCTn cInuKOM Hn3Ka
IobbcTe rpoMKoCTb C NOMOUsbMo MeHIO rpoMKoCTn
(2) DepeKTbI ayDnO-paJN
PpOBeIte npepaCy paINa noBToPHo
C KOMnbIOTepOM He yCTaHaBJIINBaETcR CBA3b.
(1)ДраиВеруctановленНеравиьно
IpeyeCTaHOBtE npaBep.
(2)РовецaktyаизauиMoTepeHcko nlaTbI
(При стом Heo6xOДМо co6IIOdaTb yka3aHЯ пОИЗВОДИТЕЯ MaTePиHСКОп ПЛаТы)
- BeJnUHa noka3aTeJI BpeMeHn NOCToRHHO MeHReTc.
(1)KoJIuYeCTBo 6ntФaIJa MP3 nImMeHЯTcB O BpeM BoCpPOn3BeDeHn.
IcnoJIb3yIte npn cXaTIN OaIIIOB OOnHaKOBoe KOnIueCTBO 6NT.
- Пи подклоченп рибopa komьтep BbIaet coobseHne ob ownbke.
(1)Плесьг OTcoeINHн OT KOMnbIOTepa BO BpeMпеpaчданhhbIX.
HnKorDa He OTCoeDnHnTe np6Op BO BpeM nepeDaun daHbIX.
- Yka3aHHbI OsbE M namrN npnbopa He COOTBeTCTByeT DeiCTBHTbHOMy obbemy namrN.
(1) Yacrb namrtn nCnoB3yETc dI nporpaMMHoro oecneueHn,
ΦopMaTnPoBaHnI xapaKTepeNCTnK n3o6paJKeHnI.
- ΦαιNbI MP3 He npoɪrpɒbIbaɪTcə, KaK Naɪɔ.
(1) Φаиbl MP3 6bln Cxatbl B He npabunbHbI φopMaT, HapnMep, B φopMaT MPEG 1 nln 2. Cotpnte φopMaTbl, KOTOpBie He noDdEprKINBaIoTcra.
Bndeo-phiJIbI He BocnpOn3BOJaTcJ.
(1)Формат He noДeрхиВаeTcra. Bndeo-ФорматdoJxhen6bITbMTV.EcIn3ToHe TaK,pepeKoDnpuYteero. O6paTnte BnHMaHneHa pa3MepФормata 160x128 nIKceJIeN.
(2) BndeofoaI npBpeKdEh. PpOBeIte npepaU BndeofoaJa noBtOpHo
- ΦOTorpaΦnHe NOKa3bIbAHTc.
(1)ΦopMaT Φaɪna He nɒdɪepxɪnBaetc.
Ipekeoɪnpyɪte φοτorpɑφnɪb B φopMaT.JPG nɪn BMP.
18. TexHnueckne daHHbIe
Tn6atapen
Ipe3apjkaemaj nHTnHo-nolmepna 6aTape
ДинTeьнocтббатapeи
\~8yacob
LCD
UBeTHoI DInCJIeH Ha 2,4"IOHMOB
Hayushnkn
5MBT+5MBT
Bndeo-ΦopMaT
MPEG 1, MPEG 4, FLV, M-JPEG
Aydno-ΦopMaT
MP3, WMA, FLAC, APE, ACC, OGG, Wave
ΦOTO-ΦOpMaT
JPEG, BMP
KoInuYeCTBO 6nT
MP3: 8-320k6/cek;
WMA:5-320k6/cek
OTHOseHne cHraJ-ym (SNR)
80d6
Nopr USB
USB2.0
Pa6o7a TeMnepe7pa MeKdy
0LcBcna +45 LcBcn
Pa6ota npn OTHOCHTeNbHOB BnaXHocTn BO3aYxa <80%
Складироване при OTHOCHTeьнов ВлжноCTN BO3dYxa<90%
19.ОБразп Te Bнман He Na cIeDyOошe
(1) Plug & Play B Windows 2000/XP/Vista/Windows 7 HeBo3MoXHbI.
Ecn y Bac BercnA Windows 98/SE, yctaHOBtpe npaBep.
(2) CHIMITE 6IOKIpOBky KHOIOK, YTO6bI pa6OtaTb c np6Opom.
(3) 3apynte 6atapeo, kOrda OHa noBNTc Ha nucnnee.
(4) OToCoeHnHnTe np6Op OT KOMNbIOTepa TOnbKO yKa3aHHbIM 06pa3OM, YTO6bl n36ExKaT B03MOXHOI NOTePN DaHHbIX.
(5) Ecnn paim 3ainn cnnkom 6oIbwo, 3arpy3ka paJna dIInTcdoIbwe.
(6) Пдержибеме порразмнhoe обесенье Windows 2000, Windows XP/Windows Vista/Windows 7.
(INTENSO)
49377 Vechta Germany www.intenso.de