Video Scooter - Mp3 player INTENSO - Free user manual and instructions
Find the device manual for free Video Scooter INTENSO in PDF.
User questions about Video Scooter INTENSO
0 question about this device. Answer the ones you know or ask your own.
Ask a new question about this device
Download the instructions for your Mp3 player in PDF format for free! Find your manual Video Scooter - INTENSO and take your electronic device back in hand. On this page are published all the documents necessary for the use of your device. Video Scooter by INTENSO.
USER MANUAL Video Scooter INTENSO
49377 Vechta Germany


Table of Contents
Table of Contents 1
About this manual 3
Intended Use 3
Notes 4
- Device overview 5
-
Package content 5
-
Connec ng to a computer 6
a) Connec ng the device 6
b) Disconnec ng the device 6
- Commissioning / Charging the bary / Headphones 7
Charging the ba ery: 7
Charging status: 7
Usage during the charging process: 8
5.Opera on 9
a) General opera on 9
(1) Switching the player on and o 9
(2) Key lock. 9
(3) The main menu. 10
(4) Naviga on. 10
b) Music 11
(1) Playback 11
(2) Folder overview. 11
(3) A-B loop 11
c) Video. 12
(1) Playback 12
(2) Folder overview. 12
d) Photo 13
(1) Playback 13
(2) Folder overview. 13
e) Recording func on 14
(1) Recording. 14
(2) Playback 14
f) File Explorer 15
g) Setup. 15
(1) Music 16
i.Playback mode 16
ii. Random playback 16
iii. Equalizer 16
(2) Recording. 16
(3) Photo 16
(4) Display 17
i. Lighting duration 17
ii.Brightness 17
iii. Eco mode 17
(5) Sleep Timer 17
(6) Language. 17
(7) System 17
i. Information 17
ii. Factory settings 17
- Micro SD card 18
- Technical data 18
- Disposal of used electric devices 19
About this manual
Read this manual carefully and observe, read and follow all instructions mentioned in this to ensure the long life and reliable use of the device. Please keep this manual handy for future reference and pass it on to other users of the device.
Intended Use
This device is used to play music files in MP3, WMA and WAV format, which can be played through the included micro-SD card.
This product is not intended for commercial uses or for medical and special applications in which the failure of the product can cause injury, death or substantial property damage.
The liability shall expire in the event of use that does not conform to the intended use.
Opening and altering the device as well as using additional equipment and accessories that have not been approved by us is prohibited.
Do not use the device under extreme environmental conditions and observe the safety instructions.
Non-compliance with information and safety instructions contained in this manual shall be deemed as noncompliance with the intended use and will cause the liability to lapse and may cause injury or property damage.
Notes
- Read and observe the user manual including warnings and notes before the first activation of the product.
- Please make sure before the first activation of the device that the rechargeable battery is fully charged.
- Avoid hard collisions of the device.
- Do not use the device in extremely cold, hot, wet or dusty areas. Also, do not expose it to direct sunlight.
- Do not put naked light sources such as burning candles near the product.
- Perform backups regularly to prevent possible data loss.
- Avoid using it in strongly magnetized fields.
- Protect the device against moisture. If moisture penetrates the device, please turn it off immediately and then please clean and dry the device.
- Do not use chemical solutions to clean the device. Only use a dry cloth.
- We are not liable for damages or data loss upon a malfunction, improper handling, and unauthorised repair of the device or changing of the battery.
- Please do not disassemble the device into its components and please do not try and repair it on your own, because otherwise the warranty expires.
- Do not block or cover the openings of the product.
- This product is only intended for private use and should not be used commercially or in industrial environments.
- Do not insert objects that are not intended for usage into the openings of the product.
- Damages that are not attributable to improper handling or disregard of the warnings or instructions of this user manual are not covered by the warranty.

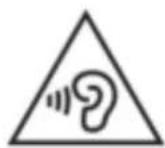
WARNING: Prolonged exposure to excessively loud music can result in temporary or permanent hearing damage or hearing loss. The use of the Video player in traffic is not recommended. It can cause the listener to react disregardful towards potential hazards such as approaching vehicles
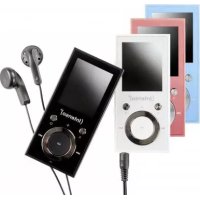
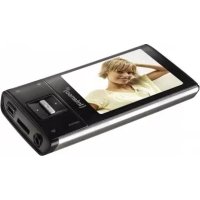
1. Device overview
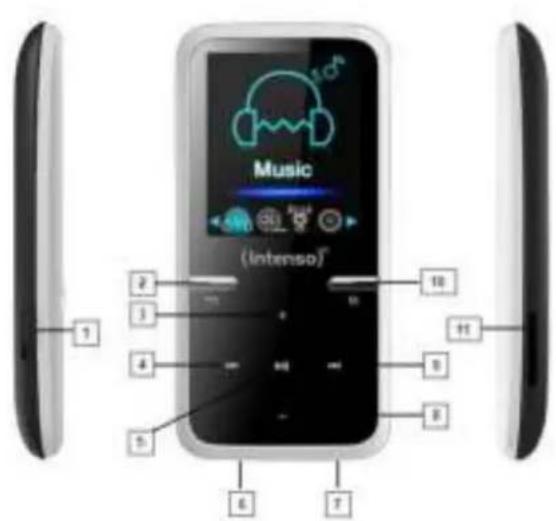
- On / Off Switch
- w back button
- Volume (+) button
- Back button
- Play / pause button
- Mini USB port
- Headphohe jack
- Volume (-) button
- Forward button
- M (Menu) button
- Micro SD slot
2. Package content
Please check the package content for completeness
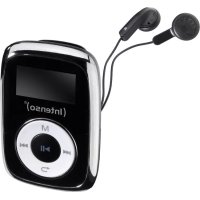
- Intenso Video player
Hi-Fi Stereo headphones
Hi-Fi stereo earphones - Micro SD card
- CD with conversion software (AVI format)
USB cable - User manual
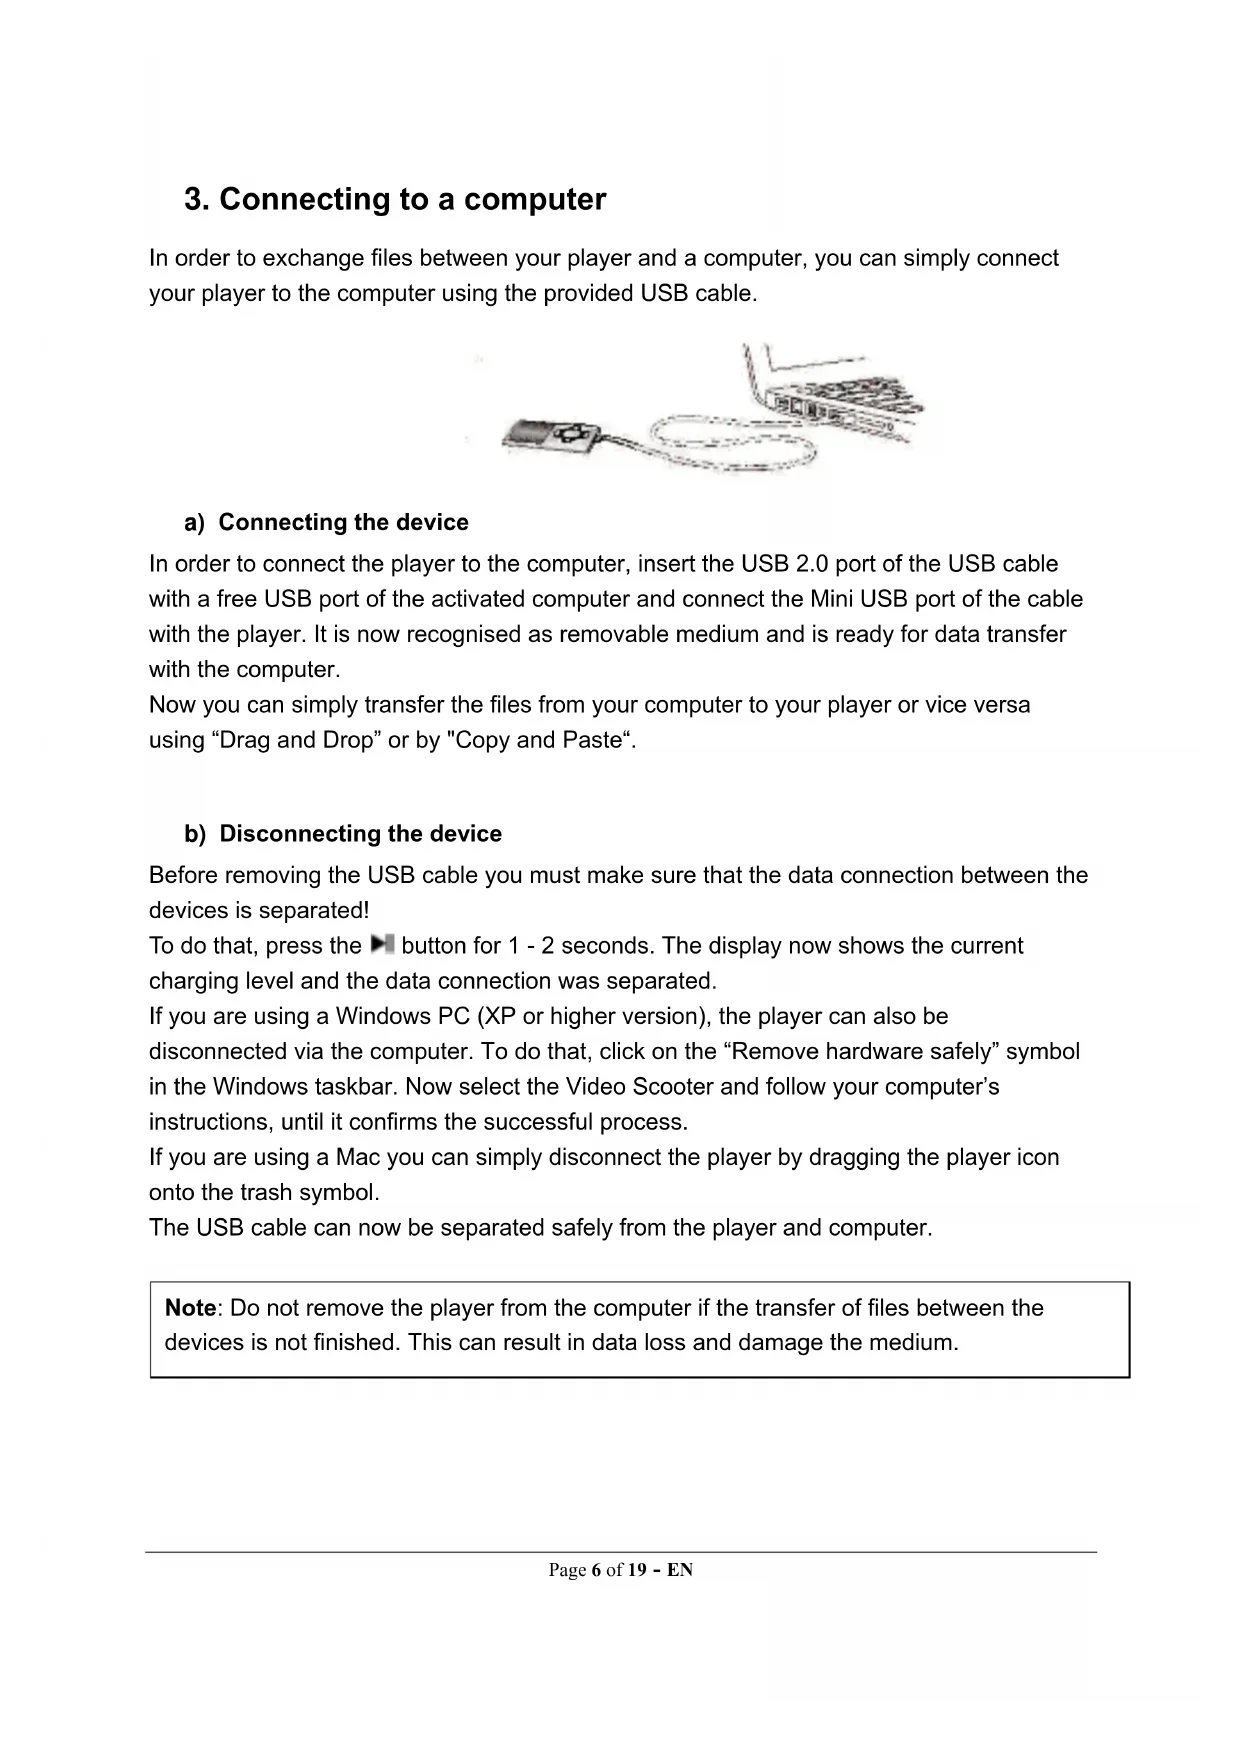
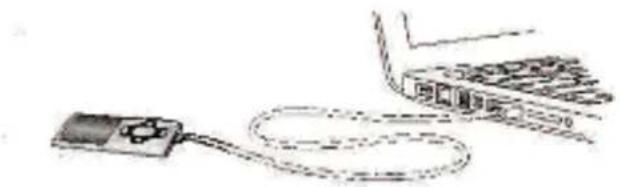
3. Connecting to a computer
In order to exchange files between your player and a computer, you can simply connect your player to the computer using the provided USB cable.
a) Connecting the device
In order to connect the player to the computer, insert the USB 2.0 port of the USB cable with a free USB port of the activated computer and connect the Mini USB port of the cable with the player. It is now recognised as removable medium and is ready for data transfer with the computer.
Now you can simply transfer the files from your computer to your player or vice versa using "Drag and Drop" or by "Copy and Paste".
b) Disconnecting the device
Before removing the USB cable you must make sure that the data connection between the devices is separated!
To do that, press the button for 1 - 2 seconds. The display now shows the current charging level and the data connection was separated.
If you are using a Windows PC (XP or higher version), the player can also be disconnected via the computer. To do that, click on the "Remove hardware safely" symbol in the Windows taskbar. Now select the Video Scooter and follow your computer's instructions, until it confirms the successful process.
If you are using a Mac you can simply disconnect the player by dragging the player icon onto the trash symbol.
The USB cable can now be separated safely from the player and computer.
Note: Do not remove the player from the computer if the transfer of files between the devices is not finished. This can result in data loss and damage the medium.
4. Commissioning / Charging the battery / Headphones
The player has an installed internal rechargeable battery. Make sure before activating the device for the first time that the battery is fully charged. This process usually takes up to 3 hours.

Battery fully charged
Charging the battery:
The battery is charged via the USB connection with your PC. To charge the battery, connect the device with the PC using the USB cable. The charging process starts automatically. The symbol for a connection (Connect) appears on the screen of the device.

Note: For optimum performance, the battery must be used regularly. If this is not the case, recharge the battery at least once a month.
Charging status:
Press the Play/Pause button for 1-2 seconds to view the current charging status. A battery symbol is now shown on the screen. If the battery is fully charged, a green battery is shown. If the battery is still charging, a charging animation is displayed.
Usage during the charging process:
You can use the player during the charging process. Simply press once more on the Play/Pause button and the device changes from the charging status display into the main menu.
You can also view the current charging status during usage. In the upper right corner it is shown in 3 stages, e.g. during playback of music. If the battery is fully charged, all three fields are displayed. If the battery is still charging, the animation is shown here as well.

0-33%

34-66%

67-100%
Note: If you change into the charging status display or use the device connected to the computer, data transfer with the computer is no longer possible. To be able to transfer files again, you must reconnect the player to the computer.
Switching on:
You will find further information on this in the next section "Operation".
Using the headphones:
This player reproduces music through the 3,5mm stereo jack. Before the connection assures that the player is set up on a low volume level. Now connect the supplied headphones with the device and slowly adapt the volume to the level you desire. Use the hi-fi on-ear stereo headphones or the stereo cushions.
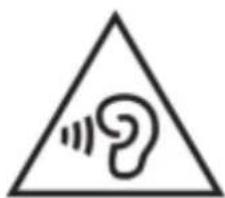
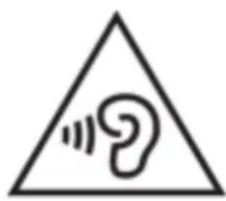
WARNING: Prolonged exposure to excessively loud music can result in temporary or permanent hearing damage or hearing loss. The use of the Video player in traffic is not recommended. It can cause the listener to react disregardful towards potential hazards such as approaching vehicles
5. Operation
Note: Make sure that a Micro SD card is inserted into the player!
a) General operation
(1) Switching the player on and off
Slide the on / off switch on the left side of the device to the "ON" position. Then press the Play/Pause button for approx. 3 seconds to switch on the player. To set the device into standby mode, press the Play/Pause button again for approx. 3 seconds. If you wish to deactivate the player permanently, slide the button on the left side of the player into "OFF" position.
Note: This player has an energy-saving function. The device automatically switches off, if it is not used for more than 10 minutes.
(2) Key lock
In order to prevent accidental entries, the player is equipped with a key lock. To activate it, press Play/Pause button and the M button simultaneously. A closed lock is displayed for confirmation now. To unlock, simply press the Play/Pause button and the M button again at the same time. Now, an open lock is displayed for confirmation.
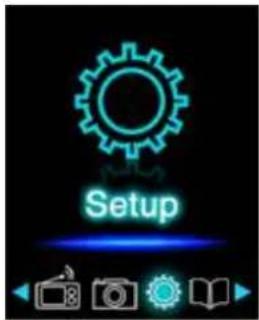
(3) The main menu
After activating the player, the main menu appears. It consists of six different menu items (Music, Video, Photo, Record, File Explorer and Setup).
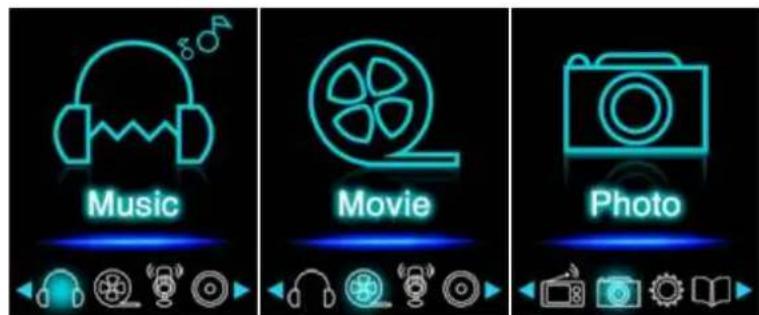
Music
Video
Photo
Record
File
Setup
(4) Navigation
With the Forward and Back button, you can navigate through the different menus. With the Play/Pause button you can open the desired menu item or start the desired function. Press the Arrow Back button briefly to return to the previous level. Press the Arrow Back button for 1 - 2 seconds to return to the main menu directly.

b) Music
(1)Playback
Navigate from the main menu to the menu item Music and confirm your selection with the Play/Pause button. A playback screen opens and playback starts automatically.
To pause the playback or continue it, press the Play/Pause button.
To jump one track forward or back, press the Forward or Back button respectively.
To fast forward or rewind within a track, simply keep it pressed.
Press the (+) button or (-) button to adjust the volume.
(2) Folder overview
To reach the folder overview from the playback screen, press the Arrow Back button. Navigate with the (+) button or (-) button to scroll through the files and existing folders. If you confirm a music file with the Play/Pause button, it is played back. If you confirm a folder with this button it is opened. With the Arrow Back button you change into the next higher level of your folder structure up to the main menu.
To delete a file, navigate in the folder overview to the desired file and press the M button. Confirm this procedure with the Play/Pause button to delete this file permanently.
(3) A-B loop
It is possible with this player to select any period of a musical piece and set it on repeat in a loop.
Press the M button during playback of this musical piece to determine the starting point (A). Press the M button again to determine the end (B). The selected period will now be played in a playback loop.
Note: Please open the menu item Setup in the main menu for additional configuration options.

c) Video
Note: To playback videos on this player, they must be converted into the AVI format adjusted to the player using the provided conversion software.
(1)Playback
Navigate in the main menu to the menu item Movie and confirm your selection with the Play/Pause button. The folder overview opens. Select with the (+) button or (-) button the video file to play and confirm your selection with the Play/Pause button. The video starts automatically.
To pause the playback or to continue it, press the Play/Pause button respectively. To jump one track forward or back, press the Forward or Back button respectively. To fast forward or rewind within a track, simply keep it pressed.
Press the (+) button or (-) button to adjust the volume.
(2) Folder overview
To reach the folder overview from the playback screen, press the Arrow Back button. Navigate with the (+) button or (-) button to scroll through the files and existing folders. If you confirm a video file with the Play/Pause button it is played back. If you confirm a folder with this button it is opened. With the Arrow Back button you change into the next higher level of your folder structure up to the main menu.
To delete a file, navigate in the folder overview to the desired file and press the M button. Confirm this procedure with the Play/Pause button to delete this file permanently.

d) Photo
(1)Playback
Navigate from the main menu to the menu item Photo and confirm your selection with the Play/Pause button. The folder overview opens. Select with the (+) button or (-) button the image file to be reproduced and confirm your selection with the Play/Pause button. To start automatic image rendition or to pause, press the Play/Pause button respectively.
(2) Folder overview
To reach the folder overview from the playback screen, press the Arrow Back button. Navigate with the (+) button or (-) button to scroll through the files and existing folders. If you confirm a file with the Play/Pause button, it is played back. If you confirm a folder with this button it is opened. With the Arrow Back button you change into the next higher level of your folder structure up to the main menu.
To delete a file, navigate in the folder overview to the desired file and press the M button. Confirm this procedure with the Play/Pause button to delete this file permanently.
Note: Please open the menu item Setup in the main menu for additional configuration options.
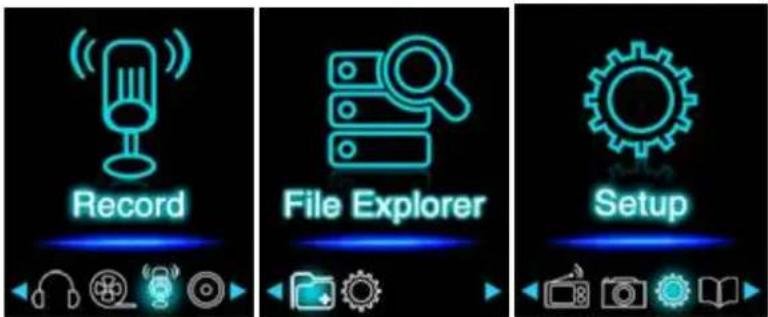
e) Recording function

(1) Recording
Navigate from the main menu to the menu item Record and confirm your selection with the Play/Pause button. The player is now ready to start an audio recording via the integrated microphone. To do this, simply press the Play/Pause button. The current recording is now displayed on the screen. To pause the current recording or to continue it, press the Play/Pause button again. Press the M button during the recording to save the recording. With the Arrow Back button you change back into the main menu; the current recording is then saved automatically.
Note: The recorded files (.wav format) can be found in the folder "VOICE" with the file explorer. If there is not enough disk space available for a recording, the player will inform you with the message "Disk space full!".
(2)Playback
Navigate from the main menu to the menu item File Explorer and confirm your selection with the Play/Pause button. Now select the folder VOICE. All recordings previously made will be displayed chronologically here. Navigate to the desired file and start the playback with the Play/Pause button. With the Arrow Back button you change back into the main menu.
Note: Please open the menu item Setup in the main menu for additional configuration options.
f) File Explorer

Navigate from the main menu to the menu item File Explorer and confirm your selection with the Play/Pause button. Now, the main directory of your memory card is displayed. Navigate with the (+) button or (-) button to scroll through the files and existing folders. If you confirm a file with the Play/Pause button, it is played back. If you confirm a folder with this button it is opened. With the Arrow Back button you change into the next higher level of your folder structure up to the main menu.
To delete a file, navigate in the folder overview to the desired file and press the M button. Confirm this procedure with the Play/Pause button to delete this file permanently.
Note: In the Setup under the menu item System under Information you can get information about the unused or reserved disk space as well as the entire disk space of the inserted memory card.
g) Setup
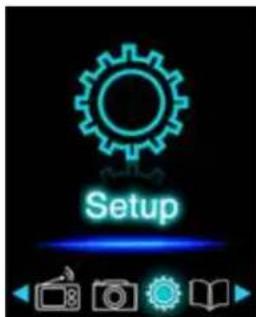
Navigate in the main menu to the menu item Setup and confirm your selection with the Play/Pause button.
(1) Music
In the menu item Music you can find the following setup options:
i. Playback mode
Define the desired playback mode here.
| Track once | Plays back the selected track once and then stops the playback. |
| Repeat track | The selected track is played back repeatedly. |
| Folder once | Repeats the track in the selected folder once and then stops the playback. |
| Repeat folder | Repeats all tracks in the current folder. |
| All once | All songs are played once. |
| Repeat all | Repeats all saved songs. |
| Intro | Intro of the individual songs. |
ii. Random playback
Here you can activate or deactivate the random playback of all song files.
iii. Equalizer
Select here your favourite equalizer mode. You can select between Normal, Rock, Pop, Classical, Jazz, Pure Bass / 3D and user EQ.
iv. Bass / 3D setting
Here you have the opportunity to preset under point "Bass/3D Settings" an enhanced bass or 3D sound for this equaliser mode.
v. User EQ setting
Here you have the opportunity to set up a personalised equaliser. Adjust the settings for each frequency band with the (+) button or (-) button. To move to the next frequency band, press the Forward or Back button. Press the Play/Pause button to apply your s selected settings.
(2) Recording
In the menu item Recording you can define the recording quality. You can choose between normal quality (32 KBPS) and high quality (64 KBPS). Please note that the high quality requires more disk space.
(3) Photo
In the menu item Photo you can define the display time of the automatic slide show. You can choose between: 2 s, 4 s, 6 s, 8 s, and 10 s.
(4) Display
In the menu item Display you can find the following setup options:
i. Lighting duration
Here you can define how long the display is illuminated. You can choose between 5 s, 10 s, 15 s, 20 s, 30 s and always active.
ii. Brightness
Here you can define the brightness of the display lighting in 5 levels.
iii. Eco mode
If you activate the Eco mode, the display switches off completely after the preset time. If the Eco mode is deactivated, the display remains illuminated permanently on the lowest level after the preset time. Please note that this significantly reduced the battery life.
(5) Sleep Timer
In the menu item Sleep Timer you can define a period of time after which the device automatically switches off. You can choose between off (the device does not switch off automatically), 10 min, 15 min, 30 min, 60 min, and 120 min.
(6) Language
In the menu item Language you can select one of the eight pre-installed languages. You can choose between English, Spanish, French, German, Italian, Portuguese, Polish and Russian.
(7) System
In the menu item System you have the following options:
i. Information
Here you can get information about the firmware version of the player, the total available disk space, the reserved disk space (U:) and the free disk space (F:) of your memory card.
ii. Factory settings
By confirming this option you set the player back to the standard settings.
6. Micro SD card
This player does not have usable internal memory. It is provided with an inserted memory card in the size displayed on the packaging. With an existing USB connection, the player is only recognised by a computer, if a memory card is inserted. Memory cards with a capacity of up to 64 GB are supported.
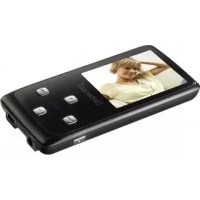
7. Technical data
Video Scooter:
| Dimensions | 88 mm (H) x 41 mm (B) x 9.0mm (T) |
| Weight | ~30gr. |
| LCD | 4,4 cm (1.8 inch) colour display, resolution: 128 x 160 Pixel |
| PC connection | USB 2.0 (PC) | mini USB port (player) |
| Battery | Rechargeable Li-Polymer battery, capacity: 150mAh |
| Music playback: ~ 12 hours (MP3 music in energy-saving mode) | |
| Frequency range | 20Hz to 20000Hz |
| SNR | >70dB |
| Music format | MP3 / WMA 32 – 320kbps |
| Video format | AVI 160 x 120 pixels |
| Recording format | WAV with 32 or 64 KBPS |
| Image format | JPEG / BMP |
| Operating temperature | 0 to 40°Celsius |
| Operating system | Windows XP / Vista / Win7 / Win8, 8.1 / Mac 9.2 or higher |
Hi-Fi Stereo headphones:
| Dimensions: | 150 x 135 x 70 mm |
| Weight: | 125 gr |
| Cable length: | 120 cm |
| Stereo jack: | 3.5 mm Stereo |
| Frequenzbereich: | 20 Hz - 20 KHz |
| Impendence: | 32 Ohm |
| Maximal input performance: | 40 mW |
| Size adjustable: | yes |
Hi-Fi stereo earphones:
| Dimensions: | 30 x 17 x 13 mm |
| Weight: | 14.2 gr |
| Cable length: | 115 cm |
| Stereo jack: | 3.5 mm Stereo |
| Frequenzbereich: | 20 Hz - 20KHz |
| Impendence: | 32 Ohm |
| Maximal input performance: | 5 mW |
| Size adjustable: | no |
Exclusion of liability
Changes to the firmware and / or hardware can be made at any time without prior notification. For this reason it is possible that parts of the manual, technical data and images in this documentation may deviate slightly from the product in your hand. All products described in this manual are only for the purpose of clarification and must not necessarily match any certain situation. No claims can be made based on this manual.
8. Disposal of used electric devices
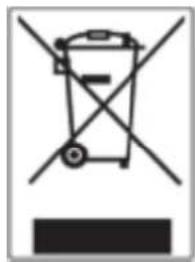
Devices marked with this symbol are subject to the European Directive 2012/19/EG. All electric and used electric devices must be separated from the household waste and disposed of at the provided public locations.
With proper disposal of used electric devices you avoid damaging the environment.


Indice
d) Photo 13
(1) Lecture 13
(3) O menu principal
(1) Odtwarzanie 11
(2) Widok folderow. 11
(3) Petla A-B 12
c) Video 12
(1) Odtwarzanie 12
(2) Widok folderow. 13
d) Aparat 13
(1) Odtwarzanie 13
(2) Widok folderów 13
IcnoJb3ObaHHe HayuHnKOB:
ДанньйnpоигрьВаTeЛь может BOCПОИЗВODИТь My3ыКу chepe3 3,5 MM cTepeo pa3beM.перд поклIOUeHnEM y6eINTEcB,чTo Ha npOriRpgbIBATeJIe yCTaHOBJIe Hn3Km yPOBeHb rPOMKOCTN. 3aTeM noKlIOUHTe npINarAeMbIe HayuHnK K yCTpOJCTBy n MeДпeHNO OtpeYIpyTe rPOMKocTbdo HuxHoro yPOBn. IcNoJIb3yIte hi-fi cTepeo hayuHnKnBkIaDbIshn ИПС cTepeo am6yUOpbl.
PNEyPExEHNe: PocnyuBaHne My3bIKN B CnNkOM rPOMKopeXmI Nn NOCTOAHoe npocnyuBaHne npeepa He pekomEndyetc. TaKKeNCNoJIb3OBaHne BnDeOpONrpbIbATEJn He pekomEndyetc B CTpeCCOBbIXCtyaqnx. 3TO MOxET Bbl3BaTb HEBHMaTeJIbHOCTb CnywateJN BNOTEHuaJIbHO ONaChbIX CNTyaQnx, HApnPmEp, B6n3n DBrNkUxxCr TpaHCnOpTHbIX CpeDCTB.
5. OchOBhble onepaun
UTo6bl npnoctaHOBnTb NIN BO3O6HOBnTb BOCnpOn3BeDeHne, HaxMNTe Ha KHONky BocnpOn3BeDeHne/Naay3a.
UTo6bI nepeiTu K npedbIyueemy nnn CneDyuOeMy Tpeky HaxMMTe KHOKny Bneped nn a3a.ДЯ nepemOTkn Tpeka npocTo ydepxuBaIte OndHy n3 daHHbIX KHOPOK haxaToi.
HaKmTe KhoNky (+) nIe (-) IJpeRyInpOBKn rpoMkoCTn.
(2) Cnncok paHnoB
YTo6bI BbIMTN3 3KpaHa BocnpOn3BeDeHnB CnncOcK paJIOB, HaxMnte Ha KHOkny BepHyTbcraHa3ad. IepemeaaTeCb c nOMoSbIO KHOKN (+) mJN (-) MeJy DpaJAMn i cyueCTByUoUMn pankm. HaxMNTe Ha KHOKNy BocnpOn3BeDeHne/Play3a YTO6bl BbIbPaTB My3bIKaJIbHbI paJn dJa BOCnpOn3BeDEHnR. TaXKe HaxMNTe 3Ty KHOKN dJa OTKpbITnra PANKn. HaxMNTe KHOKNy BepHyTbcra Ha3ad, YTO6bl BepHyTbcra Ha npEdbIduyu npOBehc TpyKTypbI nanOK n DnRA BO3BpTa B rJaBHOe MeHIO.
UTo6bI ydaHnTb paHn, npeeJnte B Cnncok paHIOB, Bbl6epNTe HxKbI paHn n HaxMITE KhoNky M. Dnra ydaJeHnra paHa na HaxMTe KhoNky BocpnOn3BeDeHne/Na3a.
(3) Lukn A-B
Pn nOMoUdAHHOro nHeepa MoXHO BbIpaTb IIO6Oy My3bIkaJIbHbY TpeK N NOBTOpAr beroB cIKNe Uepe3 OnpedeJIeHHoe Bpem.
Hajmte Bo BpeM Bocnpn3BeHnra TpeKa KhoNky M, YTo6bI yCTaHOBnTb HaayalbHyto Ky (A) NOBTOphoro Bocnpn3BeHnra, HaxmTe KhoNky M cHOBa, YTo6bI yCTaHOBnTb KOHeuHyTOy Ky (B). BbIbpaHHbI nepNoD BpeMeHn 6yDeT BOCnpn3BODnTbcr OnpedeJIeHHbI TpeK B zIKne.
Примechанe: Ymobbi bocnoIb3OaMbcsd oONHumeIbHbIMU 603MOxHOCmMu KOHouyaPauu, noXanyucma, omKpoUme aNaBHe MeHIO, bIbepume Hacmpouka.

c) Bndeo
Приимechа: Дя ворочьдаю budeo Ha daHOM pneepe, budeo Heobxodmo npeo6pa308amb b noxdoxrau u'dЯ пeepa foPmAm AVI npu nomou npunazaemso npo2pamMHOZO obecneueHua dЯ npeo6pa308aHua.
(1) Bocnpon3BedeHne BnDeo
IpeeIITe B rnaBHOe MeHIO npn NOMOUI HAIBraUIN, BbI6epITe NyHKT BnDeo I NOdTBePITe BbI6Op, HaxaB Ha KhoNkU BocnpOn3BeDEHne/Play3a. OTKpoETcCnCOK faiIOB. BbI6epITe C NOMOsbU KOHNKU (+) nII ( - ) BnDeofoaJl DnA BOCpON3BeDEHnA IN NOdTBePITe CBOI BbI6Op C NOMOsbU KHOKN BocnpOn3BeDEHne/Play3a. BocnpOn3BeDEHne BnDeo NaHETcA BtOMaTnueckn.
UTo6bI npnoctaHOBnTb nIn BO3O6HOBnTb BOCnpOn3BeJeHne, HaxMnte Ha KhoNky BocnpOn3BeJeHne/Play3a.
UTo6bI npeiTn K npedbyuemy nn cneyuOeMy Tpeky haxmnte KhoNkY Dneped nn 3a3ad. IyapeMOTKn Bndeo npocTo ydepXnBaTe OndHy n3 daHHbIX KHOJOK Haxatoi.
HaKMMTe KHOHKnky (+) nIIN (-) IJIpeRyIINpOBKn rPOMKOCTN.
(2) Cnncok faaiNoB
YTO6bI BbIITN I3 3KpaHa BOCnpon3BeDEHnB CnncOK 0aJIOB, HaxMnTe Ha KHOkny BepHyTbcra Ha3ad. NepemeuaitecB c nOmoU KHOKN (+) nIn (-) MeJy 0aJIaMn i cyueCTByuUzmmn pankamn. HaxMnTe Ha KHOKN YBOcpOn3BeDEHne/Any3a YTO6bl BbIbPaTB Bndeo 0aJn DnA BOCnpOn3BeDEHn. TaKke HaxMnTe 3Tu KHOKN dJa OTKpbITna 0aJna. HaxMnTe KHOKN YBoHyTbcra Ha 3aAd, YTO6bl BepHyTbcra Ha npEdbyuyn ypoBeHb CTpyKtypbl 0aJIOB n DnA BO3BpTa B TnabHoe MeHIO.
UTo6bI ydaNTb faai, npeiDnTe B cncoc KaIIOB, Bbl6epnte HxHbI KaaII n HaxMITE KhoNky M.ДЯ ydaJIeHna faaiNa haxMITE KhoNky BocpnOn3BeDeHne/Play3a.
d)Φoto

(1)ПлосмотфOTO
IpeenTe B rnaHoe MeHIO npn NOMOu HABraun, Bb6epTe nyHKT Bndeo I NOdTBePnte Bb6op, Haxab Ha KhoNky BocnpOn3BeDeHne/Play3a. OTKpoEtc cncok fainob. Bb6epTe C nOMOu bKHOKN (+) nII (-) faJn 13o6paXeHnA dnn BOCpOn3BeDEHnI INoDTBePNTe BaW Bb6Op C NOMOu bKHOKN
Bocnpon3BeDHeN/ay3a. NpOBuTcBbI6paHHOe 1306paXKeHne.
Для 3аусяа abTomatnueckoro Bocnpo3BedeHЯ n3o6paXeHЯ nIи npnoCTaHOBKn HaxmTe Ha KhoNky Bocnpo3BedeHne/Play3a.
(2) Cnncok paioB
UTo6bI BbIMTu N3 3KpaHa BocnpOn3BeDeHnB CnncOcK paJIOB, HaxMnte Ha KhoNky BePhyTbc Ha3ad. NepemeuaTeC b nOMoSbIO KHOPIK (+) mJIn (-) MeJxdy paJAmn i cyuecTByHOzIMn pankamn. HaxMnte Ha KhoNky BocnpOn3BeDeHne/Play3a UTo6bI BbIbpaTb BVdeO paJIN dJa BOCpOn3BeDeHnA. TaKke HaxMnte 3Ty KHOKNy dJa OTkpbltna. paJna. HaxMnte KHOkKy BeHyTbcr Ha To6bI BePhyTbcr Ha npEdbIduuyn ypoBeHb cTpykTypbI paJIOB IN dJa BO3BpTa B rIaNBHOe MeHIO.
UTo6bI ydaNTb faiN, npeiDnTe B cncoc kaiNoB, Bbl6epnte HxHbI faiN i HaKMnTe KhoNky M.ДЯ ydaJIeHnA faiJa haxMnTe KhoNky BocnpOn3BeDeHne/Play3a.
IpmeaHne: ymo6bI BocnoB308ambcra donoHumeJIbHbIMU 8O3MOxHOCmMu KOHoupauu, noXanyucma, omKpoUm eZnaeHoe MeHIO, bibepum Hecmpouku.
e)ФункцяЗаисn

(1) 3anncb
IpeennteB rnaHoe MeHIO npn nOoHn HABrau, Bb6epTe nyHKT 3aNcB. Ineep roTOB hauaTb aydno3aNCS bpn nOoU BCTpoEHNO MmKpOfoHa. IpocTo haxMITE KhONky BocnpOn3BeHne/ay3a. Tekuza 3aNcs b OTo6pa3ntc Ha dncnlee. IpnocTaHOBKn 3aNCS B pOceCSe IIN NOBTOPHOro BKIOUHNr 3aNCS HaxMITE KhoNkY BocnpOn3BeHne/ay3a. HaxMITE BO Bpem 3aNCS KhONkMy DJIa COxpanHeHn 3aNCS. Iprn nOMoUKN KhoNk NepHyTbcra Ha3ad MOXHO BbIITN B rnaBHOe MeHIO; TeKuua 3aNcB aBTOMATnueckn coxpanYeTcR.
Приимechан: 3anucaHbIe phaunbl (e fOpMaTe .wav) compume e nanke VOICE" uepe3 faunobli Mehedjep. Ppu Hexamke Mecma dny 3anucu Ha duonnee nneepa noaumcra coocheHue «Pammb 3anonHeHa!».
(2) Bocnpon3BedeHne
Ipeennte B rnaBHOe MeHIO K nyHKTy FaiJIbI I NOITBepDnTe CBOB Bbl6Op, HaxaB Ha KhoNk Ky BocnpOn3BeDeHne/ay3a. Teepb Bbl6epTe nanky VOICE. Bce pahee cdeHaHHte 3annc pacnoNaTcR B xpoHONorueckom nopAKe. Bbl6epTe HxKbIi FaiI N HaunHe BOCpOn3BeDeHne Prn NOMOu KNoKKn BocnpOn3BeDeHne/lay3a. Pn NOMOu KNoKn BeHyTbcra Ha3ad MOXHO BblTN B rnaBHOe MeHIO.
PpmeaHne: ymo6bI 60cNoJb3OaMb8 cdoONHumeJIbHbIMU 603MOxHOCMaMu KOHfuaypauuu, noXaIyucma, omKpoUme 2na8Hoe MeHIO, ebEpume Hacmpouku.
f) Nounck paioNob

IpeenDHTe B rnaBHOe MeHIO K nyHKTu FaiJIbI N IOdTBePdnte CBOB BblOp, HaxKaB Ha
KhONkY Bocnpo3BeDeHne/Naay3a. OTKpoETcK oRheBOJ KAtaIor, HaxOJaUncsHa
KapTe NaMrtn. IepemeuaTecb C NOMuBIO KHONK (+) nII (-) mExdy faiJamn i
CyueCTByuOUMn PankamN. DnA Bocnpo3BeDeHnE faiJa HaxMMTe Ha KhoKy
Bocnpo3BeDeHne/Naay3a. TaKke npi NOMoUs DaHHo KhoKN MoXHO OTKpbITb NaKy. Ppi
NOMoUs KNoK BeHyTbcra Ha3ad MOxHO nepeiTn Ha npedbyuyn ypOBehb
CTpykTypbI nanok nII NBtB rnaBHOe MeHIO.
UTo6bl ydaNTb faiI, nepeiDHTe B cncoc kpaIIOB, Bbl6epITE Heo6xOdmbl faiI n
HaxMMTe KnaBnuy M. DnA ydaJeHnE faiJa HaxMMTe KhoKy
Bocnpo3BeDeHne/Naay3a.
IprimeaHne: HOpMaUO HeucnoB3oHaHO uu UcNoB3yEmou NaMmu o6uou obem naMmu Ha UcNoB3yEmou Kapme naMmu, MoXHo NocMompemb 8 NyHKme MeHIO hacmpouku noD nyKmamu MeHIO Cucmemu UHOpMaua.
g) Hactpoyn