SRP 4343 - Cd player/recorder AEG - Free user manual and instructions
Find the device manual for free SRP 4343 AEG in PDF.
User questions about SRP 4343 AEG
0 question about this device. Answer the ones you know or ask your own.
Ask a new question about this device
Download the instructions for your Cd player/recorder in PDF format for free! Find your manual SRP 4343 - AEG and take your electronic device back in hand. On this page are published all the documents necessary for the use of your device. SRP 4343 by AEG.
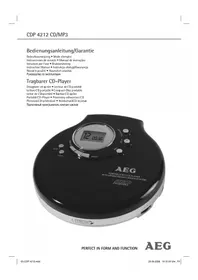
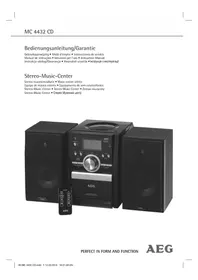
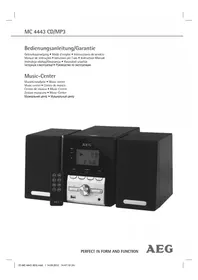
USER MANUAL SRP 4343 AEG
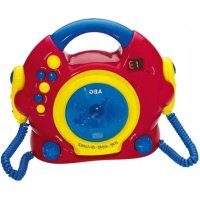
GB Sound machine for iPod/iPhone
natural_image
Black and white photo of a portable electronic device with AEG branding, featuring a smartphone on display (no readable text or symbols)iPhone and iPod are trademarks of Apple Inc., registered in the USA and other countries.
CE
AEG
Location of Controls Page 3
User manual......Page 40
Technical Specifications Page 46
Disposal Page 46
Język polski
Spis treści
Location of Controls
iPod touch (4th generation) iPhone 4GS iPod nano (6th generation) iPhone 4
iPhone 3GS
iPhone 3
▶ II PLAY/PAUSE (7/5)
▶/SKIP/TUNING UP/DOWN (8/6)
iPod touch (4th generation) iPhone 4GS
iPod nano (6th generation) iPhone 4
iPhone 3GS
iPhone 3
▶ II PLAY/PAUSE (7/5)
▶/SKIP/TUNING UP/DOWN (8/6)
Installation/Introduction
iPod touch (4th generation) iPhone 4GS
iPod nano (6th generation) iPhone 4
iPhone 3GS
iPhone 3
▶ II PLAY/PAUSE (7/5)
"Made for" iPod touch (4th generation) iPhone 4GS iPod nano (6th generation) iPhone 4 iPhone 3GS iPhone 3
Saving/Selecting Stations
▶ II PLAY/PAUSE (7/5)
iPod touch (4th generation) iPhone 4GS
iPod nano (6th generation) iPhone 4
iPhone 3GS
iPhone 3
▶ II PLAY/PAUSE (7/5)
Thank you for choosing our product. We hope you will enjoy using the appliance.
Symbols in this user manual
Important notes for your safety are marked distinctively. Pay absolute attention to them to avoid accidents and damage to the device:
WARNING:
Warns of dangers for your health and indicates potential risks of injury.
CAUTION:
Indicates potential dangers for the device or other objects.
i NOTE:
Highlights tips and information for you.
General Safety Guidelines
Before using this device, carefully read this user manual and keep it together with the Warranty Certificate, cashier receipt and if possible, the original package inclusive its interior packing. If you hand on the device to any third person, include the user manual as well.
- To avoid the risk of fire or electric shock, you should not expose the device to rain or humidity. Do not use the device near water (e.g. bathroom, swimming pool, humid cellars).
- The unit is designed solely for private use and its intended purpose. This unit is not designed for commercial use.
- Make sure that the power cable is not bent, pinched, or comes into contact with heat sources.
• Make sure that the power cable is not a tripping hazard.
• The AC adapter is only suitable for use in dry rooms. - Connect the AC adapter only to a properly installed outlet. Be sure the device voltage corresponds to the grid voltage. Also check that the output current and the polarity of the power supply match the information on the connected device.
- Do not touch the AC adapter with wet hands!
• Always install batteries in the correct direction. - Avoid covering the device's vent openings.
-
Never open the device's case. Improper repairs can cause severe danger to the user. If the device or particularly the power cord is damaged, don't use the device any further and have it repaired by a qualified specialist. Check the power cord regularly for damages.
-
To avoid any danger, a damaged power cord must be replaced only by the producer, its customer service or a similarly qualified person with an equal cord.
- If the device won't be used over an extended period of time, disconnect the power cord and remove the batteries.
These symbols may be found on the device and are intended as warnings:

The lightning flash is intended to alert the user to the presence of dangerous voltage within the device.

The exclamation mark is intended to alert the user to the presence of important operating and maintenance instruction accompanying this device.

Products with this symbol operate with a "Class 1 Laser" for scanning the CD. The built-in safety switches are intended to prevent the user from being exposed to the dangerous laser beam not visible to the eye when opening the CD compartment.
These safety switches must not be bypassed or altered; otherwise there is a risk of being exposed to the laser beam.
Children and disabled persons
- For the safety of your children, keep any packing parts (plastic bags, cartilage, Styrofoam etc.) out of their reach.
WARNING!
Don't let small children play with foils for danger of suffocation!
- This device is not intended for use by persons (including children) with reduced physical, sensory or mental capabilities, or lack of experience and/or knowledge unless they have been given supervision or instructions concerning the use of the device by a person responsible for their safety.
- Supervise children to ensure they do not play with the device.
Special safety guidelines

This device operates with a Class 1 laser.
WARNING:
This appliance shall not be exposed to dripping or splashing water and that no object filled with liquids such as vases shall be placed on apparatus.

CAUTION:
Do not touch the speaker membranes (A) with your hands or with objects. This may damage the membranes.
Overview of the components
1 CD compartment
2 CD tray lock (OPEN/LOCK)
3 VOLUME control (volume)
4 Docking port
5 MUTE button
6 button (Stop)
7 button (play/pause)
8 /▶buttons (search forward/backwards)
9 PROG button (Memory)
10 AUX IN jack
11 IR sensor for the remote control
12 MODE function switch
13 EQ button (Equalizer)
14 Button (standby/power)
15 LCD display
16 BASS control (Bass)
17 Nylon handle mounting
18 Telescopic antenna
A Speaker
Rear view (not shown)
POWER ON/OFF switch
DC IN 12 V Power supply connection
Battery compartment
Remote control
1 ⏻ STANDBY button
2 EQ button
3 PROG button
4 APPLE CONTROL buttons
/ Menu navigation
OK (Confirm)
MENU (select previous menu)
5 PLAY/PAUSE (play/pause) button
6 /SKIP/TUNING UP button (search forward)
/ SKIP/TUNING DOWN button (search backwards)
7 STOP / FM MONO/ST button
8 VOLUME +/- buttons
9 RANDOM/ID3 button (random playback)
10 REPEAT/INTRO button
11 PRESET/FOLDER DN/UP buttons (radio station memory / Album selection)
12 MUTE button
13 MODE function switch
Installation/Introduction
- Read the manual thoroughly before operating the device!
- Select a suitable location for the device. Suitable locations are dry, even and anti-slip surfaces on which you may operate the device easily.
• Make sure there is proper ventilation for the device! - Remove, if necessary, the protection sheet from the display.

WARNING:
Turning up the volume too high may damage your hearing.
Power supply
- Insert the grid plug into a properly installed three prong socket with 230 V, 50 Hz. Connect the device with the plug connector by inserting its plug into the DC IN 12 V jack of the device.
• Make sure the grid voltage corresponds to the figures on the rating plate.

CAUTION:
- The included AC adapter may only be used with this device. Do not use it for other devices.
- Use only an AC adapter with 12 V (⊕—⊖)—. A different AC adapter may damage the unit.
• The mains plug shall remain readily operable. - The direct plug-in adapter is used as the disconnect device, the disconnect device shall remain readily operable.

NOTE:
- Disconnect from mains power supply during longer periods of non-use.
- The preset time and station is lost as soon as the power supply has been interrupted.
Battery Operation (Batteries not supplied)
- Open the lid of the battery compartment on the rear side.
- Insert the 10 batteries type UM1/R20 1.5 V. Observe the correct polarity (see bottom of battery compartment)!
- Close the battery compartment.
Should the device not be used for a long periods, remove the batteries, to prevent any "leakage".

NOTE:
- If a mains cable is connected, the batteries are automatically switched off.
- The preset time station is lost as soon as you remove the batteries.
42 English

CAUTION:
- Different battery types or new and used batteries must not be used together.
- Do not dispose of batteries with your household trash. Please hand over at authorized collection points or return to your dealer.

WARNING:
The batteries shall not be exposed to excessive heat such as sunshine, fire or the like. Danger of explosion!
Insert/Replace Battery in Remote Control

NOTE:
The lithium cell in the battery compartment of the remote control may have been safeguarded for transport with a piece of foil. This extends the life of the battery. Please remove this foil before the first use to make the remote control ready for operation.
- Open the battery compartment on the underside of the remote.
- Replace the cell by a battery of the same type (CR 2032). Check that the polarity is correct (see battery compartment).
- Close the battery compartment.
If the remote is not in use for a lengthy period of time, please remove the battery to prevent the battery acid from "leaking".

WARNING:
- The battery shall not be exposed to excessive heat such as sunshine, fire or the like. Danger of explosion!
- Keep batteries out of the reach of children. They are not toys.
- Do not force batteries open.
- Avoid contact with metallic objects. Rings, nails, screws etc.) Danger of short circuits!
- Short circuits may overheat or even ignite batteries. This may lead to combustion.
- When transporting the batteries, cover the terminals for your safety with an adhesive strip.
- If a battery leaks, do not rub the fluid into the eyes or the skin. If acid comes into contact with the eyes, rinse with purified water and seek medical advice if symptoms persist.

CAUTION:
Batteries must not be disposed of in the garbage. Please bring used batteries to competent collection centers or back to the dealer.
Transport securing device of CD compartment
- Open the CD tray (1) by rotating the lock (2) to the left in the OPEN direction.
- Remove, if present, the transport securing device from the CD player before starting operation.
- Close the CD compartment again. Rotate the lock (2) to the right in the LOCK direction.
Turning the device on/ off
- Turn the device on by setting the POWER ON/OFF switch to the "ON" position on the rear side of the device.
- To turn off the device, set the POWER ON/OFF switch to the "OFF" position. Then, disconnect the device from the mains.
Setting the clock (during standby mode)
- Briefly hold down the PROG button (9/3). The display will show "24 HOUR".
- Use the ▶/▲button (8/6) to select between 24-hour and 12-hour display setting. Confirm with PROG.

NOTE: The 12-hour setting will result in the following splay
$$ A M = \text { m o r n i n g }, P M = \text { a f t e r n o o n }. $$
-
Use ▶▶/▲buttons to set the hours. Confirm with PROG.
-
Use ▶buttons to set the minutes.
-
Press PROG again in order to save the time settings.
iPod/iPhone Compatibility
"Made for"
iPod touch (4th generation) iPhone 4GS
iPod nano (6th generation) iPhone 4
iPhone 3GS
iPhone 3
Due to the large variety of iPod and iPhone models and generations on the market, full compatibility cannot be guaranteed. Before connecting your iPod/iPhone, ensure that it has a compatible interface.
Full compatibility of the remote functions also cannot be guaranteed. Operate your iPod/iPhone as normal, while it sits in the docking station.

NOTE:
Depending on the software version of your iPhone the following error message may be displayed:
"This accessory was not developed for iPhone use. It is possible that noise occurs and signal strength is reduced." In this case press "OK".
General operation

NOTE:
Some buttons you will find on both the device and the remote control. Buttons with the same name result in the same functions.
STANDBY (14/1)
Press STANDBY button to switch the device into standby mode. Press this button again to turn on the device.
Volume (3/8)
Adjust to your preferred volume level. The display will show "VOL" and a number. This will equal to the set volume of "VOL MAX" or "VOL MIN".
BASS control (16)
You can use this control to adjust the bass individually. The display will show "BASS" and a number.
Infrared remote control
Wireless operation from a distance of up to 5 meters. If this range gets less, please change the battery. Make sure there are no obstacles between the remote control and the sensor (11) on the device during operation.
AUX IN jack (10)
Connect analogue playback devices. When connecting to this jack you may also listen to the audio of other devices, such as MP3 or CD players etc., via the speakers.
- Please connect the external device via 3.5 mm plug jack to the AUX IN jack.
- Now use MODE button (12/13) to select AUX mode.
- You will hear the sound playback through the speakers. You can adjust the volume with the VOLUME control (3) or the VOLUME +/- buttons (8 on the remote). The CD buttons are not active.
- For further functions please refer to the user manual of the external audio device.
i NOTE:
Set the volume of the external device to a proper audible level.
Listening to the radio
Searching for channels
- Repeatedly press MODE button (12/13) until the display shows "TUNER".
- Use the ▶/▲buttons (8/6) to tune in the desired station.
- The FM.ST control lamp ((ST)) (in the display) will light up when the selected station is received with stereo quality. If reception is too poor and the station experiences static, the control lamp will flicker. Try to improve the reception by changing the position of the telescopic antenna. For FM stations you may use STOP / FM MONO/ST button (7 on the remote) to switch between MONO and STE-REO reception. In case of poor reception we recommend switching to MONO mode.
Saving/Selecting Stations
- When you have found the desired station, press the PROG button (9/3). MEMORY will light up in the display and the memory position will flash.
- For choosing the memory position, please press PRESET/FOLDER UP/DN button (11 on the remote).
- Press PROG to save the settings.
To select a stored station, please press PRESET/FOLDER UP or PRESET/FOLDER DN button.
Music Playback from iPod/iPhone
(iPod/iPhone not supplied)
- Press the MODE button (12/13) repeatedly, until "NO IPOD" appears in the display.
- Insert your iPod/iPhone into the dock.
CAUTION:
Make sure that your iPod/iPhone is plugged upright into the port. Do not bend or tilt the iPod/iPhone whilst it is plugged into the port. This may cause damage to the dock or the iPod/iPhone.
-
Depending on the iPod/iPhone Model, firstly release the button lock and start playing music if necessary with the ▶ II PLAY/PAUSE button (7/5).
-
Follow your iPod/iPhone manual for further use of the controls.
CAUTION:
Stop playback before connecting the iPod/iPhone, otherwise the iPod/iPhone could become damaged.
i NOTE:
- If necessary, you can change the audio settings of your iPod/iPhone in order to achieve optimum sound.
- If you have an incoming call when playing back music with the iPhone docked, then playback stops and you can hear the ring tone. Take the iPhone out of the device in order to accept the call.
iPod/iPhone Charging
Your iPod/iPhone battery is charged as soon as the iPod/iPhone is docked. To do this, the unit must be connected to the mains.
i NOTE:
- Not all iPod/iPhone generations support the charge mode.
- The duration of the charging process depends on the iPod/iPhone which is used and its operating condition.
• We do not recommend charging during battery operation, since doing so will run down the batteries quicker.
44 English
Playing CDs/MP3
This is how to play a CD
- Repeatedly press MODE button (12/13) until the display shows "CD".
- Open the CD tray (1) by rotating the lock (2) to the left in the OPEN direction.
- Insert the audio CD onto the conical spindle with the label facing upwards, so that it snaps into place mechanically. Then close the CD compartment cover again. Rotate the lock (2) to the right in the LOCK direction.
4. AUDIO CD:
"READING" briefly appears on the display, then "Cd", the number of titles and total playback time. The playback starts from the first title on the CD. The current song, the elapsed playback time and the "Cd" symbol are displayed.
CD in MP3 format:
"READING" briefly appears on the display. The number of folders (F) and the titles will then appear briefly. The playback starts from the first track and from the first folder. The current folder (e.g. 01), the current song (e.g. 005), and the elapsed playing time will be shown in the display. Use the PRESET/FOLDER UP or PRESET/FOLDER DN buttons (11 on the remote) to select the individual folders.
- To remove a CD press the ■ STOP button (6/7), open the CD compartment and carefully take out the CD.
Always keep the CD door closed.
i NOTE:
- When playing CD in MP3 format containing folders, the display will show 001 for the first track of the new folder when switching to another folder.
- If a disc is not properly or not at all inserted, "READING" will light up and the display will show "NO DISC".
- Playback of CDs created by the user cannot be guaranteed due to the variety of available software and CD media equipments.
Description of the Operating Buttons
▶ II PLAY/PAUSE (7/5)
You may temporarily stop playback and start again. The elapsed playing time will flash on the display. Pressing the button again will continue playback from the same position.
▶◀/◀SKIP/TUNING UP/DOWN (8/6)
During playback of an audio CD, of a CD in MP3 format, or in the IPOD mode:
With the ▶I button you may skip to the next or next but one track, etc. Press and hold this button to quickly search music (sound will be muted).
You may operate the button as followed:
Press 1 x = Starts current track again from the beginning.
Press 2 x = Skips back to previous track.
Press 3 x= Plays track prior to that, etc. Press and hold this button to quickly search music (sound will be muted).
During radio mode:
Tune the desired radio station.
■ STOP (6/7)
The CD or the songstops.
OK (4 on the remote)
In IPOD mode:
Press this button to activate a function or to display the next menu.
MENU (4 on the remote)
In IPOD mode:
Press this button to open the iPod/iPhone menu or to return to the previous menu.
NOTE:
For this function, the music app must have been already started.
▲/▼(4 on the remote)
In IPOD mode:
Press this button to browse the iPod/iPhone menu upwards or downwards.
MUTE (5/12)
Quickly turn off the sound. "MUTE" will flash in the display. To cancel this function, press MUTE again.
EQ (13/2)
(Preset equalizer function). There are different sound modes available (CLASSIC, ROCK, POP, JAZZ, FLAT).
NOTE: During iPod/iPhone playback
If necessary, you can change the EQ settings of your iPod/iPhone in order to achieve optimum sound.
STOP / FM MONO/ST (7 on the remote)
During FM radio mode:
Switch between STEREO and MONO.
REPEAT/INTRO (10 on the remote)
Press 1x: (REPEAT lights up) The current track will be repeated entirely.
Press 2x: (REPEAT ALL lights up) The complete CD will be repeated entirely.
Press 3x: (INTRO lights up) Each title of the CD will be played for 10 seconds.
Press 4x: All functions will be canceled. Normal play-back will be continued.
Only for CDs in MP3 format:
Press 1x: The current track will be repeated continuously (The display will show REPEAT).
Press 2x: The selected folder of the MP3 CD will be repeated continuously (the display will show REPEAT ALBUM). Use PRESET/FOLDER UP/DN buttons (11 on the remote) to select the individual folders.
Press 3x: The entire CD will be repeated continuously (REPEAT ALL is displayed).
Press 4x: Each title of the CD will be played for 10 seconds each (INTRO will appear on the display).
Press 5x: The function will be deactivated and the CD will be played in normal mode.
RANDOM / ID3 (9 on the remote)
The display will show "RANDOM" and the number of the track that will be played first. All tracks will be played consecutively in random order.
Only for CDs in MP3 format:
Keep the button pressed down to turn on the function. "ID3 ON" will briefly appear on the display. If ID-3 tag information is stored, it will continue to appear on the display.
Keep the button pressed down again to deactivate the function. "ID3 OFF" will briefly appear on the display.
PRESET/FOLDER UP/DN (11 on the remote)
CD in MP3 format:
Press these buttons during playback to switch one folder up or down. The display shortly shows a message, e.g. ALBUM 02, Then the system automatically starts play back of the MP3 CD. When pressing the buttons during stop mode, the message will also shortly be shown in the display. Then press
▶ II PLAY/PAUSE to start playback.
During radio mode:
Select a stored radio station.
PROG (9/3)
To save the stations and to set the programmed playback.
Program Playback
Program playback in desired sequence. (only in CD mode).
-
Press ☐TOP button (6/7).
-
Press PROG button (9/3). The display will show “- - - PR:01” (“track” PR: “memory position”) and MEMORY. Use the ▶buttons (8/6) to select the desired track and press PROG buttons again. The display will change to memory position P02.
-
Use the / Buttons to select the next track and press PROG again. Repeat the steps until you have selected all tracks.
i NOTE:
If the memory capacity of the programmable title is reached, "FULL" will be displayed.
-
Press the ▶ II PLAY/PAUSE button (7/5). Playback starts. The display will show the first selected track number.
-
Press STOP button once to stop playback. The memory will be kept.
-
For repeated playback of the programmes, press the ▶ II PLAY/PAUSE button.
-
To delete memory, please press STOP button twice. MEMORY will no longer be displayed.
The device will stop automatically after all stored tracks have been played. The program sequence will be kept in the memory until you switch to another mode, remove the CD from the compartment or switch off the device.
It is possible to combine program playback with the REPEAT function. After programming and starting playback, please press REPEAT/INTRO button (10 on the remote) up to three times; the functions can be applied as described under "REPEAT/INTRO".
Playback of music files in MP3 format
This device allows the playback of music files in MP3 format. The device furthermore supports the common CD types: CD, CD-RW, and CD-R.
Your device can play MP3 CDs. These are compressed CDs that can store up to 200 tracks. Your device automatically recognizes MP3 discs (the display will show total number of tracks and folders). Please refer to chapter "Playing CD/MP3" for playback of such CDs. You may program tracks as already described under "Program playback".
Please note:
There are many burning and compressing methods, as well as differences in quality of CDs and burnt CDs.
Furthermore, the music industry does not apply fixed standards (copy protection).
For that reason there might, in rare cases, occur problems when playing CDs and MP3 discs. That is not a malfunction of this device.
Cleaning and maintenance
- Disconnect the mains plug before cleaning.
- You may wipe off external stains, using a slightly damp cloth without any additives.
46 English Troubleshooting
| Symptoms Course Solution | ||
| CD can not be played back. | CD is not inserted or inserted incorrectly. | Ensure that the disc is inserted with the label facing upwards. |
| Batteries too weak. | Insert new batteries or operate the device with the mains lead. | |
| CD jumps during playback. | Check the disc for fingerprints, dirt or scratches. | Check the disc for fingerprints, dirt or scratches. |
| The unit does not work. | The unit is blocked and “hangs”. | Disconnect the mains plug for approximately 5 seconds. Then switch the unit back on. |
| Volume (3) and basses (16) cannot be adjusted on the device. | The PROG button (9/3) was held pressed down until the time display appeared. Then one of the controls was pressed while the time was displayed. | Press any button to release the lock of the control. |
Technical Specifications
Model: SRP 4343 iP
Voltage supply: DC 12 V⊕—D—⊖
Battery operation: 10x 1.5 V Type UM1/R20
Output power: 400 W PMPO
Power consumption: 36 W
Net weight: 580 kg
Radio:
Frequency ranges: VHF /FM 87.5 \~ 108.0 MHz
AC adapter
Protection class:....II
Input: AC 100-240 V\~ 50/60 Hz
Output: DC 12V, 3A
Polarity: ⊕-⊖
Technical modifications reserved!
This device has been tested according to all relevant current
CE guidelines, such as electromagnetic compatibility and low voltage directives, and has been constructed in accordance with the latest safety regulations.
"Made for iPod" and "Made for iPhone" mean that an electronic accessory has been designed to connect specifically to iPod or iPhone and has been certified by the developer to meet Apple performance standards. Apple is not responsible for the operation of this device or its compliance with safety and regulators standards Please note that the use of this accessory with iPod or iPhone may affect wireless performance.
Disposal
Meaning of the "Wheelie Bin" Symbol
Take care of our environment, do not dispose of electrical appliances via the household waste.
Dispose of obsolete or defective electrical appliances via municipal collection points.
Please help to avoid potential environmental and health impacts through improper waste disposal.
You contribute to recycling and other forms of utilization of old electric and electronic appliances.
Your municipality provides you with information about collecting points.
▶ II PLAY/PAUSE (7/5)
▶/SKIP/TUNING UP/DOWN (8/6)
CTC Clatronic Sp. z o.o
iPod touch (4th generation) iPhone 4GS
iPod nano (6th generation) iPhone 4
iPhone 3GS
iPhone 3
▶ II PLAY/PAUSE (7/5)
"Made for" iPod touch (4th generation) iPhone 4GS iPod nano (6th generation) iPhone 4 iPhone 3GS iPhone 3
▶ II PLAY/PAUSE (7/5)
▶/SKIP/TUNING UP/DOWN (8/6)
iPod touch (4th generation) iPhone 4GS
iPod nano (6th generation) iPhone 4
iPhone 3GS
iPhone 3