SR 4345 - Cd player/recorder AEG - Free user manual and instructions
Find the device manual for free SR 4345 AEG in PDF.
| Product type | Stereo radio with CD player |
| Brand | AEG |
| Model | SR 4345 |
| Mains power | 230 V, 50 Hz |
| Battery power | 6 x 1.5 V, type UM2/R14 |
| Power consumption | 12 W |
| Net weight | 1.29 kg |
| Radio frequency range | FM 88 – 108 MHz |
| Compatible disc types | Audio CD (not MP3) |
| Laser system | Class 1 laser |
| Main functions | FM radio, CD playback, AUX input |
| Programmed playback | Yes, up to 20 tracks |
| Repeat | Single track or entire disc |
| Forward/backward search | Yes, by pressing and holding |
| Volume adjustment | VOLUME knob |
| Care and cleaning | Wipe with a slightly damp soft cloth |
| Safety | Warnings: do not open, avoid moisture, use batteries correctly |
| Supplied accessories | Mains cable, instruction manual |
| General information | Domestic use, not professional |
Frequently Asked Questions - SR 4345 AEG
User questions about SR 4345 AEG
0 question about this device. Answer the ones you know or ask your own.
Ask a new question about this device
Download the instructions for your Cd player/recorder in PDF format for free! Find your manual SR 4345 - AEG and take your electronic device back in hand. On this page are published all the documents necessary for the use of your device. SR 4345 by AEG.
USER MANUAL SR 4345 AEG
GB Stereo radio with CD player
Elimination. Page 16
Espanol
Indice
Overview of the Components.. 3
Instruction Manual.. Page 25
Technical Data . Page 28
Disposal Page 28
Język polski
Spis tresci
Thank you for choosing our product. We hope you enjoy using the device.
Symbols in these Instructions for Use
Important information for your safety is specially marked. It is essential to comply with these instructions in order to avoid accidents and prevent damage to the machine:

WARNING:
This warns you of dangers to your health and indicates possible injury risks.

CAUTION:
This refers to possible hazards to the machine or other objects.

NOTE:
This highlights tips and information.
General Safety Instructions
Read the operating instructions carefully before putting the appliance into operation and keep the instructions including the warranty, the receipt and, if possible, the box with the internal packing. If you give this device to other people, please also pass on the operating instructions.
-
To avoid the risk of fire or an electric shock, you should not expose the device to rain or moisture. Consequently, do not use the device in the immediate vicinity of water - for example near a bath tub, a swimming pool or in a damp cellar.
-
The appliance is designed exclusively for private use and for the envisaged purpose. This appliance is not fit for commercial use.
-
Only connect the device at a properly installed plug socket. Pay attention that the specified voltage corresponds to the voltage of the plug socket.
-
When using external mains supply, pay attention to the correct polarity and voltage. Always place the batteries in the correct direction.
-
Assemble the device in such a way that the available ventilation openings are not covered.
-
Never open the housing of the device. Incorrect repairs can constitute a considerable risk for the user. Should the device become damaged, in particular the mains supply cable, do not operate the device any longer, but rather have it repaired by an expert. Check the mains supply cable regularly for damage.
-
For safety reasons a broken or damaged mains lead may only be replaced by an equivalent lead from the manufacturer, our customer service department or a similary qualified person.
-
If the device is not used for a longer period, remove the plug connector from the plug socket or take out the batteries.
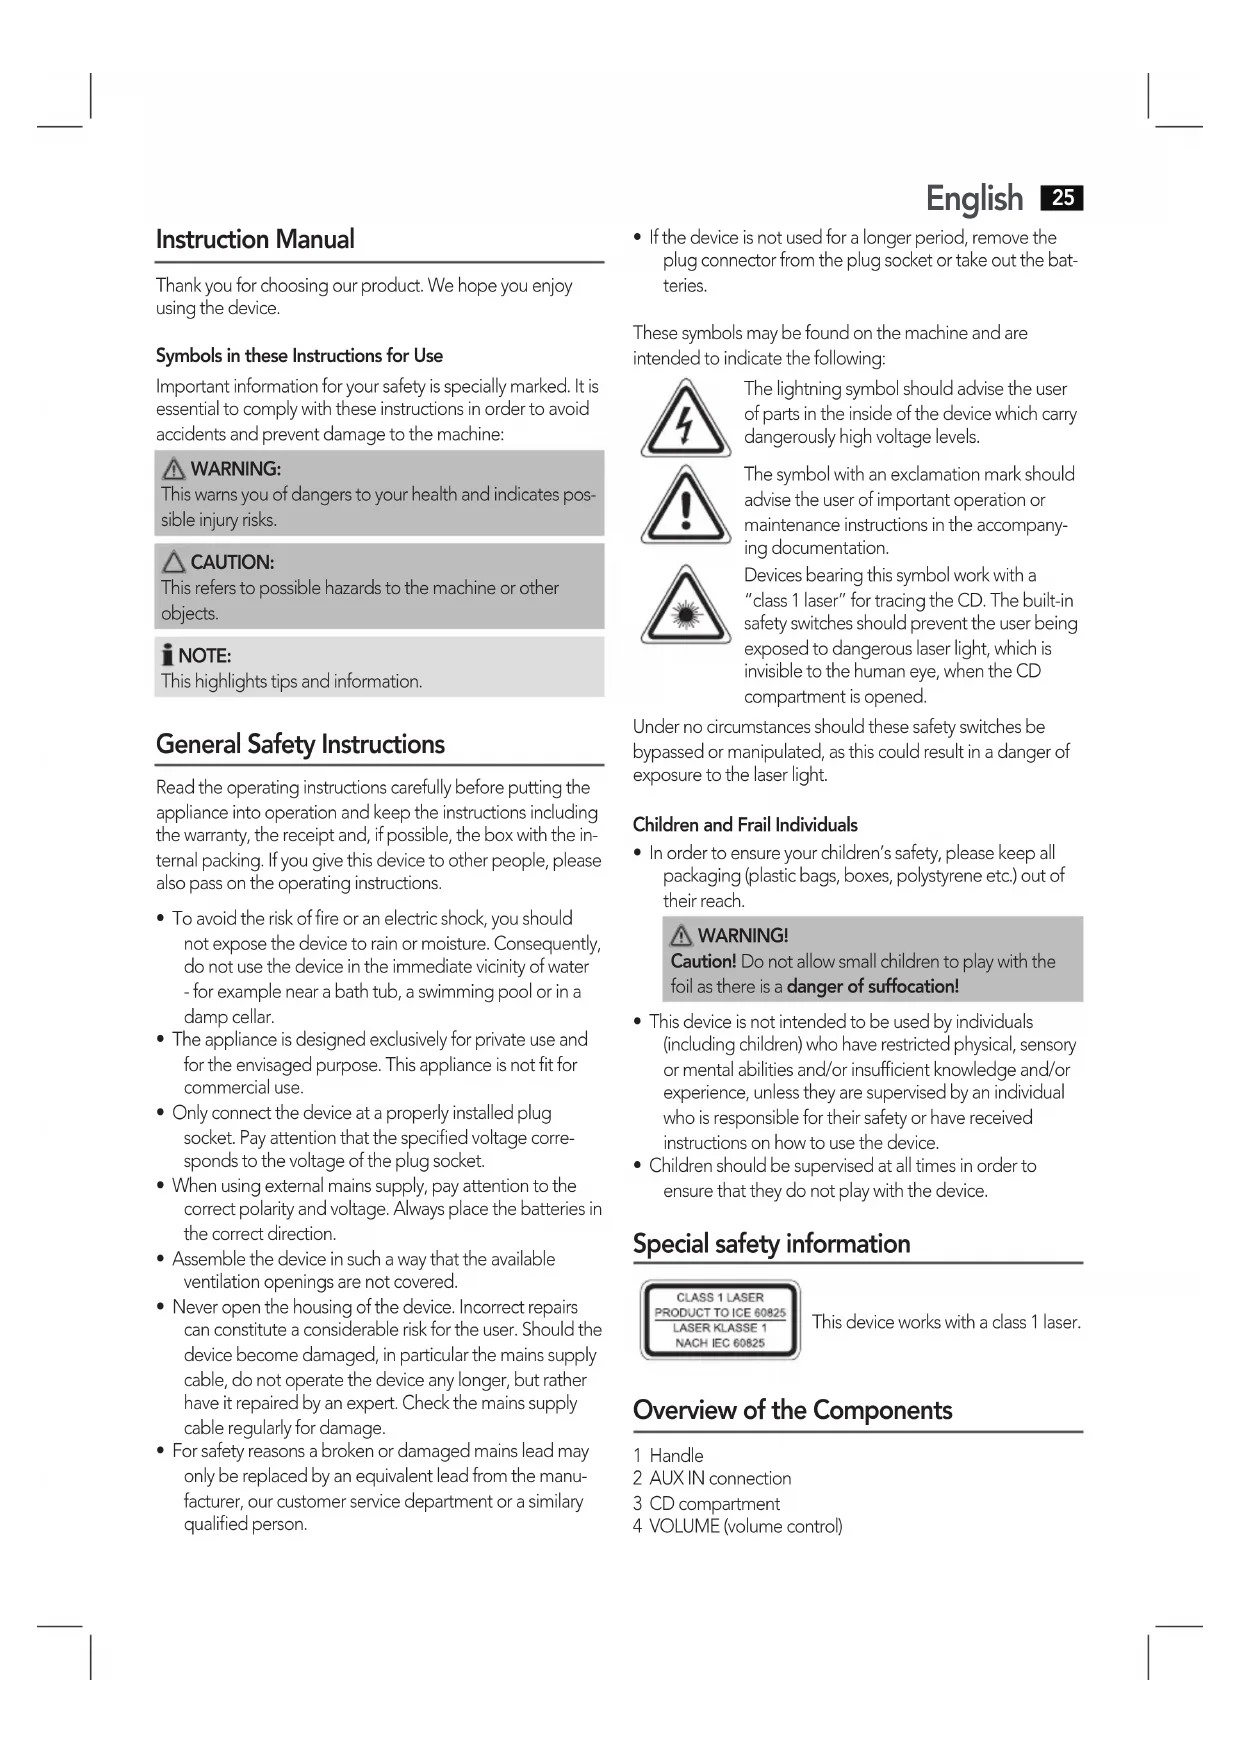
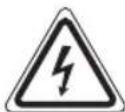
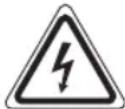
These symbols may be found on the machine and are intended to indicate the following:
The lightning symbol should advise the user of parts in the inside of the device which carry dangerously high voltage levels.

The symbol with an exclamation mark should advise the user of important operation or maintenance instructions in the accompanying documentation.
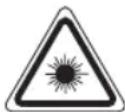
Devices bearing this symbol work with a "class 1 laser" for tracing the CD. The built-in safety switches should prevent the user being exposed to dangerous laser light, which is invisible to the human eye, when the CD compartment is opened.
Under no circumstances should these safety switches be bypassed or manipulated, as this could result in a danger of exposure to the laser light.
Children and Frail Individuals
In order to ensure your children's safety, please keep all packaging (plastic bags, boxes, polystyrene etc.) out of their reach.

WARNING!
Caution! Do not allow small children to play with the foil as there is a danger of suffocation!
- This device is not intended to be used by individuals (including children) who have restricted physical, sensory or mental abilities and/or insufficient knowledge and/or experience, unless they are supervised by an individual who is responsible for their safety or have received instructions on how to use the device.
Children should be supervised at all times in order to ensure that they do not play with the device.
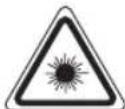
Special safety information
This device works with a class 1 laser.
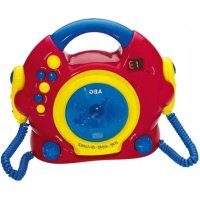
Overview of the Components
1 Handle
2 AUX IN connection
3 CD compartment
4 VOLUME (volume control)
26 English
5 FUNCTION Function selector switch (FM / AUX/OFF / CD)
6 TUNING control
7 PUSH/Open (push/open) CD tray
8 Loudspeaker
9 REP button (Repeat)
10 button (forward search)
11 button (Stop)
12 button Play/Pause)
13 button (reverse search)
14 PROG button (memory)
15 LCD-display
16 AC Mains connection
Bottom side (without illustration)
Battery compartment
Dipole antenna
Intended Use
This device is used for
The reception of radio programmes
- Playing back audio CDs
Sound playback from external audio sources.
It is intended exclusively for this purpose and may only be used as such.
It may only be used in the manner described in these instructions for use. The device must not be used for commercial purposes.
Any other use of this device is considered to be contrary to the intended use and may result in damage to materials or even personal injury.
The firm ETV - Elektro-Technische Vertriebsgesellschaft mbH does not accept any liability for damage caused as a result of the use of this device contrary to its intended use.
Start-up of the device/introduction
- Please read the operating instructions carefully before using the device for the first time!
- Select a suitable location for the device, such as a dry, flat, non-slip surface on which it is easy to operate the machine.
- Ensure that the device is sufficiently ventilated!
- Remove the protective film from the display if it is still present.
Power Supply
- Connect the power cable supplied (see battery compartment if necessary) to a properly installed 230V / 50Hz safety power socket and the mains connector AC ~ (16) on the back of the machine.
- Ensure that the voltage is the same as that indicated on the model identification plate.
Inserting the Batteries (not supplied)
- Open the lid of the battery compartment on the bottom.
- Insert 6 batteries of type UM2/R14 1.5 V. Please ensure that the polarity is correct (see the floor of the battery compartment)!
- If the device is not used for a long period of time, remove the batteries to avoid the spilling of battery acid.
- Then close the battery lid. While doing so, guide the dipole antenna through the small notch on the battery compartment.
NOTE:
When a mains cable is connected the batteries are automatically switched off.
CAUTION:
- Different battery types or new and used batteries must not be used together.
- Batteries are not to be disposed of together with domestic wastes. Disposse of the used batteries at the relevant collection bin or at your dealer's.
WARNING:
Do not expose the batteries to high temperatures or direct sunlight. Never throw batteries into the fire. There is a
danger of explosion!
Transport Safety Device, CD Compartment
- Open the CD tray (3) by pushing the PUSH/Open button (7).
- Before operating the machine for the first time, remove the transport safety device from the CD player if it is still in place.
Volume
The desired volume can be sent using the VOLUME regulator (4).
Switch-off
The machine is switched off when the function selector switch (5) is turned to the AUX/OFF position. Unplug the device.
AUX IN socket
To connect analogue replay devices. Via this socket you can also hear the sound of other playback devices such as MP3 players, CD players etc. through the loudspeakers.
- Please connect the external device with a 3.5mm stereo jack plug to the AUX socket (2).
- Set the function selector (5) to AUX/OFF. The device switches automatically to AUX IN operation.
-
Through the loudspeakers you can hear the playback of the sound from the external device; with the VOLUME control (4) you can change the volume. The CD buttons do not have any function.
-
For the remaining procedure please see the operating instructions of the external sound source.
NOTE:
Adjust the volume of the external device to a comfortable level.
Listening to the Radio
- Turn the function selector switch (5) to the FM.
- Tune in the desired station with the station adjustment knob TUNING (6).
- In case of poor reception, try to improve the reception by changing the position or winding, respectively unwinding the dipole antenna.
Playing CDs
This is how you play a CD
- Turn the function selector switch (5) to the "CD" position.
- Open the CD tray (3) by pushing the PUSH/OPEN button (7).
- Insert an audio CD with the printed side facing upwards on to the central cone so that the CD clicks into place and then close the lid of the CD compartment.
- The display shows "--" and then the number of titles. Press the button (12) to play the CD. The current song and the symbol " " are shown in the display.
Important NOTE: Playing of CDs and CDRs in MP3 format!
The unit cannot play MP3s. The CD will rotate, but the sound cannot be reproduced.
- In order to remove a CD, please press the button (11), open the CD compartment and lift the CD out carefully.
Always keep the CD deck closed.
NOTE:
- If a disc is incorrectly inserted - or no disc has been inserted - the symbol "--" and the word "NO" appear in the display.
- Please observe: Many burning methods exist, as well as quality differences with CDs and burned CDs.
In addition, the music industry does not observe fixed standards (copy protection).
Because of this, in rare cases there may be problems with playback of CDs. This is not a malfunction of the device.
Description of the CD buttons
II(12)
You can briefly interrupt and resume playback using this button. The symbol "▶" will blink in the display. Pressing again continues playback.
10/13
When audio CD is playing:
With you can jump to the next or previous track etc.
- If the button is kept pressed down, the machine starts to search through the tracks.
The button can be used as follows:
Press once = This starts the current track again from the beginning.
Press twice = This jumps back to the previous track.
Press three times = This plays the song before etc. If the button is kept pressed down, the machine starts to search through the tracks.
(11)
The CD stops.
REP (9)
When audio CD is playing:
Press once = the current track is repeated continuously. REP 1 will be shown in the display.
Press twice = the whole CD is played continuously. REP ALL will be shown in the display.
Press three times = all functions are cancelled. The normal play mode is resumed.
Programmed Play
This can be used to program any desired sequence of tracks.
1. Press the button (11).
2. Press the PROG button (14). PROG. 01 (storage space) blinks in the display. Use H button (10/13) to select the desired track and then press the PROG button again. The display changes to memory slot 02.
3. Select the next track with the button and press the PROG button again. Repeat the procedure until all the desired tracks are selected.
NOTE:
If the storage capacity of the titles to be programmed has been reached, the programmed titles will be shown in sequence.
- Press the button (12). The playback starts. The display shows the first selected title number. The display PROG lights up.
28 English
- Press once the button to stop the playback while retaining the program. The display PROG. will stay lit.
- To play the programme back again, press the button.
- To delete the program, press the button twice. The display PROG. goes out.
The device stops automatically once the entire sequence of programmed tracks is completed. The display PROG. goes out and the programmed sequence will be deleted from the memory.
Cleaning and Maintenance
- Always remove the mains plug before cleaning the machine.
- Any marks on the surface can be wiped off with a slightly damp cloth without any additives.
Troubleshooting
| Symptoms Course | Se Solution | |
| CD can not be played back. | CD is not inserted or inserted incorrectly. | Ensure that the disc is inserted with the label facing upwards. |
| Batteries too weak. | Insert new batteries or operate the device with the mains lead. | |
| CD jumps dur ing playback. | Check the disc for fingerprints, dirt or scratches. | Check the disc for fingerprints, dirt or scratches. |
| The unit does not work. | The unit is blocked and “hangs”. | Disconnect the mains plug for approximately 5 seconds. Then switch the unit back on. |
Technical Data
Model: SR 4345 CD
Power supply: 230 V, 50 Hz
Battery operation: .6 x 1.5 V, Type UM2/R 14
Power consumption: 12W
Protection class:
Net weight: 1.29 kg
Radio section:
Frequency ranges: VHF /FM 88 ~ 108.0 MHz
Subject to technical changes without prior notice!
This device has been tested according to all relevant current CE guidelines, such as electromagnetic compatibility and low voltage directives, and has been constructed in accordance with the latest safety regulations.
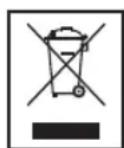
Disposal
Meaning of the "Dustbin" Symbol
Protect our environment: do not dispose of electrical equipment in the domestic waste.
Please return any electrical equipment that you will no longer use to the collection points provided for their disposal.
This helps avoid the potential effects of incorrect disposal on the environment and human health.
This will contribute to the recycling and other forms of reutilisation of electrical and electronic equipment.
Information concerning where the equipment can be disposed of can be obtained from your local authority.
Instrukcja obslugi
CTC Clatronic Sp. z o.o.
IopHHJXMBJIeHHJ: 230B,50T
XINBENHBAID6aTaTpeek: .6x1,5B,TnUUM2/R 14
Tpyna eIektpo6e3neHocti: 12BT
CnoxuBaHHn noTyXHocTi:
Bara HETTO: 1,29
Páriobók:
Yka3bBaet Ha BO3MOxHHyIO ONaCHOCTb,IINI3JeJIIMN IpyTNX OKpyKaIOUxN INpeDMETOB.
I PIMMEYAHNIA:
JaetcoBebtiuHOpMaunIO.
06uye yka3aHnno TeXnKe 6e3oNaChOCTn
Ipeed Hauanom 3KcNlyatau npibopa BHMaTeIbHO npouHTaIte npinraeMyIO uHCTpyKLIO NO 3KcNlyataUIM COxpaHNTe ee B HAdexHOM MecTe, BMeCTe C rapaHTnHBIM TaHOHOM, KaccOBbIM YekOM N, NO BO3MOXHOCTN, KAPTOHHO Kopo6koC yNaKoBOyHbIM MaTePnAionom. EcnI daTe KOMyJIbO NOJb30BaTbCn pnpobopm, O83aTeJIbHO daIte BpndaHy dAnHyIO uHCTpyKLIO NO 3KcNlyataUIM
- 4TObI npedOTbpaTb pNCK BO3HKnHOBeHn NOkapa nIIN NopaxeHn 3JekTpOToKOM, 3aIpeuaeTcA 3KcIpyATnpoBaT b 3JekTpOpnpOpBbl NOI DOxJem IIN BO Bnaxhix MecTAX. 3aIpeuaeTcBAKIOUaTB 3JekTpOpnpOpBbl HEnocpeICTBeHHo 6NI3OCTN K BOe (HaPIM.: B BaHHoKOMHaTe, 6accEInHe, BlaxKHOM IOBaJIe).
- I3dJIeIne npEHa3HaueHo TOnbKO dJa DomaHHeRo
NcPONb3OBAHn; OHO He npEHa3HaueHo dJa KOMMepYeCKNX cJIeJi.
BkIIOHaIte 3JKeTPOPnpObOpToTbKO Bpo3eTKu, yCTaHOBJIeHHbIE B COOTBETCTBM CO BCEMn PpeDnICAHmN. CJeINTE 3a TEM, YTO6bHapraKeHne cTei CoBnaJaLo C HapraKeHnEM NITAHNA 3JKeTPOPnpObOp.
EcINcIOb3yeTcBHeuHn6IokNITaHnO6paTtE BHMMaHHeHaeroBbIXoDHOeHaNPaXKeHneNIOJaPHOCTb, npaBnJbHO BCTaBnJIte 6aTapeKn. - YctaHabInBaIte 3JeKTpOpiu6Opbi TaK, TTo6bI He 3aKpbH BaINCb IMeIOUneCE BHTUNJIOOHBIE OTBepCTNIA.
HnB KOem Cnyae He BCKpbBaIte 3JeKTPoPnp6Op. HnpoceccnoHaBbHpeMOHT pEcdTabnre 60JbUio
OanachocbIgnoTpe6nteJI. Ecn3JekTpnpn6Op BbIeHn3 cTPOB, BOCo6eHHoCTn n3 3a JeKcTa cTeBOrO shypa, 60nbwe erO He BKIOHaTb, a 3daTb Ha pemOH KBaIIuΦmUPOBaHOMy CneuaAIncty. PeryIarpho npOBepaIte ceTeBOI shHyp ha OTCyTCTBne NobpeXdEHN.
- TTo6bI npEeOpTbpaTnB HeCuaCTbHcNcyaH, DOnyckaeTc3aMeHrTb DePekTHbI CTeBOH UHyp ToJIbKO Ha paBHO3HaHbH Na 3aBOeHN3rOToBNTeJe, HauJem CepBNCOMUENTpe NIN ObpaTnBUnCb K KBaJIuΦNIpOBaHHOMCyueJaNCTy.
- Ecnn 3neKtpnpnbop dnoIroe Bpema He nCnOJb3yeTcA, OTKIOHHTe erO CTEN N BbIHbTe 6aTapeKn.
3TN HAKJIeKIMMOYTHAXOINTBcH KaKpNcy N ObaaIOT BaUe BHMaHHe Ha CJeDyIOUe:
CIMBON "MOJHNA" Yka3bIbAeT Ha TO, YTO BHTPN 3JIeKTPoPnIbOpa IMeOTcA,DeTaJIH HAXOJaUncsA NOI ONaChbIM, BbICOKIM HAnpR-XeHEM.

CmBON "BOCKNIUaTeJIbHbI 3HaK" o6pauaet BaIe BHNMaHHe Ha BaXHbI pIMMeaHnB COpOBoNDteJIbHbIX DOkUMeHTax NO nOJIb30BaHIO nTexOCMOTpy 3JKeTPOnpn6opa.
YCTpoHCTBa,HaKOTOpbIXeCTb3TOTcIMBON, pa6OtaIOTcJe3epOM"Klacca1"ДЯчTeHIN KOMnAKT-DNCKa.BCTpoEHhIbe aBapInHbIe BbIKJIIOHTeJIN 3aUIIuAJOIT NOJB3OBaTeJIr OT BO3dEiCTBnO nAChORo JAsepHOrO N3JnyeHIN,HE BVIDIMTOQYeIOBueeCKMΓJa3OM, KOrDaOTCEKДЯ KOMnAKT-DNCKOBOTKpbIT.
Hn np KaKnx 6ObToBcTBax He CneDyET 6xOaNTb 3Tn abapnHbIe nepeKIOuATEnn Nn KAKm-IM6o 6pa3OM MaHnpyIpOBaTb MM, TAK KaK MOXHO IOnactb NOB BO3dEICTBVE Ja3epHOrO n3JyHeHr.
Teu n Imua HxkaioueeB npncmOTpe
IV3 coo6paKeHn 6e3oNaCHOCHT nIaTeHe octaBnaIte JexKaTb yNakOBky (PiactNKOBbie MeUKn, KapTOH, neHONJIaCT NT.D.) 6e3 npiCMOTpa.
I PENEYIPKDEHNEI
He no3B0JIaTe DeTAM UrpaTb C nOIN3TNHeHOBOI nIEHko. OnachocTb ydyub!
3TOT np6op He npedha3HaueH nnI NOB3OBAHn IuAM (BKIOUaI DeTei) C OPAHnEHHbIMn Pn3NueCKIMN, CEHCOPHBIM NIN YMCTBEHHbIMn CNOC6HOCTAMN INI IINI CaMn, HE IMeOLcMMn ONbTa WNNn HEO6XoDMbIX 3HaHNI. NCKIOHHeMe COCTABJIOT CInyAn, KOrDa OHn HAXOATCn IOI pncmOTpOM IuCa, OTBETCBENHOrO 3a INx 6e3ONaCHOCTb, INI KOJa OT 3TOrO IuCa NoLyHebl yKa3AHn IO NlB3OBAHn Ip6Opom.
HeoXoDIMO npICMaTpBaTb 3a DeTbM, YTo6bl y6e- DITbcB TOM, YTO OH He INrpaIOT C np6Opom.
CneuaHbIe yka3aHnnoTexnke 6e3oNaChOCTn
CLASS1LASER PRODUCTTOICE60825 LASER KLASSE1 NACH IEC 60825
3To yctpoiCTBO pa6oTaET cna3epom KnaCa 1.
063op detalei np6opa
1 Puyka
2 THe3do AUX IN
3 OTeKДIЯ KOMnAaT-DIACKOB
4 VOLUME (perynatop rpmkoctn)
5 IpeeknouateIb yHKuIN FUNCTION (FM/AUX/OFF/ CD)
6Рунkaнадсторки TUNING
7 PUSH/OPEN (BDbHHyTb/OTkpbItb) JIoToK CD
8「pomkoROBOpTeJIb
9 KhoKa REP (IOBTop)
10 Khonka (nonck Bnepe)
11 Khonka (cton)
12 KhoPiKa Bocnpom3BedeHne/Naay3a)
13 KhoNka (Honck Ha3a)
14 KhoIka PROG (namrTb)
15 LCD-dinncjnei
16 He3do AC
HmXnHa YacTb (6e3 pncyHka)
BaTapeHbIOTcK
CmmMtpnHaa BbpaTopha aHTehHa
Ha3haeHne
YcTpoIcTBOppeHa3NaueHo dIa
PnneMa paanopporpaMM
Bocnpoun3BeJeHnaydno CD
Bocnpon3BeDHeHn 3ByKa O TBHeUHHx NCTOHTHKnOB.
YCTPOINCTBO INeIHa3HaeHo TOnbKO,IaIgA TnX CJIeIe, HNKaKINxDpyTnx.
EroMOxHO NcNoIb3OBAbT ToJIbKO TaK, KaK OINCAHO B DaHHOM pyKOBOdCTBe. YCTpoIcTBo HeJIb3r INcNOJIb3OBAbT B KOMMepuecknx LcJIax.
JIIOBOE DpyrOe IcNoIb3oBaHnE daHHoro yCTpoIcTBA paccMaTpINBaETC KAK IPOTNBOpeuAaUee erO Ha3HaueHnO, IN MOKeT npINBeCTN K eRTO NOBpeXdEHnIO nII daJce K TpaBMIpOBaHnO noJIb3OBAteJIa.
Haayano pa6oTbI/BBeHne
BnHMaTeIbHo npOHTe INHCTpyKUIN NO 3KcNlyaTaUINpeEaTEm,KaK NcNoJIb3OBA Tb YCTpOINCTBO B NepBbipa3!
BbIepeNTeIyycTPOINCTBaIIOxOAnuueMeCTo,IOBepxHocTBKOTOPoIOnJkHa6bITbCyXoI,IOCKoIHeCKoJIb3KO,IgDeYcTPOINCTBOM6yIDETyIO6HOynpaBnTb.
- Y6eIITecb, yTO yCTpOJIcTBO xopoIo npoBepTnBaetcaI
- CHIMITE C DMCNIEE 3AUHTHYIO NIEHky, ECNI OHa BCE eue ectb Ha HEM.
3NeKtpOnTaHne
BCTaBbTe WtTencel bHypa 3JeKtpOnuTaHnA, IMeIOUe- roCa B KOMPNeKTe (pnp Heo6xOJIMocTn CM. B 6aTapeHOM OTcKe) B nCnpaBHyIO HacteHNyIO po3eTKy 230 B/50 T,pyroI KOHeI Zhpya DOnjXeN 6bITb CoedInen C pa3bEmom AC (16) Ha 3aDHe I NaHeI yCTpoiCTBa.
- Y6eIITecb, YTO HApJxKeHHe CeTn TaKoe JKe KaK yKa3aHHoe Ha TabInuChe, INeHTNuNpUpyOuEe MoJeB yCTpoiCTBa.
BCTaBA6aTapeek (HE BXOJAT B KOMNJIeKt)
- OtkpoTe KpbIuKy 6batapeHoro OTCeKa, HaxoJaIeOcB HIXKHe Yactn yCTpoICTBa.
BctabbTe 6 baTapeek Tnna UM2/R14 1,5 B. Y6eNITeccb, yTO cO6JIIODeHa npaBnIbHaa nOlaPHOCTb (CM. 06O3HaueHHa Hne bTaapeHoro OTCeka)! - Ecn yctpoCTBO He nCnOJb3yETc dIITeJIbHOE BpEMr, H3BLeKNTe H3 Hero GaTapeKeKn, YTObbl N36ExKaTb BblTeKaHn CoepKaUeICR B HIX KNCLOTbl.
- Pocne 3Toro 3aKpOIne KpbUkky 6aTapeHOro OTCeka. PInu 3TOM npOnyCTIne CmMMeTpnuHyIO Bn6paTopHyIO aHTehHy cKB03b He6oJbWoe OTBepCTne B OTCKe 6aTapeek.
I PIMMEYAHNA:
Korda K yctpoCTbY NOcOeINH HHyp 3JeKTPoNTaHn, nTaHne OT 6aTapeek ABTomATueckn OTKIIuOaETcR.
BHIMAHNE:
He cIeNyTe nCIOJIb3OBA Tb BMeCTe CTapbIe HHOBIIe 6aTapeKn, a TAKKe 6aTapeKn pa3JIuHbIX TINOB.
BaTapeKn HEnb3a BbI6paCbIBaT BMeCTe C npTyIMN 6bITOBbIMN OTXoAMN. Vx HyxHO cdaBA Tb B COOTBETCTByIOUne NHyKTbI NO YTNIN3aUN IN IN CBOEMY npOabu.
IPEyUPTKDEHNE:
He noDBepraTe 6aTapeKu BO3deIcTBIO BbICOKx Tempe
paTy npMbIX COJIHebIX LyueH. HnKOrJa He 6pocaiTe
6aTapeKu B OROH. OnachOCTb B3pbiBa!
44 Pycckn
3aunTHoe npncnooc6JIeHne Ira TpaHCnOpTnpOBKn,OTCEK DnKOMNAKT-DnCKOB
- OTKpoIe JIoTOK CD (3), HauKab KhoNky PUSH/OPEN (7).
- IpepeTEm, KaK NaHaTaB 3KcNpyaTaUIO yCTpoIcTBA B nepBbI pa3, cHMMTE 3aUHTHO pncnOc6NeHne C CD-nHeepa, ecIn OHO BCE eEe ectb.
TpOMKoCTb
XeIaembl ypoBeHb rpoMKoCTM MOxHO yCTaHOBnTb c nmoUbIO peryIaTopa VOLUME (4).
BbIKIOyehne
YcTpoiCTBO BbIKNIO6OaETcA,ecnI nepeKNIouateJIb FyHKU (5) nobepHyB bNoIoxKeHne AUX/OFF. OToeDInHte ycTpoiCTBOOTcTe 3JekTPOPiTuHa.
Tne3do AUX IN
IHe3IO ppeHa3HaeHO IJIa NOKIIIOHcHnIA Dpynx ayINO yCTPOINCTB. Ype3 Hero MoXHO BOCpON3BOIDITb 3BYK chee3 rPOMKOrOBOpNTeIN OT dpYnx UCTOHNKOB, TaNX KaK MP3- nleepbl, CD- nleepbl nT. d.
1.ПодключITEВHeUHHe yCTpoIcTBo,IMeIOUe pa3bEm 3,5 MM,Чepe3 rHe3do AUX (2).
2. YctahOBHTe nepeKIOUaTeIb FyHKcI (5) B noLOKeHne AUX/OFF.YCTPOINCTBO ABTOMaTNUeCKN peKIOUHTCA Ha npIeM CnHaJa C rHe3da AUX IN.PaIIOnpIeMHNK BblKIOUHTCA.
3. Yepe3 rpoMkoROBOpTeHnIeepa Bbl cMOxet npocnyuBaTb 3ByK OT BHeUHeRo NCTOuHNka; C NOMoUbOperylaToppa VOLUME (4) MoXHO MeHrTa yPoBeHrPoMkoCTN. KhoKn CD b 3tOM peKmme He fYHKUHOHpyIOT.
4. OctaIbHyIO INΦopMaUIO CM. B INHCTpyKlJx no pa6Ote C BHELIHIMN NCTOHHKAMN.
I INPIMEYAHNIA:
Otperyunpyte rpoMKoCTb BHeuHero nctouHnKa do KOMOPOPTHORO yPOBHA.
PpocnyuBHaHne paHno
- NopepnTe nepeKIOuATEIb fynKcI (5) B noJoxeHne FM.
- HactpoTecb Ha Jxenaemyu paiaocTaHcuio C nOmoUbo pyHKn HactpoKn TUNING (6).
3.Пи nIoxom pIneMe nonpo6yIte yIyIuIb erO 3a cHTn3MeHeHne nIOJoxEHn IIN CBOpauBaHNr/pa3BopauBaHNr CmMMETpUHoi BIBpaTOPHOaHTeHHbl.
Bocnpoun3BepeHne KomnakT-dnCKOB
Bocnpon3BeDHeN KOMnAkrT-dncka
1.ПовернitepepeKIOUaTeIbФункuI(5)В полженe"CD".
2. OTPoTe IToK CD (3), Haxab KhoNky PUSH/OPEN (7).
- BCTaBbTe aydno CD 3tukketoBvepx,Ha KOhyc B ceHTpe TaK, YTO6bl OH 3aUeKNHynC Hc CBOeM MeCe, NocJe Yero 3akpOte KpbIuKy OTceKa KOMnKT-DmCKOB.
- Ha dinclnee BbCBeTnTc"--" n KOJIueCTBO 3aIOnOB-KOB.HaxMnte KhoNky II(12),YTo6bl HaHaTb Bocnpo3-BeDeHne DnCKa.BocpOu3BeJeHne HauHETcC nepBoro 3aIOnOBka.Ha dinclnee 6yDet Noka3aHO Ha3BaHne TeKyuE neChn n CmBoJ
BAXKHOE PIPMEUHAR: Bocnpn3BeJeHne CD nCD-R BΦopMaTe MP3!
JaHHoe yCTPOIcTBO HE BOCPON3BOJNT MP3 paINbI. Dnck 6yDet KpyTNTbcra, Ho 3Byka He 6yDet.
- YTO6bl N3BLeyb KOMnAKT-DnCK, HaxMMTe KNONKy (11), OTKpoIte OTCEK DnRA KOMnAKT-DnCKOB, N OCTOPoXHO NOHIMMTE DnCK.
OTcEK KOMnAKT-DNCKOB CJeDyET BCERda epKaTa3aKpblbIM.
I PIMMEYAHNIA:
- EcINДИСКБынВСТАВЛЕН HeNpaBnIbHо, ИЛ ecIN B yCTPОИCTBE BOOБЧE HETДИСКа,HaДИСПЛeE BbICBETNTC RA CIMBOJ"--"и cILOBO"NO".
- PpimmeaHne:
CyIeCTByIOt pa3JIHbIe MeToIbI 3aIINcN cKATnA, a TAKKe pa3HIua B KaueCTBe MExJy ObuHbIMKOMNaKT- INCKAMN INDCKAMN, 3aIINcaHHbIMC amOCToTeJBHO.
Kpome 3TOrO, INDyCTPnA 3Byko3aIncn He npudepknBaETCA NOCToAHbIX CTaHdAPTOB (3aUHTa OT KOnnpobaHn).
IIO ATIM PnHnHAM BO3MOXHO, YTO B HEKOTOpbIX CnyaX MOYT BO3HnKaTb Ipo6JIeMbI C BOCIpOu3Be-DeHnEM DnCKOB CD. 3To He RaBnaTeC6oem B paBoTe yCTpOCTBa.
Oncanme Khoonok CD-neeepa
II(12)
C NOMOUIBIO 3TOI KHONKMOXHO IPINOCTaHABNBA Tb N BO3-06HOBJIbT BOCPON3BeDeHNE.CMBOI 一 ^ 一 6yET MIRATb Ha DCnlee. IOBTOPHoe HAXaTne 3TOI KHONK BO306HOBNT BOCPON3BeDeHne.
10/13)
PnBocnpon3BedeHnn ayDNO CD.
Ondno haxatne = Tekyuaa 3aInbc 6dyet Bocnpo3BO-dntbca nocToHHo. Ha dncnnee 6dyet BBBeDeHO REP 1.
YachToTHbIe dnaa3oHbI: YKB/FM 88~108,0 M
CneuФИKauJMA MoKET 6bITb N3MeHeHa 6e3 npEaBapNTeHb-Horo yBeDOMHeHr!
3To n3dJeHHe npoJIO BCE Heo6xOIMbIe n aKTyaJIbHbIe npOBepKn, npEtniCaHbIe DnpeKTHBOI CE, K npim. Ha 3JIeKTPomarHHTHyIO COBmecTlMOCTb I COOTBeTcTBNE Tpe6oBaHnAM K Hn3KOBoJbTHOI TexHnke, OHO bIIO TaKKe CCKOHCTpyuPobAoHO IN NOCTpOeHO C UyeTOM NocJeDHNX Tpe6oBaHn IO TexHnke Be3OnacHOCTN.