
SR 4347 - Cd player/recorder AEG - Free user manual and instructions
Find the device manual for free SR 4347 AEG in PDF.
| Product type | CD player/recorder with stereo radio |
| Brand | AEG |
| Model | SR 4347 |
| Mains power supply | 220-240 V~, 50 Hz |
| Battery power | 6 UM2/R14 batteries, 1.5 V each |
| Power consumption | 11 W |
| Net weight | 1.25 kg |
| Protection class | Class II (double insulation) |
| Radio frequency ranges | FM 88-108 MHz, AM 540-1600 kHz |
| Disc playback | CD audio, CD-R, CD-RW, CD MP3 |
| CD playback functions | Play, pause, skip, search, repeat (1, all, random), programming |
| Radio functions | FM (stereo) and AM, manual tuning, extended dipole FM antenna |
| Auxiliary input | AUX IN socket (3.5 mm jack) for external audio sources |
| Alarm function | 2 independent alarms with source selection: buzzer, radio, CD |
| Sleep function | Adjustable auto-off timer from 10 to 90 minutes |
| Clock setting | Adjustable 12/24 hour display |
| Display | LCD screen with function indicators |
| Speakers | Built-in speakers |
| Cleaning and maintenance | Wipe with a slightly damp cloth without additives, unplug before cleaning |
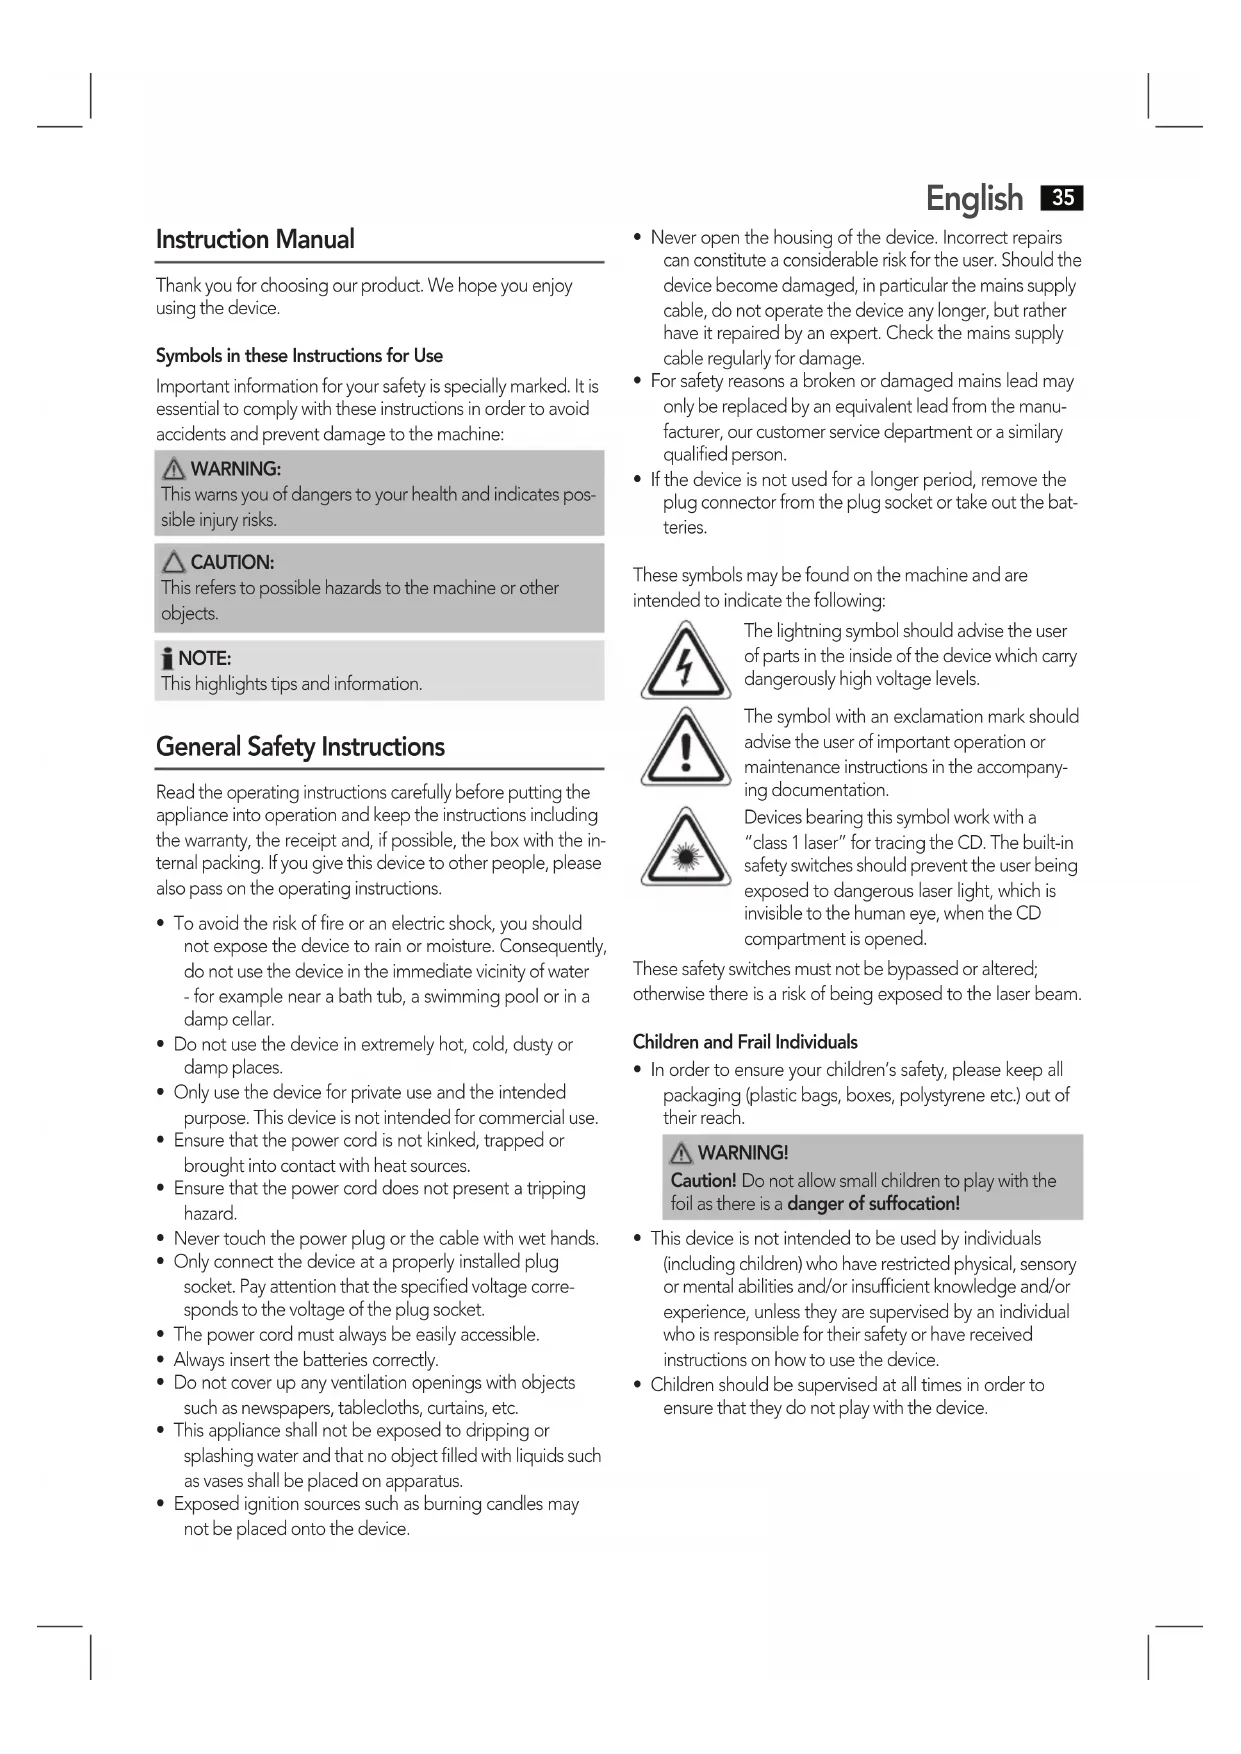
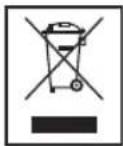
| Laser safety | Class 1 laser, do not open the housing, built-in safety switches |
| Safety symbols | Lightning bolt (internal high voltage), exclamation point (important instructions), class 1 laser symbol |
| Warranty and repairs | Repairs exclusively by the manufacturer or a qualified specialist |
Frequently Asked Questions - SR 4347 AEG
User questions about SR 4347 AEG
0 question about this device. Answer the ones you know or ask your own.
Ask a new question about this device
Download the instructions for your Cd player/recorder in PDF format for free! Find your manual SR 4347 - AEG and take your electronic device back in hand. On this page are published all the documents necessary for the use of your device. SR 4347 by AEG.
USER MANUAL SR 4347 AEG
GB Stereo radio with CD/MP3 player
Élimination. Page 22
Espanol
Indice
Overview of the Components.. Page 3
Instruction Manual.. Page 35
Technical Data.. Page 40
Disposal. Page 40
Język polski
Spistresci
TexhiHn npaMeTp.. cTOp.59
Pycckn
Copepkanne
Ob3op deTaeIe npibopa... ctp. 3
PykoBocTBo no 3Kcnnyatau.. ctp.60
TexHHuecknexapakTepncTtKn.. cTp.65
Thank you for choosing our product. We hope you enjoy using the device.
Symbols in these Instructions for Use
Important information for your safety is specially marked. It is essential to comply with these instructions in order to avoid accidents and prevent damage to the machine:
WARNING:
This warns you of dangers to your health and indicates possible injury risks.
CAUTION:
This refers to possible hazards to the machine or other objects.
NOTE:
This highlights tips and information.
General Safety Instructions
Read the operating instructions carefully before putting the appliance into operation and keep the instructions including the warranty, the receipt and, if possible, the box with the internal packing. If you give this device to other people, please also pass on the operating instructions.
- To avoid the risk of fire or an electric shock, you should not expose the device to rain or moisture. Consequently, do not use the device in the immediate vicinity of water - for example near a bath tub, a swimming pool or in a damp cellar.
- Do not use the device in extremely hot, cold, dusty or damp places.
- Only use the device for private use and the intended purpose. This device is not intended for commercial use.
- Ensure that the power cord is not kinked, trapped or brought into contact with heat sources.
- Ensure that the power cord does not present a tripping hazard.
- Never touch the power plug or the cable with wet hands.
- Only connect the device at a properly installed plug socket. Pay attention that the specified voltage corresponds to the voltage of the plug socket.
- The power cord must always be easily accessible.
Always insert the batteries correctly. - Do not cover up any ventilation openings with objects such as newspapers, tablecloths, curtains, etc.
- This appliance shall not be exposed to dripping or splashing water and that no object filled with liquids such as vases shall be placed on apparatus.
- Exposed ignition sources such as burning candles may not be placed onto the device.
English
- Never open the housing of the device. Incorrect repairs can constitute a considerable risk for the user. Should the device become damaged, in particular the mains supply cable, do not operate the device any longer, but rather have it repaired by an expert. Check the mains supply cable regularly for damage.
- For safety reasons a broken or damaged mains lead may only be replaced by an equivalent lead from the manufacturer, our customer service department or a similary qualified person.
- If the device is not used for a longer period, remove the plug connector from the plug socket or take out the batteries.
These symbols may be found on the machine and are intended to indicate the following:

The lightning symbol should advise the user of parts in the inside of the device which carry dangerously high voltage levels.

The symbol with an exclamation mark should advise the user of important operation or maintenance instructions in the accompanying documentation.

Devices bearing this symbol work with a "class 1 laser" for tracing the CD. The built-in safety switches should prevent the user being exposed to dangerous laser light, which is invisible to the human eye, when the CD compartment is opened.
These safety switches must not be bypassed or altered; otherwise there is a risk of being exposed to the laser beam.
Children and Frail Individuals
- In order to ensure your children's safety, please keep all packaging (plastic bags, boxes, polystyrene etc.) out of their reach.
WARNING!
Caution! Do not allow small children to play with the foil as there is a danger of suffocation!
- This device is not intended to be used by individuals (including children) who have restricted physical, sensory or mental abilities and/or insufficient knowledge and/or experience, unless they are supervised by an individual who is responsible for their safety or have received instructions on how to use the device.
Children should be supervised at all times in order to ensure that they do not play with the device.
36 English Special safety information
This device works with a class 1 laser.
Overview of the Components
1 Handle
2 FM Dipole antenna
3 CD compartment
4 Loudspeaker
5 Tab for opening the CD tray
6 TUNING control / Radio scale
7 button Play/Pause)
8 button (Stop)
9 MODE button (Repeat/random playback/Memory)
10 bttons (next/previousong)
11 LCD display
12 SNOOZE buttons
13 VOL+/AL 1 /VOL-/AL 2 bottons (volume/alarm time)
14 SLEEP/TIME SET button
15 BAND/ALBUM button
16 ST/FUNC button (standby/operation / operating mode)
17 AUX-IN socket
Reverse
18 AC Mains connection
Underside (not shown)
Battery compartment
Intended Use
This device is used for
The reception of radio programmers
- Playing back audio/MP3 CDs.
Sound playback from external audio sources.
It is intended exclusively for this purpose and may only be used as such.
It may only be used in the manner described in these instructions for use. The device must not be used for commercial purposes.
Any other use of this device is considered to be contrary to the intended use and may result in damage to materials or even personal injury.
The firm ETV - Elektro-Technische Vertriebsgesellschaft mbH does not accept any liability for damage caused as a result of the use of this device contrary to its intended use.
Start-up of the device/introduction
- Please read the operating instructions carefully before using the device for the first time!
- Select a suitable location for the device, such as a dry, flat, non-slip surface on which it is easy to operate the machine.
- Ensure that the device is sufficiently ventilated!
- Remove the protective film from the display if it is still present.
Power Supply
- Connect the power cable supplied (see battery compartment if necessary) to a properly installed 230V / 50Hz safety power socket and the mains connector AC on the back of the machine.
- Ensure that the voltage is the same as that indicated on the model identification plate.
Inserting the Batteries (not supplied)
- Open the lid of the battery compartment on the bottom.
- Insert 6 batteries of type UM2/R14 1.5 V. Please ensure that the polarity is correct (see the floor of the battery compartment)!
- If the device is not used for a long period of time, remove the batteries to avoid the spilling of battery acid.
- Then close the battery lid.
NOTE:
When a mains cable is connected the batteries are automatically switched off.
CAUTION:
- Different battery types or new and used batteries must not be used together.
- Batteries are not to be disposed of together with domestic wastes. Dispose of the used batteries at the relevant collection bin or at your dealer's.
WARNING:
The batteries shall not be exposed to excessive heat such as sunshine, fire or the like. Danger of explosion!
Setting the clock (during standby mode)
- Briefly hold down the SLEEP/TIME SET button (14). The display will show "24 H".
- Use the button (10) to select between 24-hour and 12-hour display setting. Confirm with SLEEP/TIME SET.
NOTE: The 12-hour setting will result in the following display
$$ A M = \text {m o r n i n g}, P M = \text {a f t e r m o n} $$
-
Use / buttons to set the hours. Confirm with SLEEP/ TIME SET.
-
Use//buttons to set the minutes.
- Press SLEEP/TIME SET again in order to save the time settings.
Transport Safety Device, CD Compartment
- Open the CD compartment (3) by pulling the lid upwards by the tab (5).
- Before operating the machine for the first time, remove the transport safety device from the CD player if it is still in place.
Volume
You can set the desired volume with the VOL+/AL 1 / VOL-/ AL 2 buttons (13).
Turning device on/ off
- Press the ST/FUNC button (16) to turn the device on.
- To turn off the device, keep the ST/FUNC pressed down. The time display will appear. Unplug the device.
NOTE:
After about 10 minute without a signal, the device will automatically switch to standby.
Listening to the Radio
- Select the radio mode with the ST/FUNC button (16). FM or AM appears in the display.
- Select the desired frequency band with the BAND/ ALBUM button (15).
$$ V H F = F M, \text {M e d i u m w a v e} = A M (M o n o) $$
- Tune in the desired station with the station adjustment knob TUNING (6).
- During FM operation, completely unwind the dipole antenna (2). Change its position to improve the reception.
- An aerial is integrated into the device for the reception of AM stations. The machine can be aligned to the station by turning it. In this frequency band programs are transmitted in "mono" only.
Playing CDs/MP3
This is how you play a CD
- Select the CD mode with the ST/FUNC button (16). The following will appear in the display "----".
- Open the CD compartment (3) by pulling the lid upwards by the tab (5).
- Insert an audio CD with the printed side facing upwards on to the central cone so that the CD clicks into place and then close the lid of the CD compartment.
- After a few seconds the total number of songs/tracks is shown in the display.
NOTE:
In the case of CDs in MP3 format the number of folders is briefly displayed at first.
- The CD will play from the first title. The elapsed play time and the message "▶" respectively "▶MP3" are shown in the display.
- In order to remove a CD, please press the button (8), open the CD compartment and lift the CD out carefully.
Always keep the CD deck closed.
NOTE:
- If a disc is inserted the wrong way around, respectively if no disc is inserted, then the message "---" will blink and "NO" appears on the display.
- Playback of CDs produced by the user cannot be guaranteed due to the large variety of software and CD media available.
Description of the CD buttons
II(7)
You can briefly interrupt and resume playback using this button. The symbol "▶" and the elapsed playtime will blink in the display. Pressing again continues playback.
11(10)
With you can jump to the next or previous track etc.
- If the button is kept pressed down, the machine starts to search through the tracks.
The button can be used as follows:
Press once = This starts the current track again from the beginning.
Press twice = This jumps back to the previous track.
Press three times= This plays the song before etc. If the button is kept pressed down, the machine starts to search through the tracks
(8)
The CD stops.
MODE (9)
- In stop mode for programming any order of tracks (see the section on "Programmed Play").
With a running audio CD or a CD in MP3 format:
Press once = (the REP emits a fixed light) the current track is repeated continuously.
Press twice = (the ALLSSBits a fixed light) the whole CD is played continuously.
Press three times = the display RAND appears in the display. All the titles are replayed consecutively in a random order.
38 English
Press four times = all functions are cancelled. The normal play mode is resumed.
Only for running CDs in the MP3 format:
Press once = the current track is repeated continuously (REP appears in the display).
Press twice = the selected folder of the MP3 CD is repeated continuously (PABUM appears in the display). Repeatedly press the BAND/ALBUM button (15) to select a folder.
Press three times = the whole CD is played continuously
Press four times = the display RAND appears in the display. All the titles are replayed consecutively in a random order.
Press five times = the function is deactivated and the CD is played in the normal mode.
ALBUM/BAND (15)
Press this button repeatedly to change a folder upwards each time. The display, e.g. F02 is briefly shown. The replay will then start automatically. If you press this button in the stop mode, you will start the replay with the▶II button (7).
SLEEP/TIME SET (14)
When the device is switched on, you can set the time after which the device will turn into standby mode; set the time in 10 minutes intervals from 90 to 10 minutes. The device will turn off automatically after the preset time.
- Keep the button pressed for ca. 3 seconds. The notification "90" will appear in the display.
- Press the button repeatedly to reduce the time in steps of 10.
To retrieve the remaining time, keep the button pressed for ca. 3 seconds.
NOTE:
The activated function is shown on the display by the "SLEEP" message.
Alarm function (in standby mode)
Setting of the Alarm
You can set two alarm times. Proceed as follows:
- Keep the VOL+/AL 1 button pressed for ca. 3 seconds. The hours of the currently set alarm time start to flash.
- Use the buttons and (10) for setting.
- Press the VOL+/AL 1 button for confirmation. The minutes start to flash.
- Use the buttons and for setting.
- Press the VOL+/AL 1 button to confirm. Then select how you want to be awakened. Select from:
BUZZ (Buzzer):
A buzzer sounds when the alarm time is reached. The buzzer interval increases from slow to fast. The volume cannot be adjusted.
FM:
As soon as your set alarm time is shown, the radio switches on. The last set station is played. The volume increases slowly to the set volume. The volume cannot be adjusted.
- dIsc (CD):
As soon as your specified alarm time has been reached, the device will start in CD mode. The inserted CD will be played starting with the first title. The volume will slowly increase to the adjusted volume.
- Now select the maximum alarm volume with the bind buttons.
- Finally, press the VOL+/AL 1 button again. The first alarm time is now activated. The adjustments are shown to you in the display successively.
To set the second alarm time, repeat the above steps with the VOL-/AL 2 button (13).
NOTE:
If the alarm time is activated, the respective symbol (or) will light up.
Turning off the Alarm
To turn off the alarm signal, press the VOL+/AL 1 or VOL-/ AL 2 button (13).
Automatic Alarm Interval
The automatically set alarm function can be shut off for approximately 9 minutes with the SNOOZE button (17).
NOTE:
The activated function is shown on the display by the "SNOOZE" message.
Deactivate the Alarm Function
To deactivate the alarm function, press the VOL+/AL 1, respectively VOL-/AL 2 button (12). The symbol "1" respectively "3" will go out.
Programmed Play
This can be used to program any desired sequence of tracks.
- Press the button (8).
- Press the MODE button (9). "P01" (Storage space) and the notification PROG will appear in the display. Use the (\text{串串串串串串串串串串串串串串串串串串串串串串串串串串串串串串串串串串串串串串串串串串串串串串串串串串串串串串串串串串串串串串串串串串串串串串串串串串串串串串串串串串串串串串串串串串串串串串串串串串串串
NOTE:
For CDs in the MP3 format, press the BAND/ALBUM button (15) to change the folder.
- Select the next track with the / buttons and press the MODE button again. Repeat the procedure until all the desired tracks are selected.
iNOTE:
Once the storage capacity of the tracks to be programmed has been reached "FULL" flashes in the display.
- Press the button (7). The playback starts. The elapsed playtime, the notification " ", respectively " MP3" and PROG will be shown in the display.
- Press once the button to stop the playback while retaining the program.
- To play the programme back again, press the button.
- To delete the program, press the button twice. The PROG control lamp goes out.
The device stops automatically after all programmed titles have been played. The indication PROG goes out and the programmed sequence is deleted from the memory.
Playing back Music in MP3 Format
With this device it is possible to play back pieces of music in MP3 format. The device also supports all standard CD types: CD, CD-RW, CD-R.
This machine of is able to play MP3 CDs. Up to 200 tracks can be compressed and stored on these CDs. Your machine detects an MP3 CD automatically (the total number of tracks and MP3s appears in the display). If you would like to play one of these CDs, proceed as described under "Playing CDs/MP3". Tracks can be programmed as described under "Playing Back Programmed Tracks".
Please note:
There are a number of different recording and compression methods, as well as quality differences between CDs and self-recorded CDs.
Furthermore, the music industry does not adhere to fixed standards (copy protection).
For these reasons it is possible that in rare cases there are problems with the playback of CDs and MP3 CDs. This is not a malfunction of the device.
AUX IN socket
To connect analogue replay devices. Via this socket you can also hear the sound of other playback devices such as MP3 players, CD players etc. through the loudspeakers.
- Please connect the external device with a 3.5mm stereo jack plug to the AUX-IN socket (17).
- Turn on the device with the ST/FUNC button (16). The device switches automatically to AUX IN operation. The radio sound will be turned off.
- You will hear the sound playback from the external device through the loudspeakers. You may adjust the volume with VOL+/AL 1 / VOL-/AL 2 (13). The CD buttons are not functional.
- For the remaining procedure please see the operating instructions of the external sound source.
NOTE:
Adjust the volume of the external device to a comfortable level.
Cleaning and Maintenance
Always remove the mains plug before cleaning the machine.
- Any marks on the surface can be wiped off with a slightly damp cloth without any additives.
Troubleshooting
| Symptoms Course Solution | ||
| CD can not be played back. | CD is not inserted or inserted incorrectly. | Ensure that the disc is inserted with the label facing upwards. |
| Batteries too weak. | Insert new batteries or operate the device with the mains lead. | |
| CD jumps dur-ing playback. | Check the disc for fingerprints, dirt or scratches. | Check the disc for fingerprints, dirt or scratches. |
| Device cannot be operated. | Device crashes and "hangs". | Disconnect the power supply for 5 sec. Then switch the device on again. |
40 English Technical Data
Model: SR 4347 CD/MP3
Power supply: 220-240 V~50 Hz
Battery operation: .6 x 1.5 V, Type UM2/R 14
Power consumption: 11 W
Protection class:
Net weight: 1.25 kg
Radio section:
Frequency ranges: VHF/FM 88 ~ 108.0 MHz
...MW/AM 540~1600 KHz
The right to make technical and design modifications in the course of continuous product development remains reserved.
This device has been tested according to all relevant current CE guidelines, such as electromagnetic compatibility and low voltage directives, and has been constructed in accordance with the latest safety regulations.
Disposal
Meaning of the "Dustbin" Symbol
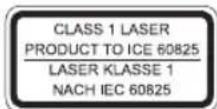
Protect our environment: do not dispose of electrical equipment in the domestic waste.
Please return any electrical equipment that you will no longer use to the collection points provided for their disposal.
This helps avoid the potential effects of incorrect disposal on the environment and human health.
This will contribute to the recycling and other forms of reutilisation of electrical and electronic equipment.
Information concerning where the equipment can be disposed of can be obtained from your local authority.
Instrukcja obslugi
CTC Clatronic Sp. z o.o
He Do3B0JIaIe MaIIM dITHM rpaTncb i3 nIIBKOIO. IcHyc 3arpo3a 3adyxN!
Ley npnlaH ne npn3haeHm dIy BnKOpCTaHHnIObMn (BKNIOUHOuO nTei) 3 OMeXeHMMn fI3NcHMM,UYTBeHMn a6o po3yMOBIMn 3dIOHOCTaHm, HeIOCTaTHIMdoCBIDom Ta/a6o 3HaHAMn - Kpim BNpaKIB, KOJI 3aHMMn DOrJaAe BiNDIaJbHa 3a ix 6e3neky oO6a a60BOHN OTPMaJIIN BkazIBKn IooDn BnKOpCTaHHn npnlaNy.
-ITAM He I03BOJIeHO rpaTncb 3 cIIM npuJaIOM. IOTpiBcH DoJIaI 3a HIMN.
CneuaIbHi Bka3iBKn 7oDo 6e3neKn
Ley npnilad npaloe 3 naepom knacy 1.
Orlae eIemEnTb ynpabliHn
1 Puyka
2ДиюьнFaM-aHTeHa
3BjinnoknKOMnakT-dnckIB
4 TuyHOMOBeUb
5ΦikcaTop,Yepe3ЯknMOKHaBjIKpTNJIoTOKДКOMnKaT-DnCKiB
6 PernyarTop noukyx bInb TUNING / Lka npaiaocTaHui
7 KhoNka II (BjIDTBOpOBaHHn/Nay3a)
8 KhoNka (3ynnHeHHa)
9 KhoNka MODE (IOBTOpeHHra/BiTbOpeHHra y BuNaKOBOMy npaIKy/naM'ATb)
10 KhoNKnHnHa(hacTynHa/NopeepnKaKmno3uijia
11 LCD-ducnnei
12 KhojnsNOOZE
13 KhoNknu VOL+/AL 1/VOL-/AL 2 (ryuHicTB/yac 6yduNbHnka)
14 Khoonka SLEEP/TIME SET
15 Khonka BAND/ALBUM
16 KhoIka ST/FUNC (peXIM OChyBaHHa/po60ta/po6OuH peXIM)
17 PO3EM AUX-IN
3BopoTHa cToPOHa
IChye dyxke 6araTO cnOCOIB BnROTOBJeHHRA KOMNaKT DNCKIB i3aHcy IHOpMaJI, KpIM UbO, AKICTb OKPemNX KOMNaKT DNc-KIB dyxpeo3pi3HIOETbc.
My3nHa iNcyTpiH He MaE eDHHx CTAHApTIB (3axnCT BID KONIOBAHH).
3 liu x i nd a B OKpeMnx BNnAdkax MOkyTB BNHNKHyT npo6IeM 3 nporpaBaan KOMnak T nckib CDs i MP3. LHe e HeDolikom npnaNy.
P03'EMAUX-IN
IiKIOeHn aHAnorOBnx 3ByKOiTBPIOBaJIbHnx npnaJib. Ype3 ue Hiz3do Bu moKeTe cnyxatn ype3 dHaMikn 3Byk IHux 3ByKOiTBPIOBaJIbHnx npnaJib TNY nporpaBauib MP3, nporpaBaHb KOMnakT DnCKIB CD Ta IHnx.
1.Плкlioчызвуковідтборювальни рплада 3a домоностеpeофониогошт ekepа 3,5 MMdo rhiizda AUXIN (17).
2. YbIMKHyTb npncTpi KhoNko ST/FUNC (16).PpnaIabTOMaTuHO nepeKIOuHTbcB pexM AUX IN.3Bykpaio BUMKHETcA.
3. 3Byk i3 30BHIshhboro npictpo BIDTBOPOBaTMMeTbcrYepe3 rYHOMOBU. IyHnicb MoXHa HalaWtYBaTN 3aDonomoroKhoNOK VOL+/AL 1/VOL-/AL 2(13).KHOKNHa nporpaBAki KOMnAKT-dnCKIB He npaIOIb.
4. Iopaihui iHCTpykui Bm moKeTe OTPMaTu 3 iHCTpykui 0cbnyrobyaHHnI npuaJiB, Aki Bu nikKIOHaete.
IPIIMITKA.
IocTaBTe peryIaTOp rYHOCti nIKKIOHeHO npIaNy Ha pBeHb, Ioo E pIeEMHM dIra cIyXaHHA.
OuHHe iTexHie He 6cIyroByBaHH
- Ppe, OunuEHHa n npuaNy BuTnHtB BuNky 3 po3eTKn eKeTpnuHoi Mepexi.
ПламиHa nobepxHIpnlaMoxHa BnДaNITN3JIeKABONTOIO TkaHNOHO,6e3doTaKOBnx MInOHux 3acO6iB.
YcyHeHH HeCnpaBHOcte
Diana0HyacToT:YKX/ΦM 88~108,0 M
CXM540\~1600K
IpaBO HaTexHi3MiHn Ta 3MiHn yDn3aHi 36epiraetbca npoDBK pOUCy po3pO6Kn npOdykTy.
Ley npnad 6yno nepeBipeno 3riDnBO Cix BiinobiHnx, aKtyaIbHnx DInpeKTNB CE, HapnPKlaD IIO DO eNEKTPomarHITHOcymichoTa HN3bKOBJTHOI DInpeKTNB,Ta 36ydoBaHO 3 a HOBITIMN NOJoxEHAMM TexHKn Be3neKn.
PykoBoDcTBO no 3KcPnyaTuIN
Cnacnbo 3a Bb6op Hauero npoynkta. Haneemc, OH Bam nHpaBNTc.
CIMBOJII pRIMHeMbIe B DaHHOM pyKOBoDCTBE NOJIb-3OBaTeJRA
BaxhIbe peKoMeHdaaIINI IIO oecneueHnBaIeI 6e3OanacHOCTN Oo3HaueHbI NIO ocOBeHHOMy.ObraTeIbHo CJeDyITe 3TNIM peKoMeHdaaIAM, YTObI PpeOTbPaTb HeCAcTHbI CNyau INI NOLOMKy IN3dJIIN:

IPEYIPPEXDEHNE:
peIpypexJaetO6 ONaCHocTIN DnIa 3IOPOBbN BO3MOXHOM pIcKe IOnyHeHr TpaBMbl.

BHIMMAHINE:
Yka3bIbaeT Ha BO3MOxHyIO ONaCHOCTb,IINI3JeJIIMN IpyrNX OKpyXKaIOUnx PpeMeTOB.

TPIMEYAHN:
JaetcoBebtunHOpMaIIO.
KordaIpoDKJIIOHEnUHypceTeBOrO nHTaHnI,6aTapeKn ABTOMaTHHeCKNOTKJIIOUaOTCn.
BHIMAHNE:
He nCnoIb3yIte CoBMeCTHO 6aTapeKn pa3HbIX TINOB, IIO6 CTapBle N HOBIE 6aTapeKn.
He BbIpaCbIbAaTe 6BaTapeKn BMeCTe C bItOBbIMN OTxOaAMn. IoxaanyIcTa, OTHeCnTe NcNoJIb3OBAHHbIe 6BaTapeKn B COOTBeTCTByIOUm KOHTeHep C6opa UIN o6paTHo PO3HNUHOMy PpOdABuY.
62
Pycckn

IPEYIPPEKDEHNE:
He noDBepraTe 6aTapeKn BO3DeICTBNO MOUHO NCTOHNKa TEnla, HApIMeP IpAMoR OJIHeHOrO CBeta, ORHa IIN aHaONrUHOrO. CyIeCTByET pNk B3pbBa!
HacpoKa yacob (BpeKmE OknDaHn)
- Haxmte KhoNky SLEEP/TIME SET (14) Ha nncnnee noBntcra 24H
- VcnoJb3yIte KHOHKnK110)Ia InepeKJIIOUeHIM MEXdy pexiMAMn BpemEHN 24-Haca n 12-HacOB. PoIb- TBepDITe C NOMOsbIO SLEEP/TIME SET.
I IINMEUAHNA: Pn 12-uaOBom pexmbe BpeMa 6ydt nokazHO cneDyIOuM o6pa3OM: AM = ytpo,PM = noCne noLynd.
3.ИспόньуITE KНОПКИТАЯ yctановки уа ca.ПдТВерДИТЕ C NOMOПБО SLEEP/TIME SET.
4. VcnoJIb3yIte KHOIIKINHJIA yCTaHOBKN MHHY.T
5. HaxmTe SLEEP/TIME SET cHObaIra coXpaHeHH npaMeTpOB yCTaHOBKn BpeMeHN.
3aunTHoe TpaHcnpTHoe npncnoc6JeHne, oTceK nckOB CD
- OTkpOte IOTOKДЯ KOMNaKT-DNcKa (3), NToTHyB KpbIiK Ky BBepx B MecTe ΦNKCuPyIOUeRo MexaHn3Ma (5).
- PpeepnepBOHaaybHbIM nCpONb3OBAHNem np6opa ydaJIte 3aUHTHOe TpaHCnOpTHoe npncnoc6JeHne u3 pHeepa CD,ecn taKoe npncnoc6JeHne IMeETc.
PpMkoctb
BbIMoKeTe HAcTpOntb KeJaembI yPoBeHb rPOMKocTN KhONkAmVOL+/AL 1/VOL-/AL (13).
BkIOeHMe/BbIKIOeHMe np60pa
HaxmTe KhoNky ST/FUNC (16)Дп BAKIOHeHЯ yCTpoI-CTBa
-Дя BBKIOUeHn yCTpoiCTBa, yIepKINbaTe KHOKNy ST/ FUNC haxaToI. IIOBNTcN uNdkaun BpeMeHN. OTKIOHTe yCTpoiCTBO OT CETN.

IPIMEMAHNIA:
PpIMepHOnepe3 10MnHyT 6e3 CnHaJyCtPoIcTBO aBTOMaTHueCKN peKJIIOHUYTBcB YdExyPhbI pEXHM.
PpocnyuBbHne paHonepepa
- Bb6epnte pexkim paIIO c nOmoIbHO KHOIIK ST/FUNC (16). 3HaOK FM IIM AM IORBNTCR Ha 3KpaHe.
- BbIepeNTe JeJaembl yactOTHbI dHaan3OH c nOMouBo KhoNkBAND/ALBUM (15).
$$ Y K B = F M, C p e _ {D H N E} B O J L H b l = A M (M O H O) $$
- HacptpoTecb Ha HyxHyio paIIOCTaHcIIO KpyrIIO peYI npOBouHOH pyKoTUNING (6).
4.Пи pa6OTe FM,нлHoCTbHbBbIbHbTe aHTeHHy-DnIOJIb (2).ИзMeHЯITE ee npocTpaHCTBeHHoe nIoXeHne dIy yIyUHeHЯ npEma.
5. BCTpoEHHaB YcTPOIcTBO aHTeHb cIyXt dIa IpiEma paIOocTaUAM. IpN6Op MoKHO hAcTPOITb Ha CTaH zu 3a CHT nobopoTA. B 3OM TactOTHom dIana3oHe paIOnpOrpAmMbI nepeJaOTc TOnbKO B MOHOHueckom peKIMe.
Bocnpon3BeJeHne nckOB CD/MP3
Cnoc6Bocpnom3BeDnnaDC
- BbIepeTe peKIM CD c nOMouBIO KHOKN ST/FUNC (16). Ha ekpaHé 6yIeT OTo6paxaTbC aCneDyUouee: -- -
- OTKpoIe IOTOK dIy KOMnAaT-DmCKa (3), NToAHyB KpbIuKy BBepx B MecTe DnKcpyIOUeero MexaHn3Ma (5).
- BctabTe Dnck Audio CD neaTHoN CTOPHOH BBepx Ha UeHTpaJIbHbI KOHC TAK, YTO6bl DnCK CD 3aUeJIKNHJIC HA MeCTe, 3aTEM 3akpoTKe KpbIuKy OTcKa CD.
4.CnCTHeckoJIbKOceKHyIHaIINcPiJe6yJETNOKa3aHO 06Uee KOJIYHeCTBO neCEH/3aIInCeI.

ПРIMEЧАЙ:
B cIyuae IINCKOB CD fOpMaTa MP3 ChaHaJa KpaTkoBpeMeHHO OTo6paxaetc8 o6Uee YnCIO nAnOK.
5.ДСКCD6yETBOCpOIN3BOIDITbCnepB0N3aPNCn.IpoUeIuue BpeMBAocpOIN3BeDEnHnCOoBSeHne“coOTBeTCTBeHHoMP3"OTo6paKaetcHaekpa-He.
6. TTo6bI n3BLeHb DnCK CD, IoxKaJIyIcTa, HaxMNTe KlaBnU 18), OTKpoIte OTceK CD u AkkypaTHo NODHMNTe BBepx DnCK CD.
Bcerda depxnte 3akpbTOn naheIb CD.

IPYIMEYAHN:
- EcIN DnCK BCTaBHeH HnnpabInbHO nIN DnCK OTCyTCTByET B IOTKe, BydET OTobpaKaTbcN MmraOuIe coO6UHeH, COOTBeTcTBeHHo, "----" n "NO" Ha 3kpaHe.
- N3-3a orpomHoro YnCna pa3nHoro nporpaMMHoro oecneeyHn IOCTynbIX HOCHTeNe (NCTbIX DcKOB CD) He rapaHTnpyETcB OBCPON3BeDeHne DnCKOB CD, 3anncahhbx cammIM nOlb3ObateJem.
Onncahne KhONOKdA CD
II(7)
MoXHO KpaTkoBpeMeHHO npepBaTb N BO3o6HOBHTb BOCnpoun3BeHHe C nOMoUb 3ToI KNOpKn. CmB0J" "n IpOeJeWe Bpem Bocpon3BeHn6yDet MmraTb Ha 3KpaHe. HaxMnte ChOba, YTO6bl PNOJKNtB Bocpon3BeHne.
(10)
C NOMOUsbIO MOKHO nepeTn Ha CneIyIOUIO UIN PpeDbI DUYUO 3aIINCb I T.D.
- Ecni ydepkmbaTb KHONky HaxkaToi, npnbop hauHET noNCK NO 3aIINCAM.
KhonkaMicnoJb3yeTc Ta:
OndokpatHoe HkaTne = ChOba 3anyckaet c Hauana TekyLiyIO 3aNtCb.
ДвйhoeнжаTNe =перхoДнaЗадКпpeьdnyшЕ 3aПИСN.
Haxkatae Tpu p3a = Bocnpoun3BeDHeNpeBdyUsei 3anncnT.D.EcnjKe KhoNka ydepKnaBaetcHaxaToi, np6op HauHnaet nonck no 3annam.
(8)
OctaHabJInBaetDnck CD.
MODE (9)
Bpekme octaHOBKn CnyKNT IJN pIporpamMPOBaHnB OBCPOn3BeDeHn 3aIncE B JIObOM NopRJaKe (CM. pa3- DeI "PiOpaMMPOBaHHoe BOCpOn3BeHeHne").
Cpa6oTaHouMCDnNCDBMP3ΦopMaTe:
OndokpatHoe haxaTne = (noCToHHo rOpNTREP) Henpe- pbIBHO BOCPON3BOIDTC8 TeKUa3aPiNCb.
Довиhoeнжатne = (noctoHNO roPAT ALpE- npepbIBHO BOCPON3BOJNTCBAecb Dnck CD.
HaKmTe Tpu p3a = INHikauRANrnoBtcaHa 3kpaHe.Bce TpeKn Bocnpo3BO- TaTcNoCneDoBaTeIbHO B npo13- BOJbHOMnopAKe.
Haxkmnte yeTbipe pa3a = BCE cyHKmIOTMeHnTcR.Bo3- 06HOBnAETcR O6bHbIpeKIM BOCnpOIN3BeDeHnA.
ToIbKO dIa CD bΦopMaTe MP3:
OndhokpatoHoe hkaTne = HnpepbIBHO BOCPON3BOJNTcra Tekyuaa 3anncb (Ha dncnnee noKa3aHO
Двоьhoe haxatne = He npepbIBHO BOCPON3BOJNTcBb6paHnA npanka Ha nucke MP3CD (Ha nCnnee noKa3aHo<REPALBUM).Heckonbko pa3 NaKmTe KhoNky BAND/ALBUM (15)ДЯBb6opa nankn.
Haxatne Tpu p3a = HenpepbIBHO BOCnpOn3BODnTCBecb Nsck CD (Ha nncnnee noKa3aHoRAL).
HaxMMTe yeTbipe pa3a = BCE cyHKmIOTMeHraOTc.Bo3- 06HOBnAETcObHbIpeKIM BOCpON3BeDeHnA.
HaxmTe pTb pa3 = yHKnJy DeakTNBnpyeTcN nDnCK CD BocnpoIN3BOIDITcR B O6bIuHOM peKIme.
ALBUM/BAND (15)
HeckoIbKO pa3 hXaMmTE 3Ty KHOKNy IJIa CMeHb IaNKn BBepx no nepapxn. 3KpaH, T.e.F02 noka3bIbaeTcKpAToK. NOBTOP
HaHHeTcA BtOMaTmUeCKn.ECInBbI HaxMeTe 3Ty KHOKNy BpeKIMe OCTaHOBKn, NOBTOp HaHHeTc KHOIKoNII (7).
SLEEP/TIME SET (14)
Korda yctpoiCTBO BKJIOUeHO, Bbl MOKeTe yCTaHOBHTb BpEMn, nocne KOTOPoY yCTpoiCTBO nepeJeT B pexIM OxuJaHn; yCTaHOBITE BpEMn C 10-MNHyTHbIM INTEpBaIOM OT 90 do 10 MInHyT. YCTPOICTBO BBKJIIOHHTcABTOMaTIueCKn Nocne TOrO, kak HAcTyIIT 3aDaHHoe BpEMn.
- YdepXnBaIte KhoNky HaxaToI npMepHO 3 cekyHdbi. INdkaun "90" noBNTca Ha 3kpaHe.
2.Последоватьногжима Te KHONkyДЯУMeHbWeHnIперюс с warom 10.
HANOMHHNIOCTABUEROCBpeMeHNyepKNAHTe KHOKNKY HAKATOINpIMepHO 3cekyHbl.
IINPIMEYAHNE:
AknBupoBaHHa yHKun OTo6paKaeTcHa 3KpaHe c nOMOu bcoooHn "SLEEP".
IotppeBnHemaMMOUHOCTb: 11BT
Klacc 3aunTbI:
Bec HETTO: 1,25 kr
BbIbop paIIOCTaHcIM.
YKBAFM88\~108,0MgC5B/AM540\~1600K
CoxpaHeNo npaBo Ha TexHnueckne N KOHCTpyKluHOHHbIe N3MeHeHnB pAMkax npoDoJIkaUoIeNc pa3pa6OtKn npOdyK-Ta.
Данhoe yctpoCTBO COOTBeTCTByET BcEM TEKUIMДИPEKТиВAM CE,ТakIMΚAK элКТРOMaRHTHЯ COBMECTMOCtB ИНЗКоE HaPRAKeHHe;ОHO ПОП3BedeHOB CootBTCTBnC HOBEIMIMIпapBnAmI TExNkIb63ONaCHOCTN.
GARANTIE-KARTE

- Espanol
- Indice
- Język polski
- Spistresci
- Pycckn
- Copepkanne
- Symbols in these Instructions for Use
- WARNING:
- CAUTION:
- NOTE:
- General Safety Instructions
- English
- Children and Frail Individuals
- WARNING!
- English Special safety information
- Overview of the Components
- Reverse
- Intended Use
- Start-up of the device/introduction
- Power Supply
- Inserting the Batteries (not supplied)
- Setting the clock (during standby mode)
- Transport Safety Device, CD Compartment
- Volume
- Turning device on/ off
- Listening to the Radio
- Playing CDs/MP3
- This is how you play a CD
- Description of the CD buttons
- II(7)
- 11(10)
- (8)
- MODE (9)
- English
- ALBUM/BAND (15)
- SLEEP/TIME SET (14)
- Alarm function (in standby mode)
- Setting of the Alarm
- Turning off the Alarm
- Automatic Alarm Interval
- Deactivate the Alarm Function
- Programmed Play
- iNOTE:
- Playing back Music in MP3 Format
- Please note:
- AUX IN socket
- Cleaning and Maintenance
- Troubleshooting
- English Technical Data
- Disposal
- Meaning of the "Dustbin" Symbol
- Instrukcja obslugi
- CneuaIbHi Bka3iBKn 7oDo 6e3neKn
- Orlae eIemEnTb ynpabliHn
- 3BopoTHa cToPOHa
- P03'EMAUX-IN
- IPIIMITKA.
- OuHHe iTexHie He 6cIyroByBaHH
- YcyHeHH HeCnpaBHOcte
- PykoBoDcTBO no 3KcPnyaTuIN
- CIMBOJII pRIMHeMbIe B DaHHOM pyKOBoDCTBE NOJIb-3OBaTeJRA
- IPEYIPPEXDEHNE:
- BHIMMAHINE:
- TPIMEYAHN:
- BHIMAHNE:
- IPEYIPPEKDEHNE:
- HacpoKa yacob (BpeKmE OknDaHn)
- 3aunTHoe TpaHcnpTHoe npncnoc6JeHne, oTceK nckOB CD
- PpMkoctb
- BkIOeHMe/BbIKIOeHMe np60pa
- IPIMEMAHNIA:
- PpocnyuBbHne paHonepepa
- Bocnpon3BeJeHne nckOB CD/MP3
- Cnoc6Bocpnom3BeDnnaDC
- ПРIMEЧАЙ:
- IPYIMEYAHN:
- Onncahne KhONOKdA CD
- (10)
- IINPIMEYAHNE:
- GARANTIE-KARTE
Brand : AEG
Model : SR 4347
Category : Cd player/recorder