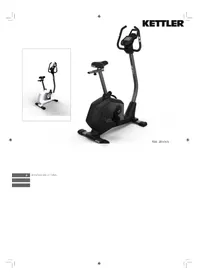
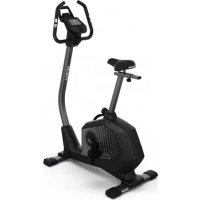
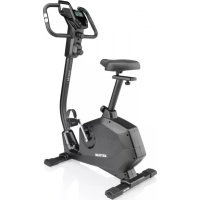
USER MANUAL Situs Cross 3+ Vélo elliptique KETTLER
BMR-FAT-BMI-PROGRAM,
Please observe the following instructions for your own safety:
For Your Safety:
- Before starting the training, check with your GP that you are fit for training with this device. The doctor's findings should form the basis for the setup of your training programme. Incorrect or excessive training may damage your health.
- Systems to monitor your heart rate can be imprecise. Excessive training may result in serious damage to your health or death. Should you feel dizzy or weak, stop the training immediately.
Switching on the unit
After switching on the unit by pressing a key or by pedalling, you hear 3 beeps and all display segments lighten up for 3 seconds.
Press QUICK START.
Note: If training stops for 4 minutes and if no data have been entered, the sleep mode is being activated. This sleep mode can be ended by pedalling or by pressing any key.
Interruption
Training can be interrupted by briefly pressing the RESET key. The training mode is continued by pressing the RESET key again.

Training and Operating Instructions
Choosing a training session
After the unit has been switched on, you have 9 program keys available to select a training session. Information is shown as ticker text on the display.
9 different training programs are available:
QUICK START
RPM PROGRAM,
MANUAL PROGRAM,
HRC PROGRAM,
USER PROGRAM,
INTERVALL PROGRAM,
CLIMBING PROGRAM
TEST PROGRAM,
BMR-FAT-BMI-PROGRAM,
Then the text area indicates either, that you have to pedal or that further data may be entered. Displayed text depends on the program chosen.
Main functions
| Key function | Description |
| MODE | Input of desired parameters
By pressing this key the next option may light up, if applicable. |
| RESET | Interruption and continuation of training session.
Return to your previous entry in data input
Restart of display by prolonged pressing of key (3 seconds) |
| Control knob
MINUS (-) | Turn anti-clockwise to lower the value of the selected training parameters: TIME, DISTANCE ... etc. |
| Control knob
PLUS (+) | Turn clockwise to raise the value of the selected training parameter. |
| QUICK START
RPM PROGRAM, MANUAL PROGRAM, HRC PROGRAM, USER PROGRAM, INTERVAL PROGRAM, CLIMBING PROGRAM, TEST PROGRAM, BMR-FAT-BMI-PROGRAM | Raising the value of the selected training parameter: |
| RECOVERY | Raising the resistance during the training. |
Entering training parameters
With exception of the rapid start program, parameters for the following values may be entered:
TIME, DISTANCE, ENERGY CONSUMPTION, RESISTANCE DEGREE, HEARTBEAT RATE
Note: Some parameters cannot be changed in certain programs.
Press the MODE key after you have chosen a program. The text area shows "SELECT TIME" for 3 seconds, then "PRESS MODE TO ACCEPT". At the same time the message "0:00" shows that time can be altered.
With the control knob, you enter the training time. Press MODE key to confirm the value. This causes the next possible value to blink. When you have completed entering training parameters, the text field shows "START PEDALING". You can now commence with your training.
| More information on Training Parameters |
| Field | Display range | Preset value | Increase/decrease values | Description |
| Time | 0:00 – 99:00 | 00:00 | +/- 1:00 | 1. When 0:00 is displayed, time values increase.
2. If a time span from 10:00-99:00 is displayed, time values decrease and stop at 0. |
| Distance | 0,00 – 99,90 | 0,00 | +/- 0,10 | 1. When 0:00 is displayed the distance counter runs upwards.
2. If a distance of 0.1~99.90 is shown it decreases and stops at 0. |
| kilojoules | 0 – 9995 | 0,0 | +/- 5 | 1. If 0:00 is displayed, the counter for KILO-JOULE runs upwards.
2. When a kilojoule value of 5 ~ 9995 is displayed, it will be counted down 0th |
| activity | 20 – 320 | 20/100 | +/- 5 | The type value can only be set in the RPM / testing program. |
| pulse | 40 – 220 | 90 | +/- 1 | If the heart rate is outside the specified range, the user is warned. |
QUICK START (Quick start program)
Press the QUICK START key after switching the unit on and start to pedal in order to start this program immediately and to commence with the training. Use the PLUS and MINUS control knob to adapt the resistance during training.
RPM-PROGRAM (Pedal frequency program)
Press the RPM PROGRAM key and then the MODE key. The text area displays "SELECT ACTIVITY" for 3 seconds, and the number "20" blinks. An activity value starting at 20 can be chosen using the PLUS and MINUS control knob and be confirmed with the MODE key.
Activity value 20 = lowest intensity
Activity value 320 = highest intensity
The first entry "Time" begins to blink and can be set with the PLUS and MINUS control knob. Press the MODE key to save this value, and continue with the next entries. Enter the desired values and start to pedal to start with the training. Use the PLUS and MINUS control knob to adapt the activity value during the training.
Training and Operating Instructions
MANUAL PROGRAM
Enter parameters for the manual program
Press the Manual Program key and thereafter the MODE key. The first entry "Time" begins to blink and can be adjusted with the PLUS and MINUS control knob. Press the MODE key to save the parameter, then continue with the next entries. Enter the desired values and start to pedal to begin with your training.
HRC PROGRAM (Target heart rate program)
Enter the parameters for the target heart rate program Press the key HRC Program and then the MODE-key. The first entry "TIME" begins to blink and can be adjusted with the PLUS and MINUS control knob. Press the MODE key to save the value, continue with the next entries right up to the target heart rate. Set the required values and start to pedal to commence with the training.
If the heart rate is above or below the target, the resistance is adapted automatically.
Heart rate is checked every 10 seconds and the resistance is accordingly raised or lowered.
(N.B.: If the computer does not get any heart rate information during training, the actual resistance level is maintained for 60 seconds.)
The resistance cannot be adapted with the PLUS and MINUS control knob during the training.
USER PROGRAM (Individual program)
The "individual program" enables the user to create their own profile which may be used for the following training sessions.
Entering parameters for the individual program
Press the USER PROGRAM key and then the MODE key. The text area displays "SELECT PROFILE" for the next 4 seconds, during which segment 1 keeps blinking. Use the PLUS and MINUS control knob to set the desired resistance. Press the MODE key to jump to the next segment and repeat this step for all 10 segments.
Set the required values and start to pedal to commence with the training.
Note: The last set profile with 10 determined segments is being saved for following training sessions.
INTERVAL PROGRAM
Entering Parameters for the Interval Program
Press the key INTERVAL PROGRAM and then the MODE key. The text area displays "SELECT PROFILE".
3 intervals with different resistance values (L1, L2 or L3) can be selected using the PLUS and MINUS control knob and confirmed with the MODE key.
Set the required values and start to pedal to commence with the training.
The resistance cannot be adapted with the PLUS and MINUS control knob during the training.
CLIMBING PROGRAM (Mountain program)
Entering Parameters for the mountain program
Press the CLIMBING PROGRAM key and then the MODE key. The text area displays "SELECT PROFILE".
3 intervals with different resistance values (L1, L2 or L3) can be selected using the PLUS and MINUS control knob and confirmed with the MODE key. Set the required values and start to pedal to commence with the training.
The resistance cannot be adapted with the PLUS and MINUS control knob during the training.
TEST PROGRAM
Press the TEST PROGRAM key and then the MODE key. The screen shows the average speed, the total distance, the total sum of burnt calories expressed in kilojoules and the average heart rate of the last training session for a period of 3 seconds.
The text area displays "SELECT ACTIVITY" for a period of 3 seconds whereby the value 100 blinks.
With the PLUS and MINUS control knob, a value starting at 100 can be selected and then be confirmed with the MODE key.
The time display shows 12:00 and cannot be changed.
After 12 minutes the monitor shows the average speed, the total distance and the total sum of burnt calories expressed in kilojoules and the average heart rate.
BMR, fat, BMI measurement
Entering the values for the measurement
Press the key BMR-FAT-BMI-PROGRAM and then the MODE key.
The text area displays "SELECT AGE" for a period of 3 seconds whereby the value 30 blinks, indicating that the age can be altered with the PLUS and MINUS control knob. Press the MODE key to save the value and continue with the next entry
The text area displays "SELECT GENDER" for a period of 3 seconds whereby the Symbol "♂" blinks, indicating that the gender can be altered with the PLUS and MINUS control knob. Press the MODE key to save the gender and continue with the next entry.
The text area displays "SELECT WEIGHT" for a period of 3 seconds, whereby the number "75" blinks, indicating that the weight can be altered with the PLUS and MINUS control knob. Press the MODE key to save the weight and continue with the next entry.
The text area displays "SELECT SIZE" for a period of 3 seconds, whereby the number "175" blinks, indicating that the size can be altered with the PLUS and MINUS control knob. Press the MODE key confirm the value.
The text area displays "TOUCH HANDPULSE SENSOR" for a period of 3 seconds. Press the MODE key and grasp the manual heart rate sensors to commence with the measurement.
The text area displays "MEASUREMENT".
After the measurement the body fat content is displayed in % and the BMI and BMR are displayed.
(The display alternates every 4 seconds between body fat content in % , BMI and BMR.)
RECOVERY (Recovery heart rate measurement)
Press the RECOVERY key. Thus the measurement of the heart rate recovery is started after or during training.
After 1 minute the display shows the level of recovery. There are levels F1-F6, whereas F1 is the best and F6 is the worst.
Activation of the device
If you activate the device, a signal is emitted during the segment test.
Presetting
A short signal is emitted, if you reach a presetting like time, distance and KJoule/kcal.
Exceeding of maximum pulse
If the set maximum pulse is exceeded by one pulse beat, two short signals are emitted for the time of exceedance.
Calculation of fitness score
The computer calculates and assess the difference between the training and recovery heart rate and the resulting "fitness score" according to the following formula:
$$
\operatorname {S c o r e} (F) = 6 - \left(1 0 x (\frac {P 1}{P 1} - P 2)\right) ^ {2}
$$
P1 = Training pulse
P2 = Recovery pulse
Score 1 = very good
Score 6 = poor
A comparison of the training and recovery heart rate is a quick and easy way in which to determine physical fitness. The fitness score is an orientation value to assess your recovering ability after physical exercise. Before pressing the recovery heart rate button and determining your fitness score, you should train at your own level of intensity for a significant period of time e.g. 10 minutes. For regular cardiovascular training you will discover that your "fitness score" improves.
Possibilities for Pulse Measurement
The pulse measurement starts as soon as the heart in the display blinks in time with your pulse beat.
With hand pulse
An extra-low voltage caused by the contractions of your heart is registered by the hand sensors and evaluated by the electronics assembly of the device.
Always grab the contact faces with both hands.
- Avoid jerky grasping.
- Hold your hands calmly and avoid contractions and rubbing on the contact faces.
Faults in the Training Computer
If the computer display is not functioning correctly, please remove the power supply and switch off the machine.
For Your Safety:
Before beginning your program of exercise, consult your doctor to ensure that you are fit enough to use the equipment. Base your program of exercise on the advice given by your doctor. Incorrect or excessive exercise may damage your health.
Training Instructions
This device has particularly been designed and developed for leisure time sportsmen. It is excellently suited for cardiovascular training.
The training methodically has to be organised on the principles of stamina training. This will predominantly cause changes and adaptations of the cardiovascular system. This includes the reduction of the resting pulse frequency and of the load pulse.
This gives the heart more time for filling the ventricles and for the blood circulation of the cardiac musculature (through the coronary vessels). Moreover, depth of breathing and the volume of air that can be breathed in (vital capacity) are increased. Further positive changes take place in the metabolic system. In order to achieve these positive changes, the training has to be planned according to certain guidelines.
Planning and control of your training
The basis for your training planning is your current physical fitness condition. Your family doctor can diagnose your personal fitness by means of an exercise tolerance test, which will constitute the basis for your training planning. If you have not undergone an exercise tolerance test, high training exertion and/or overtraining must be avoided in all cases. The following rule should be considered in your planning: stamina training is controlled via the scope of exertion as well as via the level / intensity of exertion.
Regarding exertion intensity
The intensity of exertion should preferably be checked in your fitness training via your heart's pulse rate. The maximum heart rate per minute of >220 minus age must not be exceeded. The optimum training pulse is determined by age and training target.
Training target: fat burning/weight reduction
The optimum pulse frequency is calculated using the empirical formula (220 - age) × 0.65 .
Advice: fat burning for energy supply only gains significance after a minimum training period of 30 minutes.
Training target cardio-vascular fitness:
The optimum pulse frequency is calculated using the empirical formula (220 - age) × 0.75 .
The intensity is predetermined in your training by means of the braking levels, ranging from 1-16. As a beginner, you should avoid too high braking level settings for your training, as this will quickly lead to exceeding the recommended pulse rate range. Start by using a low braking level setting and then approach your optimum training pulse step by step. Do not forget to regularly check during your fitness training whether you still range within the intensity area according to the above stated recommendations.
Sports physicians consider the following load factors to be positive for fitness:
| Frequency | Duration | |
| daily | 10 min | |
| 2-3 times weekly | 20-30 | min |
| 1-2 times weekly | 30-60 | min |
Beginners should not start with training units of 30 to 60 minutes.
A beginner training could be organised as follows during the first four weeks:
| Training frequency | Extent of training session |
| 1st week |
| 3 times a week | 2 minutes of training
Break of 1 minute for physical exercises
2 minutes of training
Break of 1 minute for physical exercises
2 minutes of training |
| 2nd week |
| 3 times a week | 3 minutes of training
Break of 1 minute for physical exercises
3 minutes of training
Break of 1 minute for physical exercises
2 minutes of training |
| 3rd week |
| 3 times a week | 4 minutes of training
Break of 1 minute for physical exercises
4 minutes of training
Break of 1 minute for physical exercises
3 minutes of training |
| 4th week |
| 3 times a week | 5 minutes of training
Break of 1 minute for physical exercises
4 minutes of training
Break of 1 minute for physical exercises
4 minutes of training |
In order to have a personal training documentation, you can enter the training values achieved in the performance table.
Prior to and after every training unit gymnastic exercises lasting approx. 5 minutes serve the warming up and/or cooling down. There should be a day without training between two training units, if you later on prefer to train three times a week for 20 - 30 minutes each. Otherwise nothing can be said against a daily training.

FR
BMR-FAT-BMI-PROGRAM,
Note 6 = insufficient
BMR-FAT-BMI-PROGRAM,
BMR-FAT-BMI-PROGRAM,
Contips
- Conakra: The energy of the body is activated by the energy of the mind. It is a way to increase the energy of the mind. It is also a way to increase the energy of the body. It is a way to increase the energy of the mind. It is a way to increase the energy of the body.
BMR-FAT-BMI-PROGRAM,
BMR-FAT-BMI-PROGRAM,
BMR-FAT-BMI-PROGRAM,
BMR-FAT-BMI-PROGRAM,
MANUAL PROGRAM (manuelt program)
P2 = restitutionspuls
BMR-FAT-BMI-PROGRAM,
$$
Z n \text {a m k a} (F) = 6 - \left(1 0 x (P 1 - P 2) \right. ^ {2}
$$
P1 = zátežovy puls
$$
P 2 = z o t a v o v a c i p u l s
$$