
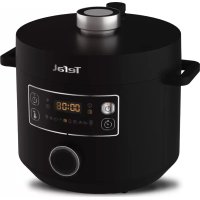
KD8501 - Kitchen appliance TEFAL - Free user manual and instructions
Find the device manual for free KD8501 TEFAL in PDF.
| Product type | Multi-function kitchen appliance (Cake Factory) |
| Brand | Tefal |
| Model | KD8501 |
| Approx. dimensions (L x W x H) | 30 x 30 x 20 cm |
| Approx. weight | 4 kg |
| Power supply | 220-240 V, 50-60 Hz |
| Power | 1200 W |
| Number of programs | 9 automatic programs + 1 manual program |
| Automatic programs | Sharing cake, Individual cakes, Molten cakes, Meringues, Dessert creams, Yogurts, Pie, Brioches, Breads |
| Manual program | Custom temperature and time settings |
| Max temperature (manual) | 140 °C |
| Included accessories | Non-stick aluminum mold, pie mold, baking support, 9 non-stick steel muffin molds, black reflector, support for 9 individual molds, 9 glass jars with plastic lids |
| Materials | Non-stick aluminum, non-stick steel, glass, plastic |
| Care and cleaning | Aluminum molds and accessories are dishwasher safe. Steel molds, supports, and plastic lids should be hand washed. Do not immerse the appliance. Clean the lid with a damp sponge. |
| Safety | Automatic shut-off at end of program. Do not touch hot surfaces. Use oven mitts. |
| Spare parts and repairability | Available from Tefal customer service. Check the manual for references. |
| General information | Manual available in multiple languages. Recipe book included. Mobile app with recipes. |
Frequently Asked Questions - KD8501 TEFAL
User questions about KD8501 TEFAL
0 question about this device. Answer the ones you know or ask your own.
Ask a new question about this device
Download the instructions for your Kitchen appliance in PDF format for free! Find your manual KD8501 - TEFAL and take your electronic device back in hand. On this page are published all the documents necessary for the use of your device. KD8501 by TEFAL.
USER MANUAL KD8501 TEFAL
Please read the "Use & Safety instructions" booklet carefully before first use.
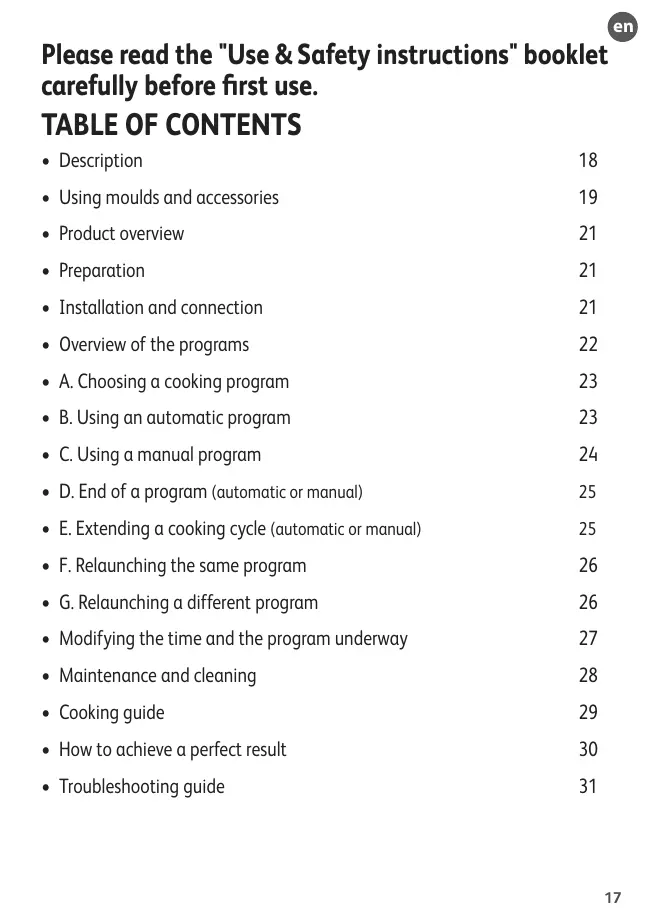
TABLE OF CONTENTS
Description 18
Using moulds and accessories 19
Product overview 21
Preparation 21
- Installation and connection 21
- Overview of the programs 22
A.Choosing a cooking program 23
B.Using an automatic program 23
C.Using a manual program 24
D.End of a program (automatic or manual) 25
E. Extending a cooking cycle (automatic or manual) 25
F. Relaunching the same program 26
G.Relaunching a different program 26
- Modifying the time and the program underway 27
- Maintenance and cleaning 28
Cooking guide 29
How to achieve a perfect result 30
Troubleshooting guide 31
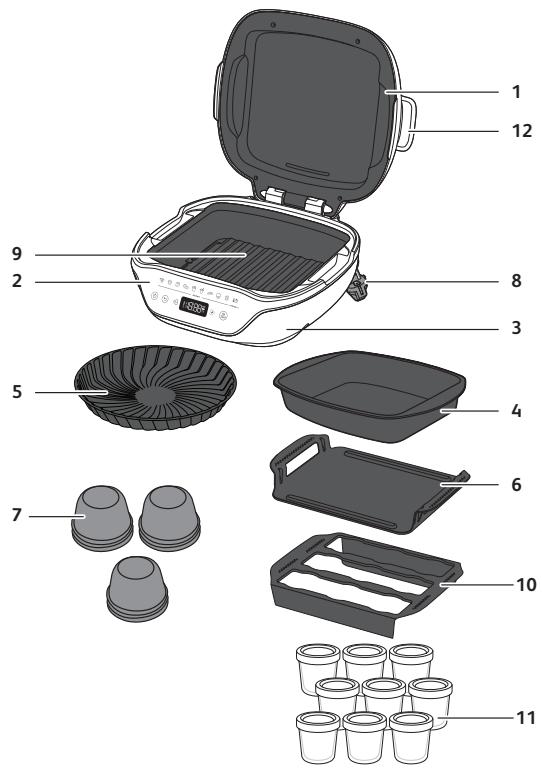
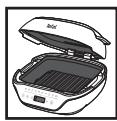
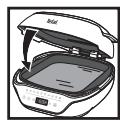
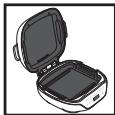
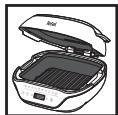
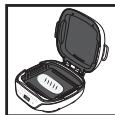
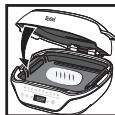
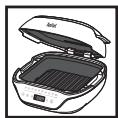
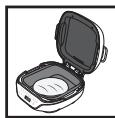
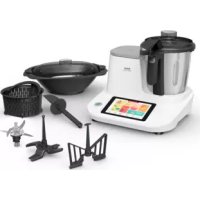
Description
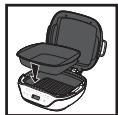
1 Lid
2 Control panel
3 Appliance base
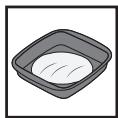
4 Non-stick aluminium mould
5 Tart mould
6 Baking tray
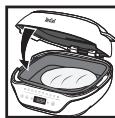
7 Non-stick steel muffin moulds (x9)
8 Power cable
9 Black reflector
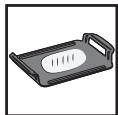
10 Holder for 9 individual moulds
11 Glass pots + plastic lids (x9)
12 Lid open/close handles
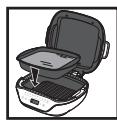
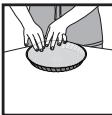
Using moulds and accessories
To ensure the proper operation of your appliance, when filling the moulds, do not exceed the proportions indicated.
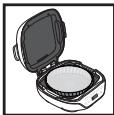
Non-stick aluminium mould
Grease the mould
Fill the mould
Ensure that the black reflector is properly in place and attached to the bottom of the appliance
Insert the mould
Close the appliance
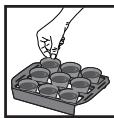
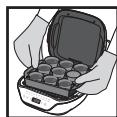
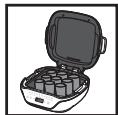
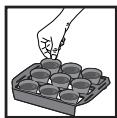
Steel moulds
Fill the moulds 3/4 full.

Pour the mix into the steel moulds
Place the moulds into the holder
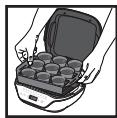
Put the holder into the appliance
Close the appliance
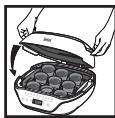
After cooking
Wear oven gloves when removing the holder from the Cake Factory
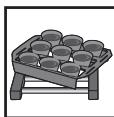
Place the holder on a heatproof surface

Remove the moulds from the holder one at a time
Allow to cool for a few minutes before removing from the moulds.
You can mix the different moulds, using the same recipe and the same quantity for each mould.
Glass pots
Do not put the lids on the glass pots during cooking.

Pour into the glass pots
Place the aluminium mould into the device
Place the glass pots into the aluminium mould
Close the appliance
Once cooking is complete, remove the mould and the glass pots from the Cake Factory—wear oven gloves because these will still be hot—and allow to cool for 10 minutes before putting on the lids. Leave the pots to rest for 2 hours, so they cool to room temperature, before putting them in the fridge.
Tart mould with baking tray
Ensure that the black reflector is properly in place and attached to the bottom of the appliance
Insert the baking tray into the device
Grease the tart mould then pour the cake batter into the mould
Place the mould into the baking tray, ensuring that it is well centred
Close the appliance
Bread and brioche cooking
- Baking tray for bread or brioche dough weighing up to 500g
Ensure that the black reflector is properly in place and attached to the bottom of the appliance
Place the dough in the centre of the baking tray
Put the baking tray into the appliance
Close the appliance
-
Non-stick aluminium mould for dough weighing more than 500g
-
brioche dough weighing up to 1000 g
- bread dough weighing up to 800g
Ensure that the black reflector is properly in place and attached to the bottom of the appliance
Place the dough into the centre of the mould
Put the non-stick aluminium mould into the appliance
Close the appliance
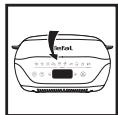
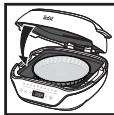
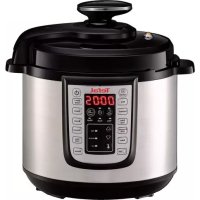
Product overview
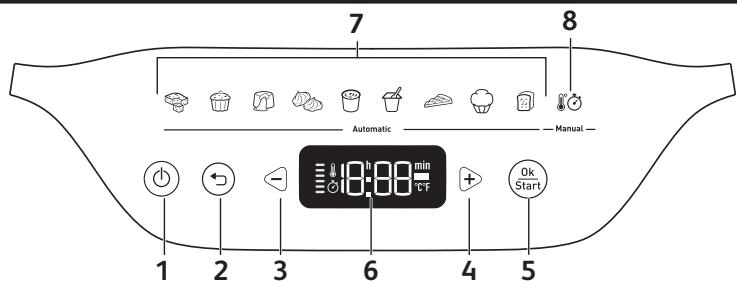
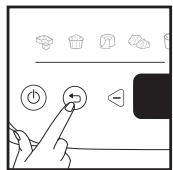
1 On/Off button
2 Back button
3 Minus button (-)
4 Plus button (+)
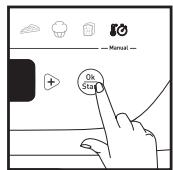
5 OK/Start button
6 Control panel
7 Automatic programs
8 Manual program
Preparation
- Remove all packaging, stickers and other accessories from both the interior and exterior of the appliance.
- Prior to first use, thoroughly clean the different moulds using hot water and some washing-up liquid, carefully rinse and dry.
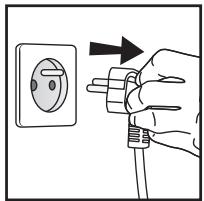
Installation and connection
The appliance startup applies to all programs
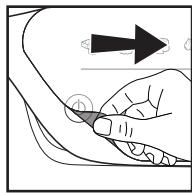
1
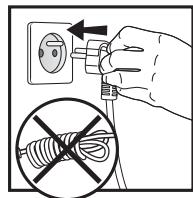
2
- Remove the adhesive protective film from the interface
- Turn on the appliance.
- Next, wait a few seconds before pressing the On/Off button. The first program flashes, indicating the "Program Selection" mode.
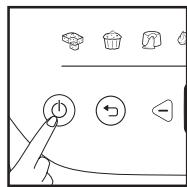
3
Overview of the programs
If you are unsure of which cooking mode to use, please refer to the Cooking guide, page 14.
9 automatic programs:
1 Cake to share program
2 Individual cakes program
3 Lava cake program
4 Meringue program
5 Cream desserts program
6 Yoghurt program
7 Tart program
8 Brioches program
9 Breads program
10 Manual program
Cooking tip: There is a program suited to each recipe style Depending on the program selected, a default cooking time is indicated. There are several recipes per program. It may therefore be necessary to adjust the time based on the recipe selected (follow the time recommended in the recipe). Preheating is not required, and cooking starts when the program is launched, once the appliance is closed and the Start button has been pressed.
The time is displayed in minutes up to 59 minutes. After that, it is displayed in hours and minutes.
Press and hold the - or + selection buttons to make the numbers move faster.
Caution: To ensure best results, it is essential to follow the recipe and to adhere to the exact quantities.
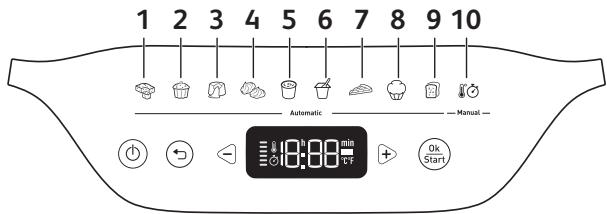
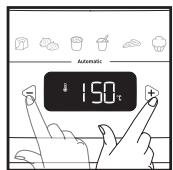
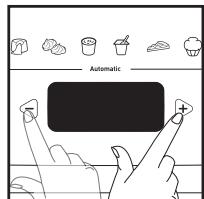
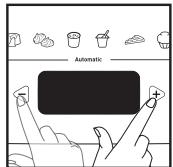
A. Choosing the cooking program
1
2
Once the mixture has been poured into the mould and the cover has been closed:
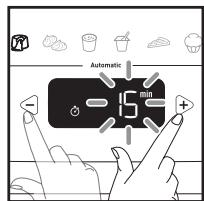
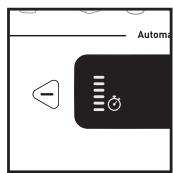
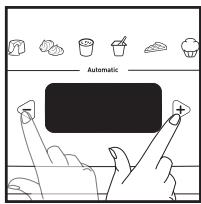
- Scroll through the cooking programs using the -and + buttons.
- The selected icon flashes. Press OK to confirm.
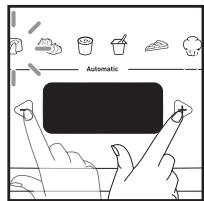
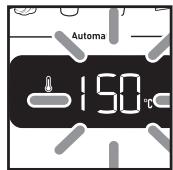
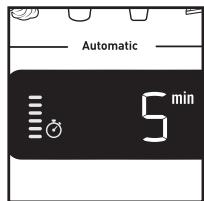
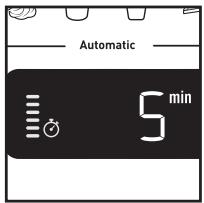
B. Using an automatic program
1
2
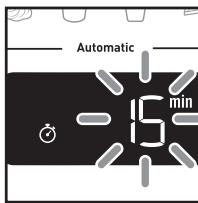
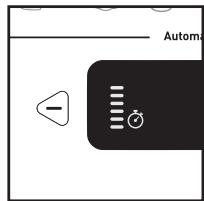
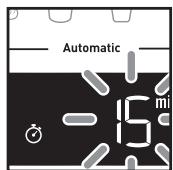
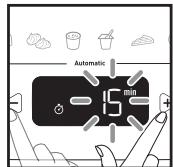
- Once the cooking program is selected, the corresponding indicator light becomes solidly lit.
- A default cooking time flashes.
- Press the - and + buttons to modify the time, if required. For all programs, the time is selected by the minute except for the yoghurt program, which is selected in increments of 30 minutes.
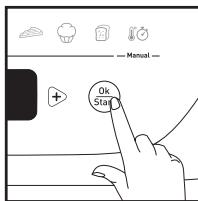
- Ensure that the cover is closed. Press the Start button to confirm and start cooking. The time display stops flashing.
- Cooking has started. The graphic on the screen's left indicates that a cooking cycle is underway and that the appliance is heating. The time counts down by the minute, and then by the second during the last minute.
3
4
Note: Each subsequent time the appliance is used, the time displayed defaults to the previous time used.
5
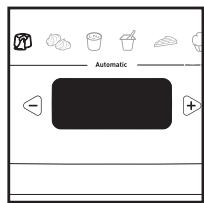
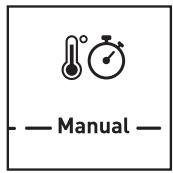
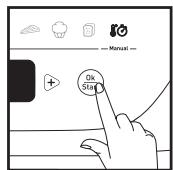
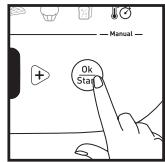
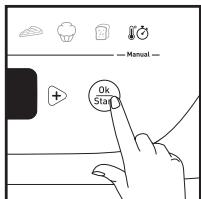
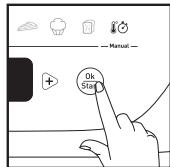
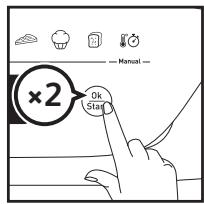
C. Using a manual program
1
2
3
4
5
6
7
8
9
10
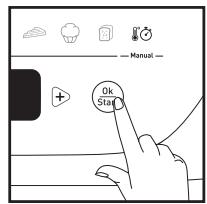
- Once the cooking program is selected, the corresponding indicator light becomes solidly lit.
- A default temperature flashes.
- Press the - and + buttons to modify the temperature, if required.
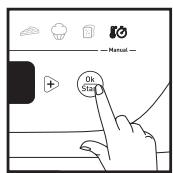
- Press the OK button to confirm.
- A predefined cooking time flashes.
- Press the - and + buttons to modify the time, if required.
- Press the Start button to confirm and start cooking, and the time display will stop flashing.
- Cooking has started. The graphic on the screen's left indicates that a cooking cycle is underway and that the appliance is heating. The time counts down by the minute, and then by the second during the last minute.
- At any time, if you need to adjust the time and/or temperature, press the Back button or the -and ^+ buttons.
- Press the OK button to confirm.
Note: Each subsequent time the appliance is used, the time and temperature displayed default to the previous time and temperature used.
D. Ending a program (automatic or manual)
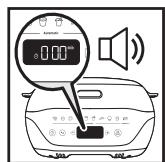
1
2

3
- The time reaches 000 and the product sounds an alert to signal the end of cooking.
- Press OK once to stop the alert. The display 000 flashes.
- You must use hand protection (oven gloves) to prevent burns when handling hot moulds and accessories.
Caution: It is important to open the appliance and to quickly remove the cakes so that they do not continue to cook.
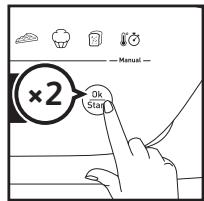
E. Extending a cooking cycle (automatic or manual)
1
2
- At the end of a program, if the cake is undercooked, you can add some cooking time by directly pressing the - and + buttons. Close the cover again.
- Once the additional time has been entered, press Start to continue cooking.
- The time display stops flashing and the minute-by-minute countdown starts. Cooking continues. The graphic on the screen's left indicates that a cooking cycle is underway and that the appliance is heating.
3
F. Relaunching the same program
Automatic and manual
- After having turned off the alert, press the OK button a second time to display the time. The last cooking time used is displayed and flashes.
- Press Start to start the program.
G. Relaunching a different program
After an automatic program
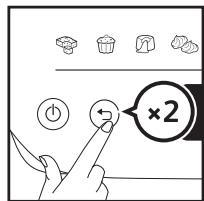
- After having turned off the alert, press the Back button to return to the program selection screen.
- Please refer to Part B to choose the program.
After a manual program
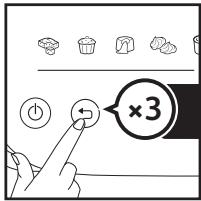
- After having turned off the alert, press the Back button to return to the program selection screen.
- Please refer to Part C to start the program.
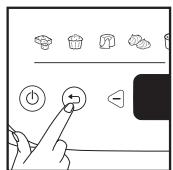
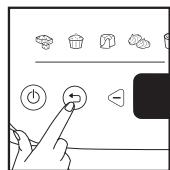
Modifying the time and the program underway
Caution: When the time is modified during cooking, the best results can no longer be guaranteed. It is preferable to relaunch the full program.
Only possible if the elapsed cooking time < 2min
1
2
3
4
- Press the Back button to return to the time selection screen. The displayed time flashes.
- If required, press the Back button a second time to return to the program selection screen.
- Press the - and + buttons to choose a program again and/or to modify the time.
- Confirm by pressing Start to restart cooking.
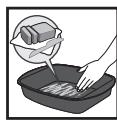
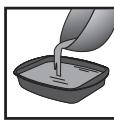
Maintenance and cleaning

1
2
3
4
5
6
7
8
Caution: All repairs must be carried out by an authorised service centre.
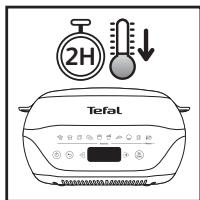
- Press the ON/OFF button to turn off the appliance.
- Unplug the appliance.
- Let the Cake Factory cool for at least 2 hours.
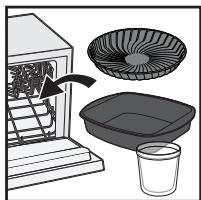
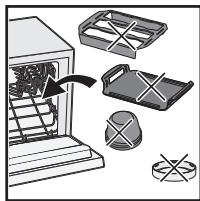
- Some of the cooking accessories are dishwasher safe.
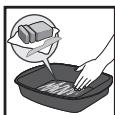
- The steel moulds, plastic lids and holders must not be put in the dishwasher. Wash them using hot water and washing-up liquid, then rinse thoroughly to remove all residue.
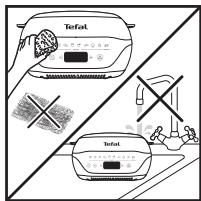
- The appliance and its power cord must never be put in the dishwasher, nor under water. Dry them thoroughly. Do not use any metal scouring pads, steel wool or abrasive cleaning products to clean the moulds and accessories. Only use nylon or non-metallic cleaning sponges. Clean the lid with a sponge soaked in warm water, then wipe with a soft, dry cloth. Never immerse the appliance wholly or partly in water or in any other liquid. Always ensure that the appliance is clean and dry prior to storage. Clean the outside of the appliance regularly. The appliance may change colour after repeated use. This is normal and is due to the temperature required for cooking food. Any yellowing does not pose any health risks and does not affect the performance of the appliance.
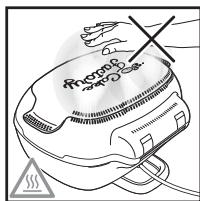
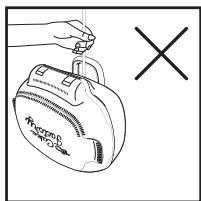
7.Warnings about the rear ventilation openings: The steam released during cooking is very hot; do not touch or get too close to this area while your appliance is heating. - Do not carry the appliance by its power cable or by the handles on the lid.
Cooking guide
Find complete recipes on our application.
| PROGRAMS | RECIPES | TIME** | ACCESSORIES |
| 1. Cake to share | Sponge cake | 25 mins | |
| Yoghurt cake | 35 mins | ||
| 2. Individual cakes | Blueberry muffins | 35 mins | |
| Cupcakes | 35 mins | ||
| 3. Lava cakes | Chocolate | 15 mins | |
| 4. Meringues | Swiss meringues | 1 hour 45 mins | |
| 5. Cream desserts | Crème brûlée | 2 hours | |
| Chocolate dessert | 2 hours | ||
| 6. Yoghurt | Natural yoghurt | 8 hours | |
| 7. Tart | Tart | 1 hour 5 mins | |
| 8. Brioches | =< 500 g | 1 hour 20 mins* | |
| 500 g < Brioche =< 1000 g | 1 hour 30 mins* | ||
| 9. Breads | =< 500 g | 1 hour 20 mins* | |
| 500 g < Bread =< 800 g | 1 hour 40 mins* | ||
| 10. Melting chocolate | White or milk chocolate Dark chocolate Chocolate + butter | 6 mins 140°C 7 mins 8 mins |
*including the rise time (60 minutes for brioche/45 minutes for bread).
**as a rough guide. Follow the times indicated in the recipe book.
How to achieve a perfect result
| EXAMPLES | ADVICE |
| Lava cakes will be undercooked if more than the recommended amount of butter is added. Lava cakes will be overcooked if more than the recommended amount of flour is added. | Carefully follow ingredient quantities.Use extra fine unsalted butter.If necessary, adjust the time according to your desires. |
| Cakes and lava cakes will be overcooked if left in the Cake Factory after the cooking timer goes off. | Carefully remove the mould at the end of cooking as recommended in the guide. |
| Lava cakes will be overcooked if the batter has been beaten rather than just stirred. | Carefully follow the instructions in the recipe. |
| Muffins will crumble when you remove them from the moulds if the ingredients are mixed randomly. | Carefully follow the order of steps in the recipe when adding the ingredients. |
| My cakes lack flavour and texture. | To ensure best results, make sure that the ingredients are of a high quality and not expired. |
| Red berry lava cakes will be undercooked on the bottom if the fruit coulis centre is not placed in the freezer for 4 hours before cooking. | Carefully follow the ingredient preparation times recommended in the recipe. |
| Bread and brioche program: A beep sounds at the end of the rise phase.For your information *bread: rise time set at 45 minutes *brioche: rise time set at 60 minutes | When preparing/cooking:During the first phase, a beep sounds to signal the end of the riseYou do not need to do anything: The cooking mode starts automatically.If you want to score the dough with a knife or add a bit of water on top of the dough, you can open the lid and do it at this point.Then close the lid quickly so that the cooking happens correctly.At the end of the cooking time, the final beep sounds.Press OK or ON/OFF to stop cooking. |
Troubleshooting guide
| PROBLEM | SOLUTION |
| Er00 or Er003 | Appliance failure: Unplug the appliance and contact your customer service or a repair centre. |
| Er01/Er02/Er04/Er05/Er06 | Unplug the appliance and wait a few minutes. Then plug in your appliance again and turn it on. If the problem persists, contact your customer service or a repair centre. |
| The displayed time flashes | If the displayed time is correct, press OK to confirm. |
| The displayed temperature flashes | If the displayed temperature is correct, press OK to confirm. |
| The illuminated program flashes | If the displayed program is correct, press OK to confirm. |
| The appliance does not close properly | The mould used is not compatible with this appliance: Use a mould that is compatible with this appliance. Check that the moulds and accessories are correctly positioned and centred. |
| The time has reached 000, but the level of cooking is insufficient | At the end of cooking, after having turned off the beep sound by pressing OK once, close the appliance again and add some time using the - and + buttons, then confirm by pressing OK. |
| During cooking, after modifying the cooking time, the cooking time automatically returns to the initial time | After having modified the time, press OK to confirm. |
| Once a cooking program has been started, it is not possible to change the cooking time | Wait for 2 minutes to elapse after launching the program to modify the time using the - and + buttons. For automatic programs, the best results will no longer be guaranteed. |
| There may be a difference between the programmed time and the actual cooking time | For automatic programs, the appliance slightly adjusts the cooking time to ensure best results. |
| It is difficult to remove my mixture from the mould | If you use metal moulds, grease your moulds before putting your mixture inside to make the removal process easier. |
HamaeketeoΦomATA C MHHHIA

Hambnhe foPMata
E. YdJIxKaBaHe Ha zIKbI Ha rotBeHe (aBTOMaTHUHO uI npb4HO)
1
2
3
- B kpa ha daedeHa nporgpama, ako KeKcbT OSe He e roTOB, MoKeTe Da yDbJIKNITE BpeMeTo 3a rotBeHe, KaTO dIpuKTHo HATINCHETe 6yToHInTe - N +. 3aTBopete OTHOBO KanaKa.
- Cnei KaTo CTe BbBEnI OOnbJIHInTEHNO T BPeMe, HATINCHETe 6yTOHa 3a CTapTnpaHe, 3a Da npOdbJIxN IOTBeHETo.
3.Дисплгета Времeto Cпра мИга Исторпа РиминутOTO obpaTHO OTбpoяBaHe. ГтBEнTo npoДьЖава. ГаКATA BЯВataЧаТ ha ekpaHa yka3Ba, Ye e 3anOuHaI zHKbI Ha rotBeH e N ye ypeBt 3aRЯВa.
F. Повторностартупане на сьцаТ npограмa
ABTomatnHOn npbUHO
- CnE KaTo Cte N3KIIOuHIn NpIeDyIpeDnteHnna 3ByKOB cnHnA, HATNCHe6 ByToHa OK BTOPiT, 3a Da ce nokajke Bpemeto. Ioka3Ba Ce nocJeHoto n3NoJ3BaHO Bpeme 3a rotBeHe, KoEtO Mira.
- HatncheTe 6yToHa 3a cTapTnpaHe, 3a da cTapTnpaTe nporpaMata.

turni compostopia in formede metallic
Introduceti formele in support


- Please read the "Use & Safety instructions" booklet carefully before first use.
- TABLE OF CONTENTS
- Description
- Using moulds and accessories
- Non-stick aluminium mould
- Steel moulds
- After cooking
- Glass pots
- Tart mould with baking tray
- Bread and brioche cooking
- Product overview
- Preparation
- Installation and connection
- Overview of the programs
- automatic programs:
- Choosing the cooking program
- Using an automatic program
- Using a manual program
- Ending a program (automatic or manual)
- Extending a cooking cycle (automatic or manual)
- Relaunching the same program
- Automatic and manual
- Relaunching a different program
- After an automatic program
- After a manual program
- Modifying the time and the program underway
- Only possible if the elapsed cooking time < 2min
- Maintenance and cleaning
- Cooking guide
- How to achieve a perfect result
- Troubleshooting guide
- YdJIxKaBaHe Ha zIKbI Ha rotBeHe (aBTOMaTHUHO uI npb4HO)
- Повторностартупане на сьцаТ npограмa
- ABTomatnHOn npbUHO
Brand : TEFAL
Model : KD8501
Category : Kitchen appliance